
PILOT XR Radar - Dash Cam Niceboy - Free user manual and instructions
Find the device manual for free PILOT XR Radar Niceboy in PDF.


| Product Type | Car Dash Camera (Dashcam) |
| Model | Niceboy PILOT XR Radar |
| Dimensions (W x H x D) | 72.5 x 43.7 (82.5 with mount) × 36.2 mm |
| Weight | 71 g (camera), 23 g (magnetic mount) |
| Chipset | Novatek 96670 |
| Image Sensor | Sony IMX335 |
| Lens | Glass 7G, 170° wide angle, f/1.8 aperture |
| Video Resolution | 4K 30fps (interpolated), 2K 30fps, 1080p 60fps, 1080p 30fps |
| Video Codec | H.264 (2K, 1080p), H.265 (4K) |
| Display | 2.45" IPS |
| GPS | Integrated in magnetic mount |
| WiFi | Yes (2.4 GHz) |
| G-Sensor | Yes, adjustable sensitivity |
| Parking Mode | Yes (requires G-Sensor active) |
| Motion Detection | Yes |
| Memory Card | microSD, UHS-I U3, max 128 GB, FAT32 format (not included) |
| Battery | Li-Ion 260 mAh (backup, ~10 min recording without power) |
| Power Supply | Car adapter 5V/4.2A (included), microUSB charging via magnetic mount |
| Speed Camera Alert | Yes, with updatable database via firmware |
| Emergency Recording | Yes, locks video from deletion |
| Operating Temperature | 0°C to +55°C |
| Warranty & Disposal | CE, RoHS; WEEE disposal info in manual |
Frequently Asked Questions - PILOT XR Radar Niceboy
User questions about PILOT XR Radar Niceboy
0 question about this device. Answer the ones you know or ask your own.
Ask a new question about this device
Download the instructions for your Dash Cam in PDF format for free! Find your manual PILOT XR Radar - Niceboy and take your electronic device back in hand. On this page are published all the documents necessary for the use of your device. PILOT XR Radar by Niceboy.
USER MANUAL PILOT XR Radar Niceboy
natural_image
Close-up of a black electronic device with two labeled pins (11 and 12), no readable text or symbols beyond labels.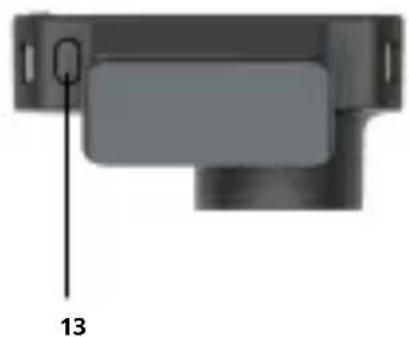
natural_image
Close-up of a mechanical component with a labeled part '13' (no other text or symbols visible)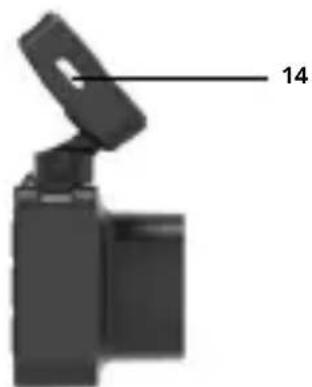
natural_image
Close-up of a black electronic device with a labeled component (14), no visible text or symbols on the device itself.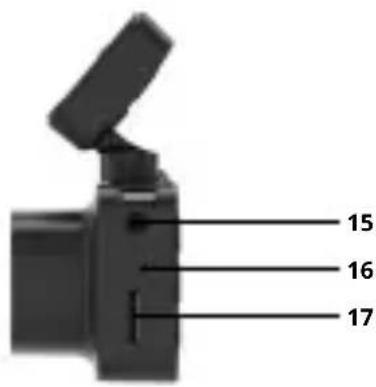
natural_image
Symbol of a trash bin crossed with two crossed lines, no text or numbers presentnatural_image
Pure mechanical component diagram without any text, numbers, or symbols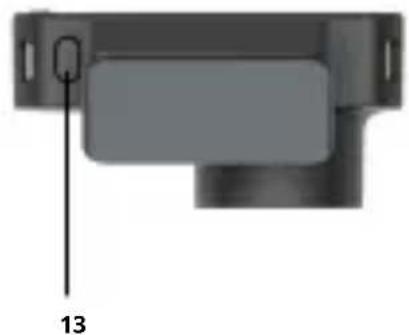
natural_image
Close-up of a mechanical component with a labeled part '13' (no other text or symbols visible)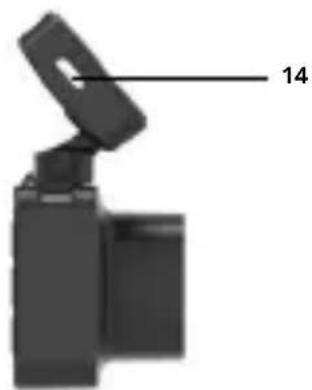
natural_image
Close-up of a black mechanical device with a labeled component '14' (no other text or symbols visible)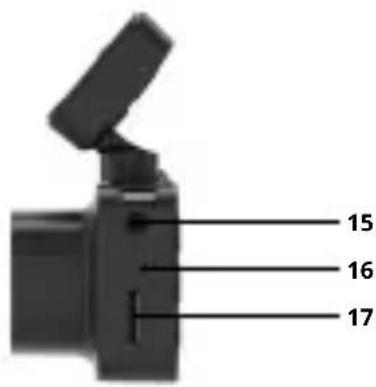
natural_image
Symbol of a trash bin with crossed lines indicating no waste, and a solid black rectangle below (no text or labels)natural_image
Close-up of a black electronic device with two labeled pins (11 and 12), no readable text or symbols beyond labels.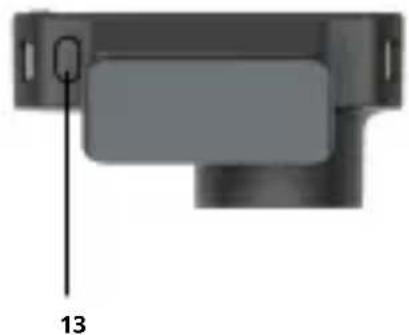
natural_image
Close-up of a mechanical component with a labeled part '13' (no other text or symbols visible)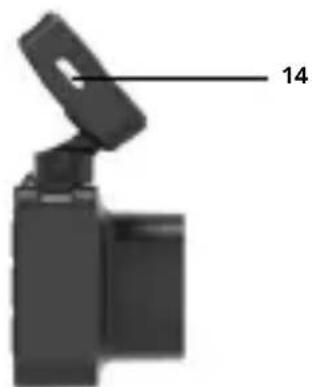
natural_image
Close-up of a black electronic device with a labeled component (14), no visible text or symbols beyond the number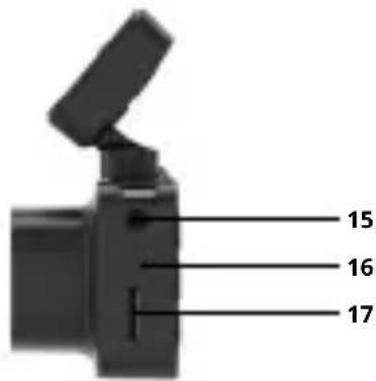
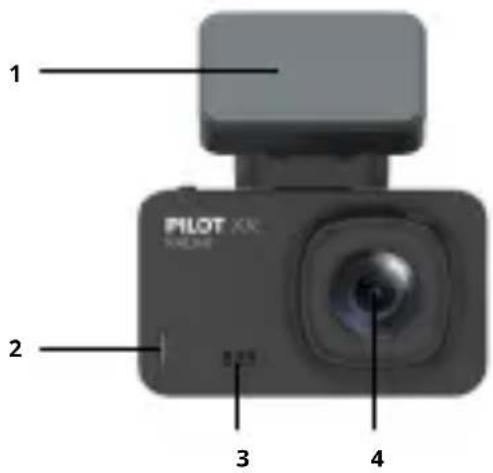
- Adhesive Part of the Magnetic Mount - for attaching the holder to the car window.
- Operation LED - signals that the camera is on.
- Speaker - for acoustic output.
- Camera Lens - a glass camera lens for capturing video and photos.
- Magnetic Mount with Integrated GPS - for attaching the camera magnetically and for GPS reception.
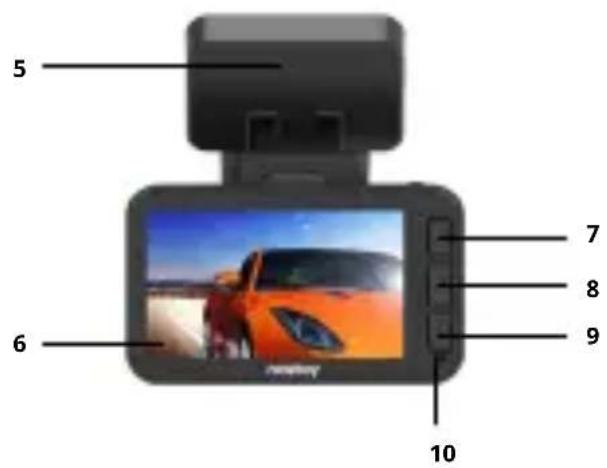
- Display - 2.45" camera display.
- Buttons „Up / WiFi / Zoom On“ - for navigating the menu. By pressing and holding during standby mode (the camera does not record video and the setup menu is not open) or during video recording will turn the digital zoom function on. Pressing the button briefly during the standby mode turns the WiFi on.
- Menu / Change Mode / Emergency Recording - pressing the button briefly during the standby mode takes you to the video / photo settings menu (based on the selected mode) and pressing it again will take you to the camera settings. In the playback mode, press the button to access the options for deleting, locking / unlocking the video or starting a slideshow. Pressing and holding in standby mode toggles between video recording mode, photo capture mode, and video playback mode. Pressing the button during video recording will start an emergency recording - this feature locks the video against accidental deletion and saves the video to a special folder on the card. Such a video will not be deleted even if the card is full.
-
Buttons „Down / Mic Mute and Unmute / Zoom Off" - to navigate the menu. Press to mute / unmute the camera microphone during standby mode and during the video recording. When zoom is on, press and hold to turn the zoom off.
-
Signalling LED - a lit red LED means that the camera is switched on. A blue flashing LED indicates that the camera is recording a video.
- Quick Photo Function Sensor - the sensor responds to a wave of a hand under the camera and takes a photo while still recording.
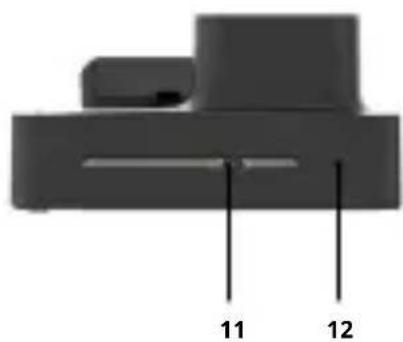
- Reset - restarts the camera if necessary.
- On / Off / OK - press and hold to turn the camera on / off. Press while in the menu to confirm the selected item. In video mode, this will start / stop the video recording. In photo mode, press to take a photo.
- microUSB - for charging connection.
- Input / Output for service purposes
- Noise Microphone - for sound recording.
- MicroSD Slot – for memory card.
CAMERA MENU LANGUAGE SETTING
Connect the camera to a power source. After turning the camera on, go to the camera settings: Press the Menu button (8) twice and then use the Menu button (9) to scroll to „Language“ option and confirm with the OK button (13). Here you can select your preferred menu language.
SETTINGS IN VIDEO MODE
Resolution: setting the resolution of the recorded video (4K video is always recorded with the H.265 codec).
Video Loop: sets cyclic (loop) recording, ie. the time periods during which videos will be recorded. When the memory card is full, the oldest recordings will be erased (except for locked videos taken during emergency recording).
WDR: turns on / off the wide dynamic range function (suitable for scenery with high contrast or for night recording).
G-Sensor: G-Sensor intensity setting. the G-Sensor detects vibrations and automatically starts emergency recording function for the recorded video (prevents the video from being erased).
Parking Mode: when the function is on, the camera switches on and starts recording when the G-Sensor detects vibrations (the G-Sensor must be active).
Exposure: exposure compensation settings. The higher the positive value, the brighter the video; the lower the negative value, the darker the video.
Quick Photo Function: for taking a photo by gesturing while recording a video. When the function is active and while recording a video, just wave your hand under the camera and the camera will take a photo. The photo is taken in the same resolution as the currently recorded video.
Motion Detection: If the camera detects movement in front of the camera, it starts recording (applies if the function is active); when the movement stops, the recording will also stop. Use this function only when the vehicle is stationary. Motion detection only works when the camera is switched on and the video loop function is deactivated.
Speed Camera Alert: turns the radar alert function on / off.
Sound Recording: turns the camera microphone on / off.
Time Stamp: turns the option to insert date and time information into the video on / off.
CAMERA SETTINGS
WiFi: turns WiFi on / off.
Date / Time: date and time settings.
Automatic Shutdown: sets the camera to switch off automatically when idle (the camera will not record video).
Screen-saver: sets the time after which the display turns off (does not affect video recording). Press the OK button (13) to switch on the display again.
Acoustic Settings: switches button sounds, speeding alert sound, and speed camera alert sound on / off.
Language: camera menu language setting.
GPS: turns GPS on / off.
Time Zone: sets the time zone to display the current time.
Speeding Alert: the camera beeps an acoustic prompt when the predefined speed limit is exceeded (applies when GPS and Acoustic Settings are active).
Speed Unit: option to switch between km/h and mph.
Frequency: frequency setting.
Format: erases all data on the memory card.
Default Settings: resets the camera to default settings.
Version: camera firmware information.
PHOTO MODE OPTIONS
Shooting Method: allows you to set how the photo is created (timer).
Resolution: sets the resolution of the photos you take.
Continuous Shot: turns the function to create several images in a row on / off.
Quality: sets the quality of the photos you take.
Sharpness: sets the sharpness of the photos you take.
White Balance: sets and adjusts the colour temperature of the photo.
Colour: adjusts the color rendering of the photo.
ISO: ISO value setting.
Exposure: exposure compensation settings. The higher the positive value, the brighter the photo; the lower the negative value, the darker the photo.
Stabilization: turns the digital image stabilization on / off.
Quick Preview: sets the preview time of the captured photo on the camera screen.
Time Stamp: turns the option to insert date and time information into the photo on / off.
SPEED CAMERA ALERT FUNCTION
The speed camera alert function utilizes a database that is part of the camera firmware. The current firmware with an updated speed camera database is located on the website www.niceboy.eu in the support section.
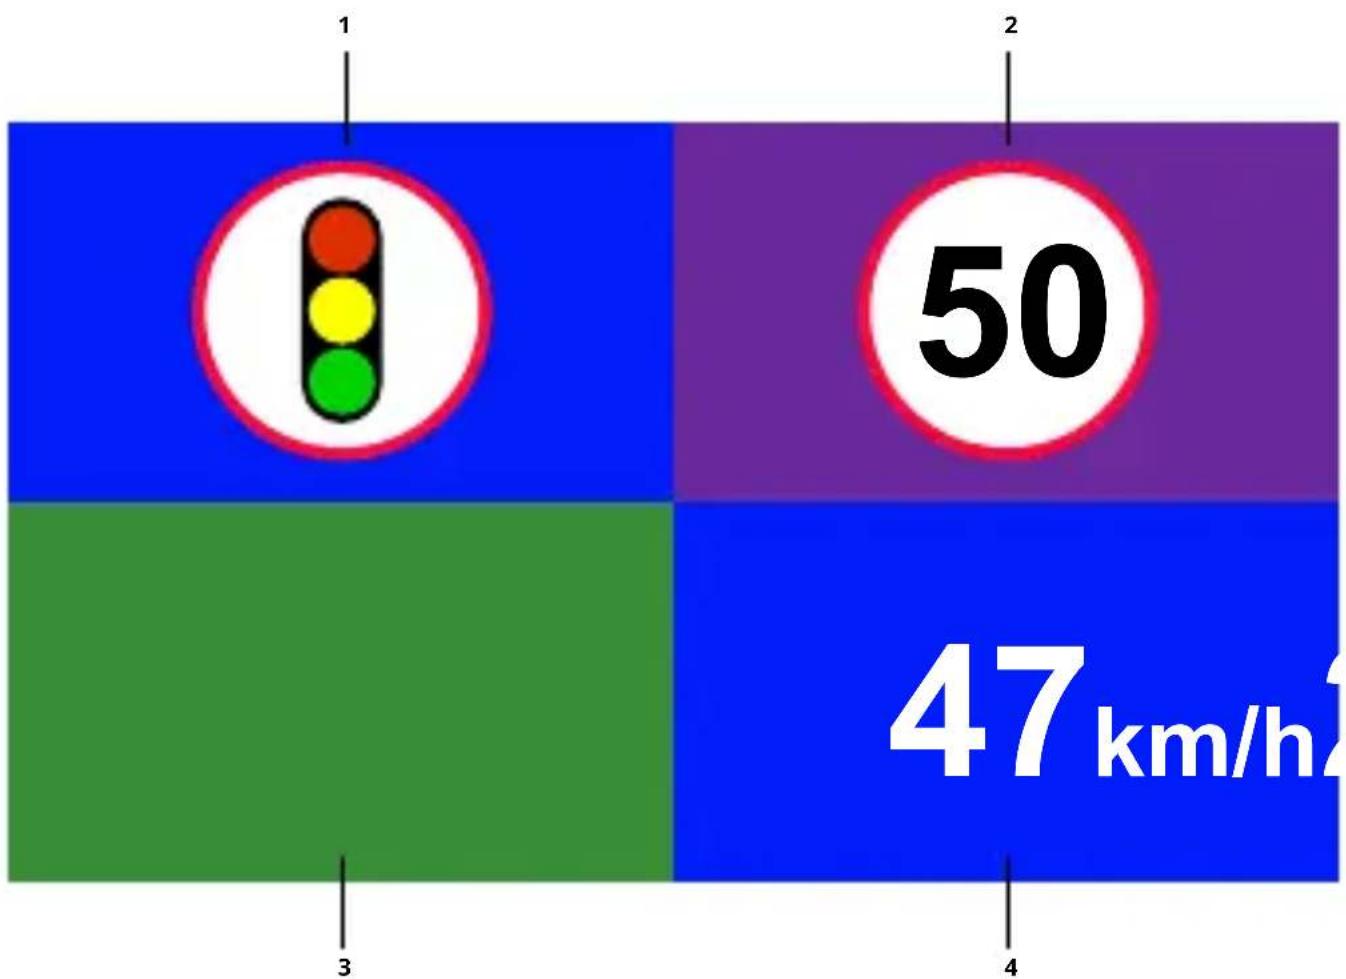
The speed camera warning is accompanied by an acoustic prompt (the Acoustic Settings fuction must be active) and graphical warning on the display (if the display is switched on), provided the Speed Camera Alert function is activated in the camera Menu:
- Type of speed camera
- Maximum permitted speed at the measuring point
- Distance to speed camera
- Current vehicle speed
bar
| Category | Value | |---|---| | Light Bulb | 1 | | White Circle | 2 | | White Circle | 50 | | Blue Area | 47 km/h | | Green Area | 3 | | Purple Area | 4 |MICROSD CARD
Choose a microSD card from an original manufacturer with fast video recording (type UHS-I U3) with a maximum capacity of 128GB. Before using the camera for the first time, it is necessary to format the card on a PC with the FAT32 file system (formatting the memory card will erase all data stored on the card). Insert the memory card into the camera with the PINs facing the camera display.
Recommendation: format the memory card regularly on a PC to avoid video recording problems. If the camera is used on daily basis, format the card at least once per month. For more information about using or formatting memory cards, contact the manufacturer of the SD card.
SWITCHING THE CAMERA ON / OFF AUTOMATICALLY
As soon as the camera detects charging, it will automatically switch on and start recording. When the camera gets disconnected from the power supply, it will stop recording and switches itself off.
CAMERA POWER SUPPLY
The camera can be connected to a power source by a car charging adapter (included in the product package), or by an USB cable connected to a PC or a charging adapter from a mobile phone. The camera can also be charged by a power bank. Charging is only possible via the magnetic mount. Switch the camera on / off without the cable connected using the button (13).
USING THE CAMERA ON BATTERY POWER (WITHOUT POWER SUPPLY)
The camera has a backup battery, which is primarily intended for parking mode. The camera is designed for recording with a permanent connection to the power supply. When using the camera on battery power, the battery must be fully charged. Battery life without connected power is about 10 minutes. Without the power supply connected, GPS and the associated functions, including speed camera warnings, do not work.
GPS PLAYER
Download the installation file for the GPS player from the website www.niceboy.eu in the support section. Run the installation file on the PC and follow the instructions on the screen.
The GPS player shows the vehicle's route on the map, coordinates and speed based on the video currently playing. The player does not support videos recorded with the H.265 codec.
Important: after installing the GPS player, it is necessary to run it for the first time on the PC as an administrator (by clicking on the player's icon with the right mouse button and „run as administrator“). The GPS player can be installed on a PC running Windows 8.1 or later. For smooth video playback on the player, we recommend copying videos from the memory card to a disc on your PC.
CONNECTING THE CAMERA TO THE PHONE VIA WIFI
Install the LuckyCam application (for free) on your phone (in the Appstore for iOS and GooglePlay for Android). Do not start the application right after installing it and follow the instructions:
- Turn the WiFi in the camera on by selecting it in the menu item or by briefly pressing the upper control button (7) on the camera.
- Open the WiFi settings on your mobile phone and connect to the camera network (name: PILOT XR RADAR, password: 1234567890).
- Once connected to the network, launch the application and you can start controlling the camera with your phone.
- To turn the WiFi on the camera off, press and hold the upper control button (7) on the camera.
Notice: before running the application, enable all the permissions of the application in the phone settings, turn off the „data connection“ of the mobile phone and leave only WiFi turned on. The application can only be installed on mobile phones with iOS 8.0 and later and on devices with Android 5.1 and later.
PRODUCT PACKAGE CONTENTS
Niceboy PILOT XR radar car camera
Windshield mount with magnetic mount and integrated GPS
Charging microUSB cable
USB car adapter
Manual
Niceboy PILOT XR SPECIFICATIONS
Chip: Novatek 96670
Sensor: Sony IMX335
Camera Lens: glass 7G, 170°
Lens aperture: f/1,8
Video resolution: 4K 30fps (interpolated), 2K 30fps, 1080p 60fps, 1080p 30fps
Video format: MP4, H.264 (for 2K, 1080p video) H.265 (for 4K video)
Max. photo resolution: 12MPx
Display: 2.45" IPS
GPS: Yes
WiFi: Yes
Memory Card: microSD card, UHS-I U3, max.
128 GB, FAT32 card format (card not included in product package)
Battery: integrated Li-Ion, 260 mAh (battery is designed for parking mode)
Operating temperature: 0 °C up to + 55 °C
Car charging adapter: output voltage 5 V, input voltage 12-24 V, output current 4.2 A (2 x 2.1 A)
Camera dimensions
(W x H x D): 72.5 x 43.7 (82.5 with mount)
× 36.2 mm
Camera weight: 71 g
Magnetic mount weight: 23 g
RTB Media s.r.o. hereby declares that the type of radio equipment NICEBOY PILOT XR RADAR complies with Directives 2014/53 / EU, 2014/30 / EU, 2014/35 / EU, and 2011/65 / EU. The full content of EU Declaration of Conformity is available on the following websites: https://niceboy.eu/cs/podpora/prohlaseni-o-shode-mM38CtmYvX693IHwvu4CWpk3vjGrvnC
USER INFORMATION FOR DISPOSING ELECTRICAL AND ELECTRONIC DEVICES (HOME USE)

natural_image
Symbol of a trash bin crossed with a diagonal line and a horizontal line, representing no waste or discharge (no text or numbers present)This symbol located on a product or in the product's original documentation means that the used electrical or electronic products may not be disposed together with the communal waste. In order to dispose of these products correctly, take them to a designated collection site, where they will be accepted for free. By disposing of a product in this way, you are helping to protect precious natural resources and helping to prevent any potential negative impacts on the environment and human health, which could be the result of incorrect waste disposal. You may receive more detailed information from your local authority or nearest collection site. According to national regulations, fines may also be given out to anyone who disposes of this type of waste incorrectly. User information for disposing electrical and electronic devices.
(Business and corporate use)
In order to correctly dispose of electrical and electronic devices for business and corporate use, refer to the product's manufacturer or importer. They will provide you with information regarding all disposal methods and, according to the date stated on the electrical or electronic device on the market, they will tell you who is responsible for financing the disposal of this electrical or electronic device. Information regarding disposal processes in other countries outside the EU. The symbol displayed above is only valid for countries within the European Union. For the correct disposal of electrical and electronic devices, request the relevant information from your local authorities or the device seller.
natural_image
Close-up of a black electronic device with two labeled pins (11 and 12), no readable text or symbols beyond labels.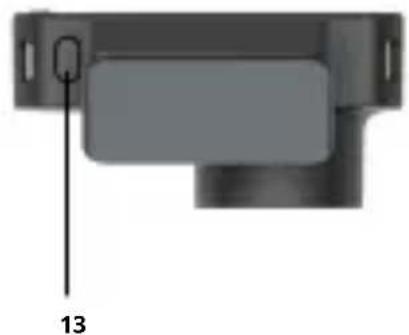
natural_image
Close-up of a mechanical component with a labeled part '13' (no other text or symbols visible)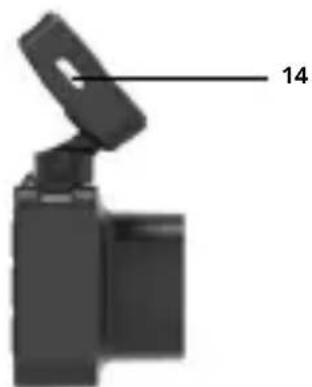
natural_image
Close-up of a black electronic device with a labeled component (14), no visible text or symbols beyond the number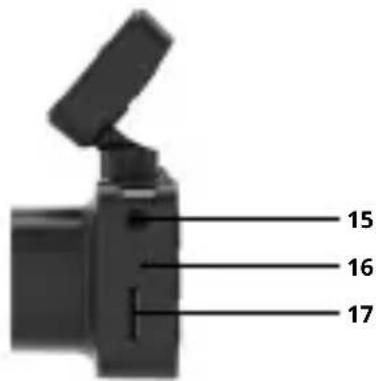
bar
| Category | Value | |---|---| | Light Bulb | 1 | | White Circle | 50 | | Green Dot | 3 | | Blue Area | 47 km/h² | | Purple Area | 2 |MICRO SD KARTE
natural_image
Close-up of a black electronic device with two labeled pins (11 and 12), no readable text or symbols beyond labels.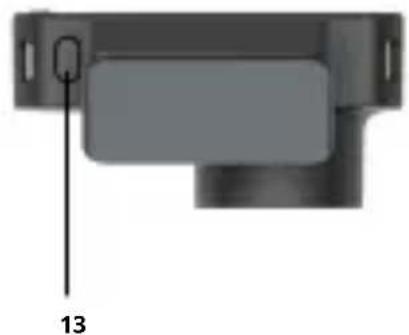
natural_image
Close-up of a mechanical component with a labeled part '13' (no other text or symbols visible)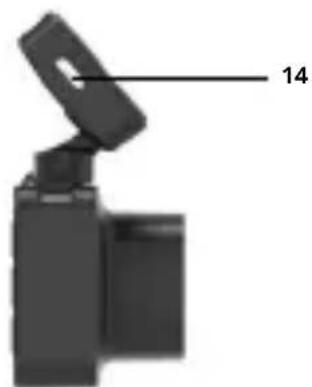
natural_image
Close-up of a black electronic device with a labeled component (14), no visible text or symbols on the device itself.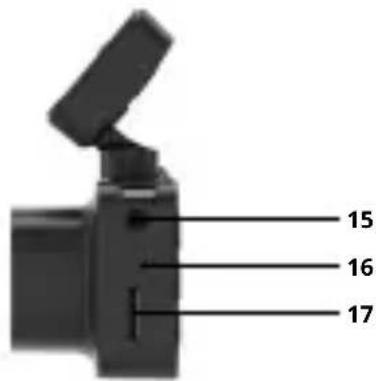
natural_image
Simple line drawing of a trash bin with crossed lines indicating no waste or restriction (no text or symbols)natural_image
Close-up of a black electronic device with two labeled pins (11 and 12), no readable text or symbols beyond labels.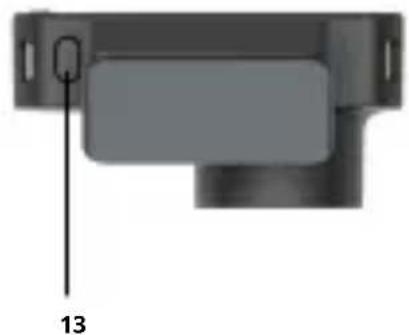
natural_image
Close-up of a mechanical component with a labeled part '13' (no other text or symbols visible)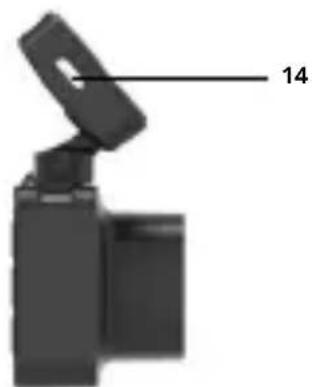
natural_image
Close-up of a black electronic device with a labeled component (14), no visible text or symbols on the device itself.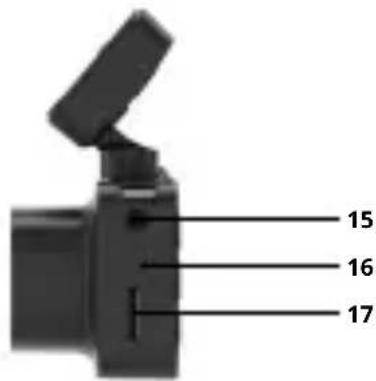
bar
| Category | Value | |---|---| | Light Signal | 1 | | Speed Marker | 50 | | Speed Label | 47 km/h | | Color Scale | Blue (1) to Green (3) to Purple (2) to Blue (4) to Green (3) to Green (4) |KARTICA MIKRO SD
Odaberite karticu microSD originalnog proizvođača s brzim snimanjem videozapisa (tipa UHS-I U3) s maksimalnim kapacitetom od 128 GB. Prije prve upotrebe kamere, kartica se mora formatirati na računalu s datotečnim sustavom FAT32 (for-matiranjem memorijske kartice brišu se svi podaci pohranjeni na kartici). Karticu umetnite u kameru tako da su brojevi PIN okrenuti prema zaslonu kamere.
Preporuka: memorijsku karticu redovito formatirajte na računalu da biste izbjegli probleme sa snimanjem videozapisa. Ako se kamera svakodnevno upotrebljava, karticu je potrebno formatirati barem jednom mjesečno. Dodatne informacije o upotrebi ili formatiranju memorijske kartice potražite kod proizvođača SD kartice.
AUTOMATSKO UKLJUČIVANJE/ISKLJUČIVANJE KAMERE
Čim kamera otkrije punjenje, automatski će se uključiti i započeti snimanje. Kada se kamera odspoji od napajanja, ona prekinuti snimanje i sama će se isključiti.
NAPAJANJE KAMERE
natural_image
Simple line drawing of a trash bin with crossed lines indicating no waste or discharge (no text or symbols)Simbol naveden na proizvodu ili u popratnoj dokumentaciji znači da je zabranjeno odlagati električne ili elektroničke proizvode zajedno s komunalnim otpadom. Pobrinite se za pravilnu likvidaciju otpada: dotrajali proizvod predajte besplatno u ovlašteni centar za skupljanje otpada. Propisnom likvidacijom dotrajalog proizvoda ćete doprinijeti očuvanju skupocjenih prirodnih izvora te prevenciji negativnih utjecaja na okoliš i ljudsko zdravlje zbog nepravilne likvidacije otpada. Za više informacija obratite se nadležnom lokalnom uredu ili mjestu zbrinjavanja. Nepravilno zbrinjavanje ove vrste otpada kažnjava se sukladno nacionalnim propisima. Informacije za korisnika o načinu zbrinjavanja električnih i elektronskih uređaja
(Poslovna uporaba)
Vezano za pravilno zbrinjavanje dotrajale električne/elektronske opreme za poslovnu upotrebu i upotrebu u tvorničkim pogonima obratite se proizvođaču ili uvozniku ovog proizvoda. Proizvođač će Vam pružiti informacije o načinu zbrinjavanja proizvoda i obavijestit će vas o tome tko je dužan osigurati zbrinjavanje ovog električnog uređaja ovisno o datumu uvođenja proizvoda na tržište. Informacije o zbrinjavanju dotrajalog proizvoda u ostalim zemljama (izvan EU). Gore na-vedeni simbol važi samo u Europskoj uniji. Za više informacija o pravilnom zbrinjavanju električnih i elektronskih uređaja se obratite prodavatelju ili dobavljaču.
PL
OPIS I FUNKCJE
natural_image
Pure mechanical component diagram without any text, numbers, or symbols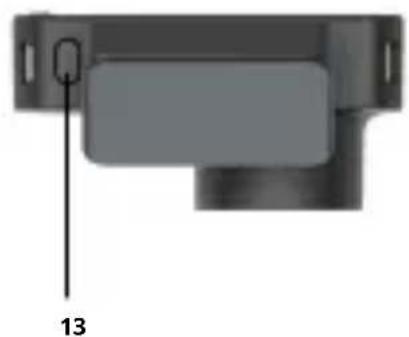
natural_image
Close-up of a mechanical component with a labeled part '13' (no other text or symbols visible)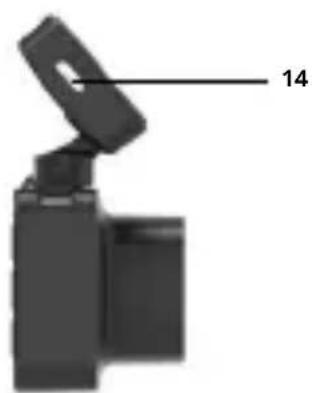
natural_image
Close-up of a black mechanical device with a labeled component '14' (no other text or symbols visible)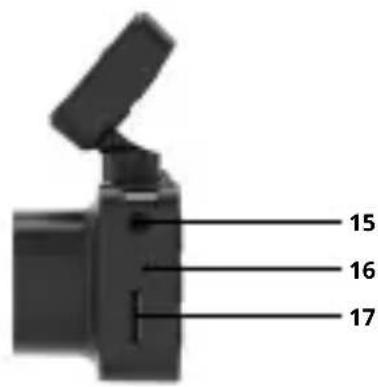
natural_image
Simple line drawing of a trash bin with crossed lines indicating no waste or discharge (no text or symbols)natural_image
Pure mechanical component diagram without any text, numbers, or symbols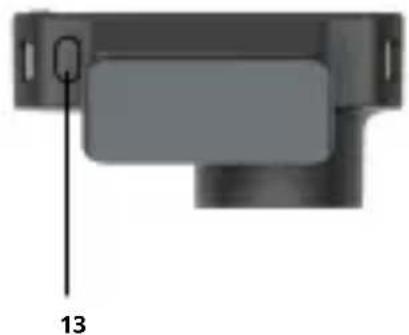
natural_image
Close-up of a mechanical component with a labeled part '13' (no other text or symbols visible)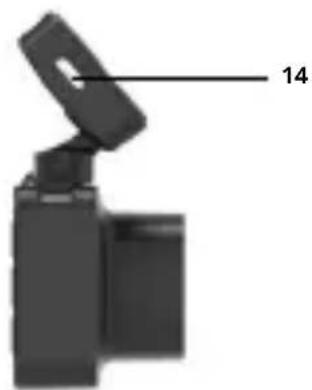
natural_image
Close-up of a black electronic device with a labeled component (14), no visible text or symbols on the device itself.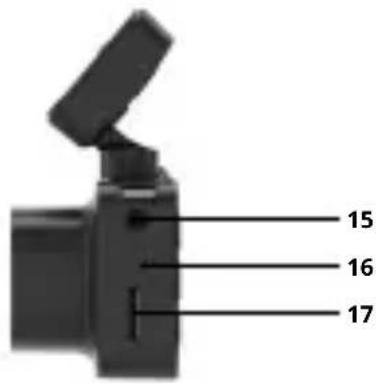
natural_image
Simple line drawing of a trash bin with crossed lines and a horizontal bar below (no text or symbols)natural_image
Close-up of a black electronic device with two labeled pins (11 and 12), no readable text or symbols beyond labels.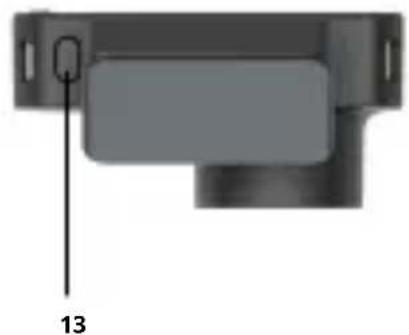
natural_image
Close-up of a mechanical component with a labeled part '13' (no other text or symbols visible)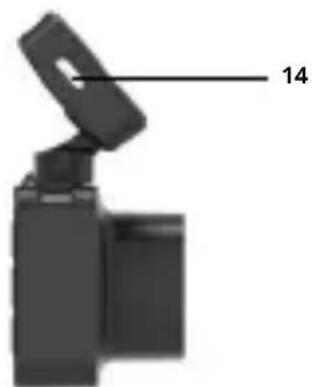
natural_image
Close-up of a black electronic device with a labeled component (14), no visible text or symbols beyond the number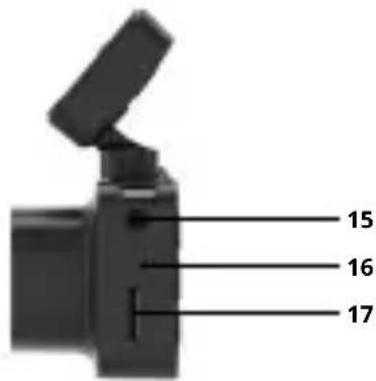
natural_image
Simple line drawing of a trash bin with crossed lines indicating no waste or discharge (no text or symbols)natural_image
Close-up of a black electronic device with two labeled pins (11 and 12), no readable text or symbols beyond labels.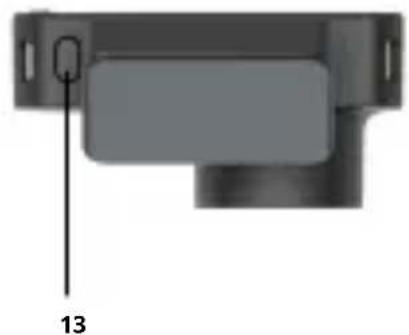
natural_image
Close-up of a mechanical component with a labeled part '13' (no other text or symbols visible)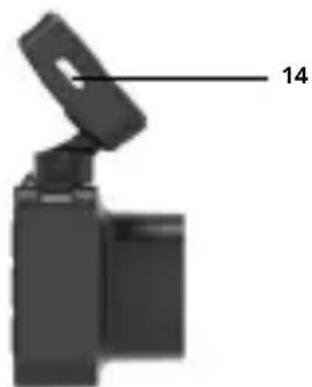
natural_image
Close-up of a black electronic device with a labeled component (14), no visible text or symbols beyond the number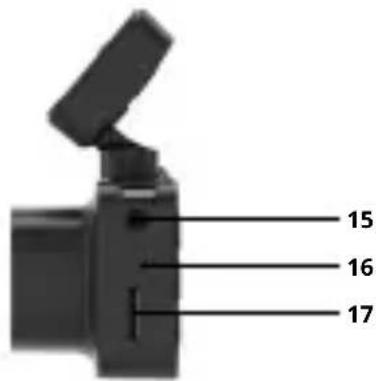
natural_image
Symbol of a trash bin with crossed lines indicating no waste, and a solid black rectangle below (no text or labels)- Kvetna 1746/22, Nusle, 140 00, Czech Republic, ID: 294 16 876, Made in China.
RoHS CE ✉ 🎨 📌
- CAMERA MENU LANGUAGE SETTING
- SETTINGS IN VIDEO MODE
- CAMERA SETTINGS
- PHOTO MODE OPTIONS
- SPEED CAMERA ALERT FUNCTION
- MICROSD CARD
- SWITCHING THE CAMERA ON / OFF AUTOMATICALLY
- CAMERA POWER SUPPLY
- USING THE CAMERA ON BATTERY POWER (WITHOUT POWER SUPPLY)
- GPS PLAYER
- CONNECTING THE CAMERA TO THE PHONE VIA WIFI
- PRODUCT PACKAGE CONTENTS
- Niceboy PILOT XR SPECIFICATIONS
- USER INFORMATION FOR DISPOSING ELECTRICAL AND ELECTRONIC DEVICES (HOME USE)
- (Business and corporate use)
- MICRO SD KARTE
- KARTICA MIKRO SD
- AUTOMATSKO UKLJUČIVANJE/ISKLJUČIVANJE KAMERE
- NAPAJANJE KAMERE
- (Poslovna uporaba)
- PL
- OPIS I FUNKCJE
Brand : Niceboy
Model : PILOT XR Radar
Category : Dash Cam