
SC1800R - Steam cleaner GORENJE - Free user manual and instructions
Find the device manual for free SC1800R GORENJE in PDF.

| Product Type | Steam Cleaner |
| Brand | Gorenje |
| Model | SC1800R |
| Dimensions (H x W x D) | 30 cm x 25 cm x 15 cm |
| Weight | 1.5 kg |
| Power Consumption | 1500 W |
| Water Tank Capacity | 0.5 L |
| Steam Pressure | 3 bar |
| Heating Time | Approx. 30 seconds |
| Continuous Steam Time | Up to 20 minutes |
| Cable Length | 5 m |
| Main Functions | Steam cleaning, floor cleaning, fabric steaming, degreasing |
| Safety Features | Auto shut-off, child lock, overheat protection |
| Maintenance | Descaling every 3 months recommended |
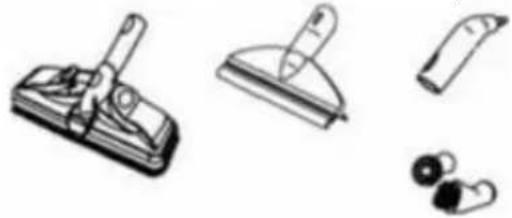
| Spare Parts | Floor brush, nozzle, microfiber pad, extension hose |
| Repair Information | Contact Gorenje service center; spare parts available online |
| Warranty | 2 years |
Frequently Asked Questions - SC1800R GORENJE
User questions about SC1800R GORENJE
0 question about this device. Answer the ones you know or ask your own.
Ask a new question about this device
Download the instructions for your Steam cleaner in PDF format for free! Find your manual SC1800R - GORENJE and take your electronic device back in hand. On this page are published all the documents necessary for the use of your device. SC1800R by GORENJE.
USER MANUAL SC1800R GORENJE
natural_image
Black and white icon showing a crossed-out bottle and container, enclosed in a circle (no text or symbols)- Lahek in prenosen

natural_image
Line drawing of a person spraying water with a hose (no text or symbols)natural_image
Line drawing of a medical or industrial device with tubing and a central component (no text or symbols)natural_image
Illustration of four different types of cleaning tools or devices, including a flat tool, a curved tool, a flat tool with a handle, and a pair of ear-shaped objects (no text or symbols present)- Večnamenski parni čistilnik: kopalnice, kuhinje, dnevne sobe, prostori za hišne ljubljenčke in naprave. Avtomobili, terase in okna
Sestavni deli
natural_image
3D rendered mechanical component with a lever and base plate (no text or symbols visible)-
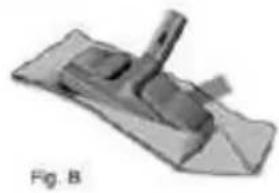
Krtačo položite na krpo.
-
Krpo zložite, kot je prikazano na (Fig. B).
natural_image
3D rendered mechanical component labeled Fig. B, showing a lever and base plate (no text or symbols on the object itself)natural_image
3D rendered mechanical component labeled Fig. C, showing a lever and base plate (no text or symbols on the object itself)natural_image
3D rendered mechanical component with a black arrow indicating force or movement (no text or symbols)natural_image
3D rendered image of a mechanical component with a lever and base (no text or symbols visible)natural_image
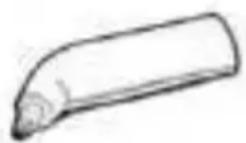
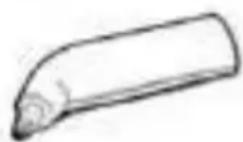
Simple line drawing of a pen resting on a curved surface (no text or symbols)Usmerjevalnik pare
Usmerjevalnik pare pritrdite na držalo ali sestavljive cevi.
Najlonska ščetka (x2)
natural_image
Two hand-drawn illustrations of donuts, one with a ring and the other with a handle (no text or symbols)natural_image
Line drawing of a person using a vacuum cleaner (no text or symbols present)VAŽNA SIGURNOSNA UPOZORENJA
DODATNA VAŽNA SIGURNOSNA UPOZORENJA
- U istu utičnicu u koju je uključen i parni čistač, ne ukapčajte druge naprave, da ne bi uzrokovali preopterećenje električne mreže.
- Ako se dogodi da stvarno trebate produžni kabel, upotrijebite kabel s nazivnom snagom 10 ampera. Kabeli s nižom nazivnom snagom se mogu pregrijati. Pazite da kabel ne bude smotan tako da se na njega spotaknete i izvučete ga iz utičnice.
- Kad je aparat prikopčan na električnu mrežu, ne ostavljajte ga bez nadzora.
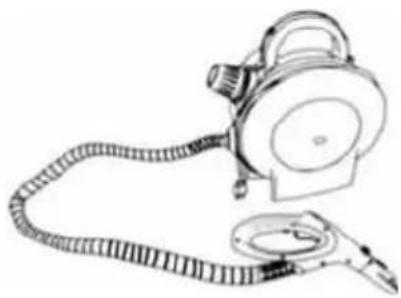
- Glavna jedinica uređaja
- Prijenosna ručka
- Remen za rame
- Kontrolna lampica 'uključeno' (crvena / para spremna (zelena)
- Sigurnosni čep
- Električni kabel
- Savitljiva cijev
- Drška
- Tipka za ispuštanje pare
- Bubanj kabela
- Zasun
- Regulator pare
- Četka za pod
- Adapter za četku
- Krpa za četku
- Nastavci (x2)
- Lijevak
- Usmjerivač pare
- Najlonske četke (x2)
Tehnički podaci
Napon: 220-240V 50Hz
Snaga: 1800 W
Zapremina posude za vodu: 1000 ml
Generator pare: Nehrđajući čelik
natural_image
Black-and-white icon showing a crossed-out bottle and container, enclosed in a circle (no text or symbols)- Lagan i prijenosan

natural_image
Line drawing of a person spraying water with a hose (no text or symbols)natural_image
Line drawing of a portable air purifier with coiled cord and handle (no text or symbols)natural_image
Illustration of four different mechanical components or tools, including a clip, handle, and gear (no text or symbols present)- Višenamjenski parni čistač: kupatila, kuhinje, dnevne sobe, prostori za kućne životinje, i naprave. Automobili, terase i prozori.
Sastavni dijelovi
Kontrolna lampica za "uključenje" (crvena): ova će se lampica upaliti kad se aparat ukopča u zidnu utičnicu 220-240V. Kad je para pripremljena, zasvijetli zelena lampica.
PAŽNJA: Prije no što odvijete sigurnosni čep, pročitajte upute za punjenje posude za vodu. PAŽNJA: Prije punjenja uvijek skinite čep. PRIJE PONOVNOG PUNJENJA NEKA SE UREĐAJ HLADI PETNAEST (15) MINUTA.
natural_image
3D rendered mechanical component with a lever and base plate, labeled Fig. A (no text or symbols on the object itself)natural_image
3D rendered mechanical part with a lever and base plate, labeled Fig. B (no text or symbols on the object itself)natural_image
3D rendered mechanical part with a lever and base plate, labeled Fig. C (no text or symbols on the object itself)natural_image
3D rendered mechanical component with a black arrow indicating force or movement (no text or symbols)natural_image
3D rendered image of a mechanical component with a lever and base (no text or symbols visible)Pričvršćenje krpe na četku za pod
natural_image
Simple line drawing of a pen resting on a curved surface (no text or symbols)Usmjerivač pare
Usmjerivač pare pričvrstite na dršku ili na cijevni nastavak.
Najlonska četka (x2)
natural_image
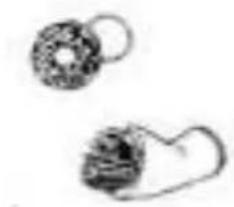
Two hand-drawn illustrations of donuts, one with a ring and the other with a handle (no text or symbols)Vješanje remena za rame
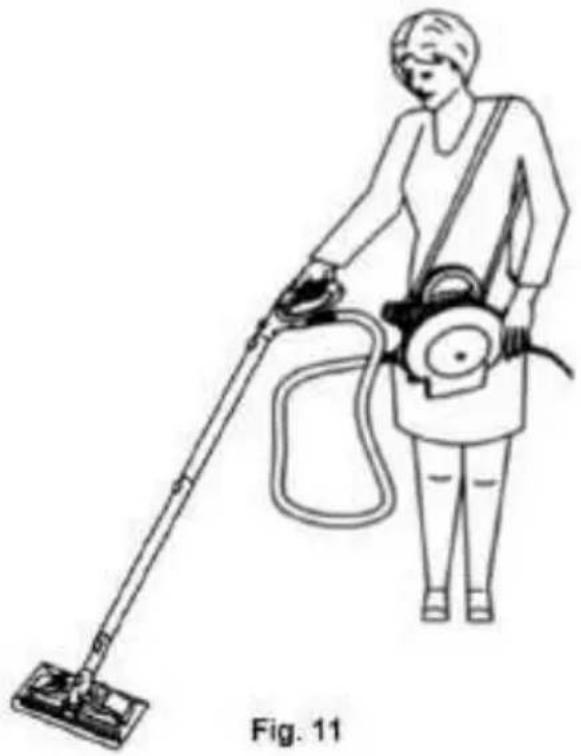
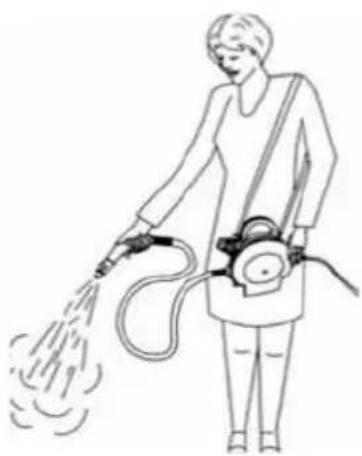
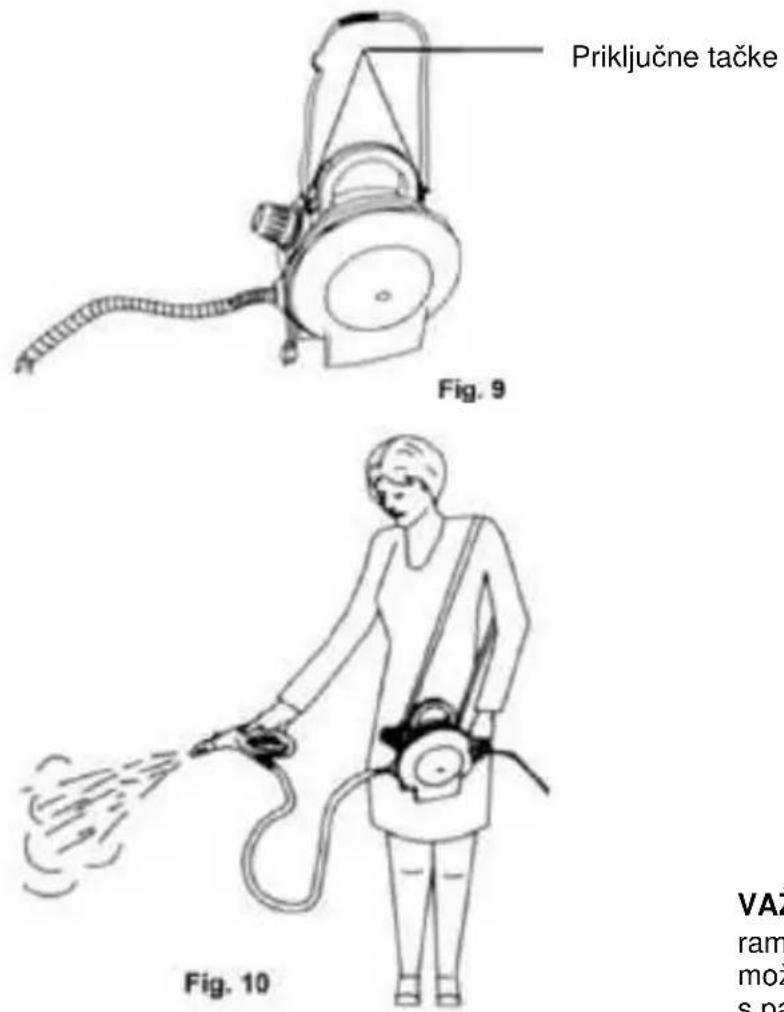
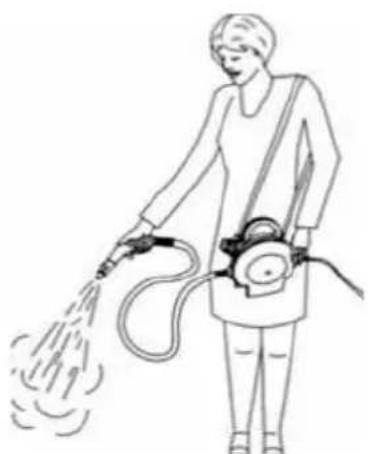
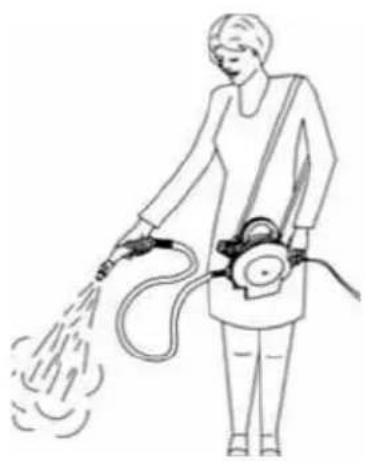
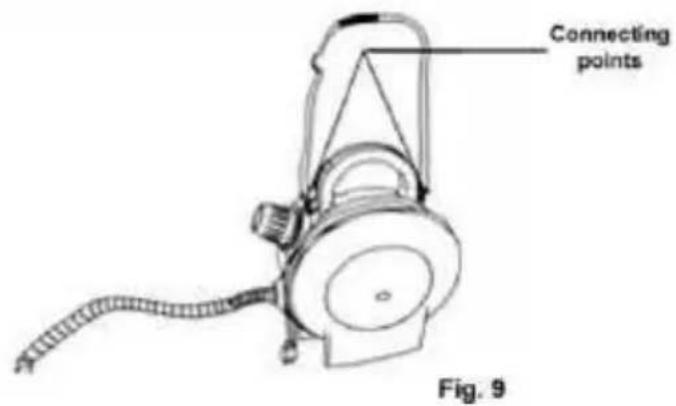
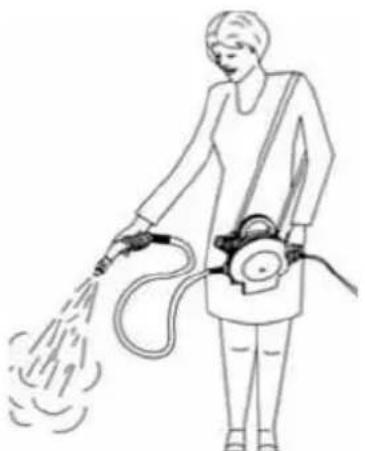
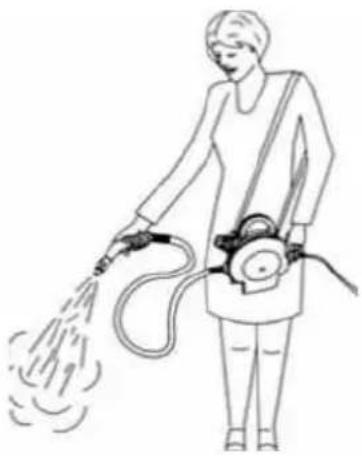
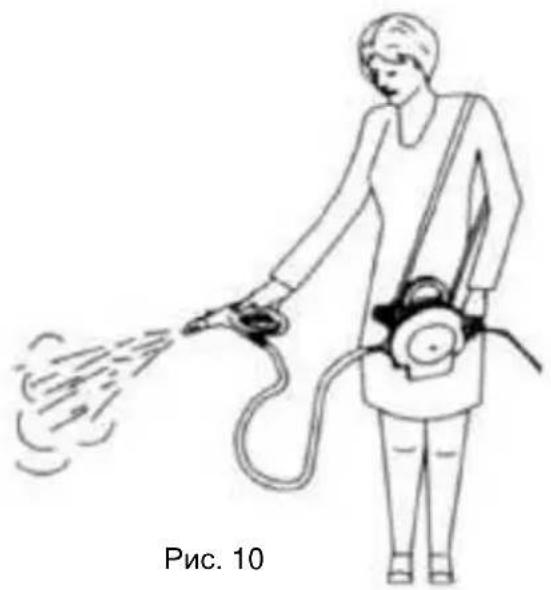
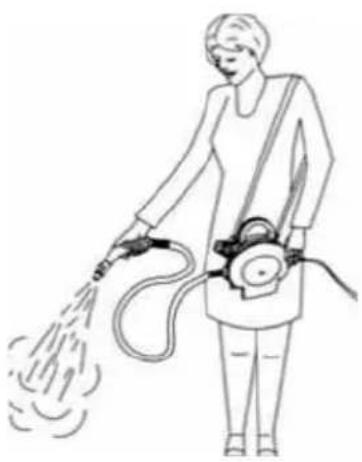
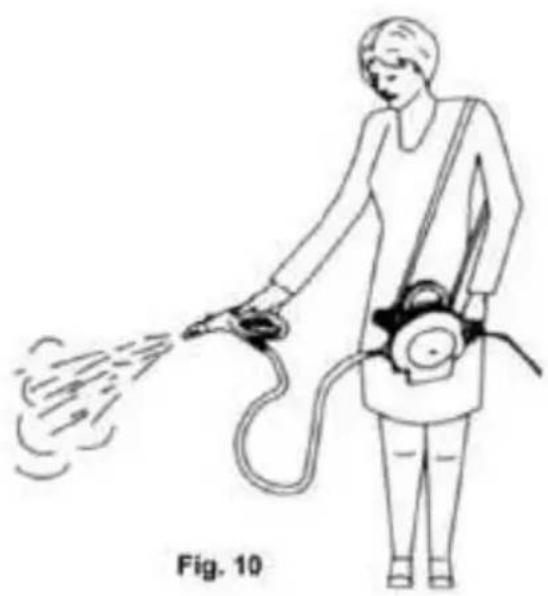
Odstranjiv remen za rame omogućava veću slobodu kretanja, a obje ruke su slobodne za razne poslove kod čišćenja. Remen pričvrstite na parni čistač tako da ga zakvačite u obruče na kućištu aparata (vidi Fig. 9, 10 i 11).

natural_image
Line drawing of a person using a vacuum cleaner (no text or symbols present)VAŽNO: Kad koristite parni čistač s remenom za rame, ne tresite ga i ne naginjite ga previše, jer to može izazvati da u cijev uđe voda i izlijeva se zajedno s parom.
SAVJETI ZA UPORABU APARATA
Njega i održavanje
Ako dosljedno koristite samo pročišćenu, odnosno destiliranu vodu, čišćenje posude za vodu nije potrebno.
- Glavna jedinica uređaja
- Prenosna ručka
- Remen za rame
- Kontrolna sijalica 'uključeno' (crvena / para spremna (zelena)
- Bezbednosni zapušač
- Električni kabl
- Savitljiva cev
- Drška
- Tipka za ispuštanje pare
- Bubanj kabla
- Kačica
- Regulator pare
- Četka za patos
- Adapter za četku
- Krpa za četku
- Nastavci (x2)
- Levak
- Usmerivač pare
- Najlonske četke (x2)
Tehnički podaci
Napon: 220-240V 50Hz
Snaga: 1800 W
Volumen posude za vodu: 1 l
Generator pare: Nerđajući čelik
natural_image
Black-and-white icon showing a crossed-out bottle and spray bottle, symbolizing anti-drug or disinfection (no text or symbols present)- Lagan i prenosan
natural_image
Line drawing of a person spraying water with a hose (no text or symbols)natural_image
Line drawing of a medical or industrial device with coiled tubing and a central component (no text or symbols)natural_image
Illustration of four different mechanical components or tools, including a clip, handle, and base (no text or symbols present)- Višenamenski parni čistač: kupatila, kuhinje, dnevne sobe, prostori za kućne životinje, i naprave. Automobili, terase i prozori.
Sastavni delovi
Kontrolna sijalica za "uključenje" (crvena): ova će se sijalica upaliti kad se aparat ukopča u zidnu utičnicu 220-240V. Kad je para pripremljena, zasvetli zelena sijalica.
natural_image
3D rendered mechanical component with a lever and base plate (no text or symbols visible)natural_image
3D rendered mechanical part with a lever mechanism, labeled Fig. B (no text or symbols on the object itself)natural_image
3D rendered mechanical component labeled Fig. C, showing a lever and base plate (no text or symbols on the object itself)natural_image
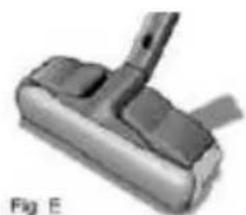
3D rendered mechanical component with a black lever and flat base, labeled Fig. D (no text or symbols on the object itself)- Krpu omotajte oko četke i složite ako što prikazuje slika E. Kad je slažete neka krpa ne bude pretesno omotana oko četke.
natural_image
Close-up of a mechanical component with a lever and handle, labeled Fig. E (no text or symbols on the object itself)Stavljanje krpe na četku za patos
natural_image
Simple line drawing of a pen resting on a curved surface (no text or symbols)Usmerivač pare
Usmerivač pare pričvrstite na dršku ili na cevni nastavak.
Najlonska četka (x2)
Najprikladnija je za čišćenje fuga među keramičkim i mramornim pločicama. Upotreba: najlonsku četku pričvrstite na kraj usmerivača pare, koji se zatim može nataknuti neposredno na držak ili na cevne nastavke.
natural_image
Two hand-drawn illustrations of donuts, one with a circular hole and the other with a curved handle (no text or symbols)Vešanje remena na rame
Remen za rame omogućava veću slobodu kretanja, a obe su ruke slobodne za razne poslove oko čišćenja. Remen pričvrstite na parni čistač tako da ga okačite na obruče na kućištu aparata (vidi slike 9, 10 i 11).

natural_image
Line drawing of a person using a vacuum cleaner (no text or symbols present)VAŽNO: Kad koristite parni čistač s remenom za rame, ne tresite ga i ne naginjite previše, jer to može izazvati da u cev uđe voda i izleva se zajedno s parom.
SAVETI ZA UPOTREBU APARATA
Nega i održavanje
natural_image
Black-and-white icon showing a crossed-out bottle and container with a diagonal line (no text or symbols)- Лесна и преносна
natural_image
Line drawing of a person spraying water with a hose (no text or symbols)natural_image
Line drawing of a portable air purifier with coiled tubing and connector (no text or symbols)natural_image
Illustration of four different mechanical components or tools, including a clip, handle, and base (no text or symbols present)- Повеюнаменска парна чистачка: бањи, кујни, дневни соби, простори за кукни љубимци и направи. Автомобили, тераси и прозорци
Составни делови
natural_image
3D rendered mechanical component with a lever and base plate (no text or symbols visible)natural_image
3D rendered mechanical component labeled Fig. B, showing a stepped assembly with no visible text or symbols.natural_image
3D rendered mechanical component labeled Fig. C, showing a bracket and mounting base (no text or symbols on the object itself)natural_image
3D rendered mechanical component with a black lever and textured base, labeled Fig. D (no text or symbols on the object itself)natural_image
3D rendered image of a vacuum cleaner (no text or symbols visible)natural_image
Simple line drawing of a pen resting on a curved surface (no text or symbols)Насочувач на парата
natural_image
Two handbags with textured designs, no visible text or symbolsnatural_image
Line drawing of a person using a vacuum cleaner (no text or symbols present)IMPORTANT SAFETY INSTRUCTIONS
When using your Steam Cleaner, basic safety precautions should always be observed, including the following:
- Read all instructions before using your steam cleaner.
- Use the system only for its intended use.
- To protect against a risk of electric shock, do not immerse any part of the system in water or other liquids.
- Never yank cord to disconnect from outlet: instead, grasp plug and pull to disconnect.
- Do not allow cord to touch hot surfaces. Let the system cool completely before putting away or opening water tank (removing the safety cap). Wrap cord loosely around system when storing.
- Always disconnect system from electrical outlet when filling with water or emptying and when not in use Always turn the safety cap slowly when opening the water tank. This will allow any remaining steam to escape gradually.
- Do not operate the system with a damaged cord or plug, or if the appliance or any other part of the system has been dropped or damaged. To avoid the risk of electric shock, do not disassemble or attempt to repair the steam cleaner. Return the system to the retailer for examination and repair. Incorrect re-assembly or repair can cause a risk of electrical shock or injury to persons when the steam cleaner is used.
- Close supervision is necessary for any appliance being used by or near children. Do not leave the system unattended while connected to electrical outlet or when hot.
- Burns can occur from touching hot metal parts, hot water or steam. Use caution when draining unit after use as there may be hot water in the unit. Never direct steam at any person. The steam is very hot and can cause burns.
- Do not operate in the presence of explosive and/or flammable fumes.
- This appliance is intended only for household use. Follow all user instructions in this manual.
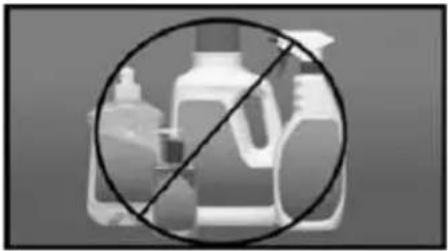
- Never use any chemicals or substance other than tap water in the machine. Use of chemicals may damage the machine. Use of chemicals will automatically void your warranty.
To reduce the risk of fire, electric shock, or injury:
- Do not leave the steam cleaner plugged in when unattended. Unplug the electrical cord when not in use and before servicing or refilling water tank.
- Do not allow to be used as a toy. Close attention is necessary when used by or near children, pets or plants.
Use only as described in this manual. Use only manufacturer's recommended accessories.
Do not pull cord, use cord as a handle, close a door on cord, or pull cord around sharp edges or corners. Keep cord away from heated surfaces. - Do not use extension cords or outlets with inadequate current carrying capacity.
- Do turn off all controls as applicable before unplugging from electrical outlet.
- Do not unplug by pulling on cord. To unplug, grasp the plug, not the cord.
- Do not handle plug or steam cleaner with wet hands or operate without shoes.
Do not put any objects into openings. Do not use with any opening blocked.
Do keep your work area well lit. Do Not turn the appliance over or on its side. Never direct steam towards people, animals or plants. - Steam should not be aimed directly at parts containing electrical components such as the electrical components inside an oven.
- Do not immerse the steam cleaner into water or other liquids. Always unplug the power cord from the electrical socket when filling the steam cleaner.
- Do NOT add cleaning solutions, scented perfumes, oils or any other chemicals to the water used in this appliance as this may damage the unit or make it unsafe for use. Use tap water or distilled/purified water if the tap water in your area is very hard. This appliance is not intended for use by persons (including children) with reduced physical, sensory or mental capabilities, or lack of experience and knowledge, unless they have been given supervision or instruction concerning use of the appliance by a person responsible for their safety.
ALWAYS STORE YOUR APPLIANCE INDOORS in a cool, dry area.
• Children should be supervised to ensure that they do not play with the appliance.
SAVE THESE INSTRUCTIONS FOR HOUSEHOLD USE ONLY
ADDITIONAL IMPORTANT SAFEGUARDS
- To avoid circuit overload, do not operate another appliance on the same socket (circuit) as the steam cleaner.
- If an extension cord is absolutely necessary, use a cord rated at a minimum of 10 amperes. Cords rated for less amperage may overheat. Care should be taken to arrange cord so that it cannot be pulled or tripped over.
- Do not leave unattended when the system is connected to a power supply/electrical outlet.
WARNING: This appliance is equipped with a grounded-type cord (plug).
CAUTION: Always drain condensed water from hose before use or if unit has been left idle for a period of time. To drain hose, direct nozzle into an appropriate container or sink and depress hand grip steam trigger. Once hose has been drained, normal use may be resumed. Never direct nozzle towards people, animals or plants.
WARNING: Your Steam Cleaner is designed to clean hard surfaces and upholstery that will withstand high heat. Do not use on soft plastics and cold glass. On surfaces that have been treated with wax or some no wax floors, the sheen may be removed by the heat and steam action. Do not use on unsealed wood. This could cause the wood grain to rise. It is therefore recommended to test an isolated area of the surface to be cleaned before proceeding.
IMPORTANT: Do NOT add cleaning solutions, scented perfumes, oils or any other chemicals to the water used in this appliance. Use regular water or distilled purified water if the tap water in your area is very hard.
WARNING: Danger of Scalding. Please use caution when using the steam cleaner. The steam emitted from this aperture very hot.
SAVE THESE INSTRUCTIONS FOR HOUSEHOLD USE ONLY

- Main Unit
- Handle
- Shoulder Strap
- Power "On" (Red) / Steam Ready (Green) Light
- Safety Cap
- Power Cord
- Flexible Hose
- Hand Grip
- Steam Trigger
- Cord Wrap
- Locking Button
- Variable Steam Control Window Squeegee
- Floor brush
- Floor Brush Angle Adapter
- Floor Brush Towel
- Extension Tubes (x2)
- Funnel
- Concentrator
- Nylon Bristle Brushes (x2)
Technical Specifications
Voltage: 220-240V 50Hz
Power: 1800 W
Water Capacity' 1000 ml
Steam Generator: Stainless Steel
* Illustrations may differ from actual product.
- No more detergents or chemicals. Just add water.
natural_image
Black-and-white icon showing a crossed-out bottle and spray bottle, symbolizing anti-drug or disinfection (no text or symbols present)- Lightweight & Portable
natural_image
Line drawing of a person spraying water with a hose (no text or symbols)- Stainless Steel Boiler: Non-corroding. stainless steel boiler. Welded construction.
- Reavy-duty crush-resistant hose.
natural_image
Line drawing of a medical oxygen mask device with attached tubing (no text or symbols)- Versatile, quick-change accessories

natural_image
Illustration of four different mechanical components or tools, including a clip, a curved blade, a cylindrical rod, and a pair of accessories (no text or symbols present)- Multipurpose Steam Cleaner Bathrooms. kitchens, living areas, pet areas and appliances. Automotive, patio and windows
Components
Power "On" Light (red): This light will illuminate when the unit is plugged into the 220-240V. wall outlet. It will then turn "green" when the steam is ready.
CAUTION: Read the instructions for -Filling the Water Tank" before opening the Safety Cap.
CAUTION: Always unplug before filling. ALLOW UNIT TO COOL FOR FIFTEEN (15) MINUTES BEFORE REFILLING.
IMPORTANT: Do NOT add cleaning solutions, scented perfumes, oils or any other chemicals to the boiler in this appliance. Use tap water or distilled/purified water if the tap water in your area is very hard.
Filling or Refilling Your Steam Cleaner With Water
IMPORTANT: Always insure that the unit is "UNPLUGGED" from the wall receptacle prior to initial filling or re-filling the water tank and has been allowed to cool for 15 minutes. Never attempt to fill this unit under a water tap. always use the filling funnel provided.
Step 1: Before refilling the steam cleaner, make sure that the unit is NOT plugged in and has been allowed to cool for fifteen (15) minutes.
Step 2: Press the steam trigger on the hand grip to vent any residual steam that is in the boiler.
Step 3: Place the unit on a flat, stable surface. Slowly turn the safety filler cap counter clockwise until it is removed.
Step 4: Insert the funnel into the tank opening and add (1000 ml) of water. Place the funnel in the tank opening as illustrated in Fig. 1. The funnel has been specially designed to show when the water tank is full. When water starts to come out of the vent hole of the funnel, the tank is full. Remove the funnel slowly and let the remaining water in it to go inside the water tank. Do Not Overfill. Replace the Safety Cap.
WARNING: Allow unit to cool for 15 minutes before refilling.
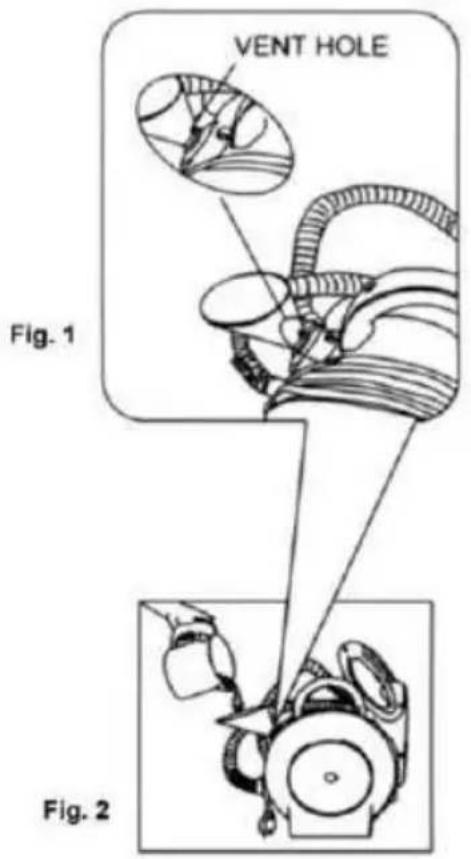
Vent hole
When refilling the steam cleaner while the boiler is still hot, there is a risk that water will squirt back during filling and cause scalding. Extreme care should be taken when refilling the unit. Use caution when opening the Safety Cap as cap may become hot during use and escaping steam can cause scalding.
Step 5: Connect desired attachments onto the Flexible Steam Hose.
Step 6: Plug the unit into a standard (220-240 volt, grounded) wall receptacle. Allow approximately 8-10 minutes for vapor to reach its working temperature and pressure. When the unit is ready for use, the red light will change to green. Always point nozzle outlet in a safe direction. At the start, some water will come out from the nozzle. This is normal.
NOTE: When the steam cleaner has run out of water, steam output will cease.
OPERATING INSTRUCTIONS
WARNING: This appliance is under pressure. After every use, press steam trigger button until all pressure has been released before removing safety cap.
Allow unit to cool for fifteen (15) minutes before refilling.
Using the Variable Steam Feature
Your steam cleaner has a variable steam feature that allows you to adjust the steam flow to the job that you are doing. The variable steam control is located on the handgrip. (Fig. 3) To increase the steam flow, turn the knob counter clockwise and to decrease, turn it clockwise.
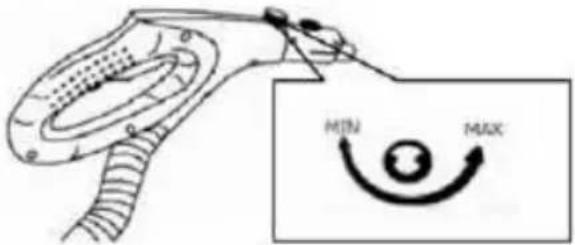
Fig. 3
Using Your Steam Cleaner
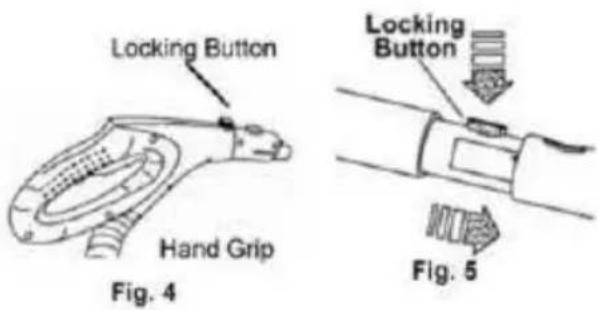
Step 1: Connect one of the extension tubes to the hand grip on the flexible steam hose. To attach the extension tubes one onto the other or onto the hand grip, press the locking button ensuring that it fits into the hole (Fig. 4, Fig. 5) and press the two sections together. To disconnect, repeat the operation by pressing the locking button and pulling the two sections apart.
NOTE: Fit the Floor Brush with
Step 2: If the angle adapter is not attached to the Floor Brush, hold the Floor Brush your left hand with the brass pin on the half toward the floor. Take the angle adapter in your right hand with the angle adapter pointing downward and the cylindrical nozzle facing toward the left. Insert it into the hole of the Floor Brush, then turn the Floor Brush 90°.
Step 3: Insert the electrical power cord into the wall outlet. Heating time is approximately 8-10 minutes with cold water. Filling the steam generator with hot water will shorten the heat up time.
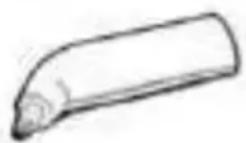
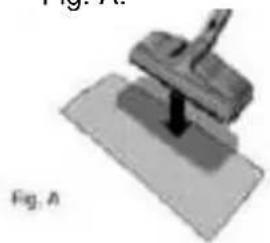
- Prepare white terry cloth towel as shown in Fig. A.
natural_image
3D rendered mechanical component with a lever and base plate, labeled Fig. A (no text or symbols on the object itself)-
Place the brush on lop of the towel.
-
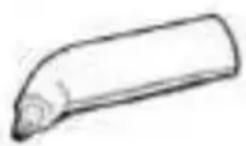
Fold the towel as shown in Fig. B.

natural_image
3D rendered mechanical part with a lever and base plate, labeled Fig. B (no text or symbols on the object itself)- Fold the other side of the towel as shown in Fig. C.

natural_image
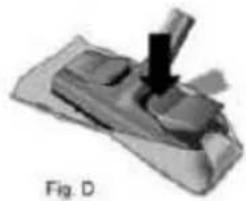
3D rendered mechanical component labeled Fig. C, showing a lever and base plate (no text or symbols on the object itself)- Place the corner under the cloth holder as shown in Fig. D.
natural_image
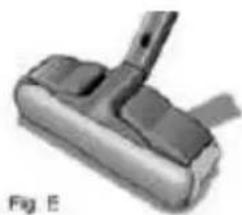
3D rendered mechanical component with a black arrow indicating force or movement (no text or symbols)- Place the towel around the brush, and repeat folding the towel as shown in Fig. E. When folding the towel, leave some slack. Do not pull tightly around the brush, leave some sooseness.
natural_image
3D rendered image of a mechanical component with a lever and handle (no text or symbols visible)Attaching a Towel to the Floor Brush
100% white terry cloth towel can be flitted on this brush, to absorb the dirt and protect delicate surfaces.
IMPORTANT: Please note that bristles may break trough thin towels. We recommend that two (2) towels, laid one on top of the other be used. This will ensure that the brush bristles do not break though and that the towels will be sufficiently absorbent and retain as much dirt as possible.
CLEANING TIP: You may also fit the towel so that the front and rearbristle areas are open and uncovered. This will result in less moisture on the towel and allow the floor to dry more quickly.
Care & Maintenance of the Steam Pocket Towel
Due to the unique cleaning ability of this cloth, proper care of your microfiber towel is required to ensure long life and continued cleaning ability.
- The first thing you should do when you get a new microfiber towel is to wash and dry it During the manufacturing process the fabric has a tendency to become flat as it picks up contaminants from the air and machinery. There will also be a number of loose threads that, while they cause no harm, can be annoying the first time you use the towel.
- To clean the towel, simply wash it in your washing machine using the warm water setting.
- Always wash your towels separately from other fabrics. They have a tendency to pick up lint and other particles from other fabrics and the next time you use your towel. this lint will transfer to the surface being cleaned.
- ONLY USE LIQUID DETERGENTS. never use dry detergents as many times the granules do not fully dissolve and become trapped in the towel. This can scratch the surface that you are cleaning.
- NEVER USE BLEACH OR FABRIC SOFTENERSI Bleach will damage the microfiber fabric and fabric softeners deposit a coating on the microfiber fabric what will not allow the cloth to clean efficiently.
• Air dry the towel. Do not put in a clothes dryer as high heat will cause the towel to shrink and the microfibers to break down.
- If you wash your towel on a regular basis and don't let them get too dirty, they will last much longer. As with any fabric, dirt particles, grease and other contaminants can cause the fibers to break down, therefore regular cleaning will help preserve your microfiber towels.
As you use the microfiber towel, you will notice that sometimes a thread will loosen or pull cut. This is normal and you should NEVER PULL AT THE LOOSE THREAD! Pulling the thread can cause the weave to come undone. Instead, simply trim the thread with a pair of sharp scissors
Attaching the Accessories to the Flexible Steam Hose
Allow the unit to cool for 5 minutes before changing accessories.
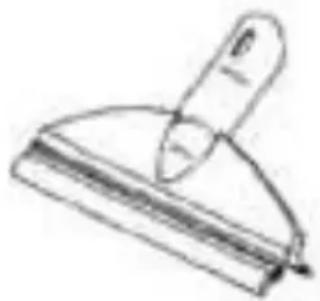
Window Squeegee
This attachment is very useful for cleaning large windows, plastic material, ceramic, tiled or marble surfaces.
IMPORTANT: When cleaning windows, always avoid any sudden changes in temperature to prevent glass breakage or cracks.
To use: Connect the tile squeegee to the hand grip or use with extension tube for hard to reach surfaces. Apply steam abundantly, rub with the soft spongy edge, then remove excess water and dirt with the glass wiping edge.
natural_image
Simple line drawing of a pen resting on a curved surface (no text or symbols)Concentrator:
Attach the concentrator to the handgrip or to the extension tubes.
Nylon Bristle Brush (x2)
It is best for cleaning grout in-between the tiles, ceramic and marble. To use: Attach the nylon bristle brush on to the end of the concentrator, which then may be used directly on the hand grip or with extension tubes.
natural_image
Two hand-drawn illustrations of donuts, one with a textured outer ring and the other with a flared bottom (no text or symbols)Attaching the Shoulder Strap
Using the detachable shoulder strap allows for greater freedom of movement when both hands are needed for various cleaning tasks. To attach the shoulder strap to the steam cleaner, simply snap the shoulder strap hooks onto the connecting rings on the unit body. See Fig. 9, 10& 11.

natural_image
Illustration of a person spraying water with a hose, labeled 'Fig. 10' (no text on diagram)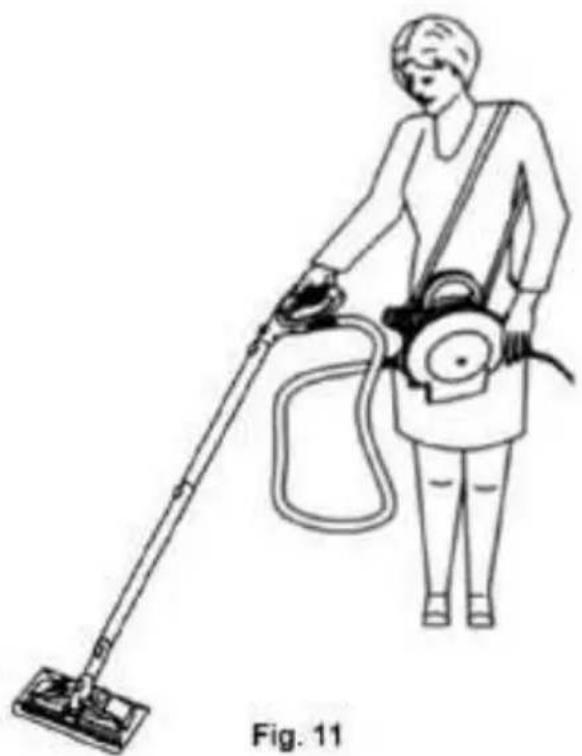
natural_image
Line drawing of a person using a vacuum cleaner (no text or symbols present)IMPORTANT: When using the steam cleaner with the shoulder strap, avoid rocking or tilting the unit excessively as this may cause water to enter the hose and be discharged along with the steam.
TIPS ON HOW TO USE YOUR SYSTEM
Care and Maintenance
If you consistently use demineralized or distilled water, cleaning the tank is unnecessary.
Rinsing Out the Steam Cleaner
Normally. a periodic rinse of your steam cleaner will free it from deposits. This is recommended every 10-15 tankfulls, to free up any scale deposits from the tank. Fill the boiler with 600m1. of water and shake the cleaner vigorously. Tilt the cleaner upside down to empty the boiler of water and any scale deposits.
Descaling Your Steam Cleaner
If the tap water in you area contains a high level of calcium deposits and you have been using tap water to do your steam cleaning, you should descale your unit after 10-15 tankfulls.
To Descale the Steam Cleaner
Step 1: Unplug the steam cleaner from the power source before you descale the boiler. Allow to cool.
Step 2: Fill the boiler with 1 part vinegar and 5 parts water and leave overnight or for a period of approximately 8 hours. Do not screw the safety/filler cap onto the steam cleaner while you are descaling the boiler. Do not use the steam cleaner while descaling solution is inside the boiler.
Step 3: After the period of soaking, turn the steam cleaner upside down to empty solution from the boiler. Due to the fact that a small amount of solution will be left in the boiler, it is necessary to rinse the boiler out with clean water 2 or 3 times. Your steam cleaner is now ready for use.
NOTE: When storing your unit, always drain any residual water in the boiler and do not tighten the safety filler cap onto the unit. Always leave the safety filler cap loose on the unit when not in use.
Water
- Use tap water for all your cleaning needs.
- However. if you live in an area with hard water, use de-mineralized / distilled water when steaming light colored fabrics to eliminate the possibility of hard water stains.
IMPORTANT: Do NOT add cleaning solutions, scented perfumes, oils or any other chemicals to the water used in this appliance. Use tap water or distilled/purified water if the tap water in your area is very hard.
Efficient Work
- For vertical surfaces. wipe with a towel from the top down, in this way the dirty water will not soil surfaces already cleaned.
- Avoid changing brushes back and forth while cleaning.
- Start with the smallest brush to clean tight spots and corners first.
- Use a towel to wipe dirt as soon as possible, otherwise it will dry and re-adhere to the surface.
TIPS ON HOW TO USE YOUR SYSTEM
Wood, Vinyl and Marble Floors
Use the Floor Brush. Move the Floor Brush across the floor as if you are mopping. When one side of the towel is soiled, turn the steam pocket frame and use the other side. If you are working on a very dirty area, you can move the steam pocket over the area slowly, several times. If it is a wood floor, move fast to avoid heat or moisture buildup in the wood.
To Clean Waxed Floors: Use the Floor Brush with quick strokes. This will cause the dirt to be removed but not the wax
Vinyl Floors: Do not allow heat to buildup in any kind of vinyl, since it can soften it enough to affect its texture. Work fast on vinyl.
Tile Floors: Use the concentrator with the bristle brush attached to an extension. Have the Floor Brush ready as well. Clean the grout between the tiles with the bristle brush. Remove the bristle brush and attach the Floor Brush, move the Floor Brush across the floor to clean the tile and remove excess moisture and residue. Do not let the area dry before you wipe with a towel.
Spot Cleaning (Carpets)
Use the concentrator with or without the bristle brush. Move slowly over the soiled area, allowing the steam to penetrate. Agitate with bristle brush or clean towel. Dab the spot with the towel (do not rub). Repeat as necessary to remove stain. Vacuum only after the carpet has completely dried. Always test color fastness of carpet in an inconspicuous area before cleaning. If your steam cleaner fails to remove stubborn stains a commercially available carpet shampoo may be required. Do NOT add cleaning solutions, scented perfumes, oils or any other chemicals to the water
used in this appliance as this may damage the unit or make it unsafe for use.
CAUTION: Always determine the color-fastness of any fabric-especially with reds or blues - by taking a clean, moist, warm towel and gently rubbing a small area as far down on the back or other out of the way place on the furniture as possible. If color comes off on the towel, you may need to have the piece dry cleaned.
Window, Glass Surfaces and Mirrors
Use the window squeegee. Work with the vapor jet on using the top to bottom movements. Use the squeegee with the vapor off to clear the water from the glass. To do this without leaving streaks, use lateral movements from the top to the bottom of the surface.
CAUTION: When cleaning windows, always avoid any sudden changes in temperature to prevent glass breakage or cracks.
TIPS ON HOW TO USE YOUR SYSTEM
Fiberglass or Stainless Steel Surfaces
Use the bristle brush. Slowly move the brush over the surface to be cleaned. The vapor will emulsify the dirt and grease on the surface. Follow behind with a terry cloth towel over the brush to remove excess moisture and residue. Tip: An old idea for polishing stainless steel is to wipe it down with seltzer soda water after it is cleaned.
Bathroom Areas
To clean the bathtub or shower area, use the bristle brush for grout, shower door tracks, hard to get areas and heavily soiled areas. The dual edge window/tile squeegee will be the most efficient way to clean the rest of the area. Allow plenty of time for the heat to penetrate the surface. This is especially helpful in the shower area if there is tile or grout. Wipe with towel.
Removal of soap scum on tile, grout, and shower doors is also easier with the steam cleaner.
To clean sanitary fixtures, use the concentrator with or without bristle brush. Use a terry cloth towel or paper towel to wipe up excess moisture and residue. To clean the sink and faucets, use bristle brush then finish by wiping with a towel.
Soap Scum
Soap scum dissolves almost immediately under a combination of heat and moisture. Rinse the surface with a small amount of water afterwards or go back over it once more with a clean terry cloth towel.
Note: Soap scum sometimes will develop a hard surface from waterborne minerals. If this is the case, use the bristle brush to break up this surface - or spray or wipe first with lemon, vinegar or seltzer soda water to soften the minerals.
Moving too slowly can dry out the soap scum and cause it to granulate on the surface. The surface will have a gritty feel. If this happens, apply vapor to the surface with the bristle brush again and re-clean.
Garden Furniture
Use any of the brushes depending on the surface area. Work quickly when cleaning resin outdoor furniture. Finish by wiping with a towel
Blinds
Use the nylon bristle brush to clean blinds. Move the brush over the surface, allowing enough time for the vapor to penetrate. Work quickly on PVC blinds. Test for color fastness on fabric blinds before using. Finish by wiping with a towel.
Automotive
For detailing the wheels. use the concentrator and the bristle brush. Exterior windows are cleaned best by applying the vapor with the concentrator and following with a paper towel.
To clean bicycles, use the bristle brush. To clean equipment, use the bristle brush, depending on the surface area. Finish by wiping down with a towel.
Artificial Plants
Use the concentrator without a brush attached to blow off the dust and dirt.
Clothing
A vapor cleaning system is excellent for removing wrinkles from fabrics. Simply "vaporize" the surface from a distance of (30 – 45cm). The dry vapor removes wrinkles without leaving the fabric wet like ordinary fabric steamers do.
Nicotine and Tar
Nicotine and tar dissolves at high temperatures and becomes a light yellow oil that has the consistency of sewing machine oil. When the nicotine/tar film is touched by steam pocket, it immediately dissolves and flows into the steam pocket towel. You can remove it from flat surfaces as fast as you can move the steam pocket over the surface.
Removing Wax, Tar, Etc.
Many stains are only stuck on the surface of materials and can be easily and quickly removed by "blowing" excess material away from the surface from the side. This is accomplished by using the concentrator. hold the terry cloth towel to the side to catch the loose residue as it is blown by the concentrator. Note: Always vacuum any loose residue off the surface before you apply vapor to it.
TIPS ON HOW TO USE YOUR SYSTEM
ALWAYS FINISH CLEANING BY WIPING DOWN THE CLEANED SURFACE WITH A TOWEL
When using your Steam Cleaner, basic safety precautions should always be observed, including the following:
Refrigerator - Use the concentrator to blow away dirt in the ice machine and on door seals. The vapor will not dry out or crack the seals as chemicals often do. Can openers and other kitchen equipment can be easily cleaned with the bristle brush to get into all the nooks and crannies. Mold stains around door gaskets can be removed with the bristle brush.
Note: When cleaning small electrical appliances always unplug them from outlet before cleaning. Do not direct steam into any openings of the appliances.
To clean counter tops. use the bristle brush first in order to loosen the debris, then wipe with a terry cloth towel to finish.
Hints
The steam cleaner has many uses that have not been mentioned. This was meant only to give you a general idea of what can be achieved with the unit. However, the ways in which to use the attachments and brushes are in most cases universal. It is most helpful to always have a terry cloth towel or paper towel ready to use for removal of moisture and residue. 100% white cotton towels work best.
You can clean the brushes with your steam cleaner. When cleaning the bristle brushes, use a pair of pliers to hold and blow dirt as above or place in the basket of your dishwasher.
Note: Wipe with a towel immediately before the cleaned area dries. When cleaning the oven, use the bristle brush to clean around the elements and drip trays. Use the bristle brush for cracks, crevices, and hard to reach areas.
ENVIRONMENT
Do not throw away the appliance with the normal household waste at the end of its life, but hand it in at an official collection point for recycling. By doing this, you help to preserve the environment.
GUARANTEE & SERVICE
If you need information or if you have a problem, please contact the Gorenje Customer Care Centre in your country (you find its phone number in the worldwide guarantee leaflet). If there is no Customer Care Centre in your country, go to your local Gorenje dealer or contact the Service department of Gorenje domestic appliances.
For personal use only!
WISHES YOU A LOT OF PLEASURE
WHILE USING YOUR APPLIANCE
gorenje
INSTRUCTIUNI IMPORTANTE DE SIGURANTĂ
natural_image
Black and white photo of multiple cleaning products with a diagonal line overlay (no text or symbols)- Uşor și portabil
natural_image
Line drawing of a person spraying water with a hose (no text or symbols)natural_image
Line drawing of a portable air purifier with attached hose and connector (no text or symbols)natural_image
Illustration of four different types of cleaning tools or components (no text or symbols)natural_image
3D rendered mechanical component with a lever and base plate (no text or symbols visible)natural_image
3D rendered mechanical part with a lever and base plate, labeled Fig. B (no text or symbols on the object itself)natural_image
3D rendered mechanical component labeled Fig. C, showing a lever and base plate (no text or symbols on the object itself)natural_image
3D rendered mechanical component with a black arrow indicating force or movement (no text or symbols)natural_image
Close-up of a mechanical component with a handle and lever, labeled Fig. E (no text or symbols on the object itself)natural_image
Simple line drawing of a pen resting on a curved surface (no text or symbols)Concentrator:
natural_image
Two hand-drawn illustrations of donuts, one with a ring and the other with a handle (no text or symbols)natural_image
Line drawing of a person using a handheld vacuum cleaner (no text or symbols)natural_image
Black-and-white icon showing a crossed-out bottle and spray bottle, symbolizing no chemical or food restrictions (no text or symbols present)- Lekki i przenośny
natural_image
Line drawing of a person spraying water with a hose (no text or symbols)natural_image
Line drawing of a portable air purifier with coiled cord and connector (no text or symbols)natural_image
Illustration of various mechanical components including a clip, handle, and screw (no text or symbols)natural_image
3D rendered mechanical component with a lever and base plate, labeled Fig. A (no text or symbols on the object itself)natural_image
3D rendered mechanical part with a lever and base plate, labeled Fig. B (no text or symbols on the object itself)natural_image
3D rendered mechanical part labeled Fig. C, showing a bracket and mounting plate (no text or symbols on the object itself)natural_image
3D rendered mechanical component with a black arrow indicating force or movement (no text or symbols)natural_image
Close-up of a mechanical component with a lever and textured body (no visible text or symbols)natural_image
Simple line drawing of a pen resting on a curved surface (no text or symbols)natural_image
Two hand-drawn illustrations of different objects, possibly a donut or ring, with no visible text or symbols.natural_image
Line drawing of a mechanical device with a coiled cable and handle (no text or symbols)natural_image
Line drawing of a person spraying water with a hose (no text or symbols)Fig. 10

natural_image
Illustration of a person using a vacuum cleaner in a field, labeled 'cowania' and 'Fig. 11' (no text on diagram itself)GWARANCJA I SERWIS NAPRAWCZY
DÔLEŽITÉ BEZPEČNOSTNÉ POKYNY
natural_image
Black and white icon showing a crossed-out bottle and container with a diagonal line (no text or symbols)- L'ahký & Prenosný

natural_image
Illustration of a person spraying water with a hose (no text or symbols)natural_image
Line drawing of a portable air purifier with coiled cord and handle (no text or symbols)natural_image
Illustration of four different types of cleaning tools or devices, including a flat tool, a curved tool, a flat sheet, and a pair of accessories (no text or symbols present)natural_image
3D rendered mechanical component with a lever and base plate, labeled Fig. A (no text or symbols on the object itself)natural_image
3D rendered mechanical component labeled Fig. B, showing a folded sheet and central pin (no text or symbols on the object itself)natural_image
3D rendered mechanical part with a pointed tip and rectangular body, labeled Fig. C (no text or symbols on the object itself)natural_image
3D rendered mechanical component with a black cylindrical feature, labeled Fig. D (no text or symbols on the object itself)natural_image
3D rendered image of a mechanical component with a handle and internal structure (no text or symbols visible)Pripojenie utierky na kefu na podlahu
natural_image
Simple line drawing of a pen resting on a curved surface (no text or symbols)Koncentrátor:
natural_image
Two hand-shaped objects with textured surfaces, possibly decorative items or accessories (no text or symbols visible)natural_image
Illustration of a person spraying water with a hose, labeled 'Fig. 10' (no text on diagram)
natural_image
Line drawing of a person using a vacuum cleaner to clean or operate equipment (no text or symbols)natural_image
Black-and-white icon showing a crossed-out bottle and cleaning product, symbolizing anti-drug or disinfection (no text or symbols present)- Könnyű & Hordozható

natural_image
Line drawing of a person spraying water with a hose (no text or symbols)natural_image
Line drawing of a portable air purifier with coiled cord and connector (no text or symbols)natural_image
Illustration of four different mechanical components or tools, including a clip, handle, and screw (no text or symbols present)natural_image
3D rendered mechanical component with a lever and base plate, labeled Fig. A (no text or symbols on the object itself)natural_image
3D rendered mechanical component labeled Fig. B, showing a stepped assembly with no visible text or symbols.natural_image
3D rendered mechanical component labeled Fig. C, showing a lever and base plate (no text or symbols on the object itself)natural_image
3D rendered mechanical component with a black lever and textured base, labeled Fig. D (no text or symbols on the object itself)natural_image
Close-up of a mechanical component with a lever and handle, labeled Fig. E (no text or symbols on the object itself)natural_image
Simple line drawing of a pen resting on a curved surface (no text or symbols)Súrító:
natural_image
Two handbags with textured designs, no visible text or symbolsnatural_image
Line drawing of a person using a vacuum cleaner (no text or symbols present)natural_image
Black-and-white icon showing a crossed-out bottle and container with a diagonal line, no text or symbols present.natural_image
Line drawing of a person spraying water with a hose (no text or symbols)natural_image
Line drawing of a portable air purifier with attached hose and clamp (no text or symbols)natural_image
Illustration of four different types of cleaning tools or components (no text or symbols)natural_image
3D rendered mechanical component with a lever and base plate (no text or symbols visible)natural_image
3D rendered mechanical part with a lever and base, labeled Fig. B (no text or symbols on the object itself)natural_image
3D rendered mechanical component labeled Fig. C, showing a lever and base plate (no text or symbols on the object itself)natural_image
3D rendered mechanical component with a black cylindrical pin and textured base, labeled Fig. D (no text or symbols on the object itself)natural_image
3D rendered image of a vacuum cleaner (no text or symbols visible)natural_image
Simple line drawing of a pen resting on a curved surface (no text or symbols)Спрямовувач:
natural_image
Two hand-drawn illustrations of donuts and a shoe (no text or symbols)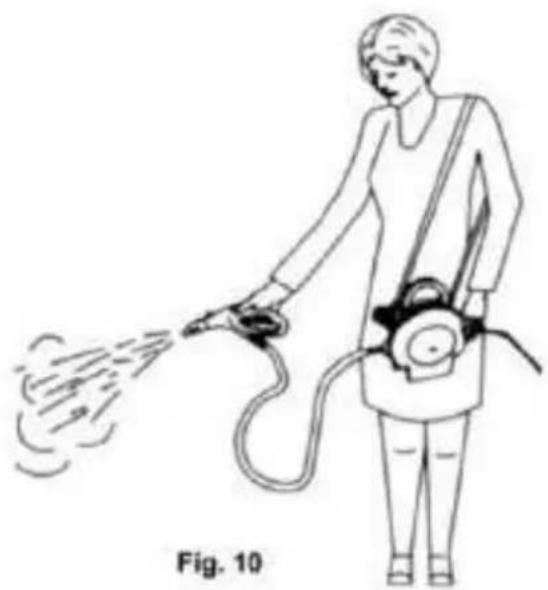
natural_image
Illustration of a person spraying water with a hose, labeled 'Fig. 10' (no text on diagram)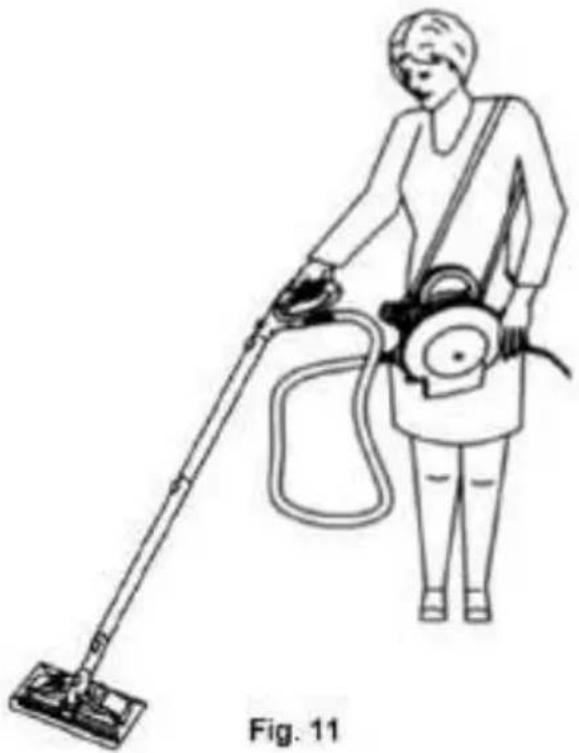
natural_image
Illustration of a person using a vacuum cleaner to clean or operate equipment (no text or symbols visible)natural_image
Black-and-white icon showing three cleaning bottles with a diagonal line crossed out, no text or symbols present.natural_image
Line drawing of a person spraying water with a hose (no text or symbols)natural_image
Line drawing of a medical device with attached tubing (no text or symbols)natural_image
Illustration of four different cleaning tools or components (no text or symbols visible)natural_image
Simple 3D illustration of a mechanical component with a lever and base plate (no text or symbols)Рис. А
natural_image
3D rendered mechanical component with no visible text or symbolsnatural_image
3D rendered mechanical component with a lever and base plate (no text or symbols visible)natural_image
Mechanical component with a black arrowhead and label 'mc. D' (no readable text or symbols on the object itself)natural_image
Close-up of a mechanical component with a lever and handle (no visible text or symbols)Рис. Е
natural_image
Simple line drawing of a pen resting on a curved surface (no text or symbols)Точечное сопло
natural_image
Two hand-drawn illustrations of donuts, one with a circular handle and the other with a textured handle (no text or symbols)Рис. 9
natural_image
Illustration of a person spraying water with a hose, labeled 'Рис. 10' (no text on diagram itself)
natural_image
Line drawing of a person using a vacuum cleaner (no text or symbols on the diagram itself)Domestic Appliances.
natural_image
Black and white photo of multiple cleaning products with a diagonal line overlay (no text or symbols)- Леко & подвижно
natural_image
Line drawing of a person spraying water with a hose (no text or symbols)natural_image
Line drawing of a gas vent with attached tubing (no text or symbols)- Лесно подменящи се аксесоари
natural_image
Illustration of four different mechanical components or tools, including a clip, a curved blade, a cylindrical rod, and a pair of accessories (no text or symbols present)natural_image
3D rendered mechanical component with a lever and base plate, labeled Fig. A (no text or symbols on the object itself)natural_image
3D rendered mechanical component labeled Fig. B, showing a lever and base plate (no text or symbols on the object itself)natural_image
3D rendered mechanical component labeled Fig. C, showing a lever and base plate (no text or symbols on the object itself)natural_image
3D rendered mechanical component with a black lever and textured base, labeled Fig. D (no text or symbols on the object itself)natural_image
Close-up of a mechanical component with a lever and handle, labeled Fig. E (no text or symbols on the object itself)natural_image
Simple line drawing of a pen resting on a curved surface (no text or symbols)Концентратор:
natural_image
Two hand-drawn illustrations of donuts, one with a circular handle and the other with a curved handle (no text or symbols)Fig. 9
natural_image
Illustration of a person spraying water with a hose, labeled Fig. 10 (no text or symbols on the diagram itself)
natural_image
Line drawing of a person using a handheld vacuum cleaner (no text or symbols)DALŠÍ DŮLEŽITÉ BEZPEČNOSTNÍ POKYNY
natural_image
Black and white icon showing a crossed-out bottle and container with a diagonal line (no text or symbols)- Lehký a prěnosný:

natural_image
Illustration of a person spraying water with a hose (no text or symbols)natural_image
Line drawing of a gas purifier with attached tubing (no text or symbols)natural_image
Illustration of four different mechanical components or tools, including a clip, a curved component, a flat pin, and a pair of circular objects (no text or symbols present)natural_image
3D rendered mechanical component with a lever and base plate, labeled Fig. A (no text or symbols on the object itself)natural_image
3D rendered mechanical part with a lever mechanism, labeled Fig. B (no text or symbols on the object itself)natural_image
3D rendered mechanical component labeled Fig. C, showing a lever and base plate (no text or symbols on the object itself)natural_image
3D rendered mechanical component with a black arrow indicating force or movement (no text or symbols)natural_image
Close-up of a mechanical component with a lever and handle, labeled Fig. E (no text or symbols on the object itself)natural_image
Simple line drawing of a pen writing on a curved surface (no text or symbols)Koncentrátor:
natural_image
Two hand-drawn illustrations of donuts and a wristband (no text or symbols)
natural_image
Illustration of a person spraying water with a hose, labeled 'Fig. 10' (no text on diagram)