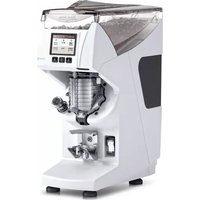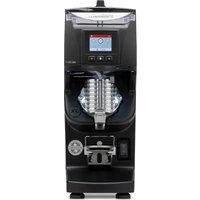
Mythos GX - Grinder NUOVA SIMONELLI - Free user manual and instructions
Find the device manual for free Mythos GX NUOVA SIMONELLI in PDF.


User questions about Mythos GX NUOVA SIMONELLI
0 question about this device. Answer the ones you know or ask your own.
Ask a new question about this device
Download the instructions for your Grinder in PDF format for free! Find your manual Mythos GX - NUOVA SIMONELLI and take your electronic device back in hand. On this page are published all the documents necessary for the use of your device. Mythos GX by NUOVA SIMONELLI.
USER MANUAL Mythos GX NUOVA SIMONELLI
USERHANDBOOK Translation of the Original Instructions
MANUEL D'INSTRUCTIONS Traduction des Instructions Originales
USO IMPROPRIO PREVEDIBLE
USO IMPROPRIQ PREVEDIBLE 5
RISCHI RESIDUI 6
SMALTIMENTO 6
TRASPORTO 6
MOVIMENTAZIONE 7
STOCCAGGIO 7
DATI TECHNICI 9
ACCENSIONEMACCHINA 12
ACCENSIONE DISPLAY 16
PROCEDURA DI PRIMO AVVIO 16
SCHERMATA PRINCIPALE 16
MODALITA EROGAZIONE GRAVIMETRICA 16
MODALITA EROGAZIONE C-AUTOMATION 17
MODALITA EROGAZIONE BARISTA 18
MODALITA EROGAZIONE STOP & GO 18
MENURICETTE 18
SALVATAGGIO RICETTE 20
PARAMETRIRICETTE 20
- Automation ID.
- Automation Auto-Fully.

Pagina precedente.

Carefully read these requirements, as they provide important safety information during the installation, use and cleaning of the machine.
This Manual forms an integral part of the machine and is delivered to the user.
Keep this manual in a safe place for further consultation.
The machine must only be used for the purposes described in this manual. Before using the machine, read and fully understand the Instruction Manual or at least these safety requirements and the set-up instructions.
The machine can only be used with roasted coffee beans.
This machine can be used by children aged from 8 years and above and persons with reduced physical, sensory or mental capabilities or lack of experience and knowledge if they have been given supervision or instruction concerning use of the machine in a safe way and understand the hazards involved. Children must not play with the machine. Cleaning and maintenance must not be carried out by children unless supervised.
After removing the machine from the packaging, ensure the integrity of all the contents of the box. Inside must be the machine, this Handbook and related accessories. If you have any doubts, do not use the machine and contact a professionally qualified person. Always keep all packaging (plastic bags, polystyrene foam, nails, pallets, etc...) out of the reach of children as they may be a potential source of danger and never disperse such materials in the environment.
The machine can be installed only in places where the use and maintenance is limited to trained personnel.
The access to the service area is restricted to persons having knowledge and practical experience of the machine, in particular as far as safety and hygiene are concerned.
The machine must be installed on a horizontal, flat, and stable surface capable of supporting its weight and at a height of at least 900mm from the ground.
The environment operating temperature must be within the range of [+5, +25]^ .
The machine must not be installed where it may be used water jets.
To facilitate aeration of the machine, position the aeration portion of the machine 15 cm from walls or other machinery.
The noise level of the machine is less than 70db(A).
Before carrying out any installation, maintenance, unloading, adjustment, the qualified technician must wear the correct Personal Protective Equipment (PPE) such as work gloves and safety shoes.
Before connecting the machine, make sure that the data on the CE plate correspond to those of the electrical system.

For electrical safety, this machine requires a ground system. Contact a technically certified electrician who must check that the line electrical capacity is adequate for the maximum capacity indicated on the machine label.
The warranty expires if the characteristics of the power supply do not correspond to the CE nameplate data.
In case of incompatibility between the socket and the machine's plug, have an electrician with the appropriate certification replace the socket with one of the correct type. The electrician should also verify that the wiring in the system is suitable for the power required by the machine.
Never use adapters, multiple jacks or extension cords. When such items prove absolutely necessary, call in a qualified electrician.
To avoid risks of electric shock, the use of the machine involves compliance with some basic rules, in particular:
- Never touch the machine with wet hands or feet;
- Never use the machine with bare feet;
- Never use in bathrooms or showers;
- Do not pull the power cord or the machine itself to disconnect the plug from the power outlet;
- Never leave the machine exposed to atmospheric agents (rain, direct sunlight, etc...);
- Do not allow the machine to be used by children as specified above, or by unauthorised staff who have not read and understood the information in this Manual;
- Never place the machine in water or other liquids.
To prevent dangerous overheating, it is advisable to fully extend the power supply cord. Never block the intake and/or heat dissipation grills.
The user must never replace the machine's power supply cord. If this cord is damaged, turn OFF the machine and have it replaced by a professionally qualified technician.
Should it be necessary to replace the power cord, this operation must only be performed by an authorized service centre or by the manufacturer.
For cleaning and maintenance operations follow the instructions given in this manual carefully.
While using the machine, it is forbidden to insert utensils or kitchen cutlery into the dispensing nozzle or the coffee bean container to make withdrawals or perform interventions.
Always switch OFF the machine before removing blockages from the dispensing spout.
In case of breakdown or poor function, turn OFF the machine. It is strictly forbidden
to intervene. Contact only professionally qualified personnel. Only the manufacturer or an authorized service center can make repairs and only using original spare parts. Non compliance with the above can compromise machine safety.
Before performing any sort of maintenance, the authorized technician must turn OFF the machine and disconnect the power cable..
In case of fire, if possible, disconnect power to the machine by turning OFF the main switch. Its absolutely avoid to extinguish the fire with water when the machine is electrically powered.
The machine can be used 24 hours a day with intermittent service. The machine components are designed and manufactured to last at least 1000 hours of operation, which includes appropriate ordinary cleaning and maintenance. Recommended period of use are Ton 30 sec and Toff 60 sec.
EXEMPTION FROM LIABILITY
The Simonelli Group Manufacturer cannot be held responsible for damages, injuries and/or hazardous situations generated, such as for example:
- Failure to comply with the safety, installation, use, cleaning and maintenance requirements of this Manual.
- Any damage caused by improper, incorrect and unreasonable use of the machine.
- Machine left on without the presence and supervision of a qualified operator.
- The lack of grounding of the electrical system by the buyer.
- Repairs carried out independently without the authorisation of the Manufacturer, or without the appropriate skills.
- Dismantle the parts of the machine, especially remove or tamper with the safety devices provided by the Manufacturer during the design phase.
The Manufacturer also reserves the right to amend the Booklet without the obligation to update previous editions, except in exceptional cases, so images may differ slightly from reality.
INTENDED USE
The correct use of the machine must comply with what is stated in this Manual:
- Machine designed and built respecting what is expressed in the declaration of conformity.
- The machine can only be used with roasted coffee beans.
FORESEEABLE IMPROPER USE
This paragraph lists only a few reasonably foreseeable misuse situations.
- Use by non-professional or incorrectly trained operators.
- Do not touch the heating element and/or the upper grinder holder before they have cooled down.
- Do not place anything other than coffee beans into the container, or insert utensils or kitchen cutlery into the ventilation grilles and/or the dispensing nozzle.
- Obstructing the vents with cloths or other items.
- Use the machine if wet or with wet hands or feet.
RESIDUAL RISKS

Although the manufacturer has provided mechanical and electrical safety systems, touching the heating element or the upper
grinder holder during use still poses a risk of burns.
Immediately after use and after switching OFF, hot areas of the machine still remain.
DISPOSAL

Should you decide to stop using this type of machine, we suggest you render it inoperable by unplugging it and cutting the power supply cord.
Do not disperse the machine in the environment: for disposal, contact an authorized center or contact the manufacturer for pertinent indications.
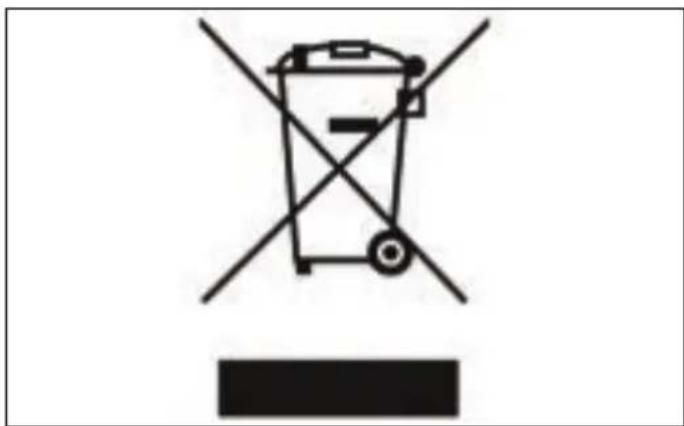
Under the senses of the Directives 2015/863/EU concerning the reduction of the use of dangerous substances in electric and electronic equipment, as well as the disposal of wastes.
The symbol of the crossed large rubbish container that is present on the machine points out that the product at the end of its life cycle must be collected separately from the other wastes.
The user for this reason will have to give the equipment
that got to its life cycle to the suitable separate waste collection centres of electronic and electro-technical wastes, or to give it back to the seller or dealer when buying a new equipment of equivalent type, in terms of one to one.
The suitable separate waste collection for the following sending of the disused equipment to recycling, the dealing or handling and compatible environment disposal contributes to avoid possible negative effects on the environment and on the people's health and helps the recycling of the materials the machine is composed of.
The user's illegal disposal of the product implies the application of administrative fines as stated in Law Decree n.22/1997" (article 50 and followings of the Law Decree n.22/1997).
TRANSPORT
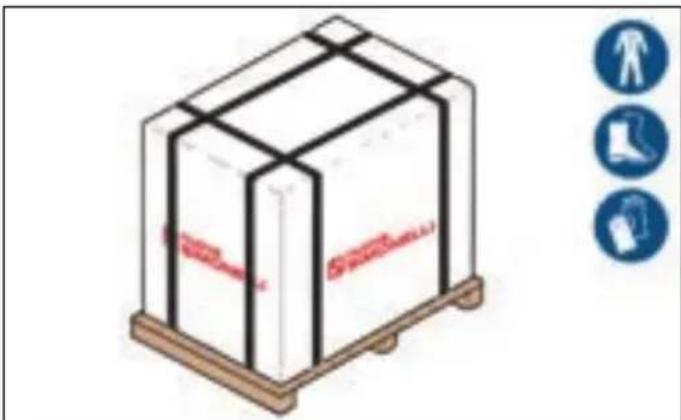
The machine is transported on pallets containing several machines inside cartons strapped to the pallet.
Before performing any transport or movement operations, the operator must wear gloves, safety shoes and overalls with elasticized cuffs.
MOVEMENTS
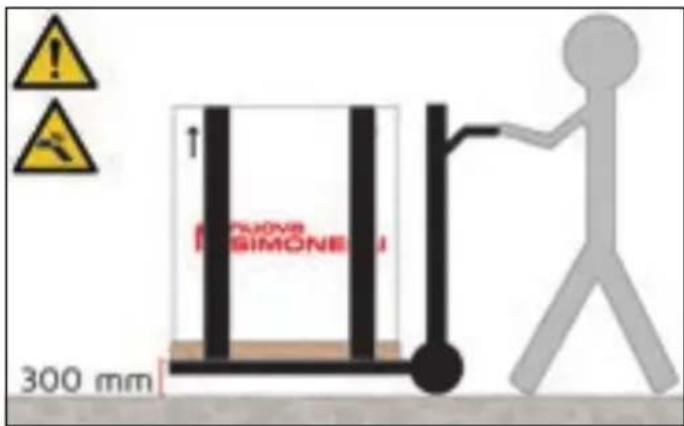
Slowly lift the pallet about 30~cm from the ground and reach the loading area.
After checking that there are no obstacles, things or people, proceed with the loading.
Once you arrive at your destination, always with a suitable lifting device (e.g. forklift), after making sure that there are no things or people in the unloading area, take the pallet to the ground and move it about 30~cm from the ground, until to the storage area.
STORED
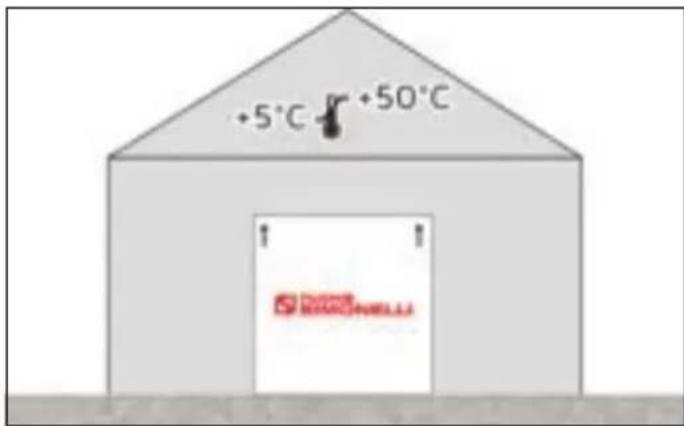
The package containing the machine must be stored away from atmospheric agents.
Before performing the following operations, make certain that the load is in stable and will not fall when the straps are cut.
Wearing gloves and safety shoes, the operator must cut the straps and store the product. During this operation, see the product technical features for the weight of the machine being stored and proceed as necessary.
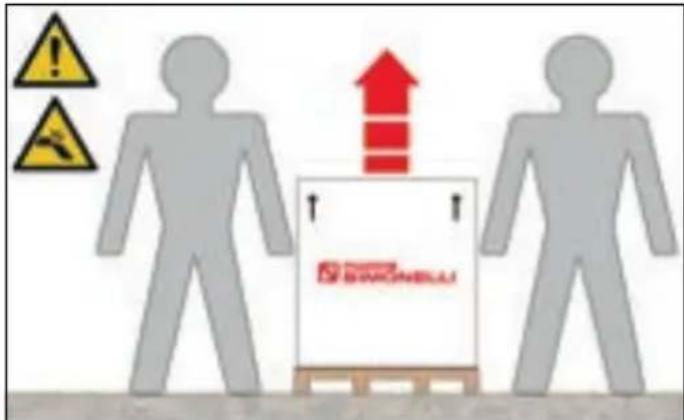
The machine must be moved by 2 or more operators.
Failure to respect current safety regulations and standards on lifting and handling materials absolves the Manufacturer from all liability for possible damage to person or things.
INDEX
SAFETY INDICATIONS 36
EXEMPTION FROM LIABILITY 38
INTENDED USE 38
FORESEEABLE IMPROPER USE 38
RESIDUAL RISKS 39
DISPOSAL 39
TRANSPORT 39
MOVEMENTS 40
STORED 40
TECHNICAL DATA 42
MACHINE DESCRIPTION 43
INSTALLATION 44
PREPARATION BY THE PURCHASER 44
POSITIONING 44
ELECTRICAL CONNECTION 44
SCALE BLOCK REMOVAL 44
ASSEMBLY AND DISASSEMBLY
OF PORTAFILTER FORK 45
PORTAFILTER FORK HEIGHT ADJUSTMENT 45
USE 45
SWITCH ON THE MACHINE 45
PREDIPOSITION TO USE 46
DOSE DISPENSING 46
SWITCH OFF THE MACHINE 47
PROGRAMMING 48
INTRODUCTION TO PROGRAMMING 49
SWITCHING ON THE DISPLAY 49
INITIAL START-UP PROCEDURE 49
HOME PAGE 49
GRAVIMETRIC DISPENSING MODE 49
C-AUTOMATION DISPENSING MODE 50
BARISTA DISPENSING MODE 51
STOP & GO DISPENSING MODE 51
RECIPES MENU 51
RECIPESSAVING 53
RECIPPEARAMETERS 53
RECIPERE OPTIONS
FOR MACHINE CONFIGURATION 53
ALARMS MENU 54
LIST OF ALARMS 54
MAIN MENU 54
LANGUAGE 55
COUNTERS 55
KEYS AND DISPLAY 56
TECHNICAL SETTING 58
MAINTENANCE 59
password 60
CONFIGURATION 61
BURRS CALIBRATION (with Stepper motor) 62
INFO 62
SCALE CALIBRATION 63
COPY PARAMETERS 64
ORDINARY CLEANING 67
TROUBLESHOOTING 67
MAINTENANCE 68
ELECTRICAL DIAGRAMS 168
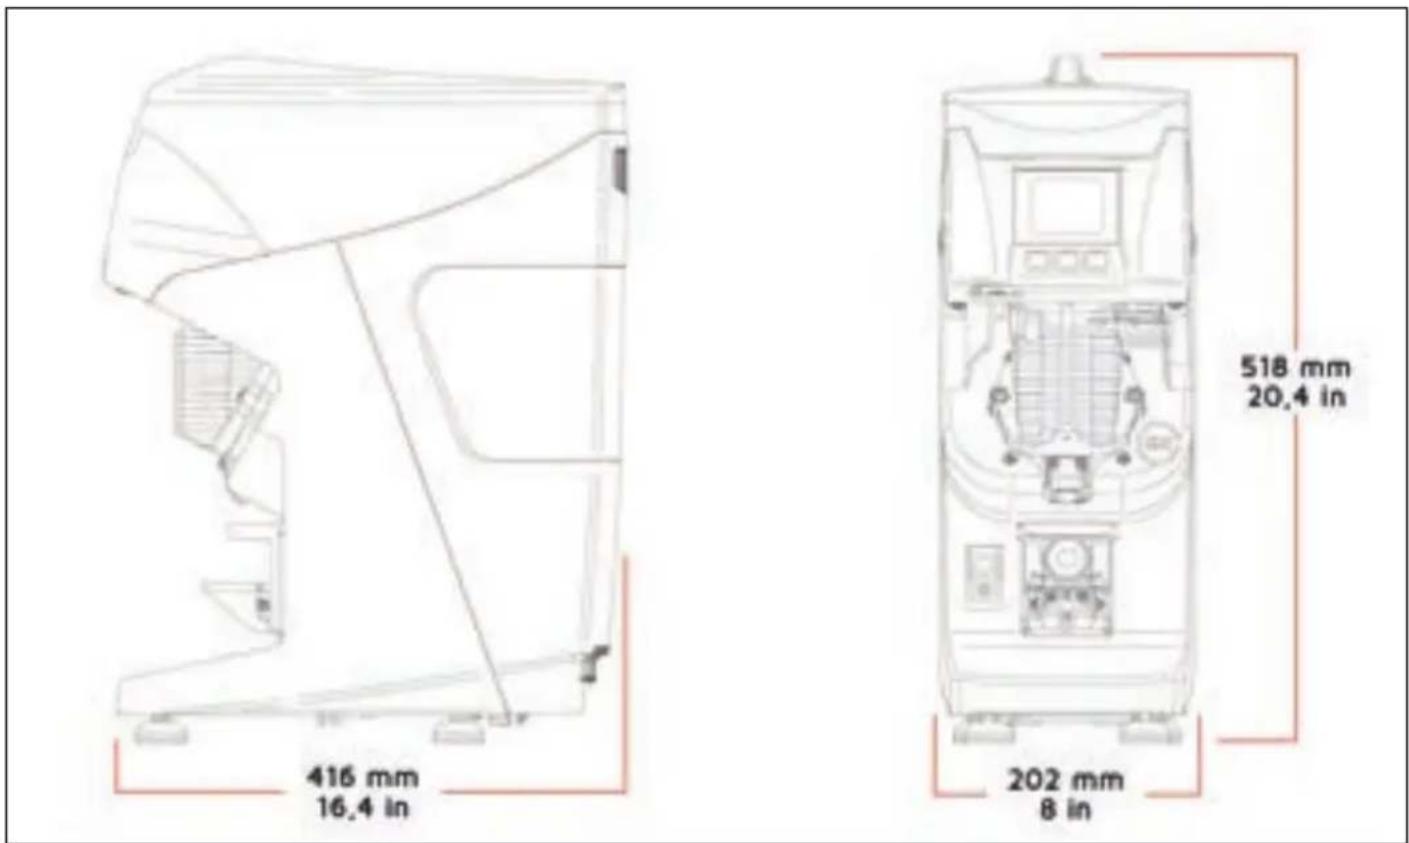
TECHNICAL DATA
In order to identify the appliance, read the code immediately after "SERIAL NUMBER" on the label applied on this manual or on the appliance itself and select the corresponding voltage.
| MODEL | GX 85 WAM GX 85 TAM GX 75HS TAM | ||
| Version | Gravimetric Timed High Speed Timed | ||
| Voltage V | 110 220/240 110 220/240 110 220/240 | ||
| Frequency Hz | 50 50 / 60 50 50 / 60 50 50 / 60 | ||
| Consumption W | 700 700 | 1150 | |
| Grinding speed | g/s | 3 / 3,5 | 3 / 3,5 |
| Hopper | kg (lb) | 2 (4,4) | 2 (4,4) |
| Net weight | kg (lb) | 21,5 (47,4) | 21,5 (47,4) 21,5 (47,4) |
| Gross weight | kg (lb) | 24 (53) | 24 (53) |
| Height | mm (in) | 518 (20,4) | 518 (20,4) |
| Width | mm (in) | 202 (8) | 202 (8) |
| Depth | mm (in) | 416 (16,4) | 416 (16,4) |
MACHINE DESCRIPTION
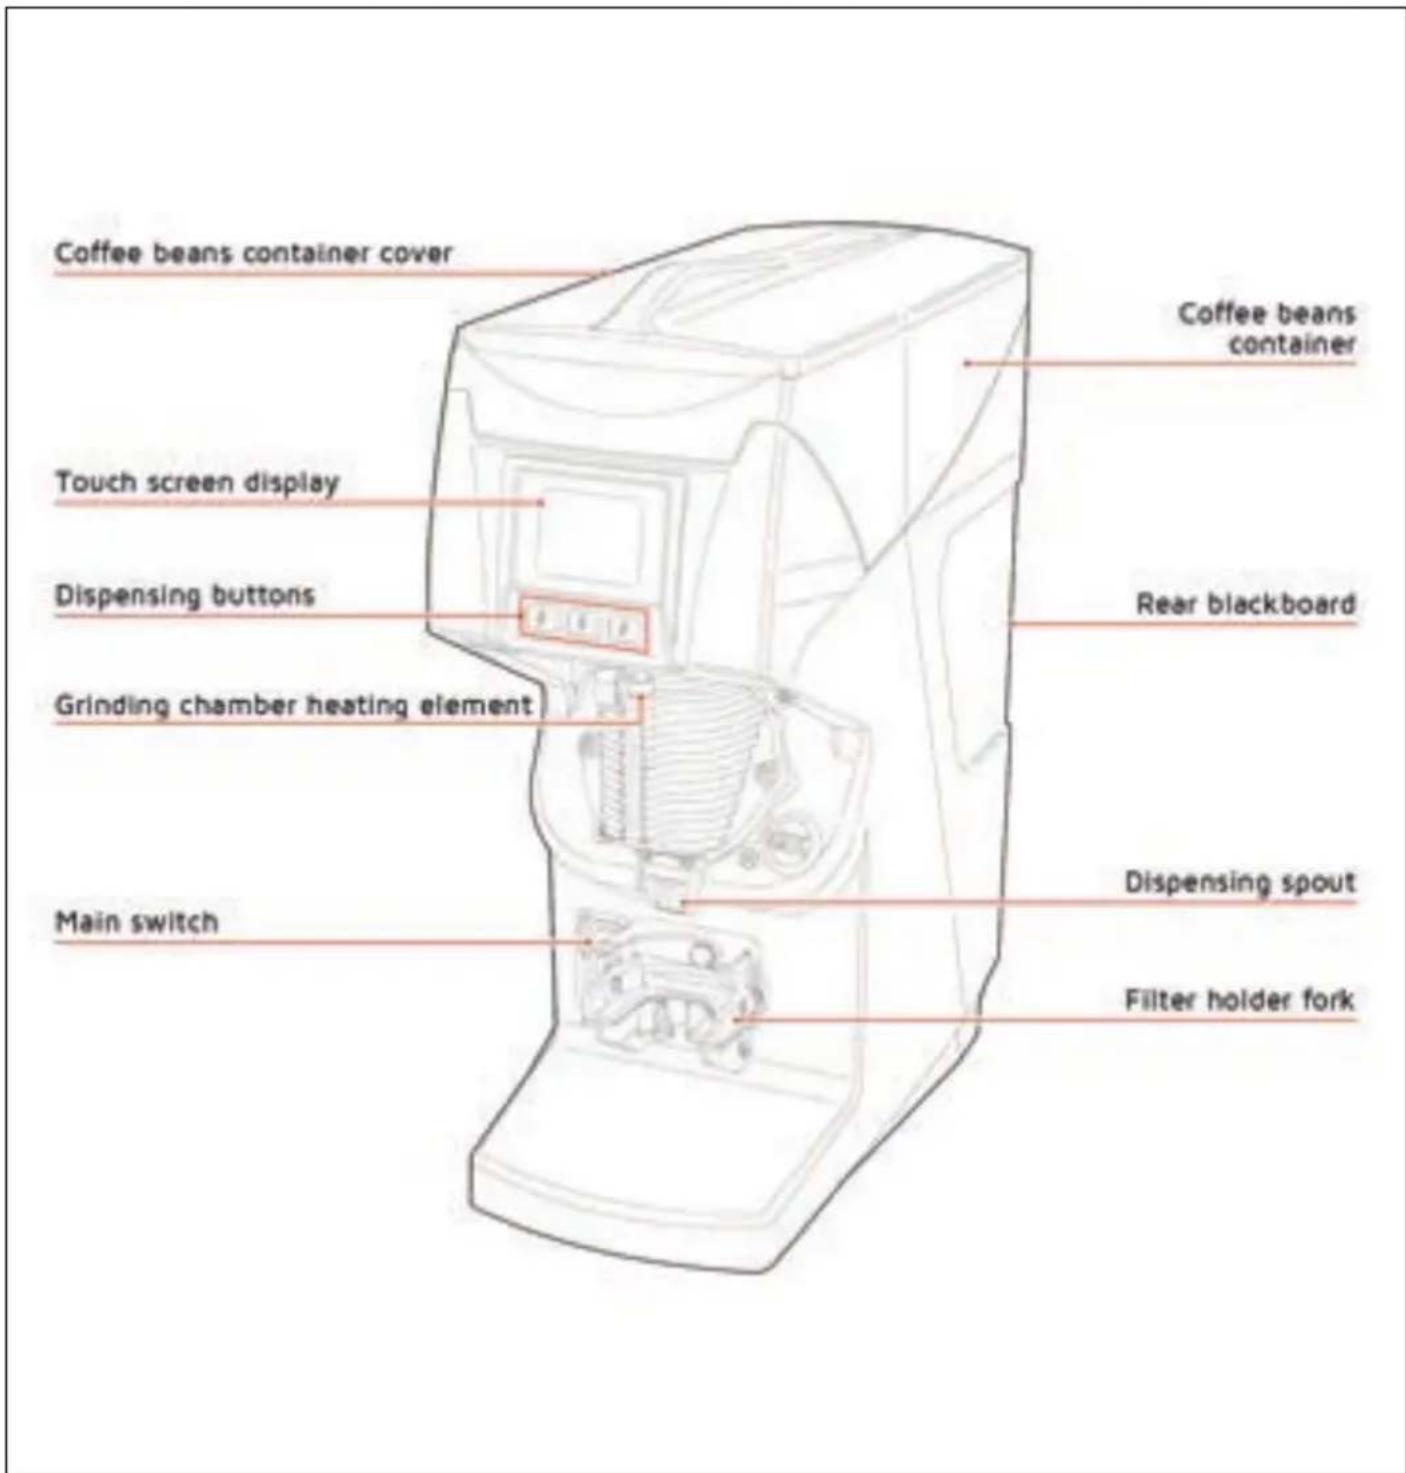
The GX85W is a professional grinder-doser that dispenses ground coffee in GRAVIMETRIC mode, ensuring maximum precision during the grinding process.
Thanks to C-Automation technology, the use of the GX85W grinder-doser is recommended together with the NUOVA AURELIA coffee machine.
The manufacturer has also included a blackboard at the rear, where notes can be written with chalk and easily wiped clean with a damp cloth.
INSTALLATION
PREPARATION BY
THE PURCHASER
Preparation of the installation site
The purchaser must prepare the surface on which the machine will stand suitable to support the machine weight.
Electrical requirements

The mains power installation must comply with the safely regulations and standards in force in the country of installation and must include an efficient earth system.

The power wires must be sized according to the maximum current required by the machine to ensure a total voltage loss under full load of less than 2% .
ELECTRICAL CONNECTION
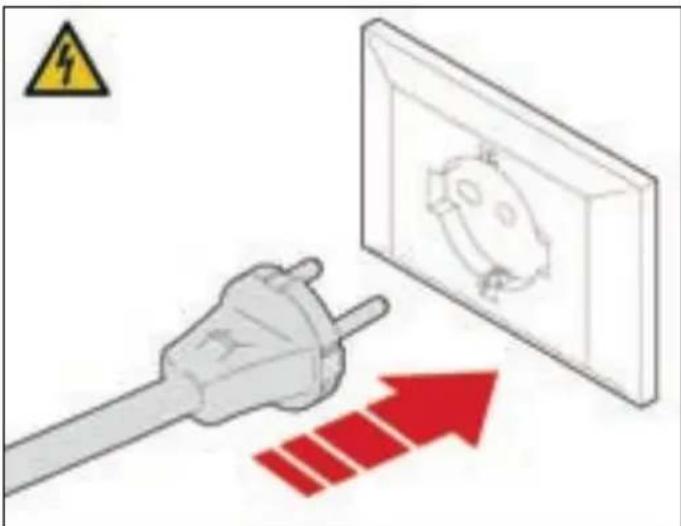
Prior to connecting the machine to the electrical mains, assess that the voltage shown on the machine's data plate corresponds with that of the mains.
Insert the plug into the electrical socket.
POSITIONING
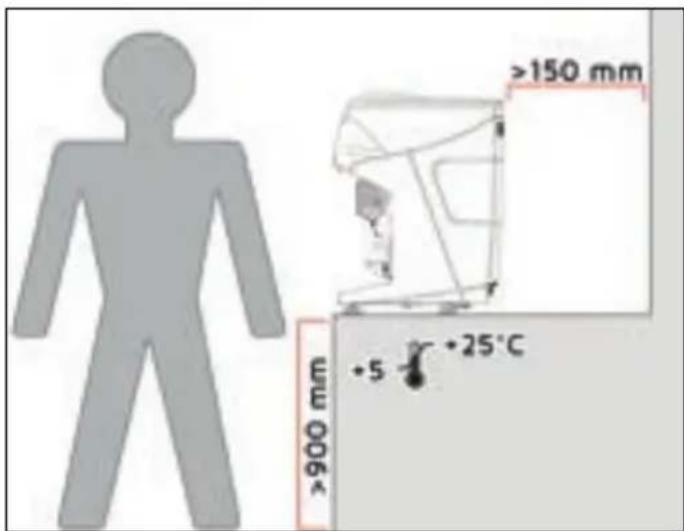
Before installing the machine, make sure the area where it will be installed is compatible for the size and weight of the machine.

When moving or handling the machine, never lift it by the coffee bean container.
Position the machine on a horizontal plane at least 900 mm high from the ground.
Keep at least 150~mm around the machine for proper ventilation.
SCALE BLOCK REMOVAL

After connecting the machine to the mains, remove the safety padlock before use.
ASSEMBLY AND DISASSEMBLY OF PORTAFILTER FORK
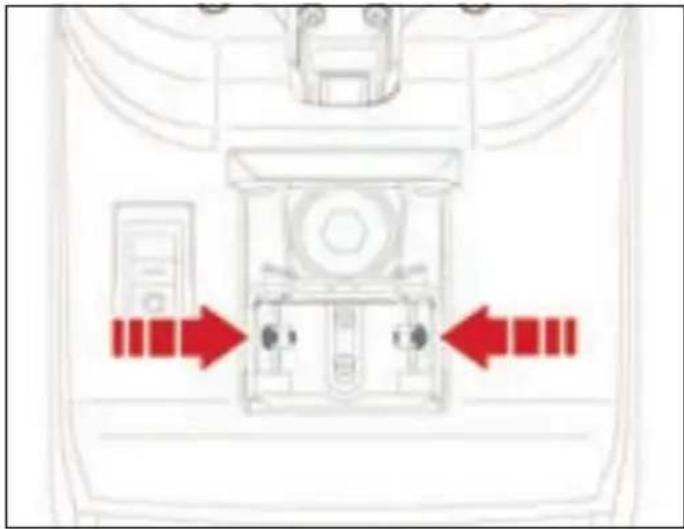
To attach or remove the portafilter fork, use a screwdriver on the fork-fixing screws.
PORTAFILTER FORK HEIGHT ADJUSTMENT
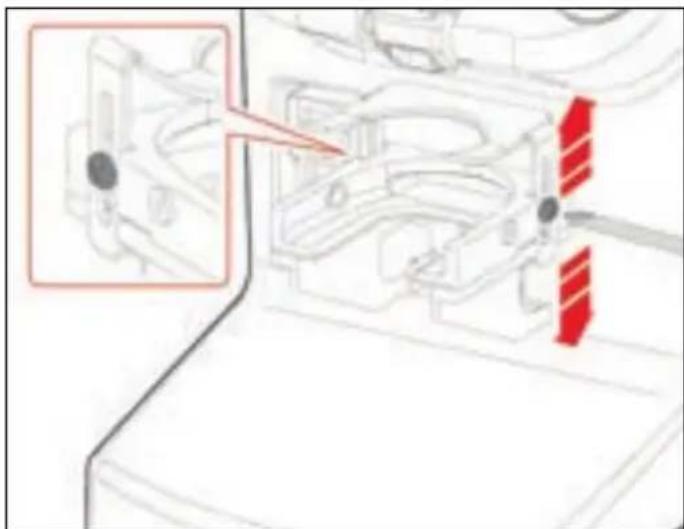
Using a cross-head screwdriver, loosen the fastening screw of the portafilter fork.
It is recommended not to unscrew the screws completely.
Raise or lower the fork in order to adjust it according to portafilter dimensions.
Once you've found the correct position, ensure the machine is level and tighten the side adjustment screws.
USE

Before starting to use the appliance, the operator must be sure to have read and understood the safety prescriptions contained in this Manual.
SWITCH ON THE MACHINE
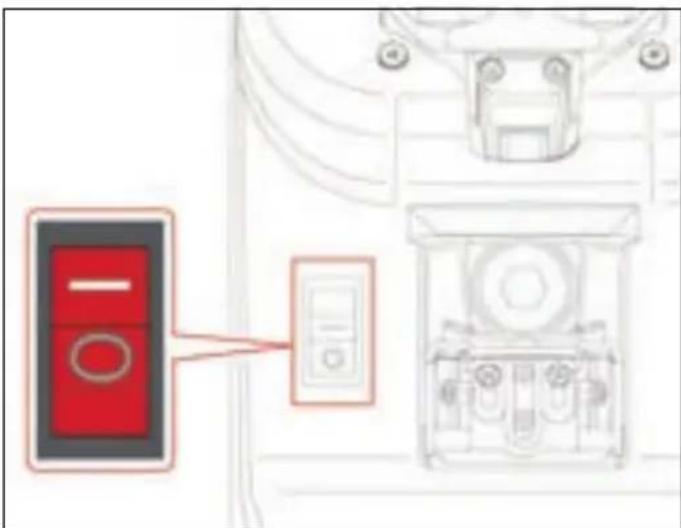
The GX85W grinder-doser has the power switch located on the front, on the left side.
The button has two states:
- 0 = machine OFF.
- I = machine ON.
After performing the operations described in the previous chapters, to switch the machine ON, press the power button to the 'I' position.

When switching on for the first time or after a reset, the qualified technician must initially set some general parameters following a guided procedure:
- Display language.
- Date and time.
Unit of measurement.
These settings remain stored for subsequent start-ups and, if necessary, can be changed via the display in the Language and Keys and Display menus.
In subsequent start-ups, the display will show the welcome page with the Nuova Simonelli logo for 2 seconds.
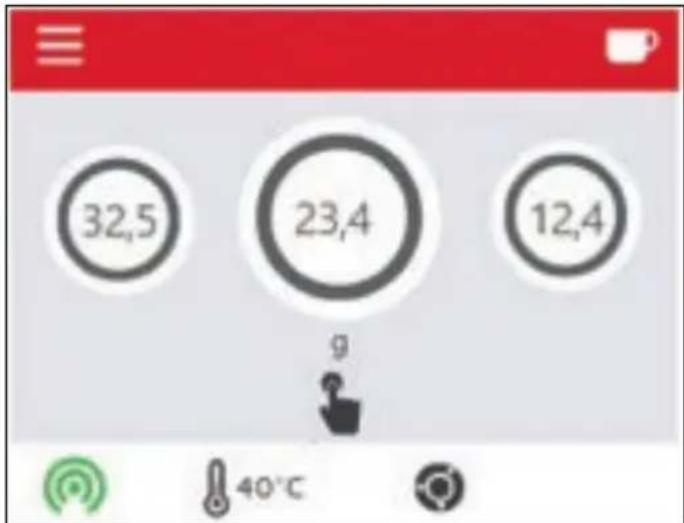
The Home Page will then be visible.
PREDISPOSITION TO USE
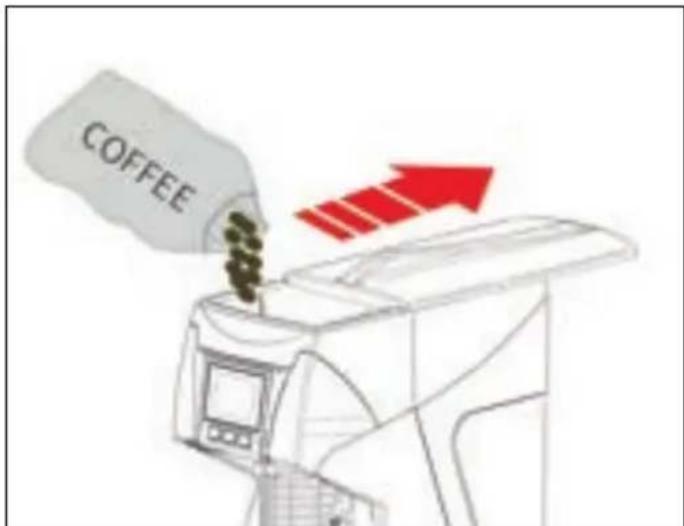
Open the cover and fill it with coffee beans.
Pull the internal tab of the container to allow the coffee beans to pass into the grinder.
DOSE DISPENSING
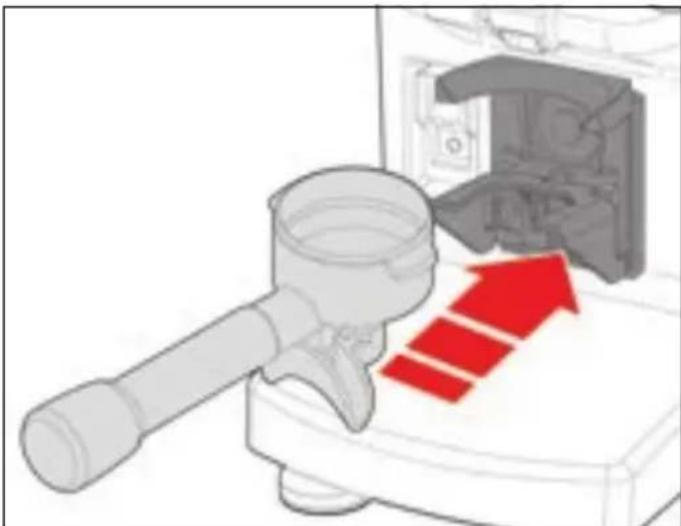
Insert the portafilter into the fork.
The machine tares and the dispensing starts automatically until the set weight is reached.
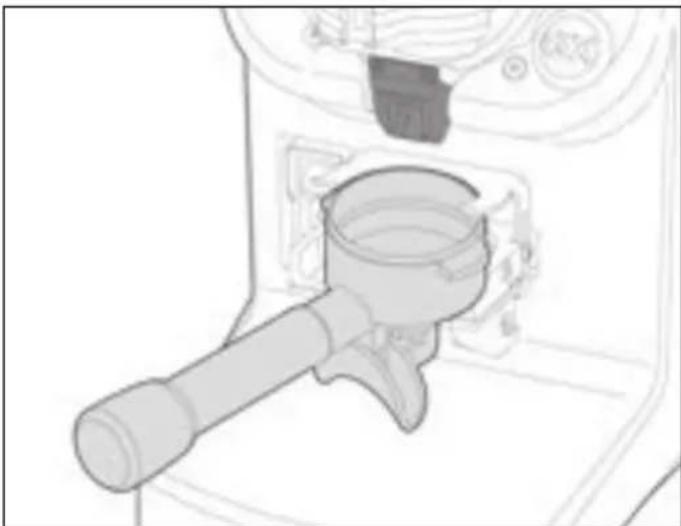
The fork is equipped with a portafilter sealing device.
This device is prepared for Nuova Simonelli portafilters with sensor or standard.

To avoid blockages of the nozzle, hold the portafilter cup on the fork or in the sealing device.
SWITCH OFF THE MACHINE
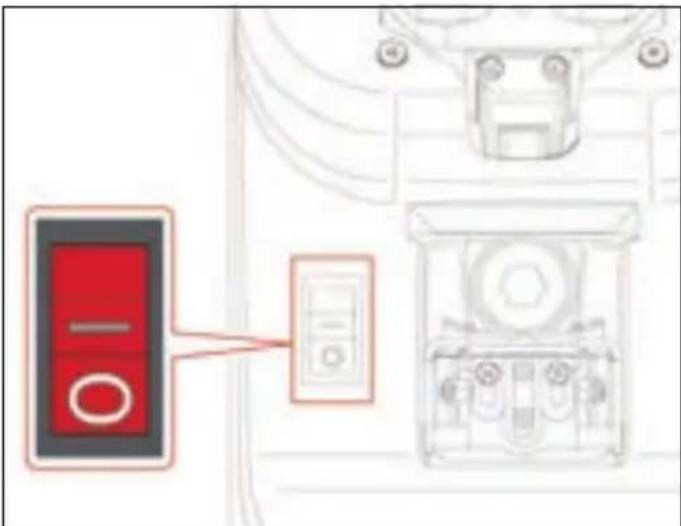
To turn OFF the machine, press the power button located on the front, on the left side, in the "0" position.
For long pauses and for the safety of people, it is good practice to also disconnect the plug from the mains.
PROGRAMMING

INTRODUCTION TO PROGRAMMING
In addition to the settings of the grinder itself, programming allows you to choose the level of communication between a NUOVA AURELIA machine and the GX85W grinder.
C-AUTOMATION OFF
X Portafilter recognition.
Communication with machine on dose dispensed.
X Automated burrs distance adjustment.
C-AUTOMATION ID
Portafilter recognition.
× Communication with machine on dose dispensed.
X Automated burrs distance adjustment.
C-AUTOMATION AUTO-FULLLY
Portafilter recognition.
Communication with machine on dose dispensed.
Automated burrs distance adjustment.
SWITCHING ON THE DISPLAY
When switched ON, the display shows the Nuova Simonelli logo for 2 seconds.
INITIAL START-UP PROCEDURE
For information on the procedure for starting the machine for the first time, see paragraph SWITCH ON THE MACHINE.
HOME PAGE
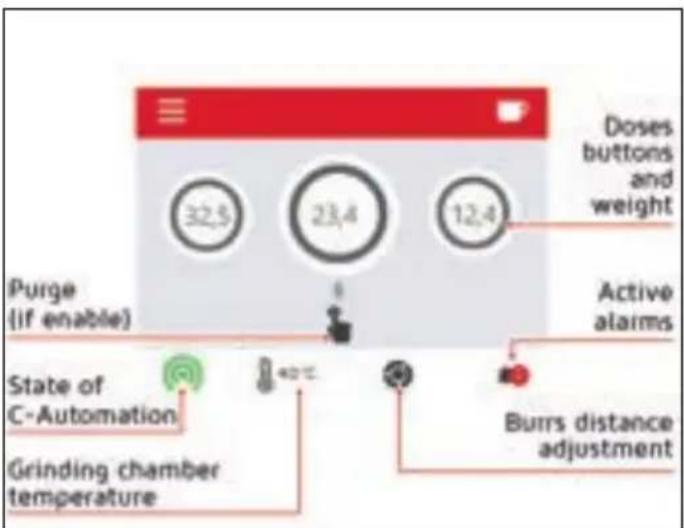

Visible only if the Stepper Motor option is activated.

Visible only if the relevant connection is active.

Visible only if there are active alarms.
Also, the Home Page allows access to:

Recipes Menu.

Alarms Menu (display of active alarms).

Main Menu.
GRAVIMETRIC DISPENSING MODE
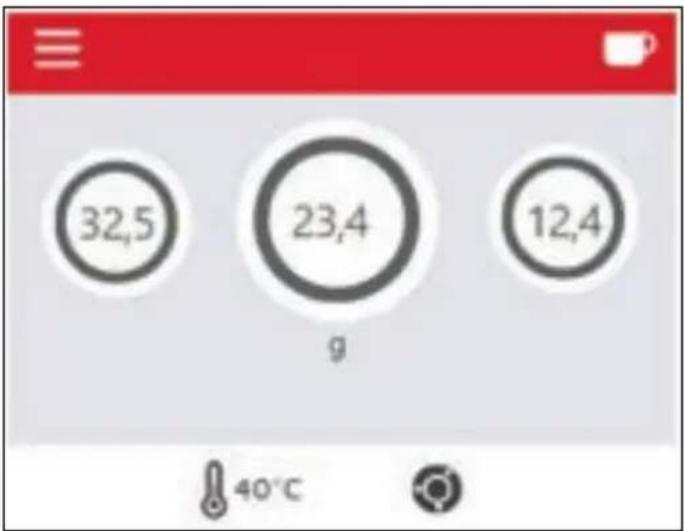
The display shows the grams of the dose. Insert the portafilter to start grinding.
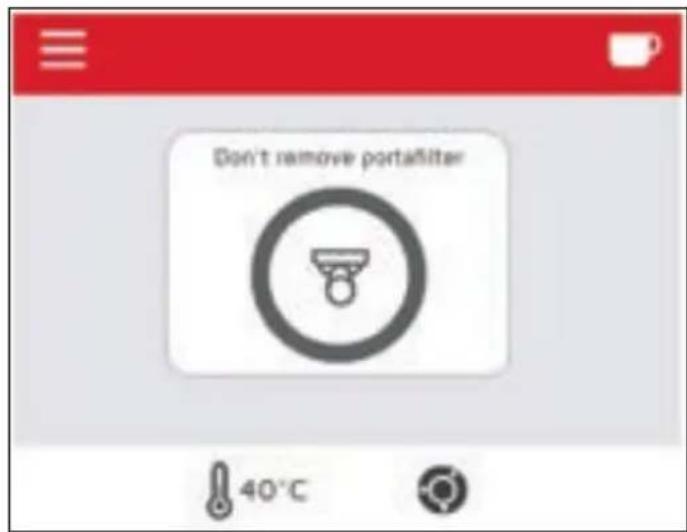
The grinder-doser starts the tare calculation.
If the operator does not remove the hand from the portafilter, the display shows "Remove hand".

After the tare, dispensing starts and the display shows the weight dispensed.
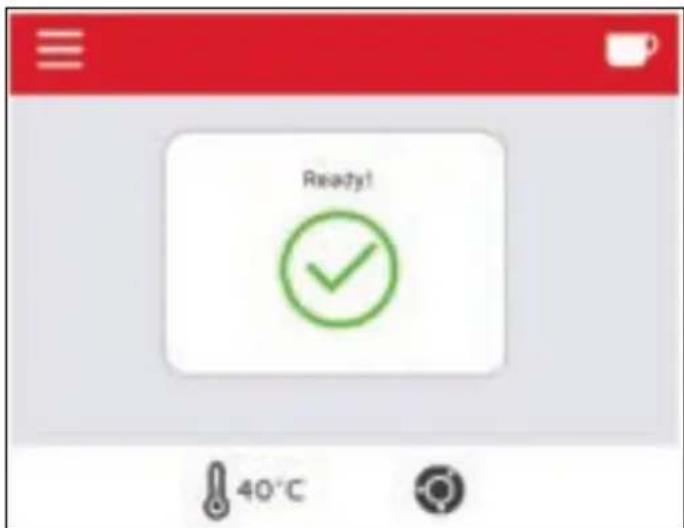
When finished, the display confirms dispensing and the portafilter can be removed.
C-AUTOMATION DISPENSING MODE
With the C-Automation option active and connected, the grinder recognises the portafilter and automatically dispenses the associated dose.
For more information on C-Automation, see the relevant documentation.
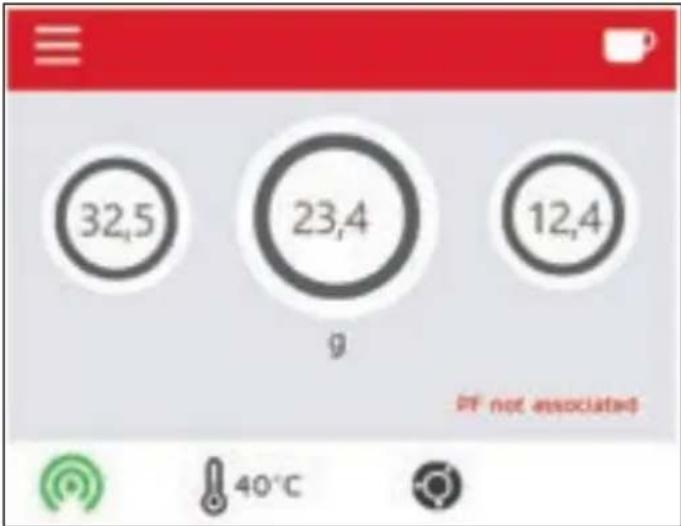
The display shows "PF not associated" and grinding does not start when the portafilter is not recognised.
In case of error or non-communication, it is possible to start grinding manually by pressing a dose button.
BARISTA DISPENSING MODE
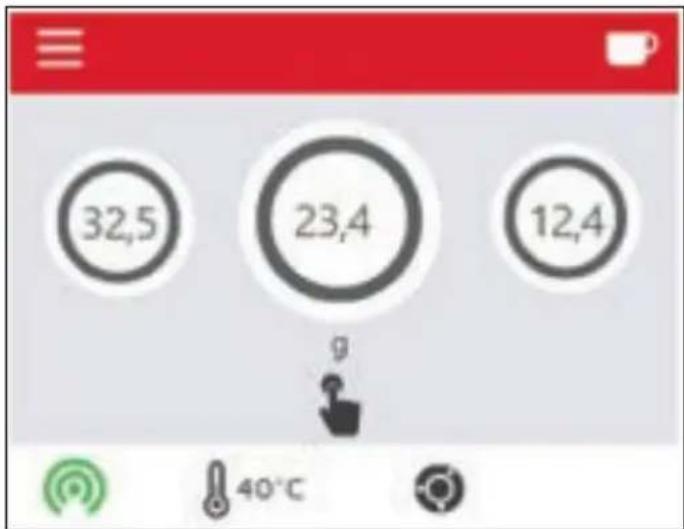
Press a dose button to access the dispensing page in Barista Mode.
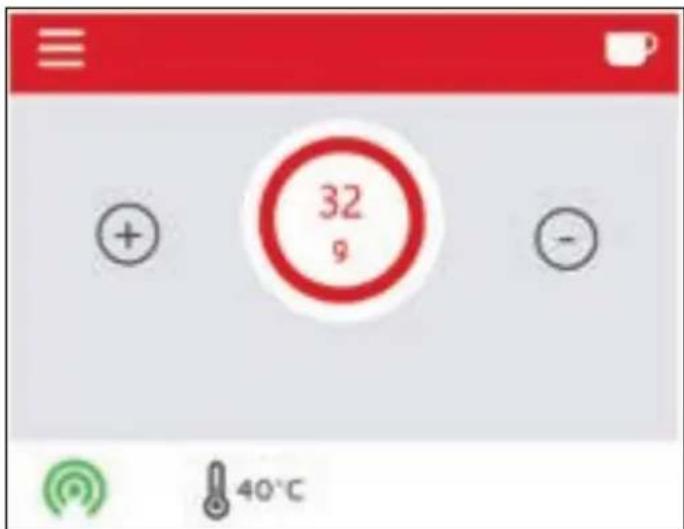
Press or to change the dose in real time and start dispensing by inserting the portafilter.
Press the dose button to return to the Home Page.
STOP & GO DISPENSING MODE
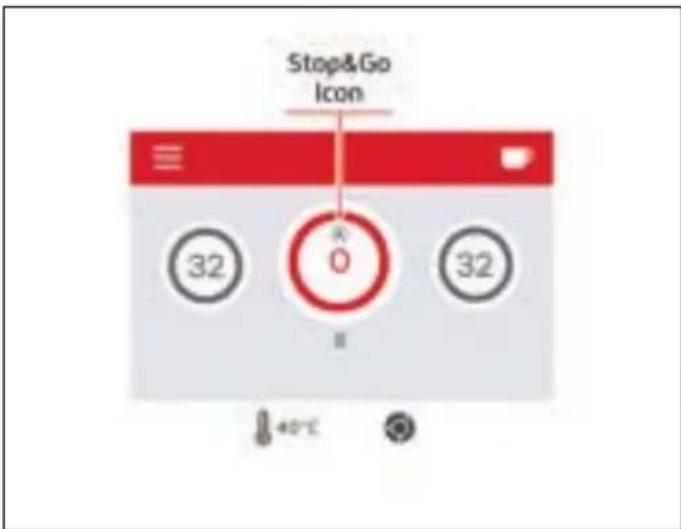
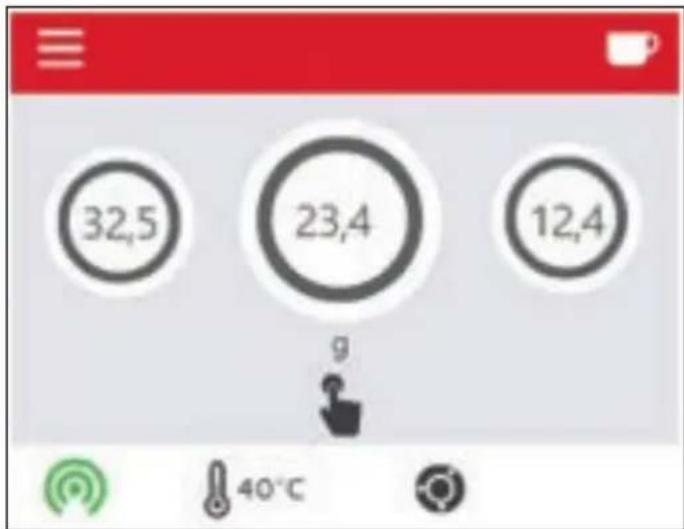
If the Stop&Go option is enabled for the selected dose, the dispensing icon appears as shown in the figure.
This function allows you to stop and resume grinding the same dose. The grinding stops when half the dose is reached and the selected dose flashes on the display. To complete the grinding, press the flashing dose.
RECIPES MENU
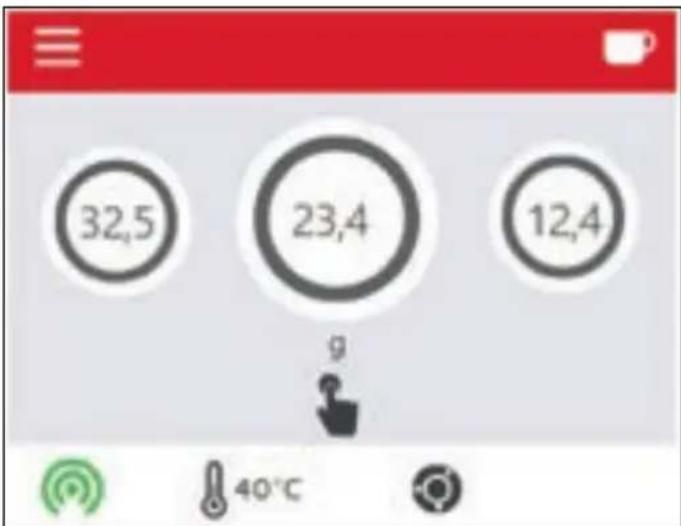
From the Home Page, press the button to access the Recipes Menu.
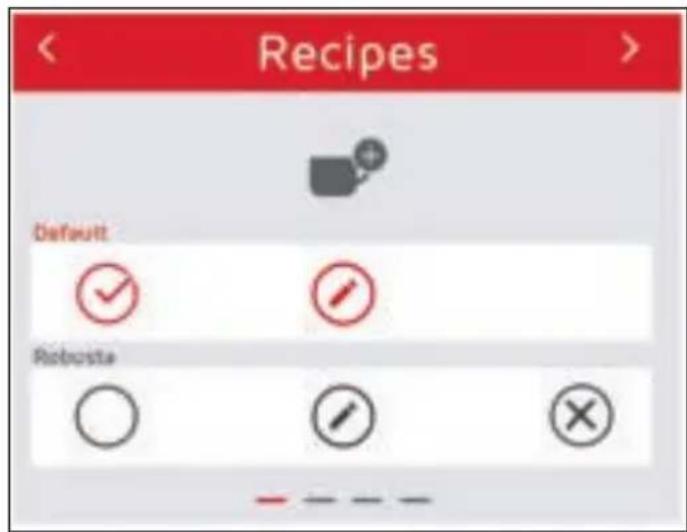
The selected recipe is highlighted in red.

New recipe.

Edit recipe.

Delete recipe.
The Default recipe and the currently selected recipe cannot be deleted from the list.
Scroll down the list of saved recipes with

- Purge: allows you to grind by pressing the icon.
- Barista: allows you to edit the recipe from the Main Menu.
- Timer mode: allows you to set the dose in seconds.
-
Stop&Go: allows you to stop and resume grinding the same dose. The grinding stops when half the dose is reached and the selected dose flashes on the display. To complete the grinding, press the flashing dose.
-
Dose: allows you to set the dose dispensed.
- Temp. ^ C : allows you to set the temperature of the grinding chamber.
- Pair PF: allows you to link the portafilters with the ID sensor to the recipe.

Next page.

Previous page.
PF PAIRING OPTION
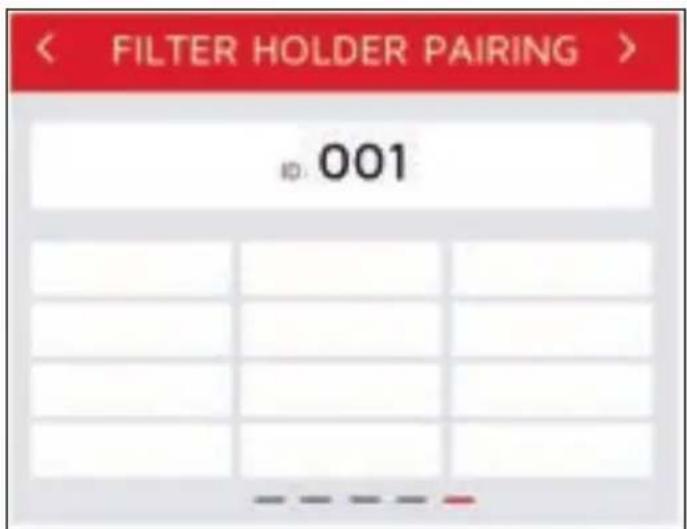
If the PF Pairing option is enabled, you can access the dedicated page to manage the portafilter pairings.
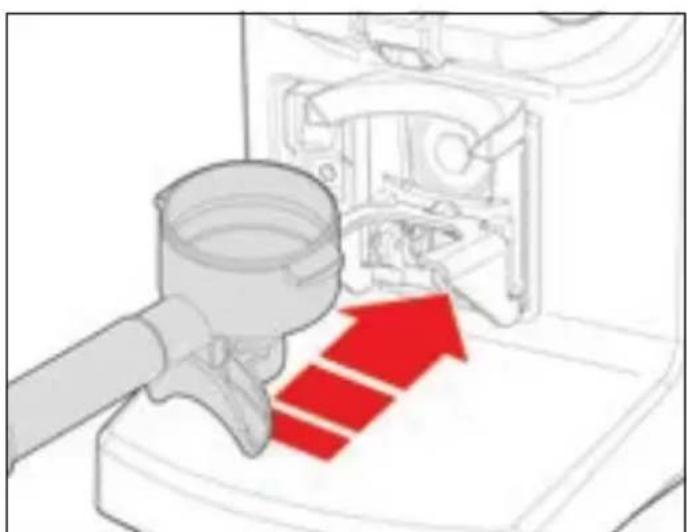
To associate the portafilter with the recipe, the portafilter itself must be placed on the fork.
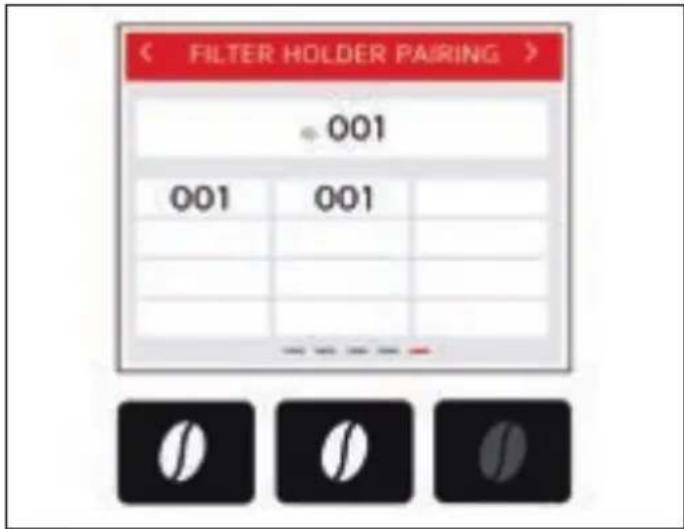
Press the desired dispensing buttons to which you want to associate the portafilter.
As soon as a button is pressed, the relevant association field is filled in on the display and the button lights up.
RECIPE PARAMETERS
| Parameters Min Max | Default Value | Step | ||
| Purge OFF ON OFF ON/OFF | ||||
| Barista mode OFF ON OFF ON/OFF | ||||
| Timer mode OFF ON OFF ON/OFF | ||||
| Stop&Go (Dose 1-2-3) | OFF ON OFF ON/OFF | |||
| Dose 1* | 1 s | 90 s | 2,4 s | 0,1 s |
| 1 g | 90 g | 8 g | 0,1 g | |
| Dose 2* | 1 s | 90 s | 4,8 s | 0,1 s |
| 1 g | 90 g | 16 g | 0,1 g | |
| Dose 3* | 1 s | 90 s | 5,4 s | 0,1 s |
| 1 g | 90 g | 18 g | 0,1 g | |
| Temp.°C 20°C 50°C 30°C 0,5°C | ||||
| Pair PF * OFF ON OFF ON/OFF |
- If C-Automation is set to Auto-Fully, the doses can only be set in grams, and the default value for Pair PF is ON.

RECIPES SAVING
Using the alphanumeric keyboard, enter the name of the recipe that will appear in the list and press to save. If there is a recipe with the same name in the list, the display will ask you to confirm overwriting.
RECIPE OPTIONS
FOR MACHINE CONFIGURATION
| Recipe options | C-Automation level | ||
| C-Auto OFF | C-Auto ID | C-Auto Auto-Fully | |
| Purge | ✓ | ✓ | ✓ |
| Barista mode | ✓ | × | × |
| Timer mode | ✓ | ✓ | × |
| Stop&Go | ✓ | × | × |
| Doses | ✓ | ✓ | ✓ |
| Temp.℃ | ✓ | ✓ | ✓ |
| Pair PF | × | ✓ | ✓ |
ALARMS MENU
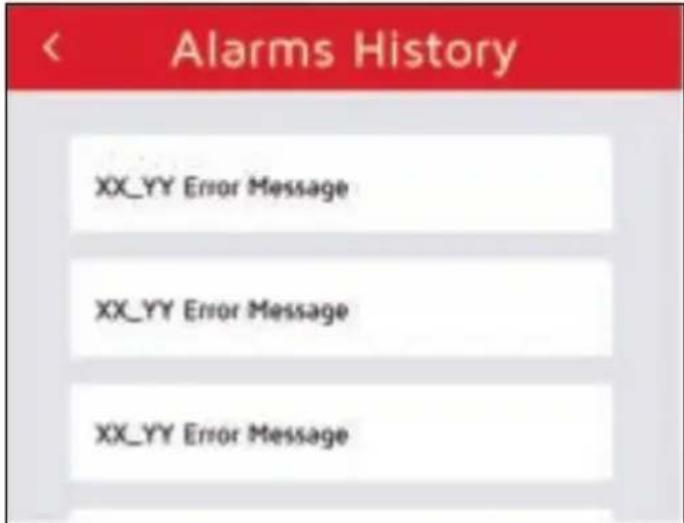
In the Home Page the Alarms Menu icon is only visible if there is an error.
In this case, press the button to access the Alarms Menu.
The number visible in the icon identifies the error present.
LIST OF ALARMS
| Alarm number | Description |
| 1 | Temperature probe open |
| 2 | Temperature probe in short circuit |
| 3 | Scale reading error |
| 4 | Portafilter sensor out |
| 5 | Portafilter sensor KO |
| 6 | Portafilter sensor power supply KO |
| 7 | Portafilter sensor absorption KO |
| 8 | Portafilter sensor fault |
| 9 | Generic portafilter sensor alarm |
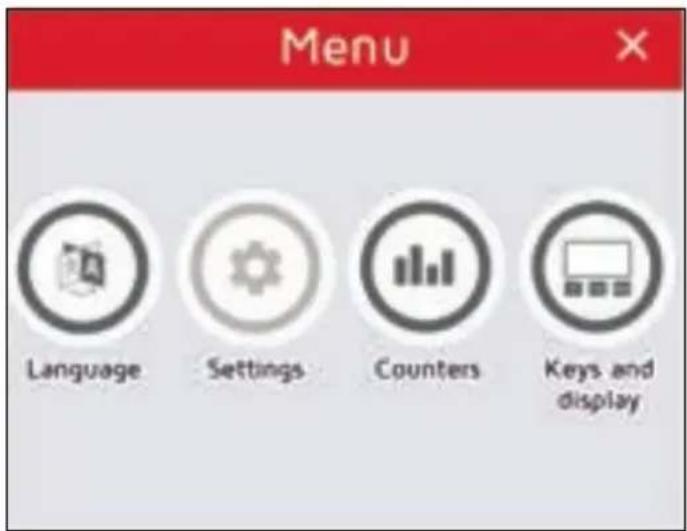
MAIN MENU
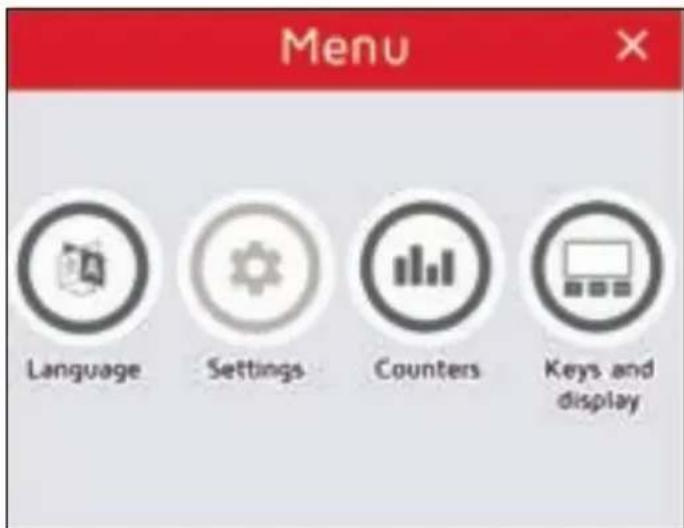
From the Home Page, press to access the Main Menu:
Language.
Technical Settings.
Counters.
Keys and Display.
Back to Home Page.
A password is required to access the Technical Settings.
LANGUAGE
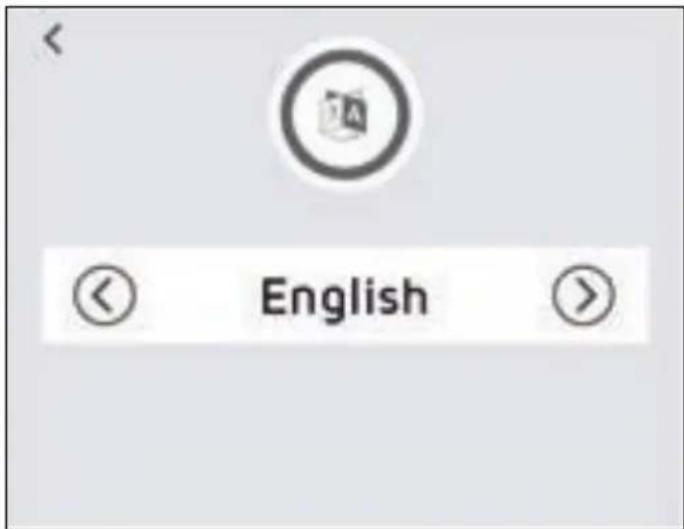
From the Main Menu, press the button to set the display Language:
Italian.
- English.
- French.
German.
- Spanish.

Save settings and go back to the previous page.
COUNTERS
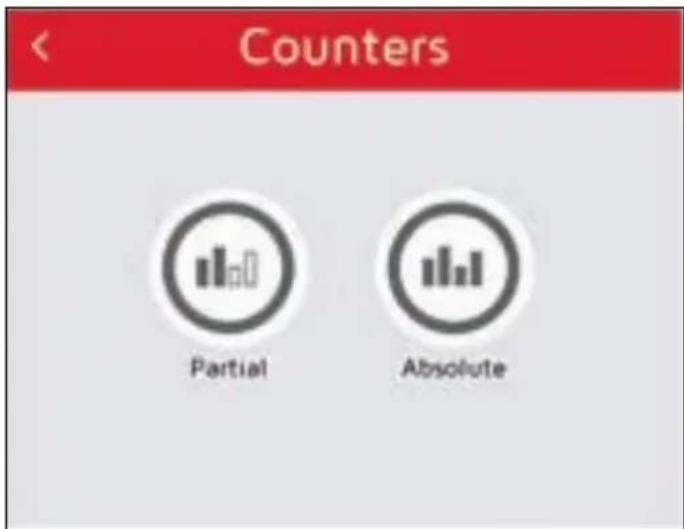
From the Main Menu, press the button to access the Counters Menu:

Partial counter.

Absolute counter.

Previous page.
PARTIAL COUNTER
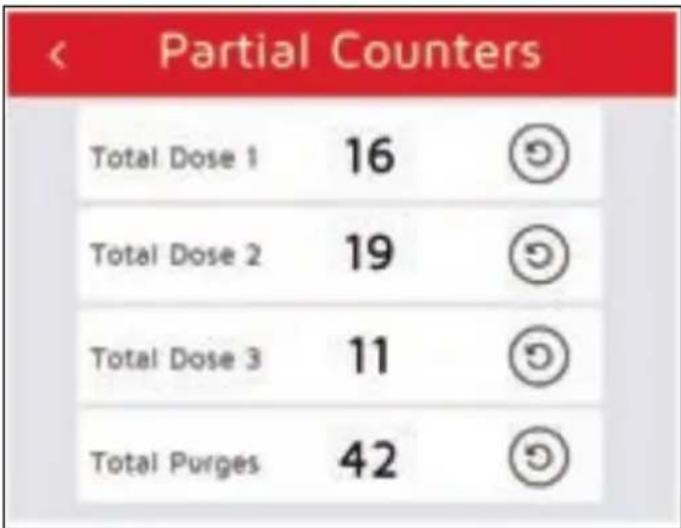
From the Counters Menu, press to access Partial Counters:
- Doses 1, 2 and 3.
Purges.

Reset the partial counter.

Previous page.
ABSOLUTE COUNTER

From the Counters Menu, press to access the Absolute Counters display.
The first page displays the Absolute Counters, which cannot be reset.

Next page.

Previous page.
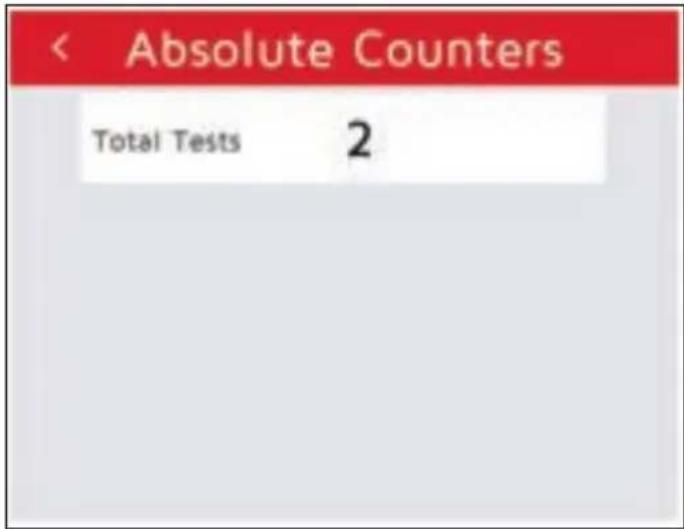
The second page displays the number of Total Tests performed with a positive result.

Previous page.
KEYS AND DISPLAY
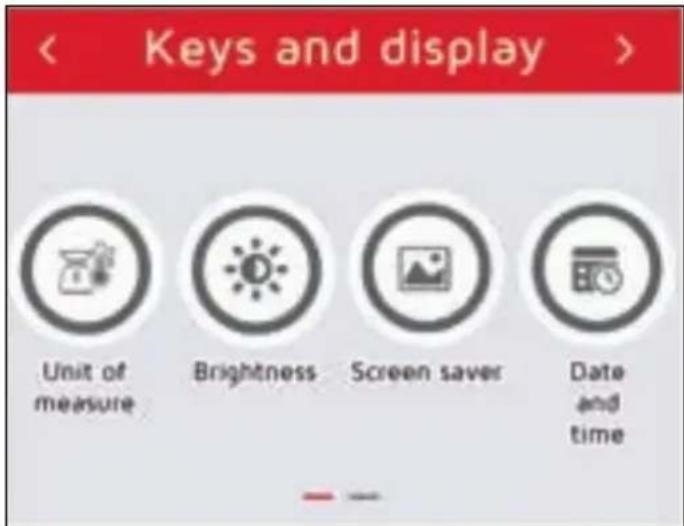
From the Main Menu, press the button to access the Keys and Display Menu:
The first page allows access to:

Unit of measurement.

Brightness.

Screensaver.

Date and Time.

Next page.

Previous page.
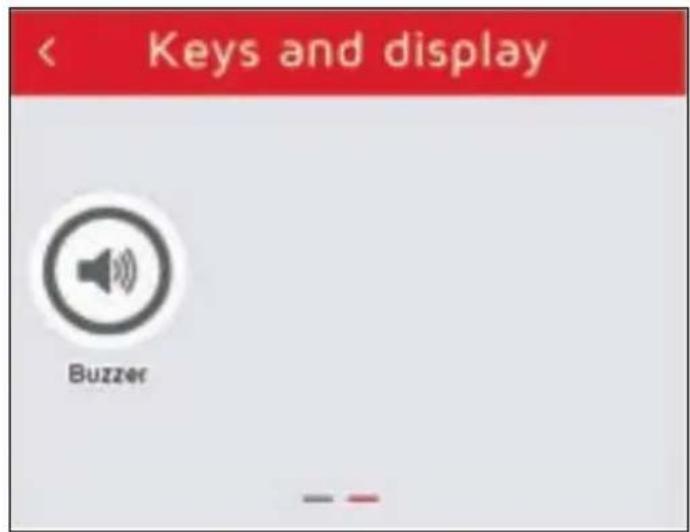
The second page allows access to:

Buzzer.

Previous page.
UNIT
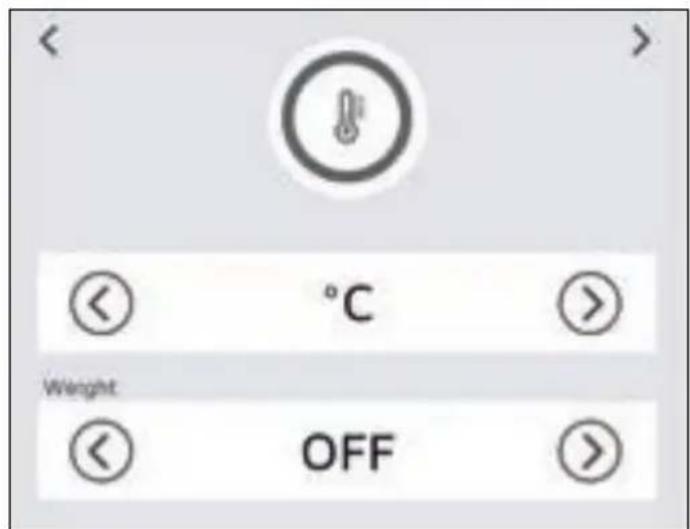
From the Keys and Display Menu, press to enter the Unit menu.
On the first page, the unit of measurement can be set between ^ C and ^ and the display of the Weight on the Home Page:
Actual: during dispensing, the actual weight measured by the scales is displayed.
- Set weight: during dispensing, the set weight of the chosen recipe is displayed.
OFF: the weight is not displayed on the Home Page.

Next page.

Previous page.
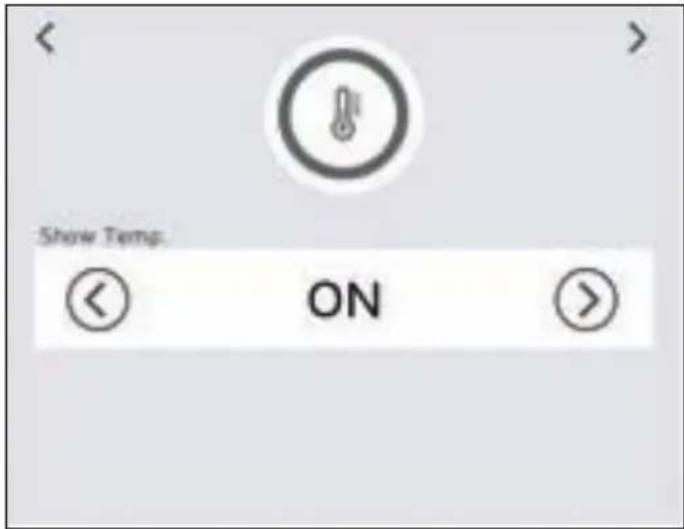
On the second page, you can set the Temperature visualisation on the Home Page.

Save settings.

Previous page.
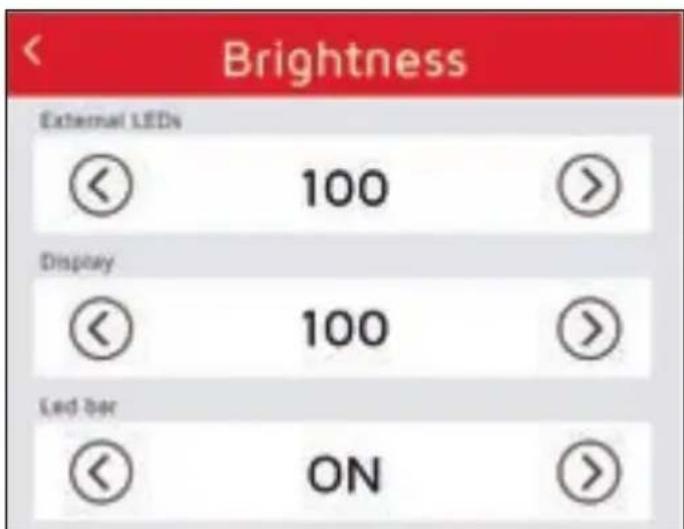
BRIGHTNESS
From the Keys and Display Menu, press to set the Brightness:
External LEDs (2-10).
- Display (1 - 10).
LED bar (ON/OFF).

Previous page.
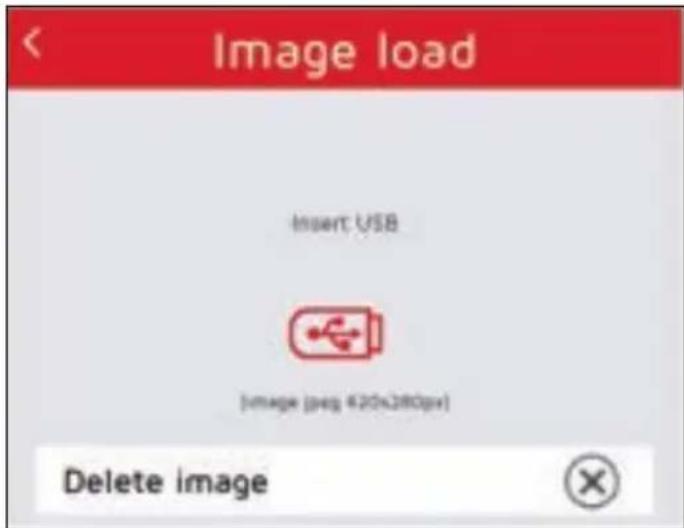
SCREENSAVER
From the Keys and Display Menu, press to access Screensaver settings.
A setup wizard will be visible on the display where you can load a screensaver via a USB support.

Delete image.

Previous page.
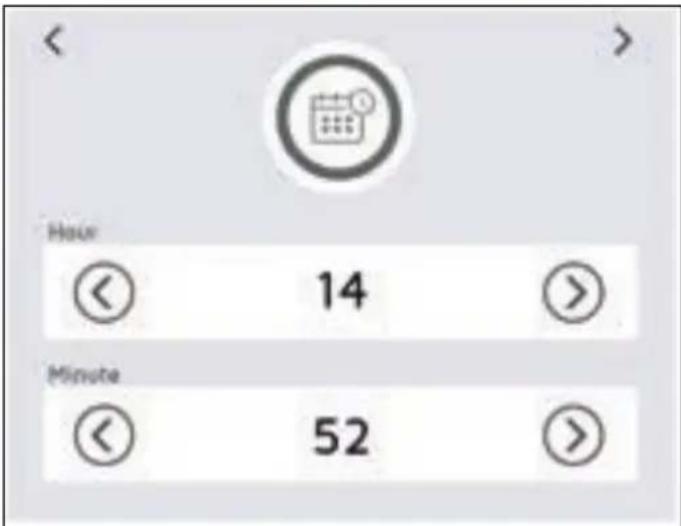
DATE AND TIME
From the Keys and Display Menu, press to access the Date and Time display settings.
On the first page you can set:
Hours.
Minutes.

Next page.

Previous page.
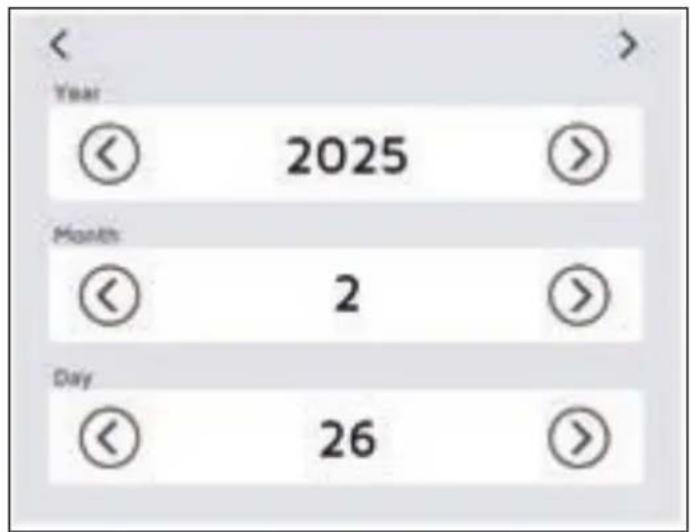
On the second page you can set:
Year.
Month.
Day.
Previous page.
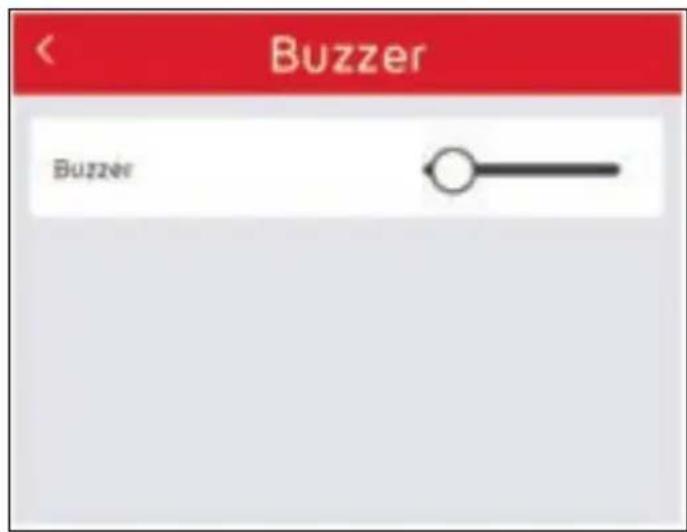
BUZZER
From the Keys and Display Menu, press to enable or disable display sounds:

Buzzer disabled.

Buzzer enabled.

Previous page.
TECHNICAL SETTING
From the Main Menu, press the button to access the Technical Settings menu.
This menu allows sensitive parameters to be set which, in the event of setting errors, could cause the machine to malfunction.
Access to the Technical Settings is only possible after entering the 4-digit password.
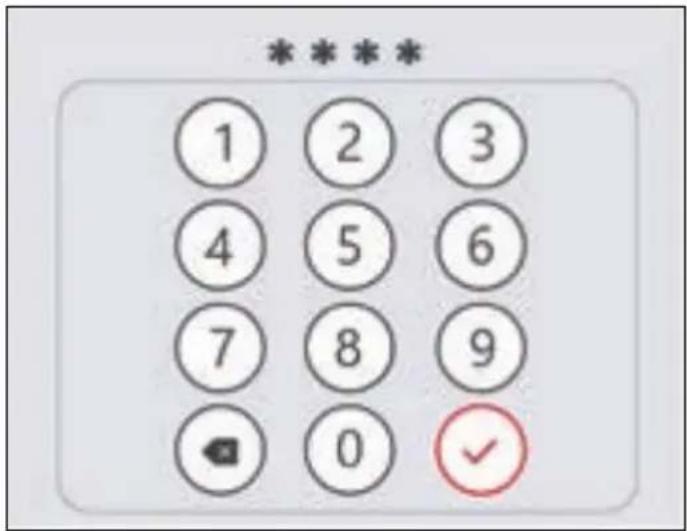
After entering the password, press to confirm.
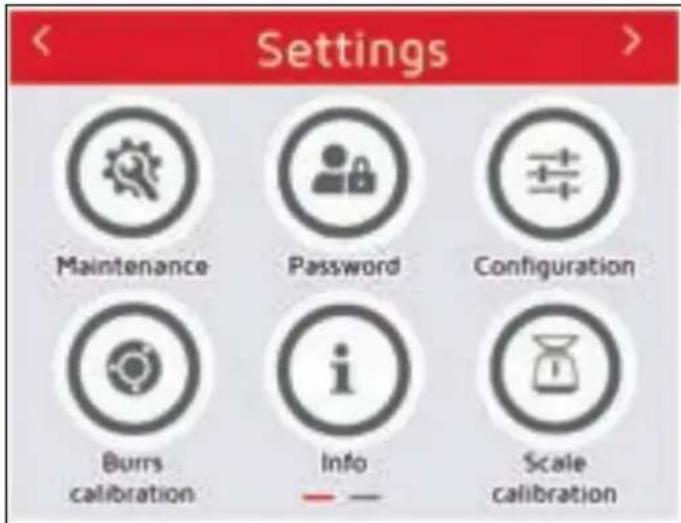
On the first page, you can access:

Maintenance.
Password.
Configuration.
Burrs calibration.
Informations.
Scale Calibration (visible if Gravimetric).
Next page.
Previous page.
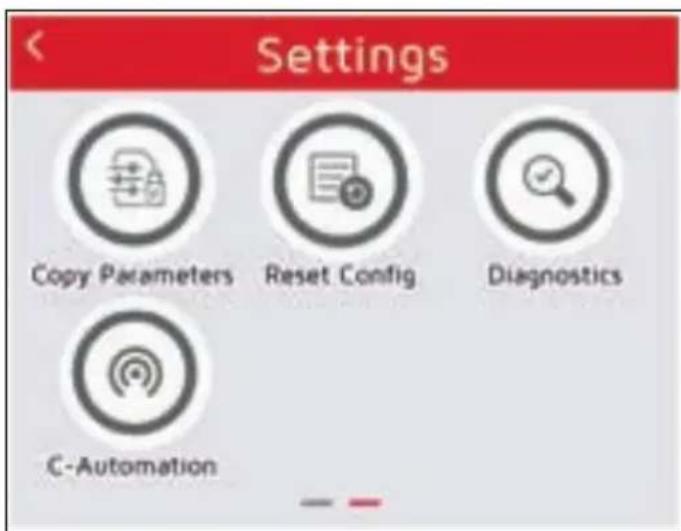
On the second page, you can access:

Copy Parameters.
Reset Configuration.
Diagnostic.
C-Automation (visible only if enabled).
Previous page.
Back to Main Menu.
MAINTENANCE
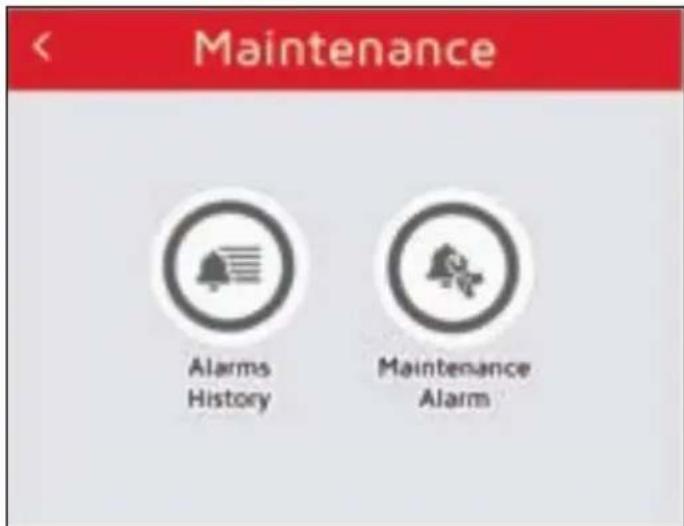
From the Technical Settings menu, press to access the Maintenance Menu:

Alarms History.
Maintenance Alarm.

Previous page.
ALARM HISTORY
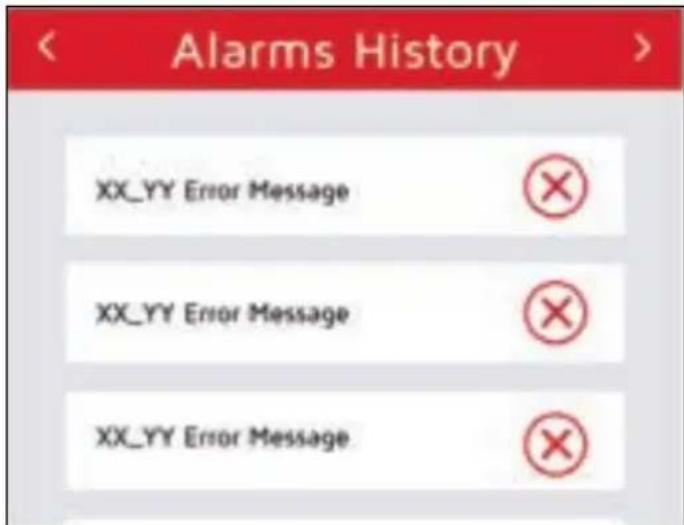
From Maintenance menu, press Alarm History.

access the

Delete the error line.

Previous page.
MAINTENANCE ALARM
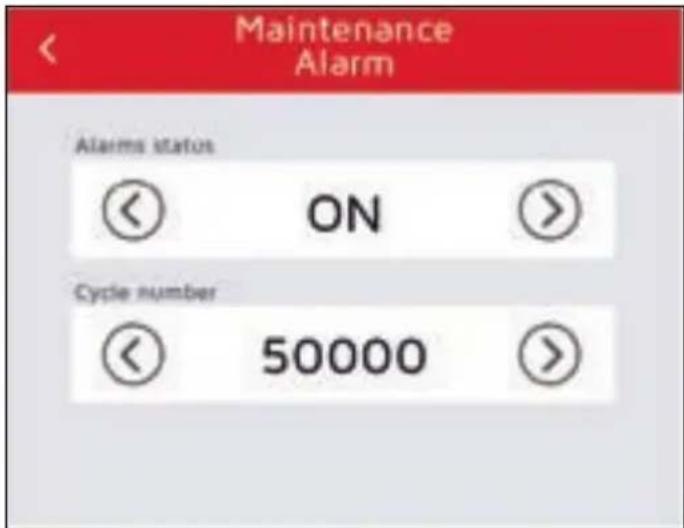
From Maintenance menu, press to access the Maintenance Alarm setting.
The number of cycles is set in increments of 5,000 cycles at a time (5,000 - 50,000).
Previous page.
Password
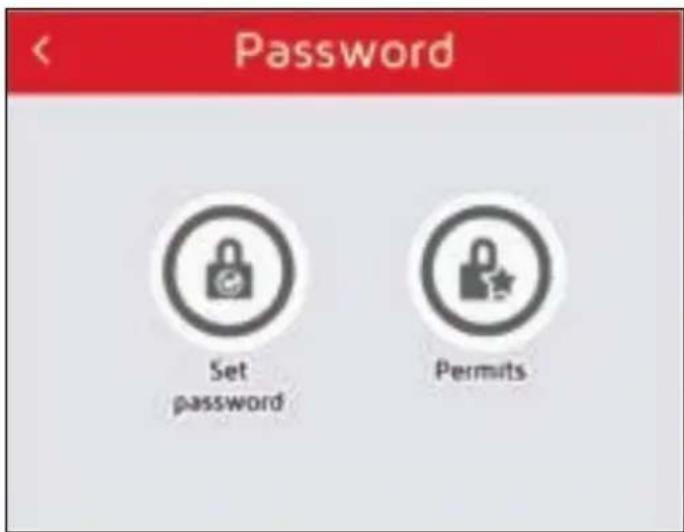
From the Technical Settings menu, press to access the Password Menu:
Set password.
Permissions Management.
Previous page.
SET PASSWORD
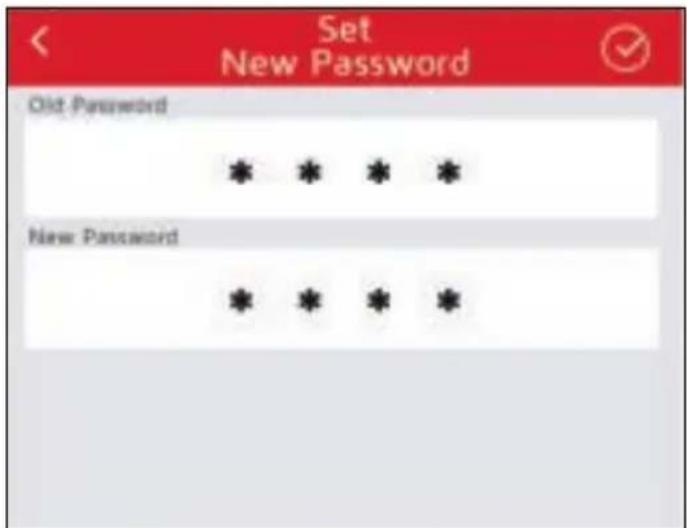
From the Password Menu, press to set a New Password.
Press on the respective fields to enter, using the numeric keypad, the Old Password, the New Password and then press to Confirm.
Previous page.
PERMISSIONS MANAGEMENT
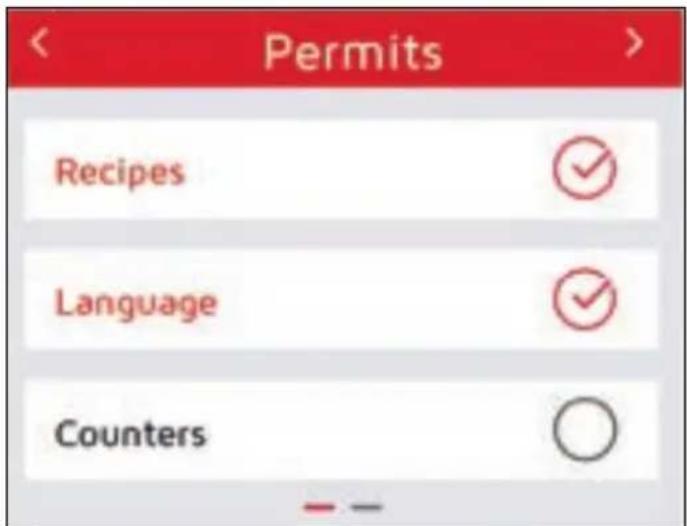
From the Password Menu, press to access the Privilege Management menu, which allows you to choose which functions the user can access:
- Recipes.
Language.
Meters. - Buttons and Display.
Selected function (in red).
If the user tries to access a function to which he is not authorised, he will be asked for his password.
Next page.
Previous page.
CONFIGURATION
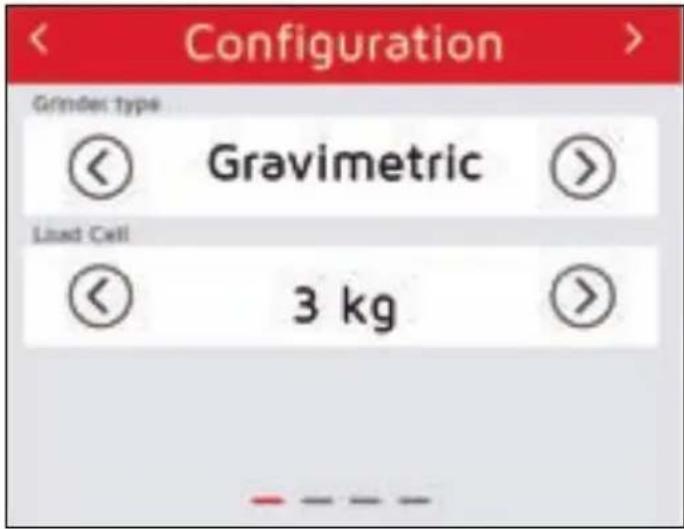
From the Technical Settings menu, press to access Machine Configuration.
On the first page, you can set:
Type of grinder-doser: either Timer or Gravimetric.
Scale of the 3 or 9kg load cell, visible only for Gravimetric versions.
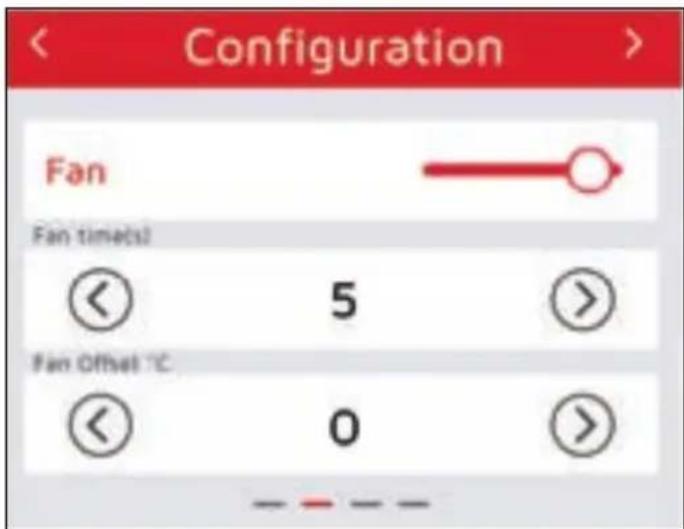
On the second page, you can enable or disable the cooling fan:
Fan disabled.

Fan enabled.
Fan time: seconds of fan operation when the set temperature is reached.
- Fan Offset: the fan start is brought forward by the number of degrees (^) set.
The fan is activated at the time of grinding to lower the temperature inside the grinding chamber.
| Parameters Min Max | Default Value | Step | |
| Fan OFF ON ON ON/OFF | |||
| Fan time 10 s 30 s 10 s 1 s | |||
| Fan Offset 0°C 10°C 0°C | 1°C |
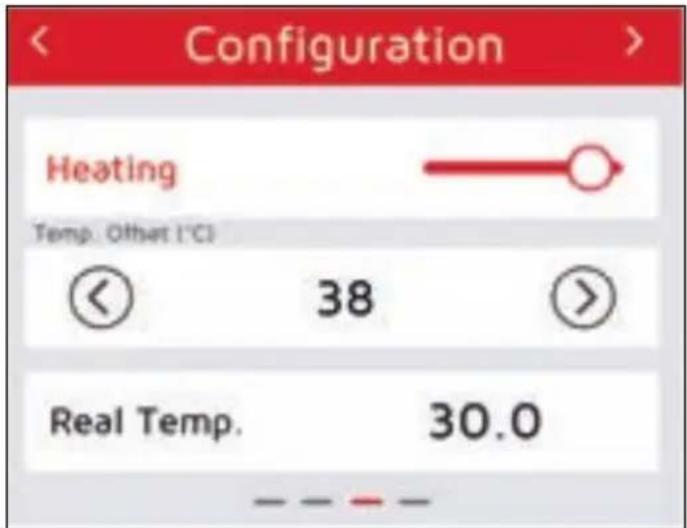
The third page allows you to enable or disable the heating element inside the grinding chamber:
Heating disabled.

Heating enabled.
In addition, the actual temperature detected by the temperature probe is visible.
| Parameters Min Max | Default Value | Step | ||
| Heating | OFF ON | OFF ON/OFF | ||
| Temp. Offset (°C) | -10°C | 10°C | 0°C | 0,5°C |
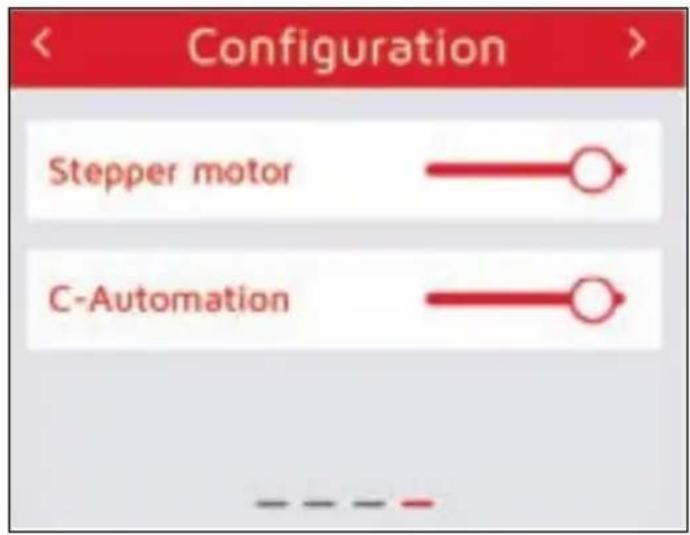
On the fourth page, you can enable or disable the Stepper Motor option and the C-Automation option.
The Stepper Motor must be enabled for the machine to function properly.
If C-Automation is enabled, the relevant menu will be visible in Settings.

Next page.
Previous page.
BURRS CALIBRATION (with Stepper motor)
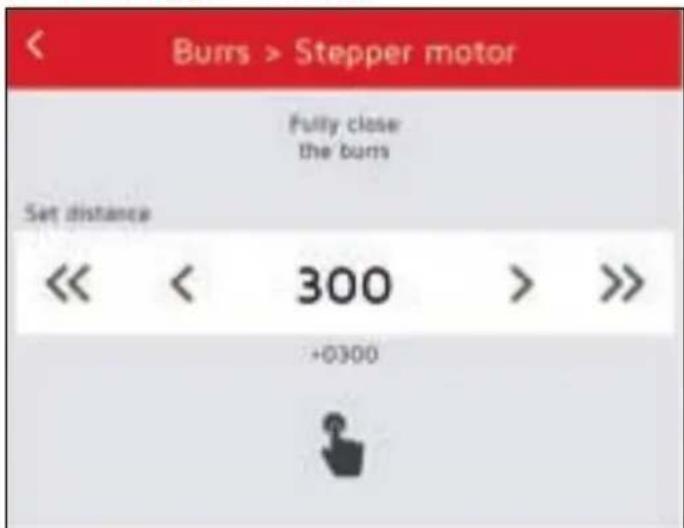
From the Technical Settings menu, press to access Burrs Calibration.
Press to purge and remove residues from the grinding chamber.
Bring the grinders to complete closure and press for 3 seconds on the number set to reset the distance and define the new "zero" starting point (all grinders closed).
To change the grinder distance value, use the buttons:
:10 :-1 :+1 :+10
-
= burrs spacing.
-
= burrs closing.

Previous page.
INFO
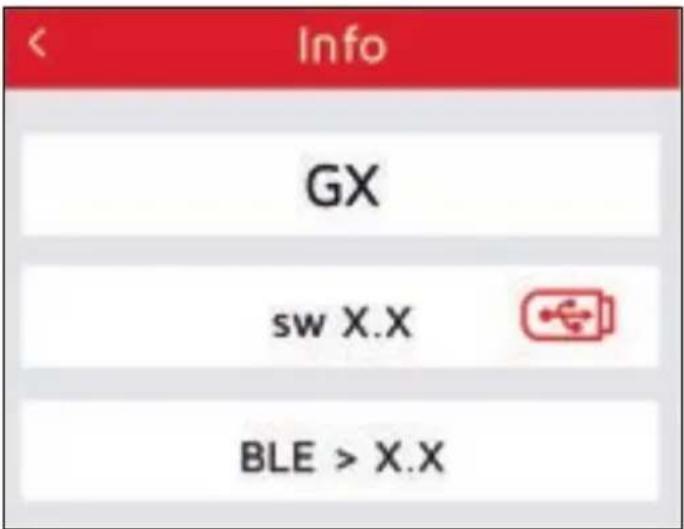
From the Technical Settings menu, press to access Information:
Machine model.
- Firmware versions.
- Bluetooth versions.

Previous page.
Firmware updating via the icon is reserved for the Qualified Technician.
SCALE CALIBRATION
Only in Gravimetric mode.
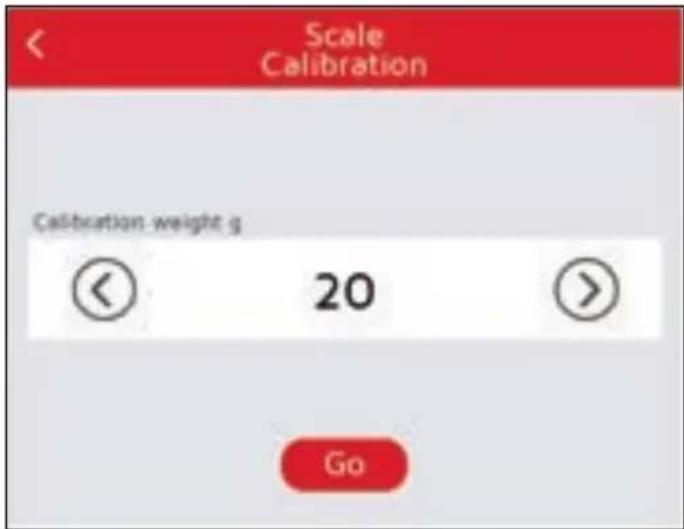
From the Technical Settings menu, press to access Scale Calibration.
Set the weight used from 16g or 20g and press Go to start calibration.
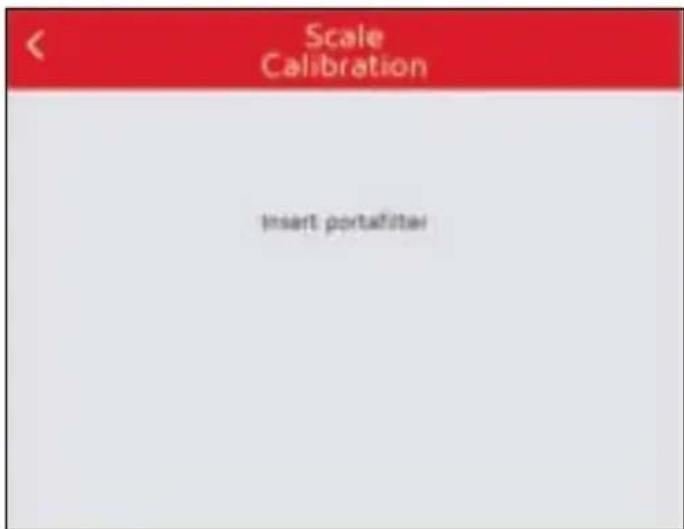
Place the portafilter on the fork and wait for the grinding to start.
Grinding starts automatically when the grinder detects the inserted portafilter.
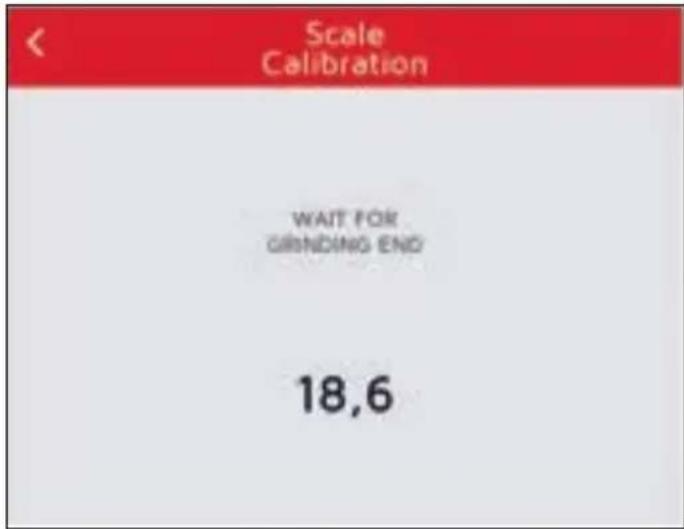
Grinding stops automatically when the set weight (16 g or 20 g) is reached.
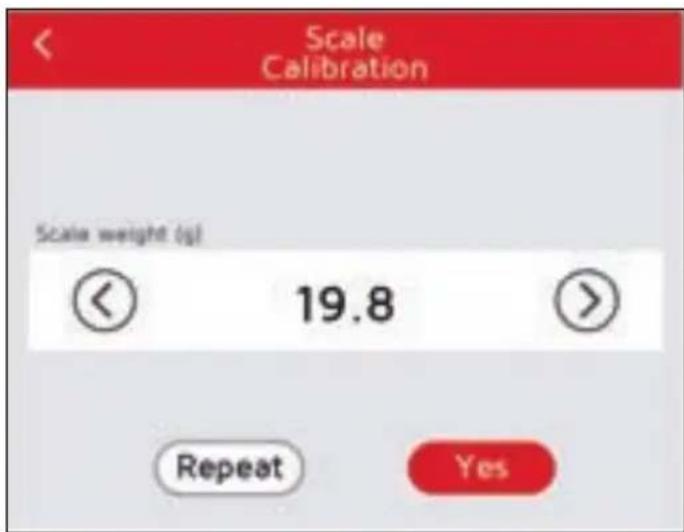
At the end of dispensing, remove the portafilter and weigh the dispensed dose with an external scale.
In the Scale Weight (g) field, set the value read on the external scale.
Press Yes to confirm or Repeat to repeat Calibration.
Previous page.
COPY PARAMETERS
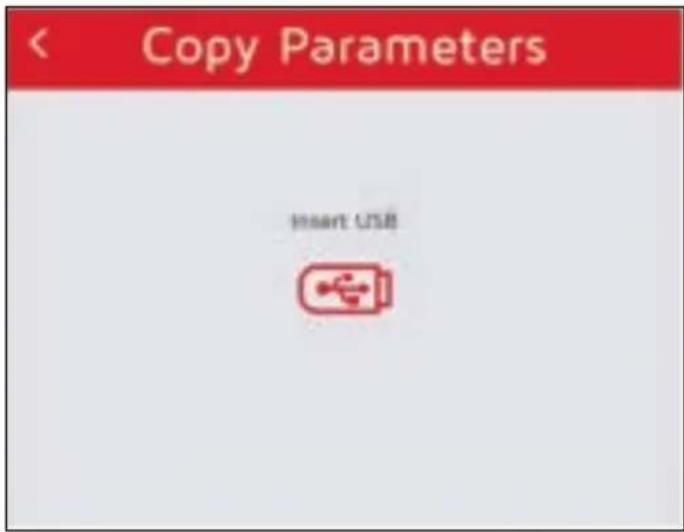
From the Technical Settings menu, press to access the Copy Parameters menu:
- Recipes.
- Configuration.
Insert a USB medium to import data.

Previous page.
RESET CONFIGURATION
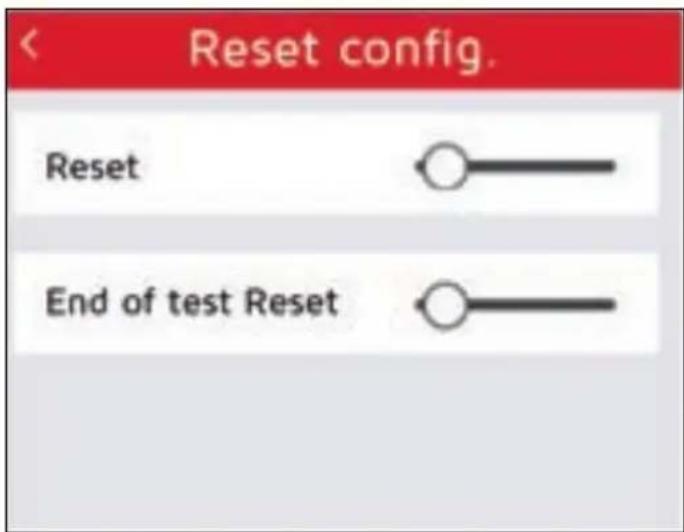
From the Technical Settings menu, press to access the Configuration Reset menu.

Previous page.
RESET
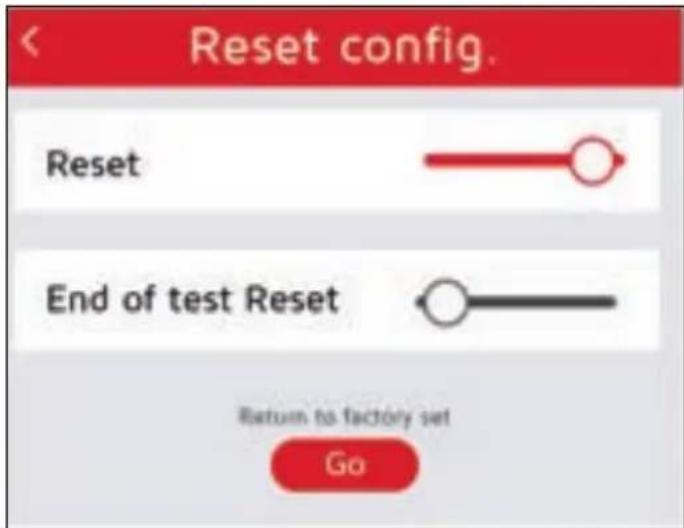
From the Reset Configuration menu, enable the Reset item and press Go to proceed with the reset.
The machine is completely reset and restarted.
The control unit will go back to the factory settings and the configurations will be lost.

Previous page.
END OF TEST RESET
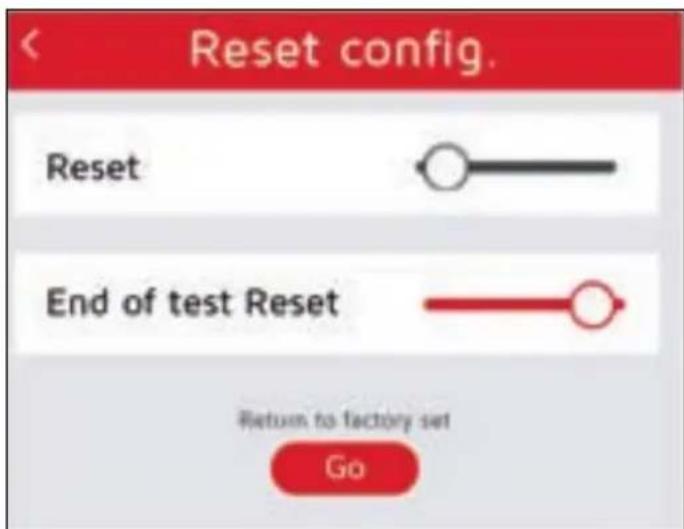
From the Reset Configuration menu, enable the Reset Test item and press Go to proceed with the reset.
The machine is restarted and the first start-up procedure must be completed again.

Previous page.
DIAGNOSTIC
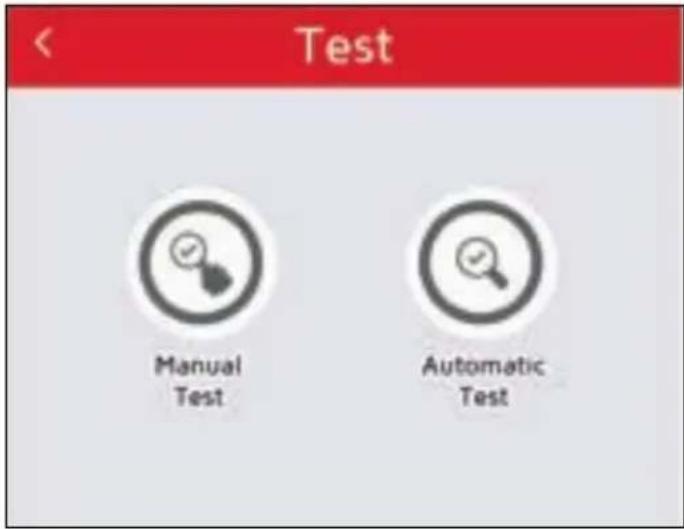
From the Technical Settings menu, press to access the Diagnostics menu.

Manual testing.

Automatic testing.

Previous page.
These menus allow you to check the operating status of the individual machine components.

Test passed correctly.

Test failed.
MANUAL TESTING
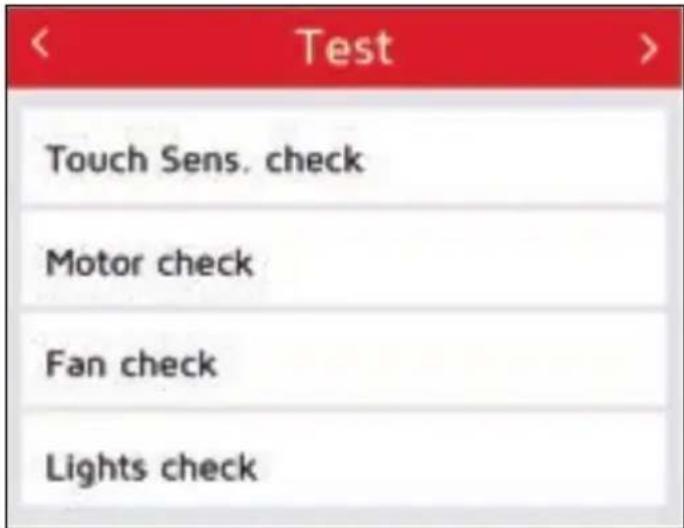
From the Diagnostics menu, press to access the Manual Testing.
On the first page, you can:
- Check the sensitivity of the touch screen display.
- Check the motor rotation.
- Check fan operation.
- Check the lights.
On the second page, you can:
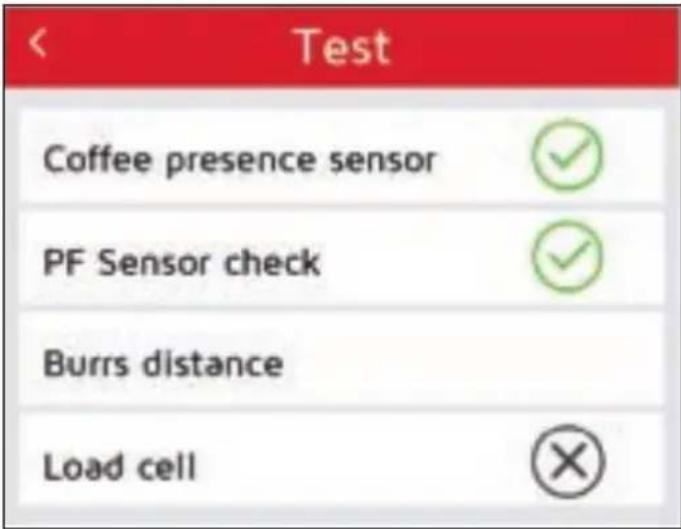
- Check the coffee presence sensor.
- Check the portafilter sensor.
- Grinding distance check and calibration (only available with the stepper motor installed).
- Check and calibration of the load cell (if present).

Previous page.
AUTOMATIC TESTING
From the Diagnostics menu, press to access the Automatic Testing.
Component tests will be performed automatically in the same order as the Manual Test.
The touch screen display sensitivity test is not available in automatic mode.
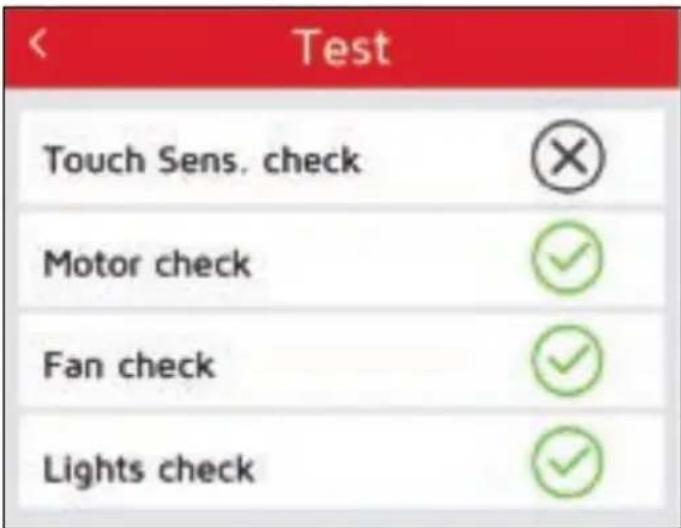
After completing the Automatic Testing, the test results are displayed and the counter on the specific page is increased.

Previous page.
C-AUTOMATION
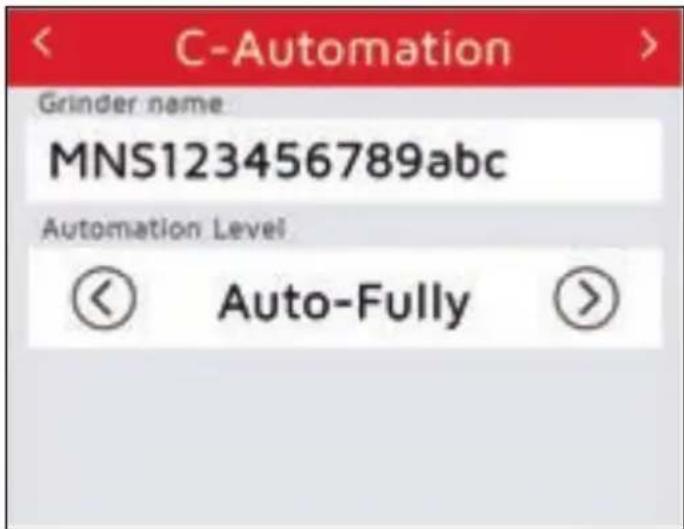
From the Technical Settings menu, press to access the C-Automation settings.
Available only if the C-Automation option is enabled in the configuration of the dosing grinder.
When accessing, on the first page it is possible to associate a name with the grinder-doser and select the automation level:
- Automation ID.
- Automation Auto-Fully.

Previous page.

Next page (if Auto-Fully).

Exit menu.
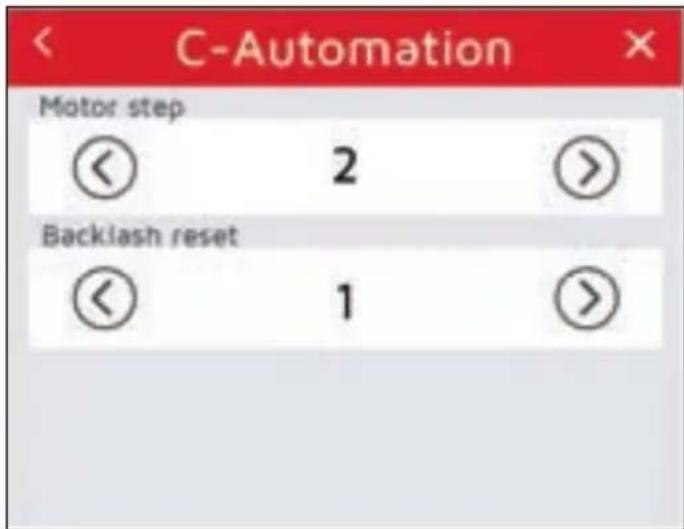
The second page allows you to set:
- Motor step: it is the conversion factor of the motor steps with respect to the machine steps.
- Backlash reset: it is the increase or decrease factor, expressed in motor steps, to reset the mechanical backlash of the motor in case of a reversal of the direction of rotation.

Previous page.
For more information on C-Automation, please see the relevant documentation.

Scan the QR Code
to view the
C-Automation Manual
ORDINARY CLEANING
Unplug the appliance before performing any cleaning and maintenance operation.
Do not pull the power cable or the appliance itself to disconnect the plug from the power supply socket.
Avoid to clean the machine using water jets or standing it in water.
Do not use solvents, chlorine-based products or abrasives.
Before removing the container always remember to close the tab, otherwise it will not come away.
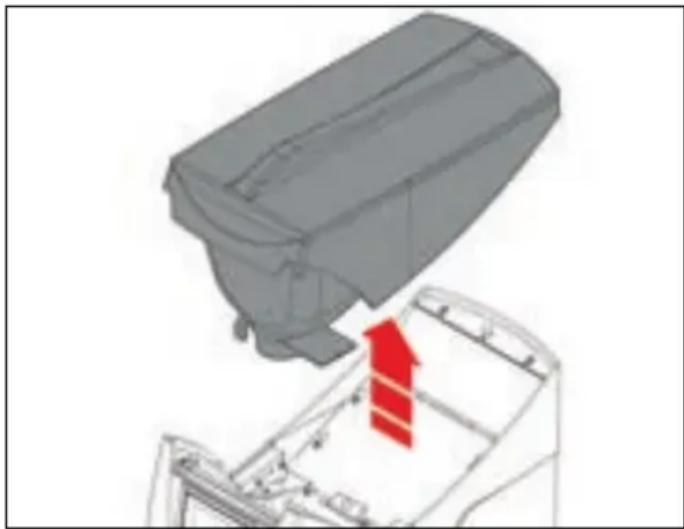
At least once a week it is necessary to remove the coffee bean container, which simply rests on the machine body and remove the oily layer left by the coffee beans using a clean cloth.
If this operation is not performed, there is a risk that the grease will become rancid, with negative effects on the flavour of next cups of coffee.
To clean the external parts and the back panel, use a damp cloth.
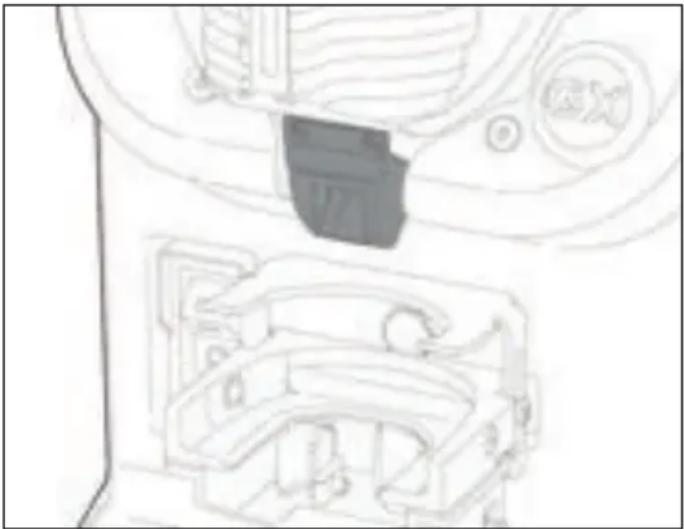
To clean the spout from any coffee blockage, use a vacuum cleaner and a small brush, taking great care not to fold or bend the PET flap.
This flap is extremely flexible, but a sharp fold could prevent it from functioning properly and it could be necessary to be replaced.
TROUBLESHOOTING
In the event of faults or malfunctions, contact specialised personnel or the manufacturer's Technical Service Department.
MAINTENANCE
In the event of maintenance, switch OFF the machine using the switch and unplug the power cord.
During maintenance / repairs, the parts used must be able to guarantee compliance with the safety and hygiene requirements envisaged for the machine. Original replacement parts can offer this guarantee.
After the repair or replacement of any components of parts that come into contact with food or water, it is necessary to carry out the washing procedure as described in this manual or according to the manufacturer's instructions.
If the machine has been in use recently, wait for it to cool down before carrying out any kind of work on it.
For any additional work on the machine, please contact the dealer where you purchased the product.
If the machine must be shipped:
Empty the coffee bean container.
- Switch OFF the machine.
Use the original packaging.
- Give your contact details or put them inside the box.
PRESCRIPIONS DE SECURITE
- Automation ID.
- Automation Auto-Fully.

Page precedente.
- Automation ID.
- Automation Auto-Fully.
- Automation ID.
- Automation Auto-Fully.

Página anterior.

A Main switch.
B Hopper switch.
C Heating element.
D Capacitor.
E Motor.
F Electronic control unit.
G Temperature probe.
LEGEnde SCHEMAS ELECTRIQUES
H Display control board.
Cooling fan.
J Scale.
K Coffee bean infrared sensor.
L LED bar.
M Stepper motor.
N RC filter.
O Relay.
EC DECLARATION OF CONFORMITY

nuova SIMONELLI
SIMONELLI GROUP
Via E. Betti, 1 - 62020 Belforte del Chienti (MC) - ITALY
Declare under our responsibility that the product:
MACINADOSATORE PER CAFFÉ MODELLO: GX85W
VERSION: 120/220 V - 50/60 Hz
SERIE:AA
MATRICOLA dal: 0001-25
COFFEE GRINDER MODEL: GX85W
VERSION: 120/220 V - 50/60 Hz
SERIES:AA
SERIAL NUMBER from: 0001-25
to which this declaration relates, following the provisions of the directives:
2006/42/EC - 2014/35/EU - 2014/30/EU
2011/65/EU - 2012/19/EU - 2014/68/EU - EC 1935/2004
Data: Dicembre 2025
Date: December 2025
CEO
Marco Feliziani