
FX 200 - Talkie Walkie LOGICOM - Free user manual and instructions
Find the device manual for free FX 200 LOGICOM in PDF.
User questions about FX 200 LOGICOM
0 question about this device. Answer the ones you know or ask your own.
Ask a new question about this device
Download the instructions for your Talkie Walkie in PDF format for free! Find your manual FX 200 - LOGICOM and take your electronic device back in hand. On this page are published all the documents necessary for the use of your device. FX 200 by LOGICOM.
USER MANUAL FX 200 LOGICOM
natural_image
Black and white photo of a LoHCOM mobile phone with visible grille and antenna (no text or symbols on body)FX 100 / 200
F Guide de l'utilisateur
Talkie Walkie
GB User manual 2 Way Radio
NL Gebruiksaanwijzing
Zender / Ontvanger
E Manual de uso
Emisor a/ Receptor
P Manual de utilização Emissor / Receptor
Sommaire
natural_image
Line drawing of a mechanical component with arrows indicating motion or force (no text or symbols)natural_image
Simple line drawing of a mechanical component with a cylindrical shaft and internal shaft (no text or symbols)Face avant
natural_image
Close-up of a gray, oval-shaped object with two circular cutouts and a grid pattern on its surface (no text or symbols visible)Distance Optimale Dehors
Terrains plats, ouverts
natural_image
Silhouette of two people with sound waves, no text or symbols presentDistance Moyenne Dehors
natural_image
Silhouette of two people with a tree and signal waves, no text or symbols presentDistance Minimale Dehors
text_image
Diagram showing two human figures with sound waves and a triangular signal pattern, likely illustrating sound or signal transmission.natural_image
Illustration of a person holding a walkie-talkie (no text or symbols present)- Charging the FX 200 batteries p 24
- Turning the radio on and off p 24
Radio diagram p 25
Volume adjustment p 26
Channel adjustment p 26
Advice for using the 2 way radio p 26
Speaking p 26
Receiving p 26
Sending a call tone p 26
Scanning p 27
Attaching belt clips p 28
Front cover of the FX 100/200 p 28
Additional Information p 29
Troubleshooting p 30
Care and use p 31
Information on the guarantee p 32
General and safety information p 33
Recommendations for use p 36
Operating precautions p 37
A new 2 way radio
FX 100/200 radios operate on PMR446 frequencies and can be used in all countries where PMR446 frequencies are authorised, once the applicable regulations are observed. This unlicensed 2 way radio service is intended for use by families and groups for leisure activities, games, etc. Radio use outside of the country in which it is intended for sale is subject to governmental regulations and may be prohibited.
Please read this manual carefully and ensure that you are familiar with the radio's functions before using.
Set up
Installing batteries
FX 100
The FX 100 2-way radio only operates with three AAA alkaline batteries.
Installing the AAA alkaline batteries:
- Push the locking mechanism of the rear cover upwards to open the catch and release the battery cover.
- Insert three AAA batteries into the compartment as indicated.
- Replace the rear cover and push down until it clicks into place.
FX 200
The FX 200 2 way radio operates with three AAA alkaline batteries or with the rechargeable batteries supplied.
Installing the AAA alkaline batteries or the rechargeable batteries
- Push the locking mechanism of the rear cover to open it.
- Insert three AAA batteries into the compartment as indicated
or - Insert the battery set supplied.
- Replace the rear cover and push down until it clicks into place.
Charging the batteries of the FX 200
Do not dismantle or open the battery unit.
To charge the rechargeable batteries:
- Insert one of the jack plugs from the supply plug underneath the FX 200.
- Plug into the wall plug (220 V).
- The lights on the ‘power LED’ flash. If the LED do not flash, the batteries have been incorrectly installed. Check the polarity of the batteries and if necessary turn them around.
Note : remove the radio after 16 hours to ensure that the batteries attain their maximum life. Do not charge the batteries beyond this period, because the lights will not flash or turn off to indicate that the batteries have been charged.
Caution : Your radio will emit a beep when the cells are running low.
NB : Remove the batteries if not using the 2 way radio for a long period. Batteries corrode with time and may permanently damage the 2 way radio. Pay particular attention when dealing with leaking batteries. Dispose of used batteries at a waste collection centre or in a recycling container for batteries, and not in a domestic rubbish bin. Information on battery recycling may be requested from your retailer.
Turning the radio on and off
- To turn the radio on, press the Ⓜ key until the radio emits a beep and a channel number appears.
- To turn the radio off, press the MENU key until the radio emits a beep and the screen becomes empty.
Diagram of the 2 way radio
1 Press to Speak (PTT)
- Press to speak, release to receive.
- In menu mode, press to confirm your selection.
2
- Press briefly to send a call tone.
3 MENU
- Press for longer to turn the radio on or off.
- Press briefly to open the menu mode:
- Press once to change the channel
- Press twice to turn the scanner on or off.
- Press three times to monitor activity on the channel.
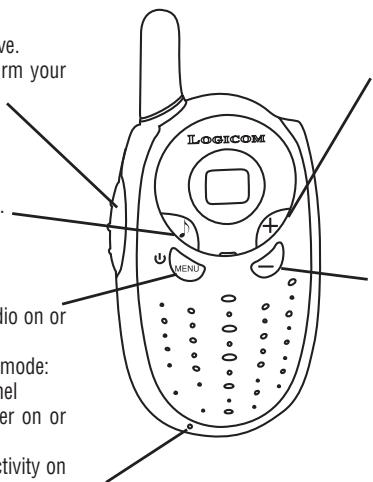
text_image
LOGICOM MENI bio on or mode: pel er on or tivity onConcerns only the FX 200: Outlet socket for battery charging.
4 +
- Increases the volume (the volume level flashes and v is displayed)
- In menu mode, changes to a higher channel (the number of the channel flashes)
- In menu mode, turns the scan on or off, is displayed, as well as or - which flashes.
5 -
• Decreases the volume (the volume level flashes and v is displayed.)
- In menu mode, changes to a lower channel (the number of the channel flashes)
- In menu mode, turns the scan on or off, is visible as well as y or — which flashes.
Volume adjustment
Use the ⭕ and the ⭺ keys to adjust the volume. The volume level flashes and v is displayed. Press the PTT key to confirm.
Channel adjustment
The radio has 8 channels. For a group wishing to speak to each other, all radios must be tuned to the same channel.
If interference is encountered, and you need to change channels, ensure that the channel is modified for the whole group's 2 way radios.
- Press the MENU key briefly and then release. The channel number flickers.
- Press the + key or the - key to select a channel.
- Press the PTT key to confirm.
Advice for using the 2 way radio
It is important to monitor the channel for activity before speaking to ensure that you do not interrupt other users already present on the channel. Press the 📋 key 3 times to check for channel activity. If you hear static, the channel is ready for use.
Speaking
To speak, press and hold down the PTT key. When you have finished speaking, release the PTT key and the radio will emit a beep (speech confirmation tone). For optimal clarity, hold the radio 5 to 7 cm away from your mouth and speak directly into the microphone. Do not cover the microphone when you speak.
Receiving
Make sure that you are not pressing the PTT key.
Adjust the volume if necessary with the + and - keys.
Sending a call tone
The call tone informs others that you wish to speak. To send the call tone to other radios in your group, press the ⏰ key.
Scanning
Scanning may be used to monitor channel transmissions and to find someone in the group who has accidentally changed channels.
- Press twice on the Ⓜ key until the ➞ is displayed on the screen and a ♀ or — flashes.
- Press the ⭕ key or the ⬤ key until ∪ is displayed to start the scan.
- Press the ⭕ key or the ⏻ key until — is displayed to end the scan.
- Press the PTT key to confirm.
When the radio detects activity on a channel, it stops scanning and the user can listen to the transmission. To respond, press the PTT key in the following five seconds.
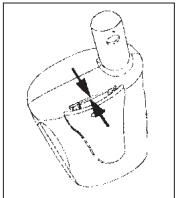
Attaching Belt Clips

natural_image
Line drawing of a mechanical component with arrows indicating motion or force (no text or symbols)Place the belt clip in the slot on top of the radio and slide it downwards until it's in place. To remove a clip, pull the release latch and slide the clip upwards.
text_image
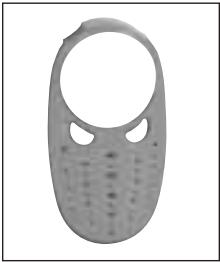
Diagram of a mechanical or fluid system with labeled components and directional arrows indicating flow or movement.Front Cover
The 2 way radio is equipped with a removable front cover allowing you to customise the 2 way radio.
Note : Do not use the 2 way radio without its front cover.
To remove the cover
- Move the upper part of the front cover and the rear cover apart by pressing forwards.
- Gently remove the front cover, starting with the upper part, then the lower part to release the front cover tabs of the 2 way radio.
To attach the cover
- Reinsert the front cover tabs into the casing.
- Then press to interlock the front cover.
natural_image
Close-up of a gray, oval-shaped object with two circular cutouts and a grid pattern on its surface (no text or symbols visible)Front cover of the FX 100 / 200
Additional Information
Conversation range
The 2 way radio is designed to optimise performance and improve transmission range in the field. It is not advisable to use 2 way radios at a distance of less than 1.5 meters from each other to avoid interference.
The conversation range depends on the zone concerned. It is affected by concrete structures, thick foliage and can be reduced when radios are used inside buildings or vehicles.
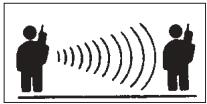
Optimal range Outside
Flat, open terrain
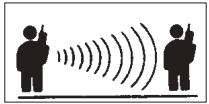
Medium range Outside
Trees or buildings Close proximity to residential buildings
Minimum range Outside
Dense foliage or mountains Inside a building
natural_image
Silhouette of two people with sound waves, no text or symbols present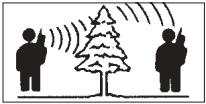
natural_image
Silhouette of two people with a tree and signal waves, no text or symbols present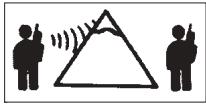
text_image
Diagram showing two human figures with sound waves, one holding a phone and the other listening to a triangular signal waveform.Optimal range is obtained in flat, unobstructed zones, spreading over three kilometres maximum. A medium range is obtained when buildings or trees obstruct transmission. The range is minimal when foliage and mountains obstruct the transmission channel.
Troubleshooting
| No display or incorrect display | • Reposition, replace or recharge the batteries |
| Unsent message | • Ensure that the PTT key is held down completely on speaking• Reposition, replace or recharge the batteries.• The shared channel may be in use |
| Message not received | • Check the 2 way radios are tuned to the same channels• Ensure that the PTT key has not been pressed accidentally• Reposition, replace or recharge the batteries.• Obstructions and use of the 2 way radio inside a building may disrupt transmissions. Change location.• Check that the volume has been increased. |
| Another conversation or noise on the channel | • A shared channel may be in use, try using a different channel. |
| Restricted 2 way radio conversation range | • Steel or concrete structures, dense foliage and use in buildings reduces range.• Check visibility is not obstructed to improve transmission.• Carrying the 2 way radio close to the body, in a pocket or on a belt reduces its range. Change the 2 way radio's location. |
| High levels of static or interference | • The 2 way radios are too close together. The 2 way radios must be at least 1.5 meters distance apart.• The 2 way radios are too far apart. Obstacles are disrupting transmission. |
Care and Use
To clean the radio
- Use a soft, damp cloth
- Do not immerse in water.
- Do not use spirits or cleaning solvents.
If the radio gets wet
- Turn the 2 way radio off and remove the batteries.
- Dry with a soft cloth.
- All battery elements may be wiped with a dry, lint-free cloth.
- Do not use the radio while it is not completely dry.
Technical Specifications
| Channels : | 8 |
| Operating frequency : | 446.00625-446.09375 MHz |
| Conversation range : | 3 km maximum |
| Power supply : | 3 AAA alkaline batteries |
| Transmission power (Watts) : | 0.5 PAR |
| Channel separation (kHz) : | 12.5 |
Frequency List PMRU6
| 1. | 446.00625 |
| 2. | 446.01875 |
| 3. | 446.03125 |
| 4. | 446.04375 |
| 5. | 446.05625 |
| 6. | 446.06875 |
| 7. | 446.08125 |
| 8. | 446.09375 |
Guarantee Information
How to benefit from the guarantee service
The authorized Logicom supplier or retailer where you purchased your Logicom 2 way radio and/or accessories will respect a guarantee claim and/or provide a guarantee service. Return your radio to the supplier or retailer to benefit from the guarantee service. Do not return the radio to Logicom.
To be eligible for a guarantee service, you must present your sales receipt or similar proof of purchase bearing the date of purchase.
The radio must also clearly display its serial number. The guarantee will be considered invalid if the serial type or numbers have been manipulated, deleted, removed or made illegible.
Beyond the scope of the guarantee:
- Defects or damage resulting from incorrect or abnormal use of the product, or from incorrect application of the instructions contained in the user manual.
- Defects or damage resulting from inappropriate or unsuitable usage, from accidents or negligence.
- Defects or damage caused by tests, incorrect use, maintenance, modification or handling of any sort.
- Damage to or breakage of the aerial, unless this is a direct result of faults in the equipment or a manufacturing fault.
- Products disassembled or repaired in such a way that their capabilities are negatively affected or that an inspection or test cannot be carried out to verify the substance of a guarantee claim.
- Defects and damage caused by the range.
- Defects and damage caused by humidity, liquids or leakages.
- Scratches or damage to plastic surfaces and other parts exposed to the elements during the course of normal usage.
- Products rented on a temporary basis.
- Periodic maintenance and repairs or the replacement of parts damaged in the course of normal usage.
General and safety information
Important safety information for effective use of the 2 way radio.
Please read these instructions before use.
Send and receive procedure
The portable 2 way radio contains a send and a receive function.
- Do not transmit for more than 50% of the time.
- To send (speak), press the PTT key.
- To receive calls, release the PTT key.
Portable radio use and exposure to electromagnetic energy (EME)
Aerial
Only the aerial supplied with the 2 way radio or an approved replacement model should be used. Any other unapproved aerial, modification or accessory may damage the portable 2 way radio and contravene regulations relating to electromagnetic energy exposure.
Do not hold the 2 way radio by the aerial when it is turned on. Touching the aerial affects the conversation range of the radio.
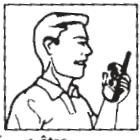
Use in Walkie-Talkie Mode
To use the 2 way radio like a walkie-talkie, hold it vertically with the microphone at 2.5 to 5cm away from the mouth.
Data mode operation
When the data transfer function is being used, with or without an accessory cable, the radio and its aerial must be held further than 2.5 cm away from the body.
Electromagnetic interference/compatibility
Note : the majority of electronic appliances are sensitive to electromagnetic interference (EMI) in the event of insufficient protection, design or configuration regarding electromagnetic compatibility.
Locations
To avoid interference caused by electromagnetic radiation, turn off the radio when requested to do so by a public sign or an official. Hospitals and medical centres use equipment with external RF energy sources.
Aeroplanes
Turn off the 2 way radio when requested to do so on board an aeroplane. All radio use must be in accordance with airline regulations and cabin crew instructions.
natural_image
Line drawing of a person holding a walkie-talkie (no text or symbols)Medical Equipment - Pacemakers
The Advanced Medical Technology Association recommends that radios should be held at more than 15cm. (6 inches) from a pacemaker. This is in accordance with research undertaken by the US Food & Drug Administration and their recommendations. Those with pacemakers fitted must:
- ALWAYS hold the radio at more than 15cm. (6 inches) from their pacemaker when the radio is turned on.
- Avoid carrying the 2 way radio in a chest pocket.
- Hold the 2 way radio to the ear on the opposite side of the body to the pacemaker, to reduce the possibility of interference.
- TURN OFF the radio immediately if there is reason to suspect the presence of interference.
Medical devices - Hearing aids
Certain 2 way radios can create interference for certain hearing aids. If this is the case, contact the hearing aid manufacturer to discuss other possible solutions.
Other medical devices
If another type of personal medical device is used please consult the manufacturer to establish whether it is sufficiently protected against external RF energy sources. Your doctor can help obtain such information.
Safety and use in a vehicle
Drivers must check the laws and regulations relative to the use of 2 way radios in the areas where they are driving. Always observe these laws and regulations strictly.
If you wish to use the radio when driving, stop and park on the shoulder of the road before sending or responding.
Recommendations for use
Vehicles equipped with inflatable airbags.
Do not place the radio in the area above the inflatable airbag or in the airbag deployment area. The opening of a safety airbag is very strong. If the radio is placed in the airbag deployment area and the airbag opens, the 2 way radio may be propelled with significant force and cause serious injury to the vehicle occupants.
Explosion-risk areas
Turn off the radio before entering areas where explosions may occur, except if the 2 way radio is of the ‘built-in safety’ type specially designed for use in such areas. Avoid removing, replacing or recharging batteries in such an area. Resulting sparks may cause an explosion or a fire that could lead to injury or even death in an explosion-risk area.
Note: The explosion-risk areas referred to here are fuelling zones beneath small craft, transfer plants or fuel depots as well as areas which may contain airborne chemical products, in the form of particles, steam, gas, dust or metallic powders. Hazardous areas also include any other zone where drivers are generally requested to turn off their engines. Explosion-risk areas are usually though not always clearly signposted.
Dynamiting and Blasting Zones
Turn off the 2 way radio when close to electrical detonators or in a dynamiting area, to avoid setting off an explosion. The 2 way radio should also be switched off when signs "Turn off 2 way radios" are posted.
Observe these signs and all instructions.
Operating Precautions ⚠️
Aerials
Do not use 2 way radios with damaged aerials.
The skin may be mildly burnt if exposed to a damaged aerial.
Batteries
Batteries can cause damage and injury if a conducting object (for example, jewellery, keys or a metal bracelet) touches the exposed areas. The conducting object may create a short-circuit in this situation and become extremely hot. Empty or charged batteries must be handled with care, especially when placed in pockets, bags or into any other container for metal objects.
NEVER TRY TO recharge the batteries themselves as they may explode and cause personal injury or damage the 2 way radio.
Application of the guarantee
The LOGICOM supplier guarantee is valid for normal use of the appliance as defined in the user manual.
Damage due to a cause external to the appliance is not covered in this guarantee. The guarantee is invalid if the 2 way radio has been damaged because of being hit or dropped, due to incorrect use, an incompatible connection as regards the instructions described in the instructions, problems relating to insufficient protection from heat, humidity or frost.
In all instances, the legal guarantee for hidden defects will be applied in accordance with article 1641 and following articles of the Civil Code.
CE
DECLARATION OF CONFORMITY
The EC label testifies that products conform to the harmonised standards applicable at the product launch date, in accordance with directive R&TTE 1999/5/EC of the European Parliament and European Council and in accordance with the additional provisions 73/23/CEE for user safety and electromagnetic interference.
This product is regularly checked for conformity to EC label standards.
This 2 way radio is intended for use in the following countries : France, Belgium, Spain, Portugal and the United Kingdom.
LOGICOM® S.A.
Z.I. Paris Nord 2
74, rue de la Belle Étoile - BP 50338 - 95941 Roissy CDG Cedex
Inhoudsopgave
natural_image
Line drawing of a mechanical component with arrows indicating motion or force (no text or symbols)text_image
Diagram of a mechanical or fluid system with labeled components and directional arrows indicating flow or movement.natural_image
Close-up of a gray, oval-shaped object with two circular cutouts and a textured surface (no visible text or symbols)natural_image
Silhouette of two people using a device with sound waves, no text or symbols presentStandaard bereik
natural_image
Silhouette of two people using a tree with signal waves, no text or symbols presentLaag bereik
text_image
Diagram showing two human figures with sound waves and a triangular signal triangle, likely illustrating sound or signal transmission.natural_image
Line drawing of a person holding a walkie-talkie (no text or symbols)Elektromagnetische interferenties en compatibiliteit
Batterijen of accu's
natural_image
Simple line drawing of a mechanical component with arrows indicating motion or force (no text or symbols)natural_image
Close-up of a gray, oval-shaped object with two circular cutouts and a grid pattern on its surface (no text or symbols visible)Parte delantera del FX 100 / 200
natural_image
Silhouette of two people using a device with sound waves, no text or symbols present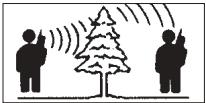
natural_image
Silhouette illustration of two people using a tree with signal waves, no text or symbols present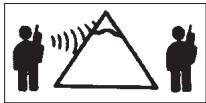
natural_image
Silhouette of two human figures with sound waves inside a triangle (no text or symbols)natural_image
Line drawing of a person holding a walkie-talkie (no text or symbols)natural_image
Line drawing of a mechanical component with arrows indicating direction (no text or symbols)text_image
Diagram of a mechanical or fluid system with labeled components and directional arrows indicating flow or movement.Tampa
natural_image
Close-up of a gray, oval-shaped object with two circular cutouts, resembling a stylized face or mask (no text or symbols visible)Tampa do FX 100 / 200
natural_image
Silhouette of two people with sound waves, no text or symbols presentDistância média
No exterior
natural_image
Silhouette of two people with a tree and signal waves, no text or symbols presentDistância mínima
No exterior