
H2060 - Intercom Emos - Free user manual and instructions
Find the device manual for free H2060 Emos in PDF.

| Product type | Video intercom |
| Brand | Emos |
| Model | H2060 |
| Monitor dimensions | 184 × 123.8 × 20.5 mm |
| Camera unit dimensions | 63 × 151 × 41 mm |
| Power supply | AC adapter 100-240 V AC, output 32 V DC / 0.8 A |
| Power consumption | 9 W (0.5 W standby) |
| Monitor resolution | 1024 × 600 pixels |
| Camera resolution | 1288 × 728 pixels |
| Viewing angle (camera) | 82° horizontal, 41° vertical |
| Sound volume | 70-80 dB at 30 cm |
| Operating temperature (monitor) | -10 °C to 50 °C |
| Operating temperature (camera) | -20 °C to 50 °C |
| Operating humidity | 10% to 90% RH |
| Lock/gate output | Max. 30 V / 2 A |
| Package contents | Monitor, monitor stand, outdoor camera unit, rain canopy, adapter, mounting hardware |
| Main functions | Two-way communication, door/gate unlocking, live view, Do Not Disturb mode, image/sound settings |
| Maintenance and cleaning | Disconnect before cleaning; do not immerse; do not use harsh chemicals |
| Safety | Follow manual instructions; do not open or modify; use original cable; installation by qualified technician |
Frequently Asked Questions - H2060 Emos
User questions about H2060 Emos
0 question about this device. Answer the ones you know or ask your own.
Ask a new question about this device
Download the instructions for your Intercom in PDF format for free! Find your manual H2060 - Emos and take your electronic device back in hand. On this page are published all the documents necessary for the use of your device. H2060 by Emos.
USER MANUAL H2060 Emos
A
natural_image
Pure technical line drawing of a mechanical component with mounting flanges (no text or symbols)B
natural_image
Simple line drawing of a refrigerator front panel with circular top and bottom, no text or symbols presentC
natural_image
Simple line drawing of a rectangular device with a small rectangular slot and two terminals (no text or symbols)D
natural_image
Simple line drawing of a mechanical tool or probe with no text or symbolsE
natural_image
Illustration of various screw and pin components including screws, cylindrical rods, and a flashlight (no text or symbols)F
2
flowchart
graph TD
    A["Electric Lock DC 12 V ≤ 400 mA LOCK 1"] --> B["Outdoor Unit"]
    B --> C["Non Polarity"]
    C --> D["Indoor Unit"]
    D --> E["AC 100-240 V 50/60 Hz"]
    B --> F["Power supply for unlocking"]
    F --> G["Gate Unlock LOCK 2"]
    G --> H["DC 32 V"]
    H --> I["AC 100-240 V 50/60 Hz"]
3
GB | Video Door Phone Set
Safety instructions and

Before using the equipment, read the instructions and make sure you understand them. Keep this document and the packaging for future reference.

Observe the safety instructions in this manual.
- Improper installation or use may cause electric shock or fire.
- Read the instructions before installation and take into account the specific characteristics of the space and location where the product will be installed.
- Do not open, disassemble, modify or alter the device unless specifically instructed to do so in the instructions.
- Any unauthorized opening or repair will result in the loss of all liability, replacement rights and warranties.
• Always use only the original power cord.
- The product can only be supplied with a voltage that corresponds to the information on the product label.
- Only a qualified technician may service this product to reduce the risk of electric shock.
- Disconnect the product from the power supply before cleaning.
- The product must not be used by persons (including children) whose physical, sensory or mental abilities or lack of experience and knowledge prevent them from using the product safely without supervision or instruction.
- Cleaning and user maintenance must not be carried out by unsupervised children.
- Do not immerse the product in water or other liquids.
- Do not use the product if any part is damaged or defective. Replace the damaged or defective product immediately.
- Do not let children play with the packaging material. Keep the packaging material out of the reach of children.
- The power cord and the product must always be positioned so that it does not interfere with normal walking areas.
- Use the product only as described in this document.
- Prevent the product from falling and protect it from impact.
- Do not use aggressive chemical cleaning agents when cleaning the product.
- Supervise children so that they do not play with the product.
EMOS spol. s r.o. declares that the product H2060 complies with the essential requirements and other relevant provisions of the directives. The equipment can be operated freely in the EU.
The Declaration of Conformity can be found on the website http://www.emos.eu/download.
The equipment can be operated on the basis of general authorisation No. V0-R/10/07.2021-8 as amended.
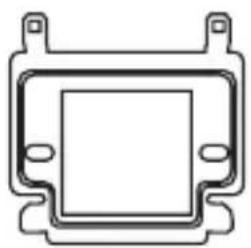
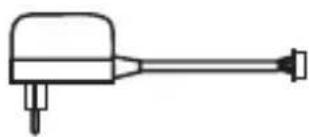
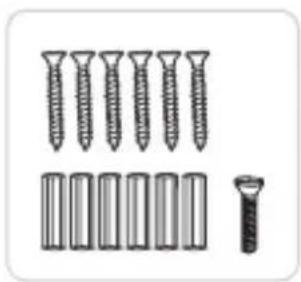
Contents of the package (see Figure 2)
A – Internal monitor
D – Rain canopy
B - Monitor holder
E - Power adapter
C - Outdoor camera unit
F - Installation material
Technical Specifications
Indoor Monitor
Power adapter: 100–240V 50/60 AC input
DC output 32V/0.8A
Power consumption: 9 W, (0.5 W in standby mode)
Monitor resolution: 1024*600
Volume range: 70\~80 dB at a distance of 30 cm
Operating temperature range: -10 °C\~ 50 °C
Operating humidity range: 10%\~90% (RH)
Dimensions: 184 × 123,8 × 20,5 mm
outdoor camera unit
Camera resolution: 1288*728
Viewing angle: 82° horizontally, 41° vertically
Volume range: 70\~80 dB at a distance of 30 cm
Operating temperature range: -20 °C\~ 50 °C
Dimensions: 63 × 151 × 41 mm
External lock support: max. 30 V/2 A
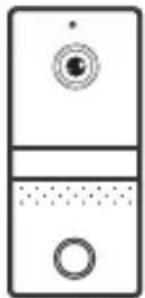
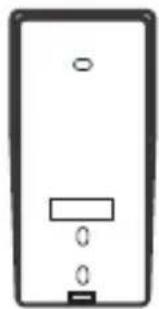
Description (see Figure 1)
| 1 – Microphone | 8 – Microphone |
| 2 – Live preview of the camera unit | 9 – Photobooth |
| 3 – Settings | 10 – Camera |
| 4 – Open lock/move menu to the left | 11 – Name tag |
| 5 – Open gate/move menu to the right | 12 – Speaker |
| 6 – Receiving a call | 13 – Bell button |
| 7 – Rain canopy |
Cable line parameters
Use a high quality shielded data cable to connect the monitor and the outdoor camera unit, RVV or CYSY cable can also be used. For distances up to 30 meters, a 0.5 mm ^2 cross-section can be used. For distances up to 100 meters, use a 1 mm ^2 cross-section cable. The communication cable must not run parallel to the power line and must not pass through the power section of the house cabinet. Use only high quality shielded cables, otherwise the image quality may be significantly degraded.
Parameters for lock/gate connection
Use RVV or CYSY cable with a cross section of 1 mm to connect an external lock or gate control.
Commissioning procedure
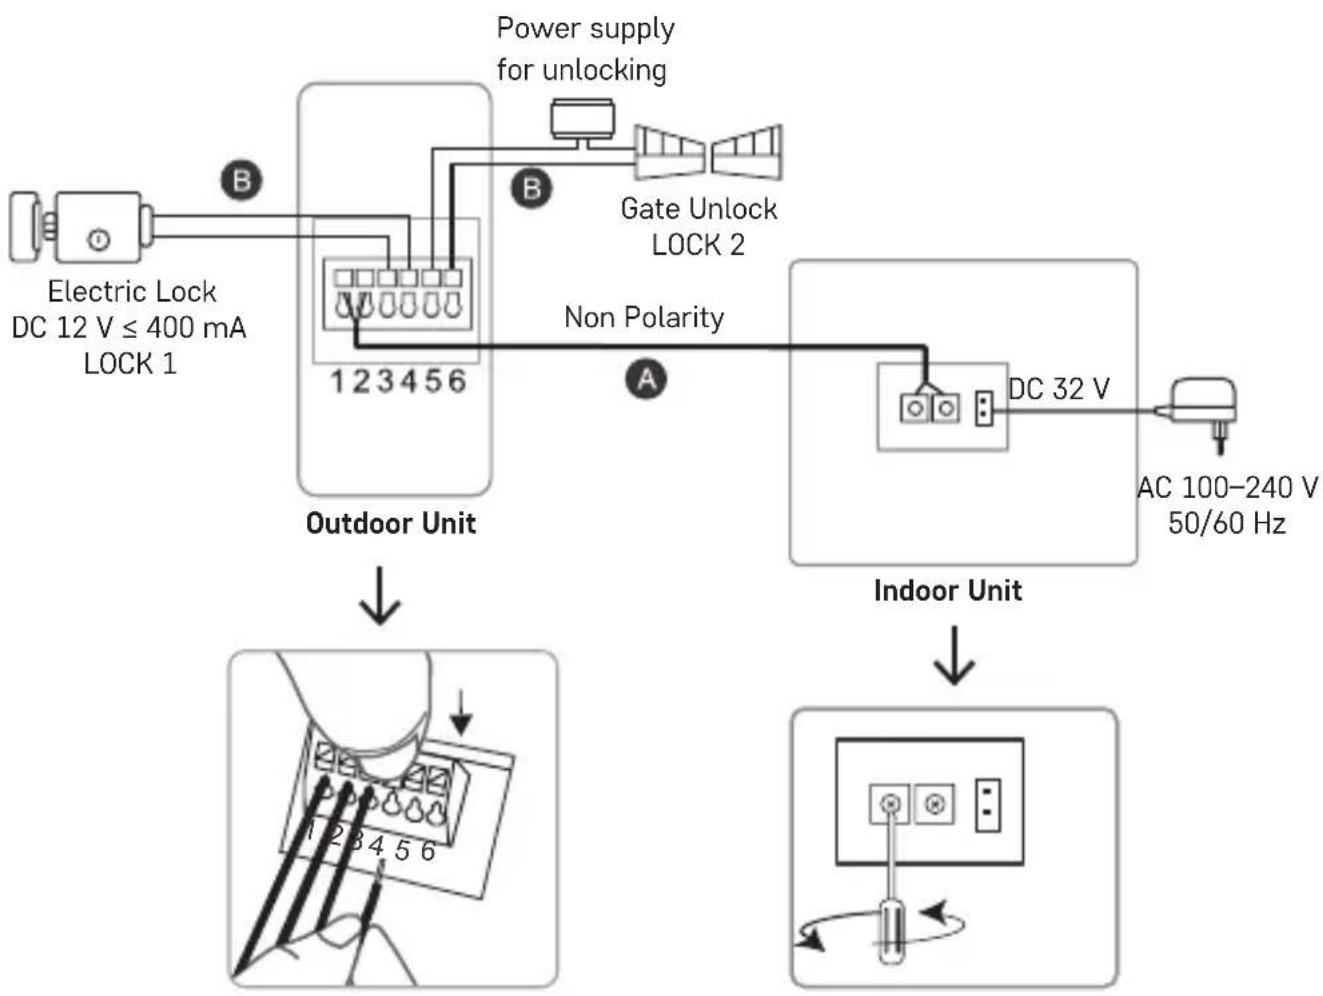
- Select a location for the outdoor camera unit. The unit should be at a height of 1.4 to 1.6 metres from the ground. Drill holes and install a rain canopy. Pull the communication cable through the hole in the canopy. Connect the cable to the outdoor camera unit according to the wiring diagram (Figure 3). You do not need to deal with polarity for this device. After connecting the cable, insert the outdoor camera unit into the canopy and secure with the screw from the underside. Under the transparent plastic on the outdoor camera unit, insert your nameplate.
- Select a location for the internal monitor. The recommended installation height is 1.4 to 1.6 meters from the ground. Install the monitor bracket using the screws and dowels provided in the package. Route the communication cable through the center of the bracket and connect it to the indoor monitor according to the wiring diagram (Figure 3). You do not need to deal with polarity for this device. Connect the original power adapter to the monitor last. Always connect the adapter to the monitor first and then plug it into a 230V socket.
Device MENU
Receiving a call
When the outdoor bell button is pressed, the monitor starts ringing and the display shows a preview of the incoming visit. To answer the call and start communication, press the „Answer Call“ button (6). You can now start communicating with the incoming caller. The maximum call duration is 120 seconds. During this time, you can open the lock at the gate/door by pressing the button for „Open lock/move menu left“ (4) or open the gate/garage door by pressing the button for „Open gate/move menu right“ (5). To end and hang up the call, press the „Answer call“ button (6) again. The call will be terminated.
View live preview
To view the live preview without anyone outside ringing the bell, press the „View live preview of camera unit“ button (2). The monitor will display a live preview for 60 seconds. If you press the „Answer call“ button (6) during this time, the call will start. The maximum call duration is 120 seconds. To end the call, press the „Live preview of camera unit“ button (2) again.
Do not disturb mode
Press the „View live preview of the camera unit“ button (2). Now press the „Settings“ button (3). Individual icons for adjusting the brightness, picture chromaticity, contrast, ringtone, ring volume, call volume, lock unlock time, gate open pulse time and do not disturb mode will appear on the bottom of the monitor. Pressing the „Settings“ button (3) again will move the cursor between items. So select the Do Not Disturb item and use the „Lock Open/Move Menu Left“ (4) or „Gate Open/Move Menu Right“ (5) buttons to turn the Do Not Disturb mode on or off. The icon for Do Not Disturb mode
on shows a crossed out speaker.
Other features
If you wish to adjust the brightness, image chromaticity, contrast, ringtone, ring volume, call volume, lock unlock time or gate/garage door opening pulse time, press the „View live view of camera unit“ button (2). Now press the „Settings“ button (3) and press this button again to move the cursor to the desired item. Then use the „Open lock/move menu to the left“ (4) or „Open gate/move menu to the right“ (5) buttons to select the desired value.
Default values of individual functions
Brightnes
The brightness can be set from 1 to 10. It is preset to 5.
Image chromaticity

The image chromaticity can be set from 1 to 10. It is preset to 5.
Contrast
Contrast can be set from 1 to 10. It is preset to 5.
Ringtone
Choose from 16 ringtones. The „Ding-Dong“ melody is preset
Ringer volume

The ringer volume can be set from 1 to 10. It is preset to 10 (maximum volume).
Call volume
The call volume can be set from 1 to 10. It is preset to 10 (maximum volume).
Lock unlock interval length 🔒
The length of the unlock interval can be set between 1 and 5 seconds. It is preset to 3 seconds.
Pulse length for opening the door/garage door

The pulse length for opening the door/garage door can be set between 1 and 5 seconds. The preset value is 3 seconds.
Do not disturb mode
Do Not Disturb mode can be turned on or off. It is disabled on initial startup.
CZ | Videotelefon sada
A - Notranji monitor
D – Dežna streha
A – Interner Monitor
Description (voir figure 1)


- GB | Video Door Phone Set
- Safety instructions and
- Contents of the package (see Figure 2)
- Technical Specifications
- Indoor Monitor
- outdoor camera unit
- Description (see Figure 1)
- Cable line parameters
- Parameters for lock/gate connection
- Commissioning procedure
- Device MENU
- Receiving a call
- View live preview
- Do not disturb mode
- Other features
- Default values of individual functions
- Brightnes
- Image chromaticity
- Contrast
- Ringtone
- Ringer volume
- Call volume
- Lock unlock interval length 🔒
- Pulse length for opening the door/garage door
- CZ | Videotelefon sada
- Description (voir figure 1)
Brand : Emos
Model : H2060
Category : Intercom