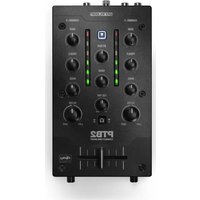
PTB2 - DJ Equipment Reloop - Free user manual and instructions
Find the device manual for free PTB2 Reloop in PDF.


User questions about PTB2 Reloop
0 question about this device. Answer the ones you know or ask your own.
Ask a new question about this device
Download the instructions for your DJ Equipment in PDF format for free! Find your manual PTB2 - Reloop and take your electronic device back in hand. On this page are published all the documents necessary for the use of your device. PTB2 by Reloop.
USER MANUAL PTB2 Reloop
text_image
CHANNEL R PTB2 COMMINICT DES MIXES PTB2 dianu PTB2 CE VCP CE CURE CE VCP CE CURE CE VCP CE CURE CE VCP CE CURE CE VCP CE CURE CE VCP CE CURE CE VCP CE CURE CE VCP CE CURE CE VCP CE CURE CE VCP CE CURE CE VCP CE CURE CE VCP CE CURE CE VCP CE CURE CE VCI CE CURE CE VCI CE CURE CE VCI CE CURE CE VCI CE CURE CE VCI CE CURE CE VCI CE CURE CE VCI CE CURE CE VCI CE CURE CE VCI CE CURE CE VCI CE CURE CE VCI CE CURE CE VCI CE CURE CE VCI CE CUSE CE VCI CE CUSE CE VCI CE CUSE CE VCI CE CUSE CE VCI CE CUSE CE VCI CE CUSE CE VCI CE CUSE CE VCI CE CUSE CE VCI CE CUSE CE VCI CE CUSE CE VCI CE CUSE CE VCI CE CUSE CE VCI CE CUSE CE VCUREV.1.0

text_image
eRELOOP®OPERATION MANUAL BEDIENUNGSANLEITUNG MODE D'EMPLOI MANUALDEINSTRUCCIONES
WARNING!
To prevent fire or avoid an electric shock do not expose the device to water or fluids! Never open the housing!
WARNUNG!
Keep information for further reference!
ATTENTION! For your own safety, please read this operation manual carefully before the initial operation! All persons involved in the installation, setting-up, operation, maintenance and service of this device must be appropriately qualified and observe this operation manual in detail. This product complies with the requirements of the applicable European and national regulations. Conformity has been proven. The respective statements and documents are deposited at the manufacturer.
Before operating this equipment we ask you to carefully study and observe all instructions. Please remove the PTB-2 from its packaging. Check before an initial operation to make sure that the device has not been visibly damaged during transport. If you detect any damage to the power cable or the casing, do not operate the device. Contact your specialized dealer.
SAFETY INSTRUCTIONS
CAUTION! Please exercise particular caution when handling power voltage. This voltage rating may lead to a critical electrical shock! Any damage caused by the non-observance of this operation manual excludes any warranty claims. The manufacturer is not liable for any damage to property or for personal injury caused by improper handling or non-observance of the safety instructions.
- This device left the factory in perfect condition. To maintain this condition and to ensure a risk-free operation the user must observe the safety instructions and warnings contained in this operation manual.
- For reasons of safety and certification (CE) the unauthorized conversion and/or modification of the device is prohibited. Please note that in the event of damage caused by the manual modification to this device, any warranty claims are excluded.
- The inside of the device does not contain any parts which require maintenance, with the exception of worn parts that can be exchanged from the outside. Qualified staff must carry out maintenance, otherwise, the warranty does not apply!
- The AC inlet acts as a disconnect device. Ensure that power is not applied until the unit is fully set up. Always connect the mains plug last. Ensure that the mains switch is in the OFF position when connecting the unit to the power supply.
- Only use cables that comply with regulations. Observe that all jacks and bushes are tightened and correctly hooked up. Refer to your dealer if you have any questions.
- Ensure that when setting up the product the power cable is not squashed or damaged by sharp edges.
- Disconnect the device when not in use and before cleaning! Be sure to hold the power plug by the body. Never pull the power cord!
- Position the device on a horizontal and stable base.
- Avoid any concussions or violent impact when installing or operating the device.
- When selecting the location of installation make sure that the device is not exposed to excessive heat, humidity, and dust. Be sure that no cables lie around openly. You will endanger your own safety and that of others!
- Do not rest any containers filled with liquid that could easily spill onto the device or its immediate vicinity. If, however, fluids should access the inside of the device, immediately disconnect the power plug. Have the device checked by a qualified service technician before reuse. Damage caused by fluids inside the device is excluded from the warranty.
- Do not operate the device under extremely hot (in excess of 35^ C) or extremely cold (below 5^ C) conditions. Keep the device away from direct exposure to the sun and heat sources such as radiators, ovens, etc. (even during transport in a closed vehicle). Never cover the cooling fan or vents. Always ensure sufficient ventilation.
- The device must not be operated after being taken from a cold environment into a warm environment. The condensation caused at this moment may destroy your device. Do not switch on or operate the device until it has reached ambient temperature!
- Controls and switches should never be treated with spray-on cleaning agents and lubricants. This device should only be cleaned with a damp cloth. Never use solvents or cleaning fluids with a petroleum base for cleaning.
- When relocating, the device should be transported in its original packaging.
- At commercial facilities, the regulations for the prevention of accidents as stipulated by the organization of professional associations must be observed.
- At schools, training facilities, hobby and self-help workshops the operation of the device must be monitored with responsibility by trained staff.
- Keep this operation manual in a safe place for later reference in the event of questions or problems.
APPLICATION IN ACCORDANCE WITH REGULATIONS
- This device is a mixing console which can regulate and mix low level audio signals. The device is thereby connected between a signal source and an audio amplifier or active speakers, respectively.
- If the device is used for other purposes than those described in the operation manual, damage can be caused to the product, leading to the exclusion of warranty rights. Moreover, any other application that does not comply with the specified purpose harbors risks such as short circuits, fires, electrical shocks, etc.
- The serial number determined by the manufacturer must never be removed to uphold the warranty rights.
MAINTENANCE
- Check the technical safety of the device regularly for damage to the power cable or the casing, as well as for wear out of wear parts such as buttons and switches.
- If it is to be assumed that a safe operation is no longer feasible then the device must be disconnected and secured against accidental use. Always disconnect the power cable from the outlet!
- It must be assumed that a safe operation is no longer feasible if the device bears visible defects, if the device no longer functions, following longer storage under unfavorable conditions or after major transport stress.
DESIGNATIONS
- Gain
- Treble
- Bass
- Filter
- BT/AUX Volume
- Main Volume
- CUE Mix
- Crossfader
- Main LED
- Bluetooth Pairing Button
- Headphone CUE Button
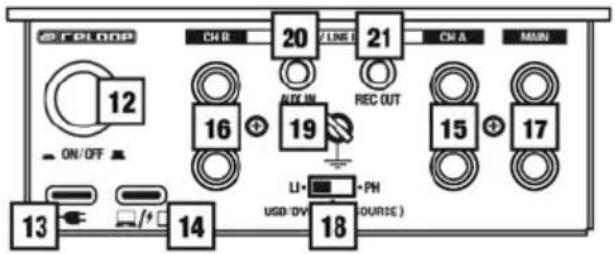
- On/Off
- Power (USB-C)
- Host Port (USB-C)
- Channel A Input
- Channel B Input
- Main Output
- Source Switch
- Ground Terminal
- Aux In
- Rec Out
- CUE Vol
- Crossfader Curve
- 3.5 mm Headphone Output
- CF Reverse
26.Host Source Switch
text_image
CPLOOP CHR 20 /TEN 21 ON A MIN 12 16 + 19 REC OUT 15 + 17 13 14 LI- PH USD/DV COURSE)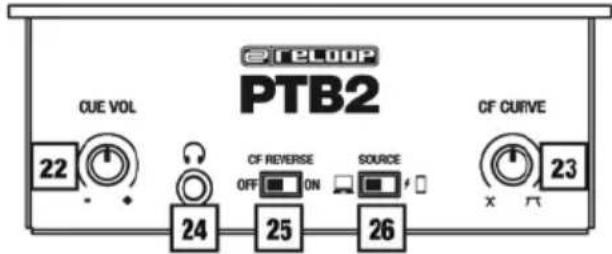
text_image
eTeloop PTB2 CUE VOL CF CURVE 22 23 24 25 26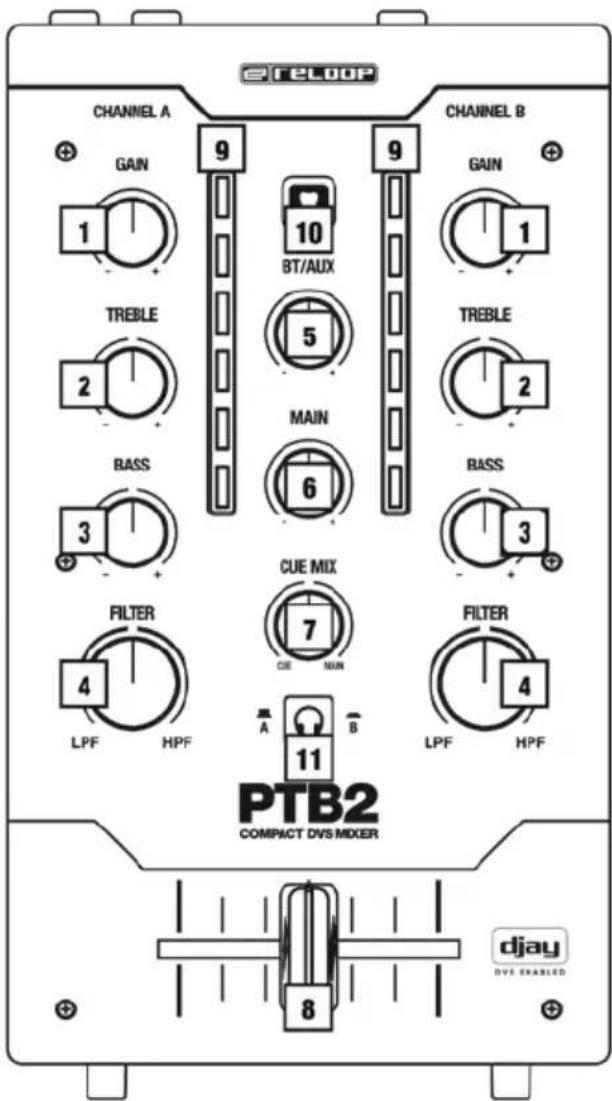
text_image
TEL00P CHANNEL A GAIN 1 9 BT/AUX 10 9 GAIN 1 TREBLE 2 5 MAIN 6 TREBLE 2 BASS 3 RASS 3 FILTER 4 LPF HPF CUE MIX 7 CIE MAIN FILTER A B 11 LPF HPF PTB2 COMPACT DVS MIXER DJAY DVS EXASLED 8CONNECTION
1. CONNECTING AUDIO SOURCES
- Line-Level Devices (CD-Player, media players): Connect to Channel A (15) or Channel B (16) RCA inputs on the rear panel. Set the source switch (18) to line.
- Turntables: Connect RCA output to Channel A (15) or B (16) input and attach ground wire to the Ground Terminal (19). Set the source switch (18) to phono.
- Aux Device (e.g. phone): Connect to the 3.5 mm Aux Input (20) on the rear panel.
- Bluetooth Device: Use the Bluetooth Button (10) to enter pairing mode and connect your PTB-2 wirelessly via Bluetooth to an external playback device. Upon successful connection, the Bluetooth Button (10) will be permanently lit.
2. OUTPUT CONNECTIONS
- Main Output: Connect RCA output (17) to powered speakers, mixer, or amp.
- Headphones: Plug into the 3.5 mm Headphone Output (23) on the front panel.
- Recording Output: Use the 3.5 mm Record Out (21) to capture your mix externally.
3. CONNECTING TO A HOST (COMPUTER, MOBILE DEVICE) / POWER
- Connect a USB-C to USB-C cable from the USB-C Host Port (14) to your computer or mobile device. Set the host source switch (26) according to the connected device.
Note: To connect an iOS device with a Lightning port, a certified Lightning-to-USB adapter is required.
- Connect a power supply to the USB-C Power port (13). For portable use a power bank can be connected (ensure sufficient output; e.g.: 5V 3A).
Note: The PTB-2 does not provide power delivery for laptops. Please ensure your laptop is powered using its own charger when in use. The mixer can charge mobile devices such as smartphones or tablets via USB-C, depending on your power source. Charging speed may vary depending on the power supply used.
SETUP EXAMPLE
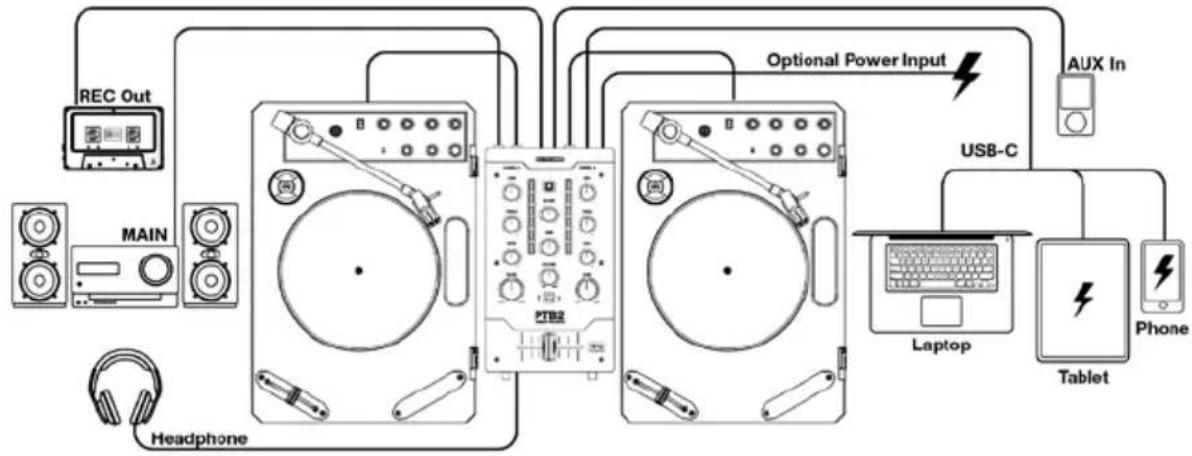
flowchart
graph TD
    A["REC Out"] --> B["PTB2"]
    C["MAIN"] --> B
    D["Headphone"] --> B
    B --> E["Optional Power Input"]
    E --> F["AUX In"]
    F --> G["USB-C"]
    G --> H["Laptop"]
    G --> I["Tablet"]
    H --> J["Phone"]
    I --> J
    J --> K["Main Device"]
DJAY PRO INSTALLATION & OPERATION
DJAY PRO IPAD/IPHONE INSTALLATION
- Scan the QR code or search for the djay Pro app in the App Store and download it.
- Connect your playback device to the PTB-2
- Open the previously downloaded djay Pro app.
Your PTB-2 will be automatically detected and is ready to use.
DJAY PRO WINDOWS INSTALLATION
- Search for the djay Pro app in the Microsoft Store and download it.
- Connect your computer to the PTB-2.
- Open the previously downloaded djay Pro app.
Your PTB-2 will be automatically detected and is ready to use.
An additional ASIO driver for low latency is available at www.reloop.com/downloadfinder.
This driver is optional and not required for operation.
DJAY ANDROID INSTALLATION
If you want to use an Android device with the PTB-2, please first check our FAQs at www.reloop.com/faqs/.
Download the djay app from the Google Play Store and connect as described above.
OPERATION
1. CHANNEL CONTROLS (A & B)
- Gain (1): Adjusts input level of the channel.
- Treble (2) & Bass (3): Controls higher and lower frequencies.
- Filter (4): Turn left for low-pass filtering and turn right for high-pass filtering. The filter is neutral in the center position.
2. CUEING AUDIO
- Cue Button (11): Push in to cue Channel B; push out to Cue Channel A.
- Cue Mix Knob (7): Turn left for full cue; turn right for full main. The signal is blended in the middle position.
- Cue Volume Knob (22): Controls headphone listening volume.
3. CROSSFADER (8)
- Blends between Channel A (left) and Channel B (right).
- Reverse Switch (25): Reverses A/B sides.
- Crossfader Curve Knob (23): Turn left for a smoother fade; turn right for a sharper cut.
This mixer is Innofader compatible. For installation and calibration, please refer to the documentation provided by Innofader.
4. MAIN OUTPUT
- Main Volume (6): Controls overall output level to Main RCA Output.
- Main LED Meter (9): Visual reference for output level. Avoid consistent red peak levels to prevent distortion.
5. BT/AUX VOLUME (5)
Controls the volume of audio coming from either the Bluetooth input or the rear 3.5 mm Aux input (20).
6. DVS
- Connect the PTB-2 to your host device via USB-C. The mixer acts as an audio interface, transmitting timecode signals from your playback device to your DJ software.
- Timecode vinyl or timecode CDs are needed, depending on your playback device. These are special media that contain a control tone recognized by your DVS software to manipulate digital files.
Note: When using DVS, it is crucial that your playback device (turntable, CD- or media player) outputs a line-level signal to the PTB-2.
TECHNICAL DATA
Power Supply: ...... DC 5 V / 400 mA
Power Consumption: 2.2 W
Frequency Response: 20 Hz - 20 kHz
Inputs: 2x Phono/Line RCA, 1x Bluetooth In, Aux In 3.5 mm jack
Outputs: ...... Main RCA, Headphones 6.3 mm jack, Rec Out 3.5 mm jack
EQ range: ...... at 100 Hz, 1 kHz, 19 kHz (+9 dB, -24 dB)
Dimensions: 105 (W) x 200 (D) x 45 (H) (height with potentiometers: 60 mm)
Weight: 700 g (N.W.)
Included accessories: USB-C to USB-C cable, instruction manual
SERVICE AND SUPPORT
For technical questions or issues, please check our FAQ or request a support ticket: https://www.reloop.com/faqs/
6. DVS (DIGITAL VINYL SYSTEM)
USO CONFORME A LAS NORMAS
text_image
Screenshot of a music streaming interface displaying multiple audio and video streams including 'The Fantasybox', 'Sonic Alphotonist Mirage', and 'MAYES'.Get the app djay for your PTB-2 mixer.
Free Download
www.algoriddim.com

Download on the App Store

Get it from Microsoft
Mac, iPad, and iPhone are trademarks of Apple Inc., registered in the U.S. and other countries and regions. The App Store is a service mark of Apple Inc., registered in the U.S. and other countries and regions. Microsoft, the Microsoft logo, and Windows are registered trademarks of Microsoft Corporation in the U.S. and/or other countries.
LEARN MORE ABOUT THE FULL RELOOP PRODUCT RANGE
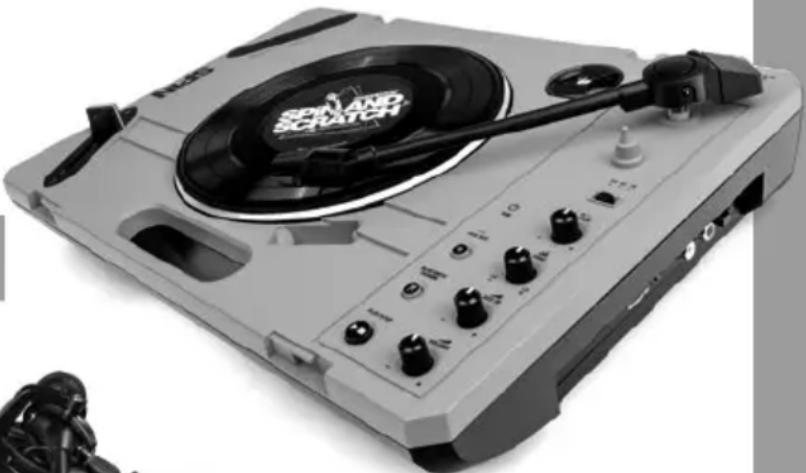
SPiN
natural_image
Black-and-white photo of a vintage CD or DVD disc with a rotary dial and control knobs (no visible text or symbols)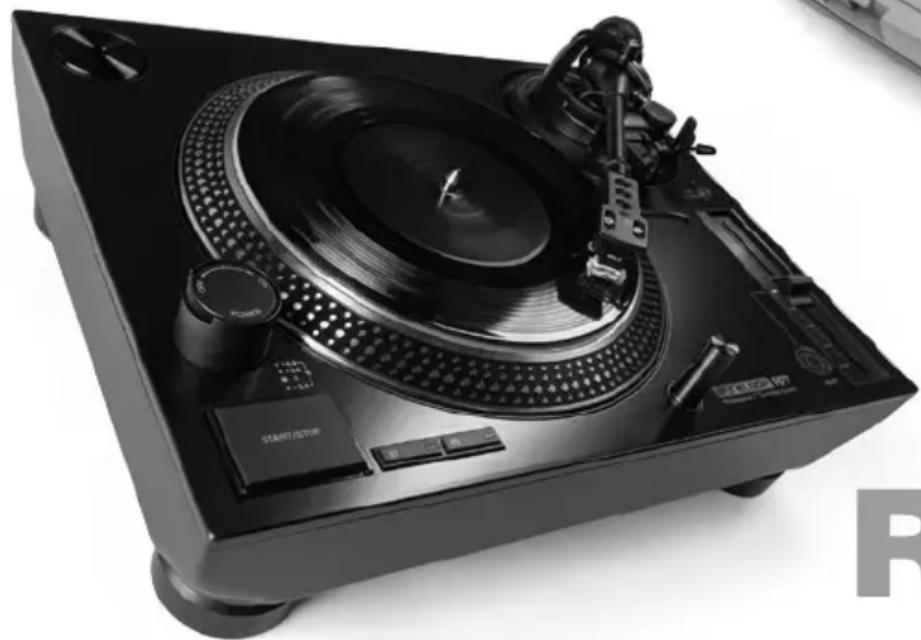
natural_image
Black desktop X-ray machine with visible CD/DVD disc, rotary knob, and control buttons (no readable text or symbols)RP7
natural_image
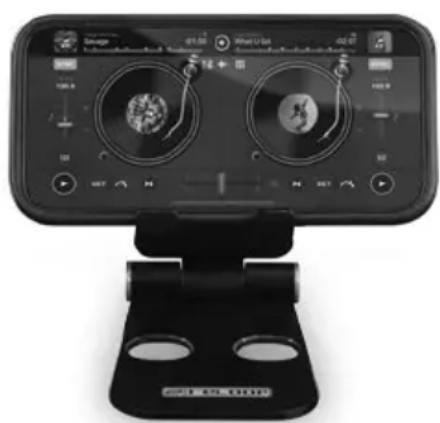
Front view of a black electronic device with dual rotary dials and a stand (no visible text or symbols)RHP15
natural_image
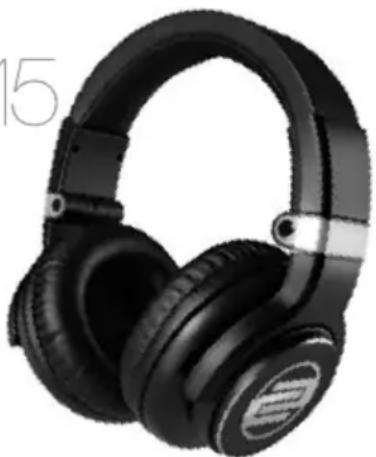
Black outdoor headphones with earbuds and black covers (no visible text or symbols)SMART DISPLAY STAND
Reloop Distribution
Global Distribution GmbH & Co. KG,
Schuckertstrasse 28, 48153 Muenster / Germany
Fax: +49.251.6099368
Subject to alterations.
Illustrations similar to original product.
Misprints excepted.
DJAY®, DJAY PRO®, NEURAL MIX®, and ALGORIDDIM® are registered trademarks of Algoriddim GmbH in the United States and other countries.
NEURAL MIX is covered by patents in the United States and other countries, which are assigned to algoriddim GmbH and identified at www.algoriddim.com/patents. Additional patents pending. Issued patents include without limitation:
US Patent No. 10,887,033 B1, US Patent No. 11,216,244 B2, US Patent No. 11,347,475 B2, JP Patent No. 6926354 B1 18:13
The Bluetooth(R) word mark and logos are registered trademarks owned by Bluetooth SIG, Inc.
DECLARATION OF CONFORMITY
English
Hereby, "Global Distribution GmbH & Co. KG" declares that this unit is in compliance with Directive 2011/65/EU, 2014/30/EU, 2014/35/EU & 2014/53/EU.
The full text of the EU declaration of conformity is available at the following internet address:
https://www.reloop.com/product-compliance
Deutsch
https://www.reloop.com/product-compliance
Français
https://www.reloop.com/product-compliance
Español
https://www.reloop.com/product-compliance
Bluetooth output power: +2.64 dBm max
Bluetooth Frequ. Range: 2402-2480 MHz






R 210-257507

CAN ICES-003(B)/NMB-003(B)
This device complies with Part 15 of the FCC rules. Operation is subject to the following two conditions:
(1) this device may not cause harmful Interference, and
(2) this device must accept any interference received, including interference that may cause undesired operation.
JAPAN DISTRIBUTOR
Ginza Jujiya., Ltd.
2-channel USB Bluetooth Mixer
Voltage: DC IN 5 V / 400 mA
UK DISTRIBUTOR
Henley Designs Ltd.
Unit B, Park 34, Collet
OX11 7WB, Didcot, Oxfordshire, UK