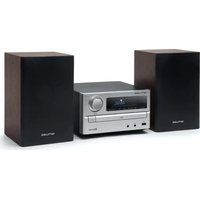
M-62 BTS - Hi-fi system MUSE - Free user manual and instructions
Find the device manual for free M-62 BTS MUSE in PDF.


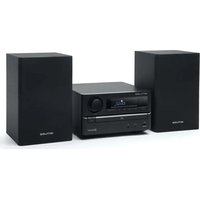
| Product Type | Stereo hi-fi system with CD player, FM radio, Bluetooth and USB |
| Brand | Muse |
| Model | M-62 BTS |
| Power supply | 100-240 V~, 50/60 Hz |
| FM range | 87.5 - 108.0 MHz |
| USB port | 5 V, 1 A (MP3 playback and charging) |
| Bluetooth | Version 5.4, band 2.402-2.480 GHz, RF power 1.08 dBm |
| Disc player | Audio CD and MP3, up to 20 programmable tracks (CD) / 99 (MP3) |
| Radio presets | 20 FM stations |
| Speakers | 2 passive speakers, connection via spring terminals |
| Remote control | Infrared, AAA batteries (not included), range 6 m |
| Functions | CD/USB/Bluetooth/AUX playback, FM radio, alarm, sleep timer, clock, eco mode |
| Headphone jack | 3.5 mm headphone output, max voltage ≤ 150 mV |
| Dimensions (approx.) | 260 x 250 x 120 mm (main unit) |
| Weight (approx.) | 3 kg (main unit + speakers) |
| Included accessories | User manual, remote control, FM antenna, 2 speakers |
| Safety | Class 1 laser product, max temperature 35 °C, min distance 5 cm for ventilation |
Frequently Asked Questions - M-62 BTS MUSE
User questions about M-62 BTS MUSE
0 question about this device. Answer the ones you know or ask your own.
Ask a new question about this device
Download the instructions for your Hi-fi system in PDF format for free! Find your manual M-62 BTS - MUSE and take your electronic device back in hand. On this page are published all the documents necessary for the use of your device. M-62 BTS by MUSE.
USER MANUAL M-62 BTS MUSE
natural_image
Exterior view of a modern audio workstation with two black speaker blocks and a central digital audio device (no visible text or symbols on the main components)Please read the instruction carefully before operating the unit.
flowchart
graph TD
    A["Central Device"] --> B["Server"]
    A --> C["Peripheral Network"]
    A --> D["Peripheral Network"]
    A --> E["Peripheral Network"]
    A --> F["Peripheral Network"]
    A --> G["Peripheral Network"]
    A --> H["Peripheral Network"]
    A --> I["Peripheral Network"]
    A --> J["Peripheral Network"]
    A --> K["Peripheral Network"]
    A --> L["Peripheral Network"]
    A --> M["Peripheral Network"]
    A --> N["Peripheral Network"]
    A --> O["Peripheral Network"]
    A --> P["Peripheral Network"]
    A --> Q["Peripheral Network"]
    A --> R["Peripheral Network"]
    A --> S["Peripheral Network"]
    A --> T["Peripheral Network"]
    A --> U["Peripheral Network"]
    A --> V["Peripheral Network"]
    A --> W["Peripheral Network"]
    A --> X["Peripheral Network"]
    A --> Y["Peripheral Network"]
    A --> Z["Peripheral Network"]
natural_image
Illustration of a hand holding an eye with a checkmark overlay (no text or symbols)Face de lecture

natural_image
Simple line drawing of a hand holding a circular object with arrows indicating motion or force (no text or symbols)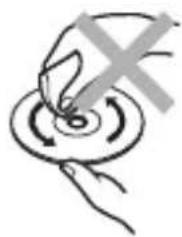
natural_image
Hand holding a circular object with arrows indicating rotation or movement (no text or symbols)CLASS 1 LASER PRODUCT PRODUCTO LÁSER CLASE 1 PRODUIT LASER DE CLASSE 1
IMPORTANT
BLUETOOTH MICRO SYSTEM WITH CD, FM AND USB PORT
PACKAGE CONTENTS
Check and identify the contents of your package:
- Main unit
- Speaker x 2
- Remote Control
- Instruction Manual
- FM Antenna
PRODUCT OVERVIEW
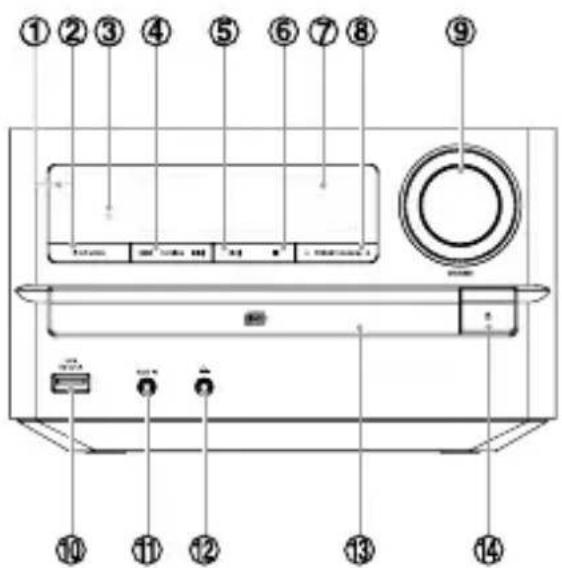
- Eco Power indicator light
-
SOURCE
-
Turn the unit on or switch it on to Eco power/standby mode.
-
Select a source.
-
Remote sensor
- Detect signals from the remote control.
-
◀◀/▶▶I/TUNING
-
Skip to the previous/next track.
- Search within a track.
- Tune to a radio station.
-
Adjust time.
-
▶ II
- Start or pause play.
6.
- Stop play.
-
Erase a program.
-
Display panel
- Show current status.
-
- PRESET/ALBUM +
-
Select a preset radio station.
-
Skip to previous/next album.
-
VOLUME: Adjust volume.
-
USB socket.
- AUX IN
- Connect external audio device.
- Connect headphone.
- Disc compartment
- ▲ Open or close the disc tray.
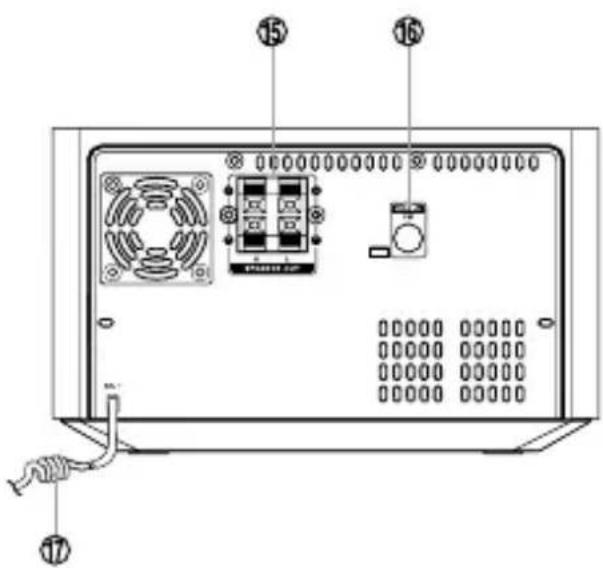
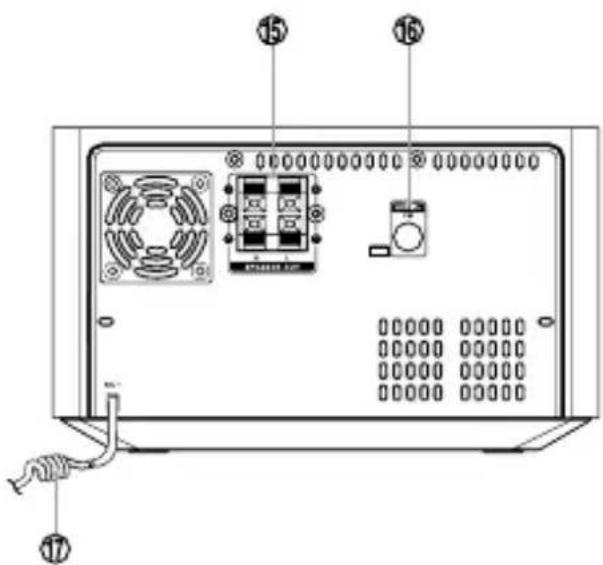
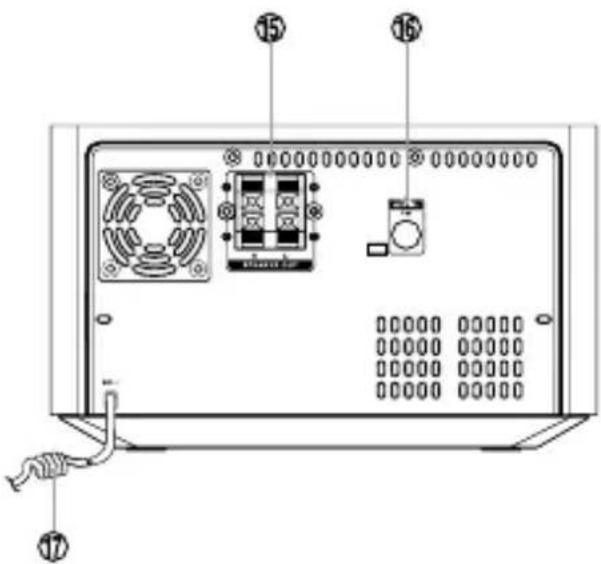
- SPEAKER OUT
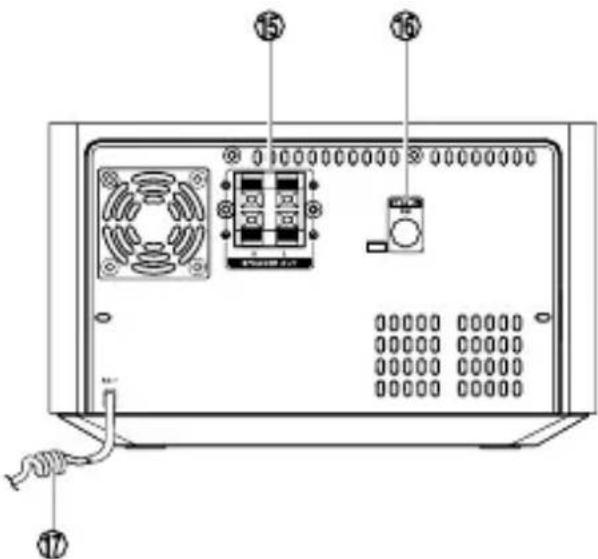
- Connect the speakers.
- FM aerial
- Connect FM antenna.
- AC\~
- Connect the AC power
Remote Control Overview
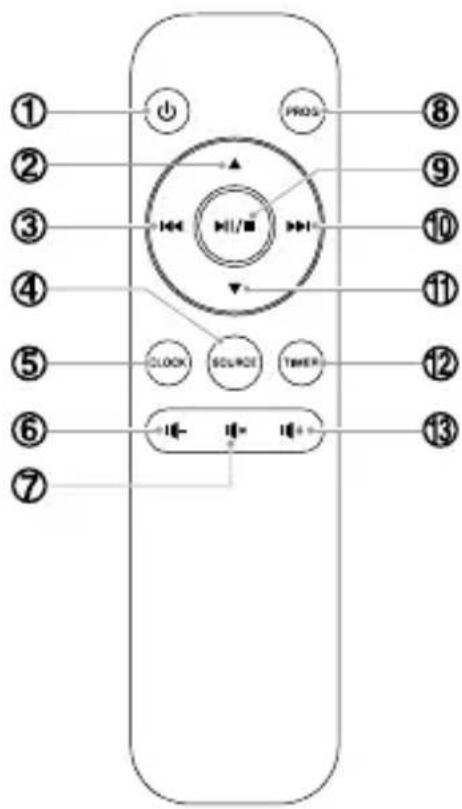
1. ⏻
- Turn the unit on or switch it on to Eco power/standby mode.
2. ▲
- Select a preset radio station forward. - Skip to next album.
3.
- Skip to the previous track. - Search backward within a track. - Tunes to a lower radio frequency. - Adjust time.
4. SOURCE
- Select a source.
5. CLOCK
- Set clock. - Select play modes
6.
- Decrease volume.
7.
- Disables or enables sound output. - Selects different levels of brightness for the display screen.
8. PROG
- Program tracks. - Program radio stations.
9. ▶□□/□
- Start or pause play. - Stop play. - Erase a program.
10.
- Skip to the next track. - Search forward within a track. - Tunes to a higher radio frequency. - Adjust time.
11. ▼
- Select a preset radio station backward. - Skip to previous album.
12. TIMER
- Sets time for turn on the unit automatically. - Sets the sleep timer function (auto off).
13.
- Increase volume.
Installation of Battery
- Open the battery compartment.
- Insert two AAA batteries (not supplied) following the indications (+/-) inside the compartment.
- Close the cover.
Notes:
- Before throwing any batteries away, consult your distributor who may be able to take them back for specific recycling.
- If the remote control is not going to be used for a long time, remove the battery to avoid damage caused by battery leakage corrosion.
- Attention should be drawn to the environmental aspects of battery disposal.
- Do not throw batteries in fire!
- Battery shall not be exposed to excessive heat such as sunshine, fire or the like.
CAUTION: Danger of explosion if battery is incorrectly replaced. Replace only with the same or equivalent type.

WARNING
Do not ingest battery, Chemical Burn Hazard.
- Keep new and used batteries away from children.
- If the battery compartment does not close securely, stop using the product and keep it away from children.
- If you think batteries might have been swallowed or placed inside any part of the body, seek immediate medical attention.
- Batteries used in the remote control for this unit are easily swallowed by young children and this is dangerous.
- Keep loose batteries away from young children and make sure that the battery holder tray is secure in the remote control. Seek medical advice if you believe a cell has been swallowed.
- Please dispose of batteries correctly by following the guidance in this manual.
- Batteries (battery pack or batteries installed) shall not be exposed to excessive heat such as sunshine, fire or the like.
Remote Control Operation Range
Point the remote control to the unit no more than 6 meters from the remote control sensor and within ±30^ (Horizontal)/ ±20^ (vertical) of the front of the unit.
The operating distance may vary according to the brightness of the room.
Note:
- Make sure that there is no obstacle between the infrared remote sensor of the unit and remote control. If you install the unit on rack, etc., the remote controllable range may decrease depending on the thickness or color of glass door of rack.
- Do not expose the infrared remote sensor to direct sunlight or other strong light, such as inverter fluorescent light.
CONNECTIONS
Caution: Make all connections before plugging the unit into the AC Power outlet.
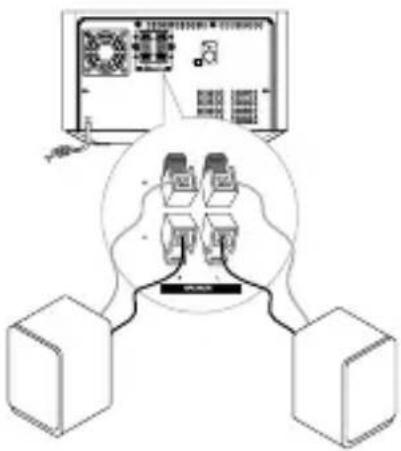
Connecting the speakers
flowchart
graph TD
    A["Central Device"] --> B["External Devices"]
    B --> C["Device 1"]
    B --> D["Device 2"]
    B --> E["Device 3"]
    style A fill:#f9f,stroke:#333
    style B fill:#ccf,stroke:#333
    style C fill:#cfc,stroke:#333
    style D fill:#fcc,stroke:#333
    style E fill:#cff,stroke:#333
Connect the cable with a black head to the (-) terminals and cable with a red head to the (+) terminals.
- Opened the socket flap.
- Insert the stripped part of the wire completely.
- Closed the socket flap.
Connecting the FM antenna
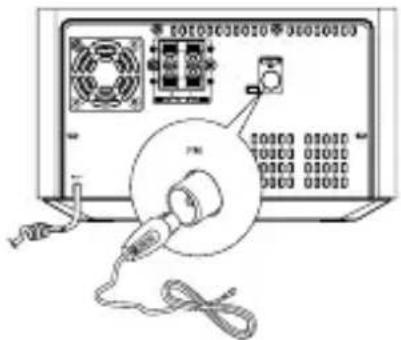
Connect the supplied FM Antenna to the FM aerial socket on the rear of the unit.
Caution:
To avoid noise, keep antenna away from the unit, the connecting cables and the AC power cord.
GB
Connecting the AC Power
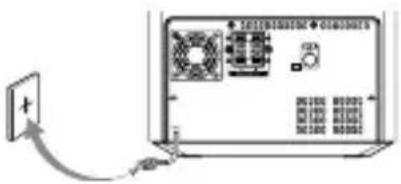
Insert the AC Power cable into a wall outlet, then your unit is ready to use.
Caution:
Be sure to unplug the power plug from the outlet when going out or when the unit is not in use for an extended period of time.
ECO POWER/STANDBY FEATURES
Turning the unit to ON / OFF
When you first connect the unit to the AC power, the unit will be in standby mode.
- Press the ⏻ button to switch the unit on, the unit will switch to the last selected source.
- Press the button on the unit for 2 seconds or more or button on the remote control to switch the unit back to standby mode, the clock display.
Switching the unit to ECO Power/Standby mode
- In standby mode, press and hold the button for 2 seconds or more to switch ECO power standby, the ECO indicator light turns on, and the display turns off.
- In ECO Power mode, press the button to switch standby, the clock display on the LCD.
Power-saving automatic standby
As a power-saving feature, the unit will automatically switch to Standby mode if you do not press any buttons within 10 minutes after playback is stopped.
SETTING THE CLOCK
Setting the Clock Manually
Caution: You can set the clock in standby mode only.
- In standby mode, press and hold the CLOCK button on the remote control for 2 seconds or more to activate the clock setting mode, the time format [24] or [12] begins to blink.
- Set the 12/24 hour format with the I◄◄/►►/TUNING, - PRESET/ALBUM + buttons on the unit or ▲,▼,I◄◄,►►I buttons on the remote control.
- Press the CLOCK button to confirm, hour indicator will blink.
- Repeat above steps 2-3 to set the hour and minute.
Note:
- To exit clock setting mode without storing, press the button on the remote control.
■ button on the unit or ▶ 11/■ - If no button is pressed in 10 seconds, the unit exits clock setting mode automatically.
- If a power failure occurs or the unit is disconnected from the mains, the clock setting will be lost.
Display the Clock
In any source mode, the built-in clock shows the time on the display by press the CLOCK button.
SOUND QUALITY
Adjusting the Volume
To increase or decrease the volume, rotate the VOLUME knob on the unit or press the + button on the remote control.
Mute sound
During play, press the 🔊 button on the remote control to mute or unmute sound.
Note: If you change the volume or source when the sound is muted, muting is cancelled.
Changing the Front Panel Darkness
To dim or brighten the display, press and hold the 📄 button on the remote control for 2 seconds or more to the desired brightness.
Listen through headphone
Plug a headphone into the ⏻ (PHONES) socket on the unit.
DISC (AUDIO CDs AND MP3 DISCs) OPERATION
Disc Playing
- Repeatedly press the SOURCE button to select the disc source, LCD will display "CD".
- Press the ▲ button on the unit to open the disc tray and place the disc (with the printed side up).
- Press the ▲ button on the unit to close the disc tray, the unit will read the disc and play it automatically.
Note: If in stop mode, please press the ▶■ button to start playing the disc.
-
Press the ▶■ button to temporarily stop the playing, press the button again, it will continue to play.
-
Press the ■ button on the unit or press and hold the ▶■/■ button on the remote control for 2 seconds or more to stop the disc playing.
To Skip or Search and Play
- Press the ◀◀◀, ▶▶▶I buttons once or more to skip previous/forward one or more tracks on the disc.
- Press and hold the ◀◀◀, ▶▶▶I buttons to search for the position that you intend to start playing. Release to resume normal play.
Programme Play
You can programme up to 20 tracks for audio CDs and 99 tracks for MP3 to play in any desired order.
The player must be in stop mode only with a CD inserted.
- Insert a disc and press the ■ button on the unit or press and hold the ▶■/■ button on the remote control for 2 seconds or more when it playing.
- Press the PROG button on the remote control, LCD will blink "PROG" and "P01".
- Press the ◀◀◀,▶▶I buttons to select the desired track number.
- Press the PROG button on the remote control to confirm the track number to be stored.
- Repeat steps 3-4 to select and store all desired tracks.
- Press the ▶■ button to start programme play.
- Press the ■ button on the unit or press and hold the ▶■/■ button on the remote control for 2 seconds or more to stop the programme play.
Press the ■ button on the unit or press and hold the ▶■/■ button on the remote control for 2 seconds or more again to clear programme.
Playing Repeatedly
ONE and ALL repeat play and random can be set by pressing the CLOCK button on the unit for 2 seconds or more. (The unit default is in ALL repeat play mode when it is turned on, the icon "REP ALL" is displayed.)
- First press : All tracks are played in a random sequence, the icon "SHUF" is displayed.
- Second press : To cancel the repeat playing.
- Third press : The current track is played repeatedly, the icon "REP" is blink.
- Fourth press : All tracks are played repeatedly, the icon "REP ALL" is displayed.
To Select folder (For MP3 discs)
- During playing, press the ALBUM+/- buttons on the unit or ▲, ▼ buttons on the remote control to select the next/previous folder and the first file is play automatically.
- In stop mode, press the ALBUM+/- buttons on the unit or ▲,▼ buttons on the remote control to select a folder then press the ▶■ button to start play the first file.
FM RADIO OPERATION
Caution:
- Make sure that you have correctly connected and fully extended the FM antenna.
- You can program a maximum of 20 FM radio stations.
Tuning in to a Station
- Repeatedly press the SOURCE button to select the tuner source, LCD will display "TUNER".
- Select a station using one of the following methods.
- Auto Tuning
Press and hold the ◄◄◄/►►I/TUNING buttons on the unit or ◄◄◄/►►I buttons on the remote control for 2 seconds or more, the frequency changes down or up automatically until a station is found.
- Manual Tuning
Repeatedly press the ◄◄◄/►►I/TUNING buttons on the unit or ◄◄◄/►►I buttons on the remote control to change the frequency until you find the station you want.
- Preset Tuning (Available only after the stations are preset)
Repeatedly press the - PRESET/ALBUM + buttons on the unit or ▲, ▼ buttons on the remote control to select the desired preset number. Its band and frequency are displayed on the front panel.
Program radio stations
- Automatically
Press and hold the PROG button on the remote control for 2 second or more to activate automatic program mode.
- The frequency change on the display.
- All available stations are programmed.
- The first programmed radio station is broadcast automatically.
- Manually
- Tune to a radio station.
- Press the PROG button on the remote control to activate program mode, LCD will blink "PROG" and "P01".
- Press the ◄◄◄/►►►/TUNING buttons on the unit or ◄◄◄/►►► buttons on the remote control to allocate a number to this radio station.
Note: If you select more than 20, the preset number will be changed to "1" automatically.
-
Press the PROG button on the remote control again to store the station.
-
Repeat above steps 1 to 4 for each station you want to store in memory with a preset number.
Note: If the unit is unplugged or if a power failure occurs, the preset stations will not be erased.
PLAY FROM USB
- Insert the USB device's USB plug into the USB socket on the front of unit.
- Repeatedly press the SOURCE button to select the tuner source, LCD will display "USB".
-
The unit will read the USB and play it automatically.
-
In stop mode, press the ▶■ button to start playing. During playing, press the ▶■ button to temporarily stop the playing, press the button again, it will continue to play.
-
Press the ■ button on the unit or press and hold the ▶■/■ button on the remote control to stop playing.
Note: The player support the USB music file format of MP3.
To Select folder
- During playing, press the ALBUM+/- buttons on the unit or ▲, ▼ buttons on the remote control to select the next/previous folder and the first file is play automatically.
- In stop mode, press the ALBUM+/- buttons on the unit or ▲,▼ buttons on the remote control to select a folder then press the ▶■ button to start play the first file.
Playing Repeatedly
ONE and ALL repeat play and random can be set by pressing the CLOCK button on the unit for 2 seconds or more. (The unit default is in ALL repeat play mode when it is turned on, the icon "REP ALL" is displayed.)
- First press : All tracks are played in a random sequence, the icon "SHUF" is displayed.
- Second press : To cancel the repeat playing.
- Third press : The current track is played repeatedly, the icon "REP" is blink.
- Fourth press : All tracks are played repeatedly, the icon "REP ALL" is displayed.
To Skip or Search and Play
- Press the ◄◀◀ ▶▶▶I buttons once or more to skip previous/forward one or more tracks on the USB device's.
- Press and hold the ◀◀◀, ▶▶▶I buttons to search for the position that you intend to start playing. Release to resume normal play.
Charge your device
You can charge your device through the USB socket on the unit with a USB cable.
Note:
- The maximum current for USB charging is 5V -1A.
- Not all devices for USB charging are guaranteed.
PLAY FROM BLUETOOTH DEVICE
The Bluetooth ^® word mark and logos are registered trademarks owned by Bluetooth SIG, Inc. and any use of such marks by New One S.A.S is under license. Other trademarks and trade names are those of their respective owners.
- Repeatedly press the SOURCE button to select the tuner source, LCD will display "BT".
- Activate the Bluetooth function in your Bluetooth device (see the device user manual).
- Select "MUSE M-62 BTS" on your device for pairing.
- For elder devices, you need to input "0000" as pairing password.
-
Start music play on your Bluetooth device, you can use this unit to control the function to your Bluetooth device.
-
To pause/resume play, press ▶II.
- To skip to a track, press ◀◀◀,▶▶▶.
-
To increase or decrease the volume, press VOLUME knob on the unit or press the buttons on the remote control.
-
Press and hold the ▶▶▶ button for 2 seconds or more to disable the Bluetooth function from your Bluetooth device.
Note:
- The operational range is approximately 10 meters.
- Compatibility with all Bluetooth devices is not guaranteed.
- Any obstacle can reduce the operational range.
- If the signal strength is weak, your Bluetooth receiver may disconnect, but it will re-enter pairing mode automatically.
Hereby, NEW ONE S.A.S, declares that this MUSE M-62 BTS / M-62 FB is in compliance with the essential requirements and other relevant provisions of Directive 2014/53/EU. The declaration of conformity may be consulted at www.muse-europe.com
SETTING THE SLEEP TIMER
When the unit is turned on, repeatedly press the TIMER button on the remote control to select a set period of time (in minutes): 15, 30, 45, 60, 90, 120
Note:
When sleep timer is activated, press the TIMER button, to display the time on the LED.
To deactivate sleep timer
Repeatedly press the TIMER button on the remote control until [OFF] is displayed.
SETTING THE DAILY ON TIMER
Caution: This unit can be used as an alarm clock, but please make sure the clock time is correct before setting the alarm time.
- In standby mode, press and hold the TIMER button on the remote control for 2 seconds or more, LCD will display " 🔒" and blink the hour digits.
- Press the ◄◀◀/▶▶▶I/TUNING, - PRESET/ALBUM + buttons on the unit or ▲, ▼, ◀◀◀, ▶▶▶I buttons on the remote control to set the hour.
- Press the TIMER button to store the setting, the minute digits blink.
- Repeat steps 2-3 to set the minute, source and adjust volume.
Caution:
- To exit timer setting mode without storing, press the ■ button.
- If no button is pressed in 10 seconds, the unit exits clock setting mode automatically.
- If DISC or USB source is selected and the audio cannot be played, TUNER is activated automatically.
To deactivate or re-activate an alarm timer
In standby mode, press the TIMER button to activate or deactivate timer.
- If timer is activated, " ⊕" is displayed.
USING HEADPHONES / EARPHONES (NOT INCLUDED)
Maximum output voltage ≤ 150mV
HEADPHONE VOLUME WARNING
Connect earphones with the volume set low and increase it if required. Prolonged listening through some earphones at high volume settings can result in hearing damage. When headphones/earphones are connected, no sound will be emitted from the unit's speaker.
Caution: Avoid listening to sound at levels which may be harmful to your ears.
To prevent possible hearing damage, do not listen at high volume levels for long periods.
LISTEN TO AN EXTERNAL DEVICE
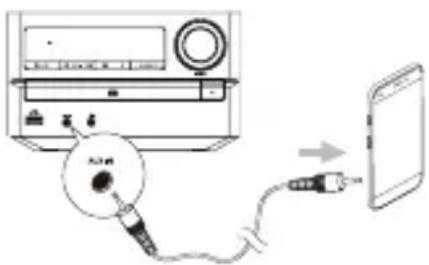
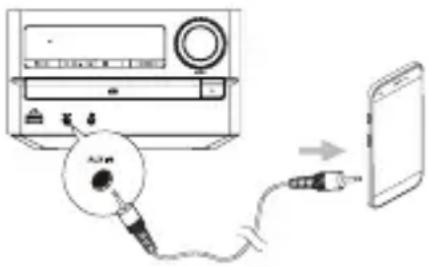
- Connect the AUDIO IN terminals on the font of unit to the headphone socket on the external device with the MP3-LINK cable (not supplied).
- Repeatedly press the SOURCE button to select the tuner source, LCD will display "AUX".
- Start to play on the device (see the user manual of the external device).
SPECIFICATIONS
Power requirements : 100-240V\~50/60Hz
FM Tuning range : 87.5 – 108.0 MHz
USB Port : 5V 1A
=
Bluetooth
Bluetooth version : 5.4
Frequency range : 2.402 – 2.480 GHz
RF Output Power : 1.08 dBm
Maximum communication Range : approx.10m
Note: Design and specifications are subject to change without prior notice.
MAINTENANCE
Cleaning the Unit
Note: Ensure the unit is fully unplugged from the mains socket before cleaning.
- To clean the unit, wipe the case with a slightly moist, lint-free cloth.
- Do not use any cleaning fluids containing alcohol, ammonia or abrasives.
- Do not spray an aerosol at or near the unit.
Handling Discs
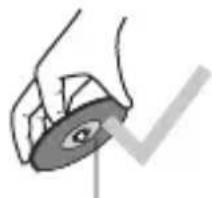
- Do not touch the playback side of the disc.
- Do not attach paper or tape to the disc.
natural_image
Illustration of a hand holding an eye with a checkmark (no text or symbols)Playback side

Cleaning Discs

natural_image
Simple line drawing of a hand pressing a button on a circular object (no text or symbols)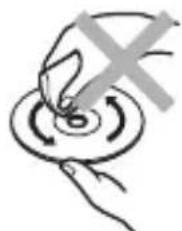
natural_image
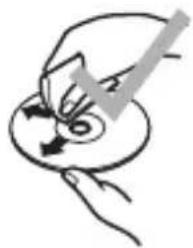
Hand holding a circular button with directional arrows, no text or symbols present- Fingerprints and dust on the disc cause picture and sound deterioration. Wipe the disc from the centre outwards with a soft cloth. Always keep the disc clean.
- If you cannot wipe off the dust with a soft cloth, wipe the disc lightly with a slightly moistened cloth and finish with a dry cloth.
- Do not use any type of solvent such as thinner, benzine, commercially available cleaners or antistatic spray. They may damage the disc.
Storing Discs
- Do not store discs in places subjected to direct sunlight or near heat sources.
- Do not store discs in places subjected to moisture and dust such as a bathroom or near a humidifier.
- Storing discs vertically in a case, stacking discs or placing objects on discs outside of their cases may cause warping.
TROUBLESHOOTING
If you are having a problem with your unit, check this list for a possible solution before calling for service.
If you cannot solve the problem from the hints given here, or the unit has been physically damaged, call a qualified person, such as your dealer, for service.
No power
- Ensure that the AC plug of the unit is connected properly.
- Ensure that there is power at the AC outlet.
- To save power, the unit switches to standby automatically 15 minutes after a play reaches the end and no control is operated.
No response from the unit
- Disconnect and reconnect the AC plug, then turn on the unit again.
Remote control does not work
- Before pressing any function button, first select the correct source with the remote control instead of the main unit.
- Reduce the distance between the remote control and the unit.
- Insert the battery with its polarities (+/- signs) aligned as indicated.
- Replace the batteries.
- Aim the remote control directly at the sensor on the unit.
No disc detected
- Insert a disc.
- Check if the disc is inserted with the print side facing inward.
- Wait until the moisture condensation at the lens has cleared.
- Replace or clean the disc.
- Use a finalized CD or correct format disc.
Cannot display some files in USB device
- The number of folders or files in the USB device has exceeded a certain limit. This phenomenon is not a malfunction.
- The formats of these files are not supported.
USB device not supported
- The USB device is incompatible with the unit. Try another one.
Poor radio reception
- Increase the distance between the unit and your TV or VCR.
- Fully extend and adjust the DAB/FM antenna.
Music playback is unavailable on this unit even after successful Bluetooth connection.
- The device cannot be used to play music through this unit wirelessly.
The audio quality is poor after connection with a Bluetooth-enabled device.
- The Bluetooth reception is poor. Move the device closer to this unit or remove any obstacle between them.
Cannot connect with this unit.
- The device does not support the profiles required for this unit.
- The Bluetooth function of the device is not enabled. Refer to the user manual of the device to find out how to enable the function.
- This unit is not in pairing mode.
- This unit is already connected with another Bluetooth-enabled device. Disconnect that device and then try again.
Timer does not work
- Set the clock correctly.
- Switch on the timer.
Clock/timer setting erased
- Power has been interrupted or the power cord has been disconnected.
- Reset the clock/timer.
SAFETY INSTRUCTIONS
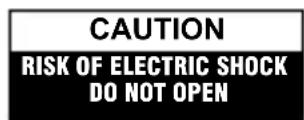
CAUTION: To reduce the risk of electric shock, do not open the device, there is no party inside for the user. Refer all servicing to qualified personnel.
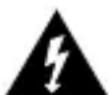
The lightning with the arrow symbol in the triangle is a warning sign alerting the user to "dangerous voltage" inside the unit.

The exclamation point in the triangle is a warning sign alerting the user of important instructions accompanying the product.
The caution mark is located on the bottom of the device.
WARNING: TO PREVENT FIRE OR SHOCK HAZARD, DO NOT EXPOSE THIS APPLIANCE TO RAIN OR MOISTURE.
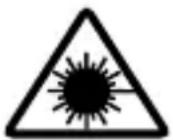
CAUTION: Invisible laser radiation when open and interlocks defeated. Avoid exposure to beam.
This compact disc player is classified as a CLASS 1 LASER product. The CLASS 1 LASER PRODUCT marking is located on the back cabinet.
CLASS 1 LASER PRODUCT PRODUCTO LÁSER CLASE 1 PRODUIT LASER DE CLASSE 1
IMPORTANT
- The use of apparatus in moderate climates.
- The Marking plate is located on the bottom of the device.
- Make sure to have a minimum distance of 5 cm around the unit for sufficient ventilation.
- Ensure that the ventilation openings is not covered with items such as newspapers, tablecloths, curtains, etc.
- Do not place naked flame sources, such as lighted candles on the apparatus.
- Do not expose this appliance to dripping or splashing water.
- Do not place objects filled with liquids, such as glass, vase on the device.
- The power plug is used as a disconnect device and must be easily accessible. To be completely disconnected from the power, the plug of the appliance should be disconnected completely. The socket must not be obstructed and should be easily accessible during intended use.
- The apparatus' maximum operating ambient temperature is 35^ C.
- Under the influence of fast transient and / or electrostatic electric phenomenon, the product may malfunction and the user must perform a power reset of the device
- The normal function of the product may be disturbed by strong Electro-Magnetic Interference. If so, simply reset the product to resume normal operation by following the instruction manual. In case the function could not resume, please use the product in other location.
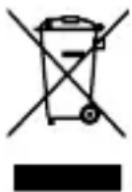
If in the future, you need to get rid of this product, please note that Waste electrical products should not be disposed of with household waste. Recycling facilities exist. Check with your municipality or ask your dealer for advice. (Directive for Waste Electrical and Electronic Equipment)
NEW ONE S.A.S
10, Rue de la Mission, 25480 Ecole Valentin, France
contact@muse-europe.com
CE
PT Microssistema Bluetooth com CD, FM e porta USB
CONTEÚDO DA EMBALAGEM
natural_image
Diagram of an electronic device with a central rotary knob connected to a cable, showing ports and wiring (no readable text or symbols)Ligue a antena FM fornecida à ficha de antena FM na parte traseira do aparelho.
Atenção:
natural_image
Illustration of a hand holding an eye within a circular device (no text or symbols)Lado de reprodução

Limpeza de Discos

natural_image
Simple line drawing of a hand holding a circular object with arrows indicating motion or force (no text or symbols)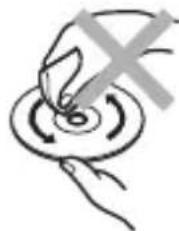
natural_image
Hand holding a circular object with arrows indicating rotation or movement (no text or symbols)CLASS 1 LASER PRODUCT
PRODUCTO LÁSER CLASE 1
PRODUIT LASER DE CLASSE 1
ATENÇÃO
natural_image
Illustration of a hand holding an eye with a checkmark (no text or symbols present)Wiedergabeseite

Reinigung der Discs

natural_image
Hand holding a circular object with arrows indicating motion or force (no text or symbols)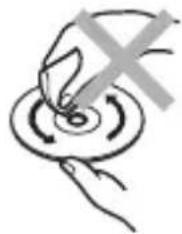
natural_image
Hand holding a circular object with arrows indicating rotation or movement (no text or symbols)CLASS 1 LASER PRODUCT PRODUCTO LASER CLASE 1 PRODUIT LASER DE CLASSE 1
ACHTUNG
natural_image
Illustration of a hand holding an eye with a checkmark (no text or symbols)
Lado de reproducció
Limpieza de discos

natural_image
Hand holding a circular object with arrows indicating rotation or movement (no text or symbols)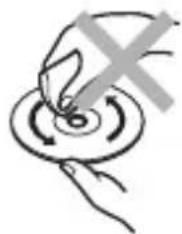
natural_image
Hand holding a circular object with arrows indicating rotation or movement (no text or symbols)CLASS 1 LASER PRODUCT PRODUCTO LÁSER CLASE 1 PRODUIT LASER DE CLASSE 1
ATENCIÓN
- ⏻
natural_image
Illustration of a hand holding an eye within a circular device (no text or symbols visible)Lato riproducibile

Pulizia dei dischi
natural_image
Hand holding a circular object with arrows indicating motion or force direction (no text or symbols)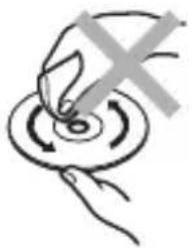
natural_image
Hand holding a circular button with arrows indicating rotation or clockwise motion (no text or symbols)CLASS 1 LASER PRODUCT PRODUCTO LASER CLASE 1 PRODUIT LASER DE CLASSE 1
ATTENZIONE
natural_image
Diagram of an electronic device with a central connector and cable, no visible text or symbolsWAARSCHUWING MET BETREKKING TOT HET VOLUME VAN DE HOOFDTELEFOON
NAAR EEN EXTERN APPARAAT LUISTEREN
natural_image
Illustration of a hand holding a circular object with an eye symbol, no text or symbols presentAfspeelkant

Schijven reinigen

natural_image
Hand holding a circular object with arrows indicating rotation or movement (no text or symbols)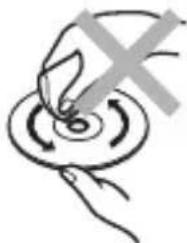
natural_image
Hand holding a circular object with arrows indicating rotation or movement (no text or symbols)CLASS 1 LASER PRODUCT PRODUCTO LÁSER CLASE 1 PRODUIT LASER DE CLASSE 1
OPGELET
- IMPORTANT
- BLUETOOTH MICRO SYSTEM WITH CD, FM AND USB PORT
- PACKAGE CONTENTS
- PRODUCT OVERVIEW
- Remote Control Overview
- ⏻
- ▲
- 3.
- SOURCE
- CLOCK
- 6.
- 7.
- PROG
- ▶□□/□
- 10.
- ▼
- TIMER
- 13.
- Installation of Battery
- Notes:
- WARNING
- Remote Control Operation Range
- Note:
- CONNECTIONS
- Connecting the speakers
- Connecting the FM antenna
- Caution:
- GB
- Connecting the AC Power
- ECO POWER/STANDBY FEATURES
- Turning the unit to ON / OFF
- Switching the unit to ECO Power/Standby mode
- Power-saving automatic standby
- SETTING THE CLOCK
- Setting the Clock Manually
- Display the Clock
- SOUND QUALITY
- Adjusting the Volume
- Mute sound
- Changing the Front Panel Darkness
- Listen through headphone
- DISC (AUDIO CDs AND MP3 DISCs) OPERATION
- Disc Playing
- To Skip or Search and Play
- Programme Play
- Playing Repeatedly
- To Select folder (For MP3 discs)
- FM RADIO OPERATION
- Tuning in to a Station
- - Manual Tuning
- - Preset Tuning (Available only after the stations are preset)
- Program radio stations
- - Automatically
- - Manually
- PLAY FROM USB
- To Select folder
- Charge your device
- PLAY FROM BLUETOOTH DEVICE
- SETTING THE SLEEP TIMER
- To deactivate sleep timer
- SETTING THE DAILY ON TIMER
- To deactivate or re-activate an alarm timer
- USING HEADPHONES / EARPHONES (NOT INCLUDED)
- HEADPHONE VOLUME WARNING
- LISTEN TO AN EXTERNAL DEVICE
- SPECIFICATIONS
- Bluetooth
- MAINTENANCE
- Cleaning the Unit
- Handling Discs
- Cleaning Discs
- Storing Discs
- TROUBLESHOOTING
- No power
- No response from the unit
- Remote control does not work
- No disc detected
- Cannot display some files in USB device
- USB device not supported
- Poor radio reception
- Music playback is unavailable on this unit even after successful Bluetooth connection.
- The audio quality is poor after connection with a Bluetooth-enabled device.
- Cannot connect with this unit.
- Timer does not work
- Clock/timer setting erased
- SAFETY INSTRUCTIONS
- WARNING: TO PREVENT FIRE OR SHOCK HAZARD, DO NOT EXPOSE THIS APPLIANCE TO RAIN OR MOISTURE.
- PT Microssistema Bluetooth com CD, FM e porta USB
- CONTEÚDO DA EMBALAGEM
- Limpeza de Discos
- ATENÇÃO
- Reinigung der Discs
- ACHTUNG
- Limpieza de discos
- ATENCIÓN
- Pulizia dei dischi
- ATTENZIONE
- WAARSCHUWING MET BETREKKING TOT HET VOLUME VAN DE HOOFDTELEFOON
- NAAR EEN EXTERN APPARAAT LUISTEREN
- Schijven reinigen
- OPGELET
Brand : MUSE
Model : M-62 BTS
Category : Hi-fi system