
CH1924 - Heat press Vevor - Free user manual and instructions
Find the device manual for free CH1924 Vevor in PDF.
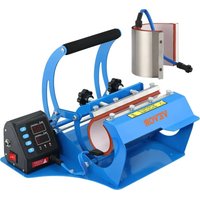


| Product Type | Heat Press for Mugs and Cylindrical Objects |
| Brand | VEVOR |
| Model | CH1924 / TLK2420OZ-S |
| Heating Plate Size | 24 x 23 cm (9.4 x 9 inches) |
| Temperature Range | 0-232 °C (32-450 °F) |
| Timer Range | 0-999 seconds |
| Voltage / Power | 120 V ~ 60 Hz 500 W (US) / 230 V ~ 50 Hz 500 W (EU) |
| Heating Pad Material | Stainless Steel |
| Maximum Cup Capacity | Diameter 87 mm, height 240 mm, up to 20 oz |
| Pressure Adjustment | Adjustable handwheel |
| Display | LED screen for temperature and time |
| °C/°F Switching | Yes, via MINUS button held for 5 seconds |
| Power Supply Required | Grounded mains outlet |
| Main Functions | Heat press for sublimation on mugs, bottles, cups |
| Care and Cleaning | Clean with a damp cloth; do not immerse in water |
| Safety | Automatic shut-off, overheat protection, grounding required |
| Spare Parts and Repairability | Replaceable heating plate, relay, fuse; technical support via vevor.com/support |
| General Information | Indoor use only; working ambient temperature: 10-40 °C |
Frequently Asked Questions - CH1924 Vevor
User questions about CH1924 Vevor
0 question about this device. Answer the ones you know or ask your own.
Ask a new question about this device
Download the instructions for your Heat press in PDF format for free! Find your manual CH1924 - Vevor and take your electronic device back in hand. On this page are published all the documents necessary for the use of your device. CH1924 by Vevor.
USER MANUAL CH1924 Vevor
Technical Support and E-Warranty Certificate www.vevor.com/support
HEAT PRESS MACHINE USER MANUAL
MODEL: TLK2420OZ-S
We continue to be committed to providing you with tools at competitive prices. "Save Half", "Half Price", or any other similar expressions used by us only represent an estimate of savings you might benefit from buying certain tools with us compared to the major top brands and do not necessarily mean to cover all categories of tools offered by us. You are kindly reminded to verify carefully when placing an order with us if you are actually saving half in comparison with the top major brands.
MODEL: TLK24020OZ-S
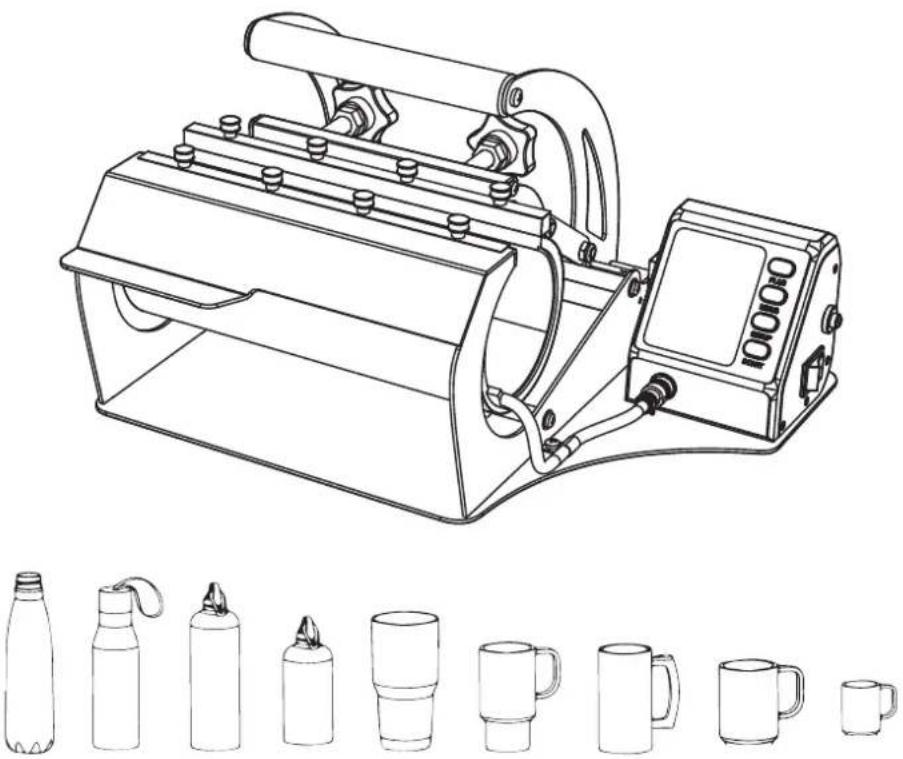
Max. diameter: 87 mm. Max. length: 240 mm. Up to 20 OZ stainless steel cup can be made.
NEED HELP? CONTACT US!
Have product questions? Need technical support? Please feel free to contact us:
Technical Support and E-Warranty Certificate www.vevor.com/support
This is the original instruction. Please read all manual instructions carefully before operating. VEVOR reserves a clear interpretation of our user manual. The appearance of the product shall be subject to the product you received. Please forgive us that we won't inform you again if there are any technology or software updates on our product.
| Symbol Symbol Description | |
 | Warning: To reduce the risk of injury, the user must read the instructions manual carefully. |
 | This symbol, placed before a safety comment, indicates a kind of precaution, warning, or danger. Ignoring this warning may lead to an accident. To reduce the risk of injury, fire, or electrocution, please always follow the recommendation shown below. |
 | Danger!Risk of personal injury or environmental damage! Risk of electric shock! Risk of personal injury by electric shock! |
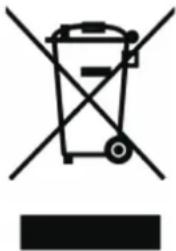 | CORRECT DISPOSAL:This product is subject to the provision of European Directive2012/ 19/EC. The symbol showing a wheelie bin crossed through indicates that the product requires separate refuse collection in the European Union. This applies to the product and all accessories marked with this symbol. Products marked as such may not be discarded with normal domestic waste, but must be taken to a collection point for recycling electrical and electronic devices. |

Read all safety warnings, instructions, illustrations, and specifications provided with this electrical appliance. Failure to follow all instructions listed below may result in electric shock, fire, and/or serious injury.

Warning:
When using electrical appliances, basic safety precautions should always be followed, including the following:
- Keep unplugged when moving the machine.
- Keep unplugged when installing accessories.
- Place on a flat and stable platform and operate under ventilated conditions.
- Wear special protective equipment when operating the machine.
- Do not use this machine in a hazardous location.
- Do not use when the machine is not working properly.
- Do not disassemble or repair this machine.
- Do not use an unsuitable AC outlet.
- Do not touch the heating plate when the machine is heating.
- Do not use in a humid environment or contact with water. Do not allow liquid to infiltrate the machine to prevent fire or electric shock caused by short circuit.
- Do not use a power supply that does not meet the rated voltage. A power supply that does not meet the specified voltage may cause fire or electric shock.
- Ensure that the machine is grounded so as not to cause harm to the body.
- Do not touch the rotating rod or bearing parts with your fingers during use to avoid injury.
- If the machine will not be used for a long time, unplug the power cord from the socket.
- Do not use the machine during thunderstorms or lightning to avoid damage.
- Place the machine on a stable, flame-retardant surface and keep it away from flammable and explosive items.
- If the machine smokes, emits an unusual odor, becomes noisy, or shows other abnormal conditions, stop using it immediately.
- This appliance can be used by children aged 8 years and above and persons with reduced physical, sensory, or mental capabilities or lack of experience and knowledge if they have been given supervision or instruction concerning use of the appliance in a safe way and understand the hazards involved. Children shall not play with the appliance. Cleaning and user maintenance shall not be made by children without supervision. To avoid a hazard due to inadvertent resetting of the thermal cutout, this appliance must not be supplied through an external switching device, such as a timer, or connected to a circuit that is regularly switched on and off by the utility.
SAVE THESE INSTRUCTIONS
FCC INFORMATION
CAUTION: Changes or modifications not expressly approved by the party responsible for compliance could void the user's authority to operate the equipment!
This device complies with Part 15 of the FCC Rules. Operation is subject to the following two conditions:
1) This product may cause harmful interference. 2) This product must accept any interference received, including interference that may cause undesired operation.
WARNING: Changes or modifications to this product not expressly approved by the party responsible for compliance could void the user's authority to operate the product.
Note: This product has been tested and found to comply with the limits for a Class B digital device pursuant to Part 15 of the FCC Rules.
These limits are designed to provide reasonable protection against harmful interference in a residential installation.
This product generates, uses and can radiate radio frequency energy, and if not installed and used in accordance with the instructions, may cause harmful interference to radio communications. However, there is no guarantee that interference will not occur in a particular installation. If this product does cause harmful interference to radio or television reception, which can be determined by turning the product off and on, the user is encouraged to try to correct the interference by one or more of the following measures.
- Reorient or relocate the receiving antenna.
- Increase the distance between the product and receiver.
- Connect the product to an outlet on a circuit different from that to which the receiver is connected.
- Consult the dealer or an experienced radio/TV technician for assistance.
SPECIFICATION
| Brand | VEVOR® |
| Model | TLK2420OZ-S |
| Heat Plate Size | 9.4x9 inch (24×23 cm) |
| Temperature Range | 32-450 °F (0-232 °C) |
| Timer Range | 0-999 Seconds |
| Voltage / Power | 120V~ 60Hz 500W For US users |
| 230V~ 50Hz 500W For European users |
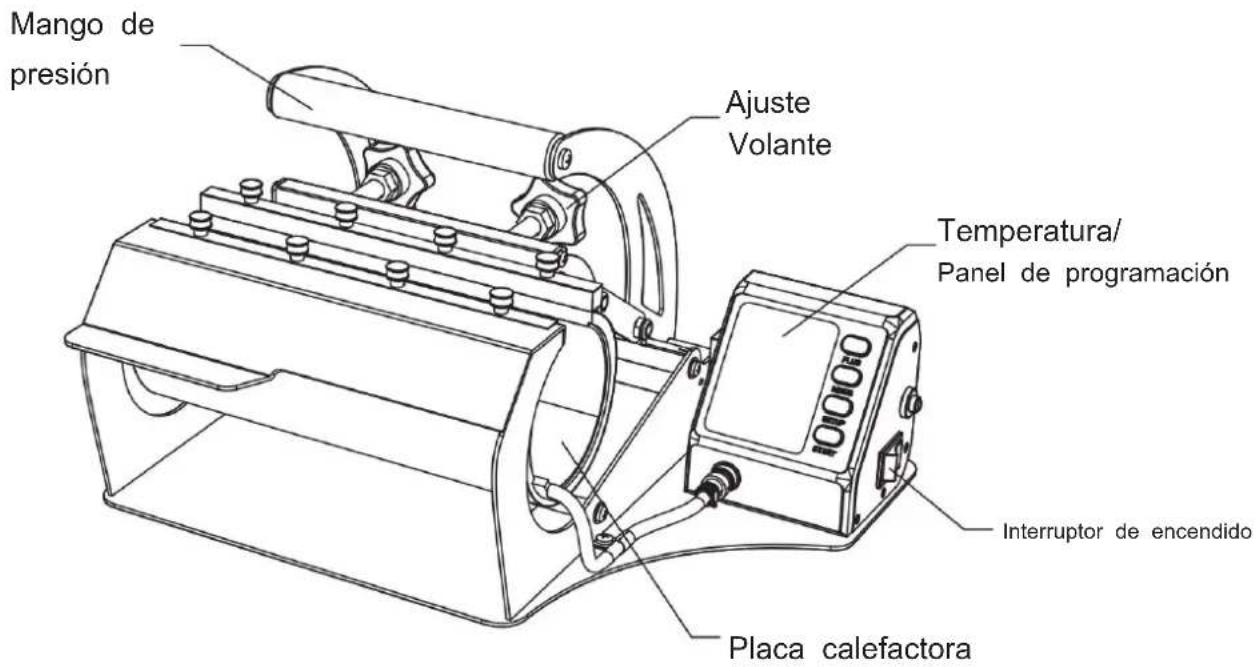
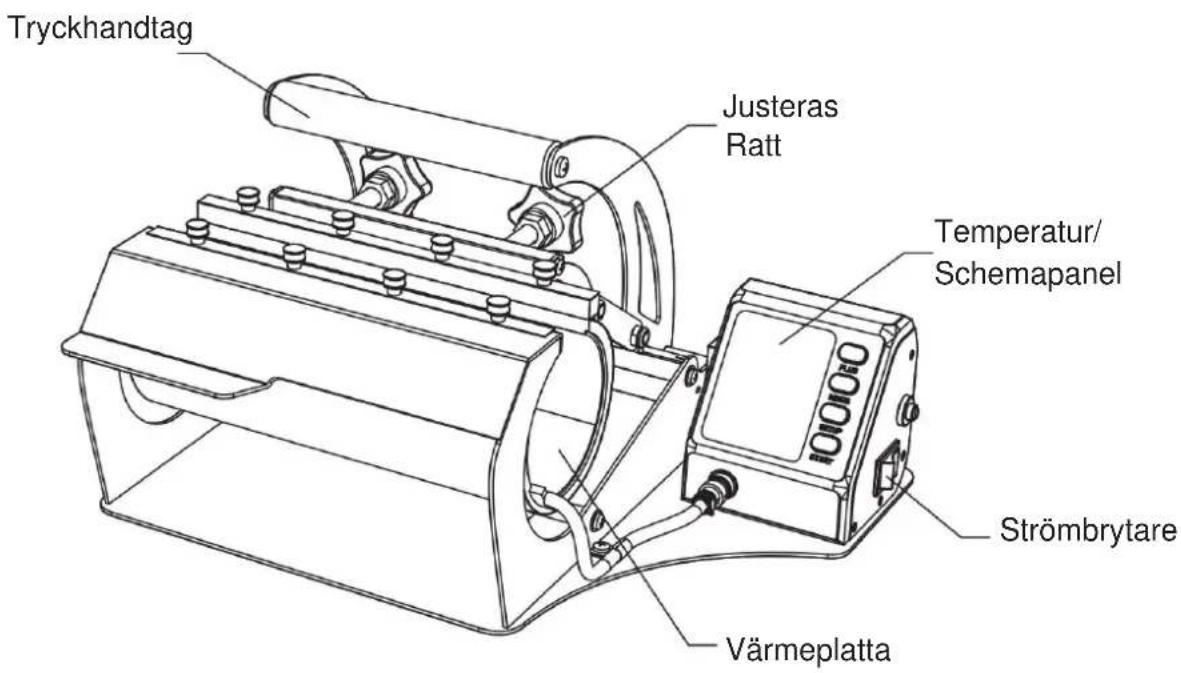
PRODUCT STRUCTURE DIAGRAM
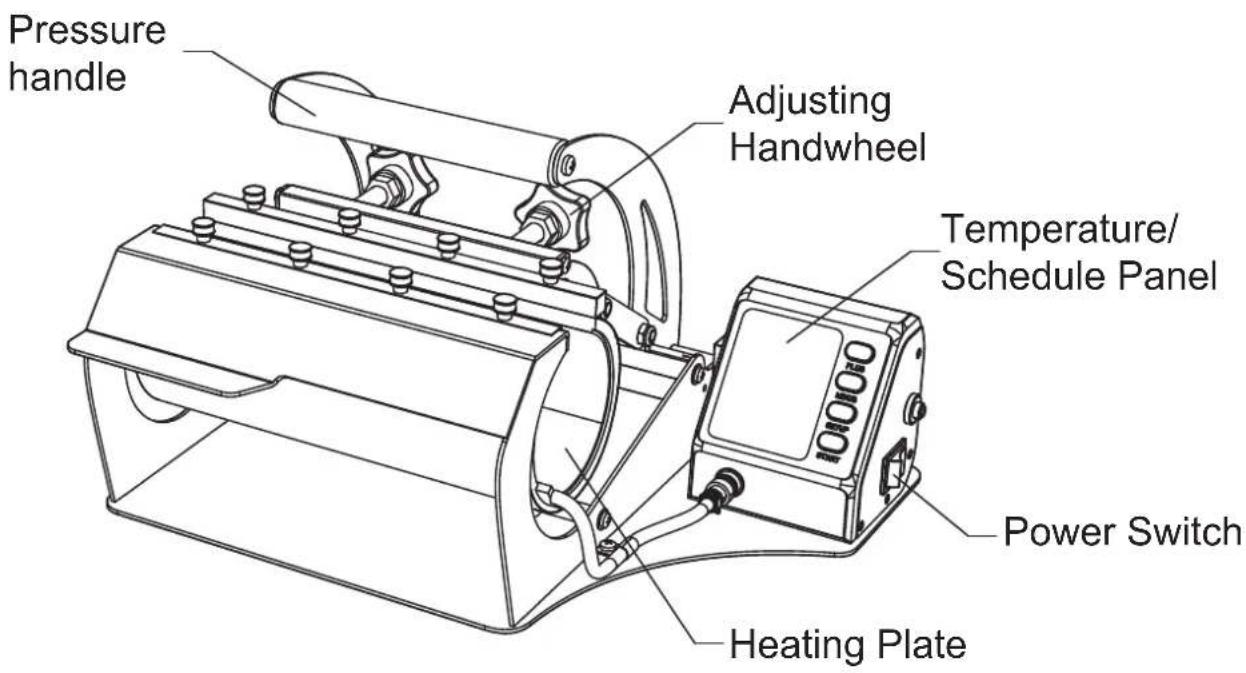
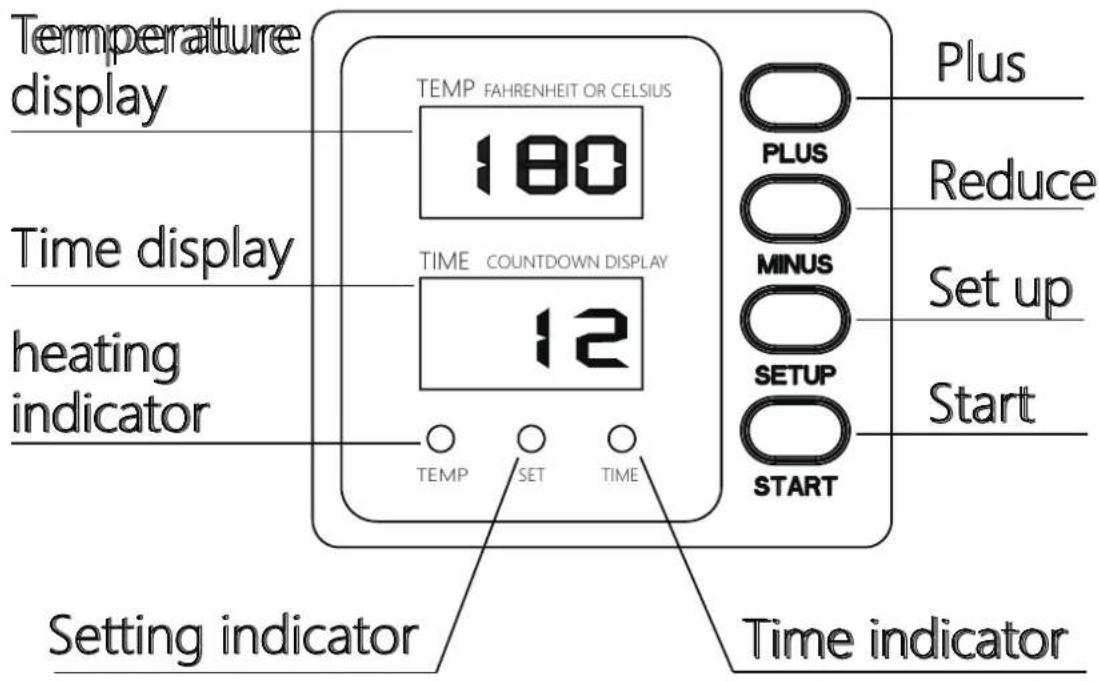
a. Connection power and parameters.
- Connect the machine to a 120V or 230V power supply according to the voltage shown on the equipment packaging. Turn on the main power switch.
(Note: The equipment must be grounded with a ground wire).
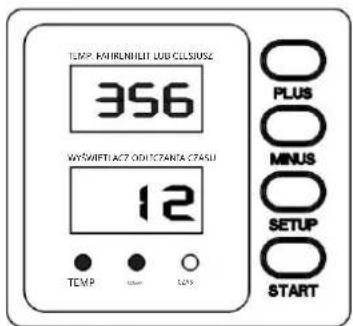
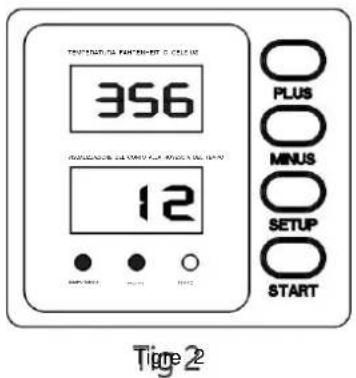
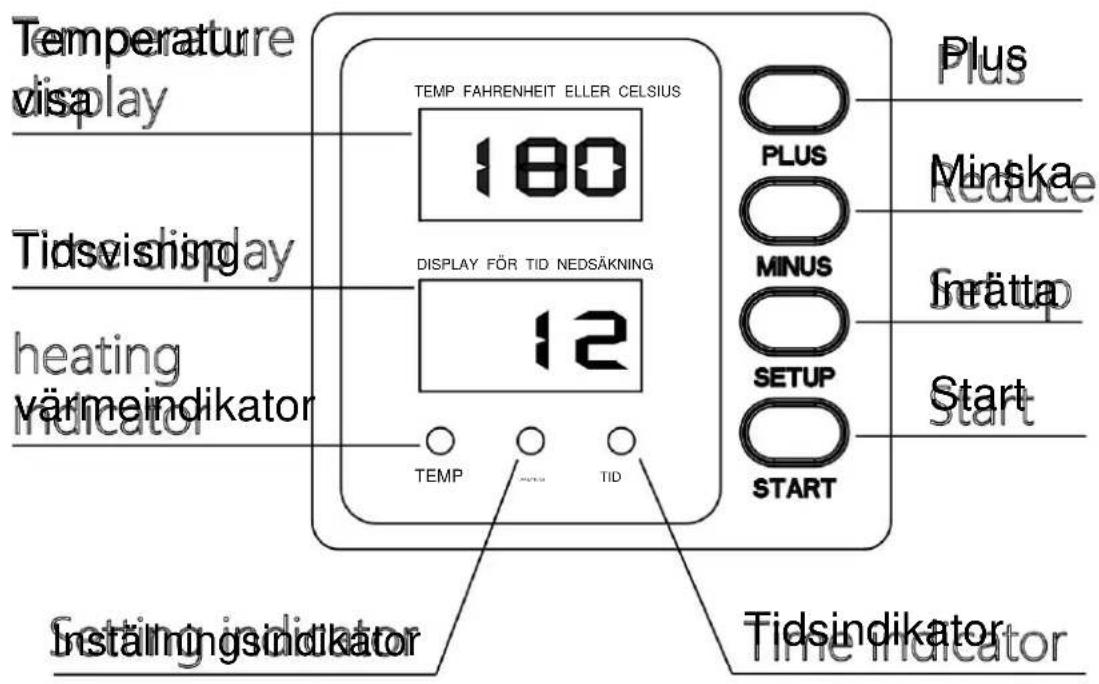
- Click "SETUP" to switch to temperature setting mode, the screen temperature value flashes (as shown in Figure 2), click the button "PLUS" to increase the set temperature, click the button "MINUS" to lower the set temperature.
When the desired temperature is set, click again "SETUP" again to exit the temperature setting mode.
(Hold down the "PLUS" or "MINUS" button to quickly increase or decrease the value).
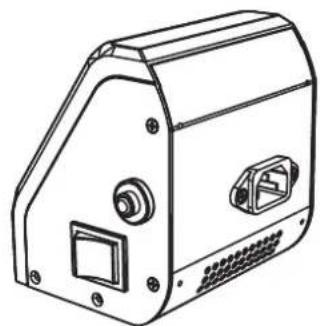
Fig 1
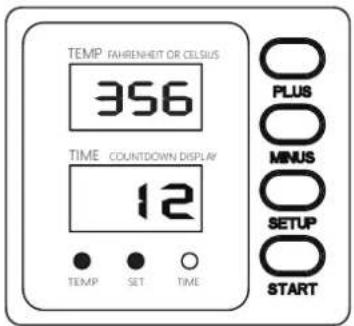
Fig 2
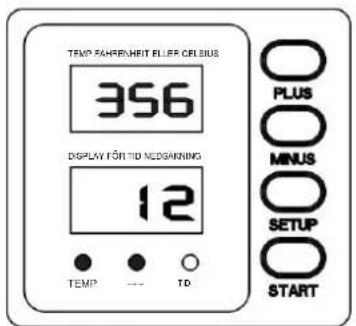
- Click "SETUP" twice to switch to time setting mode, the screen time value flashes (as shown in Figure 3), click the button "PLUS" to increase the set working time, click the button "MINUS" to lower the set working time. When the desired time is set, click again "SETUP" again to exit the time setting mode.
(Hold down the "PLUS" or "MINUS" button to quickly increase or decrease the value).
- After waiting for 10 to 15 minutes, the device heats up to the set temperature and the heating indicator goes off, The equipment stops heating.
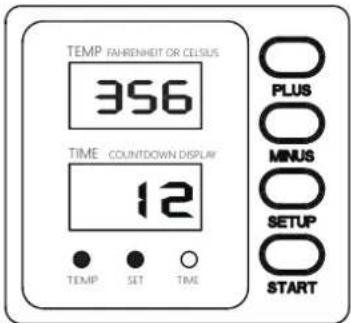
Fig 3
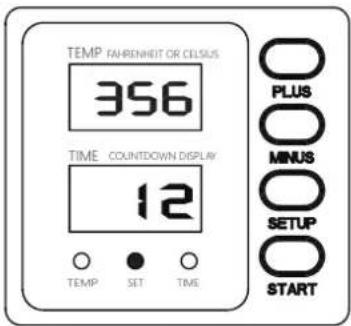
Fig 4
- Adjust the knob handwheel, try to close the device several times to adjust to the appropriate pressure, turn the handwheel clockwise to increase the device pressure; turn the handwheel counterclockwise to reduce the device pressure until the appropriate pressure.
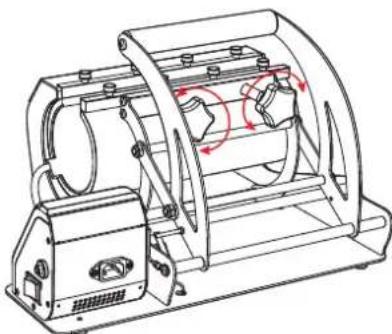
Fig 5
- Wrap sublimation transfer papers on the surface of the cup and stick it with a high-temp tape. Put the cup into the heating pad, adjust the pressure to an appropriate point, and press down the handle tightly. Turn on the switch, then set the temp and time. Wait for the heat to finish. Take out the cup when you hear a beep and finish transfer.
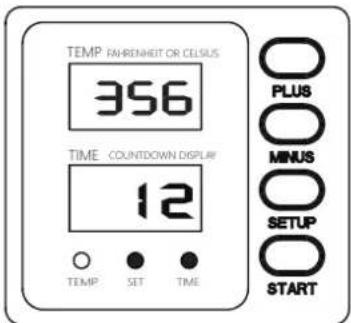
Fig 6
b. Switching F/C.
Press the "MINUS" button for 5 seconds to switch to F; conversely, press the "MINUS" button for 5 seconds to switch to C.
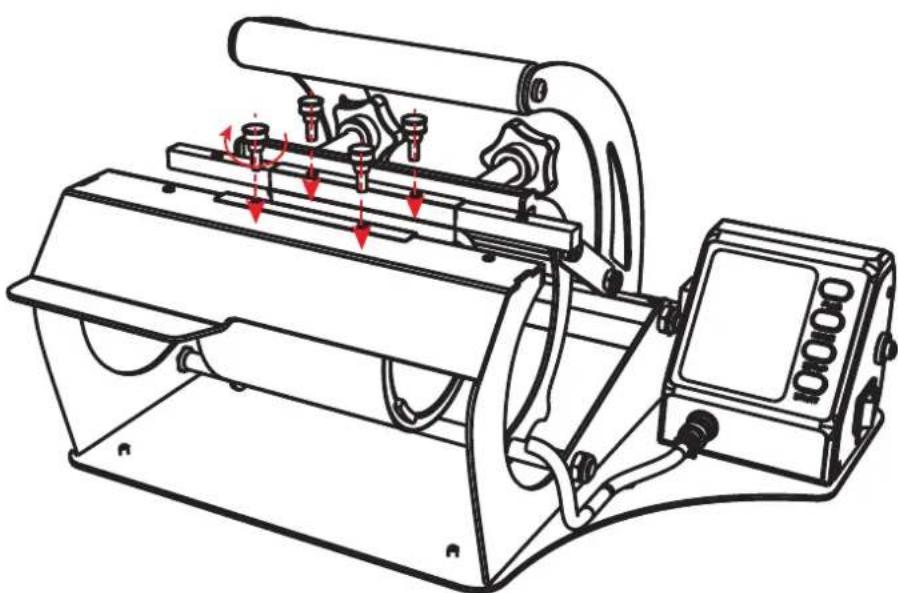
- Disconnect the main power supply, turn counterclockwise to release the safety cap of the aviation plug, and pull the aviation plug out from the controller. Turn the hand screws counterclockwise, remove the eight hand screws one by one, and remove the heating accessories.
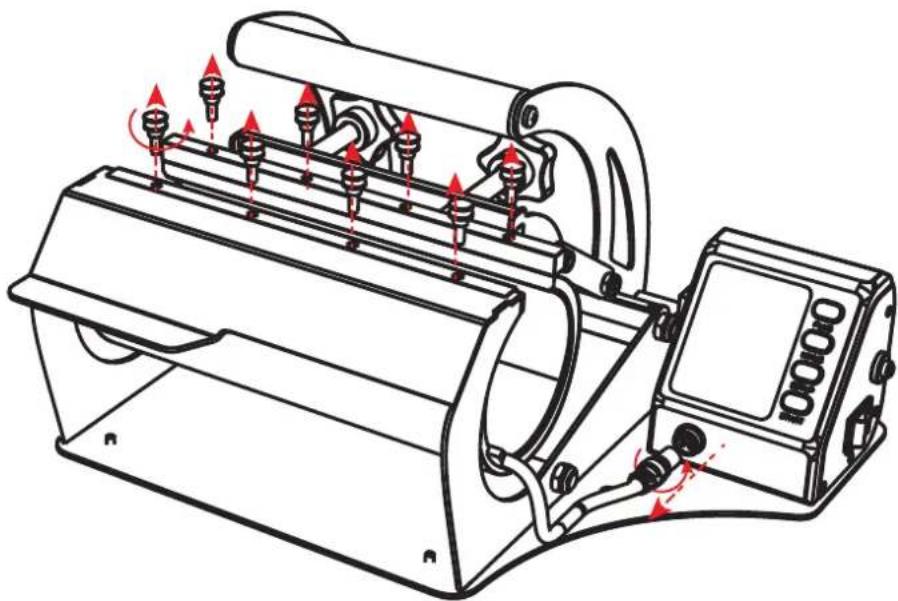
- Install the new machine parts, take one of the four screws and rotate clockwise to lock the fixed heating pad. Insert the aviation plug into the correct connection controller at the right angle, then rotate the aviation plug safety cap clockwise until it is locked, and open the main power switch to work normally.
 |  | 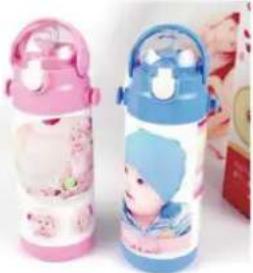 |
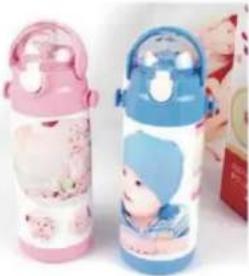
| Magic mug | Magic mug | Sport bottle |
| 180°C (360°F) 180s | 180°C (360°F) 180s | 180°C (360°F) 60s |
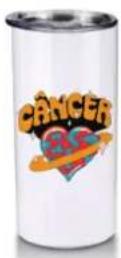 |  | 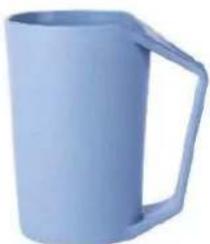 |
| 20 OZ Vacuum cup | 20 OZ Vacuum cup | ABS Plastic cup |
| 180°C (360°F) 60s | 180°C (360°F) 60s | 170°C (338°F) 25s |
COMMON PROBLEMS AND SOLUTIONS
| Problem | Cause Treatment method | |
| Cannot heated, but the screen displays normally. | Heater plate or relay damaged. | Check the heating plate or relay for damage. |
| Insufficient color, faded image. | Insufficient temperature/ Insufficient heating time. | Adjust temperature /increase heating time. |
| Dark color; blurred image. | Pressing time too long or the temperature too high. | Adjust temperature /increase heating time. |
| Machine Not Working after Power on. | Does the plug is touching well or the fuse is burning. | Check if the plug is touching well. |
| Check whether the fuse is burning. | ||
| Actual temperature exceeds set temperature. | Relay disconnected. | Relay disconnected, replace relay. |
VEVOR®
TOUGH TOOLS, HALF PRICE
Technical Support and E-Warranty Certificate
www.vevor.com/support
VEVOR®
TOUGH TOOLS, HALF PRICE
Tigys 1
Tyg 2
Tigys 5
ZAKRESICASTOSOWANIA
Tigre 5
PRODUCT STRUCTURE DIAGRAM
Tig 5
REPLACEMENT PARTS
COMMON PROBLEMS AND SOLUTIONS
PRODUCT STRUCTURE DIAGRAM
INSTRUCTIONS FOR USE
Tig 2
Tig 5
AREA OF USE
 |  |  |
| Magisk mugg | Magisk mugg | Sportflaska |
| 180 y (360 y ) 180 s180 y (360 y ) (360 y ) 60s | ||
 |  |  |
| 20 OZ Vakuumkopp | 20 OZ Vakuumkopp | ABS plastmugg |
| 180 y (360 y ) 60s180 y (360 170 60s(338 y ) 25s | ||
COMMON PROBLEMS AND SOLUTIONS
NEED HELP? CONTACT US!
www.vevor.com/support
PRODUCT STRUCTURE DIAGRAM
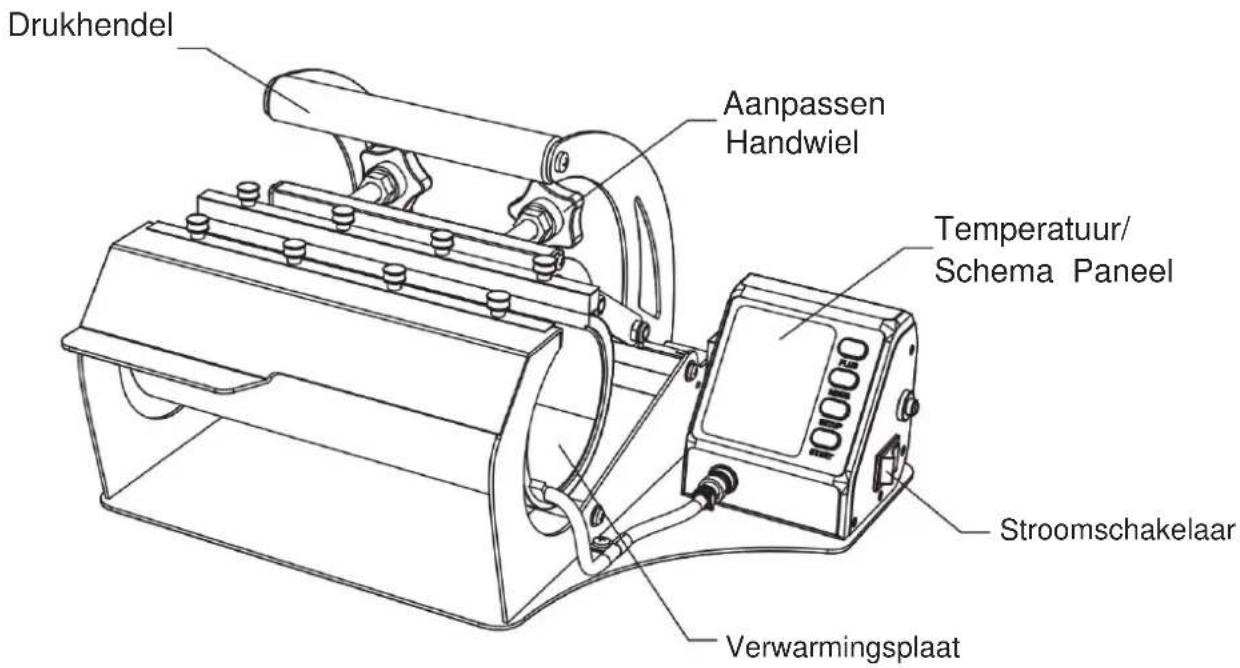
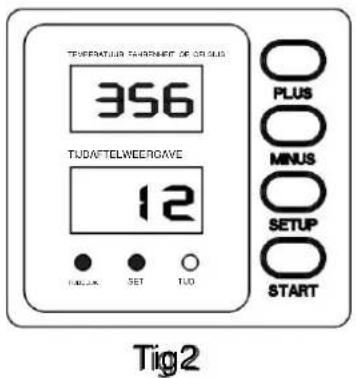
Tig 5
APPLICATION AREAS
| | |
| Magische mok | Magische mok | Sportfles |
| 180ÿ(360ÿ) 180s | 180ÿ(360ÿ) 180s 180ÿ(360ÿ) 60s | |
 | | |
| 20 OZ vacuümbeker ABS20 OZ vacuümbeker | ||
| 180ÿ(360ÿ) 60s | 170°C (338ÿ) 25 seconden18 | |
COMMON PROBLEMS AND SOLUTIONS
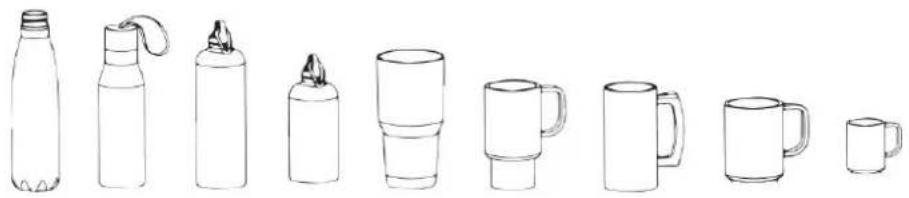
PRODUCT STRUCTURE DIAGRAM
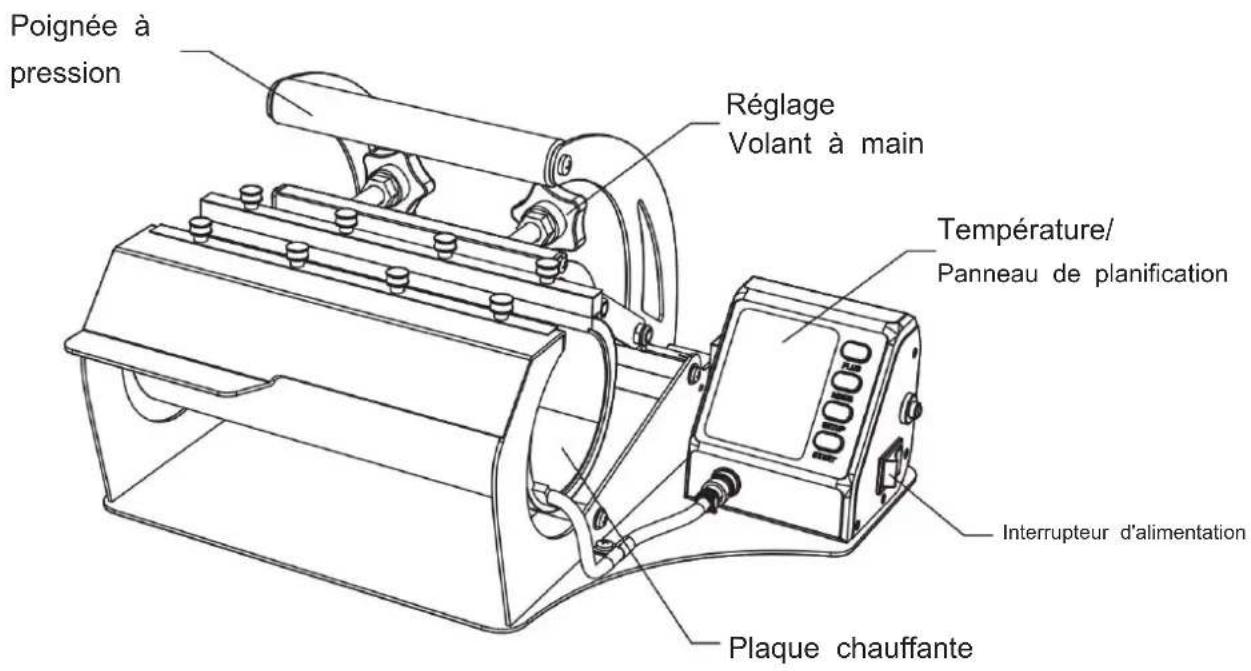
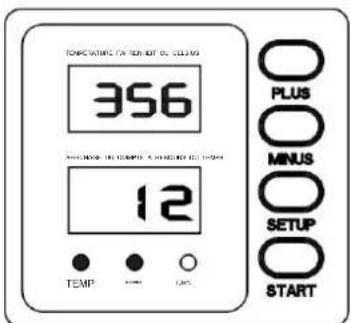
Fig. 2
Fig. 5
APPLICATION FIELD
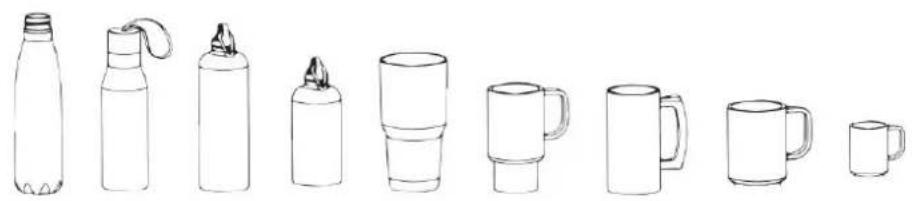
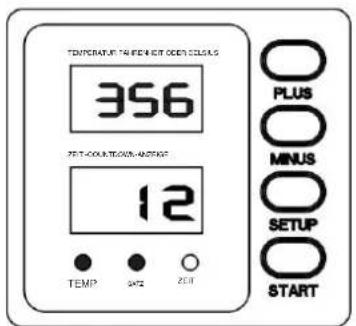
Fig. 2
Fig. 5
APPLICATION AREAS
| | |
| ZauberbecherZauberbecher Sportflasche | ||
| 180 y (360 y ) 180 s | 180 y (360 y ) 180 s 180 y (360 y ) 60 s | |
 | | |
| 20 OZ Vakuumbecher | 20 OZ Vakuumbecher | Becher aus ABS-Kunststoff |
| 180 y (360 y ) 60 s | 180 y (360 y ) 60 s 170°C (338 y ) 25 s | |
COMMON PROBLEMS AND SOLUTIONS

- HEAT PRESS MACHINE USER MANUAL
- MODEL: TLK24020OZ-S
- NEED HELP? CONTACT US
- WARNING
- SAVE THESE INSTRUCTIONS
- FCC INFORMATION
- PRODUCT STRUCTURE DIAGRAM
- CONNECTION POWER AND PARAMETERS
- SWITCHING F/C
- VEVOR®
- TOUGH TOOLS, HALF PRICE
- ZAKRESICASTOSOWANIA
- REPLACEMENT PARTS
- COMMON PROBLEMS AND SOLUTIONS
- INSTRUCTIONS FOR USE
- AREA OF USE
- APPLICATION AREAS
- APPLICATION FIELD
Brand : Vevor
Model : CH1924
Category : Heat press