
HD5850 - Cooker PHILIPS - Free user manual and instructions
Find the device manual for free HD5850 PHILIPS in PDF.

 FR
FR
 BG
BG
 CS
CS
 DA
DA
 DE
DE
 EL
EL
 EN
EN
 ES
ES
 ET
ET
 FI
FI
 HE
HE
 HU
HU
 IT
IT
 KK
KK
 LT
LT
 LV
LV
 MK
MK
 NL
NL
 NO
NO
 PL
PL
 PT
PT
 RO
RO
 RU
RU
 SK
SK
 SL
SL
 SQ
SQ
 SV
SV
 TR
TR
 UK
UK
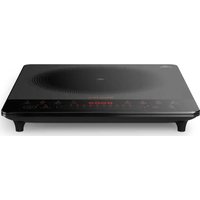
| Product type | Portable induction cooker |
| Brand | Philips |
| Model | HD5850 |
| Cooking zone | 1 zone, diameter 218 mm |
| Maximum power | 2000 W (estimated) |
| Power levels | 10 levels (P1-P10) + Boost |
| Preset cooking modes | 8 modes: slow cook, stew, BBQ, soup, wok, steam, boil, Chinese hot pot |
| Timer | Yes, adjustable from 1 to 180 minutes |
| Child lock | Yes, press and hold 3 seconds to disable |
| Control type | Touch panel with LED display |
| Compatible utensil diameter | 12 to 26 cm, flat magnetic base |
| Plate material | Ceramic glass |
| Dimensions (W x D x H) | Approximately 35 x 28 x 5 cm (estimated) |
| Weight | Approximately 2.5 kg (estimated) |
| Power supply | 220-240 V, 50/60 Hz |
| Cable length | Approximately 1 m |
| Cooling fan | Yes, built-in |
| Cleaning | Damp cloth and mild detergent; do not immerse |
| Maintenance | Avoid scratches, use suitable utensils |
| Safety | Auto shut-off, child lock, residual heat indicator |
| Repairability | Spare parts available via Philips service (estimated) |
Frequently Asked Questions - HD5850 PHILIPS
User questions about HD5850 PHILIPS
0 question about this device. Answer the ones you know or ask your own.
Ask a new question about this device
Download the instructions for your Cooker in PDF format for free! Find your manual HD5850 - PHILIPS and take your electronic device back in hand. On this page are published all the documents necessary for the use of your device. HD5850 by PHILIPS.
USER MANUAL HD5850 PHILIPS

English 6
Czech 14
Danish 22
German 30
Estonian 38
Spanish 46
French 54
Croatian 62
Italian 70
Latvian 78
Lithuanian 86
Hungarian 94
Dutch 102
Norwegian 110
Polish 118
Portuguese 126
Romanian 134
Albanian 142
Slovenian 150
Slovak 158
Serbian 166
Finnish 174
Swedish 182
Turkish 190
Greek 198
Bulgarian 206
Macedonian 214
Russian 222
Ukrainian 230
Kazakh 238
Hebrew 246
Introduction
Congratulations on your purchase and welcome to Philips!
To fully benefit from the support that Philips offers, register your product at www.philips.com/welcome.
General description
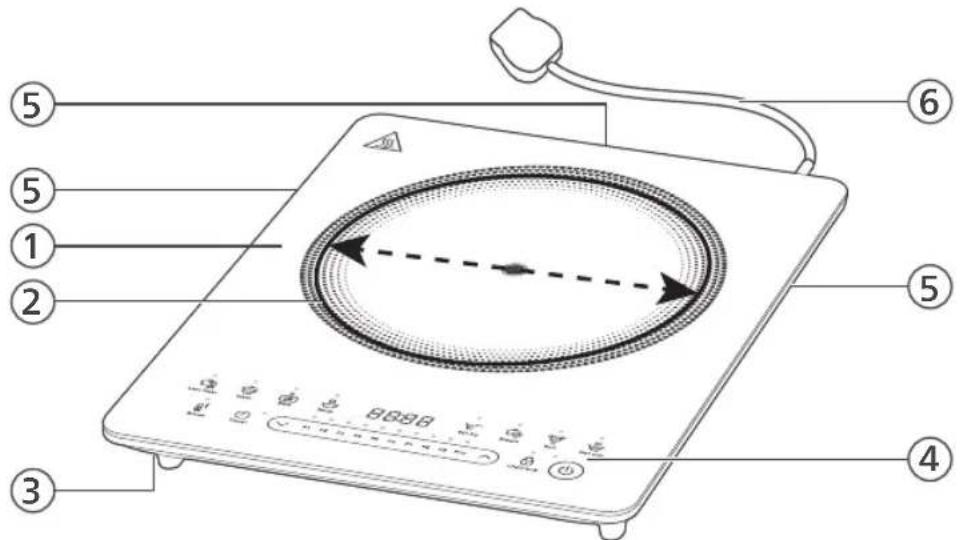
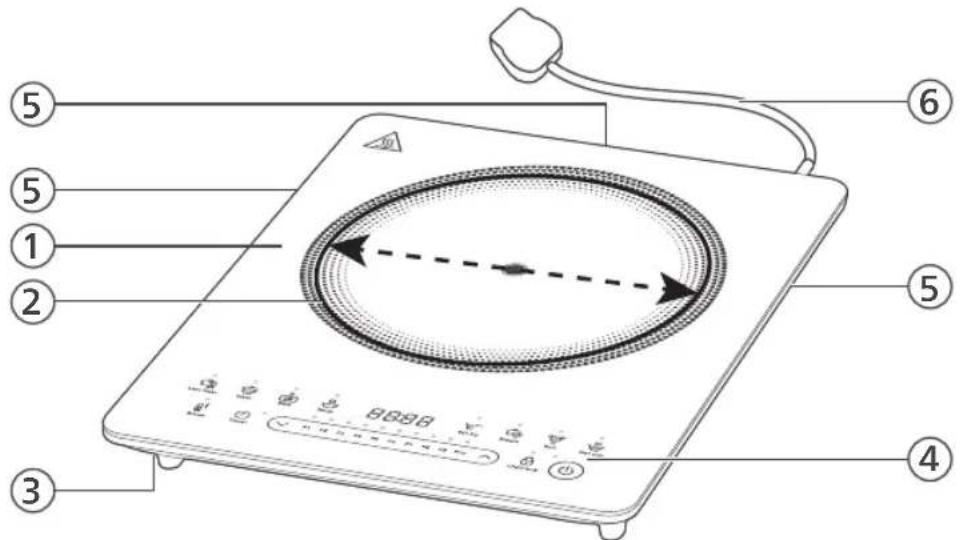
1 Cooking plate 2 Cooking zone (heating zone) - Cooking Zone Diameter: ∅ 218 mm 3 Air inlet 4 Control Panel 5 Air outlets 6 Power cord
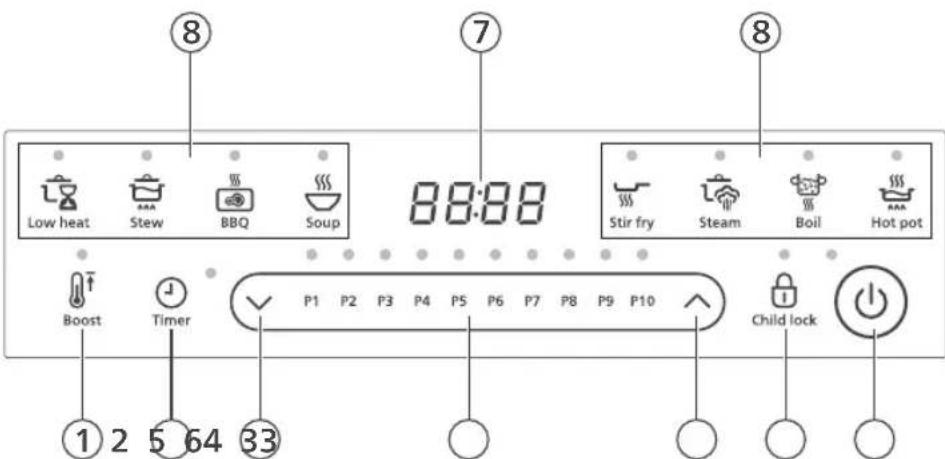
Control Panel
1 Boost button 2 Timer Button 3 Increase and decrease button 4 Power level 5 Child lock button 6 ON/OFF button 7 Status display 8 Preset cooking mode buttons
Preparing for use
1 Place the appliance on a dry, stable and level surface. 2 Make sure there is at least 10cm free space around the appliance to prevent overheating. 3 Always place the cookware on the cooking zone during cooking. 4 Make sure you use cookware of the correct types and sizes (see the tables below).
Choosing the proper cookware
Use cookware that meets below requirements:
Material: Cookware with a bottom made of iron or magnetic stainless steel
Shape: Cookware with a flat bottom
Do not use cookware described as below:
Material: Cookware with a bottom made of non-iron metal, heat resistant glass pots, ceramic, glass, aluminum or copper.
Shape: Cookware with a concave or convex bottom
Size: Cookware with a bottom diameter of less than 12 cm or more than 26 cm
Using the appliance
Cooking power level
| Cooking modes | Default Cooking Power | Default Cooking Time | Adjustable Cooking Power | Adjustable Cooking Time |
| Low heat P3 120 min P1-P4 1-180 min | ||||
| Stew P5-P3-P2 120 min P1-P10 1-180 min | ||||
| BBQ P6 60 min | P1-P10 1-180 min | |||
| Soup | P8-P5-P6-P2 | 120 min P1-P10 1-180 min | ||
| Stir Fry | P9 60 min | P1-P10 1-180 min | ||
| Steam P10-P6-P5 | 60 min | P1-P10 1-180 min | ||
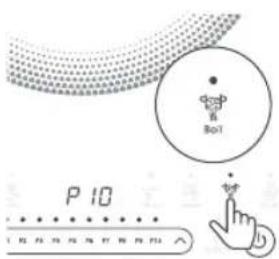
| Boil | P10 | 15 min | P1-P10 1-180 min | |
| Hot Pot | P10 | 120 min P1-P10 1-180 min | ||
| Boost | b | 60 min | P1-P10 1-180 min | |
| Manual mode | 60 min | P1-P10 1-180 min | ||
| Cooking Mode | Usage | |||
| Low Heat | Used for gentle cooking or keeping food warm over extended periods. Ideal for delicate dishes and maintaining serving temperature. | |||
| Stew | Used for slow-cooked dishes like stews and braises. Follows several automatic power stages but allows manual power changes for recipe customization. | |||
| BBQ | Suitable for grilling meats and vegetables on the pan or cookware. Power is manually adjustable and remains consistent for even cooking. | |||
| Soup | Used for making soup with automatic power adjustments to maintain optimal simmering and flavor extraction. Follows several automatic power stages. | |||
Stir Fry: Used for stir-frying with high heat and quick cooking. Power can be freely adjusted to suit different ingredients and techniques.
Steam: Used for steaming vegetables, seafood, and other items while preserving nutrients and texture.
Boil: Used for boiling water or food items. Starts at default power and allows manual adjustment of temperature and time for precise cooking.
Hot Pot: Used for hot pot meals with high initial power. Allows manual adjustment to maintain boiling and accommodate various ingredients.
Boost: Provides high heat quickly for searing or rapid cooking. Suitable for tasks requiring immediate high temperature.
Manual Mode: Allows manual setting of power level using increase or decrease buttons. Suitable for users who prefer full control over cooking settings.
Using the preset cooking modes
There are eight preset cooking modes: Low Heat, Stew, BBQ, Soup, Stir fry, Steam, Boil and Hot pot.
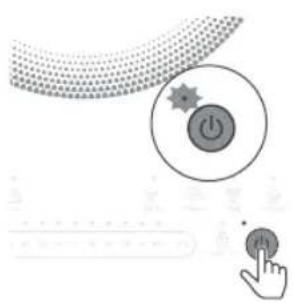
1. Follow the steps in "Preparing for use".
2. Press the ON/OFF button to switch on the appliance.
- The ON/OFF indicator lights up.
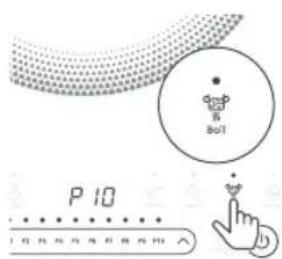
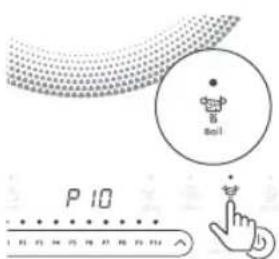
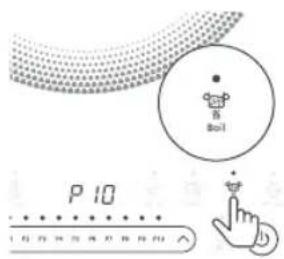
3. Press the button of the desired cooking mode.
- The corresponding indicator lights up.
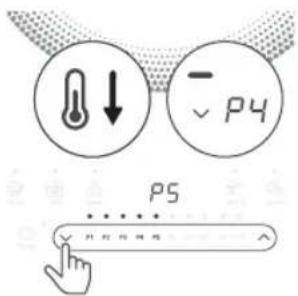
- To increase or decrease cooking power, press / or .
- The appliance starts working in the selected mode.
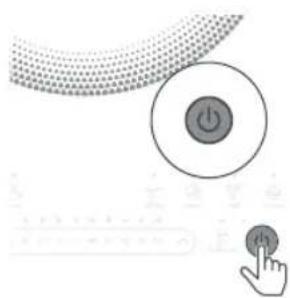
4. When the cooking is finished, press the ON/OFF button to switch off the appliance.
5 Unplug the appliance after the fan stops working.
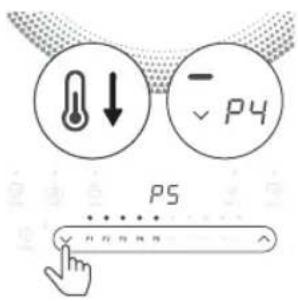
During cooking, you can change the power level by pressing the increase and decrease button.
The time for induction cooking may be less than the time taken on a gas stove. Make sure that you keep all the ingredients you need ready before you start cooking.
Using the manual cooking mode
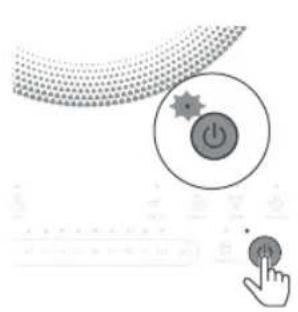
1 Follow the steps in "Preparing for use". 2 Press the ON/OFF button to switch on the appliance.
- The ON/OFF indicator lights up.
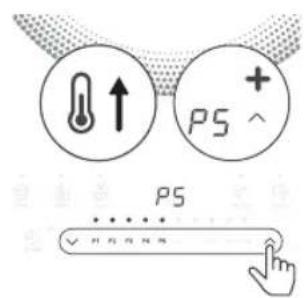
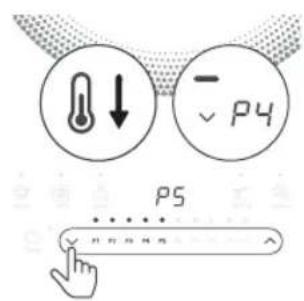
3 Press and to increase or decrease the cooking power. - The appliance starts working at the selected cooking power.
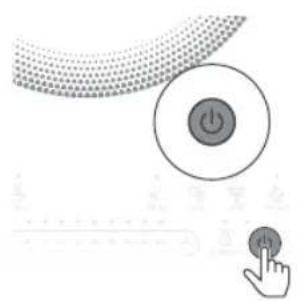
4 When the cooking is finished, press the ON/OFF button to switch off the appliance. 5 Unplug the appliance after the fan stops working.
Using the Timer function
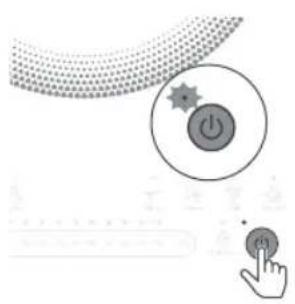
You can use the Timer button to decide how much time you want the appliance to work at different cooking modes.
1 Follow the steps in "Preparing for use". 2 Press the ON/OFF button.
- The ON/OFF indicator lights up.
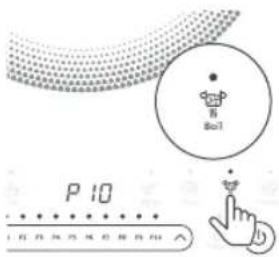
3 Press the button of the desired cooking mode.
- The corresponding indicator lights up.
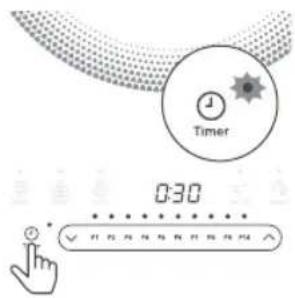
4 Press the Timer button.
- The timer indicator lights up.
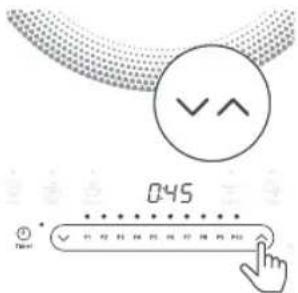
5 Press and to adjust the cooking time.
- Short press: increase or decrease by 1 minute.
- Long press: increase or decrease in 5-minute increments.
12 English
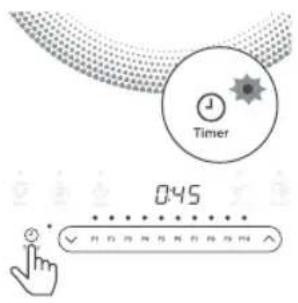
6 Press the Timer button again to confirm your selection.
- The appliance starts working in the selected mode after the cooking time is set.
Using the Child lock function
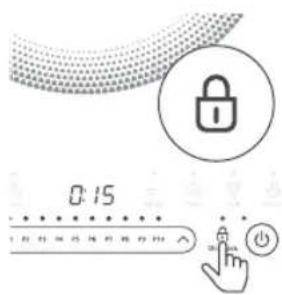
You can use the Child Lock button to lock the control panel to prevent accidental operation.
1 Press the Child Lock button during any cooking mode or after cooking to activate the lock. 2 When the Child Lock is on, you can still use the ON/OFF button. All other buttons are disabled to prevent accidental use.
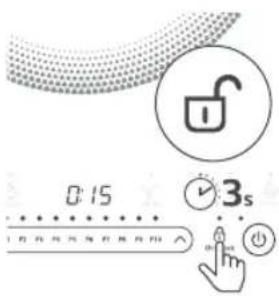
3 To deactivate this function, press and hold the Child Lock button for 3 seconds until the lock is released.
Cleaning
Unplug the appliance 3 minutes after the cooking is finished and let it cool down.
Clean the appliance with a damp cloth and, if necessary, with some mild cleaning agent.
Do not unplug the appliance before the fan stops working.
Never immerse the appliance in water nor rinse it under the tap.
Never use scouring pads, abrasive cleaning agents or aggressive liquids such as petrol or acetone to clean the appliance.
Do not put vinegar on the cooking plate.
Maintenance
Improper use can lead to scratches on the cooking plate. To avoid discoloring and scratches, use the appliance according to the instructions in this user manual and always clean the appliance and cookware properly after use.
Storage
Do not place heavy objects on the cooking plate as it is breakable.
Do not store the appliance in a hot place, for example near a cooker.
If you are not going to use the appliance for a longer period of time, store the appliance in a cool and dry place.
Introduction
120 W 300 W 500 W 800 W 1000 W 1200 W 1400 W 1600 W 1800 W 2000 W
Cooking modes
120 W 300 W 500 W 800 W 1000 W 1200 W 1400 W 1600 W 1800 W 2000 W
Cooking modes
120 W 300 W 500 W 800 W 1000 W 1200 W 1400 W 1600 W 1800 W 2000 W
120 W 300 W 500 W 800 W 1000 W 1200 W 1400 W 1600 W 1800 W 2000 W
Cooking modes
120 W 300 W 500 W 800 W 1000 W 1200 W 1400 W 1600 W 1800 W 2000 W
Cooking modes
120 W 300 W 500 W 800 W 1000 W 1200 W 1400 W 1600 W 1800 W 2000 W
Cooking modes
120 W 300 W 500 W 800 W 1000 W 1200 W 1400 W 1600 W 1800 W 2000 W
Cooking modes
| Načini rada kuhanja | Zadana snaga za kuhanje | Zadano vrijeme kuhanja | Prilagodljiva snaga za kuhanje | Prilagodljivo vrijeme kuhanja |
| Niska toplina P3 120 min P1-P4 1 – 180 min | ||||
| Pirjanje P5-P3-P2 120 min P1-P10 1 – 180 min | ||||
| Roštilj P6 60 min | P1-P10 1 – 180 min | |||
| Juha | P8-P5-P6-P2 | 120 min P1-P10 1 – 180 min | ||
| Brzo prženje uz miješanje | P9 60 min | P1-P10 1 – 180 min | ||
| Kuhanje na pari | P10-P6-P5 | 60 min | P1-P10 1 – 180 min | |
| Prokuhavanje | P10 | 15 min | P1-P10 | 1 – 180 min |
| Vrući lonac | P10 | 120 min P1-P10 1 – 180 min | ||
| Pojačanje | b | 60 min | P1-P10 1 – 180 min | |
| Ručni način rada | 60 min | P1-P10 1 – 180 min | ||
| Način rada kuhanja | Uporaba | |||
| Niska toplina | Upotrebljava se za lagano kuhanje ili održavanje hrane toplom duže vrijeme. Idealno za osjetljiva jela i održavanje temperature za posluživanje. | |||
| Pirjanje | Upotrebljava se za sporo kuhanje jela kao što su variva i pirjana jela. Sastoji se od nekoliko automatskih faza snage, ali omogućuje ručne promjene snage radi prilagodbe recepta. | |||
| Roštilj | Prikladno za roštiljanje mesa i povrća u tavi ili drugom posuđu. Snaga se prilagođava ručno i ostaje konstantna za ravnomjerno kuhanje. | |||
| Juha Upotrebljava se za pripremu juhe uz automatske prilagodbe snage kako bi se održalo optimalno ključanje i ekstrakcija okusa. Sastoji se od nekoliko automatskih faza snage. | |
| Brzo prženje uz miješanje | Upotrebljava se za brzo prženje uz miješanje uz visoku toplinu i brzo kuhanje. Snaga se može slobodno prilagoditi ovisno o sastojcima i tehnikama. |
| Kuhanje na pari Upotrebljava se za kuhanje povrća, plodova mora i drugog na pari uz očuvanje hranjivih tvari i teksture. | |
| Prokuhavanje Upotrebljava se za prokuhavanje vode ili hrane. Započinje sa zadanom snagom te omogućuje ručnu prilagodbu temperature i vremena za precizno kuhanje. | |
| Vrući lonac Upotrebljava se za jela iz vrućeg lonca uz visoku početnu snagu. Omogućuje ručne prilagodbe za održavanje prokuhavanja i dodavanje raznih sastojaka. | |
| Pojačanje Brzo omogućuje visoku toplinu za brzo prženje ili kuhanje. Prikladno za jela koja zahtijevaju brzu visoku temperaturu. | |
| Ručni način rada Omogućuje ručno postavljanje razine snage s pomoću gumba za povećanje ili smanjenje. Prikladno za korisnike koji žele potpunu kontrolu nad postavkama kuhanja. | |
Using a preset cooking mode
There are eight preset cooking modes: low heat, stew, grill, soup, stir-fry, steam, boil, and hot pot.
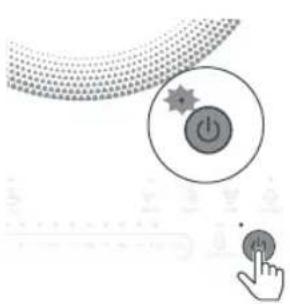
3 Press the button for the desired cooking mode.
120 W 300 W 500 W 800 W 1000 W 1200 W 1400 W 1600 W 1800 W 2000 W
Cooking modes
120 W 300 W 500 W 800 W 1000 W 1200 W 1400 W 1600 W 1800 W 2000 W
Cooking modes
120 W 300 W 500 W 800 W 1000 W 1200 W 1400 W 1600 W 1800 W 2000 W
120 W 300 W 500 W 800 W 1000 W 1200 W 1400 W 1600 W 1800 W 2000 W
Cooking modes
120 W 300 W 500 W 800 W 1000 W 1200 W 1400 W 1600 W 1800 W 2000 W
Cooking modes
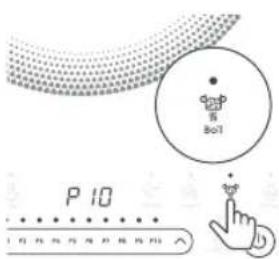
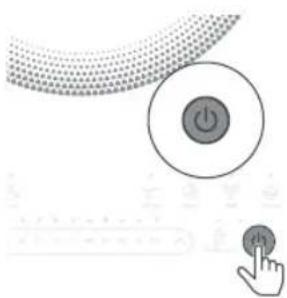
3 Press the button with the desired cooking mode.
120 W 300 W 500 W 800 W 1000 W 1200 W 1400 W 1600 W 1800 W 2000 W
Cooking modes
120 W 300 W 500 W 800 W 1000 W 1200 W 1400 W 1600 W 1800 W 2000 W
Cooking modes
120 W 300 W 500 W 800 W 1000 W 1200 W 1400 W 1600 W 1800 W 2000 W
Cooking modes
120 W 300 W 500 W 800 W 1000 W 1200 W 1400 W 1600 W 1800 W 2000 W
Cooking modes
| Načini obdelave | Privzeta moč priprave | Privzeti čas priprave | Prilagajanje moči priprave | Prilagajanje časa priprave |
| Low heat (Nizka temperatura) | P3 120 min P1-P4 1-180 min | |||
| Stew (Obara) P5-P3-P2 120 min P1-P10 1-180 min | ||||
| BBQ (Žar) P6 60 min P1-P10 1-180 min | ||||
| Soup (Juha) P8-P5-P6-P2 | 120 min P1-P10 1-180 min | |||
| Stir fry P9 60 min P1-P10 1-180 min | ||||
| Steam (Kuhanje na pari) | P10-P6-P5 | 60 min P1-P10 1-180 min | ||
| Boil (Vretje) P10 | 15 min P1-P10 1-180 min | |||
| Hot pot (Enolončnica) | P10 | 120 min P1-P10 1-180 min | ||
| Boost (Ojačano) | b | 60 min P1-P10 1-180 min | ||
| Ročni način | 60 min P1-P10 1-180 min | |||
120 W 300 W 500 W 800 W 1000 W 1200 W 1400 W 1600 W 1800 W 2000 W
120 W 300 W 500 W 800 W 1000 W 1200 W 1400 W 1600 W 1800 W 2000 W
Cooking modes
| Režimi kuvanja | Podrazumeva-na snaga kuvanja | Podrazumev-ano vreme kuvanja | Podesiva snaga kuvanja | Podesivo vreme kuvanja |
| Niska toplota P3 120 min P1-P4 1–180 min | ||||
| Krčkanje P5-P3-P2 120 min P1-P10 1–180 min | ||||
| Roštilj P6 60 min | P1-P10 1–180 min | |||
| Supa | P8-P5-P6-P2 | 120 min P1-P10 1–180 min | ||
| Prženje | P9 60 min | P1-P10 1–180 min | ||
| Kuvanje na pari | P10-P6-P5 | 60 min | P1-P10 1–180 min | |
| Kuvanje | P10 | 15 min | P1-P10 1–180 min | |
| Hot Pot | P10 | 120 min P1-P10 1–180 min | ||
| Pojačanje | b | 60 min | P1-P10 1–180 min | |
| Ručni režim | 60 min | P1-P10 1–180 min | ||
1 Follow the steps in the "Preparation for use" section. 2 Press the on/off button to turn on the appliance.
- The power indicator lights up.
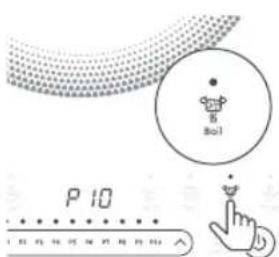
4 When cooking is finished, press the on/off button to turn off the appliance. 5 Unplug the appliance after the fan stops.
1 Follow the steps in the "Preparation for use" section. 2 Press the on/off button to turn on the appliance.
- The power indicator lights up.
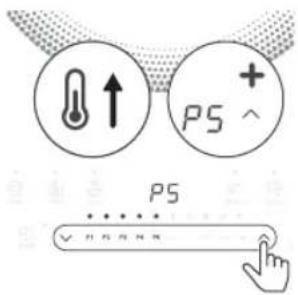
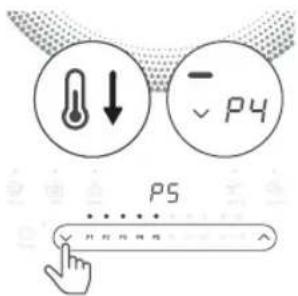
4 When cooking is finished, press the on/off button to turn off the appliance. 5 Unplug the appliance after the fan stops.
www.Philips.com/welcome.
Overview
120 W 300 W 500 W 800 W 1000 W 1200 W 1400 W 1600 W 1800 W 2000 W
Cooking modes
2 Press the ON/OFF button.
120 W 300 W 500 W 800 W 1000 W 1200 W 1400 W 1600 W 1800 W 2000 W
Cooking modes
120 W 300 W 500 W 800 W 1000 W 1200 W 1400 W 1600 W 1800 W 2000 W
120 W 300 W 500 W 800 W 1000 W 1200 W 1400 W 1600 W 1800 W 2000 W
Cooking modes
120 W 300 W 500 W 800 W 1000 W 1200 W 1400 W 1600 W 1800 W 2000 W
Cooking modes

PHILIPS and the Philips Shield Emblem are registered trademarks of Koninklijke Philips N.V. and are used under license.
This product has been manufactured by and is sold under the responsibility of Versuni Holding B.V., and Versuni Holding B.V. is the warrantor in relation to this product.


- INTRODUCTION
- GENERAL DESCRIPTION
- CONTROL PANEL
- PREPARING FOR USE
- CHOOSING THE PROPER COOKWARE
- USING THE APPLIANCE
- COOKING POWER LEVEL
- USING THE PRESET COOKING MODES
- USING THE MANUAL COOKING MODE
- USING THE TIMER FUNCTION
- ENGLISH
- USING THE CHILD LOCK FUNCTION
- CLEANING
- MAINTENANCE
- STORAGE
- USING A PRESET COOKING MODE
- OVERVIEW
Brand : PHILIPS
Model : HD5850
Category : Cooker