PRO K-3396 - Sink KOHLER - Free user manual and instructions
Find the device manual for free PRO K-3396 KOHLER in PDF.

| Brand | Kohler |
| Model | PRO K-3396 |
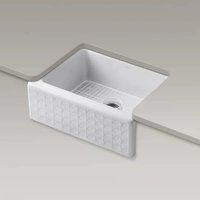
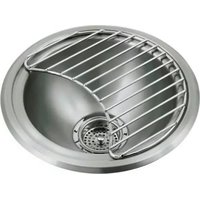
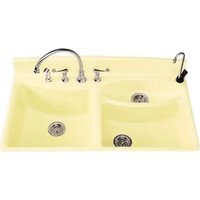
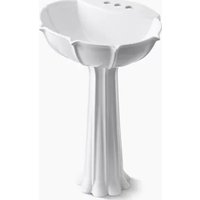
| Product Type | Cooking Sink (Heated Sink) |
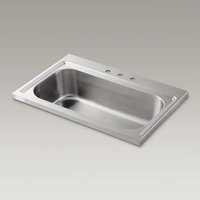
| Width | 41.9 cm (16-1/2") |
| Length | 53.3 cm (21") |
| Basin Depth | 19.1 cm (7-1/2") |
| Material | Stainless Steel |
| Electrical Supply | 120 V, 15 A, 60 Hz, dedicated circuit |
| Maximum Power | 1800 W |
| Electrical Protection | Ground Fault Circuit Interrupter (GFCI) recommended |
| Drain Type | Controlled drain with rotary knob |
| Control | Electronic with push buttons (on/off, increase/decrease, drain) |
| Display | 10 LEDs indicating heating power (10% per segment) |
| Special Functions | Immersion cooking, over-temperature protection (>250°F / 121°C) |
| High Heat Indicator | On above 140°F (60°C) |
| Installation | Built-in in a cabinet with minimum width 45.7 cm (18") |
| Cleaning | Non-abrasive cleaners only |
| Safety | Automatic shut-off in case of overheating, must be used with water |
| Included Accessories | Cutout template, owner's guide, brackets and nuts |
| Warranty | Contact customer service for warranty details |
Frequently Asked Questions - PRO K-3396 KOHLER
User questions about PRO K-3396 KOHLER
0 question about this device. Answer the ones you know or ask your own.
Ask a new question about this device
Download the instructions for your Sink in PDF format for free! Find your manual PRO K-3396 - KOHLER and take your electronic device back in hand. On this page are published all the documents necessary for the use of your device. PRO K-3396 by KOHLER.
USER MANUAL PRO K-3396 KOHLER
natural_image
Technical line drawing of a cylindrical mechanical device with a central control knob and attached tubing (no text or symbols)M product numbers are for Mexico (i.e. K-12345M)
Important Safety Instructions

CAUTION: Risk of personal injury. The use of accessory attachments not recommended by Kohler Co. may cause injuries.

CAUTION: Risk of fire. To reduce the risk of fire, do not mount this unit over any portion of another heating or cooking appliance.

CAUTION: Risk of product damage. Never turn on this product without water in the cooking vessel.

CAUTION: Risk of property damage. Provide adequate ventilation around the installation to prevent steam damage to surrounding surfaces.
☐ Read all these instructions carefully before you begin this installation.
□ Electrical service must be properly installed and grounded by a qualified electrician.
□ Do not install outdoors.
☐ Do not use this product if it malfunctions or has been damaged in any manner. Contact your dealer or plumbing contractor, or call our Customer Service Department at 1-800-4-KOHLER.
☐ This product is intended for residential (household-type) use only.
Thank You For Choosing Kohler Company
We appreciate your commitment to Kohler quality. Please take a few minutes to review this manual before you start installation. If you encounter any installation or performance problems, please don't hesitate to contact us. Our phone numbers and website are listed on the back cover. Thanks again for choosing Kohler Company.
Tools and Materials
Safety
Glasses

Tape Measure
Keyhole/Compass Saw
Plus:
• Rags or paper toweling
• 1" D. (2.5 cm) drain trap assembly
Drill with 1/8" and 1/2" bits
Sealant Pliers
Pencil
Before You Begin
☐ Read these instructions carefully before you begin this installation.
□ Observe all local, electrical, plumbing, and building codes.
☐ Prior to installation, unpack the new sink and inspect it for damage. Return the sink to its protective carton until you are ready to install it.
☐ This sink is not intended for undercounter installation.
☐ To reduce the chance of water backflow into the cooking vessel, do not install a garbage disposal to the cooking vessel.
☐ You must connect the sink strainer to a separate trap assembly to reduce the chance of water backflow into the cooking vessel and improve drainage.
☐ This sink includes accessories and a Homeowners Guide. Leave these items for the homeowner.
1. Provide Electrical Service

CAUTION: Risk of electrical shock. Disconnect the power before proceeding. Refer to the "Important Safety Instructions" section.
☐ A Ground-Fault Circuit-Interrupter (GFCI) is recommended for this circuit.
☐ Local electrical codes may require that electrical work be performed by a licensed electrician. Follow all local electrical codes.
□ Refer to the roughing-in information to determine the proper circuit location.
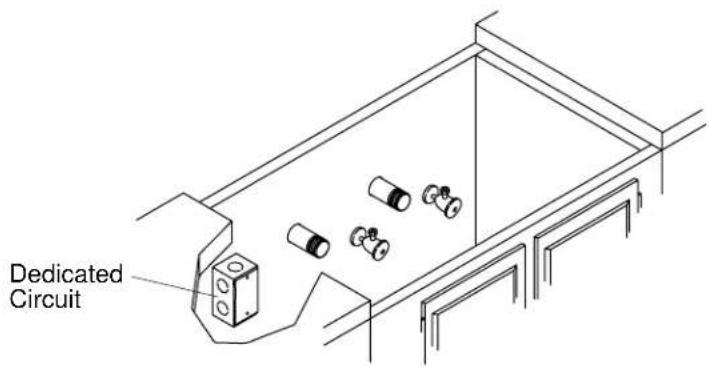
☐ The sink controls and system have been prewired at the factory. Only minor electrical connections are required during installation. The power wiring and terminal box must be provided by the customer.
☐ Provide a dedicated 120 V, 15 A, 60 Hz two-wire with ground circuit for the cook sink.
□ Locate the junction box away from any water or drain piping.
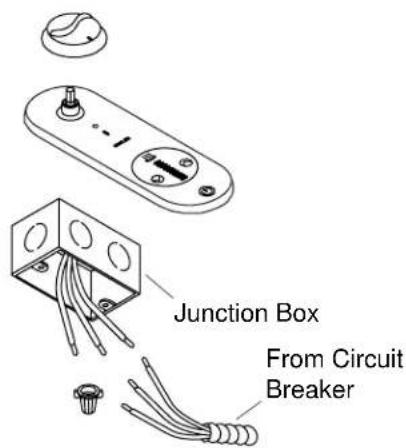
□ Install a junction box in the cabinet in the vicinity of the cook sink's location.
☐ Pull wires from the circuit breaker panel board through the junction box to the cook sink area.
☐ In the cabinet, route and support the cook sink power wiring in order to protect the wires from contact with any items that may be stored in the cabinet. Flexible watertight conduit is recommended.
☐ Route and support the cook sink power wiring.
Provide Electrical Service (cont.)
☐ Do not apply power until directed to do so.
□ Terminate the wires at the circuit breaker.

2. Preparation
□ Install the rough drain piping according to the roughing-in information.
☐ This unit can be installed into a cabinet with a width of 18" (45.7 cm) or more. The actual installation width is 16-1/2" (41.9 cm). A minimum clearance of 5/8" (1.6 cm) is required between the cabinet wall and the side of the control box. If using a small cabinet, position the template carefully in order to avoid interference between the product and the cabinet.
☐ Ensure that the desired sink location has adequate clearance to the backsplash, faucet, sink, and cabinet.
NOTE: The marks made in tracing the template may be hidden by the cook sink mounting ring. Use care if using an indelible marker.
☐ Use the supplied template (1031440-7) to mark the location for the two cutouts on the cabinet.
□ Drill starter holes for the saw in each of the cutouts.
□ Use a saber saw or equivalent to cut out the holes for the cook sink and control.
Preparation (cont.)
☐ Temporarily install the sink in order to verify fit and position. Ensure that the sink fits in the hole.
□ Verify the fit and position of the escutcheon. Ensure that the control fits in the hole.
□ Remove the sink and the escutcheon. Store the components safely.
NOTE: The spout must be a minimum of 9" (22.9 cm) long and 13-7/8" (35.2 cm) high for adequate clearance into basins.
□ If installing faucets or other accessories, install them with adequate clearance in accordance with the manufacturer's instructions.
3. Install the Sink

CAUTION: Risk of product damage. Use care to avoid damaging the cooking vessel components when you lift the sink into place.
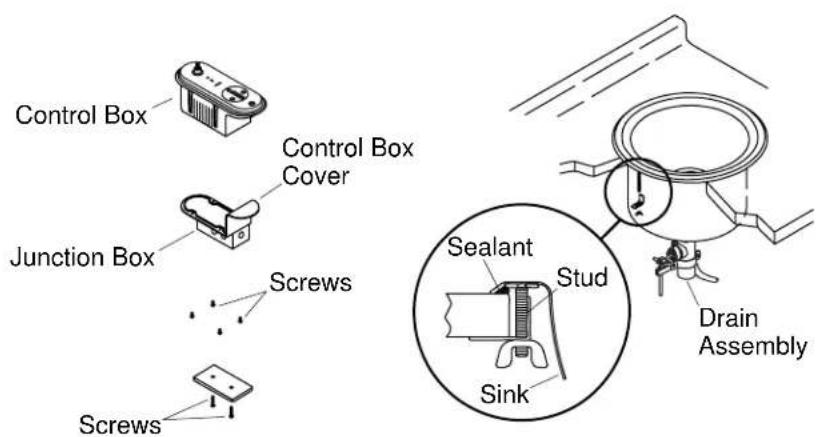
☐ Remove the two screws from the junction box cover and remove the cover. Save the screws and cover.
☐ Remove the four screws from the control box lower cover and remove the cover with junction box. Save the screws and cover.
□ Clean the countertop.
□ Apply a continuous bead of quality sealant to the underside of the sink rim.
□ Carefully position the sink in the countertop opening.
☐ Turn the sink so the flat surface of the drain assembly is to the front.
□ Assemble a clip and wing nut to each of the threaded studs.
NOTE: The wing nuts are designed to be tightened by hand. Do not use a wrench. Tighten the wing nuts in rotation evenly, a little at a time.
□ Carefully finger tighten each wing nut until no gap exists between the sink rim and the countertop.
□ Immediately wipe away any excess sealant.
4. Connect the Wiring
NOTE: This instruction assumes that a licensed electrician has installed a dedicated 120 V, 15 A, 60 Hz circuit as per the roughing-in details.
□ Connect the power and ground wiring to the junction box in accordance with local code requirements.
□ Use the two screws to replace the cover on the junction box.
□ Leave the power turned off at this time.
5. Connect the Plumbing
NOTE: Do not install a garbage disposal on the cook sink drain. □ Connect the cook sink drain to the trap as per the trap manufacturer's instructions.
6. Install the Control Knob
□ Align the drain control knob to the drain control shaft on the controller.
□ Press the drain control knob on the shaft.
☐ Check that the drain control knob will rotate about 3/4 turn in each direction.
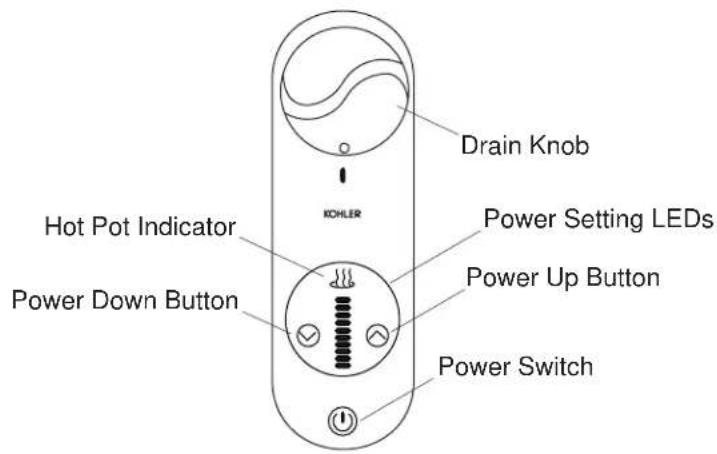
7. Operation

CAUTION: Risk of product damage. Never operate the cook sink without water in the vessel.

CAUTION: Risk of Property damage This cook sink is designed to be used with cookware that is immersed into the heating water in the cook sink. Do not use the cook sink to cook foods directly. Food residues may not be easily removed.
Preliminary Actions
NOTE: Carefully study your Homeowners Guide before operating your cook sink.
□ Remove any adhesive labels on the supplied components.
☐ Turn the drain knob clockwise to the closed position.
☐ Fill the cooking vessel half full with clean water.
Check Drain Operation
A single flashing power setting LED is an indication that the cook center is ready to operate. The Cook Center will start to operate as soon as the temperature setting is increased above the minimum.
□ Close the feeder circuit breaker for the cook sink.
□ Push the power switch button.
□ Verify that the bottom LED is flashing.
□ Turn the drain knob counterclockwise to drain the cook sink.
Operation (cont.)
□ Verify that the cook sink drains completely.
☐ Inspect the cooking vessel drain connections for leakage. Repair any leaks.
☐ Close the drain and fill the cooking vessel half full of water again.
Check Cooking Operation
□ Observe that the bottom power setting LED remains flashing.
Steady LED illumination indicates that the unit is operating. The more LED segments are illuminated, the hotter the cook sink temperature. Experience with the unit will help in setting the desired cooking temperature. Each of the 10 LEDs indicates that about 10% of the available heating power is in use. When all LEDs are illuminated, the unit is at 100% of capacity.
☐ Press the power up button for about one second to increase the temperature setpoint.
□ Observe that the LEDs are now illuminated without flashing.
The power up and the power down buttons operate one step at a time when pressed for a short period of time. That is, each time the button is pressed quickly, the heat setting increases or decreases by about 10%. If either button is held down for more than about one second, then the power will change in steps. The setting will increase or decrease at a rate of about one step per 0.3 seconds. The heat setting can be set at maximum or at minimum by holding the desired button down for a few seconds.
☐ Increase the power setting by pressing the power up button for a few seconds.
□ Observe that all LEDs are now illuminated.
☐ Press the power down button for about one second to decrease the temperature setpoint.
□ Observe that fewer LEDs are now illuminated.
The hot pot indicator illuminates when temperature exceeds about 140^ F ( 60^ C). This indication is provided for safety and remains on until the temperature drops below about 140^ F ( 60^ C). The indicator remains on when the temperature is above setpoint even though the power switch is pressed to stop the heating.
□ Increase the temperature setpoint to maximum.
The cook sink has over-temperature protection. If the sink temperature
Operation (cont.)
increases above about 250^ F ( 121^ C), all 10 Power Setting LEDs start flashing. If the temperature remains high for more than another two minutes, the cook sink stops heating automatically.
□ Observe that, after a period of time, the hot pot indicator illuminates.
□ Observe that, after a period of time, the water begins to boil.
□ Verify that the LEDs are not now flashing.
☐ Press the power down button for several seconds to decrease the temperature.
☐ When the water has cooled significantly below boiling, drain the cook sink.
□ Observe that, after a period of time, the hot pot indicator extinguishes.
8. Clean Up

CAUTION: Risk of product damage. Do not use abrasives on this product. Abrasive materials can scratch and ruin the surface finish.
NOTE: Refer to your Homeowners Guide for detailed cleaning instructions and recommended cleaners.
□ Remove any construction materials or debris.
□ Clean the sink with a non-abrasive cleaner.
Troubleshooting Guide
Troubleshooting Tips
NOTE: This troubleshooting guide is for general aid only. For warranty service, contact your dealer or wholesale distributor.
Kohler Co. 13 1032055-2-B
Troubleshooting Table
| Symptoms Recommended Action | |
| 1. The cook sink does not hold water. | A. Operate the drain by turning the drain knob open and closed several times. Then, close the drain. |
| Troubleshooting Guide (cont.) | |
| Symptoms Recommended Action | |
| B. If the cook sink still does not hold water, ensure that the drain cable is connected at both ends and operates freely as described in the installation guide. | |
| C. If the problem persists, contact a Kohler Authorized Service Representative. | |
| 2. Water drains slowly from sink or does not drain. | A. The drain or trap is probably plugged. Clean out the drain or trap. |
| B. If the problem persists, contact a Kohler Authorized Service Representative. | |
| 3. Water leaks from under sink. | A. Check if the drain or trap connections are loose or damaged. If necessary, tighten or replace the connections. |
| B. If the problem persists, contact your local plumber. | |
| 4. The cook sink does not heat water and no display indications are present. | A. Check that the specified power is supplied to the cook sink. Close any tripped circuit breaker. |
| B. If the circuit breaker opens again, contact your local electrician. | |
| C. If you do not feel comfortable checking for power at the cook sink control box, contact your local electrician. | |
| D. If power is present at the controller, contact a Kohler Authorized Service Representative. | |
| 5. The cook sink does not heat water and normal display indications are present. | A. Check that the specified power is supplied to the cook sink. Close any tripped circuit breaker. |
| B. If the problem persists, contact a Kohler Authorized Service Representative. | |
| 6. The cook sink controller repeatedly stops heating after a few minutes of time. | A. This is normal operation if there is no water in the sink. Check for the presence of water. If there is no water, while using care to avoid stream flashing, add water. |
| B. If the problem persists, contact a Kohler Authorized Service Representative. | |
| Troubleshooting Guide (cont.) | |
| Symptoms Recommended Action | |
| 7. The cook sink operates but the cook sink controller display indications do not display normally as described in the "Cook Sink Operating Instructions" section. | A. Contact a Kohler Authorized Service Representative. |
1032055-2-B 14 Kohler Co.