PRO K-3319 - Sink KOHLER - Free user manual and instructions
Find the device manual for free PRO K-3319 KOHLER in PDF.

| Brand | Kohler |
| Model | PRO K-3319 |
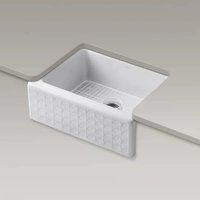
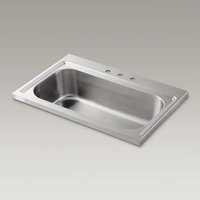
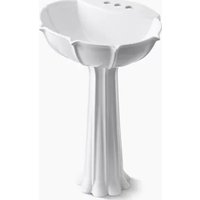
| Product Type | Work Sink |
| Installation | Drop-in on countertop |
| Material | Metal (stainless steel likely) |
| Faucet | Not included, to be installed separately |
| Drain | Trap and pipes provided? (accessories included) |
| Accessories included | Threaded rods, clips, wing nuts, sealing putty |
| Recommended cleaning | Non-abrasive cleaners |
| Safety | Sharp edges, wear gloves when handling |
| Codes to follow | Local plumbing and building codes |
| Warranty | Manufacturer's warranty Kohler (not specified) |
| Repairability | Standard parts: rods, nuts, gaskets |
Frequently Asked Questions - PRO K-3319 KOHLER
User questions about PRO K-3319 KOHLER
0 question about this device. Answer the ones you know or ask your own.
Ask a new question about this device
Download the instructions for your Sink in PDF format for free! Find your manual PRO K-3319 - KOHLER and take your electronic device back in hand. On this page are published all the documents necessary for the use of your device. PRO K-3319 by KOHLER.
USER MANUAL PRO K-3319 KOHLER
M product numbers are for Mexico (i.e. K-12345M)
- 1/2" or larger drill bit
• Rags or paper toweling - Gloves
Thank You For Choosing Kohler Company
We appreciate your commitment to Kohler quality. Please take a few minutes to review this manual before you start installation. If you encounter any installation or performance problems, please don't hesitate to contact us. Our phone numbers and website are listed on the back cover. Thanks again for choosing Kohler Company.
Before You Begin

WARNING: Risk of personal injury. Metal surfaces are sharp and can cause severe cuts. Use gloves and handle sink edges carefully.
□ Observe all local plumbing and building codes.
☐ Prior to installation, unpack the new sink and inspect it for damage. Return the sink to its protective carton until you are ready to install it.
☐ This sink is not intended for undercounter installation.
☐ Inspect the drain and supply tubing. Replace if necessary.
☐ This sink includes accessories. Leave these items in the cabinet for the homeowner.
☐ For a replacement installation, make sure the existing cut-out is the same size or smaller than the cut-out for the new sink.
1. Preparation
□ Install the water supplies and drain piping according to the roughing-in information.
Preparation (cont.)
☐ Cut along the template line where indicated for the countertop opening.
□ Position the sink template on the countertop.
☐ Check the clearance between the sink, faucet, backsplash and cabinet. Adjust the template accordingly.
□ Trace around the sink template on the countertop with a pencil.
NOTE: You may require different, more specialized tools to install this sink to countertop materials other than wood or wood composites.
☐ Measure the thickness of the countertop.
□ Determine the threaded shank length of the faucet.
☐ Compare the measurements to verify that the faucet will fit on the countertop as required. If the faucet will not fit, you will need to select a different faucet or countertop.
2. Install the Sink

WARNING: Risk of personal injury. Metal surfaces are sharp and can cause severe cuts. Use gloves and handle sink edges carefully.
☐ Cut out the opening by carefully following the pencil line traced from the template.
☐ Temporarily position the sink in the countertop opening. Verify the fit and position.
□ Carefully remove the sink from the countertop opening. Return the sink to the carton.
□ Install the faucet to the countertop according to the manufacturer's instructions.
□ Install the sink strainer to the sink according to the manufacturer's instructions.
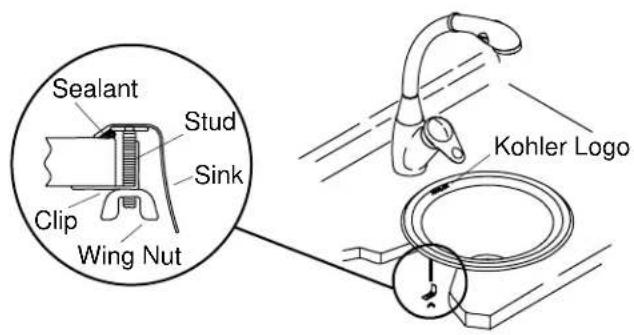
□ Apply a continuous bead of quality sealant to the underside of the sink rim.
□ Clean the countertop, and carefully position the sink in the countertop so the Kohler logo is to the back.
☐ Assemble a clip and wing nut to each of the threaded studs. Carefully finger tighten each wing nut so no gap exists between the sink rim and the countertop. Do not wrench tighten the wing nuts.
□ Immediately wipe away any excess sealant, and fill any voids as needed.
□ Verify that the sink has not moved out of position.
□ Allow the sealant to cure for at least 30 minutes before proceeding.
Install the Sink (cont.)
□ Connect and tighten the trap to the strainer, and complete the water supply connections to the faucet according to the instructions packed with the faucet.
□ Run water into the sink and check for leaks.
□ Clean up with a non-abrasive cleaner.