Easy Cool TSA5008 - Refrigerator Teesa - Free user manual and instructions
Find the device manual for free Easy Cool TSA5008 Teesa in PDF.

| Product type | Compressor cooler |
| Brand | Teesa |
| Model | Easy Cool TSA5008 |
| Capacity | 13 liters |
| Temperature range | +20°C to -22°C |
| Product dimensions (L x W x H) | 58 x 29.5 x 32 cm |
| Compartment dimensions (L x W x H) | 29.5 x 20 x 22 cm |
| Weight | 6.9 kg |
| Power supply | DC 12/24 V (3/1.5 A) or AC 100-240 V via included adapter |
| Power consumption | 35 W ±20% |
| Climate class | SN/N/ST/T (16°C to 43°C) |
| Refrigerant | R600a (17 g) |
| Insulation | C5H10 (Cyclopentane) |
| Noise level | 52 dB |
| Protection class | III |
| Main functions | LED display, touch panel, ECO and HH modes, 3-level battery protection, memory function |
| Maintenance and cleaning | Clean with a slightly damp soft cloth; defrost regularly without sharp tools |
| Safety | Protection against battery discharge, accidental stop, do not repair yourself |
| Spare parts and repairability | Replaceable fuse (f15al250v) in DC plug |
| General information | Delivered with shoulder strap, AC adapter, cigarette lighter cable; WEEE disposal |
Frequently Asked Questions - Easy Cool TSA5008 Teesa
User questions about Easy Cool TSA5008 Teesa
0 question about this device. Answer the ones you know or ask your own.
Ask a new question about this device
Download the instructions for your Refrigerator in PDF format for free! Find your manual Easy Cool TSA5008 - Teesa and take your electronic device back in hand. On this page are published all the documents necessary for the use of your device. Easy Cool TSA5008 by Teesa.
USER MANUAL Easy Cool TSA5008 Teesa
| CS DE EN | FR GR | |||
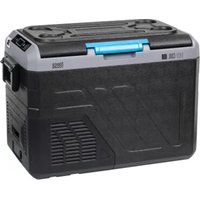
| Víko Deckel Cover Couvercle Káluμμα | ||||
| Držáky nápojů Becherhalterung Cup holder Supports de boisson Θήκη ποτηριού | ||||
| Ovládací panel Bedienfeld Control panel | Panneau de commande | Πίνακας Ελέγχου | ||
| Ventilátory Lüfter Vents | Ventilateurs | Αεραγωγοί | ||
| Zásuvka DC napájení | DC/DC Stromversorgung | DC socket Prise d'alimentation DC DC πρίζα | ||
| HU | NL PL RO SK | |||
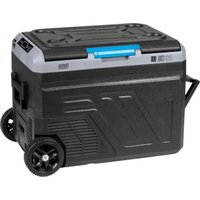
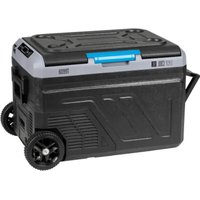
| Fedél | Deksel | Pokrywa | Usa | Veko |
| Italtartók | Drankhouders | Uchwyty na napoje | Suport pahar | Držiaky na nápoje |
| Kezelőpanel | Bedieningspaneel | Panel sterujący | Panou control | Ovládací panel |
| Ventilátorok | Ventilatoren | Wentylatory | Grilaj de ventilatie | Ventilátory |
| DC Csatlakozó aljzat | Stopcontact DC | Gniazdo zasilania DC | Soclu alimentare DC | Napájacia zásuvka DC |
| CS DE EN FR GR | ||||
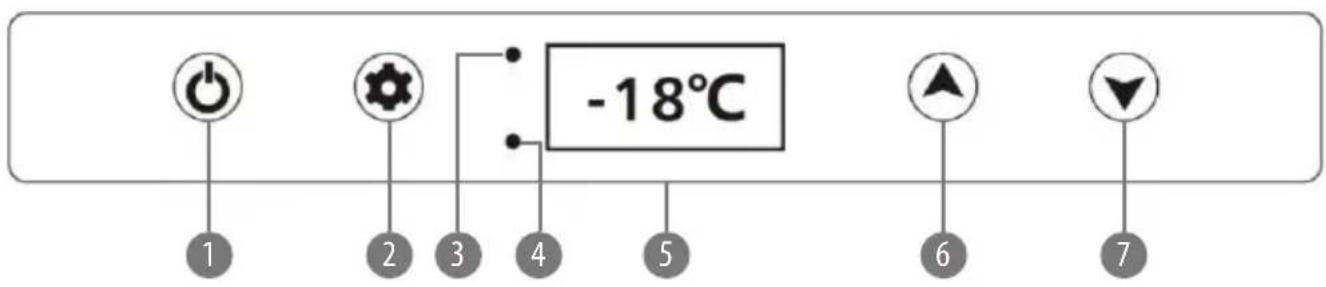
| Tlačitko zapnutí ON / OFF ON/OFF Druckknopf ON/OFF button Touche ON/OFF Πλήκτρο ON / OFF | ||||
| Tlačitko pro výběr SET (nastavení) | SET- Wahltaste | Setting button | Touche de sélection SET | Κουμπί ρύθμισης |
| Kontrolka napájení a stavu kompresoru | Kompressorstatus- und Stromversorgungsanzeige | Indicating light for power and compressor status | Témoin d'alimentation et de l'état du compresseur | Ενδεικτική λυχνία για κατάσταση ισχύος και συμπιεστή |
| Kontrolka poruchy kompresoru | Anzeige des falschen Kompressorbetriebs | Compressor malfunction light | Indicateur du fonctionnement incorrect du compresseur | Λάμπα δυσλειτουργίας του συμπιεστή |
| Displej Display Digital display Écran d'affichage Ψηφιακή οθόνη | ||||
| Tlačitko s šipkou nahoru | Taste zur Vorwärtsbewegung | Turning up | Touche vers le haut | Ανέβασμα |
| Tlačitko s šipkou dolů | Taste zur Rückwärtsbewegung | Turning down | Touche vers le bas | Κατέβασμα |
| HU | NL | PL RO SK | ||
| ON/OFF táp nyomógomb | Aan / uit knop | Przycisk włączania ON/OFF | Buton Pornire/Oprire | Tlačidlo zapnutia/ vypnutia ON/OFF |
| SET kapcsoló gomb | Keuzetoets SET | Przycisk wyboru SET | Setari | Tlačidlo nastavenia SET |
| Hálózati feszültség és kompresszor státusz kijelző | Indicator voeding en compressorstatus | Wskaźnik zasilania i statusu kompresora | Indicator functionare | Kontrolka napájania a stavu kompresora |
| Hibás kompresszor üzem kijelző | Indicator defecte compressor | Wskaźnik błędnego działania kompresora | Indicator defectiune | Kontrolka poruchy kompresora |
| Kijelző | Display | Wyświetlacz | Afisaj | Displej |
| Fel nyomógomb | Knop omhoog | Przycisk w góre | Crestere temperatura | Tlačidlo hore |
| Le gomb | Knop omlaag | Przycisk w dół | Scadere temperatura | Tlačidlo dole |
Thank you for purchasing TEESA appliance. Please read this operation instruction carefully before use, and keep it for future use.
Distributor does not take responsibility for damages caused by inappropriate handling and use of the product.
Read the instruction manual carefully before first use and keep it for future reference.
Producer disclaims liability for:
• faulty installation or connection
• mechanical damages
- damages caused by inappropriate use and handling, disregarding this instruction manual
SAFETY INSTRUCTIONS
In order to reduce the injuries or damages, follow basic safety precautions applied when using any electrical device, including the following:
• ⚠ Warning: Do not touch exposed cables.
- Warning: Do not use fridge if you suspect any connections could be wet.
• When using the fridge in the vehicle or boat, please make sure the circuit being used is fused.
• Make sure the source voltage is correct with the voltage data on the technical data label.
• Do not place any electrical devices inside the refrigerator as moisture could harm these devices!
• Prevent the fans from being stuck. The fans being stuck will heat the engine and cause fire.
- Don't disassemble nor attempt to repair the appliance yourself.
• Turn off and disconnect the device from power supply before cleaning and maintenance.
- This appliance is not intended for use by persons (including children) with reduced physical, sensory or mental capabilities, or lack of experience and knowledge, unless they have been given supervision or instruction concerning use of the appliance by a person responsible for their safety. Children should be supervised to ensure that they do not play with the appliance.
NOTES ON USING THE PRODUCT
- Your refrigerator requires good ventilation, especially around the vents of the refrigerator; allow a gap of at least 200 mm around the vents and 100 mm around the rest of the unit.
- Avoid humidity: Humidity inside the appliance can form frost and impair cooling.
• Do not allow frost to build up. Never submerge the unit in any liquid. - Avoid placing your refrigerator near heat sources or in direct sunlight. This helps the refrigerator to work more efficiently and keep the contents cool.
-
Place the refrigerator on a flat and stable surface. When using the fridge in a vehicle, please use a fastening device to secure it.
-
Clean the interior of the device with a soft, slightly damp cloth before first use.
• To obtain optimized cooling effect, we suggest putting in pre-chilled foods and drinks. - The device has a setup memory, i.e. the settings are retained even after power off.
• During transport, the slope must be less than 45^ . Handle the device with care. - The freezer must be stationary for more than 24 hours before use.
ENERGY SAVING TIPS
- Select a well-ventilated place and keep the fridge away from heat or direct sunlight;
• Cool the hot food before putting into the fridge; - Reduce the times and duration of opening the fridge cover;
• Defrost regularly; - Set optimum temperature.
POWER: The electronic control module controls the compressor motor and has the function of a three stage battery protection. When the input voltage drops below the minimum, the compressor will cut out; when the voltage comes back up to the cut-in value, the compressor will restart automatically.
BATTERY PROTECTION: The compressor requires over 10.4 V (12 V System) or 23.0 V (24 V System) to operate. If the voltage drops below this, the fridge will stop running.
CONNECTION
- Using the DC cable
NOTICE! Danger of damage!
-
For protection of the device, the DC cable supplied includes a fuse inside the plug. Do not remove the fuse from the DC plug.
• Only use the DC cable supplied. -
Plug the DC cable into the device's DC socket.
-
Connect the DC cable to the vehicle power outlet.
-
Using the AC adapter
NOTICE! Danger of damage!
• Only use the AC adapter supplied.
- Plug the AC adapter into the device's DC socket.
- Connect the AC adapter to the AC power outlet.
USING THE DEVICE
- Plug in the power cable. Use the ON/OFF switch to turn on the fridge. The LED display on the control panel will light up and the interior temperature will be displayed.
- Press SET and then press the UP A or DOWN V buttons to adjust the temperature. The selected temperature value will flash on the display for a few seconds, and then the display will show the current temperature automatically.
- To change the units between °C and °F, press and hold the SET and DOWN V buttons at the same time for about 10 seconds, until temperature unit starts to flash on the display. Use the UP ∧ or DOWN V buttons to change the setting. The selected temperature unit will flash on the display for a few seconds, and then the display will return to show the current temperature automatically.
- To set the operation mode, press SET twice. There will be HH and ECO flashing on the display. Use the UP ∧ or DOWN ∨ buttons to change the setting. The selected mode will flash on the display for a few seconds, and then the display will return to show the current temperature automatically. In HH mode red LED is on. In ECO mode green LED is on.
• To change the battery protection mode press and hold the UP and DOWN V buttons at the same time for about 2 seconds, until H1, H2 or H3 flashes on the display. Use the UP or DOWN V buttons to change the setting. The selected battery protection mode will flash on the display for a few seconds, and then the display will return to display the current temperature automatically. The three battery protection modes are as follows:
| Power supply | Status of battery protection | H1(LOW MODE) | H2(MIDDLE MODE) | H3(HIGH MODE) |
| DC 12 V | Cutting off voltage | 10.3 V 10.8 V 11.3 V | ||
| Restarting voltage | 1.1 V 11.8 V 12.6 V | |||
| DC 24 V | Cutting off voltage | 21.5 V 22.3 V 24.3 V | ||
| Restarting voltage | 22.7 V 23.7 V 25.7 V |
It is recommended to set H3 battery protection mode for the vehicle, whereas H1 and H2 modes are suitable to be used with an external battery dedicated to portable freezers.
- Press and hold the ON/OFF button for about 7 seconds to turn off the device. The device has been equipped with a protection against accidental power off, therefore it is necessary to hold the button for a few seconds.
DEFROSTING
After the freezer has been operating for a certain period of time, frost may form on the surface, which reduces the cooling effect and increases energy consumption. In this case, defrosting is necessary.
NOTICE! Danger of damage! Never use hard or pointed tools to remove ice or to loosen objects which have frozen in the freezer.
Follow the below steps to defrost the freezer:
- Disconnect the power.
- Open the door.
- Remove the food from the freezer.
- Carefully remove the ice and frost. Wipe off the remaining ice and water or drain excess water through the drain located at the bottom of the chamber.
- Place the food back in the freezer and plug the power supply back in.
REPLACING THE FUSE
DC cable plug has been equipped with a fuse. If the fuse is broken it must be replaced with a new one with the same parameters.
F15al250v fuse has been installed in the DC cable plug.
- Unscrew the tip of the DC plug and remove it.
- Replace the detective fuse with a new fuse with the same type and rating.
- Re-assemble the tip.
CLEANING AND MAINTENANCE
- Clean the appliance inside and outside with a soft, damp cloth regularly. In case of stubborn stains, use sodium bicarbonate dissolved in lukewarm water to clean the unit.
- Never use abrasive products, detergents or soap. Do not use abrasive cleaning agents or hard objects during cleaning as these can damage the refrigerator.
• After washing, rinse with clean water and dry carefully. Do not leave the refrigerator off with food inside or lid closed.
• Never clean the appliance under running water.
TROUBLESHOOTING
| Fault Possible cause Suggested remedy | ||
| Device does not function, LED light does not glow | No voltage was detected in the DC power supply | In most vehicles the ignition must be turned on before power supplied to the vehicle power outlet |
| The DC plug fuse is defective | Replace the DC plug fuse by a new one | |
| The device does not cool (plug is inserted, “ON” LED is lit) | Defective compressor | This can only be repaired by an authorized repair center |
| The device does not cool (plug is inserted, display screen shows Error Code “E1”). Please also refer to the chapter “Error Codes” | Low voltage protection battery monitor is set too high | Select a lower level for battery monitor |
| Battery voltage is too low | Test the battery and charge it if needed | |
| When operating the device from DC outlet- the ignition is on, but the device does not work, the LED light is not on either | The vehicle power outlet is dirty, this result in a poor electric contact | If the DC plug becomes very warm in the vehicle power outlet, either the outlet must be cleaned or the plug has not been assembled correctly |
| The fuse of the DC plug has blown | Replace the fuse in the DC plug, please refer to the chapter “Replacing the fuse” | |
| The vehicle fuse has blown | Replace the vehicle’s power outlet fuse, please refer to your vehicle’s manual | |
ERROR CODES
| Code Possible reason Suggested solution | ||
| E0 | Sensor circuit is broken or short Connect or replace the sensor | |
| E1 | Input voltage is low | Check the battery voltage or adjust the battery protection mode |
| E2 | Ventilating fan problem | Check if the ventilating fan is blocked or short circuit |
| E3 | Compressor started self-protection | Disconnect the device from power supply for 30 minutes, and re-start the device |
| E4 | Compressor protect itself against unusual running speed | Change the working mode by device control panel |
| E5 | Control panel's overheating warning | Move the device to a well-ventilated place |
SPECIFICATIONS
MAIN FEATURES
LED display
Touch control panel
Eco mode
Cup holder
Belt for easy transport
Car battery protection
TECHNICAL DATA
Capacity: 13 l
Type: compressor freezer
Cooling performance: 20°C \~ -22°C
Climate class: 16°C \~ 43°C (SN/N/ST/T)
Insulation: C5H10 (Cyclopentane)
Refrigerant: R600a (17 g)
Noise: 52 dB
Protection class: III
Power consumption: 35 W ±20%
Voltage: DC 12/24 V | 3/1,5 A
AC/DC adapter:
Input: 100 - 240 V; 50/60 Hz
Output: 14,5 V / 4,1 A
AC cord length: 207 cm
DC cord length: 240 cm
Weight: 6,9 kg
Product dimensions (length x width x height): 58 x 29,5 x 32 cm
Chamber dimensions (length x width x height): 29,5 x 20 x 22 cm
In set: belt, AC adapter, DC power cord
English
Correct Disposal of This Product
(Waste Electrical & Electronic Equipment)


(Applicable in the European Union and other European countries with separate collection systems) This marking shown on the product or its literature, indicates that it should not be disposed with other household wastes at the end of its working life. To prevent possible harm to the environment or human health from uncontrolled waste disposal, please separate this from other types of wastes and recycle it responsibly to promote the sustainable reuse of material resources. Household users should contact either the retailer where they purchased this product, or their local government office, for details of where and how they can take this item for environmentally safe recycling. Business users should contact their supplier and check the terms and conditions of the purchase contract This product should not be mixed with other commercial wastes for disposal.
Agent frigorific: R600a (17 g)
Zgomot: 52 dB