
SPT-505-09 - Server wall mount Vevor - Free user manual and instructions
Find the device manual for free SPT-505-09 Vevor in PDF.
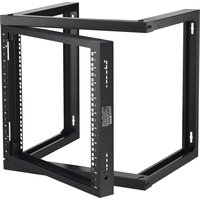


| Product Type | Wall mount server rack |
| Brand | Vevor |
| Model | SPT-505-09 |
| External dimensions | About 500 x 440 x 90 mm |
| Wall mounting dimensions (W x H) | 473 x 390 mm |
| Material | Steel |
| Weight | About 8 kg |
| Maximum load capacity | About 50 kg |
| Expansion screws included | M10 (x4) |
| Cage nuts included | M6 (x10) |
| Mounting screws included | M6 (x10) |
| Door | With latches, removable |
| Number of rack units (U) | 9 U |
| Usable depth | About 400 mm |
| Mounting type | Wall-mounted |
| Color | Black |
| Features | Network equipment mounting, natural ventilation, security with latches |
| Maintenance | Clean with a damp cloth, avoid solvents |
| Repairability | Spare parts available (latches, screws); contact support |
| Warranty | Electronic warranty via www.vevor.com/support |
Frequently Asked Questions - SPT-505-09 Vevor
User questions about SPT-505-09 Vevor
0 question about this device. Answer the ones you know or ask your own.
Ask a new question about this device
Download the instructions for your Server wall mount in PDF format for free! Find your manual SPT-505-09 - Vevor and take your electronic device back in hand. On this page are published all the documents necessary for the use of your device. SPT-505-09 by Vevor.
USER MANUAL SPT-505-09 Vevor
Technical Support and E-Warranty Certificate www.vevor.com/support
Wall Mount Server Rack
Model: SPT-505-09
We continue to be committed to provide you tools with competitive price. "Save Half", "Half Price" or any other similar expressions used by us only represents an estimate of savings you might benefit from buying certain tools with us compared to the major top brands and does not necessarily mean to cover all categories of tools offered by us. are kindly reminded to verify carefully when you are placing an order with us if you are actually saving half in comparison with the top major brands.
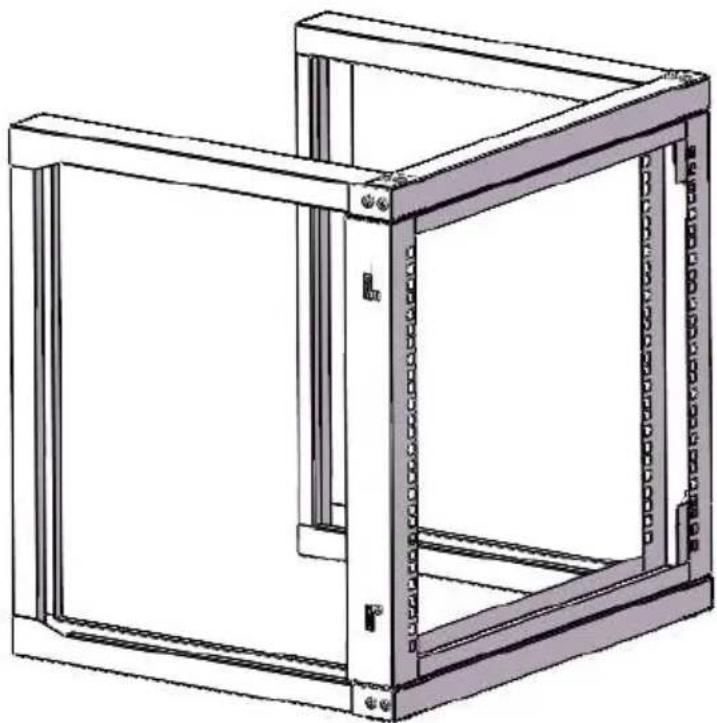
NEED HELP? CONTACT US!
Have product questions? Need technical support? Please feel free to contact us:
Technical Support and E-Warranty Certificate www.vevor.com/support
This is the original instruction, please read all manual instructions carefully before operating. VEVOR reserves a clear interpretation of o user manual. The appearance of the product shall be subject to the product you received. Please forgive us that we won't inform you ag there are any technology or software updates on our product.

Warning-To reduce the risk of injury, user must read instructions manual carefully.
PRODUCT DIAGRAM
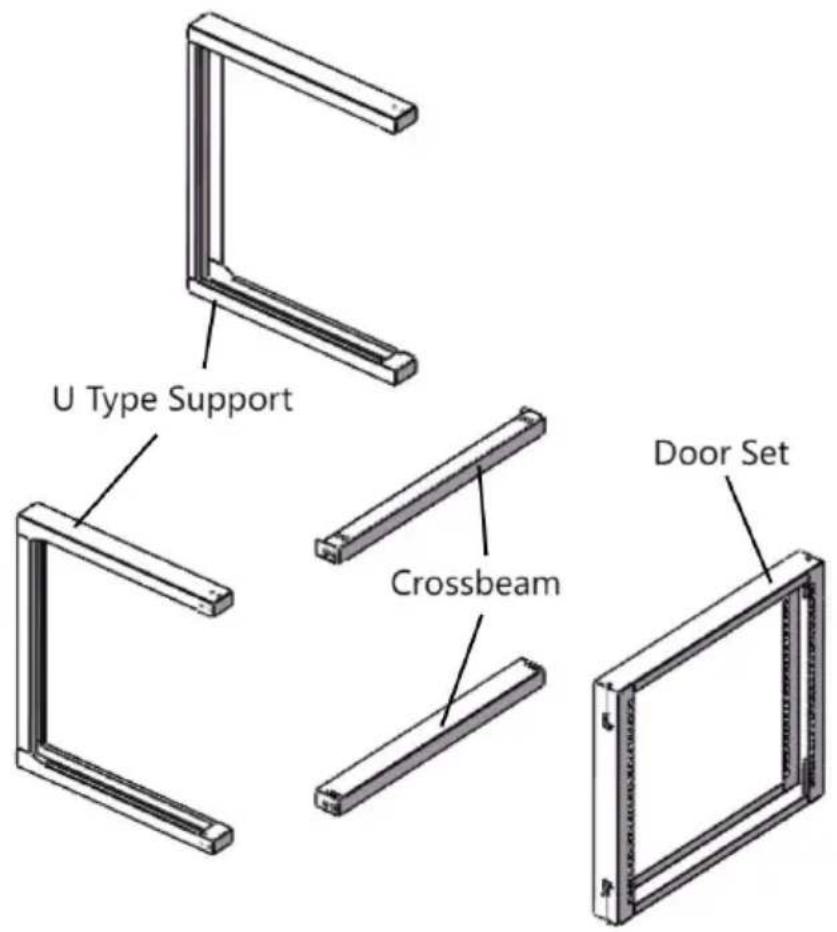
- U Type Support x2
- Crossbeam x2
- Door Set x1
REQUIREMENT
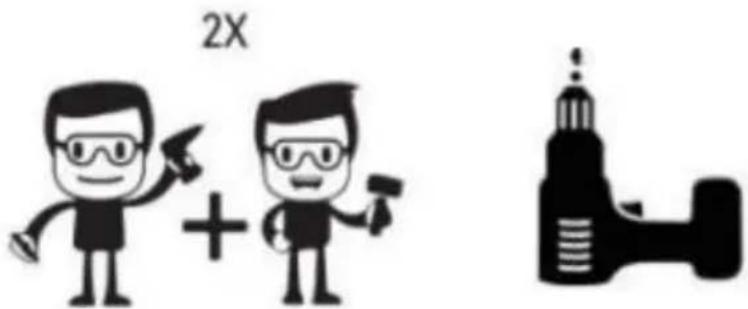
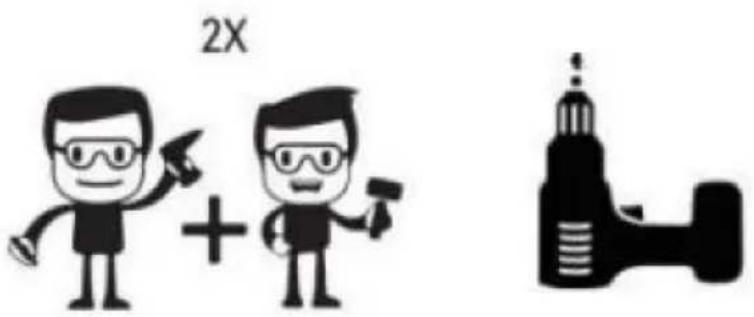
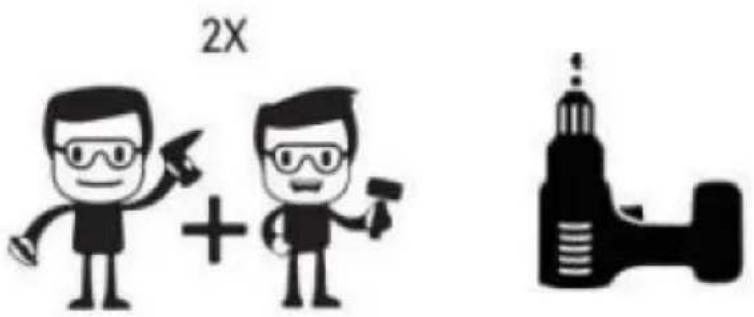
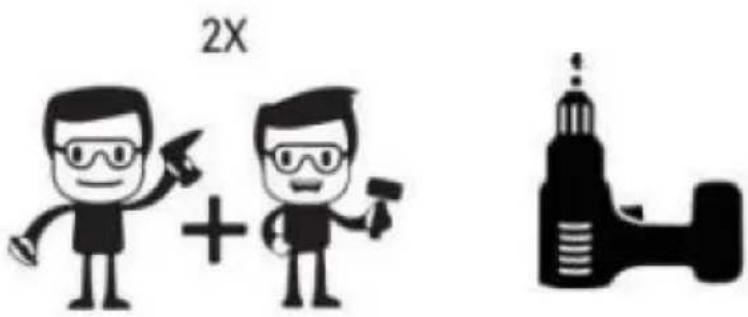
● Two People (for assembly) ● Electrical Phillips Head Screwdriver x 1
SPECIFICATION DATA
| Name | Wall Mount Server Rack |
| Model | SPT-505-09 |
| Material | Cold Roll Steel |
| Color | Black |
| Installation Width Standard | 19" |
| Depth | 18"(455mm) |
| Mounting Height | 9U |
| Ground-Mounted Load-Bearing | 150 lbs |
| Wall-Mounted Load-Bearing | 150 lbs |
| Wall Mounting Size(L*H) | 473*390mm |
| Product Size(L*W*H) | 530*450*520mm |
| Product Weight | 6.40Kg |
| Accessories | 30 x M5 assembly fix screws; 12 x M6 cage nuts; 12 x M6*12 cross head screws; 4 x wall mount M10 expansion bolts; 1 x Instruction manual. |
SERVER RACK INSTALLATION
- Insert the Bottom Crossbeam into left U Type Support and right U Type Support, secure with 8pcs M5 assembly fix screws. See Figure. Notes: during assembly, need to notice the Crossbeam direction, make sure the vertical mounting holes are aligned.
- Insert the Top Crossbeam into left U Type Support and right U Type Support, secure with 8pcs M5 assembly fix screws. See Figure. Notes: during assembly, need to notice the Crossbeam direction, make sure the vertical mounting holes are aligned.
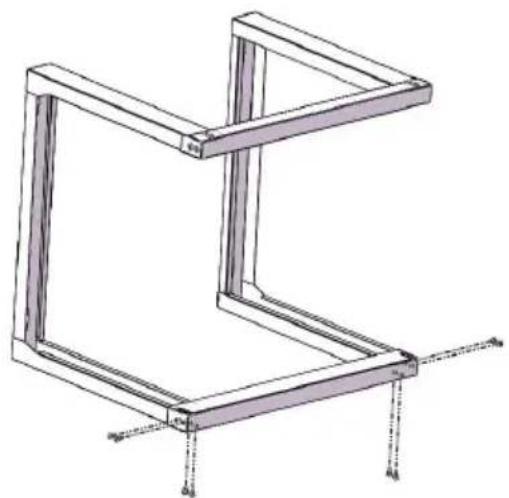
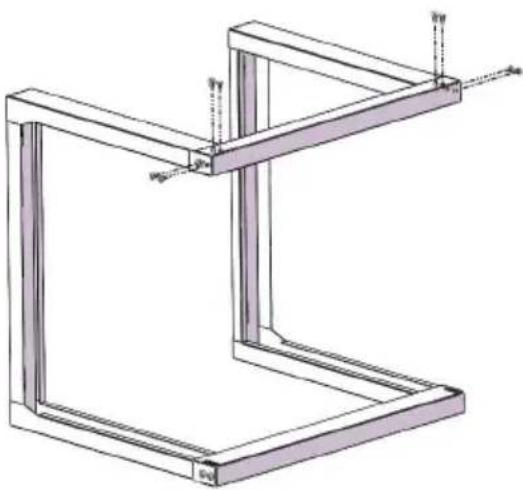
Figure 1 Figure 2
- Pull the Door Set's 4pcs door latches on unlock position as follows, ready to assembly door set on the Rack. See Figure 3
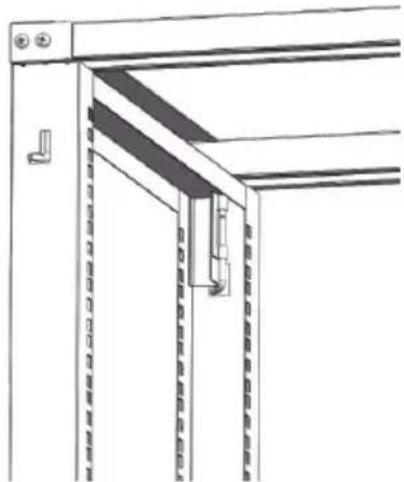
Figure 3
- Put the Door Set on the frame showed position, then lock the right
of door set's 2pcs door latches on the Rack one by one, make sure can be open and close smoothly. See Figure 4
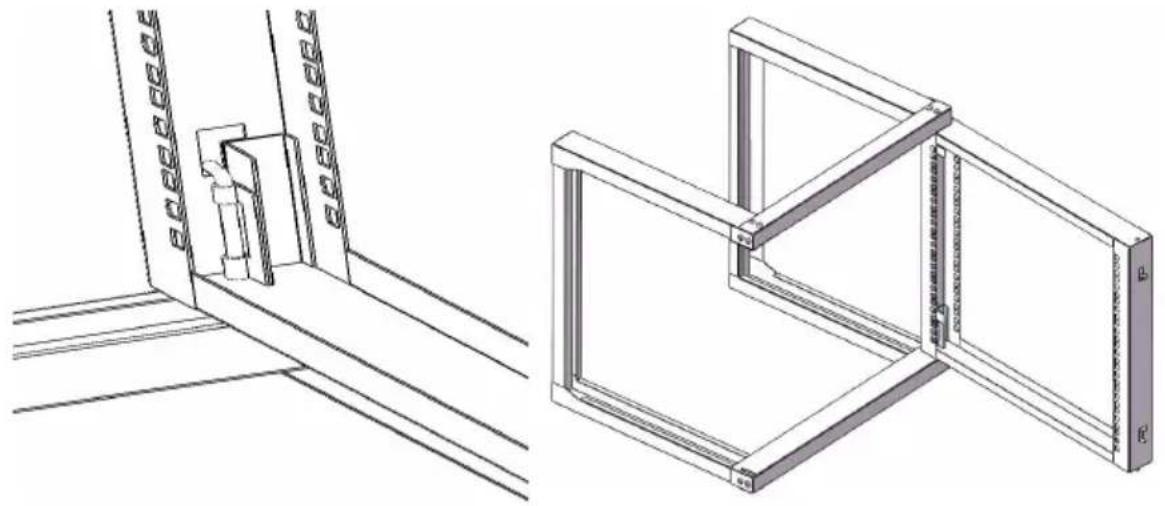
Figure 4
- Adopts same step as step 4. lock the left side of door set's 2pcs latches on the frame one by one. make sure the door set is fixed. See Figure 5
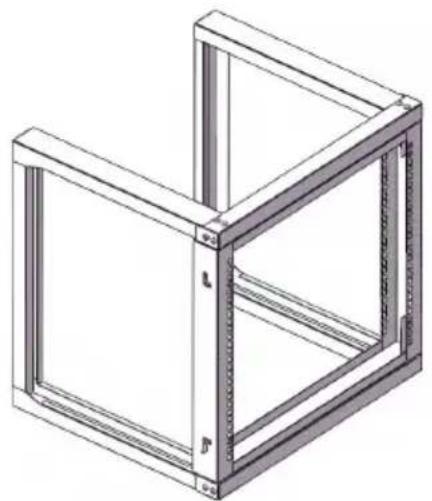
Figure 5
WALL MOUNT INSTALLATION
- First put the server rack on the wall or other suitable mounting surface, on the suitable position to mark mounting holes position by co-pen.
Or can directly according to the wall mounting hole distance L*H 473*390mm to mark mounting holes position.
- Use an electric drill to drill 4 marked holes, each 14mm in diameter.
Mount and fix the M10 expansion screws into the holes.
- Fix the server rack onto the M10 expansion screws, and tighten the expansion screw nuts.
EQUIPMENT INSTALLATION
Use the included M6 cage nuts and screws to install equipment into the wall-mounted server rack.
- Insert the wing (side) of an M6 cage nut into the back of the desired nut hole.
- Apply pressure by hand or with the cage nut tool to insert the spring of the M6 cage nut into the desired cage nut hole.
- Repeat steps 1 and 2 to insert the desired number of cage nuts for your application.
- Align the mounting holes in the equipment with the M6 cage nuts installed in steps 1-3.
- Thread an M6 screw, and repeat until the desired number of M6 screws have been prepared.
- Tighten the screws using a Phillips head screwdriver.
VEVOR®
TOUGH TOOLS, HALF PRICE
Technical Support and E-Warranty Certificate
www.vevor.com/support
VEVOR®
TOUGH TOOLS, HALF PRICE
NEED HELP? CONTACT US!
U-type support x2
Crossbeam x2
| Name | Wall Mount Server Rack |
| Model | SPT-505-09 |
| Material | Cold Roll Steel |
| Color | Black |
| Installation Width Standard | 19" |
| Depth | 18"(455mm) |
| Mounting Height | 9U |
| Ground-Mounted Load-Bearing | 150 lbs |
| Wall-Mounted Load-Bearing | 150 lbs |
| Wall Mounting Size(L*H) | 473*390mm |
| Product Size(L*W*H) | 530*450*520mm |
| Product Weight | 6.40Kg |
| Accessories | 30 x M5 assembly fix screws; 12 x M6 cage nuts; 12 x M6*12 cross head screws; 4 x wall mount M10 expansion bolts; 1 x Instruction manual. |
SERVER RACK INSTALLATION
Figure 1

Figure 2
Figure 3
Figure 4
Figure 5
WALL MOUNT INSTALLATION
| Name | Wall Mount Server Rack |
| Model | SPT-505-09 |
| Material | Cold Roll Steel |
| Color | Black |
| Installation Width Standard | 19" |
| Depth | 18"(455mm) |
| Mounting Height | 9U |
| Ground-Mounted Load-Bearing | 150 lbs |
| Wall-Mounted Load-Bearing | 150 lbs |
| Wall Mounting Size(L*H) | 473*390mm |
| Product Size(L*W*H) | 530*450*520mm |
| Product Weight | 6.40Kg |
| Accessories | 30 x M5 assembly fix screws; 12 x M6 cage nuts; 12 x M6*12 cross head screws; 4 x wall mount M10 expansion bolts; 1 x Instruction manual. |
SERVER-RACK-INSTALLATION
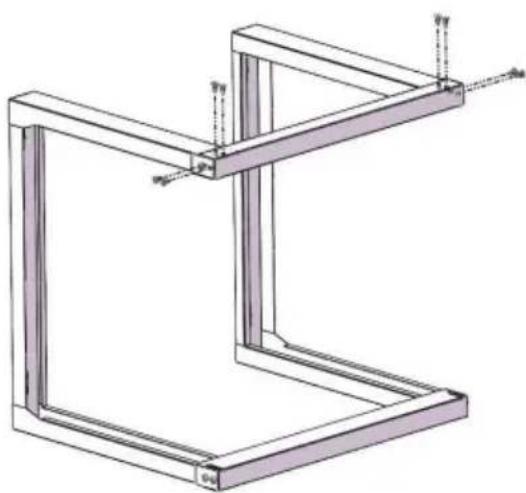
Figure 1 Figure 2
Figure 3
Figure 4
Figure 5
WALL MOUNT INSTALLATION
www.vevor.com/support
VEVOR®
TOUGH TOOLS, HALF PRICE
www.vevor.com/support
NEED HELP? CONTACT US!
| Name | Wall Mount Server Rack |
| Model | SPT-505-09 |
| Material | Cold Roll Steel |
| Color | Black |
| Installation Width Standard | 19" |
| Depth | 18"(455mm) |
| Mounting Height | 9U |
| Ground-Mounted Load-Bearing | 150 lbs |
| Wall-Mounted Load-Bearing | 150 lbs |
| Wall Mounting Size(L*H) | 473*390mm |
| Product Size(L*W*H) | 530*450*520mm |
| Product Weight | 6.40Kg |
| Accessories | 30 x M5 assembly fix screws; 12 x M6 cage nuts; 12 x M6*12 cross head screws; 4 x wall mount M10 expansion bolts; 1 x Instruction manual. |
RACK SERVER INSTALLATION
Figure 1
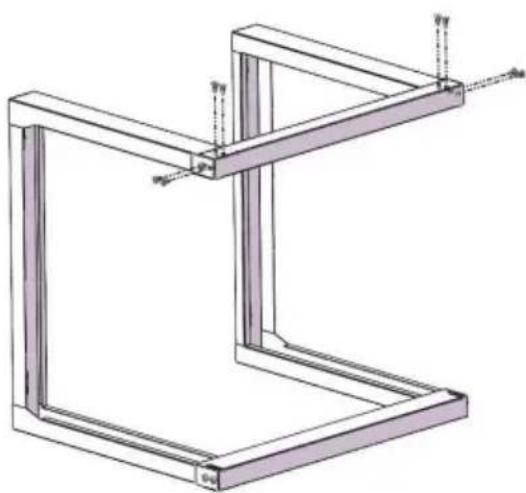
Figure 2
Figure 3
Figure 4 5.
Figure 5
PRODUCT DIAGRAM
SPECIFICATION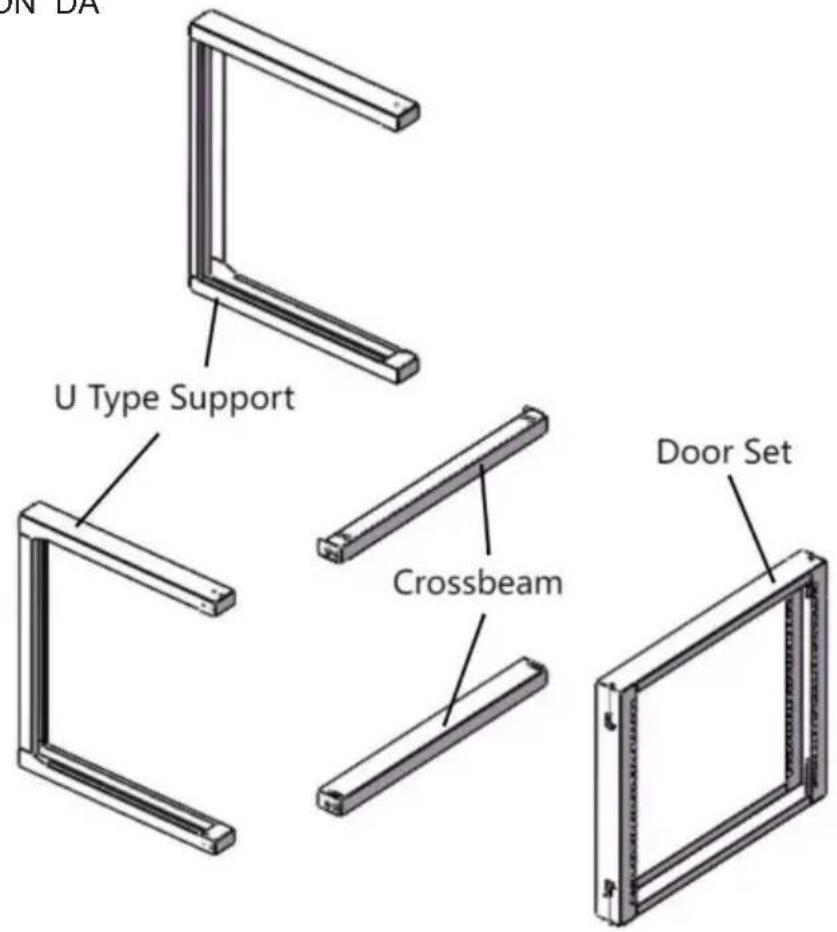
U-type support x2
Cross beam x2
Door set x1
REQUIREMENT
| Name | Wall Mount Server Rack |
| Model | SPT-505-09 |
| Material | Cold Roll Steel |
| Color | Black |
| Installation Width Standard | 19" |
| Depth | 18"(455mm) |
| Mounting Height | 9U |
| Ground-Mounted Load-Bearing | 150 lbs |
| Wall-Mounted Load-Bearing | 150 lbs |
| Wall Mounting Size(L*H) | 473*390mm |
| Product Size(L*W*H) | 530*450*520mm |
| Product Weight | 6.40Kg |
| Accessories | 30 x M5 assembly fix screws; 12 x M6 cage nuts; 12 x M6*12 cross head screws; 4 x wall mount M10 expansion bolts; 1 x Instruction manual. |
Figure 1
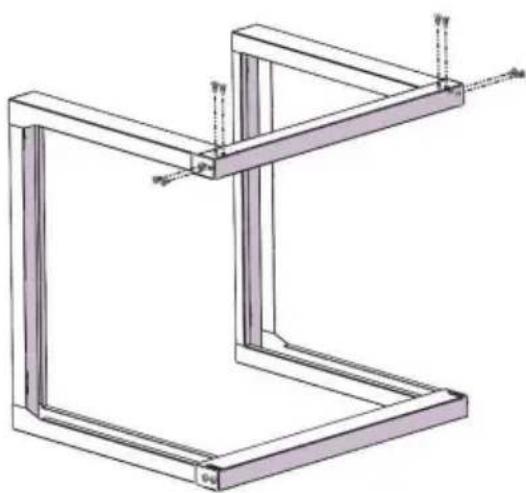
Figure 2
Figure 3
Figure 4 5.
Figure 5
NEED HELP? CONTACT US!
U-type support x2
Cross beam x2
Door set x1
REQUIREMENT
| Name | Wall Mount Server Rack |
| Model | SPT-505-09 |
| Material | Cold Roll Steel |
| Color | Black |
| Installation Width Standard | 19" |
| Depth | 18"(455mm) |
| Mounting Height | 9U |
| Ground-Mounted Load-Bearing | 150 lbs |
| Wall-Mounted Load-Bearing | 150 lbs |
| Wall Mounting Size(L*H) | 473*390mm |
| Product Size(L*W*H) | 530*450*520mm |
| Product Weight | 6.40Kg |
| Accessories | 30 x M5 assembly fix screws; 12 x M6 cage nuts; 12 x M6*12 cross head screws; 4 x wall mount M10 expansion bolts; 1 x Instruction manual. |
MOUNTING IN SERVER RACK
Figure 1
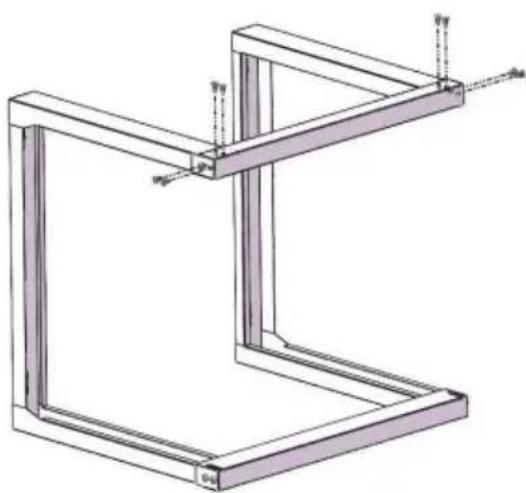
Figure 2
Figure 3
Figure 4
Figure 5
WALL MOUNTING
www.vevor.com/support
VEVOR®
TOUGH TOOLS, HALF PRICE
Technical support and e-warranty certificate www.vevor.com/support
NEED HELP? CONTACT US!
U-type support x2
Crossbar x2
Door set x1
REQUIRED
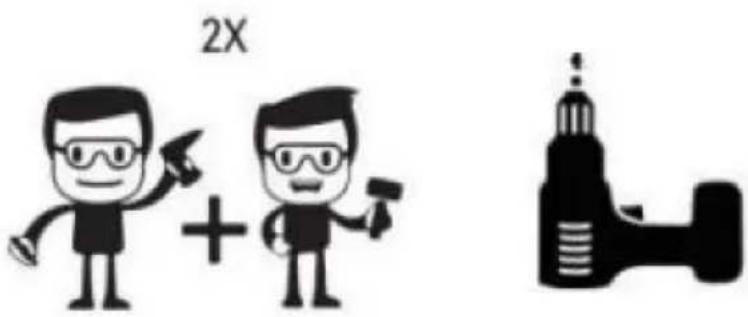
Two people (for installation)
| Name | Wall Mount Server Rack |
| Model | SPT-505-09 |
| Material | Cold Roll Steel |
| Color | Black |
| Installation Width Standard | 19" |
| Depth | 18"(455mm) |
| Mounting Height | 9U |
| Ground-Mounted Load-Bearing | 150 lbs |
| Wall-Mounted Load-Bearing | 150 lbs |
| Wall Mounting Size(L*H) | 473*390mm |
| Product Size(L*W*H) | 530*450*520mm |
| Product Weight | 6.40Kg |
| Accessories | 30 x M5 assembly fix screws; 12 x M6 cage nuts; 12 x M6*12 cross head screws; 4 x wall mount M10 expansion bolts; 1 x Instruction manual. |
INSTALLATION OF SERVER RACK
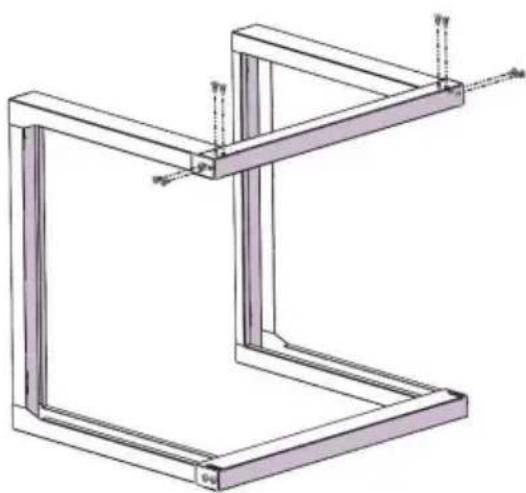
Figure 1 Figure 2
Figure 3
Figure 4
Figure 5
WALL MOUNT INSTALLATION
NEED HELP? CONTACT US!
U Type support, Crossbar x2
x2
Door kit x1
REQUIREMENTS
| Name | Wall Mount Server Rack |
| Model | SPT-505-09 |
| Material | Cold Roll Steel |
| Color | Black |
| Installation Width Standard | 19" |
| Depth | 18"(455mm) |
| Mounting Height | 9U |
| Ground-Mounted Load-Bearing | 150 lbs |
| Wall-Mounted Load-Bearing | 150 lbs |
| Wall Mounting Size(L*H) | 473*390mm |
| Product Size(L*W*H) | 530*450*520mm |
| Product Weight | 6.40Kg |
| Accessories | 30 x M5 assembly fix screws; 12 x M6 cage nuts; 12 x M6*12 cross head screws; 4 x wall mount M10 expansion bolts; 1 x Instruction manual. |
INSTALLATION OF SERVER RACK
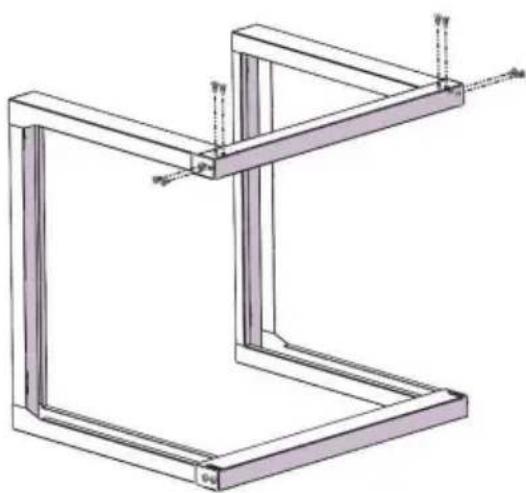
Figure 1 Figure 2
Figure 3
Figure 4
Figure 5
INSTALLATION OF WALL MOUNT
www.vevor.com/support
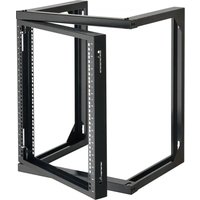
- WALL MOUNT SERVER RACK
- NEED HELP? CONTACT US
- PRODUCT DIAGRAM
- REQUIREMENT
- SPECIFICATION DATA
- SERVER RACK INSTALLATION
- WALL MOUNT INSTALLATION
- EQUIPMENT INSTALLATION
- VEVOR®
- TOUGH TOOLS, HALF PRICE
- SERVER-RACK-INSTALLATION
- RACK SERVER INSTALLATION
- MOUNTING IN SERVER RACK
- WALL MOUNTING
- REQUIRED
- INSTALLATION OF SERVER RACK
- REQUIREMENTS
- INSTALLATION OF WALL MOUNT
Brand : Vevor
Model : SPT-505-09
Category : Server wall mount