
SPT-505-12 - Server wall mount Vevor - Free user manual and instructions
Find the device manual for free SPT-505-12 Vevor in PDF.
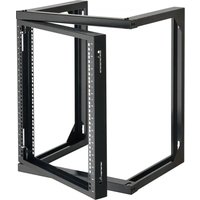


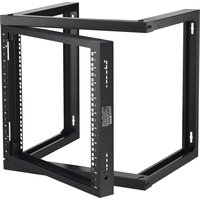
| Product Type | Wall mount server rack |
| Brand | Vevor |
| Model | SPT-505-12 |
| Height | 12U (53.3 cm) |
| Depth | 45 cm |
| Usable width | 48.3 cm (19 inches) |
| Material | Cold rolled steel |
| Color | Black |
| Maximum load capacity | 60 kg |
| Mounting type | Wall mount with M10 expansion bolts |
| Door | Yes, with locking latches |
| Cage nuts included | M6 |
| Screws included | M6×12 (for equipment), M10 (for wall mounting) |
| Assembly | Requires 2 people |
| Required tools | Cross-head electric screwdriver, electric drill |
| Maintenance | Clean with a dry cloth |
| Safety | Read manual before use, use protective equipment |
Frequently Asked Questions - SPT-505-12 Vevor
User questions about SPT-505-12 Vevor
0 question about this device. Answer the ones you know or ask your own.
Ask a new question about this device
Download the instructions for your Server wall mount in PDF format for free! Find your manual SPT-505-12 - Vevor and take your electronic device back in hand. On this page are published all the documents necessary for the use of your device. SPT-505-12 by Vevor.
USER MANUAL SPT-505-12 Vevor
Wall Mount Server Rack
Model: SPT-505-09/SPT-505-12/SPT-505-15
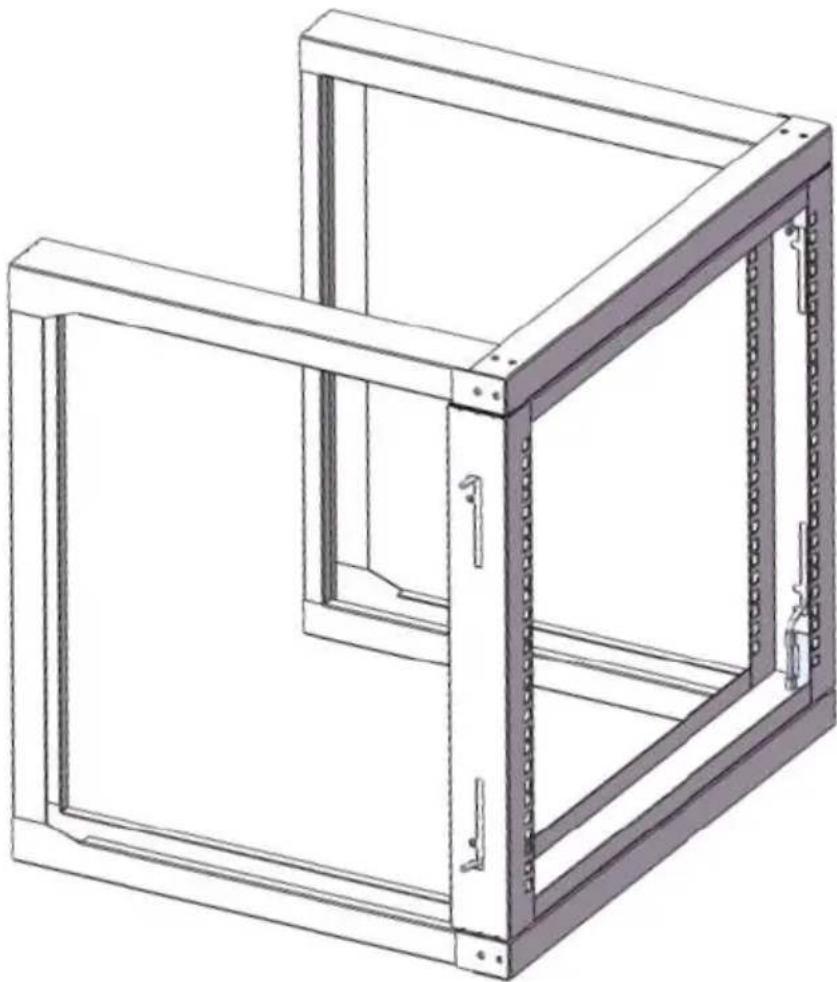
This is the original instruction. Please read all manual instructions carefully before operating. VEVOR reserves a clear interpretation of the user manual. The appearance of the product shall be subject to the product you received. Please forgive us that we won't inform you again if there are any technology or software updates on our product.

Warning: To reduce the risk of injury, the user must read the instructions manual carefully.
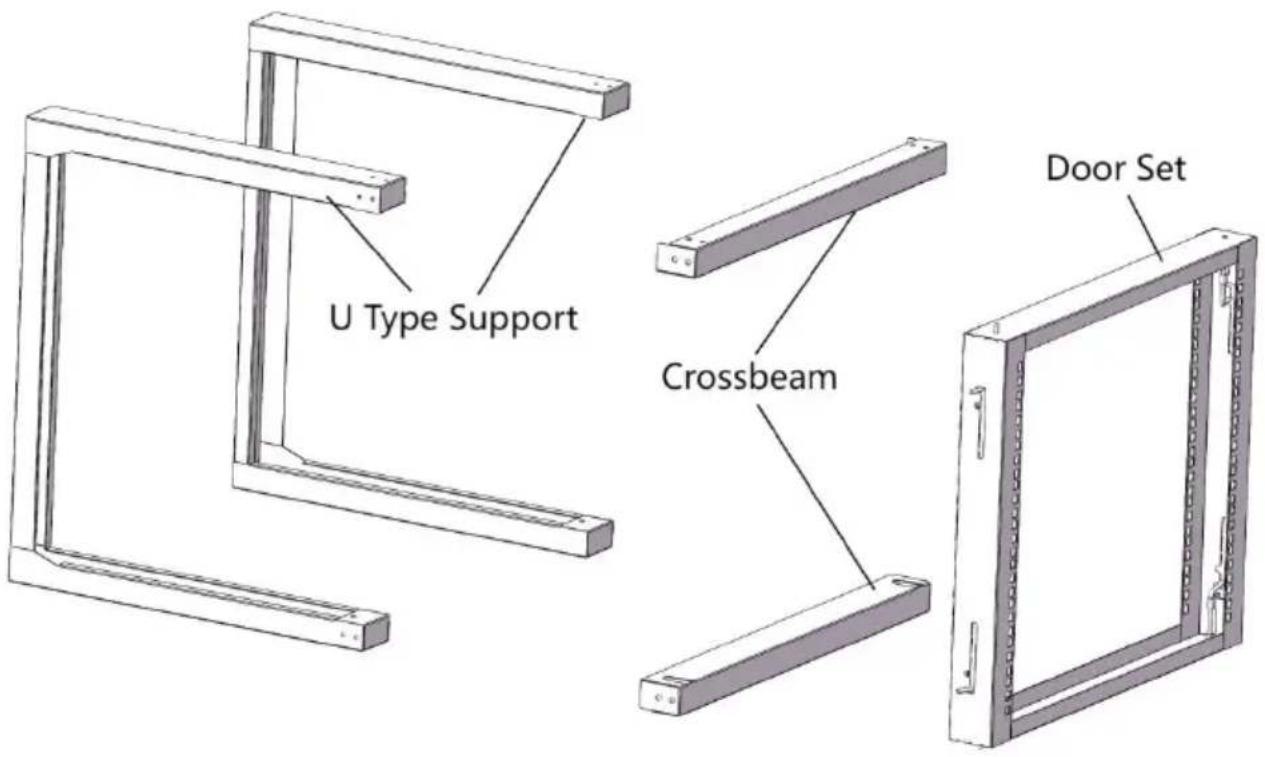
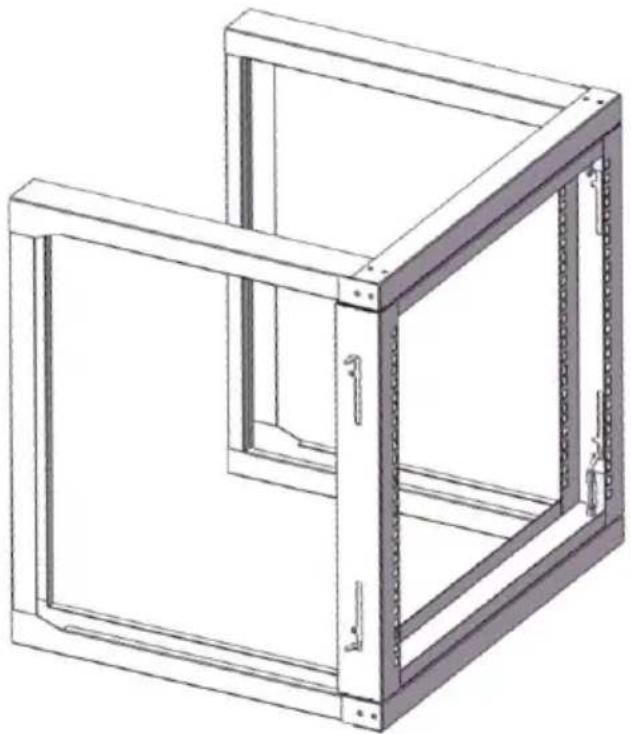
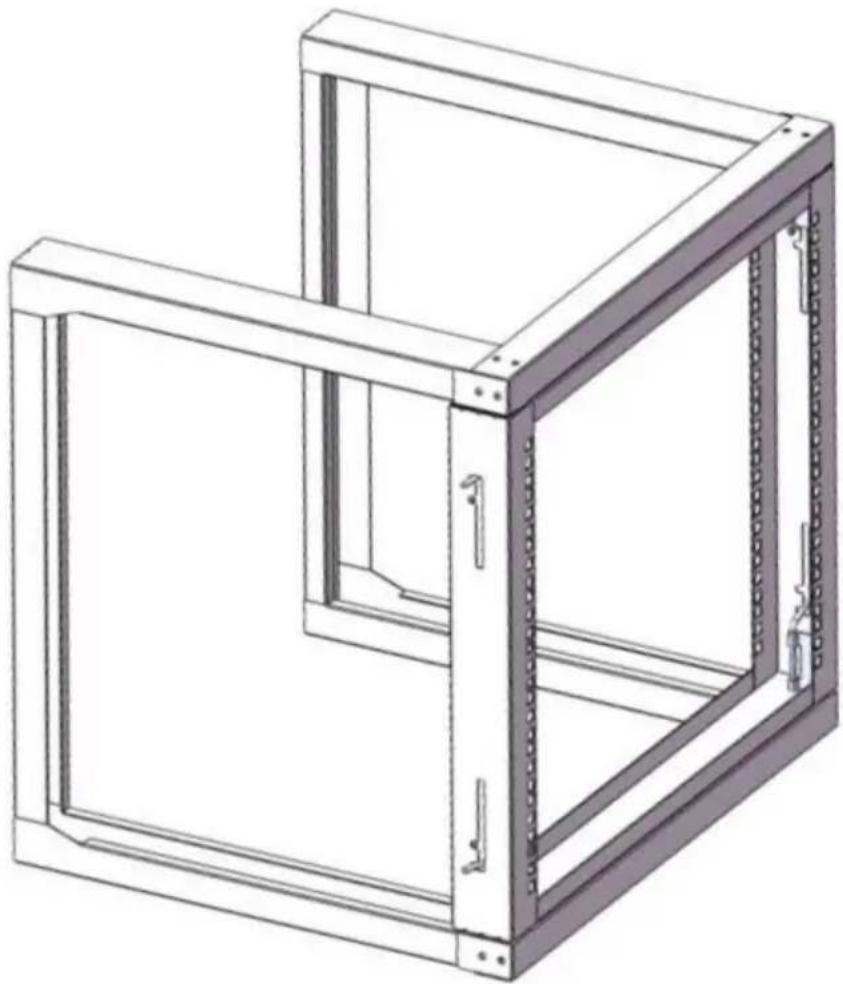
PRODUCT DIAGRAM
| PACKAGE CONTENTS | |||
| Part No. | Part Name | QTY | Photo |
| 1 | U Type Support | 2 | as diagram showed |
| 2 | Crossbeam | 2 | |
| 3 | Door Set | 1 | |
| 4 | M5 assembly fix screws | 30 | 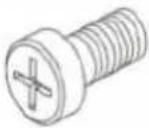 |
| 5 | M6 cage nuts | 12 | 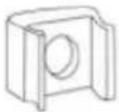 |
| 6 | M6*12 cross head screws | 12 | 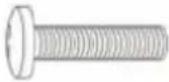 |
| 7 | wall mount M10 expansion bolts | 4 | 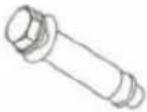 |
REQUIREMENT

● Two People (for assembly) ● Electrical Phillips Head Screwdriver x 1
SPECIFICATION DATA
| Name | Wall Mount Server Rack | ||
| Model | SPT-505-09 | SPT-505-12 | SPT-505-15 |
| Material | Cold Roll Steel | ||
| Color | Black | ||
| Depth | 18"(455mm) | ||
| Mounting Height | 9U | 12U | 15U |
| Ground-Mounted Load-Bearing | 150 lbs | ||
| Wall-Mounted Load-Bearing | 150 lbs | ||
| Rack Door Load-Bearing | 100 lbs | ||
| Wall Mounting Size(W*H) | 473*390mm | 473*524mm | 473*657mm |
| Product Size(W*D*H) | 530*455*520mm | 530*455*660mm | 530*455*795mm |
| Product Weight | 8.30Kg | 9.00Kg | 9.70Kg |
| Accessories | 30 x M5 assembly fix screws;12 x M6 cage nuts;12 x M6*12 cross head screws;4 x wall mount M10 expansion bolts;1 x Instruction manual. | ||
SERVER RACK INSTALLATION
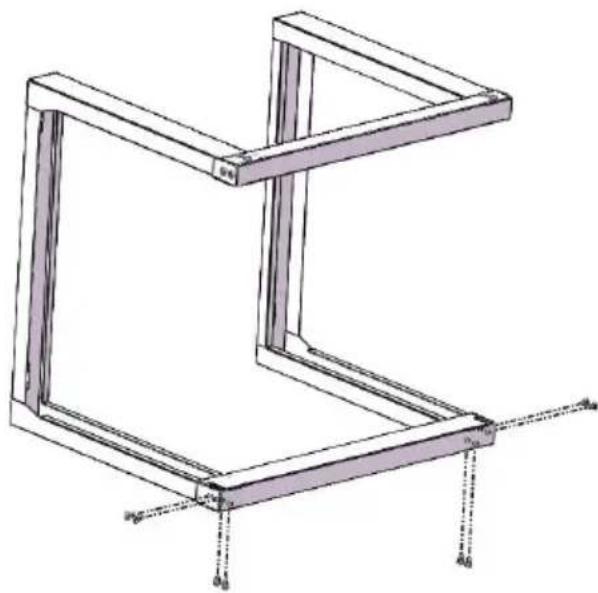
- Insert the Bottom Crossbeam (②) into the left U Type Support (①) and right U Type Support (①). Secure with 8 pcs M5 assembly fix Screws (④). See Figure 1.
Notes: During assembly, need to notice the Crossbeam direction, make sure the vertical mounting holes are aligned.
If the holes do not all line up, please secure the side screws first; the rest of the holes will gradually line up during the installation process.
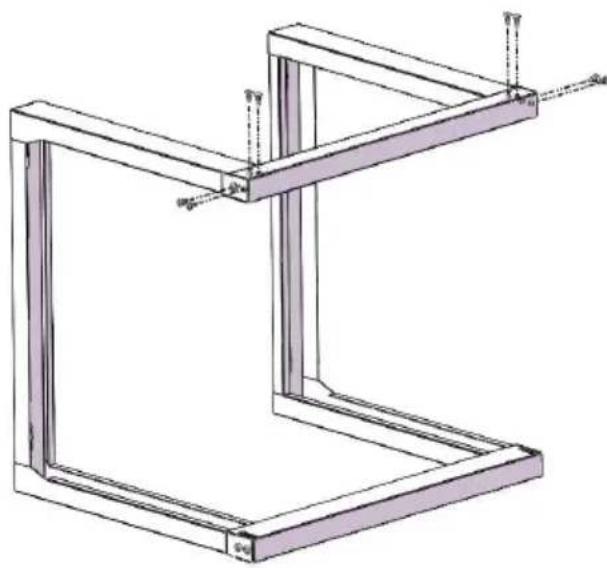
- Insert the Top Crossbeam (②) into the left U Type Support (①) and right U Type Support (①). Secure with 8 pcs M5 assembly fix Screws (④). See Figure 2.
Notes: During assembly, need to notice the Crossbeam direction, make sure the vertical mounting holes are aligned.
If the holes do not all line up, secure the side screws first; the rest of the holes will gradually line up during the installation process.
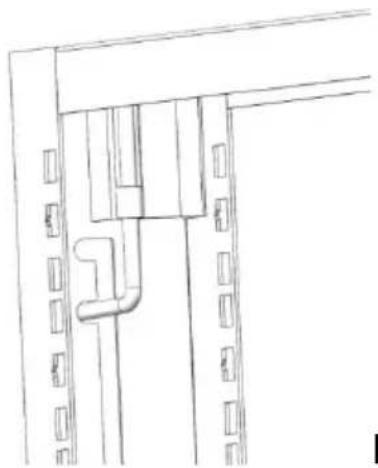
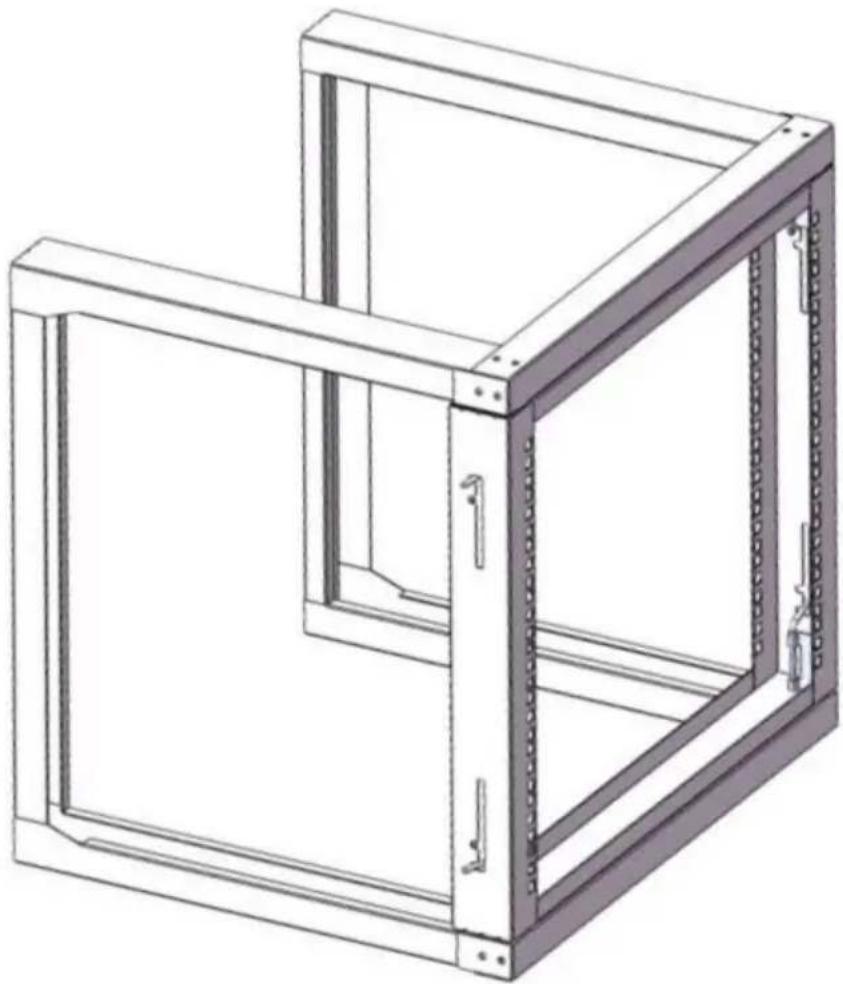
- Pull the 4 door latches of the Door Set (③) to the unlock position as follows, ready to assemble the door set on the rack. See Figure 3.
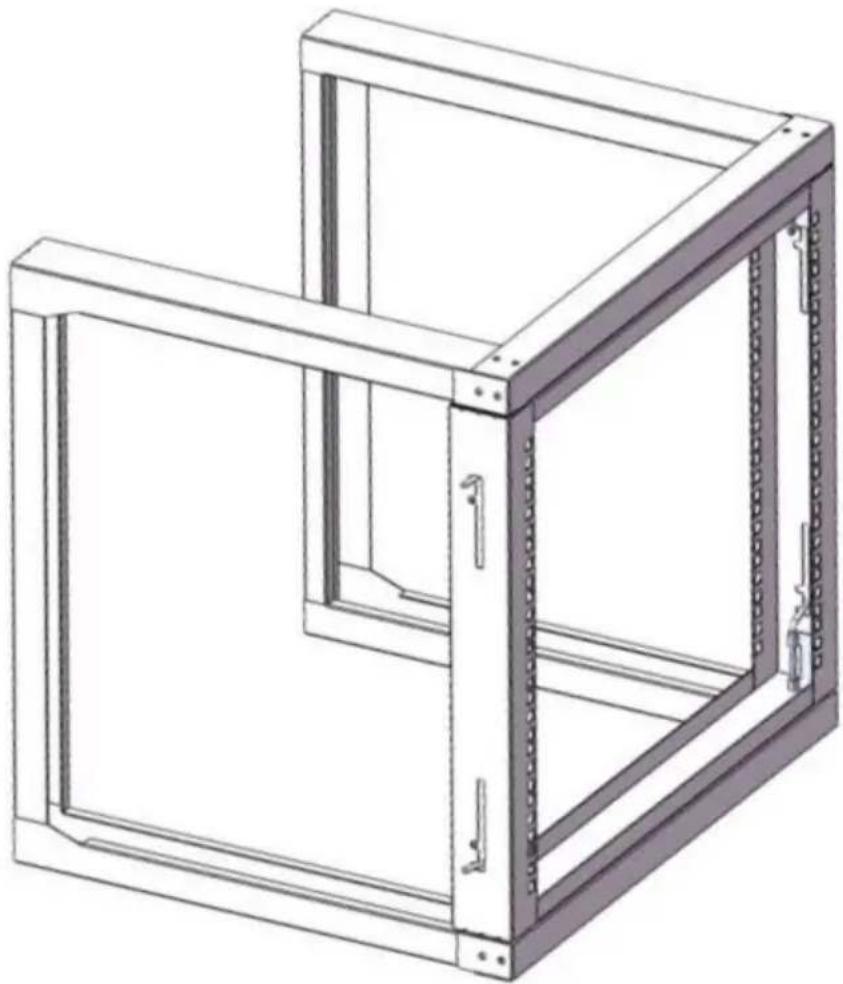
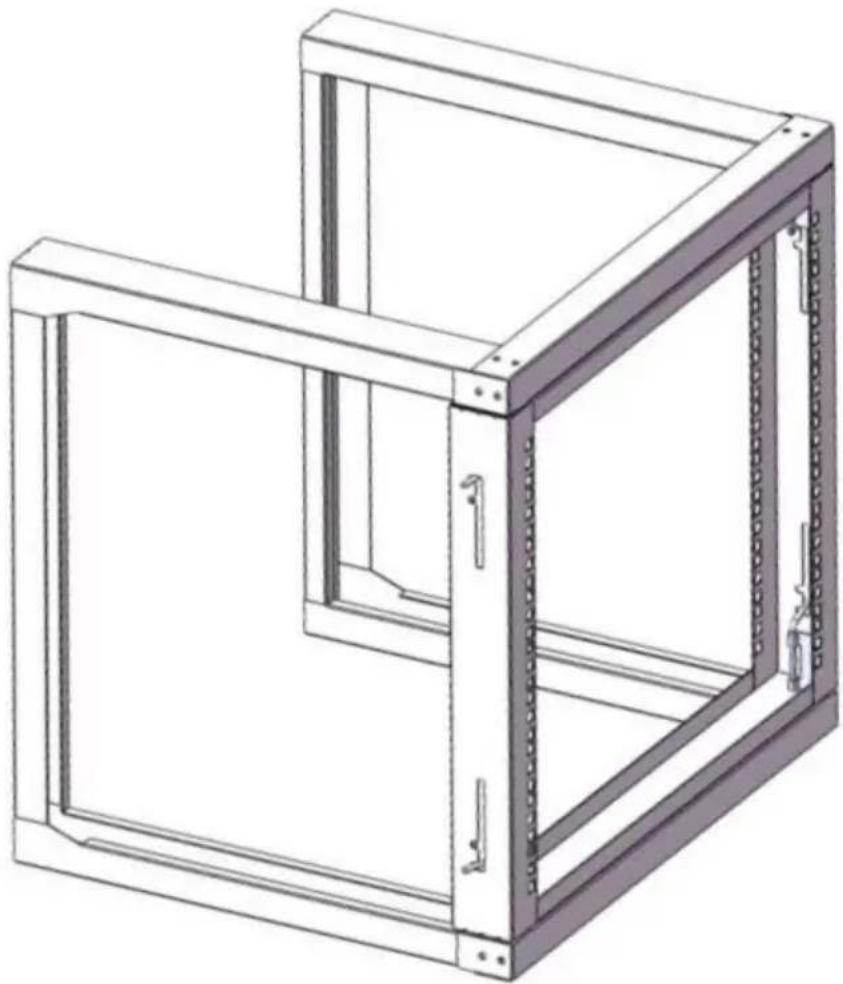
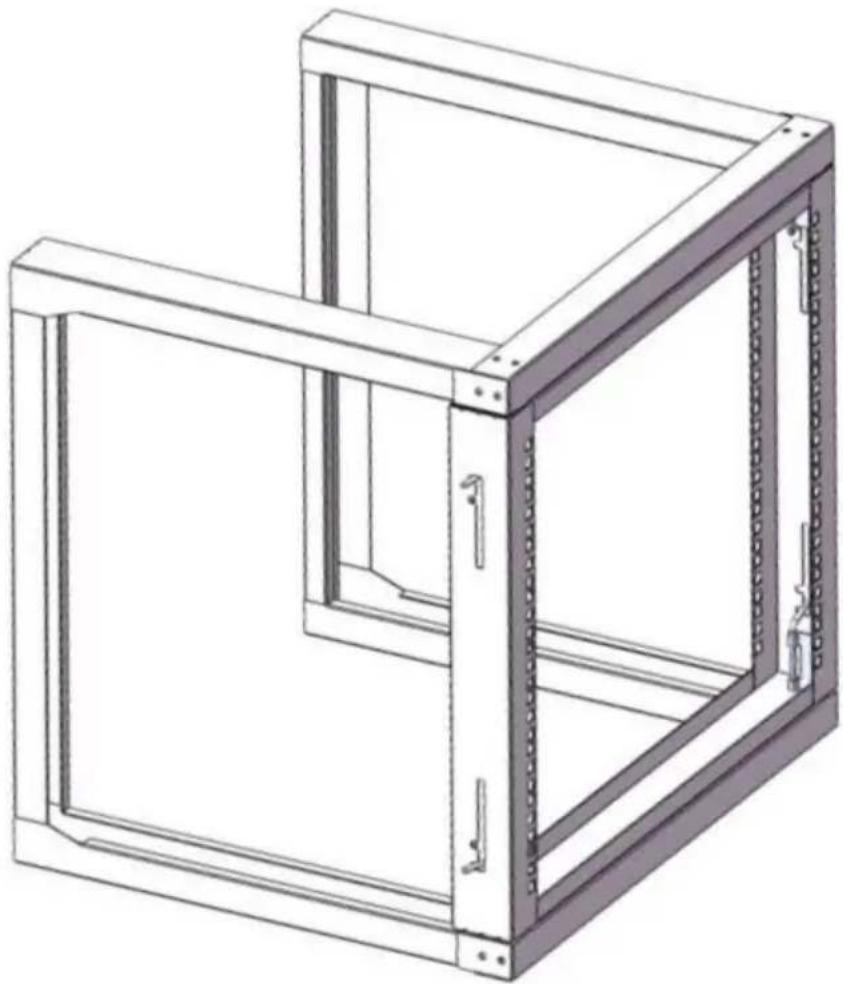
- Place the Door Set (③) on the frame in the shown position, then lock the 2 door latches on the side of the Door Set (③) onto the rack one by one. Make sure the door can open and close smoothly. See Figure 4.
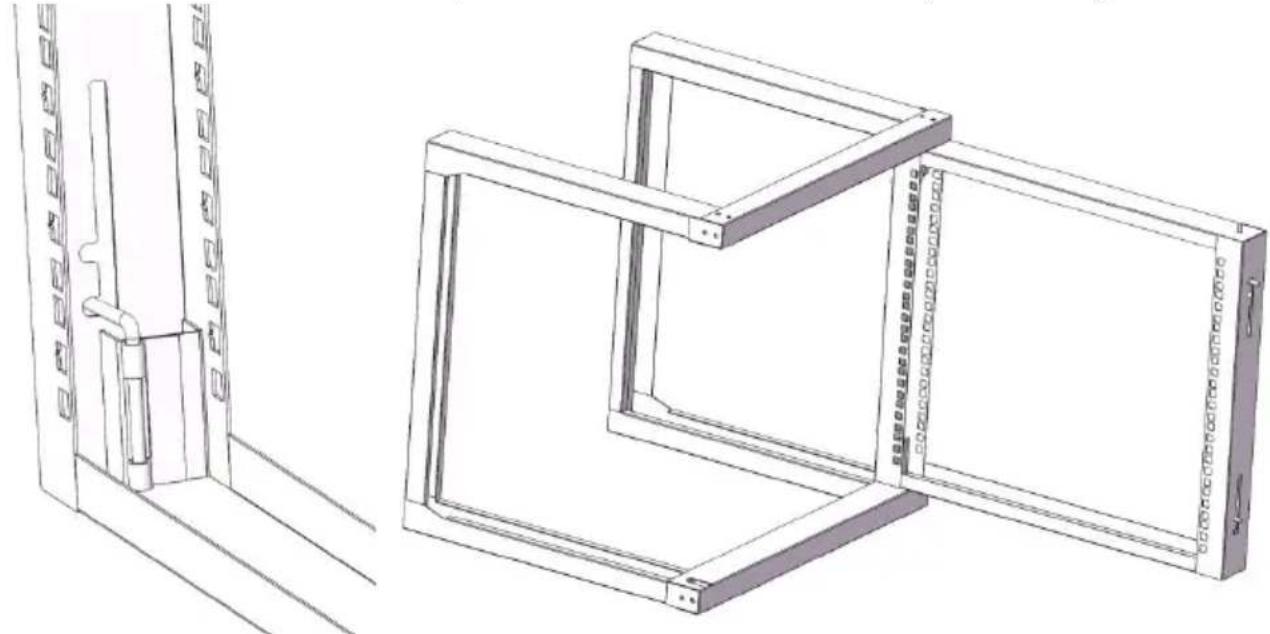
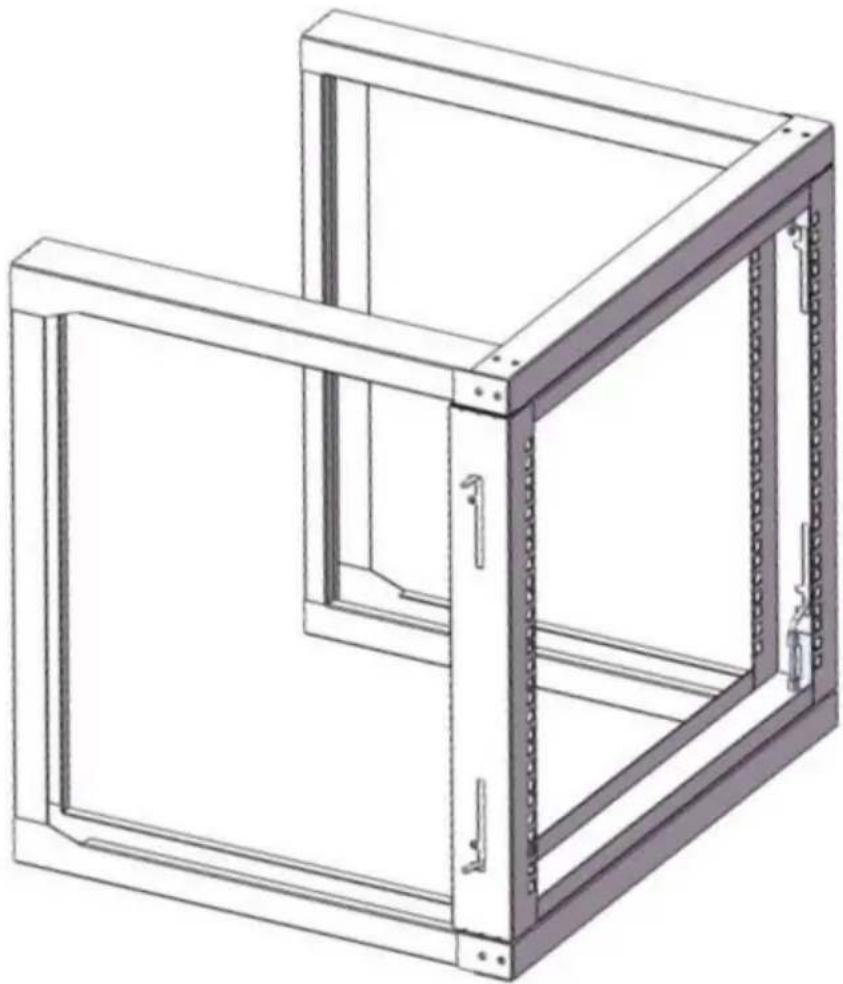
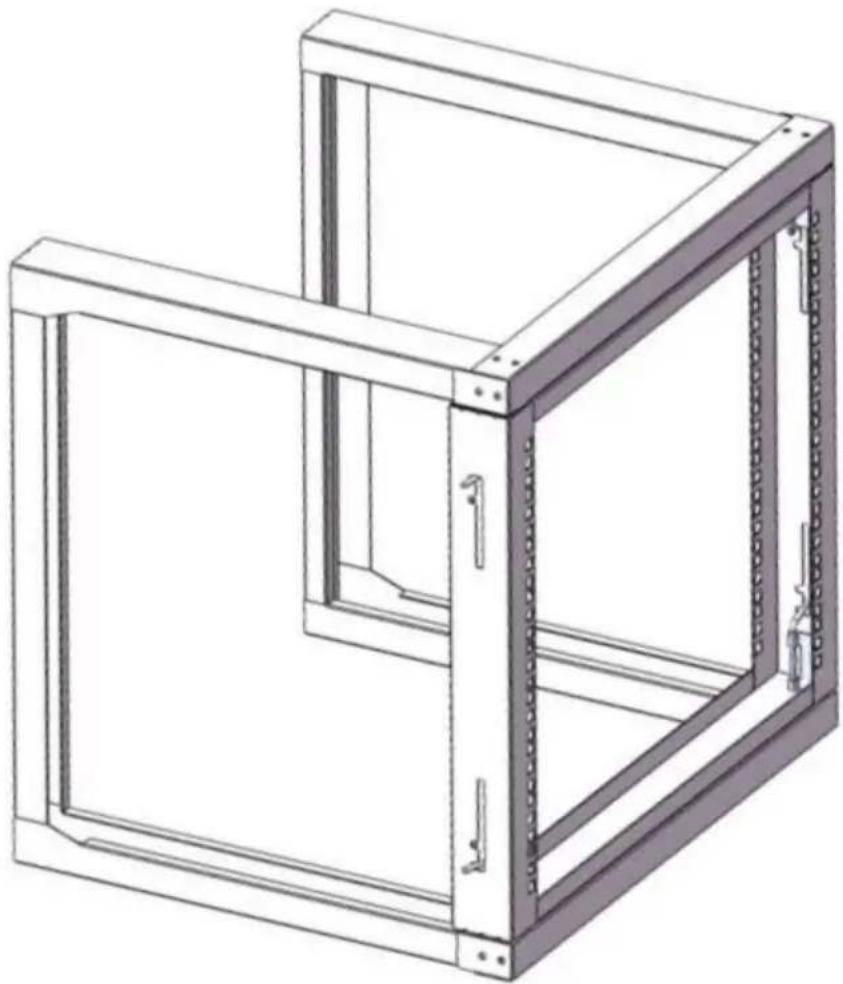
- Using the same step as step 4, lock the 2 door latches on the left side of the Door Set (③) onto the frame one by one. Make sure the door set is fixed. See Figure 5.
WALL MOUNT INSTALLATION
- First, place the server rack on the wall or other suitable mounting surface. Mark the mounting hole positions at suitable locations using a pencil. Alternatively, you can directly mark the mounting hole positions according to the wall mounting size W*H shown in the specification data sheet above.
- Use an electric drill to drill 4 holes of 14mm diameter at the marked positions, then mount and fix the M10 expansion screws (⑦) into the holes.
- Fix the server rack onto the M10 expansion screws (⑦), and tighten the expansion screw nuts.
EQUIPMENT INSTALLATION
Use the included M6 cage nuts (⑤) and M6*12 cross head screws (⑥) to install equipment into the wall mount server rack.
- Insert the wing (side) of an M6 cage nut (⑤) into the back of the desired cage nut hole.
- Apply pressure by hand or with the cage nut tool to insert the M6 cage nut (⑤) into the desired cage nut hole.
- Repeat steps 1 and 2 to insert the desired number of cage nuts.
- Align the mounting holes in the equipment with the M6 cage nuts installed in steps 1-3.
- Thread an M6*12 cross head screw (⑥). Repeat until the desired number of M6*12 cross head screws (⑥) have been prepared.
- Tighten the screws using a Phillips head screwdriver.
Installation Video

VEVOR
Affordable. Reliable. Home Improvement.
Wall-mounted server rack
Affordable. Reliable. Home Improvement.
| PACKAGE CONTENTS | |||
| Part No. | Part Name | QTY | Photo |
| 1 | U Type Support | 2 | as diagram showed |
| 2 | Crossbeam | 2 | |
| 3 | Door Set | 1 | |
| 4 | M5 assembly fix screws | 30 | 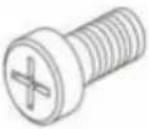 |
| 5 | M6 cage nuts | 12 | 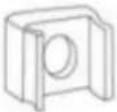 |
| 6 | M6*12 cross head screws | 12 | 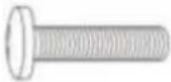 |
| 7 | wall mount M10 expansion bolts | 4 | 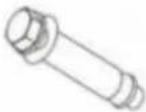 |
REQUIREMENT

| Name | Wall Mount Server Rack | ||
| Model | SPT-505-09 | SPT-505-12 | SPT-505-15 |
| Material | Cold Roll Steel | ||
| Color | Black | ||
| Depth | 18"(455mm) | ||
| Mounting Height | 9U | 12U | 15U |
| Ground-Mounted Load-Bearing | 150 lbs | ||
| Wall-Mounted Load-Bearing | 150 lbs | ||
| Rack Door Load-Bearing | 100 lbs | ||
| Wall Mounting Size(W*H) | 473*390mm | 473*524mm | 473*657mm |
| Product Size(W*D*H) | 530*455*520mm | 530*455*660mm | 530*455*795mm |
| Product Weight | 8.30Kg | 9.00Kg | 9.70Kg |
| Accessories | 30 x M5 assembly fix screws;12 x M6 cage nuts;12 x M6*12 cross head screws;4 x wall mount M10 expansion bolts;1 x Instruction manual. | ||
Figure 1
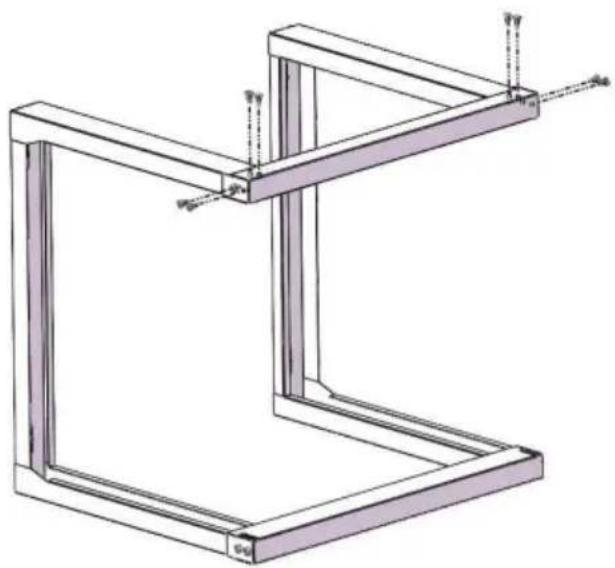
Figure 2
Figure 3
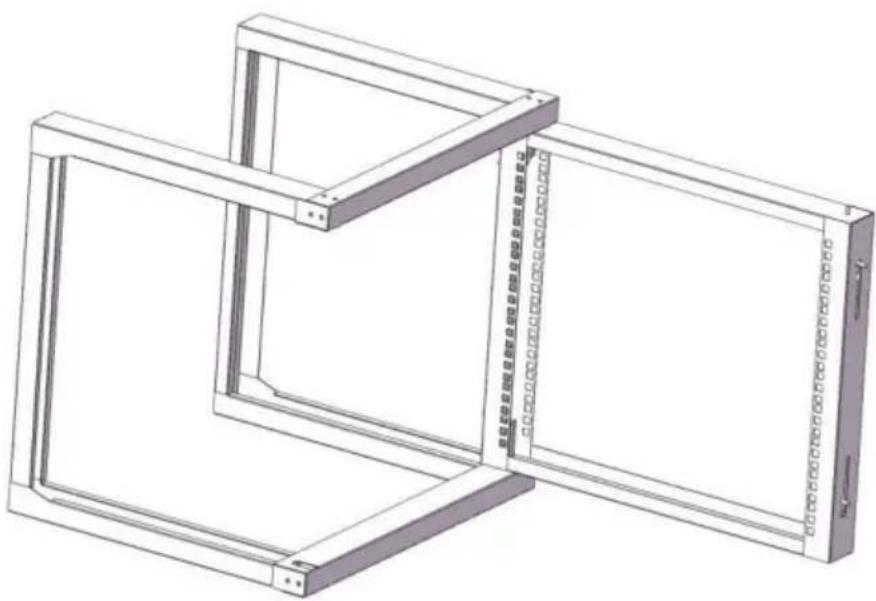
Figure 4
Figure 5
WALL MOUNTING

VEVOR
Affordable. Reliable. Home Improvement.
Server Rack for Wall Mounting
Model: SPT-505-09/SPT-505-12/SPT-505-15
VEVOR
Affordable. Reliable. Home Improvement.
| PACKAGE CONTENTS | |||
| Part No. | Part Name | QTY | Photo |
| 1 | U Type Support | 2 | as diagram showed |
| 2 | Crossbeam | 2 | |
| 3 | Door Set | 1 | |
| 4 | M5 assembly fix screws | 30 | |
| 5 | M6 cage nuts | 12 | 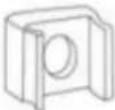 |
| 6 | M6*12 cross head screws | 12 | |
| 7 | wall mount M10 expansion bolts | 4 | |
REQUIREMENT

| Name | Wall Mount Server Rack | ||
| Model | SPT-505-09 | SPT-505-12 | SPT-505-15 |
| Material | Cold Roll Steel | ||
| Color | Black | ||
| Depth | 18"(455mm) | ||
| Mounting Height | 9U | 12U | 15U |
| Ground-Mounted Load-Bearing | 150 lbs | ||
| Wall-Mounted Load-Bearing | 150 lbs | ||
| Rack Door Load-Bearing | 100 lbs | ||
| Wall Mounting Size(W*H) | 473*390mm | 473*524mm | 473*657mm |
| Product Size(W*D*H) | 530*455*520mm | 530*455*660mm | 530*455*795mm |
| Product Weight | 8.30Kg | 9.00Kg | 9.70Kg |
| Accessories | 30 x M5 assembly fix screws;12 x M6 cage nuts;12 x M6*12 cross head screws;4 x wall mount M10 expansion bolts;1 x Instruction manual. | ||
Figure 1
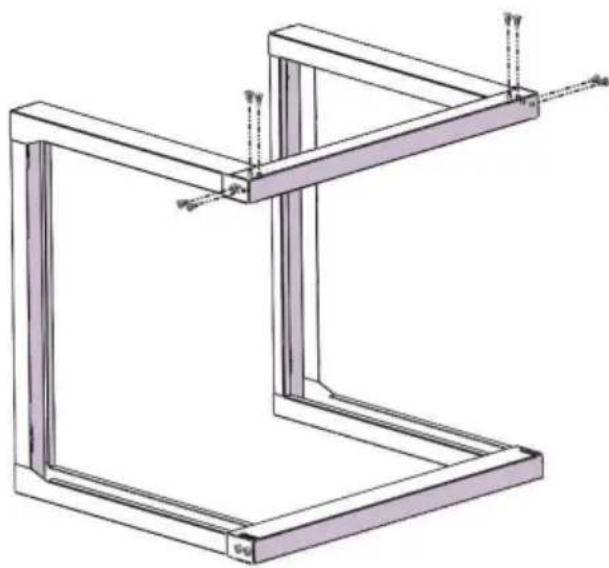
Figure 2
Figure 3
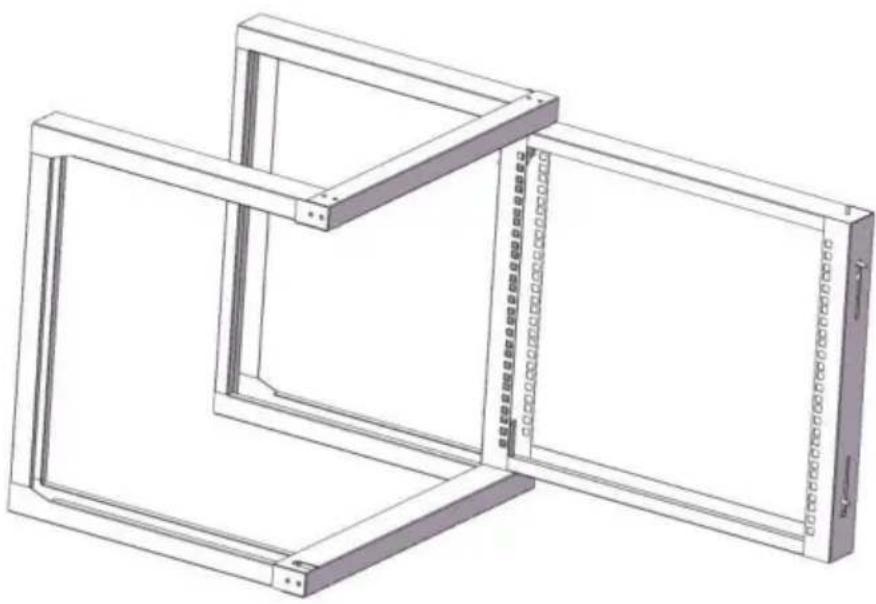
Figure 4
Figure 5
WALL MOUNTING

VEVOR
Affordable. Reliable. Home Improvement.
Affordable. Reliable. Home Improvement.
| PACKAGE CONTENTS | |||
| Part No. | Part Name | QTY | Photo |
| 1 | U Type Support | 2 | as diagram showed |
| 2 | Crossbeam | 2 | |
| 3 | Door Set | 1 | |
| 4 | M5 assembly fix screws | 30 | |
| 5 | M6 cage nuts | 12 | |
| 6 | M6*12 cross head screws | 12 | |
| 7 | wall mount M10 expansion bolts | 4 | |
REQUIREMENTS

| Name | Wall Mount Server Rack | ||
| Model | SPT-505-09 | SPT-505-12 | SPT-505-15 |
| Material | Cold Roll Steel | ||
| Color | Black | ||
| Depth | 18"(455mm) | ||
| Mounting Height | 9U | 12U | 15U |
| Ground-Mounted Load-Bearing | 150 lbs | ||
| Wall-Mounted Load-Bearing | 150 lbs | ||
| Rack Door Load-Bearing | 100 lbs | ||
| Wall Mounting Size(W*H) | 473*390mm | 473*524mm | 473*657mm |
| Product Size(W*D*H) | 530*455*520mm | 530*455*660mm | 530*455*795mm |
| Product Weight | 8.30Kg | 9.00Kg | 9.70Kg |
| Accessories | 30 x M5 assembly fix screws;12 x M6 cage nuts;12 x M6*12 cross head screws;4 x wall mount M10 expansion bolts;1 x Instruction manual. | ||
SERVER RACK INSTALLATION
Figure 1
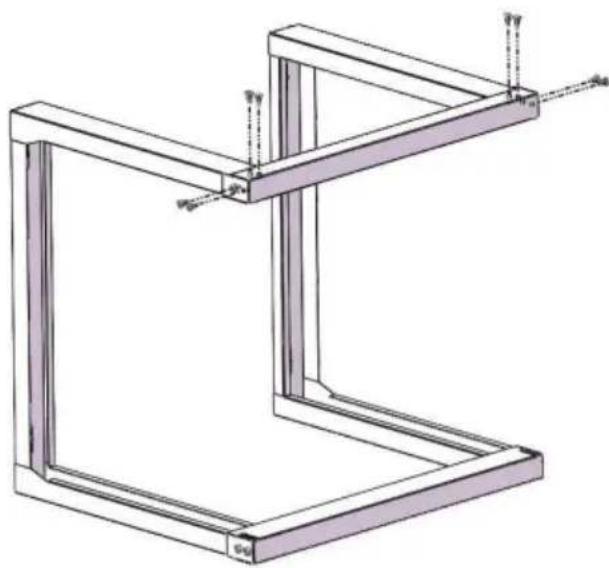
Figure 2
Figure 3
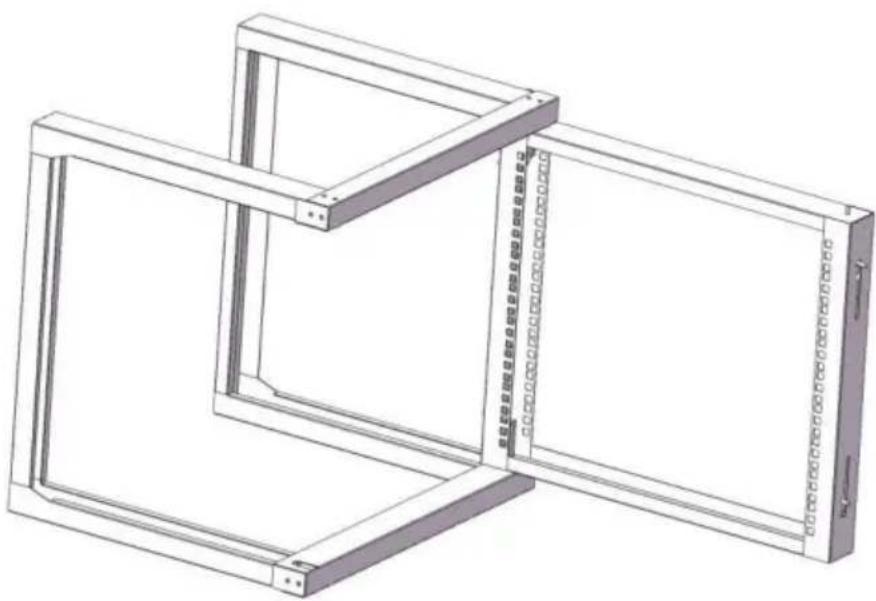
Figure 4
Figure 5

VEVOR
Affordable. Reliable. Home Improvement.
Affordable. Reliable. Home Improvement.
| PACKAGE CONTENTS | |||
| Part No. | Part Name | QTY | Photo |
| 1 | U Type Support | 2 | as diagram showed |
| 2 | Crossbeam | 2 | |
| 3 | Door Set | 1 | |
| 4 | M5 assembly fix screws | 30 | |
| 5 | M6 cage nuts | 12 | |
| 6 | M6*12 cross head screws | 12 | |
| 7 | wall mount M10 expansion bolts | 4 | |
REQUIREMENT

| Name | Wall Mount Server Rack | ||
| Model | SPT-505-09 | SPT-505-12 | SPT-505-15 |
| Material | Cold Roll Steel | ||
| Color | Black | ||
| Depth | 18"(455mm) | ||
| Mounting Height | 9U | 12U | 15U |
| Ground-Mounted Load-Bearing | 150 lbs | ||
| Wall-Mounted Load-Bearing | 150 lbs | ||
| Rack Door Load-Bearing | 100 lbs | ||
| Wall Mounting Size(W*H) | 473*390mm | 473*524mm | 473*657mm |
| Product Size(W*D*H) | 530*455*520mm | 530*455*660mm | 530*455*795mm |
| Product Weight | 8.30Kg | 9.00Kg | 9.70Kg |
| Accessories | 30 x M5 assembly fix screws;12 x M6 cage nuts;12 x M6*12 cross head screws;4 x wall mount M10 expansion bolts;1 x Instruction manual. | ||
Figure 1
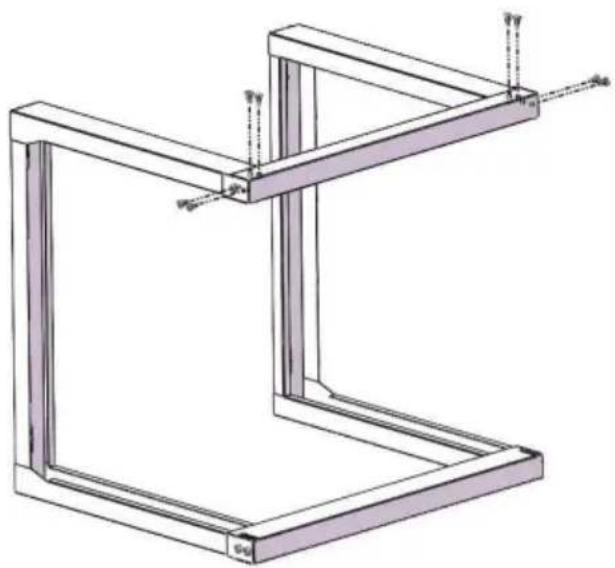
Figure 2
Figure 3
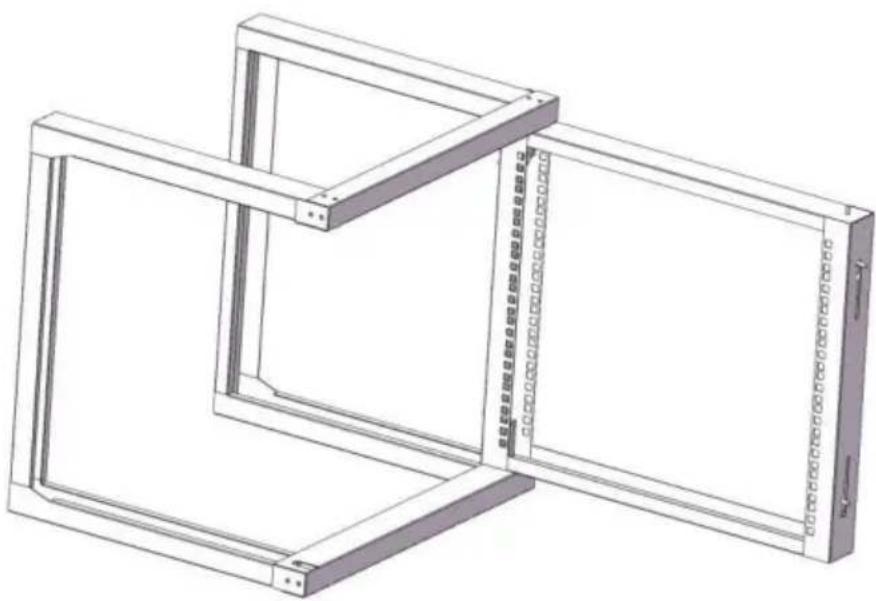
Figure 4
Figure 5

VEVOR
Affordable. Reliable. Home Improvement.
Affordable. Reliable. Home Improvement.
| PACKAGE CONTENTS | |||
| Part No. | Part Name | QTY | Photo |
| 1 | U Type Support | 2 | as diagram showed |
| 2 | Crossbeam | 2 | |
| 3 | Door Set | 1 | |
| 4 | M5 assembly fix screws | 30 | |
| 5 | M6 cage nuts | 12 | 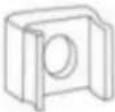 |
| 6 | M6*12 cross head screws | 12 | |
| 7 | wall mount M10 expansion bolts | 4 | |

| Name | Wall Mount Server Rack | ||
| Model | SPT-505-09 | SPT-505-12 | SPT-505-15 |
| Material | Cold Roll Steel | ||
| Color | Black | ||
| Depth | 18"(455mm) | ||
| Mounting Height | 9U | 12U | 15U |
| Ground-Mounted Load-Bearing | 150 lbs | ||
| Wall-Mounted Load-Bearing | 150 lbs | ||
| Rack Door Load-Bearing | 100 lbs | ||
| Wall Mounting Size(W*H) | 473*390mm | 473*524mm | 473*657mm |
| Product Size(W*D*H) | 530*455*520mm | 530*455*660mm | 530*455*795mm |
| Product Weight | 8.30Kg | 9.00Kg | 9.70Kg |
| Accessories | 30 x M5 assembly fix screws;12 x M6 cage nuts;12 x M6*12 cross head screws;4 x wall mount M10 expansion bolts;1 x Instruction manual. | ||
INSTALLATION OF SERVER CABINET
Figure 1
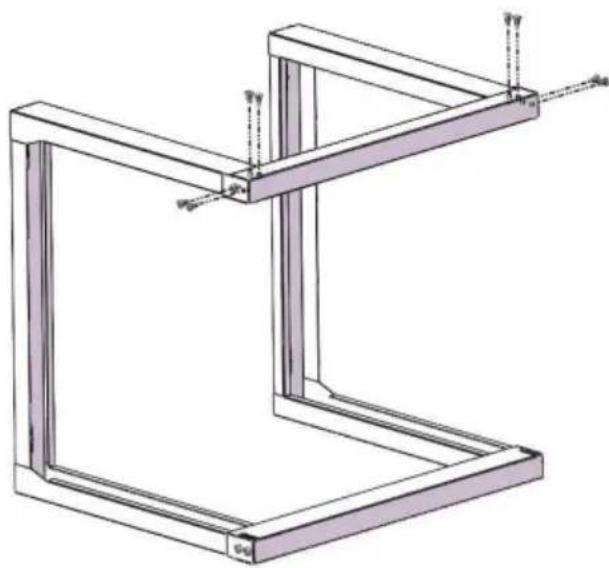
Figure 2
Figure 3
Figure 4
Figure 5
WALL MOUNTING

VEVOR
| PACKAGE CONTENTS | |||
| Part No. | Part Name | QTY | Photo |
| 1 | U Type Support | 2 | as diagram showed |
| 2 | Crossbeam | 2 | |
| 3 | Door Set | 1 | |
| 4 | M5 assembly fix screws | 30 | |
| 5 | M6 cage nuts | 12 | |
| 6 | M6*12 cross head screws | 12 | |
| 7 | wall mount M10 expansion bolts | 4 | |
REQUIREMENTS

Two people (for assembly)
| Name | Wall Mount Server Rack | ||
| Model | SPT-505-09 | SPT-505-12 | SPT-505-15 |
| Material | Cold Roll Steel | ||
| Color | Black | ||
| Depth | 18"(455mm) | ||
| Mounting Height | 9U | 12U | 15U |
| Ground-Mounted Load-Bearing | 150 lbs | ||
| Wall-Mounted Load-Bearing | 150 lbs | ||
| Rack Door Load-Bearing | 100 lbs | ||
| Wall Mounting Size(W*H) | 473*390mm | 473*524mm | 473*657mm |
| Product Size(W*D*H) | 530*455*520mm | 530*455*660mm | 530*455*795mm |
| Product Weight | 8.30Kg | 9.00Kg | 9.70Kg |
| Accessories | 30 x M5 assembly fix screws;12 x M6 cage nuts;12 x M6*12 cross head screws;4 x wall mount M10 expansion bolts;1 x Instruction manual. | ||
SERVER RACK INSTALLATION
Figure 1
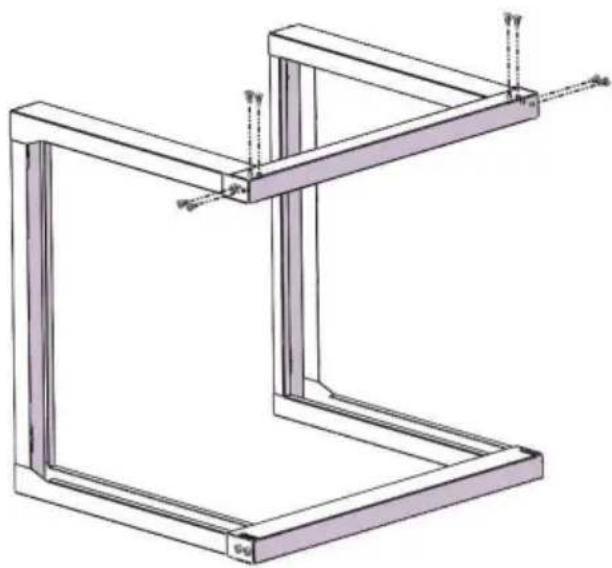
Figure 2
Figure 3
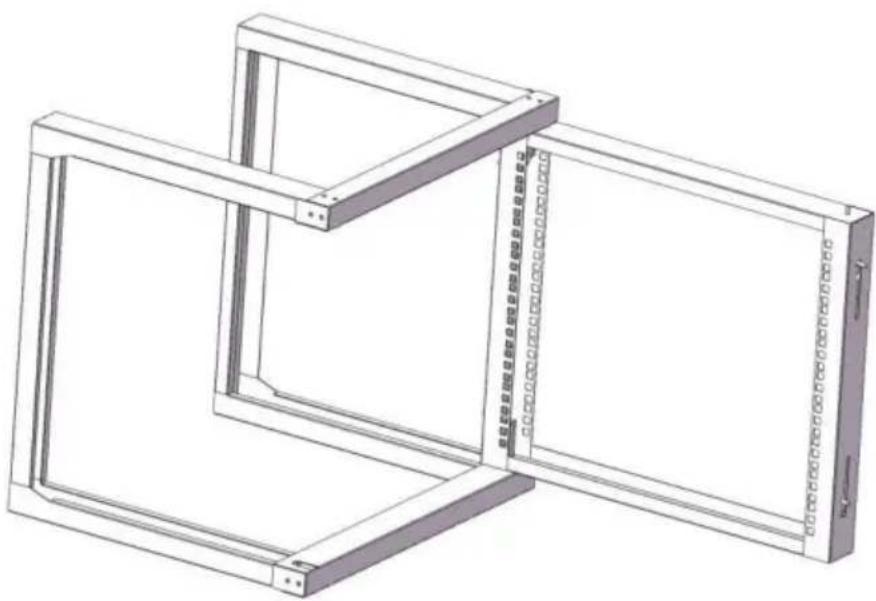
Figure 4
Figure 5
WALL MOUNTING

VEVOR
| PACKAGE CONTENTS | |||
| Part No. | Part Name | QTY | Photo |
| 1 | U Type Support | 2 | as diagram showed |
| 2 | Crossbeam | 2 | |
| 3 | Door Set | 1 | |
| 4 | M5 assembly fix screws | 30 | |
| 5 | M6 cage nuts | 12 | |
| 6 | M6*12 cross head screws | 12 | |
| 7 | wall mount M10 expansion bolts | 4 | |
REQUIREMENTS

| Name | Wall Mount Server Rack | ||
| Model | SPT-505-09 | SPT-505-12 | SPT-505-15 |
| Material | Cold Roll Steel | ||
| Color | Black | ||
| Depth | 18"(455mm) | ||
| Mounting Height | 9U | 12U | 15U |
| Ground-Mounted Load-Bearing | 150 lbs | ||
| Wall-Mounted Load-Bearing | 150 lbs | ||
| Rack Door Load-Bearing | 100 lbs | ||
| Wall Mounting Size(W*H) | 473*390mm | 473*524mm | 473*657mm |
| Product Size(W*D*H) | 530*455*520mm | 530*455*660mm | 530*455*795mm |
| Product Weight | 8.30Kg | 9.00Kg | 9.70Kg |
| Accessories | 30 x M5 assembly fix screws;12 x M6 cage nuts;12 x M6*12 cross head screws;4 x wall mount M10 expansion bolts;1 x Instruction manual. | ||
INSTALLATION AV SERVERRACK
Figure 1
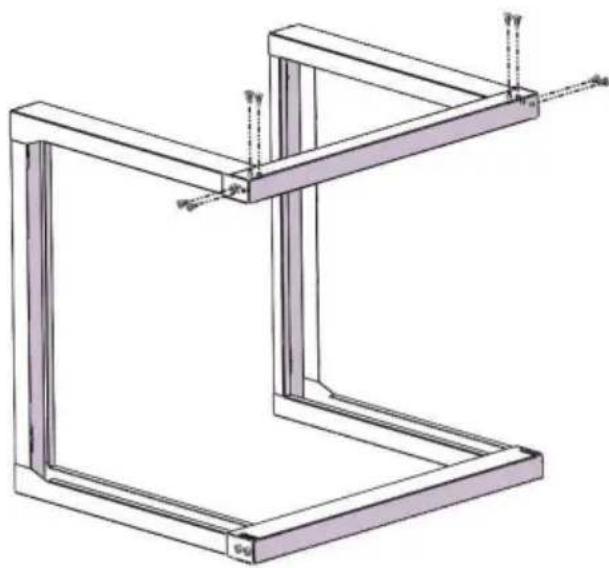
Figure 2
Figure 3
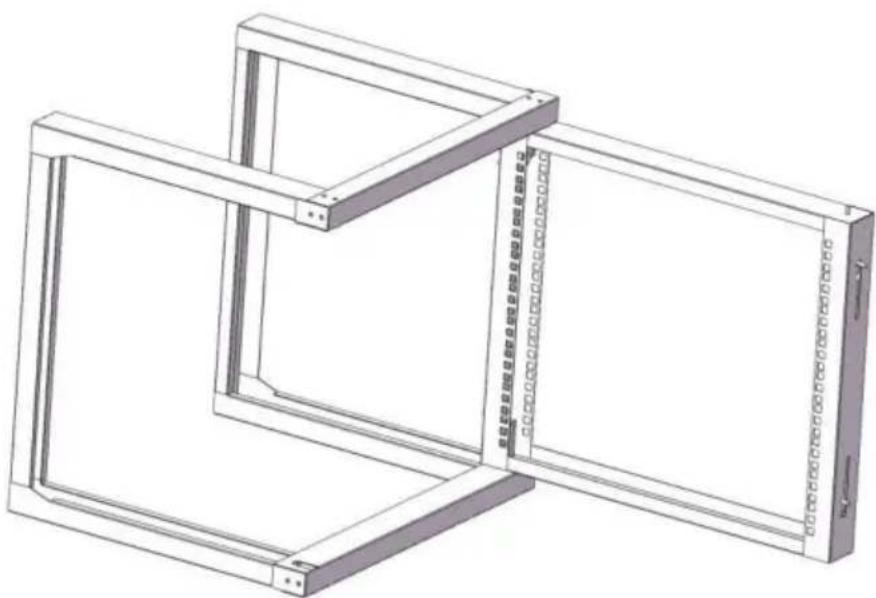
Figure 4
Figure 5
WALL MOUNTING

Brand : Vevor
Model : SPT-505-12
Category : Server wall mount