Hyper Cap - Sports recovery device Capital Sports - Free user manual and instructions
Find the device manual for free Hyper Cap Capital Sports in PDF.

| Product Type | Air compression sports recovery device |
| Brand and Model | Capital Sports Hyper Cap |
| Device Dimensions | 240 x 200 x 120 mm |
| Weight (including accessories) | 2.32 kg |
| Power Supply | 220-240 V ~ 50/60 Hz |
| Power Consumption | 30 W |
| Noise Level | ≤ 55 dB |
| Pressure Range | 30-250 mmHg |
| Usage Duration | 10 to 30 minutes |
| Cycle Duration | 85 s - 133 s ±1 s |
| Operating Mode | Mode A (sequential compression of 6 chambers) |
| Usage Type | At home or in a sports hall |
| Package Contents | Main unit, sleeves (2 legs + 1 pants), carry bag, hose cover, hose extension, connecting piece |
| Usage Method | Rotary button for pressure and duration adjustment |
| Care and Cleaning | Clean with a slightly damp soft cloth; do not use solvents; do not wash the sleeves with water |
| Operating Conditions | +10 °C to +40 °C, 10% - 95% RH, 86 kPa - 106 kPa |
| Storage Conditions | -40 °C to +70 °C, 10% - 100% RH, 50 kPa - 106 kPa |
| Repairability | Repairs prohibited by the user; contact authorized dealer |
| Safety | Do not use with a pacemaker; do not use on bare skin; stop if pain occurs |
| Recycling | Do not dispose of with household waste; deposit at a WEEE collection point |
Frequently Asked Questions - Hyper Cap Capital Sports
User questions about Hyper Cap Capital Sports
0 question about this device. Answer the ones you know or ask your own.
Ask a new question about this device
Download the instructions for your Sports recovery device in PDF format for free! Find your manual Hyper Cap - Capital Sports and take your electronic device back in hand. On this page are published all the documents necessary for the use of your device. Hyper Cap by Capital Sports.
USER MANUAL Hyper Cap Capital Sports
Hyper Cap Recovery System Weekend Warrior
Recovery Boots
INHALTSVERZEICHNIS
Technische Daten 4
natural_image
Technical illustration of a mechanical component with two curved arms and a central shaft (no text or symbols)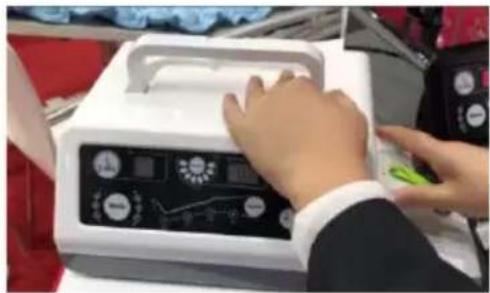
natural_image
Person operating a medical device with a control panel and display (no visible text or symbols)natural_image
Illustration of a person sitting on a bench with a medical device nearby (no text or symbols)
VORSICHT
natural_image
Symbol of a trash bin crossed with a diagonal line, no text or numbers presentBerlin Brands Group UK Ltd
PO Box 1145
Oxford, OX1 9UW
United Kingdom
Congratulations on the purchase of your device. Please read the following instructions carefully and follow them to prevent potential damage. We accept no liability for damage caused by disregarding the instructions and improper use. Please scan the QR code to access the latest operating instructions and further information about the product.

CONTENTS
Technical Data 20
Safety Information 22
Device overview 23
Control panel 24
Mode description 25
Instructions for use 26
Setup and operation 27
Cleaning and maintenance 29
Troubleshooting 30
Disposal Considerations 31
Manufacturer & Importer (UK) 31
TECHNICAL DATA
| Article number | 10041199, 10041200 | |
| Power supply 220-240 V ~ 50/60 Hz | ||
| Unit size 240 x 200 x 120 mm | ||
| Weight (including accessories) 2.32 kg | ||
| Control method By knob | ||
| Using time 10-30 minutes | ||
| Pressure 30-250 mmHg | ||
| Pressure error ≤55dB | ||
| Cycle time 85 s - 133 s ±1 s | ||
| Mode A | ||
| Power supply AC 220 - 240 V, 50 - 60 Hz | ||
| Power consumption 30 W | ||
| Noise level ≤ 55 dB | ||
| Operation environment +10 °C - +40 °C, 10% - 95% RH86 kPa - 106 kPa | ||
| Storage environment -40 °C - +70 °C 10% -100% RH50kPa-106kPa | ||
| XL: 110 x 70 cm | ||
| Extension | Width 10 cm (for leg sleeve) | |
| Hose cover | 78 x 18 cm (for leg sleeve) | |
INTRODUCTION
Air Compression System consists of air pressure sensor, air pump, sleeves etc working together as one unit. The air pump is connected to the dedicated sleeves via a series of hoses. The compression massage direction is from limb end to body centre by inflating the air chambers sequentially and then deflating as one cycle, the pressure can be adjusted. The sleeve works under the action of sensor and microprocessor.
Air Compression System, it has a sequential squeezing from distal to proximal, thus let the body relax after strenuous exercise.
Intended use
The product is indicated for use by Massage multiple parts to relax muscles (thigh muscle relaxation, calf muscle relaxation, ankle press, foot press) to eliminate fatigue The system can be used at home or Gym.
SAFETY INFORMATION
It is important that you read all the warnings and cautions in this instruction manual as they are designed to protect you, prevent injury, and avoid situations that could result in damage to the appliance.
- Do not use this device if you have a cardiac pacemaker, implanted defibrillator, or other implanted metallic or electronic device. Such use may result in electric shock, burns, or electrical interference.
- The product is not suitable for use in the presence of a flammable anaesthetic mixture with air or with oxygen or nitrous oxide.
- Repairs are not permitted. If you find that the unit is not working properly, do not disassemble it.
- If using the device feels unfamiliar or painful, stop using the device immediately.
- When you use the device for the first time, the duration of use should not exceed 20 minutes.
- Store the equipment away from infants and young children. It may cause harm such as an electric shock.
• Exercise caution. Ensure that no water or foreign objects get into the unit
- The equipment should not be placed in places where it is difficult to disconnect the power supply.
- Only use sockets with 220-240 V\~. Disconnect the power plug after each use. An unsuitable power supply can cause damage to the unit.
- Keep the hand dry when plugging in or unplugging the power supply. Wet hand may cause electric shock.
- The mains cable is sensitive. Do not place objects such as tables or chairs on it. A defective mains cable can lead to electric shocks.
- Do not kink the mains cable.
- Make sure the unit's cuff is a safe distance from heat sources such as stoves, heaters, cigarettes, etc. Failure to do so may result in damage to the cuff.
- Do not clean the cuff with oil, benzene, alcohol, petrol or other chemical agents. Otherwise, this will lead to a shortened life of the cuff. Clean the cuff only with a damp cloth.
- Never open the cuff while the unit is in operation. Opening the cuff during operation may result in damage to the cuff. Always switch off the unit before opening the cuff.
- Do not use the device naked. Always wear underwear when using the unit.
DEVICE OVERVIEW
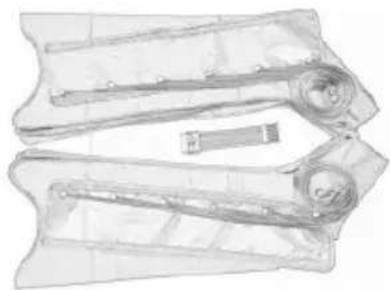
Main unit
This device consists of main unit, cuffs, connection tubes, etc.
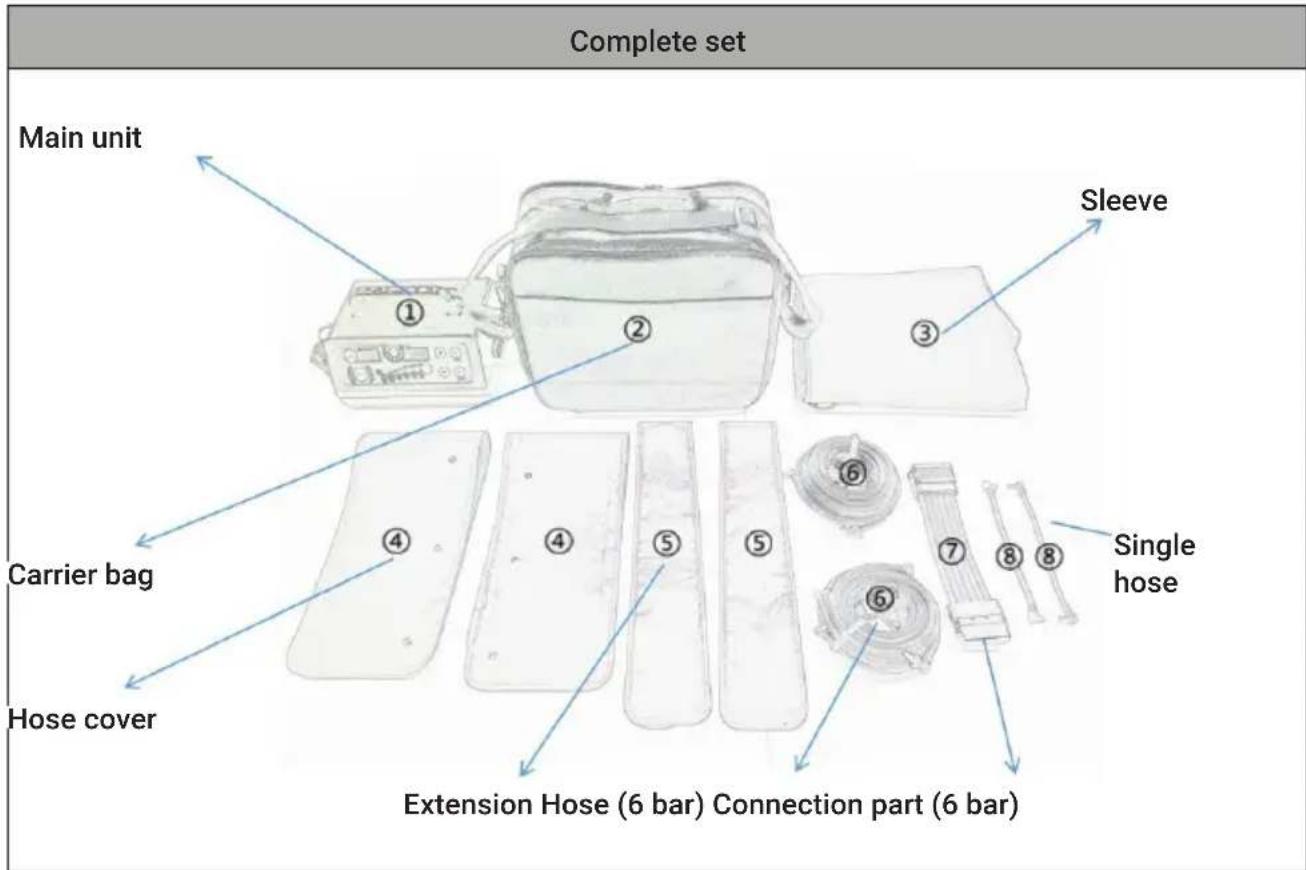
| 1 2 3 4 5 6 | |||||
 | 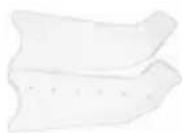 | 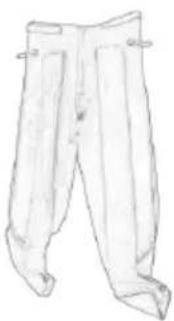 | 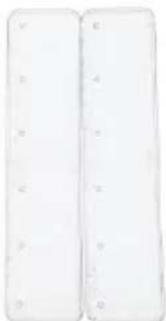 |  | 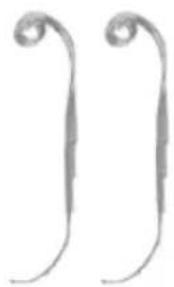 |
| Main unit Sleeves(2 legs) | Sleeves(trousers) | Hose cover Extension | Hose(6 bar) | ||
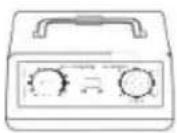
CONTROL PANEL
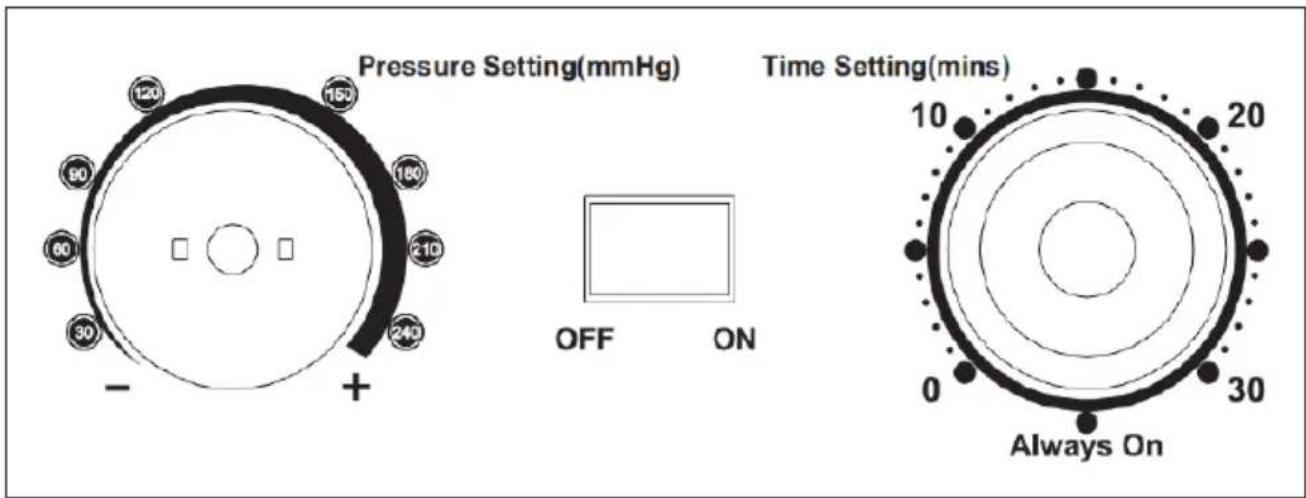
| Function Control panel Description | ||
| Pressure setting (mmHg) | Pressure setting (mmHg) | Display of the pressure settingPressure range: 30-250 mmHg. Set the desired pressure manually. |
| OFF/ON OFF/ON | When you turn the power switch ON/OFF, the device is in standby mode; press again to turn it off. ON is the start button, OFF is the stop button | |
| Time setting (min.) | Time setting (min.) | Select the time manually. The time range is 0 minutes to 30 minutes. |
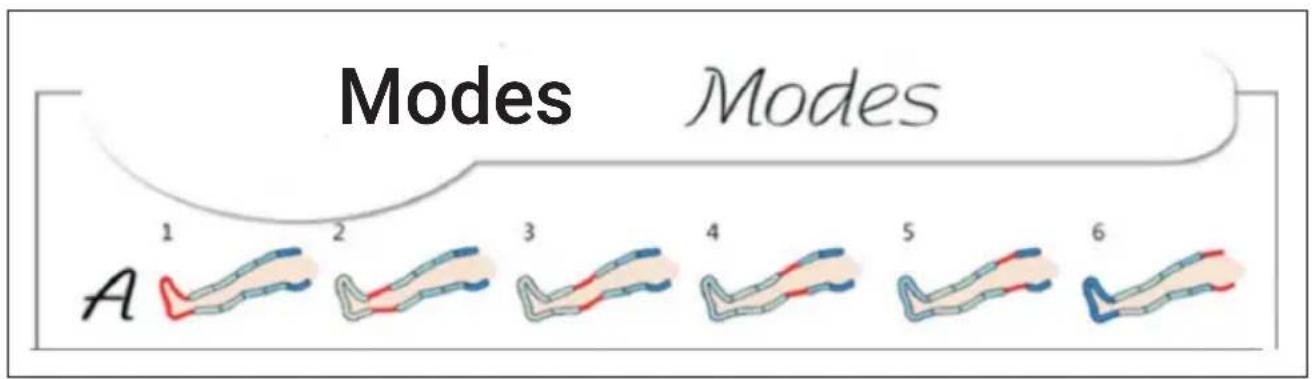
| Mode setting | Modes Ⓐ are available. | |
MODE DESCRIPTION
Normal mode

Chamber ① inflates to the set value within 18 seconds. If the chamber pressure reaches the preset value within 18 seconds, the pressure is maintained for the remaining period and then switches to the next chamber, which is then inflated. If the chamber pressure does not reach the preset value within 18 seconds, the chamber inflates for another 12 seconds. If the set chamber pressure is reached within these 12 seconds, the next chamber is inflated. If the chamber pressure does not reach the preset value within these additional 12 seconds, the unit automatically switches to inflating the next chamber. 3 seconds after the inflation of the next chamber (e.g. chamber ②), the air is released from the already inflated chamber (e.g. chamber ①). Chamber ② works like chamber ①. The same process is followed for the chambers ③, ④, ⑤ and ⑥. 13 seconds after the last chamber ⑥ starts to deflate, the cycle starts again.
INSTRUCTIONS FOR USE
Use of the sleeves
- Insert the mains plug into the socket.
- Connect the tube to the cuff(s) and put them on.
Leg sleeve
To avoid knee pain, do not fold the cuff during use.
- Wear thin clothes and relax.
- Pull the zip all the way up.
-
Turn towards the control panel. Make sure that the air outlets of the cuff point upwards and connect the hose connector to the air outlet of the unit.
-
Switch on the unit, set the time and pressure, and select the desired mode. Press the POWER ON/OFF button to start the device.
SETUP AND OPERATION
- Place the device on a flat surface.
- First connect the connector to the main unit and the cuff and then insert the mains plug into the socket.
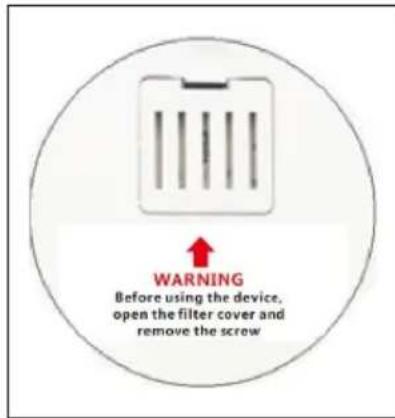
Note: After receiving the device, open the filter cover and remove the locking screw. The screw is only used to protect the unit from damage during transport.
Step 1: Insert the mains plug into a socket with 220-240 V.
Step 2: Make sure that the hose, extension and hose cover are properly connected to the cuff(s): If so, go to step 3. If not, insert the hose nozzle into the cuff outlet.
natural_image
Technical illustration of a mechanical component with no visible text or symbolsStep 3: Connect the end of the connection hose to the outlet of the main unit.

natural_image
Person operating a medical device with a control panel and display (no visible text or symbols)Step 4: Make sure that all connection links to the unit and the cuff have been made and are stable.
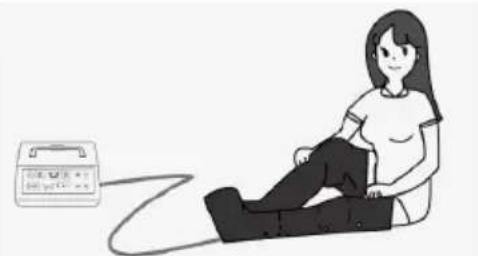
Step 5: Put on the cuffs.
natural_image
Illustration of a person sitting on a bench with a medical device nearby (no text or symbols)
CAUTION
Risk of injury! To prevent strangulation or neck injuries, the hose must not be placed around the neck.
Step 6: Press the ON/OFF button on the unit.
Step 7: Adjust the pressure by pressing a button.
Note: When using the device for the first time, it is recommended that you set the pressure lower at first (for example 120-150 mmHg) and then gradually increase it to a level that is still comfortable.
Step 8: Set the time manually.
Note: The time should be between 10 and 30 minutes.
Operating instructions:
- Do not open the cuff(s) during. Otherwise, the cuff(s) could be damaged.
• Always switch off the unit before opening the zip. - To ensure that the connection remains tight, do not pull the hose off the cuff too often.
CLEANING AND MAINTENANCE
The following daily maintenance requirements must be fully complied with to ensure that your device functions properly and to ensure long-term performance and safety.
Cleaning and Care
- Do not clean the device during working. Make sure it is turned off before cleaning it.
- Clean the device with a soft and lightly damp cloth. For heavier soiling, you can also add a mild detergent.
- Ensure that no water gets into the device. If water gets into the device, only use it again once it is completely dry.
- Do not expose the device to moisture or wetness. Do not hold it under running water or immerse it in water or other liquids.
- For hygienic reasons, each user should use their own cuff set.
- Do not use organic solvents or aggressive cleaning agents for cuff cleaning. Do not wash the cuffs with water.
- Gently clean the surface of the cuffs with a damp cloth.
Maintenance
- The manufacturer has not authorised any foreign maintenance centres. If you have any problems with your device, contact your dealer. The manufacturer accepts no responsibility for the consequences of maintenance or repair by unauthorised persons.
- The user must not attempt to repair the unit or its accessories. Contact the dealer for repairs.
- Opening the unit by unauthorised parties is not permitted and will invalidate any warranty claims.
• Each product in the manufacturing process was subjected to systematic validation. The performance is stable and does not need to be calibrated or validated. - If your product does not perform as expected and the basic function has changed during normal use, contact your dealer.
Storage
- Do not make severe kinks in the connection hoses or cuffs.
- Put the cuffs in the original packaging after use.
- Do not expose the unit to direct sunlight, and protect it from dirt and moisture.
- Store the appliance in a cool, well-ventilated place. Do not place any heavy objects on the device.
TROUBLESHOOTING
| Problem Check and ensure that | |
| The device does not start. • the mains plug is correctly inserted into the socket• the unit is switched on.• the power supply is normal (220-240 V).• the unit is automatically switched off when working time is over. | |
| There are leaks and the unit is making strange noises. | • there is no damage to the connection hose or the connection piece.• the connection hose is properly connected to the main unit.• the connection hose is not bent or kinked. |
natural_image
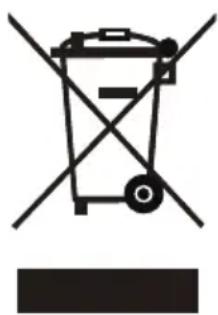
Symbol of a trash bin with crossed lines indicating no waste or discharge, and a solid black rectangle below (no text or labels)If there is a legal regulation for the disposal of electrical and electronic devices in your country, this symbol on the product or on the packaging indicates that this product must not be disposed of with household waste. Instead, it must be taken to a collection point for the recycling of electrical and electronic equipment. By disposing of it in accordance with the rules, you are protecting the environment and the health of your fellow human beings from negative consequences. For information about the recycling and disposal of this product, please contact your local authority or your household waste disposal service.
This product contains batteries. If there is a legal regulation for the disposal of batteries in your country, the batteries must not be disposed of with household waste. Find out about local regulations for disposing of batteries. By disposing of them in accordance with the rules, you are protecting the environment and the health of your fellow human beings from negative consequences.
MANUFACTURER & IMPORTER (UK)
Manufacturer:
Chal-Tec GmbH, Wallstrasse 16, 10179 Berlin, Germany.
Importer for Great Britain:
Berlin Brands Group UK Limited
PO Box 42
272 Kensington High Street
London, W8 6ND
United Kingdom
Cher client, chère cliente,
SOMMAIRE
Fiche technique 34
natural_image
Technical illustration of a mechanical component with no visible text or symbolsnatural_image
Person operating a medical device with a control panel and display (no visible text or symbols)natural_image
Illustration of a person sitting on a cushion connected to a medical device (no text or symbols visible)
ATTENTION
natural_image
Symbol of a trash bin crossed with a diagonal line, no text or numbers presentDÉCLARATION DE CONFORMITÉ

Fabricant : Chal-Tec GmbH, Wallstraße 16, 10179 Berlin, Allemagne.
Berlin Brands Group UK Ltd
PO Box 1145
Oxford, OX1 9UW
United Kingdom
INDICE
Dati tecnici 48
natural_image
Technical illustration of a mechanical component with no visible text or symbols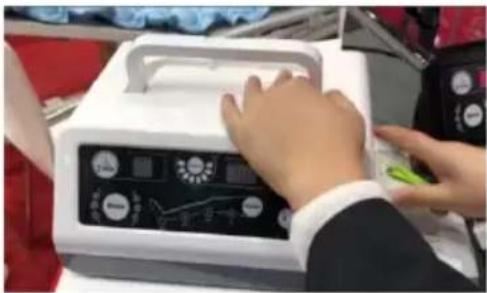
natural_image
Person operating a medical device with a green tool, no visible text or symbols on the device itself.natural_image
Illustration of a person sitting on a bench with a medical device nearby (no text or symbols)
ATTENZIONE
natural_image
Symbol of a trash bin crossed with a diagonal line, no text or numbers presentBerlin Brands Group UK Ltd
PO Box 1145
Oxford, OX1 9UW
United Kingdom
ÍNDICE
Datos técnicos 62
natural_image
Technical illustration of a mechanical component with no visible text or symbols
natural_image
Person operating a medical device with a control panel and display (no visible text or symbols)natural_image
Illustration of a person sitting on a bench with a medical device nearby (no text or symbols)
ATENCIÓN
natural_image
Symbol of a trash bin crossed with a diagonal line, representing no waste or discharge (no text or labels)Berlin Brands Group UK Ltd
PO Box 1145
Oxford, OX1 9UW
United Kingdom