Bigbig Box - Bike trailer Duramaxx - Free user manual and instructions
Find the device manual for free Bigbig Box Duramaxx in PDF.

User questions about Bigbig Box Duramaxx
0 question about this device. Answer the ones you know or ask your own.
Ask a new question about this device
Download the instructions for your Bike trailer in PDF format for free! Find your manual Bigbig Box - Duramaxx and take your electronic device back in hand. On this page are published all the documents necessary for the use of your device. Bigbig Box by Duramaxx.
USER MANUAL Bigbig Box Duramaxx
natural_image
Abstract black-and-white graphic with diagonal stripes and a large upward arrow, separated by a wavy pattern (no text or symbols)DURAMAXX
Bigbig Box
Fahrradanhänger
Bicycle Trailer
Remorque de vélo
text_image
QR code image containing encoded data, no visible human-readable textINHALTSVERZEICHNIS
Berlin Brands Group UK Limited
PO Box 42
272 Kensington High Street
London, W8 6ND
United Kingdom
SICHERHEITSHINWEISE
natural_image
Hand holding a small black object next to a metal ladder (no text or symbols visible)Schritt 2
natural_image
Three-panel photo showing hands installing a red and yellow tool on a metal frame structure, with no visible text or symbols.Schritt 3
natural_image
Two-panel image showing hands assembling a bicycle wheel, one with orange safety stripes and the other with a wrench (no text or symbols visible)Schritt 4
natural_image
Three-panel photo showing hands holding a metal rod, with tool application in action (no text or symbols visible)Schritt 5
natural_image
Close-up of hands assembling a metallic mechanical component (no text or symbols visible)Schritt 6
natural_image
Two-panel image showing a hand adjusting a mechanical clamp device, with no visible text or symbols.natural_image
Two-step photo showing hands using a wrench to adjust mechanical components (no text or symbols visible)Schritt 7
natural_image
Two-panel photo showing a person adjusting a bicycle tire and securing a metal chain (no text or symbols visible)Schritt 8
natural_image
Close-up of a hand using a bicycle brake lever to adjust the seat and handle (no text or symbols visible)Congratulations on the purchase of your appliance. Please read the following instructions carefully and follow them to prevent potential damage. We accept no liability for damage caused by disregarding the instructions or improper use. Please scan the QR code to access the latest operating instructions and for further information about the product.

text_image
QR code image containing encoded data, no visible human-readable textCONTENTS
Safety Instructions 12
Individual parts 12
Assembly 14
Important notes on attachment and use 18
TECHNICAL INFORMATION
| Product code 10027854 | |
| Permissible load 31.2 kg | |
| Permissibletotal weight 40 kg | |
| Box inside 32.5 x 26 x 49 cm (WxHxD) | |
| Trailer inside 37.5 x 17 x 55.5 cm (WxHxD) |
MANUFACTURER & IMPORTER (UK)
Manufacturer:
Chal-Tec GmbH, Wallstraße 16, 10179 Berlin, Germany.
Importer for Great Britain:
Berlin Brands Group UK Limited
PO Box 42
272 Kensington High Street
London, W8 6ND
United Kingdom
SAFETY INSTRUCTIONS
- The trailer should not be loaded with more than 31.2 kg.
- The trailer must not be used to transport people.
- Do not make any technical modifications to the unit. This can lead to dangers in road traffic and the manufacturer's warranty will be voided.
- Do not use the trailer on stony, uneven terrain and in dangerous traffic situations.
- The bicycle being towed must be in perfect condition. The brakes should work perfectly. With a trailer (and load) your braking distance will increase.
- Do not ride faster than 40 km/h with the trailer.
- The trailer must not be connected to a machine equipped with a drive system. The trailer may only be moved by directly applied human power.
- The trailer must not be moved by motorised vehicles. This also applies to bicycles with electric drive or bicycles with auxiliary electric motor drive.
INDIVIDUAL PARTS
| No. Pc. | Description | Picture | |
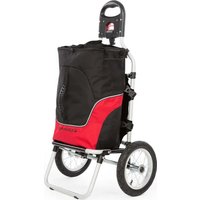
| 1 1x | Transport box |  | |
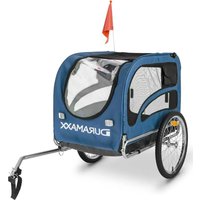
| 2 1x | Frame (including transport covers) |  | |
| 3 2x | 16" wheels with tyres |  | |
| 4 1x | Drawbar with handle | 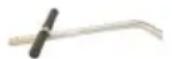 | |
| 5 1x | Drawbar (extension) |
| No. Pc. | Description Picture | |
| 6 2x | Red reflectors | 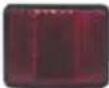 |
| 7 2x | White reflectors |  |
| 8 4x | Reflector holder |  |
| 9 2x | Axle | 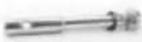 |
| 10 1x | Pin with safety hook | [TSWX] |
| 11 1x | Coupling | [GTSY] |
| 12 1x | Clamp for mounting on the seat post | 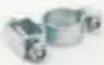 |
| 13 1x | Coupling |  |
| 14 2x | M8 screw (6 cm) incl. washer and nut | |
| 15 1x | M8 screw (3.5 cm) incl. washer and nut | |
| 16 2x | M6 screw (3.5 cm) incl. washer and nut | |
| 17 2x | Plastic spacers | 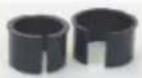 |
| 18 1x | M8 screw (5.5 cm) incl. washer and nut - for seat post assembly | |
| 19 1x | M6 screw (2.3 cm) incl. washer and nut - for seat post assembly |
ASSEMBLY
Step 1
Remove the two black transport protectors from the frame (2).
natural_image
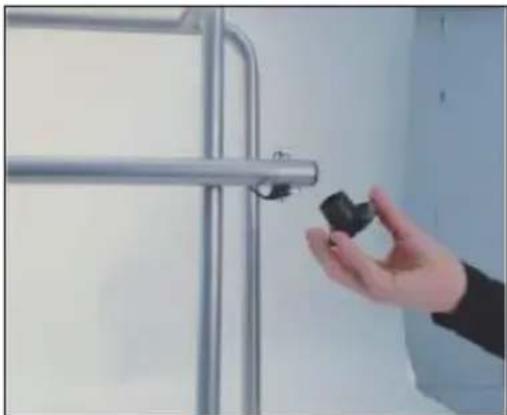
Hand holding a small black object next to a metal ladder (no text or symbols visible)Step 2
Attach the brackets for the reflectors (8) to the frame (2) as shown here. Then attach the reflectors - the white reflectors facing forwards (in the direction of travel), the red ones facing backwards.
natural_image
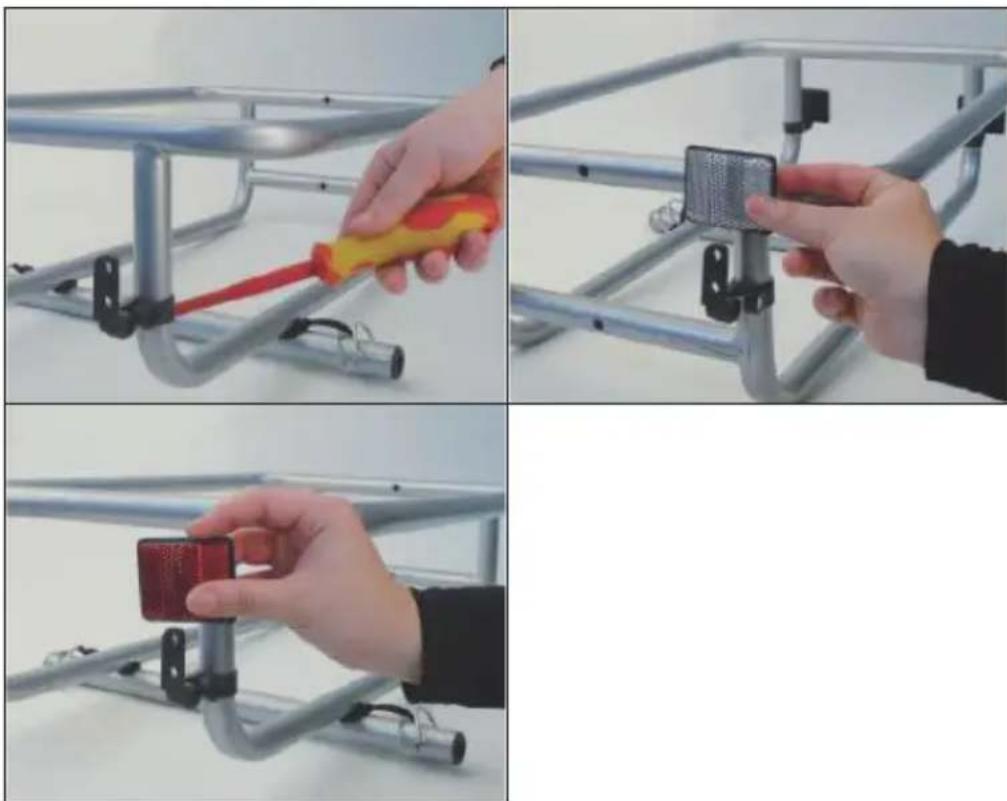
Three-panel photo showing hands installing a red and yellow tool on a metal frame structure, with no visible text or symbols.Step 3
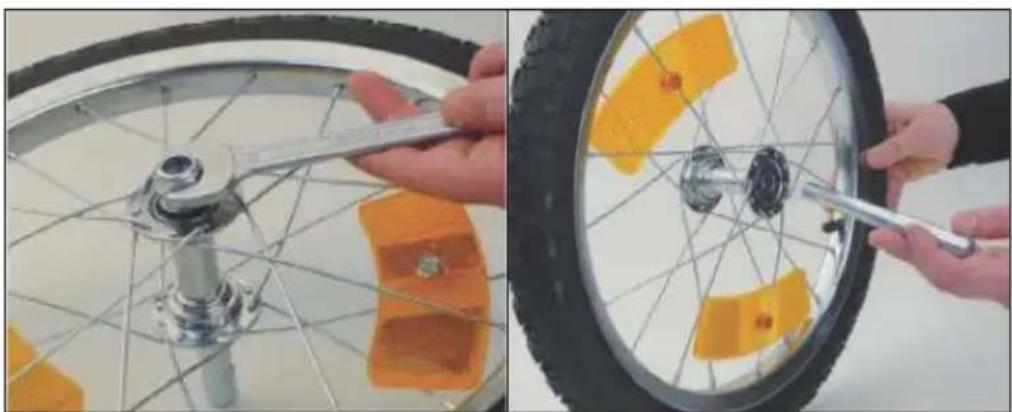
Remove the nut and washer from the wheel hub. Push the axle (9) through the wheel hub. Refit the nut and washer. Check the tight fit of the nut at regular intervals.
natural_image
Two-panel image showing hands adjusting a bicycle wheel rim and wheel rim with yellow safety tape (no text or symbols visible)Step 4
Connect the pull rod with the handle element (4) and the intermediate piece (5). Use the 5.5 cm M8 screw (15). Now connect the assembled drawbar to the frame (2). Use the two 6 cm M8 screws (14) for this.
natural_image
Three-panel photo showing hands holding a metal rod and connecting a cable, demonstrating mechanical assembly (no text or symbols visible)EN
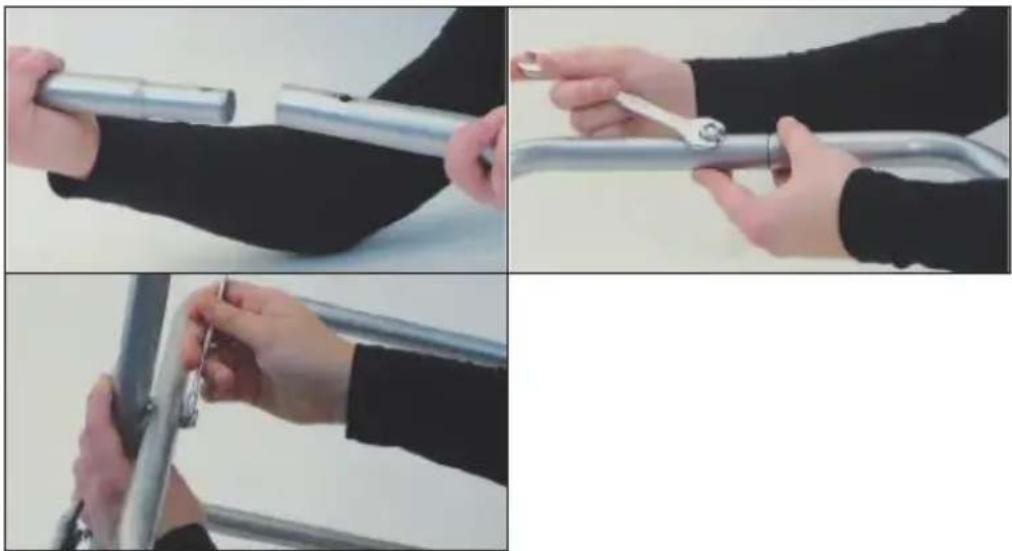
Step 5
Use the two 3.5 cm M6 screws (16) to fix the coupling (13) to the handle element (4).
natural_image
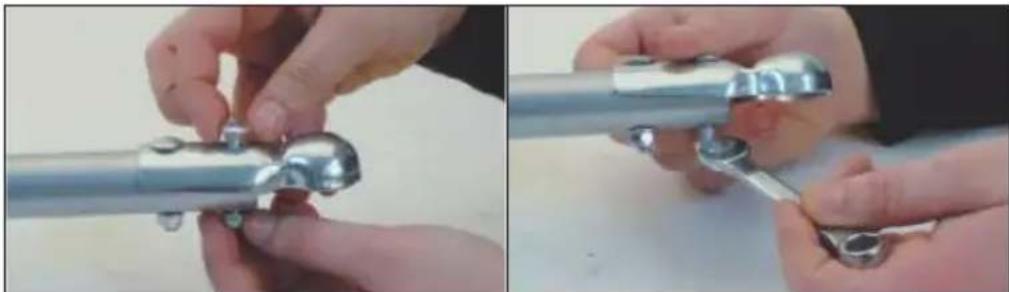
Close-up of hands assembling a metallic mechanical component (no text or symbols visible)Step 6
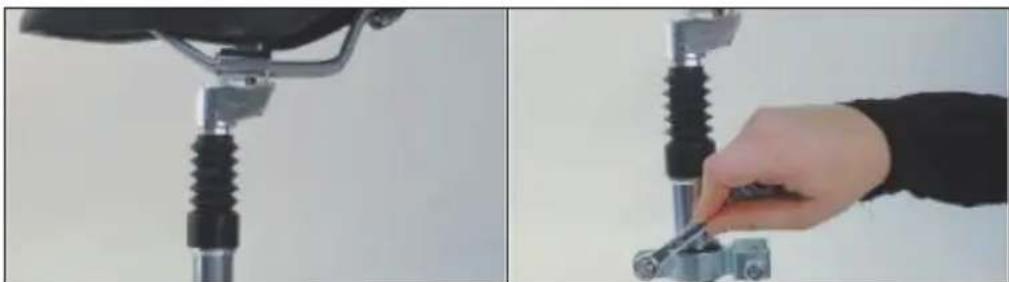
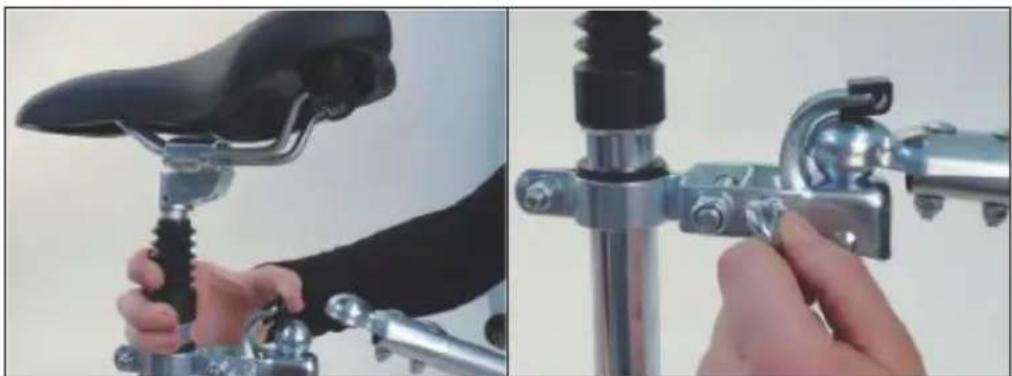
Secure the seat post assembly (12) using the plastic spacers (17). Slide the best fitting part over the seat post and the clamp (12) over it. Use the M8 bolt (19) to fix the clamp (12) to the seat post.
natural_image
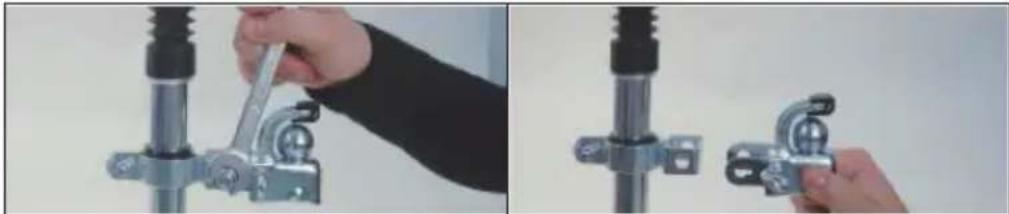
Two-step photo showing a hand using a tool to adjust mechanical components, with no visible text or symbols.Screw the coupling to the clamp with the longer M8 screw (18).
natural_image
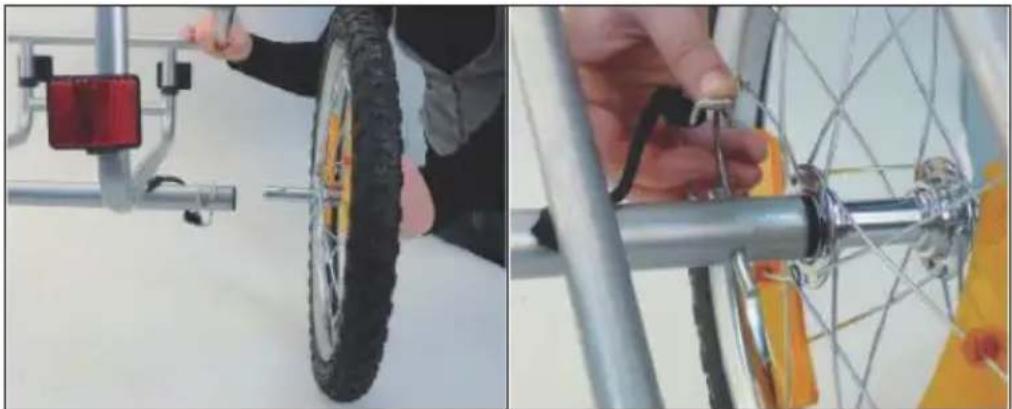
Two-step photo showing hands using a tool to adjust mechanical components, no text or symbols visibleStep 7
Press the wheels with the axles into the corresponding openings on the frame (2). Secure the axles with the pin (10) as shown in the illustration on the right.
natural_image
Two-panel image showing a person adjusting a bicycle tire and connecting a metal frame (no text or symbols visible)Step 8
Pull up the safety hook on the coupling (11) and place the coupling element of the drawbar (13) inside. Tighten the safety screw to keep the pull bar in place while riding.
natural_image
Close-up of a hand using a bicycle pedal switch to adjust the seat (no text or symbols visible)EN
IMPORTANT NOTES ON ATTACHMENT AND USE
Note: The connection between the bicycle and the trailer is the most important step in the assembly process. Make sure that the trailer is securely connected to the bicycle. If the trailer hitch cannot be securely attached or tightened to your bicycle, do not use it. Contact your bicycle dealer for help with correct installation.
- Check the condition of the bicycle and trailer before each use.
- Always ride defensively. During use, you must observe local traffic regulations.
- With a trailer, you need an additional braking distance.
- Practice with your trailer before use until you are familiar with it.
- Make sure your load is secured before riding. Do not exceed the maximum loading weight.
- Make sure you use a suitable bicycle. If in doubt, ask your local bicycle dealer or your manufacturer.
• After assembly and before riding, check that the hitch is fully engaged. - Check the tyre pressure regularly.
- If possible, use the trailer only on smooth roads. Avoid kerbs, potholes or uneven ground.
- If you are going downhill or around a bend, you must slow down.
Cher client, chère cliente,
text_image
QR code image with embedded text 'BOS' in the centerSOMMAIRE
Berlin Brands Group UK Limited
PO Box 42
272 Kensington High Street
London, W8 6ND
United Kingdom
CONSIGNES DE SÉCURITÉ
natural_image
Hand holding a small black object next to a metal ladder (no text or symbols visible)Étape 2
natural_image
Three-panel photo showing hands installing a red and yellow tool on a metal frame structure, with no visible text or symbols.Étape 3
natural_image
Two-panel image showing hands adjusting a bicycle wheel rim and inspecting the wheel rim (no text or symbols visible)Étape 4
natural_image
Three-panel photo showing hands holding a metal rod, demonstrating step-by-step assembly (no text or symbols visible)Étape 5
natural_image
Close-up of hands assembling a metallic mechanical component (no text or symbols visible)Étape 6
natural_image
Two-step photo showing a hand using a tool to adjust mechanical components, with no visible text or symbols.natural_image
Two-step photo showing hands using a tool to adjust mechanical components, no text or symbols visibleÉtape 7
natural_image
Two-panel photo showing a person adjusting a bicycle tire and securing a metal chain (no text or symbols visible)Étape 8
natural_image
Close-up of a hand using a bicycle brake lever to adjust the seat and handle (no text or symbols visible)FR
REMARQUES IMPORTANTES SUR LA FIXATION ET L'UTILISATION
text_image
QR code image containing encoded data, no visible human-readable textÍNDICE
Berlin Brands Group UK Limited
PO Box 42
272 Kensington High Street
London, W8 6ND
United Kingdom
natural_image
Hand holding a small black object next to a metal ladder (no text or symbols visible)Paso 2
natural_image
Three-panel photo showing hands installing a red and yellow tool on a metal frame structure, with no visible text or symbols.Paso 3
natural_image
Two-panel image showing hands assembling a bicycle wheel rim, one with orange safety stripes and the other with a wrench (no text or symbols visible)Paso 4
natural_image
Three-panel photo showing hands holding a metal rod, demonstrating step-by-step assembly (no text or symbols visible)Paso 5
natural_image
Close-up of hands assembling a metallic mechanical component (no text or symbols visible)Paso 6
natural_image
Two-step photo showing a hand using a tool to adjust mechanical components, with no visible text or symbols.natural_image
Two-step photo showing hands using a tool to adjust mechanical components, no text or symbols visiblePaso 7
natural_image
Two-panel image showing a person adjusting a bicycle tire and connecting a metal frame (no text or symbols visible)Paso 8
natural_image
Close-up of a hand using a bicycle brake lever to adjust the seat and handle (no text or symbols visible)text_image
QR code image with a small 'a' in the top-left corner, likely linking to a digital resource or webpage.INDICE
PRODUTTORE E IMPORTATORE (UK)
Produttore:
Chal-Tec GmbH, Wallstraße 16, 10179 Berlino, Germania.
Berlin Brands Group UK Limited
PO Box 42
272 Kensington High Street
London, W8 6ND
United Kingdom
AVVERTENZE DI SICUREZZA
natural_image
Hand holding a small black object next to a metal ladder (no text or symbols visible)2° passaggio
natural_image
Three-panel photo showing hands installing a red and yellow tool on a metal frame structure, with no visible text or symbols.3° passaggio
natural_image
Two-panel image showing hands adjusting a bicycle wheel rim and inspecting the wheel rim (no text or symbols visible)4° passaggio
natural_image
Three-panel photo showing hands holding a metal rod, demonstrating step-by-step assembly (no text or symbols visible)5° passaggio
natural_image
Close-up of hands assembling a metallic mechanical component (no text or symbols visible)6° passaggio
natural_image
Two-step photo showing a hand using a tool to adjust mechanical components, with no visible text or symbols.natural_image
Two-step photo showing hands using a tool to adjust mechanical components, no text or symbols visible7º passaggio
natural_image
Two-panel image showing a person adjusting a bicycle tire and connecting a metal frame (no text or symbols visible)8° passaggio
natural_image
Close-up of a hand using a bicycle pedal switch to adjust the seat (no text or symbols visible)IT