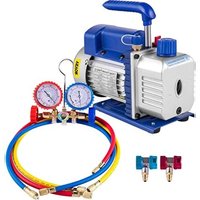
USER MANUAL RS-0.5 Vevor
Technical Support and E-Warranty Certificate
www.vevor.com/support
VACUUM PUMP
REFRIGERANT METER GROUP
MODEL: RS-0.5, RS-1, RS-1.5, RS-2
We continue to be committed to providing you with tools at competitive prices. "Save Half", "Half Price", or any other similar expressions used by us only represent the savings you might benefit from buying certain tools with us compared to major top brands, and do not necessarily mean to cover all categories of tools. You are kindly reminded to verify carefully when placing an order to see if you are actually saving half in comparison with the top major brands.
VEVOR®
TOUGH TOOLS, HALF PRICE
VACUUM PUMP
REFRIGERANT METER GROUP
MODEL: RS-0.5, RS-1, RS-1.5, RS-2
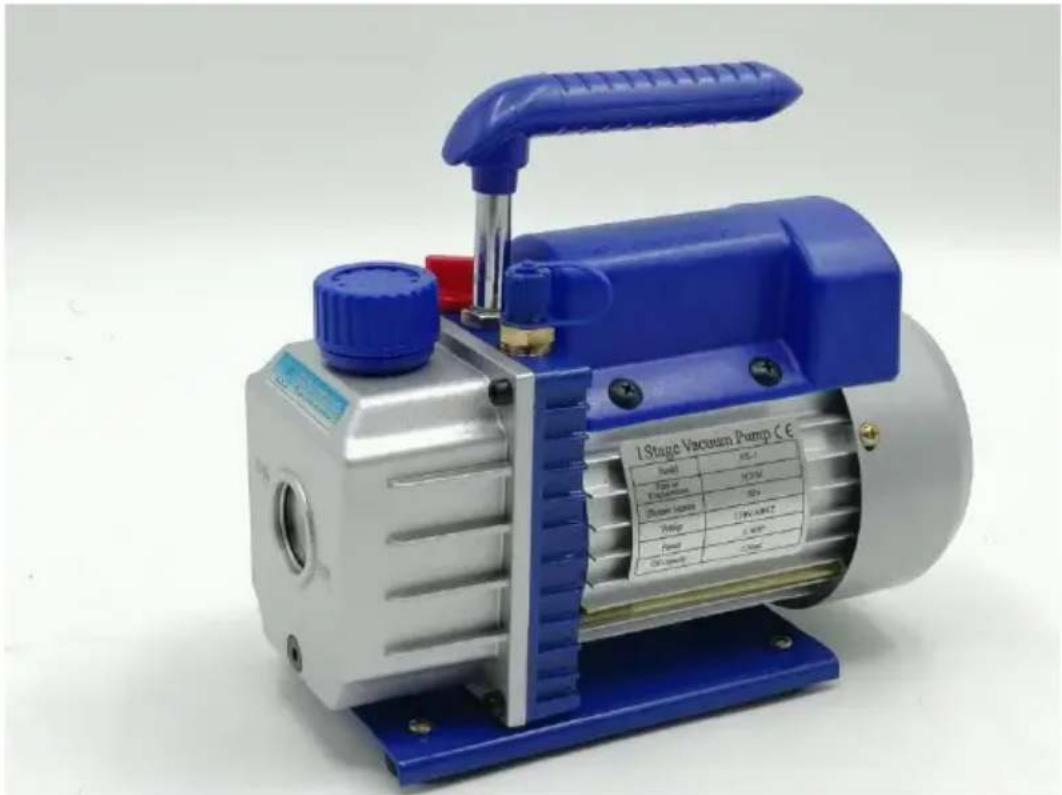
Have product questions? Need technical support? Please feel free to contact us:
Technical Support and E-Warranty Certificate
www.vevor.com/support
This is the original instruction. Please read all manual instructions carefully before operating. VEVOR reserves the right to interpret the user manual. The appearance of the product shall be subject to the product you received. Please forgive us that we won't inform you of any technology or software updates on our product.
SAFETY INSTRUCTION
Before operating this appliance, please read the instruction manual carefully and save these instructions. Basic safety precautions should always be followed, including the following:

Warning - To reduce the risk of injury, the user must read the instruction manual carefully.

This symbol, placed before a safety comment, indicates a precaution, warning, or danger. Ignoring this warning may cause an accident. To reduce the risk of injury, fire, or electric shock, please always follow the recommendations shown below.

WARNING
Household Use Only.
WARNING: Hot Surface - To reduce the risk of burns, do not touch.
CAUTION: To reduce the risk of electric shock, do not expose to rain. Store indoors.
CAUTION: To reduce the risk of electric shock, use indoors only.
WARNING: Risk of injury - Do not direct air steam at the body.
OPERATING MANUAL
1. Before using your vacuum pump
In all cases, motors are designed for operating voltages plus or minus 10% of the normal rating. Single voltage motors are supplied fully connected and ready to operate.
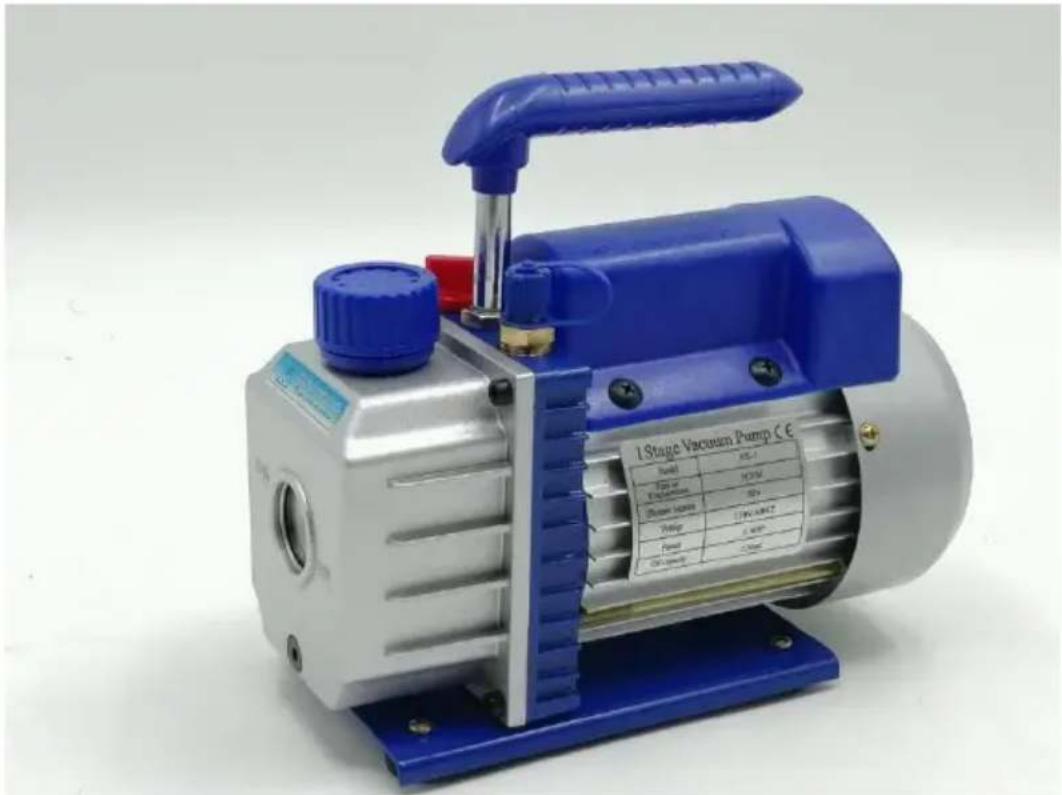
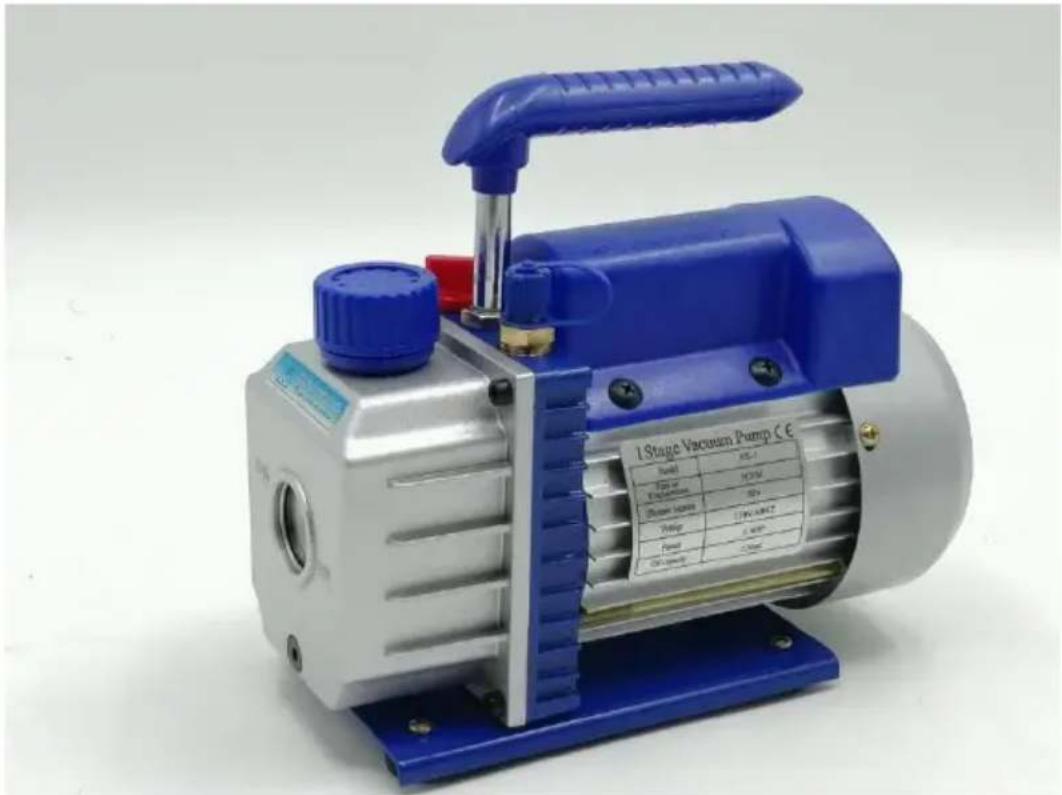
(1) Check to be sure the voltage and frequency at the outlet match the specifications on the pump motor decal. Check the ON-OFF switch to be sure it is in the OFF position before you plug the pump into an outlet. Remove and discard the exhaust cap from the end of the pump's handle. (2) The pump is shipped without oil in the reservoir. Before starting the pump, fill it with oil. Remove the Exhaust Fitting cap and add oil until the oil just shows in the bottom of the sight glass. The approximate oil capacity of the pump is 180 to 800 ml (reference the technical data). (3) Replace the Exhaust Fitting cap and remove the cap from one of the inlet ports. Turn the motor switch to ON. When the pump runs smoothly, replace the cap on the inlet port. This may take from two to 30 seconds, depending on the ambient temperature. After the pump runs for approximately one minute, check the sight glass for the proper oil level. The level should be even with the sight glass oil level line. Add oil if necessary.
Note: When the pump is running, the oil level should be even with the line on the sight glass. Underfilling will result in poor vacuum performance. Overfilling can result in oil blowing from the exhaust.
2. To shut down your pump after use
To help prolong pump life and promote easy starting, follow these procedures for shutdown.
(1) Close the manifold valve between the pump and the system. (2) Remove the hose from the pump inlet. (3) Cap the inlet port to prevent any contamination or loose particles from entering the port.
TO MAINTAIN YOUR HIGH VACUUM PUMP
1. Vacuum pump oil:
The condition and type of oil used in any high vacuum pump are important in determining the ultimate attainable vacuum. We recommend that you use High Vacuum Pump Oil. This oil has been specifically blended to maintain viscosity at normal running temperatures and to improve cold weather starting.
2. Oil Change Procedure
(1) Be sure the pump is warmed up.
(2) Remove the OIL DRAIN cap. Drain contaminated oil into a suitable container and dispose of it properly. Oil can be forced from the pump by opening and partially blocking the exhaust with a cloth while the pump is running. Do not operate the pump for more than 20 seconds using this method. (3) When the flow of oil has stopped, tilt the pump forward to drain residual oil. (4) Replace the OIL DRAIN cap. Remove the exhaust fitting and fill the reservoir with new vacuum pump oil until the oil just shows at the bottom of the sight glass. The approximate oil capacity of the pump is 180-800 ml (reference the technical data). (5) Be sure the inlet ports are capped, then turn on the pump. Allow it one minute, then check the oil level. If the oil is below the sight glass LEVEL line, add oil slowly (with the pump running) until the oil reaches the LEVEL line. Replace the exhaust fitting, making sure the inlet is capped.
(6)
a) If the oil is badly contaminated with sludge that forms when water collects in the oil, you may need to remove the oil reservoir cover and wipe it out. b) Another method of dealing with heavily contaminated oil is to force it from the pump reservoir. To do this, allow the pump to run until it is warmed up. While the pump is still running, remove the oil drain cap. Slightly restrict the exhaust. This will back-pressure the oil reservoir and force the oil from it, carrying more contamination.
When the oil ceases to flow, turn off the pump.
Repeat this procedure as required until the contamination is removed.
Replace the OIL DRAIN cap and refill the reservoir to the proper level with fresh pump oil.
TROUBLESHOOTING GUIDE
Your pump has been designed for dependable use and has a long life. If something goes wrong, the following guide will help you get the pump back into service as soon as possible.
If disassembly of the pump is required, please check your warranty. The warranty may be voided by misuse or customer tampering, which results in the pump becoming inoperable.
1. Failure To Start
Check the line voltage. The pump needs to start at ±10% line voltage (load at 320F). At extremes, switching between the standard run windings may occur.
2. Oil leakage
(1) Be sure the oil is not a residual accumulation from spillage, etc. (2) If leakage exists, the module cover gasket or the shaft seal may need replacement. If leakage exists in the area of the oil drain plug, you may need to reseal using a commercial pipe thread sealer.
3. Failure To Pull A Good Vacuum
(1) Be sure the vacuum gauge and all connections are in good condition and leak-free. You can confirm leakage by monitoring the vacuum with a thermistor gauge while applying vacuum pump oil at connections or suspected leak points. The vacuum will improve briefly while the oil is sealing the leak. (2) Be sure the pump oil is clean. A badly contaminated pump may require several oil flushes. (3) Be sure the oil is at the proper level. For maximum pump operation, the oil must be even with the OIL LEVEL line on the sight glass when the pump is running. Do not overfill---- operating temperatures will cause the oil to expand, and it will appear at a higher level than when the pump is not running. To check the oil level, start the pump with the inlet capped. Check the oil level in the sight glass. Add oil if necessary.
COMMON TROUBLESHOOTING
| FailureDescription | FaultCause | Solution |
| LowVacuum | 1.Theair inlet cap on the sp side ofthe air inlet port is I | Tighten the air inlet cap |
| 2. The rubberring inside the inletcapon the spare port si the air inlet port is damage | Replacetherubber ring |
| 3. Insufficient oil | Refuel to the centerline of the gauge |
| 4. Thepumpoil is emulsified andunclean | Replacewith new oil |
| 5. The oil inlethole of the isblockedorthe oil supply is insufficient | Clean the oil inlet hole and mesh |
| 6. Leakageof pipe container connected to the pump | Checkthe connected pipe container to prevent leakage |
| 7. Improper pumpselection | Check the size of the pump container, recalculate and sele the appropriate pump model |
| 8. The pump has been used long, and the clearance is increased due to the wear o | Check, repair,orreplacethe pump witha new one |
| OilLeakage | 1. The oil sealis damaged | Replacethe oil seal |
| 2.The oil tank connection is looseor damaged | Tightenthescrews andreplace the O-ring |
| Oil Injection | 1.Toomuchoil | Drain theoil to the oil level |
| 2.The inletpressure is too h for a long time | Selecttheappropriatepump to increase thepumping speed |
| Hard Starting | 1. The oil temperature is too | Theair inlet is ventilated, repeatedly starts the motor heats the pump oil |
| 2. The motororpower supply faulty | Check and repair |
| 3.Foreign objects fall into th pump | Checkand eliminate |
| 4. The power supply voltage too low | Check the powersupply volta |
Note: If the above solutions do not solve your problem, please contact the nearest dealer or send your pump to a professional repair center, and we will do our best to serve you.
Refrigerant meter group USE INSTRUCTIONS
Operation Instructions
Before connection, it should be checked if the pressure gauges indicate zero. If they do not, adjust the setting screw on the pressure gauge to set the pointer to zero.
System Connection
First of all, close both high pressure valve and low pressure valve.
Connect and secure the low pressure port - blue tube - (low pressure quick) to the system low pressure side.
Connect and secure the high-pressure port - red tube - (high-pressure quick connector, system high-pressure side).
Connect and secure the refill port - yellow tube - (vacuum pump).
Vacuum System or Recovery
(Caution: For a safe system and energy saving, it must select proper vacuum recovery unit according to the system pressure.)
After the completion of the above-mentioned connection, start the vacuum pump or recovery unit first.
Open both high-pressure valve and low-pressure valve together, then (open pressure and low-pressure quick connectors), the system starts vacuuming or recovery.
After a certain time (about 10-30 minutes), check
if the system is vacuumed. (If the system
is not vacuumed, it should check if there is any leakage in
the system and re-vacuum it after the leakage problem is remedied.)
Close both high-pressure valve and low-pressure valve together.
Finally, close the vacuum pump or the recovery unit.
Maintain the pressure for 3-5 minutes to check if there is any leakage.
Refill Refrigerant
Connect the yellow tube with the refrigerant bottle. Open the refrigerant bottle (normal upright position), then open the valve inside of the gauge set to purge the yellow tube. Reverse the refrigerant bottle and place it well. Inject the refrigerant into the high-pressure valve up to the specified quantity (according to the manufacturer's refill specification). Close the
high pressure valve and place the refrigerant bottle in its normal upright position.
Confirm Refill Effect
Start the system operation first.
After a certain time (about 5-10 minutes), check the system to see if both low pressure and high pressure are in normal condition. If the system pressure is insufficient, slowly open the low pressure valve (must not open the high pressure valve at this moment). After a proper quantity of gaseous refrigerant (with the steel bottle in its upright position) is supplemented, close the low pressure valve and check the system again.
Maintenance and Safety
Never overexert your force to open or close the valves, otherwise they might be damaged.
Always follow the Operation Instructions or operate it under the guidance of a professional. Never misuse the high pressure and low pressure valves.
Never open both high pressure valve and low pressure valve together during operation.
Never use a working medium that is not in compliance with the indication on the nameplate. Never let the sight glass aim at any person to avoid any accident.
The pressure gauges are wear parts and they need periodical calibration. For accuracy, normally you should deliver the gauges to the authority for calibration every 3-6 months.
Always use them carefully and protect them from vibration or careless fall. After use, the valves should be released and keep the instrument well in storage.
TECHNICAL PARAMETER
| SKU | ACKDZKB235CFM9U8YV3 |
| Model | RS-1 |
| Voltage | 220-240V 50Hz |
| Free Air Displacement | 3.5CFM |
| Ultimate Vacuum | 5PA |
| Rotating Speed | 1440 |
| Power (HP) | 1/4 |
| Oil Capacity (ml) | 220 |
| Dimension (mm) | 240*110*220 |
| Weight (Kg) | 7 |
| Accessory | Refrigerant meter groupScope of application: R22 R134A R410A R404AThree 48 inches long hoses1 pair of car air conditioning quick connect1 pair of 410A adapter |
| SKU | 3CFM1-4HPZKBZJOC1V23CFM1-4HPZKBZJ001V3 |
| Model | RS-1 |
| Voltage | 220-240V 50Hz |
| Free Air Displacement | 3CFM |
| Ultimate Vacuum | 5PA |
| Rotating Speed | 1440 |
| Power (HP) | 1/4 |
| Oil Capacity (ml) | 220 |
| Dimension (mm) | 240*110*220 |
| Weight (Kg) | 6.8 |
| Accessory | Refrigerant meter groupScope of application: R22 R134A R410AThree 36 inches long hoses1 pair of car air conditioning quick connect |
| SKU | 1.8CFM1-4HPZKBZJ1V2 |
| Model | RS-0.5 |
| Voltage | 220-240V 50Hz |
| Free Air Displacement | 1.8CFM |
| Ultimate Vacuum | 5PA |
| Rotating Speed | 1440 |
| Power (HP) | 1/4 |
| Oil Capacity (ml) | 220 |
| Dimension (mm) | 240*110*220 |
| Weight (Kg) | 6.8 |
| Accessory | Refrigerant meter groupScope of application: R22 R134A R410AThree 36 inches long hoses1 pair of car air conditioning quick connect |
| SKU | 3CFM1-4HPZKBZUMC1V1 |
| Model | RS-1 |
| Voltage | 120V/60HZ |
| Free Air Displacement | 3CFM |
| Ultimate Vacuum | 5PA |
| Rotating Speed | 1720 |
| Power (HP) | 1/4 |
| Oil Capacity (ml) | 220 |
| Dimension (mm) | 240*110*220 |
| Weight (Kg) | 6.8 |
| Accessory | Refrigerant meter groupScope of application: R22 R134A R410AThree 36 inches long hoses1 pair of car air conditioning quick connect |
| SKU | 4CFM1/4HPZKB1F001V24CFM1/4HPZKB1F001V3 |
| Model | RS-1.5 |
| Voltage | 220-240V 50Hz |
| Free Air Displacement | 4CFM |
| Ultimate Vacuum | 5PA |
| Rotating Speed | 1440 |
| Power (HP) | 1/3 |
| Oil Capacity (ml) | 225 |
| Dimension (mm) | 270*110*220 |
| Weight (Kg) | 7.6 |
| Accessory | Refrigerant meter groupScope of application: R134AThree 36 inches long hoses1 pair of car air conditioning quick connect |
| SKU | 4CFM1/4HPZKB1F001V1 |
| Model | RS-1.5 |
| Voltage | 120V/60HZ |
| Free Air Displacement | 4CFM |
| Ultimate Vacuum | 5PA |
| Rotating Speed | 1720 |
| Power (HP) | 1/3 |
| Oil Capacity (ml) | 225 |
| Dimension (mm) | 270*110*220 |
| Weight (Kg) | 7.6 |
| Accessory | Refrigerant meter groupScope of application: R134AThree 36 inches long hoses1 pair of car air conditioning quick connect |
| SKU | 4CFM1/3HPZKB4F001V2 |
| Model | RS-1.5 |
| Voltage | 220-240V 50Hz |
| Free Air Displacement | 4CFM |
| Ultimate Vacuum | 5PA |
| Rotating Speed | 1440 |
| Power (HP) | 1/3 |
| Oil Capacity (ml) | 225 |
| Dimension (mm) | 270*110*220 |
| Weight (Kg) | 7.6 |
| Accessory | Refrigerant meter groupScope of application: R22 R12 R134A R502Three 36 inches long hoses1 pair of car air conditioning quick connect1 pair of 410A adapter |
| SKU | MCKDZK44.8CFM7CNVV1 |
| Model | RS-2 |
| Voltage | 120V/60HZ |
| Free Air Displacement | 4.8CFM |
| Ultimate Vacuum | 5PA |
| Rotating Speed | 1720 |
| Power (HP) | 1/3 |
| Oil Capacity (ml) | 250 |
| Dimension (mm) | 290*120*230 |
| Weight (Kg) | 9.3 |
| Accessory | Refrigerant meter groupScope of application: R410A R22 R134A R404AFour 60 inches long hoses1 pair of car air conditioning quick connect1 pair of 410A adapter |
| SKU | MCKDZK43.6CFM6DQYV1 |
| Model | RS-1 |
| Voltage | 120V/60HZ |
| Free Air Displacement | 3.6CFM |
| Ultimate Vacuum | 5PA |
| Rotating Speed | 1720 |
| Power (HP) | 1/4 |
| Oil Capacity (ml) | 220 |
| Dimension (mm) | 240*110*220 |
| Weight (Kg) | 8 |
| Accessory | Refrigerant meter groupScope of application: R410A R22 R134A R404AFour 60inchs long hoses1 pair of car air conditioning quick connect1 pair of 410A adapter1 bottle opener1 tool kit |
| SKU | 4.8CFM1/3HPZKB3F1V24.8CFM1/3HPZKB3F1V3 |
| Model | RS-2 |
| Voltage | 220-240V 50Hz |
| Free Air Displacement | 4.8CFM |
| Ultimate Vacuum | 5PA |
| Rotating Speed | 1440 |
| Power (HP) | 1/3 |
| Oil Capacity (ml) | 250 |
| Dimension (mm) | 290*120*230 |
| Weight (Kg) | 8.6 |
| Accessory | Refrigerant meter groupScope of application: R22 R134A R410AThree 36 inches long hoses1 pair of car air conditioning quick connect |
| SKU | 4.8CFM1/3HPZKB3F1V1 |
| Model | RS-2 |
| Voltage | 120V/60HZ |
| Free Air Displacement | 4.8CFM |
| Ultimate Vacuum | 5PA |
| Rotating Speed | 1720 |
| Power (HP) | 1/3 |
| Oil Capacity (ml) | 250 |
| Dimension (mm) | 290*120*230 |
| Weight (Kg) | 8.6 |
| Accessory | Refrigerant meter groupScope of application: R22 R134A R410AThree 36 inches long hoses1 pair of car air conditioning quick connect |
| SKU | MCKDZK44.8CFM7CNVV2 |
| Model | RS-2 |
| Voltage | 220-240V 50Hz |
| Free Air Displacement | 4.8CFM |
| Ultimate Vacuum | 5PA |
| Rotating Speed | 1440 |
| Power (HP) | 1/3 |
| Oil Capacity (ml) | 250 |
| Dimension (mm) | 290*120*230 |
| Weight (Kg) | 8.6 |
| Accessory | Refrigerant meter groupScope of application: R410A R22 R134A R404AFour 60 inches long hoses1 pair of car air conditioning quick connect1 pair of 410A adaptert |
EXPLODED DRAWING
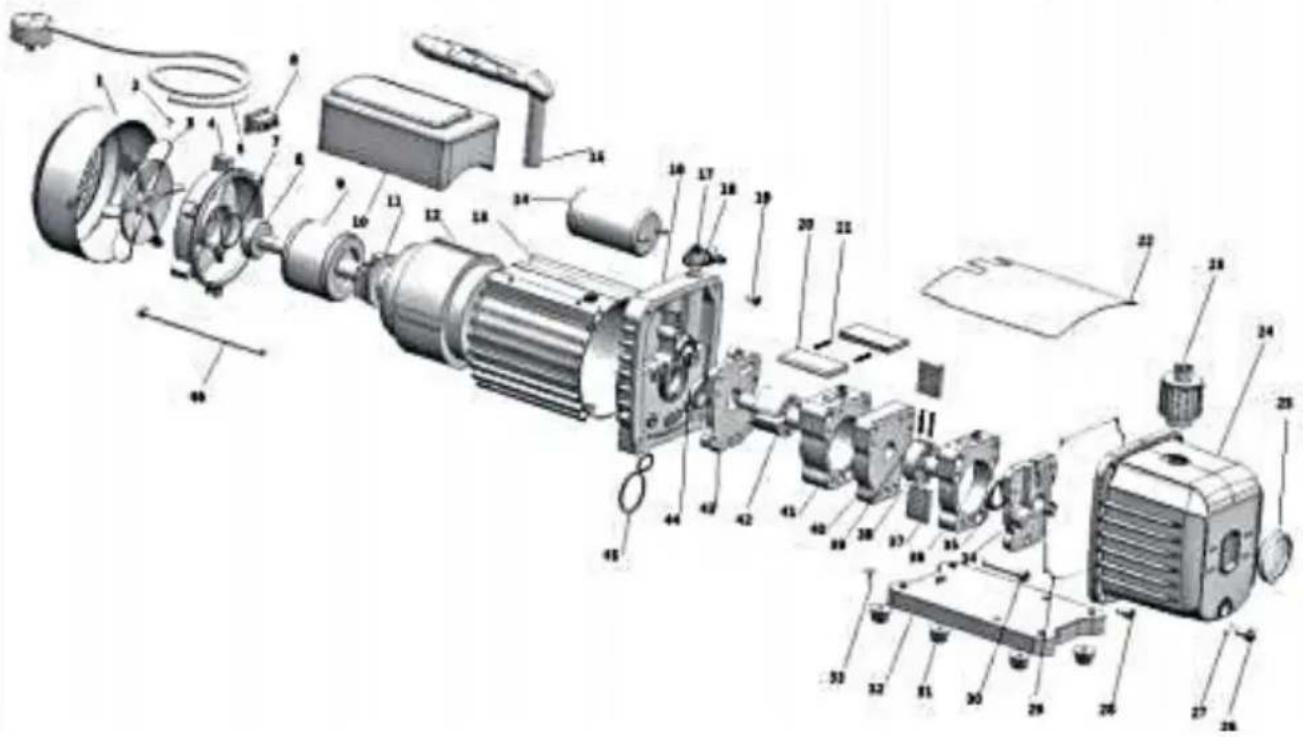
| 1 | Fancover | 24 | Die-cast aluminum housing |
| 2 | Crossscrew | 25 | Sight glass |
| 3 | Fan | 26 | Oil drain |
| 4 | Motor cover | 27 | Oil drain screw O- ring |
| 5 | Power supply cords | 28 | Screw |
| 6 | Power switch | 29 | Sealing ring |
| 7 | Washer | 30 | Screw |
| 8 | Bearing | 31 | Rubber foot |
| 9 | Motor rotor | 32 | Base plate |
| 10 | Capacitor box | 33 | Self-tapping screw |
| 11 | Centrifugal switch | 34 | Back-pumpcover |
| 12 | Motor stator | 35 | Oil seal |
| 13 | Casing | 36 | Back-pump body |
| 14 | Capacitor | 37 | Back-rotary -vane |
| 15 | Handle | 38 | Back-pump rotor |
| 16 | Trestle | 39 | Spring |
| 17 | Gas cap | 40 | Middle fence |
| 18 | The air inlet nozzle | 41 | Front-pump body |
| 19 | Screw | 42 | Front- pump rotor |
| 20 | Front rotary-vane | 43 | Front cover |
| 21 | Spring | 44 | Oil seal |
| 22 | Cap board | 45 | O type ring |
| 23 | Exhaust and oil inlet fitting | 46 | Screw |
Manufacturer: WENLING HONGBAOSHI VACUUM EQUIPMENT CO.,LTD
Address: Yaque Industrial Zone, Xinhe Town, Wenling City, Zhejiang Province
VEVOR®
TOUGH TOOLS, HALF PRICE
Technical Support and E-Warranty Certificate
www.vevor.com/support
Made In China
VEVOR®
MODEL: RS-0.5, RS-1, RS-1.5, RS-2
We continue to be committed to provide you tools with competitive price. "Save Half", "Half Price" or any other similar expressions used by us only represent of savings you might benefit from buying certain tools with us compared major top brands and does not necessarily mean to cover all categories of tools us. You are kindly reminded to verify carefully when you are placing an order v are actually saving half in comparison with the top major brands.
VEVOR®
TOUGH TOOLS, HALF PRICE
VACUUM PUMP
REFRIGERANT METER GROUP
MODEL: RS-0.5, RS-1, RS-1.5, RS-2
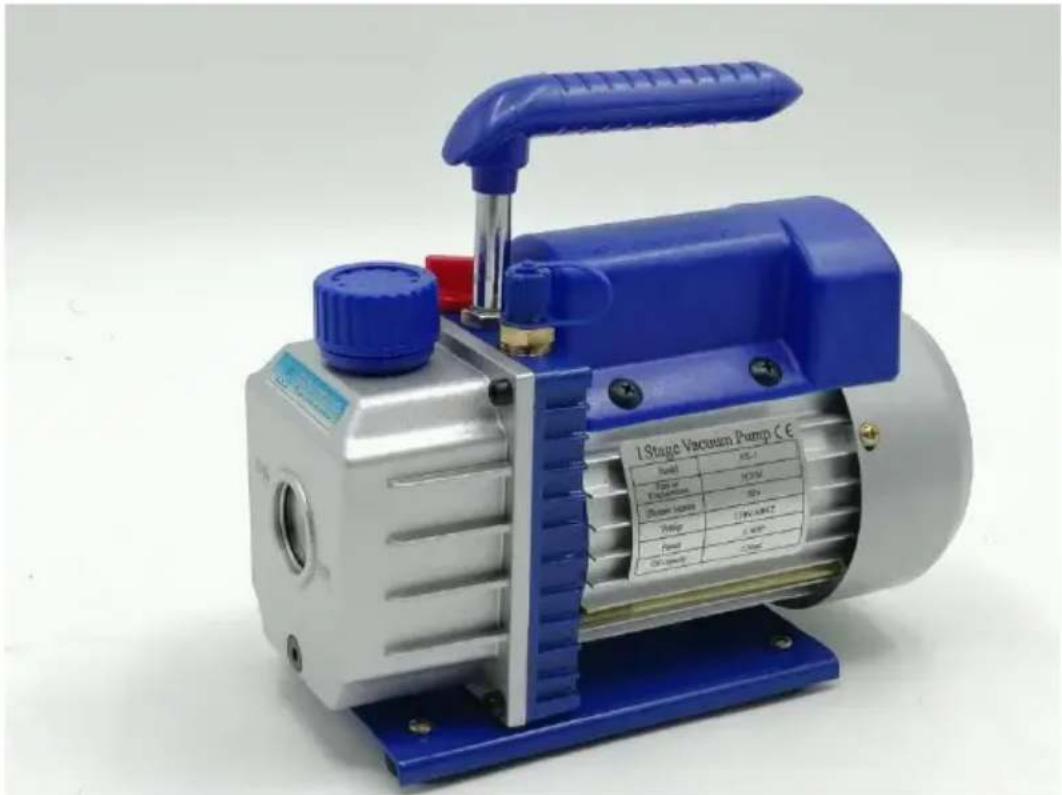
Have product questions? Need technical support? Please feel free to contact us:
Technical Support and E-Warranty Certificate
www.vevor.com/support
This is the original instruction. Please read all manual instructions carefully before operating. VEVOR reserves a clear interpretation of the user manual. The appearance of the product shall be subject to the product you received. Please forgive us that we won't inform you of data on our product.
SAFETY INSTRUCTION
OPERATING MANUAL
1. Before using your vacuum pump
TROUBLESHOOTING GUIDE
www.vevor.com/support
VACUUM PUMP REFRIGERANT METER GROUP
MODEL: RS-0.5, RS-1, RS-1.5, RS-2
We continue to be committed to providing you with tools at competitive prices. "Save Half", "Half Price", or any other similar expressions used by us only represent savings you might benefit from buying certain tools with us compared to major top brands and does not necessarily mean to cover all categories of tools from us. You are kindly reminded to verify carefully when placing an order whether you are actually saving half in comparison with the top major brands.
VEVOR®
TOUGH TOOLS, HALF PRICE
VACUUM PUMP
REFRIGERANT METER GROUP
MODEL: RS-0.5, RS-1, RS-1.5, RS-2
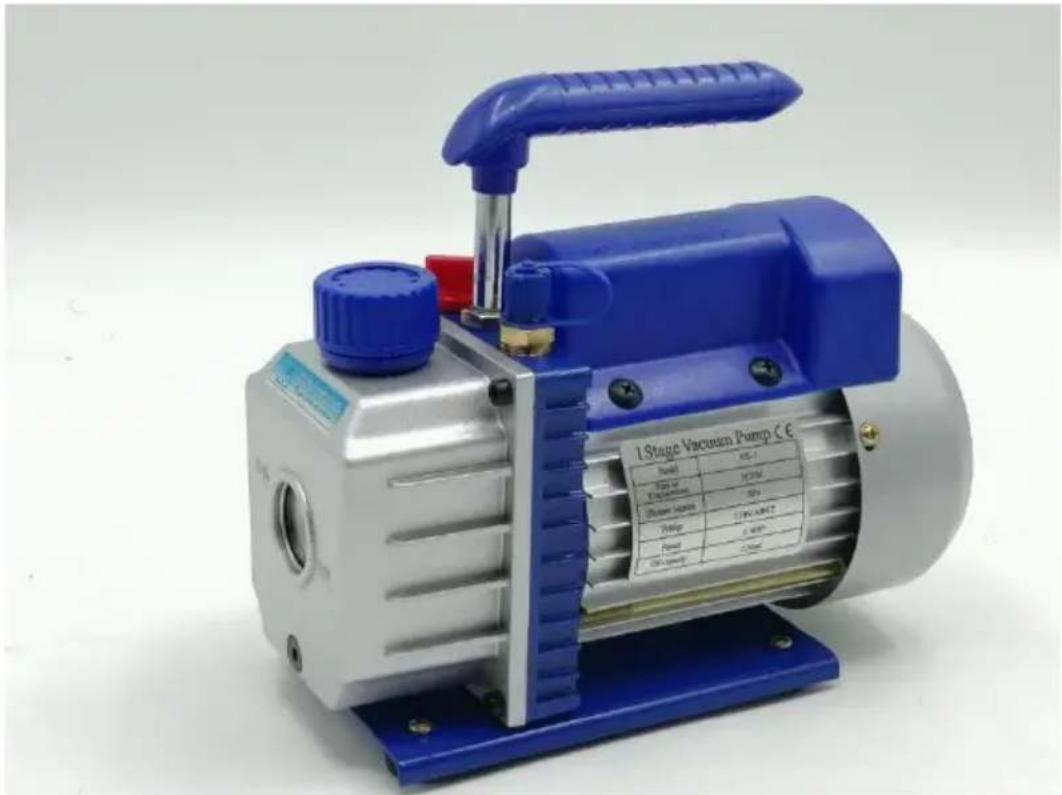
Have product questions? Need technical support? Please feel free to contact us:
Technical Support and E-Warranty Certificate
www.vevor.com/support
This is the original instruction. Please read all manual instructions carefully before operating. VEVOR reserves a clear interpretation of the user manual. The appearance of the product shall be subject to the product you received. Please forgive us that we won't inform you if there are any technology or software updates on our product.
SAFETY INSTRUCTION
OPERATING MANUAL
TROUBLESHOOTING GUIDE
MODEL: RS-0.5, RS-1, RS-1.5, RS-2
We continue to be committed to providing you tools with competitive price. "Save Half", "Half Price" or any other similar expressions used by us only represent the savings you might benefit from buying certain tools with us compared to major top brands and does not necessarily mean to cover all categories of tools from us. You are kindly reminded to verify carefully when you are placing an order that you are actually saving half in comparison with the top major brands.
VEVOR®
TOUGH TOOLS, HALF PRICE
VACUUM PUMP
REFRIGERANT METER GROUP
MODEL: RS-0.5, RS-1, RS-1.5, RS-2
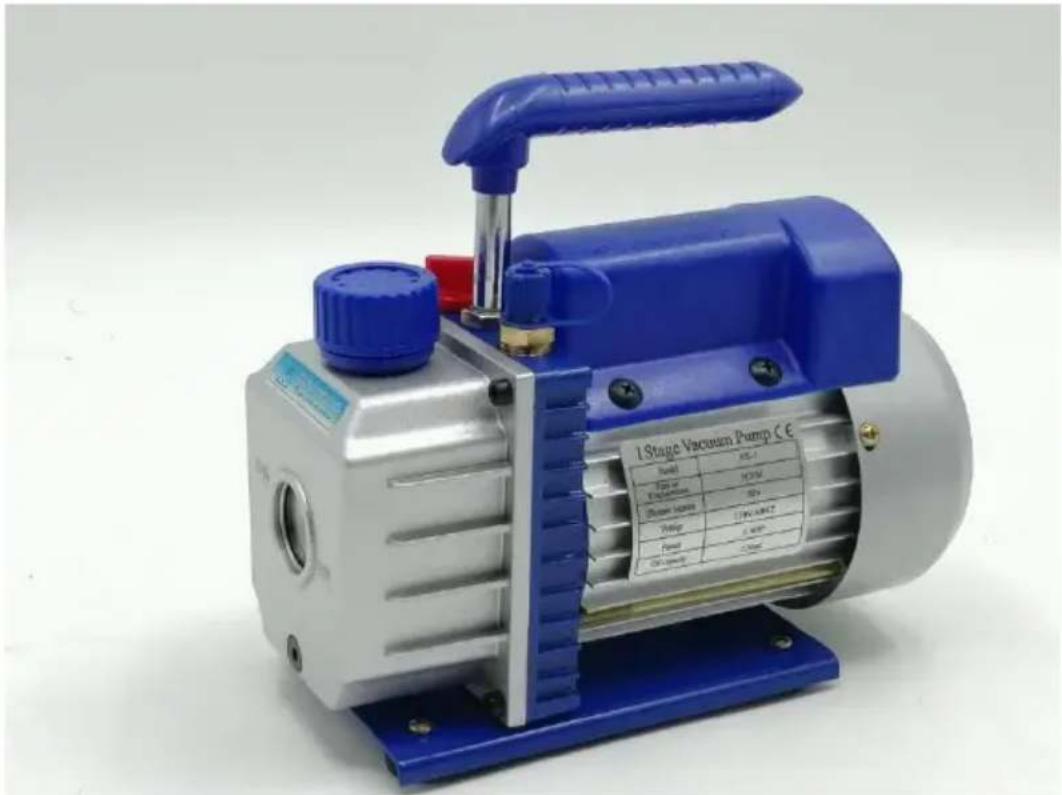
Have product questions? Need technical support? Please feel free to contact us:
Technical Support and E-Warranty Certificate
www.vevor.com/support
This is the original instruction. Please read all manual instructions carefully before operating. VEVOR reserves a clear interpretation of the user manual. The appearance of the product shall be subject to the product you received. Please forgive us that we won't inform you if there are any technology or software updates on our product.
SAFETY INSTRUCTION
OPERATING MANUAL
TROUBLESHOOTING GUIDE
MODEL: RS-0.5, RS-1, RS-1.5, RS-2
We continue to be committed to providing you tools with competitive price. "Save Half", "Half Price" or any other similar expressions used by us only represent the estimate of savings you might benefit from buying certain tools with us compared to major top brands and does not necessarily mean to cover all categories of tools. You are kindly reminded to verify carefully when you are placing an order that you are actually saving half in comparison with the top major brands.
VEVOR®
TOUGH TOOLS, HALF PRICE
VACUUM PUMP
REFRIGERANT METER GROUP
MODEL: RS-0.5, RS-1, RS-1.5, RS-2
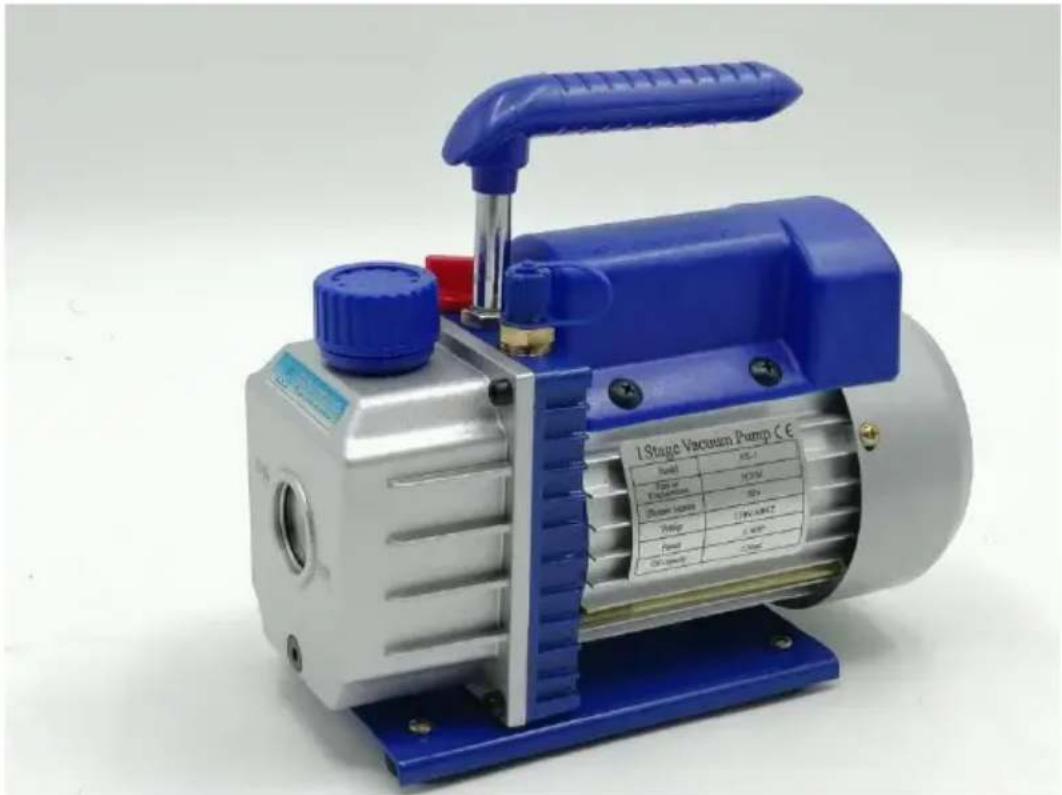
Have product questions? Need technical support? Please feel free to contact us:
Technical Support and E-Warranty Certificate
www.vevor.com/support
This is the original instruction. Please read all manual instructions carefully before operating. VEVOR reserves a clear interpretation of the user manual. The appearance of the product shall be subject to the product you received. Please forgive us that we won't inform you if there are any technology or software updates on our product.
SAFETY INSTRUCTION
OPERATING MANUAL
1. Before using your vacuum pump
TROUBLESHOOTING GUIDE
www.vevor.com/support
VACUUM PUMP REFRIGERANT GAUGE GROUP
MODELS: RS-0.5, RS-1, RS-1.5, RS-2
We continue to be committed to provide you with tools at competitive prices. "Save Half", "Half Price" or any other similar expressions used by us only represent the savings you might benefit from buying certain tools with us compared to major top brands and does not necessarily mean to cover all categories of tools. You are kindly reminded to verify carefully when you are placing an order that you are actually saving half in comparison with the top major brands.
VEVOR®
TOUGH TOOLS, HALF PRICE
VACUUM PUMP
REFRIGERANT METER GROUP
MODELS: RS-0.5, RS-1, RS-1.5, RS-2
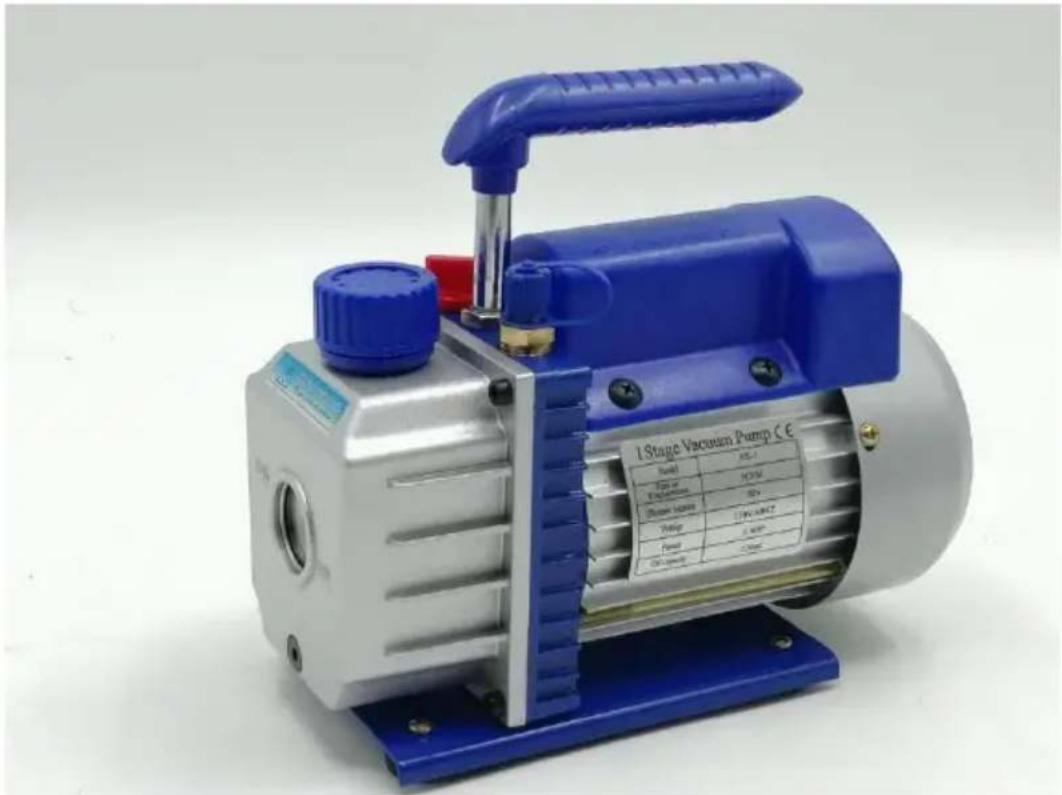
Have product questions? Need technical support? Please feel free to contact us:
Technical Support and E-Warranty Certificate
www.vevor.com/support
This is the original instruction. Please read all manual instructions carefully before operating. VEVOR reserves a clear interpretation of the user manual. The appearance of the product shall be subject to the product you received. Please forgive us that we won't inform you if there are any technology or software updates on our product.
SAFETY INSTRUCTION
OPERATING MANUAL
TROUBLESHOOTING GUIDE
www.vevor.com/support
MODEL: RS-0.5, RS-1, RS-1.5, RS-2
We continue to be committed to provide you with tools at competitive prices. "Save Half", "Half Price" or any other similar expressions used by us only represent the savings you might benefit from buying certain tools with us compared to major top brands and does not necessarily mean to cover all categories of tools from us. You are kindly reminded to verify carefully when you are placing an order to see where you are actually saving half in comparison with the top major brands.
VEVOR®
TOUGH TOOLS, HALF PRICE
VACUUM PUMP
REFRIGERANT METER GROUP
MODEL: RS-0.5, RS-1, RS-1.5, RS-2
Have product questions? Need technical support? Please feel free to contact us:
Technical Support and E-Warranty Certificate
www.vevor.com/support
This is the original instruction. Please read all manual instructions carefully before operating. VEVOR reserves a clear interpretation of the user manual. The appearance of the product shall be subject to the product you received. Please forgive us that we won't inform you if there are any technology or software updates on our product.
SAFETY INSTRUCTION
OPERATING MANUAL
TROUBLESHOOTING GUIDE
www.vevor.com/support
Made in China
VEVOR®
www.vevor.com/support
VACUUM PUMP
REFRIGERANT MANIFOLD GAUGE SET
MODEL: RS-0.5, RS-1, RS-1.5, RS-2
We continue to be committed to providing you with tools at competitive prices. "Save Half", "Half Price", or any other similar expressions used by us only represent the savings you might benefit from buying certain tools with us compared to major top brands, and do not necessarily mean to cover all categories of tools. We kindly remind you to verify carefully when placing an order to see where you are actually saving half in comparison with the top major brands.
VEVOR®
TOUGH TOOLS, HALF PRICE
VACUUM PUMP
REFRIGERANT METER GROUP
MODEL: RS-0.5, RS-1, RS-1.5, RS-2
Have product questions? Need technical support? Please feel free to contact us:
Technical Support and E-Warranty Certificate
www.vevor.com/support
This is the original instruction. Please read all manual instructions carefully before operating. VEVOR reserves a clear interpretation of the user manual. The appearance of the product shall be subject to the product you received. Please forgive us that we won't inform you of any technology or software updates on our product.
SAFETY INSTRUCTION
OPERATING MANUAL
TROUBLESHOOTING GUIDE
www.vevor.com/support
Made in China