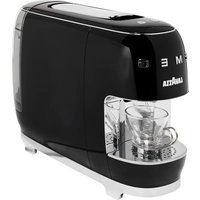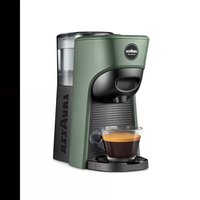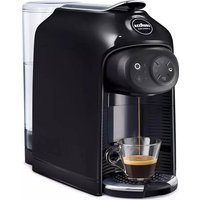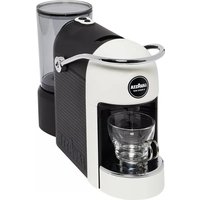
A Modo Mio Jolie Plus Evo - Coffee machine Lavazza - Free user manual and instructions
Find the device manual for free A Modo Mio Jolie Plus Evo Lavazza in PDF.


User questions about A Modo Mio Jolie Plus Evo Lavazza
0 question about this device. Answer the ones you know or ask your own.
Ask a new question about this device
Download the instructions for your Coffee machine in PDF format for free! Find your manual A Modo Mio Jolie Plus Evo - Lavazza and take your electronic device back in hand. On this page are published all the documents necessary for the use of your device. A Modo Mio Jolie Plus Evo by Lavazza.
USER MANUAL A Modo Mio Jolie Plus Evo Lavazza
Dear Customer thank you for purchasing the Lavazza A MODO MIO espresso coffee machine and for choosing our company.
Before operating the machine, we recommend you carefully read the operating instructions that explain how to use, clean and maintain it in perfect working order. We hope you enjoy brewing authentic Italian coffee, thanks to Lavazza!
Felicitations!
This appliance is intended to be used in household and similar applications such as:
- staff kitchen areas in shops, offices and other working environments;
- farm houses;
- by clients in hotels, motels and other residential type environments;
- bed and breakfast type environments.
The improper use of the machine may cause possible injuries.
It is prohibited to make any technical changes to the machine.
The machine may not be used by children under 8 years of age or persons with physical, sensory or mental impairment, or lacking the necessary experience, unless supervised or after being instructed in the safe use of the machine and understanding the potential dangers.
Do not let children play with the machine. Keep the machine and its mains lead out of the reach of children under 8 years of age.
The necessary cleaning and maintenance meant to be performed by the user must not be carried out by children if not under direct supervision and older than 8 years.
Installation site:
Place the coffee machine in a safe place, where nobody may overturn it or be injured by it. Do not keep the machine at a temperature below 41^ ( 5^ ) as freezing may damage it. Do not use the coffee machine outdoors.
Do not place the machine on very hot surfaces or close to flames.
The coffee machine shall not be stored inside a cabinet when it's in use.
Power supply:
The coffee machine shall be connected only to adequate power sockets equipped with grounding means.
The voltage must match the one on the appliance identification plate.
Power supply cable:
Do not operate the coffee machine if the power cord is damaged.
If the power cord is damaged, it must be replaced by the manufacturer (or the latter's technical service staff), in order to prevent any risk.
Do not pass the power cable for angles and sharp edges, over very hot objects, and protect it from oil.
Do not carry or pull the coffee machine holding it by the power cord.
Do not remove the plug by pulling the power cord, do not touch it with wet hands. Power cord should not hang loose from tables or shelves.
Danger of electrocution:
Live parts should never come into touch with water.
This unit shall not be dipped into any liquid.
Protect children under 8 years of age:
Prevent children from playing with the machine.
Children are not aware of the risks related to electric household appliances.
Do not leave the machine packaging materials within the reach of children.
Danger of burns:
Do not touch the hot parts (cartridge holder group) of the machine immediately after use. While dispensing the drink, pay attention to any possible splashes of hot liquid.
Cleaning:
Before cleaning, unplug the machine and let it cool down.
Do not immerse the machine in water! It is strictly forbidden to tamper with the internal parts of the machine. Change the water in the tank if not used for 3 days. To prevent damage to the appliance do not use alkaline cleaning agents when cleaning, use a soft cloth and a mild detergent.

Storing the machine:
If the machine remains inactive for a long time, unplug it and store it in a dry place out of reach of children. Keep it protected from dust and dirt.

Servicing / Maintenance:
In case of failure, problems or a suspected fault resulting from falling of the machine, immediately unplug the machine.
Do not attempt to operate a faulty machine. Servicing and repairs can only be performed by Lavazza Authorized Service Centres. All liability for damages resulting from work not carried out by professionals is declined.

Water tank:
Fill the tank only with fresh, non-sparkling, drinking water. Do not operate the machine if the water is not at least above the minimum level indicated on the tank.

apsule compartment:
Only Lavazza A MODO MIO or compatible capsules must be introduced in the capsule-holder; do not put in your fingers or any other object.
The capsules shall be used only once.

Machine disposal at the end of its operational life:
INFORMATION FOR THE USER: the symbol of the crossed-out wheeled bin on the appliance or its packaging indicates that the product must be disposed of separately from other waste at the end of its operational life.
The user must therefore take the appliance to be disposed of to an appropriate separate collection centre for electrical and electronic equipment.
Appropriate separate waste collection, in view of the decommissioned equipment's recycling, processing and environment-friendly disposal, helps avoiding possible adverse effects both on the environment and the public health and, also, promotes the reuse and/or recycling of the materials the machine is made up of. Specific administrative sanctions provided for by current regulations will be applied for illicit disposal of the product by the user.
EN
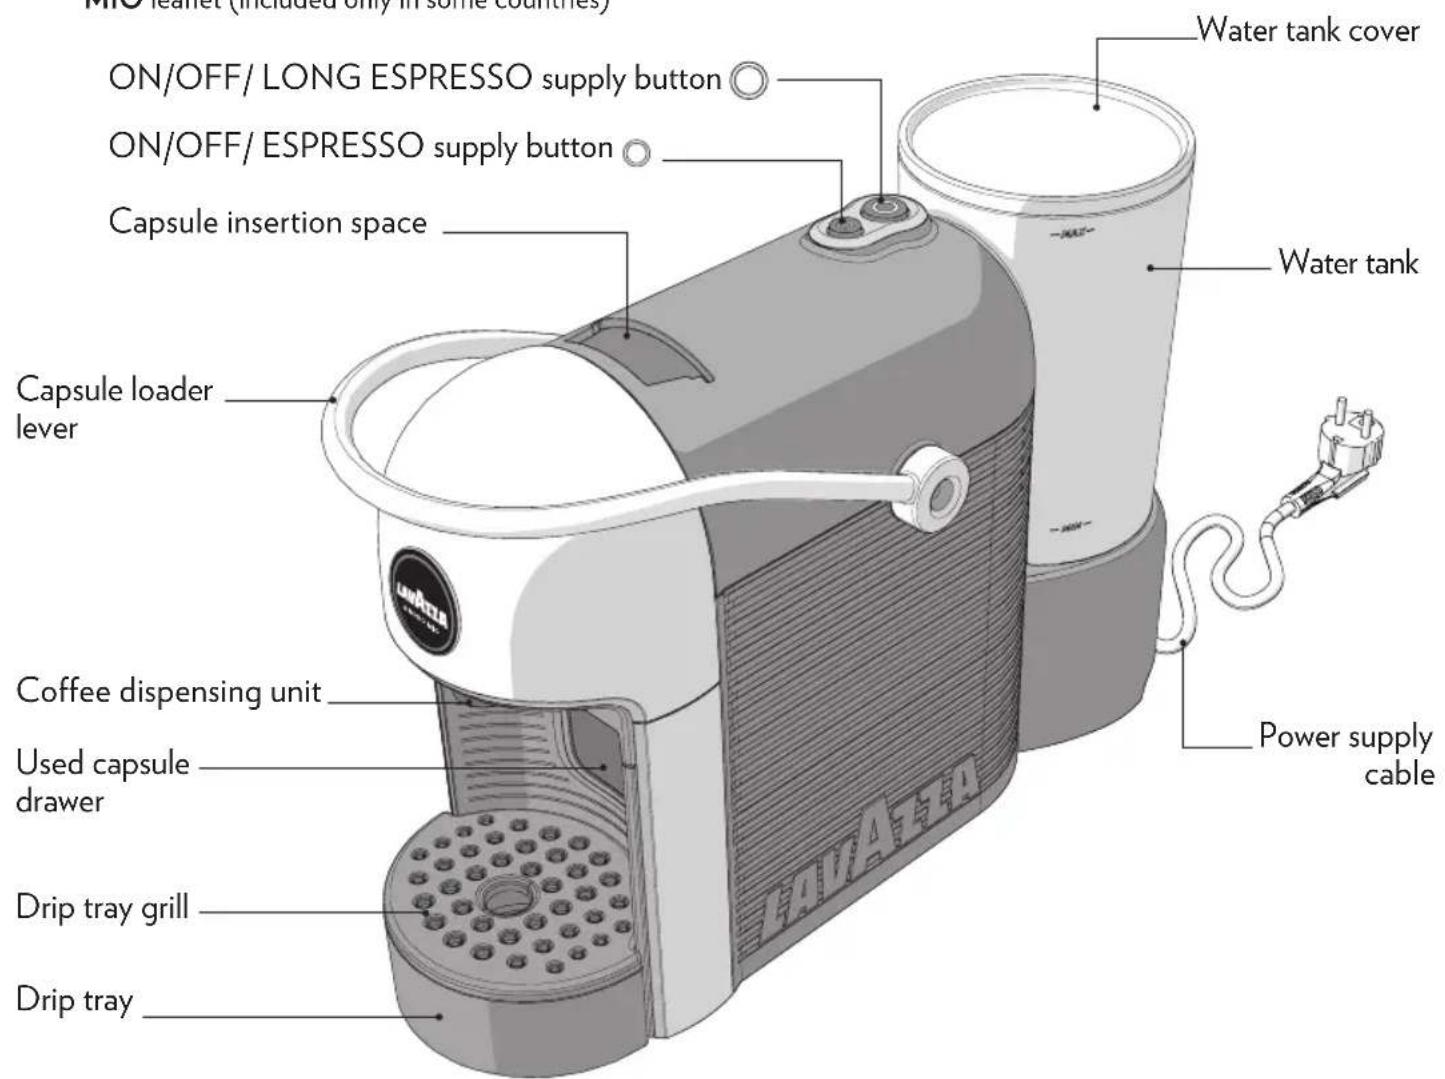
MACHINE COMPONENTS
PACKAGE CONTENT*
-
Welcome kit consisting of 9 assorted Lavazza A MODO MIO capsules and a Lavazza A MODO MIO leaflet (included only in some countries)
-
quick guide
- warranty sheet
* The characteristics and the package content can vary according to the target market.
INDICATORLIGHTS
EN
Switch-on
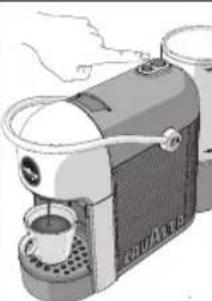
Press one of the buttons to switch the machine ON.
Heating cycle
The buttons will start blinking to a light white.
Machine ready (in temperature)
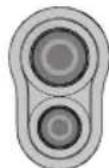
The machine will be ready for use when the buttons light up to a steady white light.
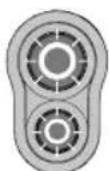
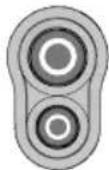
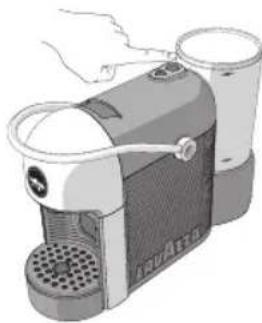
ESPRESSO supply phase (1 fl.oz/30 cc)
- Press the ESPRESSO button;
- The button will blink to a white light during the supplying phase.
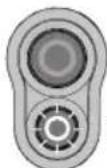
(1fl.oz/30cc)
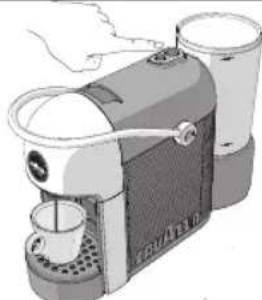
LONG ESPRESSO supply phase (2 fl.oz/60 cc)
- Press the LONG ESPRESSO button;
- The button will blink to a white light during the supplying phase.
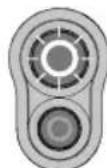
(2fl.0z/60cc)
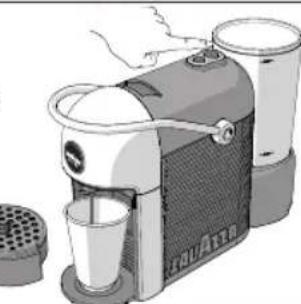
Switch-off
After 2 minutes of not being used, the machine switches off automatically.
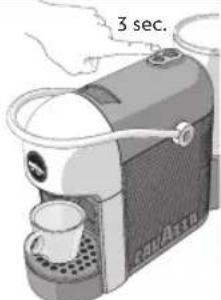
- You can switch off the machine manually by holding both buttons for at least 3 seconds before 2 minutes are elapsed.
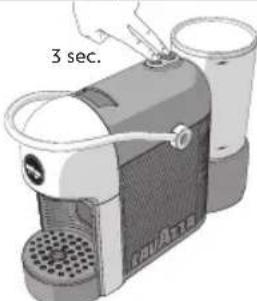
No water in tank during ESPRESSO supply phase
- Fill the water tank up to the indicated MAX level;
- Press the selected button again to keep on supplying.
No water in tank during LONG ESPRESSOsupply phase
- Fill the water tank up to the indicated MAX level;
- Press the selected button again to keep on supplying.
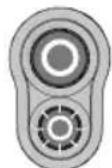
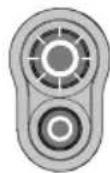
Coffee dose programming
- Press and hold one of the two coffee delivery buttons for at least 3 seconds.
- The selected button will flash.
- Once the desired amount of coffee has been obtained, stop supply by releasing the button.

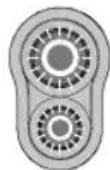
Used capsule drawer filled
- Both buttons lights on with white light and blinking fast.
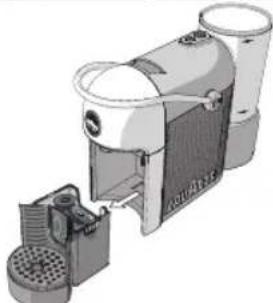
- Empty the spent capsule drawer and press one of the buttons to reset the machine.
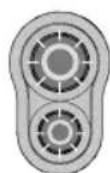
Machine broken
- Red flashing lights.
- Contact Lavazza Customer Service.
Red
Red
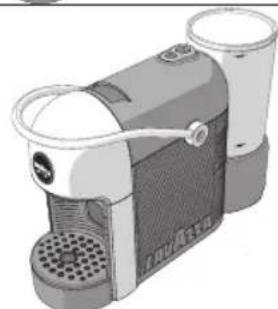
MACHINE SETTING
EN

No liability is held for damage caused by:
- incorrect use not in accordance with the intended purposes;
- repairs not carried out by Lavazza authorized service centres;
- tampering with the power supply cable;
- tampering with any parts of the machine;
the use of non-original spare parts and accessories; - failure to descale;
- storage at temperatures below 39.2^ F( 4^ C) ;
- use in places with temperature below 50^ (10^) or above 104^ (40^) ;
- use in places with relative humidity above 95% ;
- use of capsules others than indicated.
In these cases, the warranty is not valid.

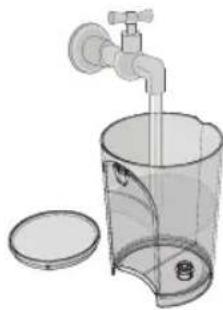
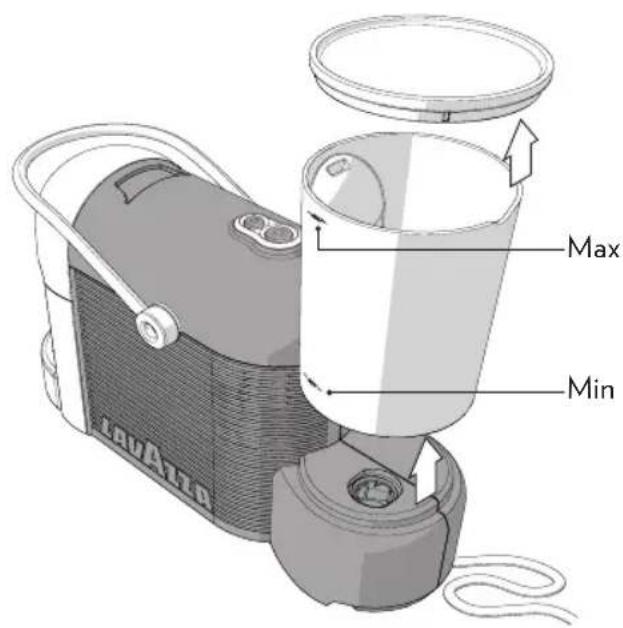
Fill the water tank up to the MAX level indicated, using only fresh drinking water. Fit the tank back into place, then close by using the cover.
STARTING THE MACHINE

Place the coffee machine on a flat and stable surface, far from water and heat sources.
Do not connect the machine to the mains supply. Machine damages due to non-observation of these indications are not covered by warranty.

Hot water and other liquids can damage the tank and the machine.
Do not operate the machine without water: make sure that there is enough water in the tank.

Lift and remove the cover, then the water tank itself.

Rinse off the tank.
EN
MACHINE SETTING
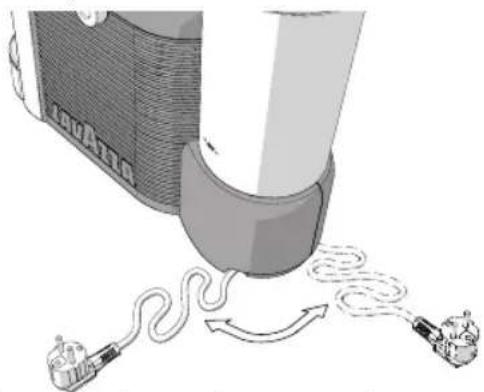
4 The machine rear features two outlets that can be used for the power cord. You should use the most suitable outlet for your needs.
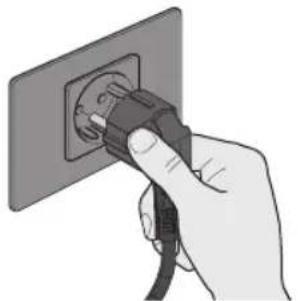
5 Fit the supply plug into the power outlet.
6 Press one of the buttons to switch the machine on.
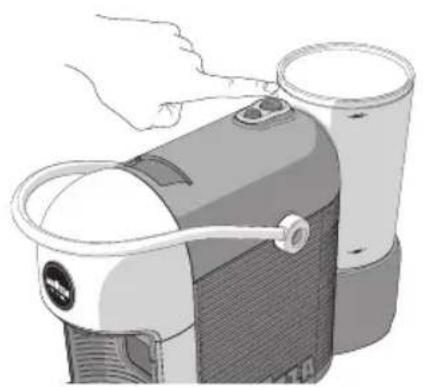
The coffee machine starts the heating cycle. The buttons will start blinking to a light white.
During the heating cycle, you can book the drink, pressing one of the supply buttons. The drink will be released after the end of the heating cycle.
The machine will be ready for use when the buttons light up to a steady white light white light.
At first power-on, supply at least 17.5 fl oz (0.5 litre) of water without capsule placing a container under the coffee spout.
OFF-MODE
To guarantee energy saving, after 2 minutes of not being used, the machine switches off automatically
You can switch off the machine manually by holding both buttons for at least 3 seconds before 2 minutes are elapsed. This mode is indicated by the switching off of the buttons.
The machine can be reactivated by pressing one of the buttons again.
The power consumption of the machine when it is switched-off is 0.2 W.
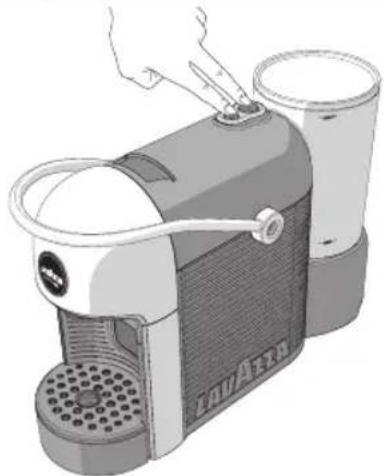
PREPARING THE COFFEE
EN
COFFEE DISPENSING
Make sure that the buttons lights up to a steady white light.
Never put fingers or objects in the capsule-holder. Only compatible capsules must be introduced in the capsule-holder.
Single-dose capsules are prepared to dispense one coffee/product.
DO NOT use the capsules more than once. Inserting two or more capsules can cause the machine to malfunction.
To always have a coffee at the perfect temperature, it is recommended to preheat the cup with hot water. Position the cup under the dispensing spout without inserting the capsule. Press one of the buttons to supply hot water enough to pre-heat the cup.
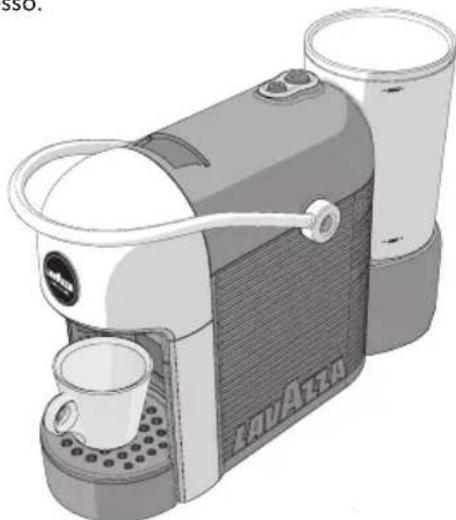
Place the cup under the coffee dispenser for a classic espresso.
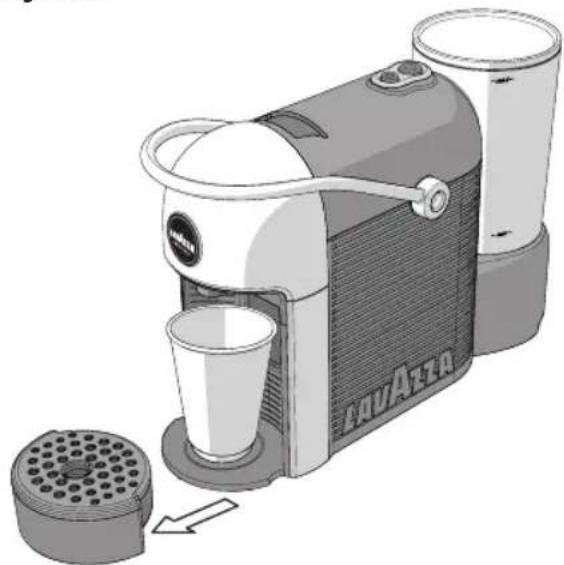
2 Remove the drip tray to use cups of different sizes for a long coffee.
If power supply is interrupted during the coffee supply cycle, restore power supply and restart the coffee supply procedure.
If during the supply cycle, water lacks in the tank, water lack will be indicated by white steady LED on the selected button, while the LED on the other button will start flashing, then proceed as follows
- Fill the water tank up to the MAX level indicated.
- Press the button previously selected. The button will start flashing and the coffee supply procedure will restart.
After 5 supplies the buttons start blinking fast with white light to indicate that the capsules drawer is filled.
Empty the capsules drawer and press one of the buttons to reset the machine.
Now the machine is ready for a new supply.
EN
PREPARING THE COFFEE
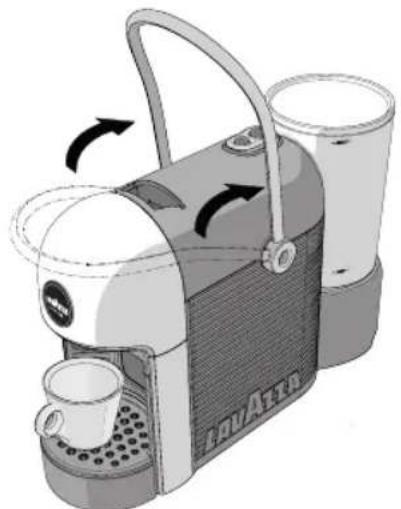
3 Lift the capsule loading lever until it locks into position to open the capsule fitting compartment.
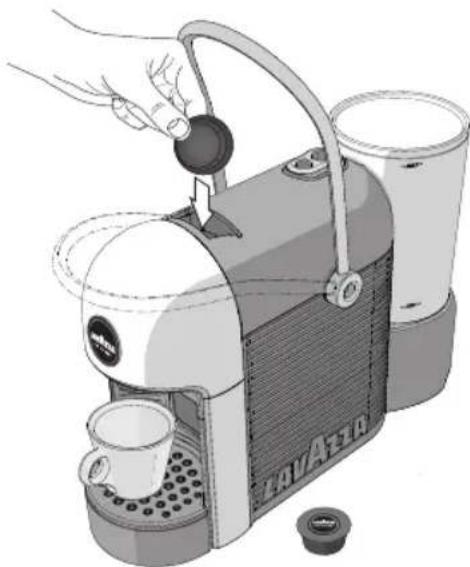
Put a capsule into the capsule fitting compartment.
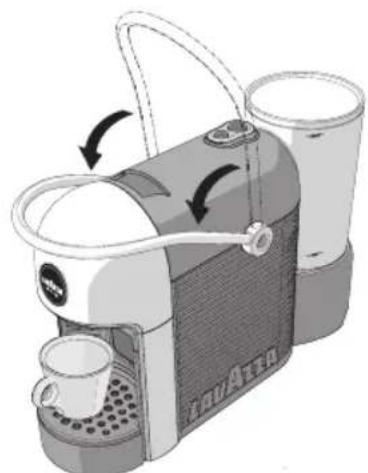
Lower the capsule loading lever to close the capsule fitting compartment.
6 Press the ESPRESSO button (1 fl.oz/30 cc) or press the LONG ESPRESSO button (2 fl.oz/60 cc) to start delivery.
The machine will stop delivery automatically when the programmed measure is reached.
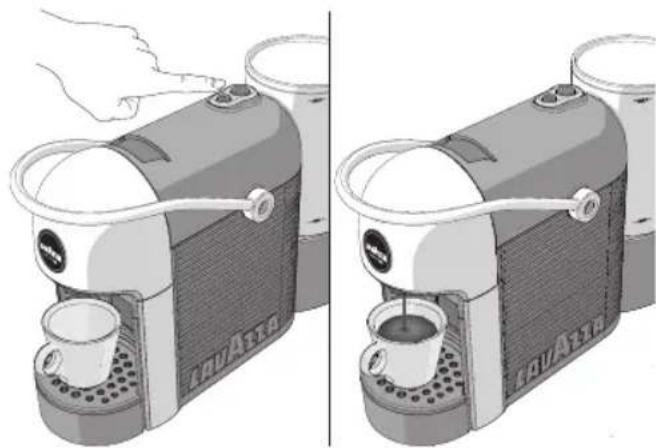
The button will light up to a blinking white light when the product is being supplied.
To supply the product again, wait for the button to light up to a steady white light.
PROGRAMMING THE MACCHINE
EN
COFFEE DOSE PROGRAMMING
Measures are always programmed using the same button; any other buttons are ignored. The programmed amount of brewed coffee can be changed by repeating the programming.
If the programmed measure exceeds the maximum allowed 8.7 floz (250 cc) the machine will automatically stop delivery, the delivery button will blink and the last programmed measure will be saved in the memory. If there is a power failure during programming, the last programmed value remains in the memory. If during a dose programming, water lack is indicated, the machine stops the supply and the dose being programmed won't be saved. Once filled the water tank, repeat the dose programming procedure.
1 Lift the capsule loading lever until it locks into position to open the capsule fitting compartment.
Put a capsule into the capsule fitting compartment.
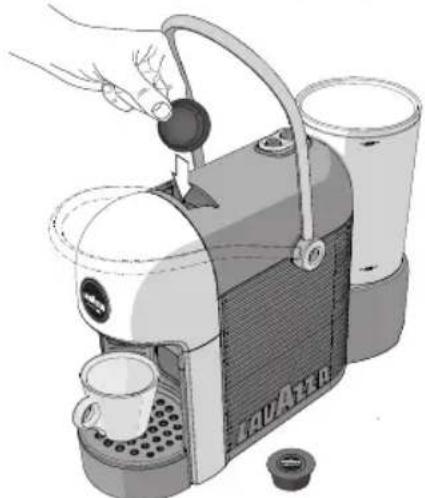
3 Lower the capsule loading lever to close the capsule fitting compartment.
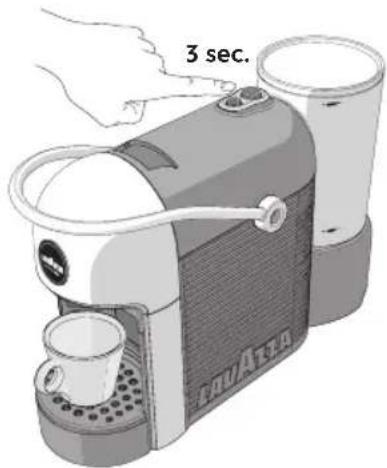
4 Press and hold one of the two coffee delivery buttons for at least 3 seconds. The selected key will flash and the coffee machine will enter the programming mode.
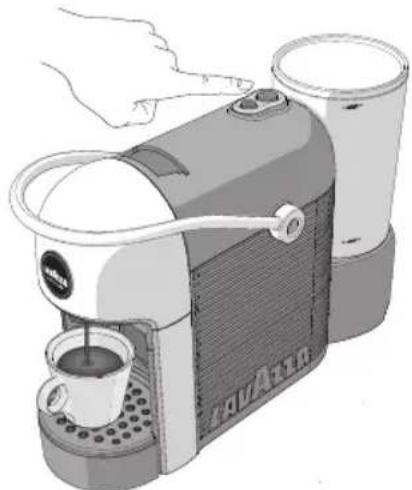
Once the desired amount of coffee has been obtained, stop supply by releasing the button.
EN
MAINTENANCE AND CLEANING

Never use solvents, alcohol or other aggressive substances or ovens for drying the coffee machine components.
Wash machine components (electric components excluded) with cold/lukewarm water and non-abrasive clothes/sponges. All removable components can be cleaned by using a dishwasher.
Do not leave water in the tank and water circuit for more than 3 days. If this is the case, drain the tank and circuit, rinse it and refill it with fresh water, then carry out a delivery without capsule before making any coffee or other beverage.
CLEANING THE CAPSULE COLLECTING DRAWER AND THE DROP COLLECTING

After 5 supplies the buttons start blinking fast with white light to indicate that the capsules drawer is filled. Empty the capsules drawer and press one of the buttons to reset the machine.
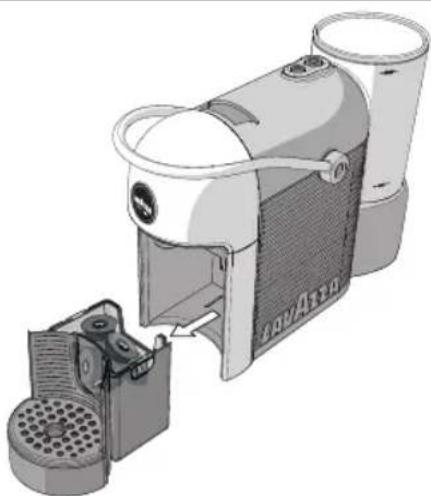

Regularly verify that the used capsule collecting drawer and the drop collecting drawer will not be full, to avoid machine malfunctions and damage.
The used capsule collecting drawer and the drop collecting drawer should be emptied and cleaned after making coffee 4/5 times or every two/three days.
Take off the drip tray and remove the drip tray grill.
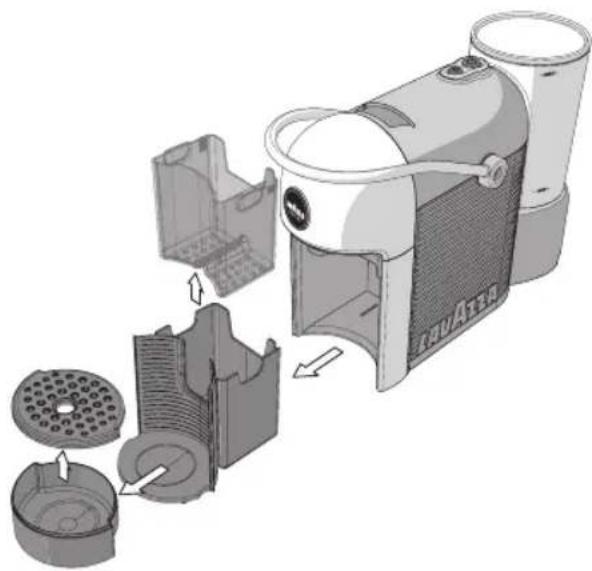

Remove and empty the used capsule collecting drawer. Clean and dry all parts before putting them back.
COFFEE DISPENSER CLEANING
To clean the dispenser, perform a weekly COFFEE DISPENSING procedure without inserting the capsule.
MAINTENANCE AND CLEANING
EN
DESCALING
Carefully read the descending instructions.
Limescale normally builds up with extended use of the appliance; the machine needs descending every 2-3 months and/or whenever a reduction in water flow is noticed.
To decalcify the machine, It is recommended that the LAVAZZA DESCALING agent should be used.

Never use vinegar as a descending solution.
The cycle will have, once it has been started, to be performed completely.
Do not switch the machine off when the descending cycle is under way.
Do not move away from the machine when the descending cycle is under way.
Do not drink the descending solution and products dispensed.
1 Check there is no capsule inside the capsule containing compartment.
2 Remove and empty the water tank
3 Fill the tank with the Lavazza DESCALING agent 8,4 fl.oz (250 ml) and water 8.4 fl.oz (250 ml).
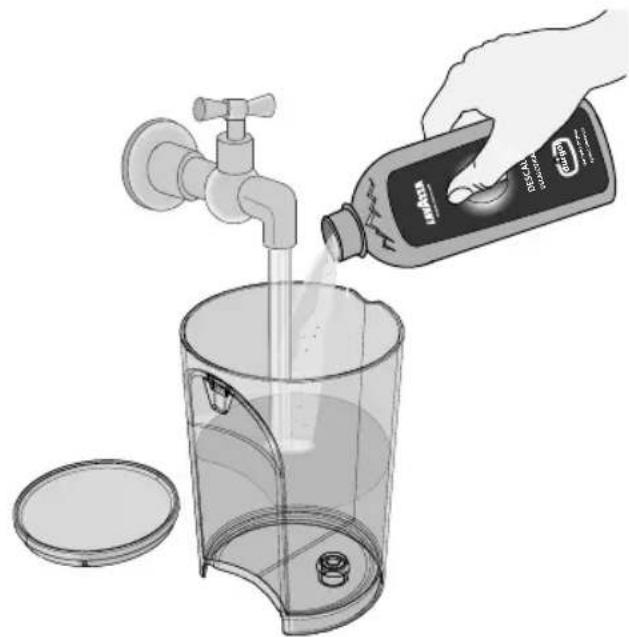
Use a moist cloth to wipe off the squirts or drops, if any.
Fit the tank back into place on the machine.
5 Power the machine ON and place a suitable container under the spout
EN
MAINTENANCE AND CLEANING
Press one of the supply buttons then supply one cup (approximately 2 fl.oz/60 ml) of descending solution. Allow the descending solution to work for about 15-20 seconds.

7 During breaks, empty the container used to collect the solution.
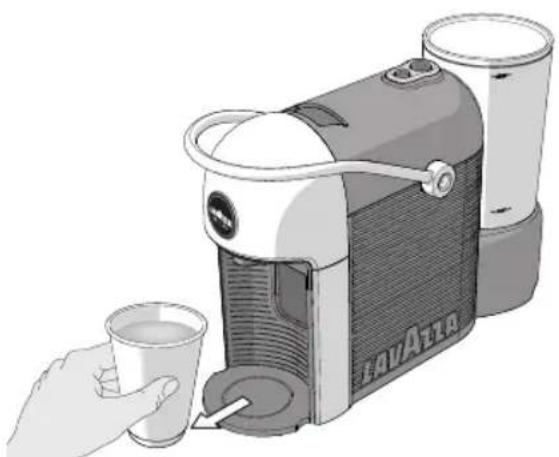
Repeat the steps described in points and until the water tank is completely empty.
9 Proceed with the rinsing cycle.
Rinsing cycle
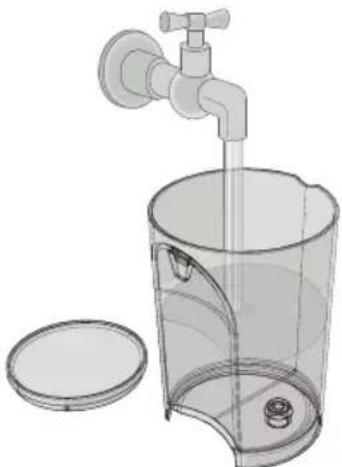
1 Remove the water tank, rinse and wash it accurately. Fill it with drinking fresh non-carbonated water up to the MAX level.
Fit the tank with the fresh water back into the machine
Place a suitable container under the spout.
Press one of the supply buttons then supply the full content of the tank.
4 Empty the container and place it again under the dispenser.
Upon completion of the rinsing cycle, perform one more rinsing cycle.
6 Remove the water tank, rinse and wash it accurately. Fill it with drinking fresh non-carbonated water up to the MAX level.
Put the tank back in place on the machine.
8 Clean the machine by means of a moist, soft cloth. After cleaning the machine, the descending process w be over. The machine will be ready for use.
TROUBLESHOOTING
EN
| Problem encountered Possible causes Solution | ||
| Machine does not turn on. Power lights are off after having pressed the one of buttons. | » Machine is not connected to the power source. » The machine is connect to power strip not working. » Power supply not present. | » Connected the machine to the power source. » Connected the machine directly to the power source. » Connect another device to check the power supply. » If the problem remain please contact L.C.S. |
| The machine requires a lot of time to heat up. | » Machine storage at low temperatures (e.g.: cellar/garage). » The machine has limescale build-up. | » Store the coffee machine in a proper environment and run 2 supplies without capsules. » Descale the machine. » If the problem remain please contact L.C.S. |
| The machine is very noisy. » Machine not is on a flat and stable surface. » Power supply cable incorrectly positioned. » Movable parts not fitted properly. » No water in the tank. » Capsule not present. | » Check the surface. » Check the correct position of the cable into the base of the machine. » Fit the movable parts properly. » Top up the tank with fresh drinking water. » Insert Lavazza capsule or compatible. » If the problem remain please contact L.C.S. | |
| No supply. » Electrical failure: buttons not working. » No water in the tank. » Tank not inserted correctly. » Power-onfailed. | » Press one of the buttons and check the operation of the pilot light (ON with white blinking light) and the machine power-on. » Top up the tank with fresh drinking water. » Insert the tank correctly. » Repeat the coffee machine power-on procedure. » If the problem remain please contact L.C.S. | |
| Problem encountered Possib|e causes Solution | ||
| Water leaks at the rear side of the coffee machine. | »Tank not inserted correctly.»Tankdamaged. | »Insert the tank correctly.»Check for leaks in the tank keeping it separate from the machine.»If the problem remain please contact L.C.S. |
| Water leaks at the front side of the coffee machine. | »Spent capsule drawer not inserted correctly.»Spent capsule drawer filled.»Capsulestuck.»Capsule not compatible. | »Insert the spent capsule drawer correctly.»Empty the spent capsule drawer and the drip tray.»Lift and lower the capsule loading lever. If this is not enough, disconnect the machine from power mains and operate manually to remove the capsule from the duct.»Use Lavazza capsules or compatibles.»If the problem remain please contact L.C.S. |
| The loading lever does not reach the supply position or requires an excessive closing effort. | »Spent capsule drawer filled.»Capsule fitted incorrectly. | »Empty the spent capsule drawer.»Repeat the sequence, lever in the off position, lever in the brewing position; if this is not enough, operate manually to remove the capsule from the duct with the machine disconnected from power mains. |
| Red flashing lights.»Machinebroken.»Contact Lavazza Customer Service. | ||
| Pilot lights ON with white light and blinking fast. | »Spent capsule drawer filled.»Empty the spent capsule drawer and press one of the buttons to reset the machine. | |
| The coffee flows out too fast and no creamy froth forms on the surface. | »Capsule not compatible.»Capsule already used. | »Use Lavazza capsules or compatibles.»Bring the lever back to rest position and load a new capsule.»If the problem remain please contact L.C.S. |
TROUBLESHOOTING
EN
| Problem encountered Possible causes Solution | |
| The coffee is cold. » Coffee pours out in drops, water circuit clogged. » The machine has limescale build-up. | » Run the machine washing cycle. » Descale the machine. » If the problem remain please contact L.C.S. |
| Dispensed coffee is insufficient or excessive. | » Incorrect dose programming. » Program the coffee dose properly. » If the problem remain please contact L.C.S. |
| Coffee not supplied and steam coming out of the capsule compartment. | » The loading lever was not set to the brewing position. » Set the loading lever to the brewing position. » If the problem remain please contact L.C.S. |
| Coffee pours out in drops. » Faultcapsule. » Pump working improperly. » Spout/water circuit clogged. » The machine has limescale build-up. | » Replace the capsule. » Check for abnormal noise of the machine. » Clean the coffee dispensing spout (see MAINTENANCE AND CLEANING). » Descale the machine. » If the problem remain please contact L.C.S. |
| One of the two buttons is not working and the relevant LED is off | » Mechanicalblocking? Try to power the machine off by disconnecting the power plug for 10 seconds then reconnect it. Power the machine on and check the correct operation of both buttons. » If the problem persists, the machine can continue to be used with the other button; in this case, the button working regularly will no longer have the automatic dosing but will be free dosing, and the user will decide when stopping the dose. » If the problem remain please contact L.C.S. |
Contact Lavazza Customer Service (L.C.S.) for any problem or failure not included in the above list.
EN
TECHNICAL SPECIFICATIONS
Nominal Voltage: ....See label on the appliance
- Power Rating: See label on the appliance
- Power Supply: .... See label on the appliance
- Measurements: Height Width Depth
214 mm 124 mm 330 mm
8.26 in 4.72 in 12.99 in
Weight: approx. 5 lb (2.5 kg)
Water tank: 21 fl. oz (0,6 L)-Removable type
- Housing materials: ....Thermoplastic
- Cable Length: 31.50 in (0.8 m)
Thermo fuses
- Instantaneous aluminum boiler with temperature probe
SECURITE
FR
Destination d'usage:
Reparacoes/Manutenacao:
The manufacturer reserves the right to make changes without prior notice.