
CGW-44INCH - Outdoor blind Vevor - Free user manual and instructions
Find the device manual for free CGW-44INCH Vevor in PDF.
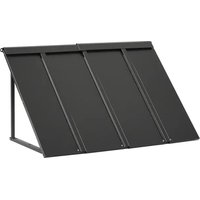


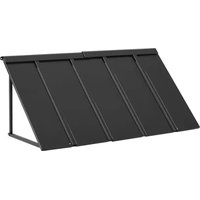
| Product Type | Outdoor Awning |
| Brand | Vevor |
| Model | CGW-44INCH |
| Material | Iron |
| Color | Black |
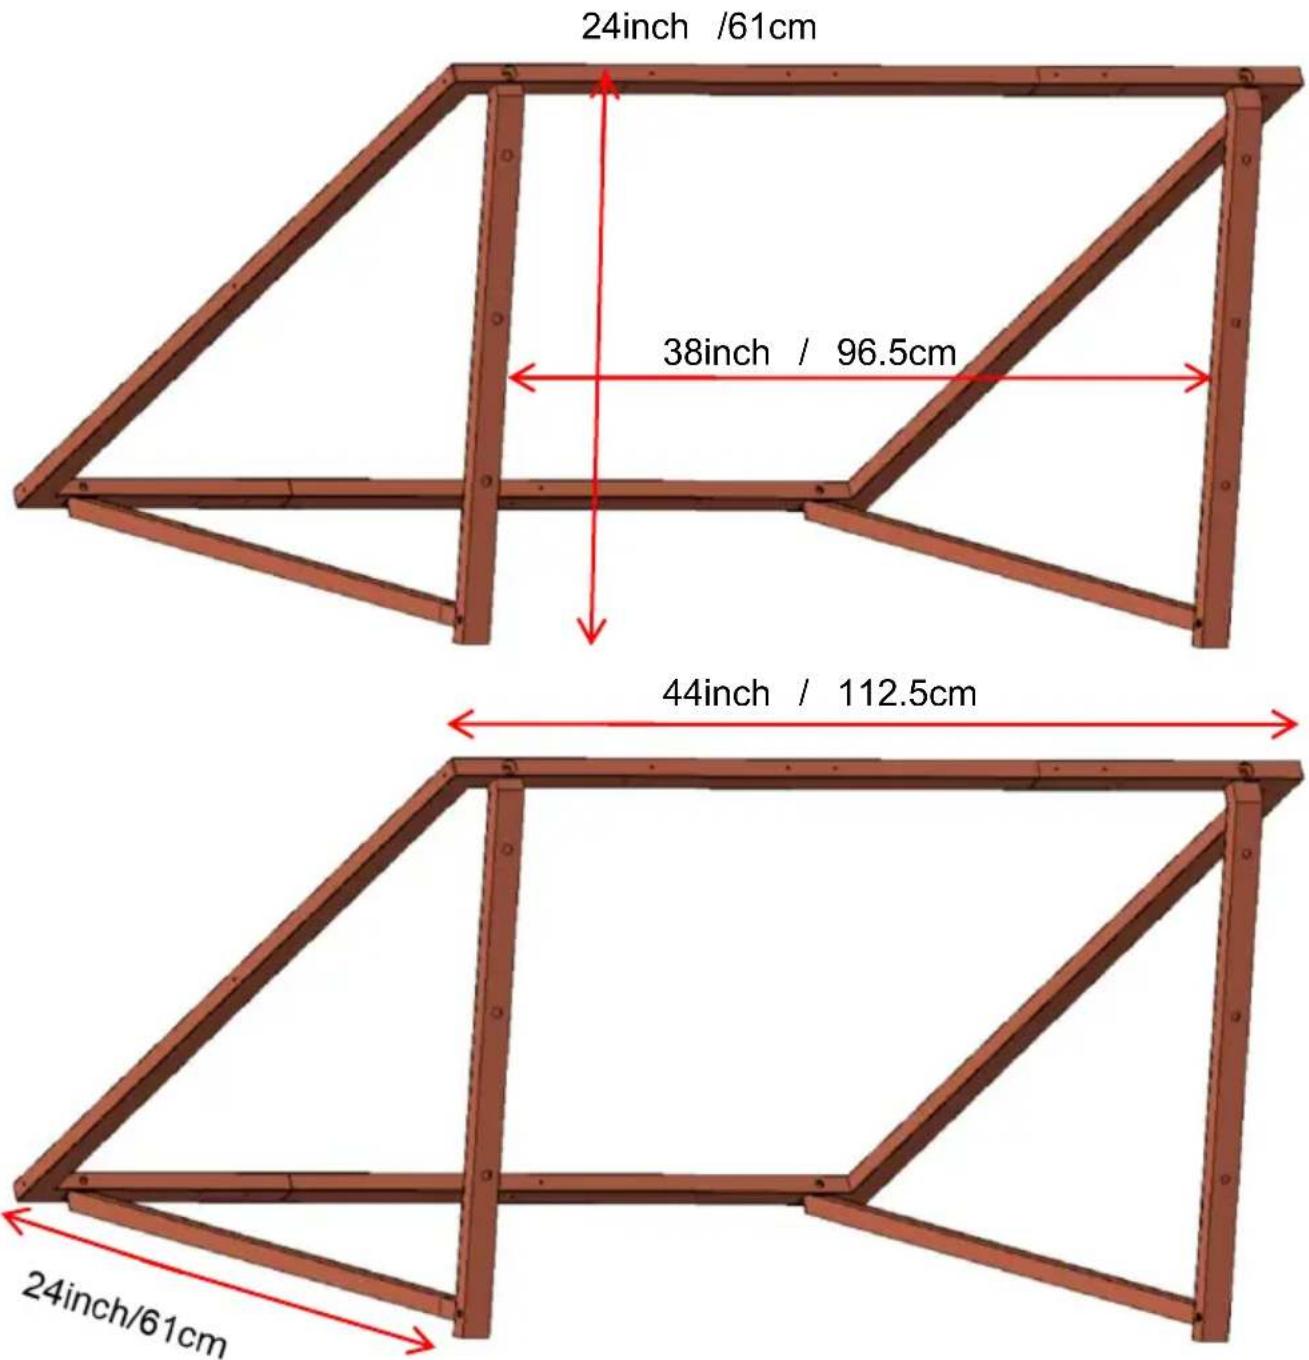
| Shade Area | 112.5 x 61 cm (44 x 24 inches) |
| Compatible Door/Window Width | Up to 80 cm (31.5 inches) |
| Awning Dimensions | 112.5 cm (L) x 61 cm (H) |
| Installation Type | Wall Mounting |
| Main Components | Support tripods, frame, metal tiles, metal plates |
| Safety (assembly) | Wear approved safety glasses and gloves; do not sit or stand on it |
| Usage Precautions | Do not exceed 30 mph wind; max snow 12 inches heavy or 24 inches light |
| Maintenance | Remove snow regularly; inspect before each use |
| Spare Parts | Replacement screws available |
| Warranty | Electronic certificate at www.vevor.com/support |
| Manufacturer | Shanghai Muxin Muye Youxian Gongsi |
| Importer (EU) | E-CrossStuGmbH |
Frequently Asked Questions - CGW-44INCH Vevor
User questions about CGW-44INCH Vevor
0 question about this device. Answer the ones you know or ask your own.
Ask a new question about this device
Download the instructions for your Outdoor blind in PDF format for free! Find your manual CGW-44INCH - Vevor and take your electronic device back in hand. On this page are published all the documents necessary for the use of your device. CGW-44INCH by Vevor.
USER MANUAL CGW-44INCH Vevor
METAL DOOR AWNING
USER MANUAL
MODEL: CGW-44INCH
Technical Support and E-Warranty Certificate
www.vevor.com/support
VEVOR
METAL DOOR AWNING
MODEL: CGW-44INCH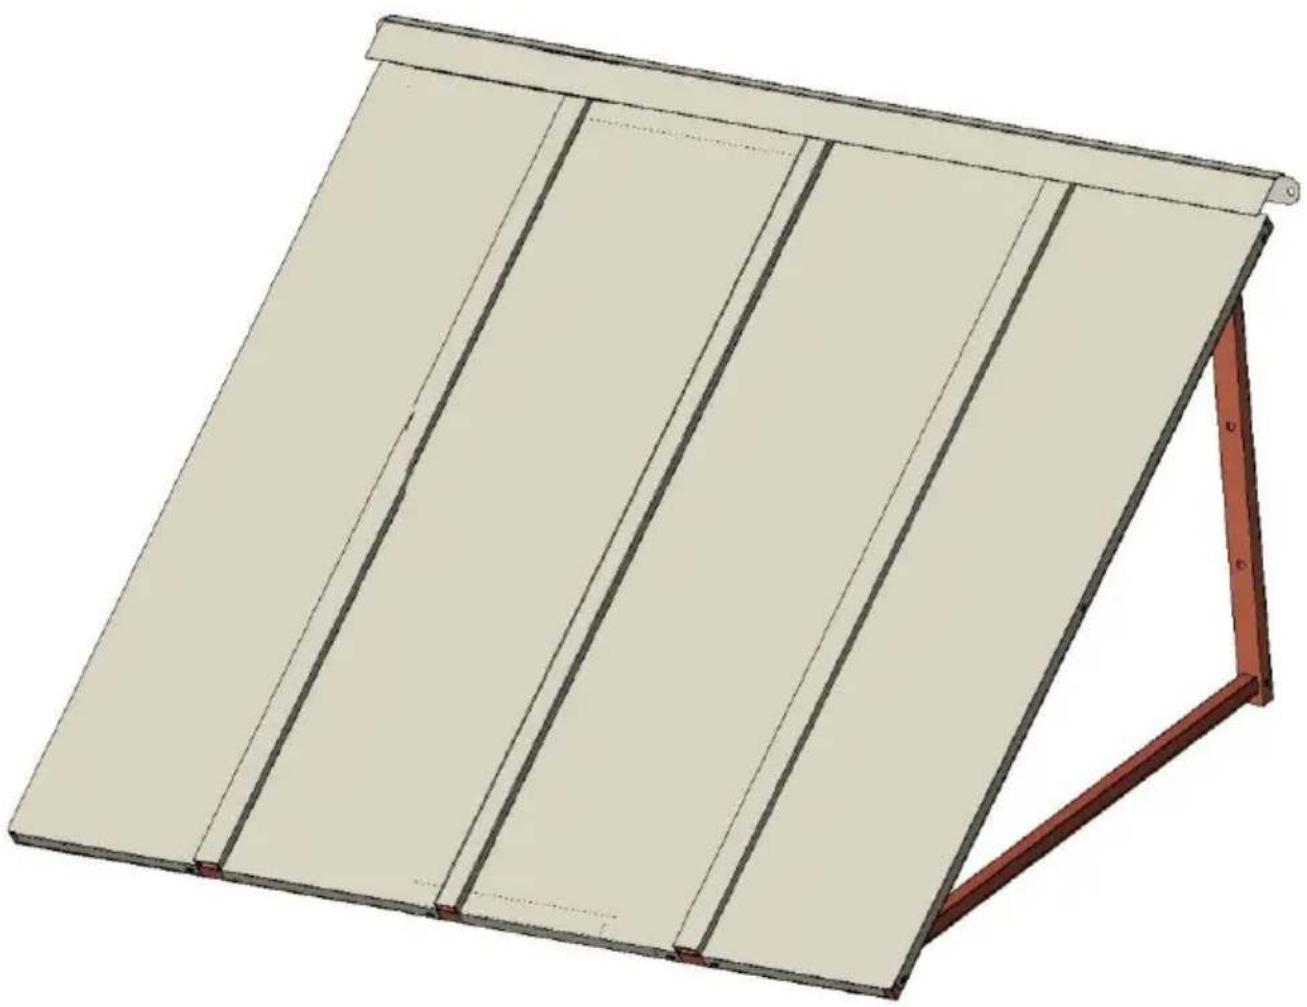
This is the original instruction. Please read all manual instructions carefully before operating. VEVOR reserves a clear interpretation of our user manual. The appearance of the product shall be subject to the product received. Please forgive us that we won't inform you again if there are technology or software updates on our product.
WARNING:
Read this material before using this product. Failure to do so can result in serious injury.
Assembly precautions
- Assemble only according to these instructions. Improper assembly can create hazards.
- Wear ANSI-approved safety goggles and heavy-duty work gloves during assembly.
- Keep the assembly area clean and well-lit.
- Keep bystanders out of the area during assembly.
- Do not assemble if tired or when under the influence of alcohol, or medication.
- The product capabilities apply to properly and completely assembled products only.
- Assemble on a flat, level, hard and smooth surface capable of supporting the Metal Door Awning.
- For additional information regarding the parts listed in the following pages, please refer to the Assembly Diagram of this manual. Unwrap and separate all parts in a clean work area.
Use precautions
- DO NOT SIT OR STAND ON THIS ITEM.
- This product is not a toy. Do not allow children to play with or item.
- Do not exceed specified weight capacities.
- Use only on a flat, level, hard, and smooth surface that can safely support a fully loaded Metal Door Awning.
- Use as intended only.
- Inspect before every use; do not use if parts are loose or damaged.
- Spare parts such as screws are available.
SAVE THIS MANUAL
PARTS LIST
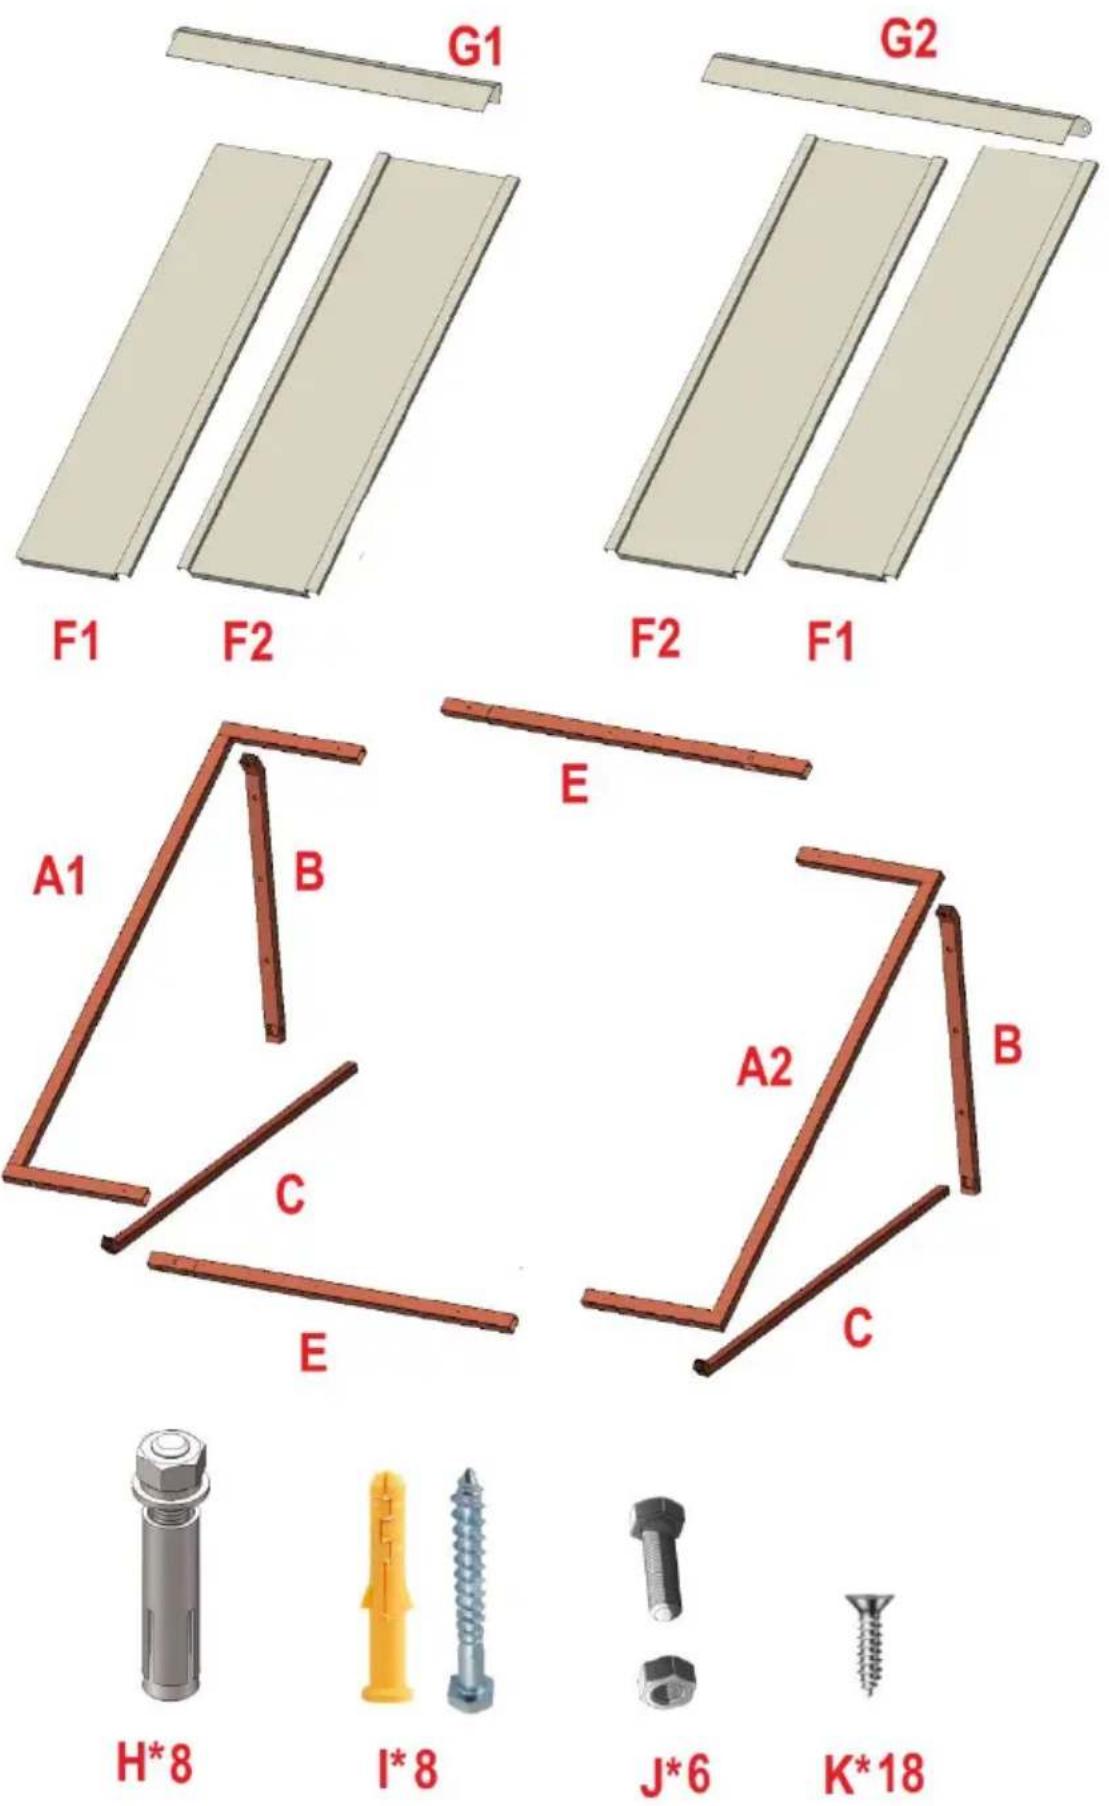
| Serial number | Quantity | Part picture |
| A1 | 1 | 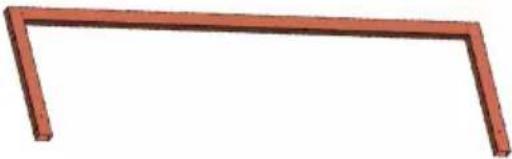 |
| A2 | 1 | 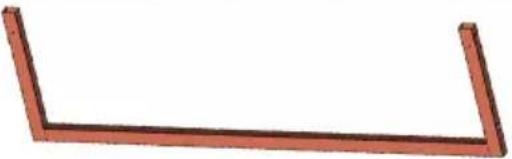 |
| B | 2 |  |
| C | 2 |  |
| E | 2 |  |
| F1 | 2 | 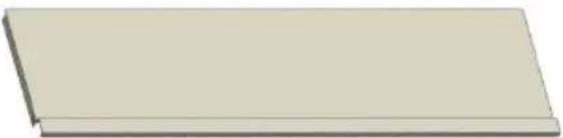 |
| F2 | 2 | 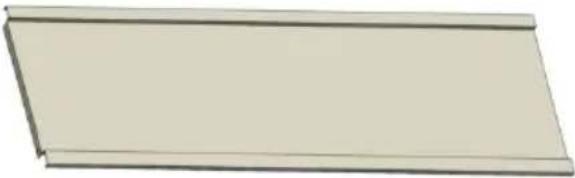 |
| G1 | 1 |  |
| G2 | 1 |  |
| H | 8 | 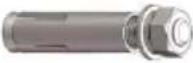 |
| I | 8 | 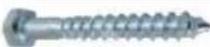 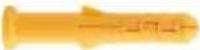 |
| J | 6 | 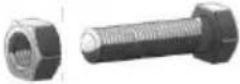 |
| K | 18 | 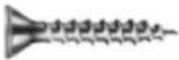 |
1 Assemble the frame.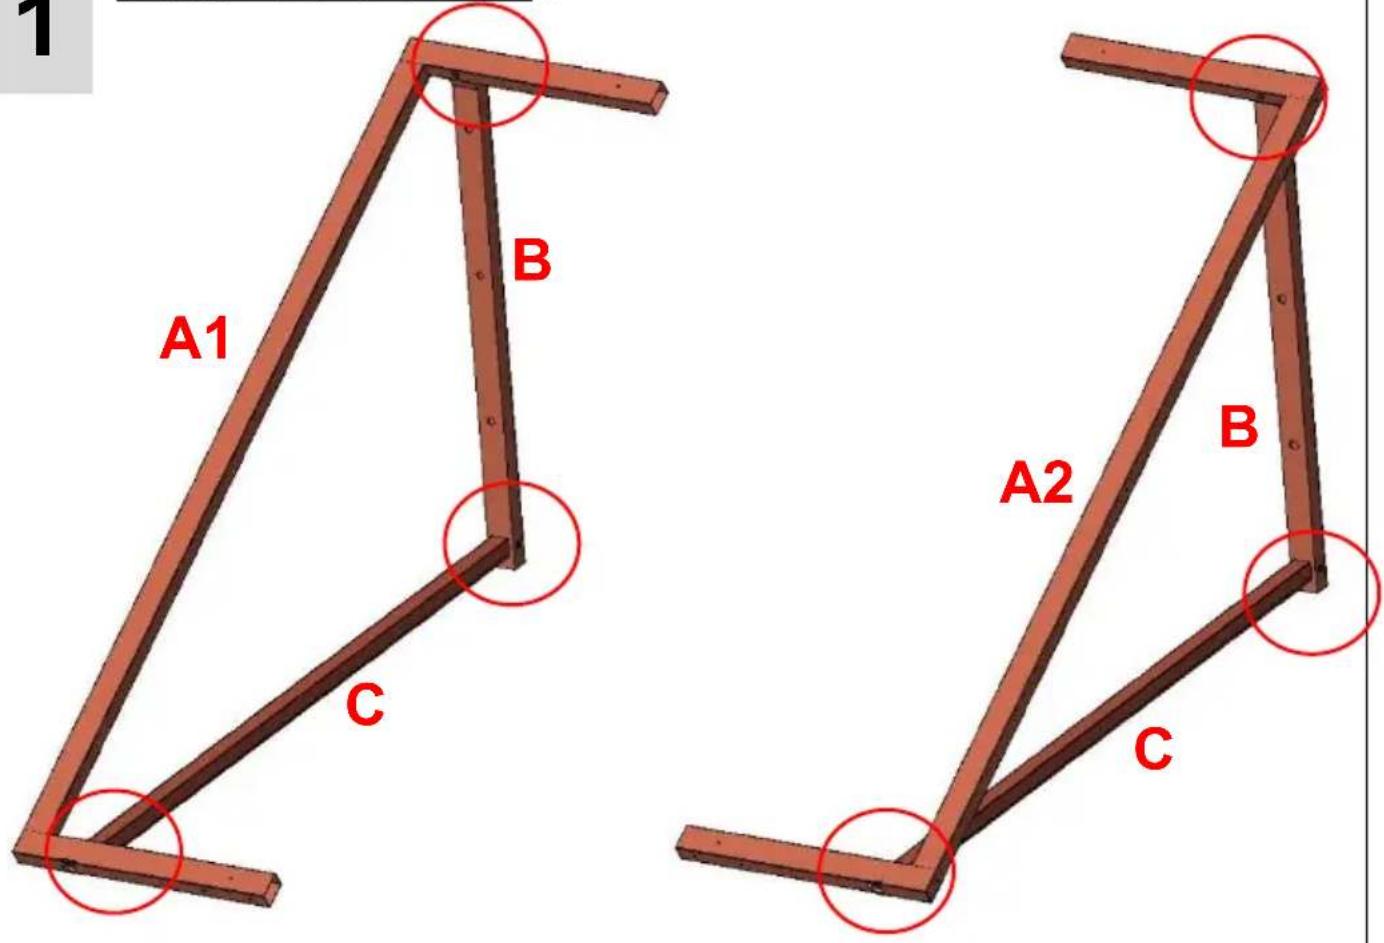
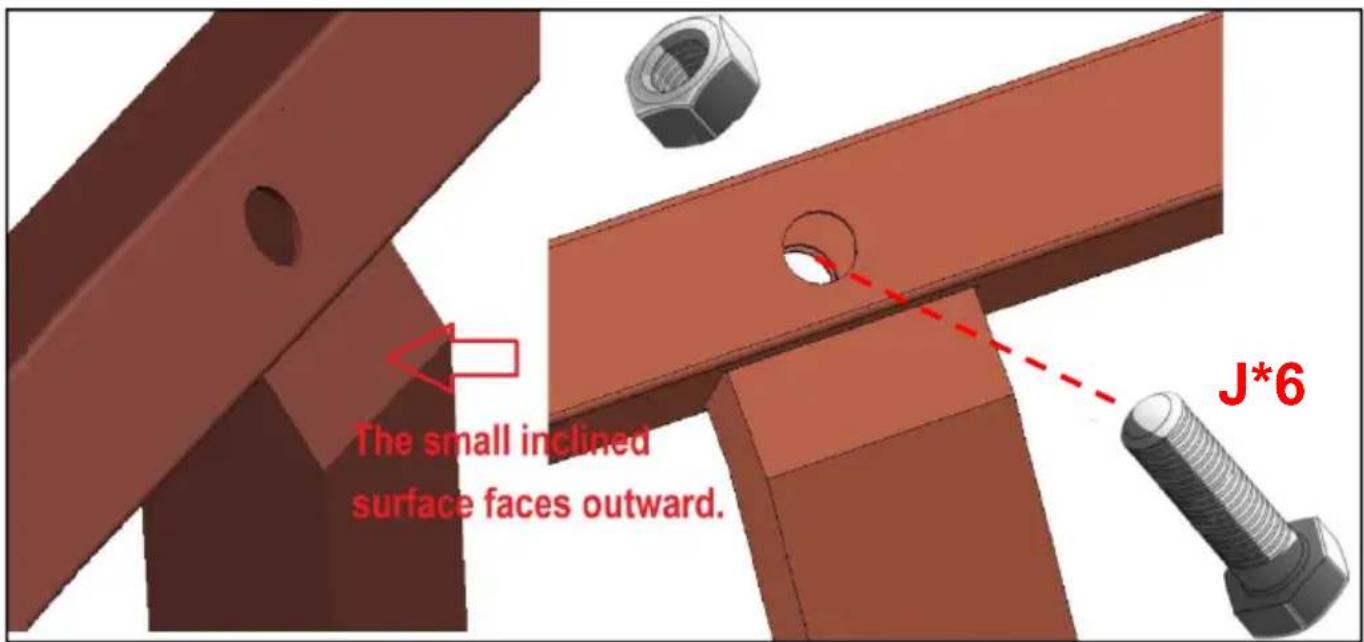
Use screws (J*6) to assemble the support tripods on both sides.
2 Assemble the frame.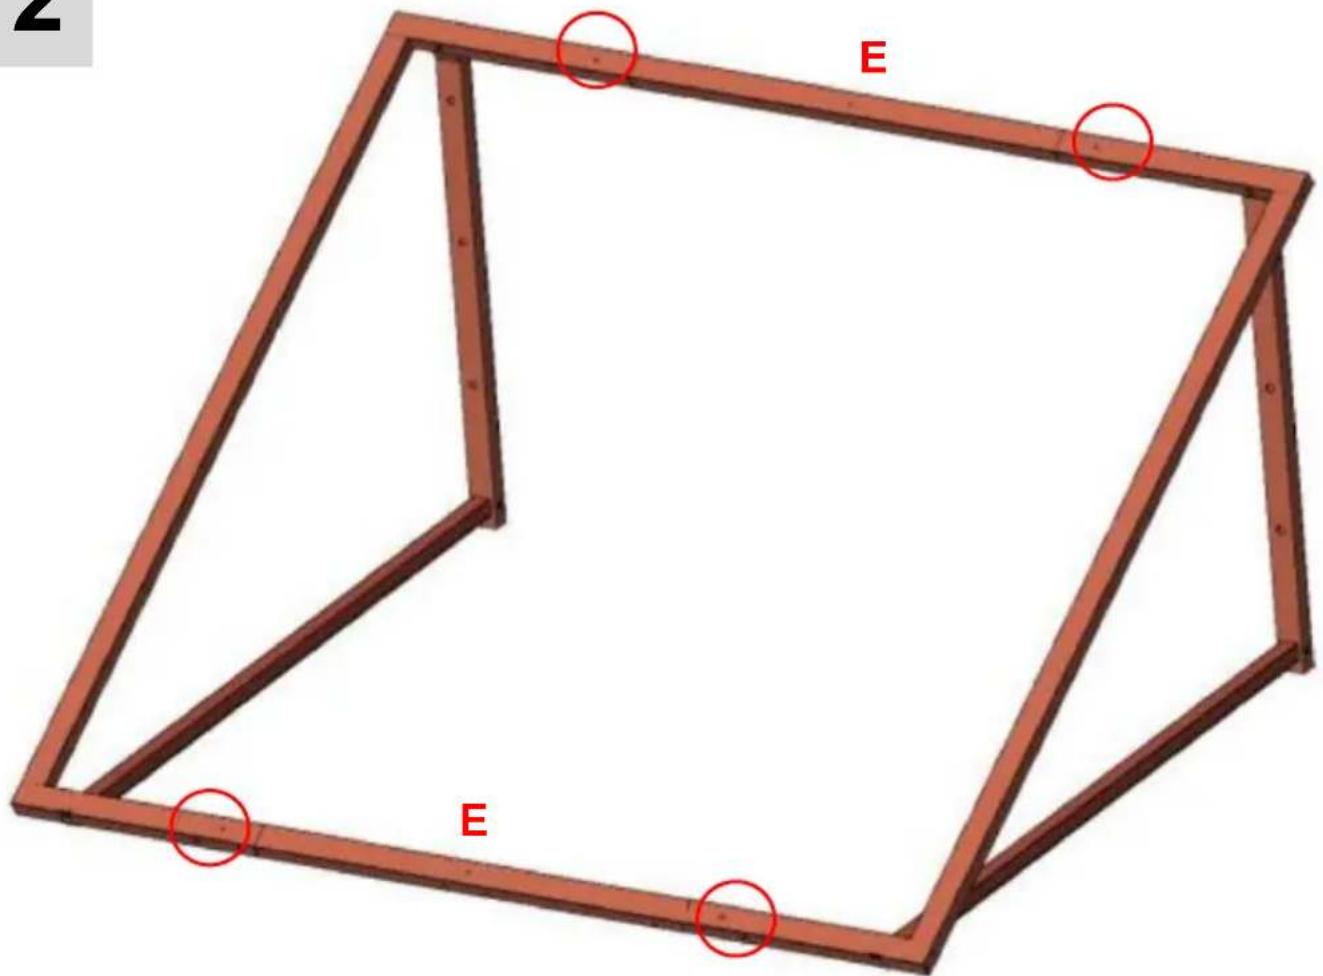
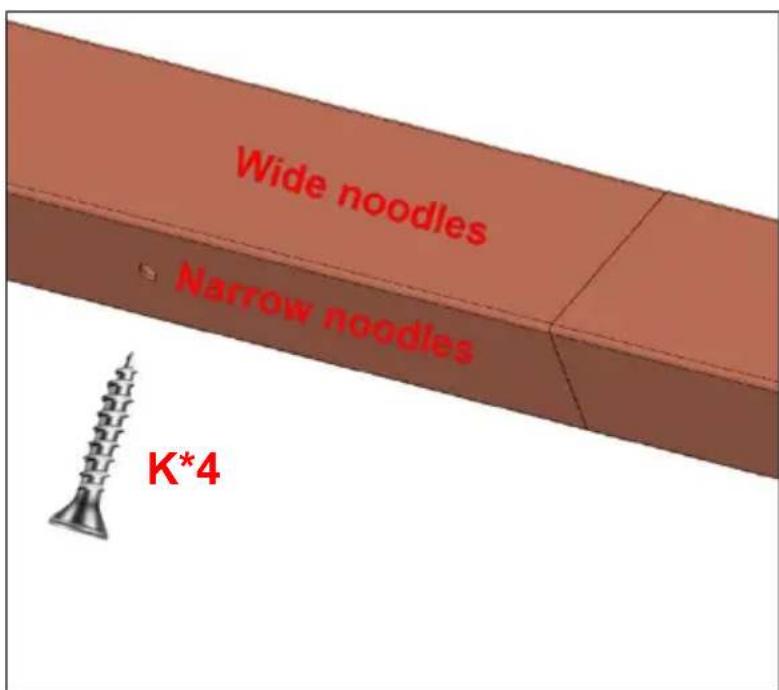
Assemble the frame using screws (K*4).
3-1
Mount the frame on the wall.
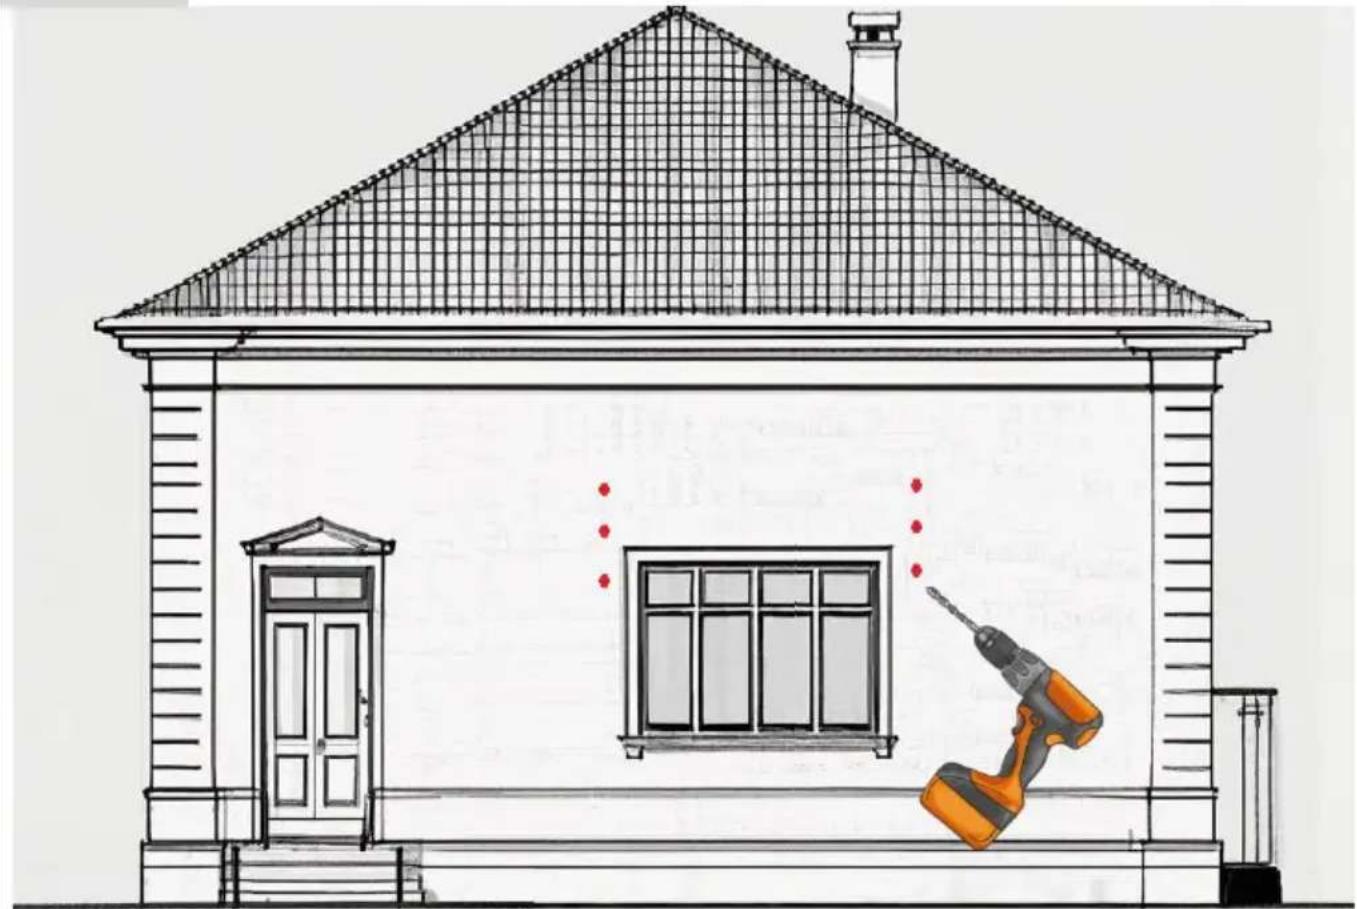
Parts Required
| Drill | Level | Measuring Tape | Chalk/Graphite | Step-Ladder |
- The installation drawings are on the next page.
- Mark the location of the mounting holes measured onto your mounting surface using chalk/graphite. Use a level as needed.
- Drill pilot holes onto the specific markers. Select the size of drilled hole according to the following different types of walls.
Plan 1 (Suitable for hard walls): Install with expansion screws using a drill bit with a diameter of 12 mm.
Plan 2 (Suitable for wooden walls): Install with wall nails (I*6), a drill bit with a diameter of 6 mm.
4. Fix the whole assembled frame to the wall.
Note: Check whether the frame is firmly installed on the wall to prevent it from falling off in the later stage.
3-2
Installation drawings.
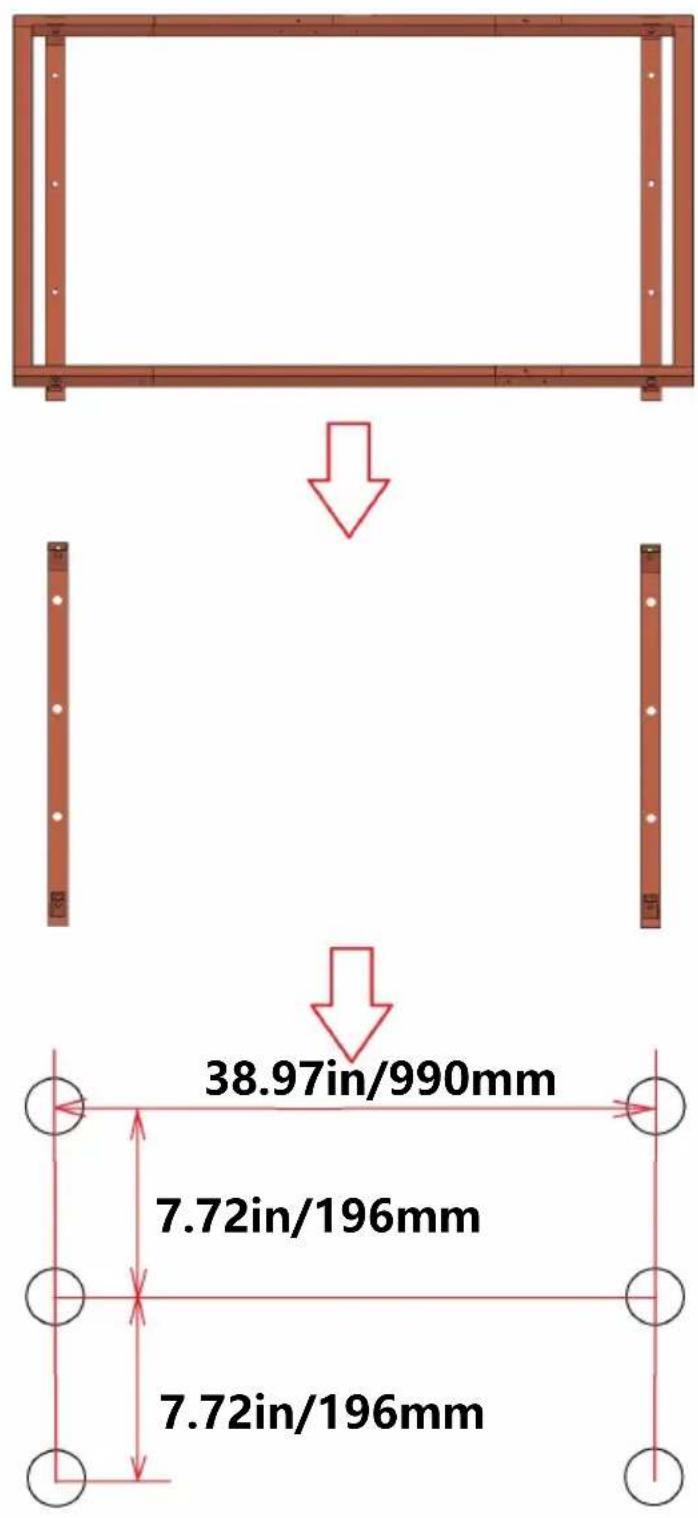
Mark 6 fixing hole positions on the wall according to the drawing, then drill 6 holes.
4
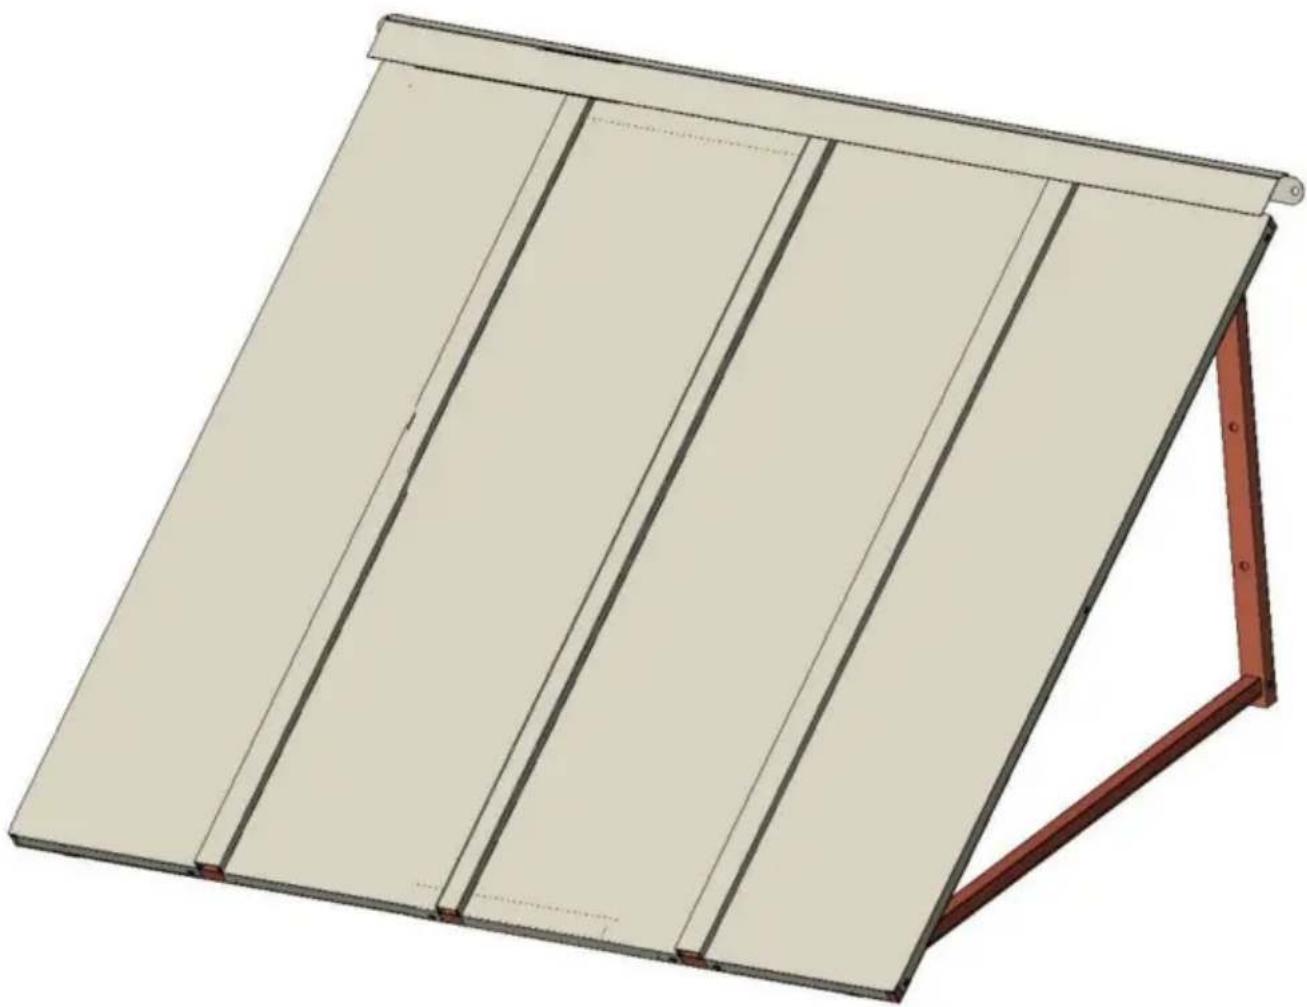
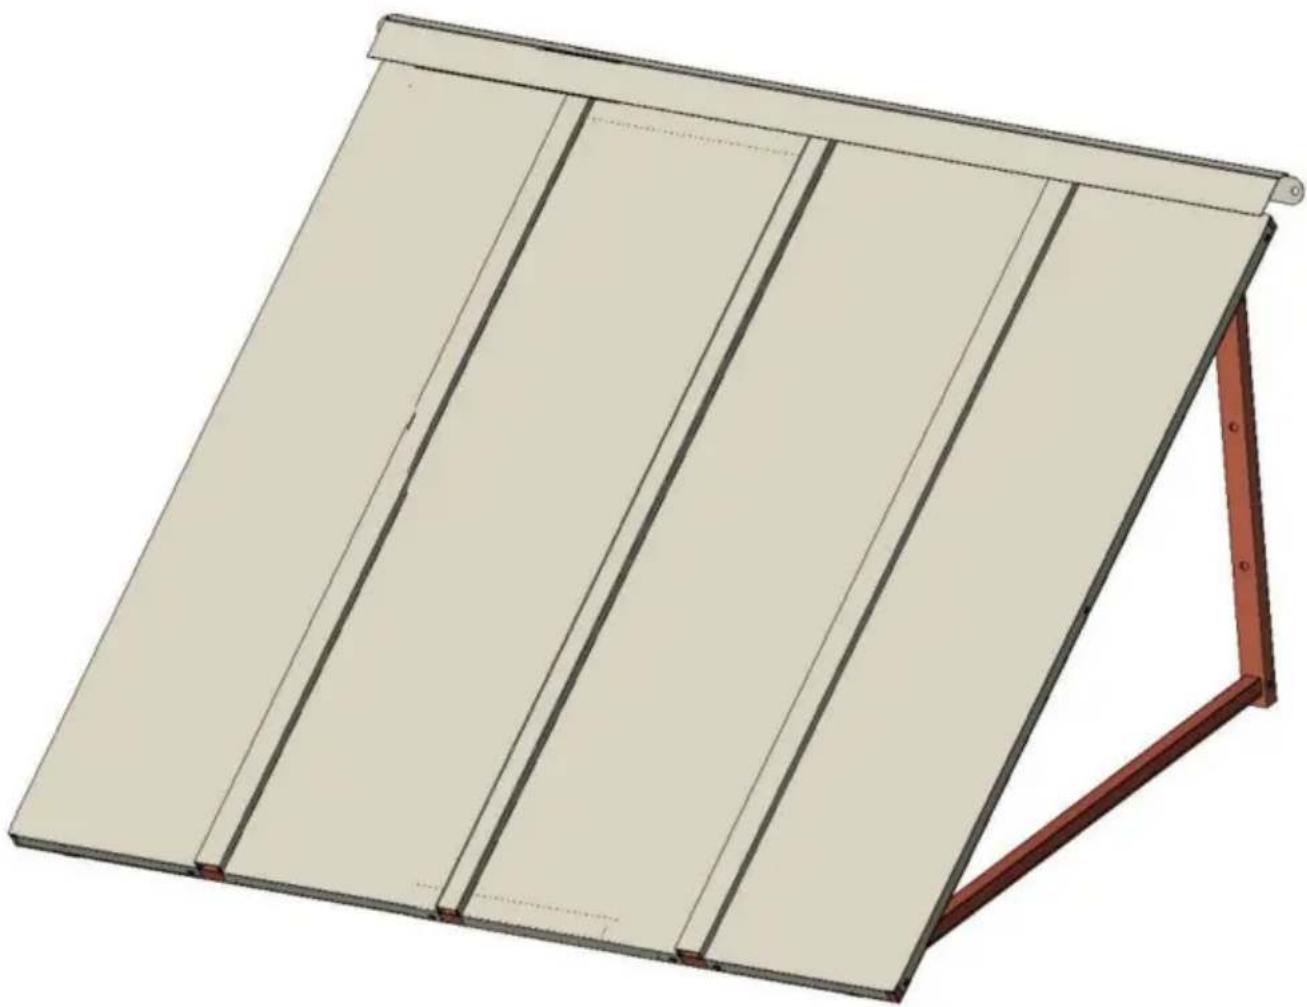
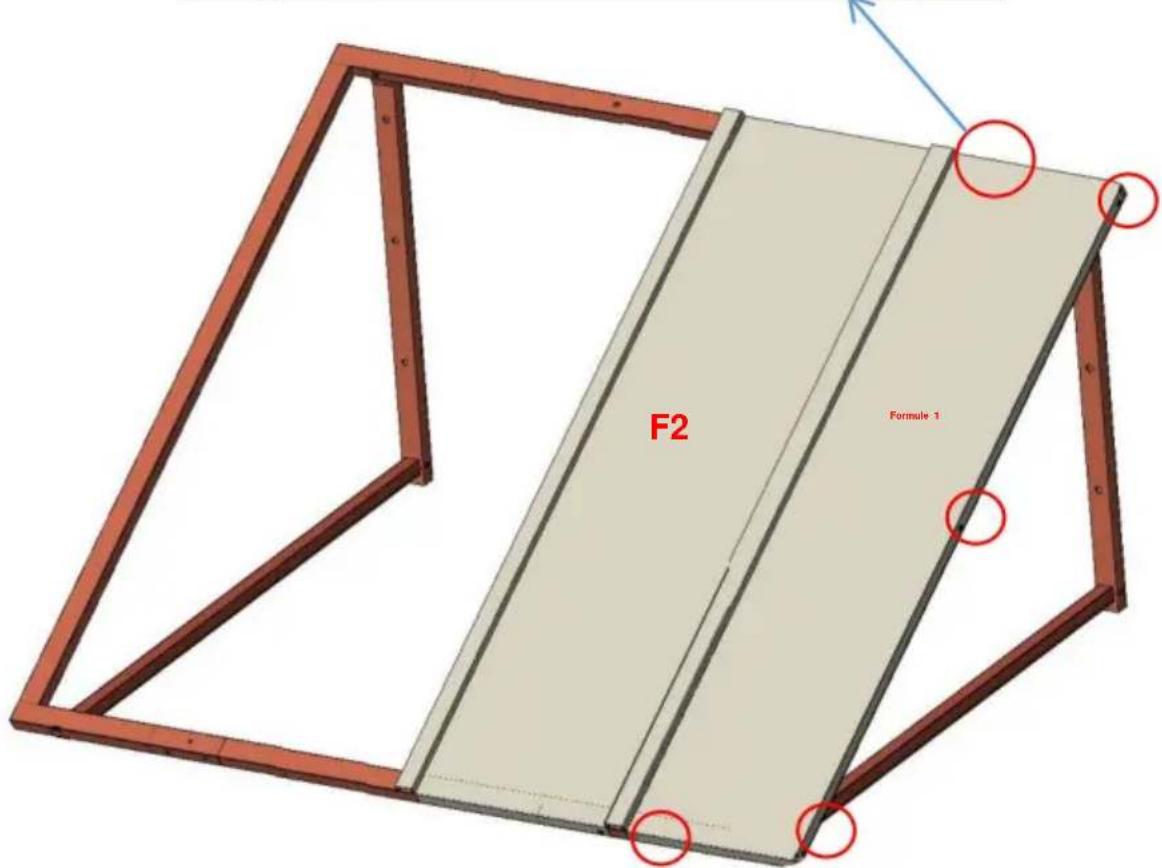
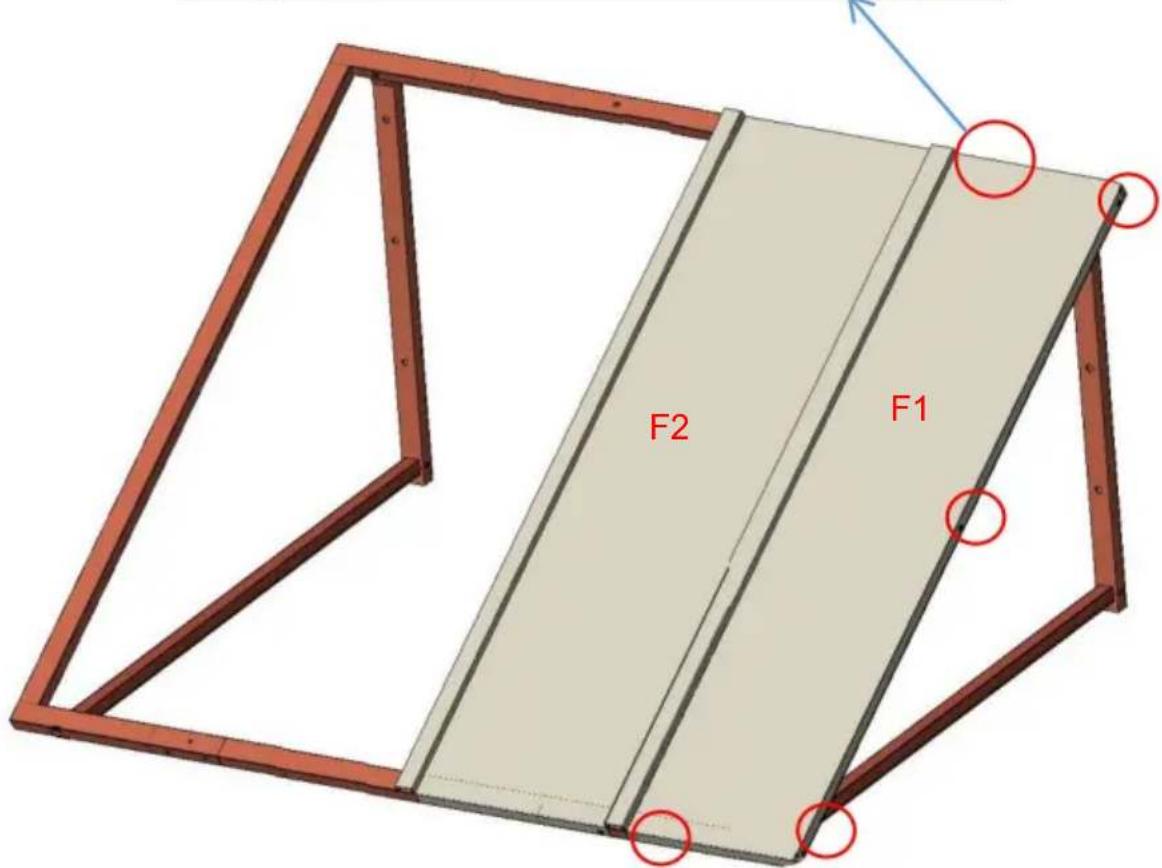
Installing the metal tiles.
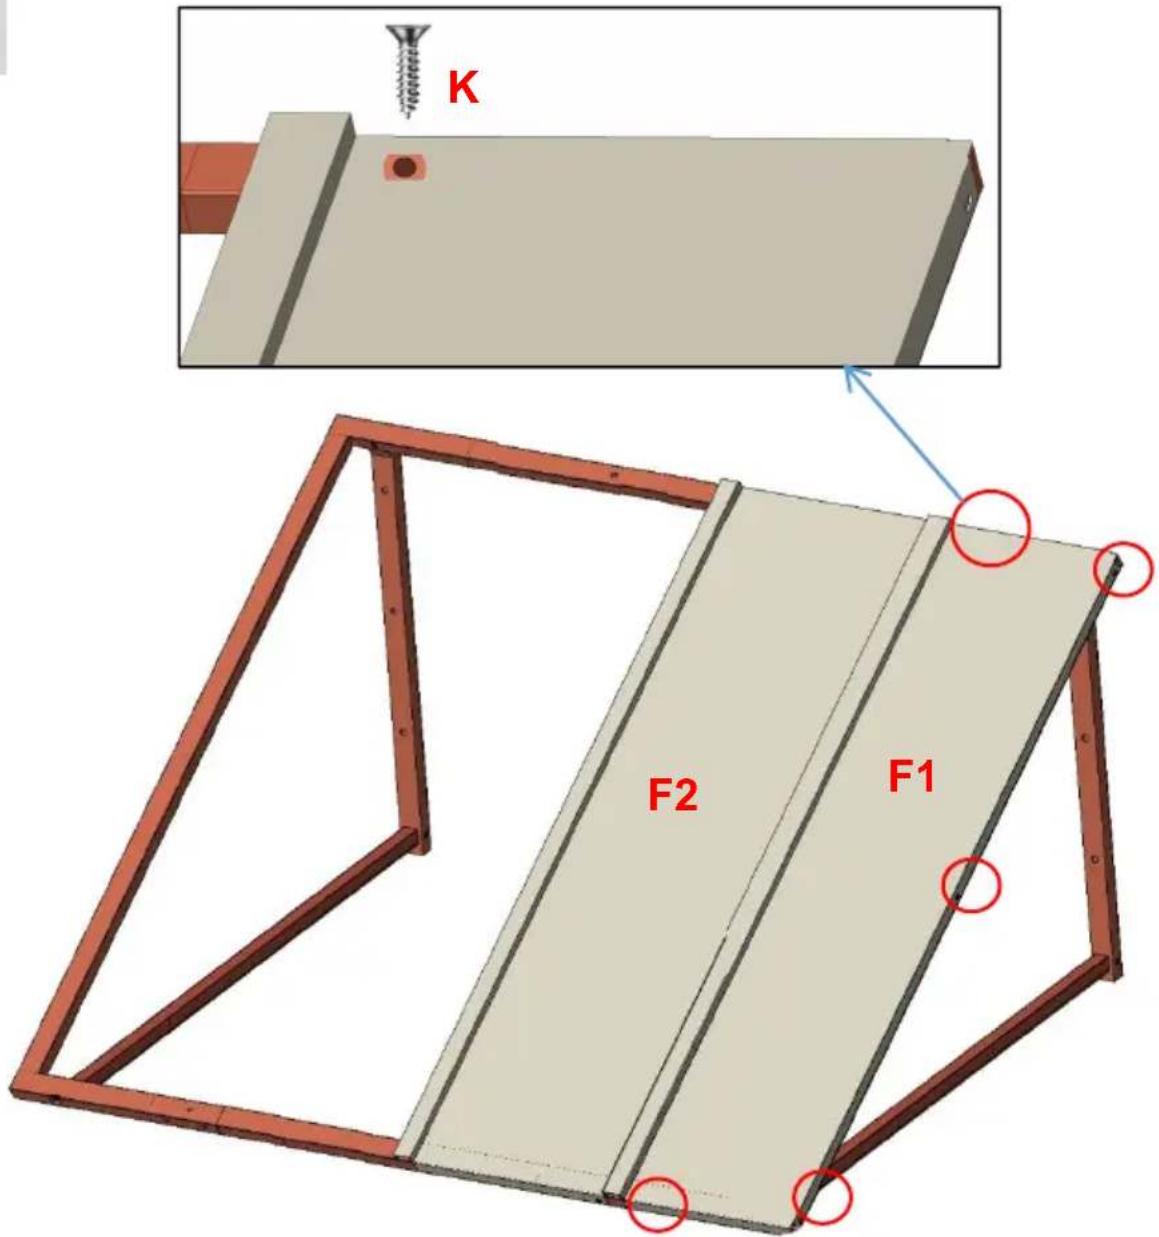
NOTE: After the frame is installed on the wall, install the metal tiles one by one.
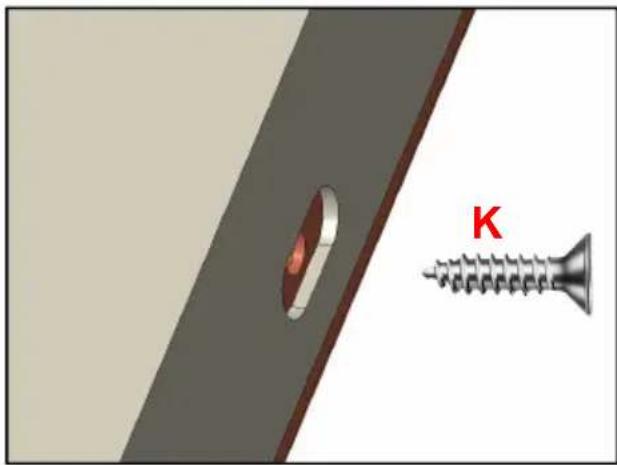
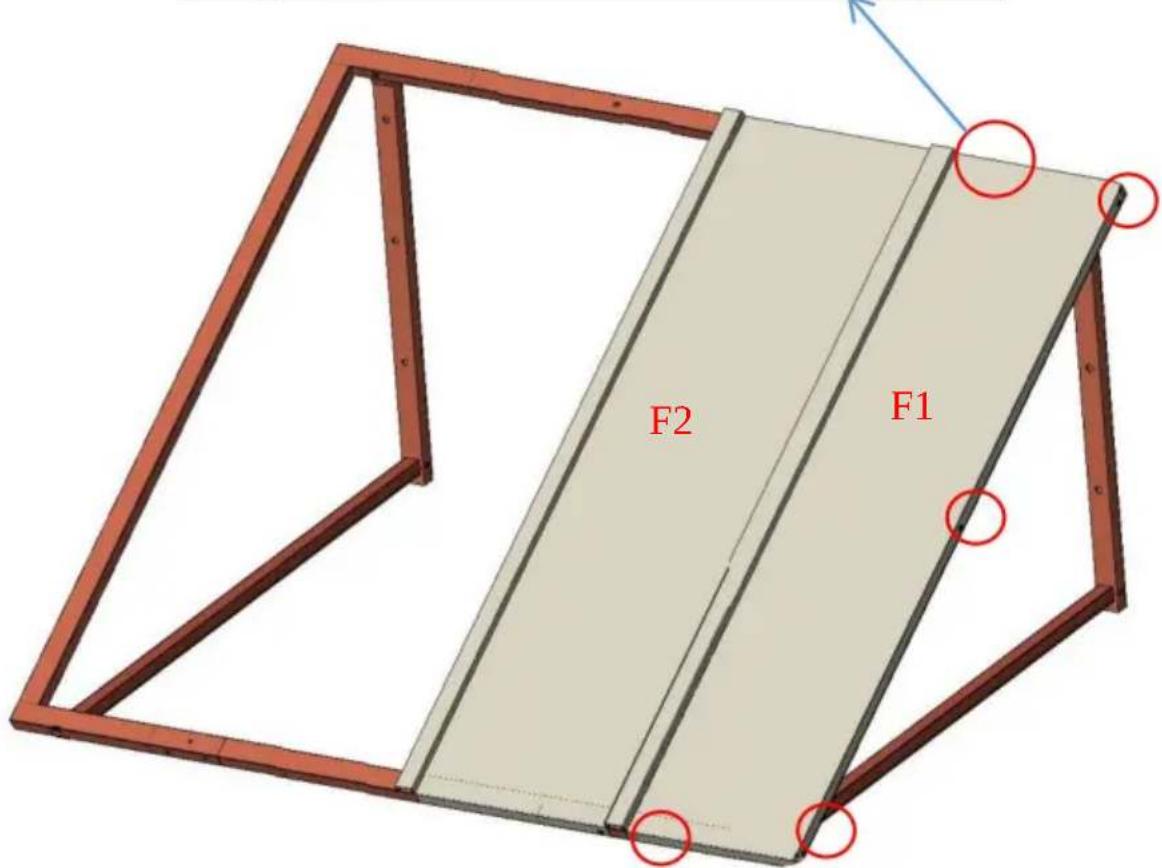
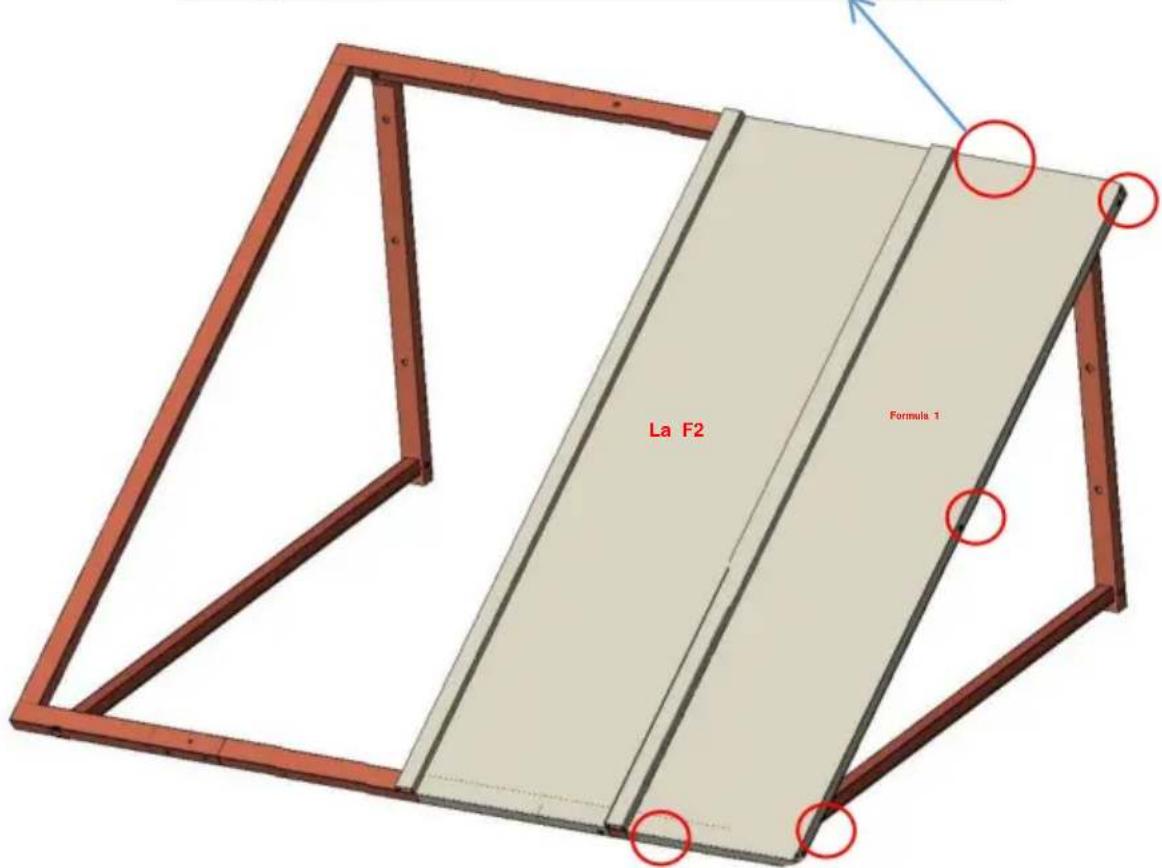
- Fix the shelf to the wall.
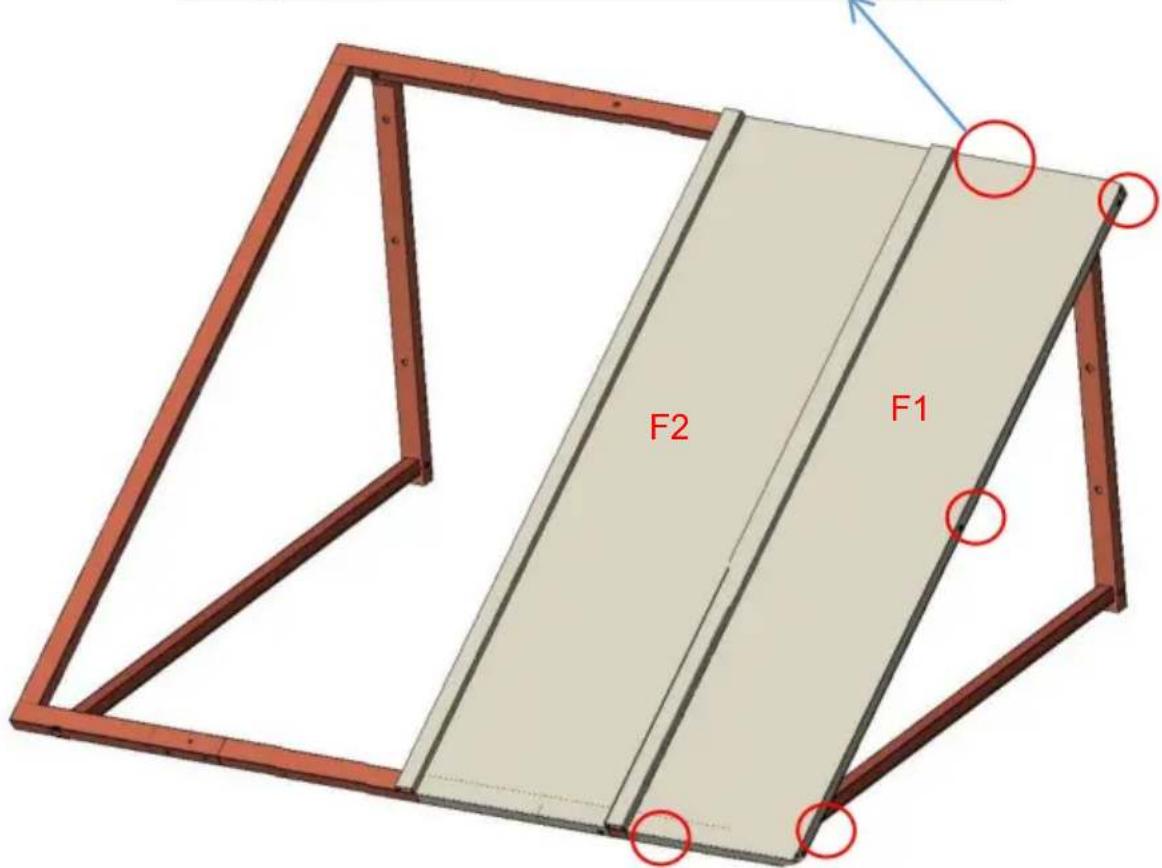
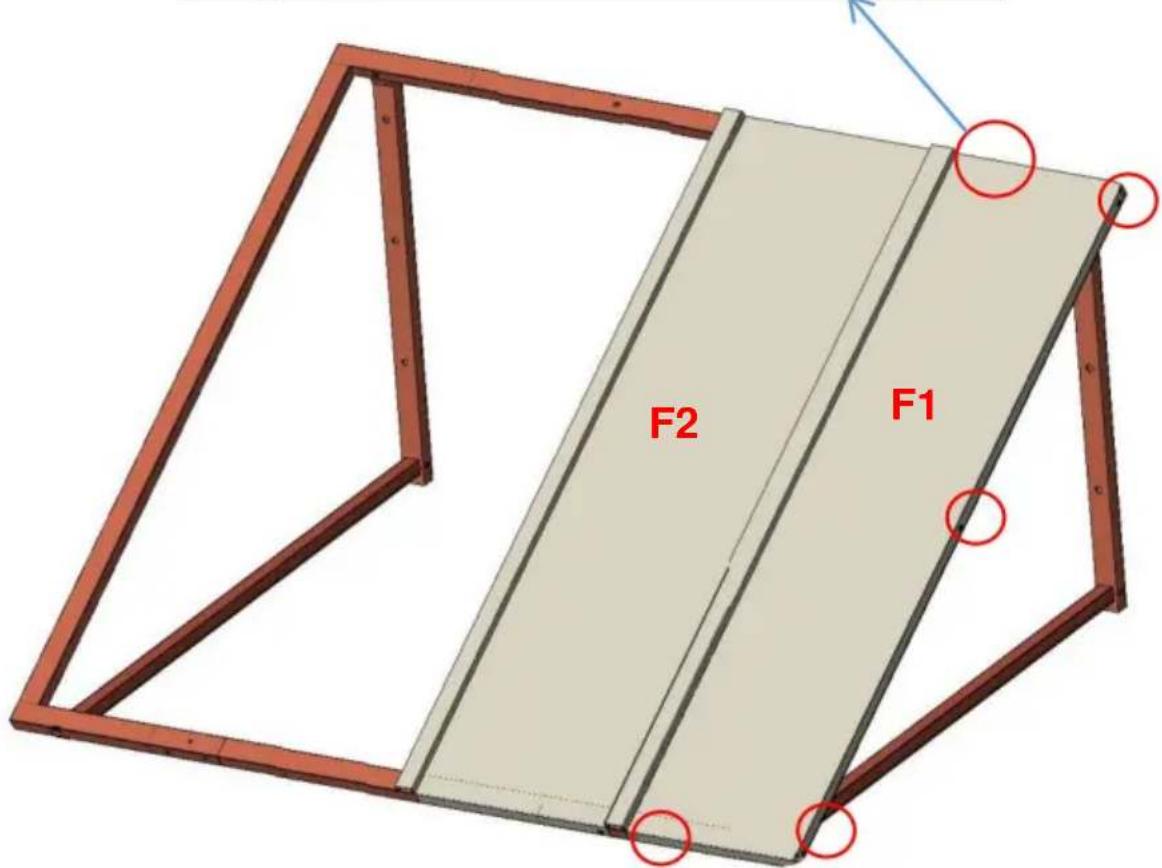
- Start installing the first metal tiles F1 and F2 from the right side of the product. Let F1 overlap F2, and then fix F1 with screws.
5
Installing the metal tiles.
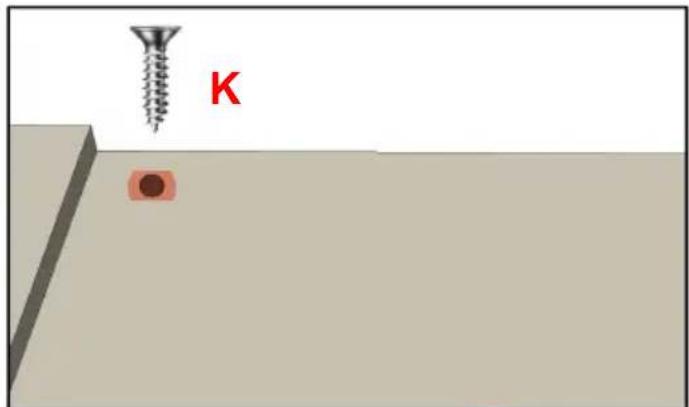
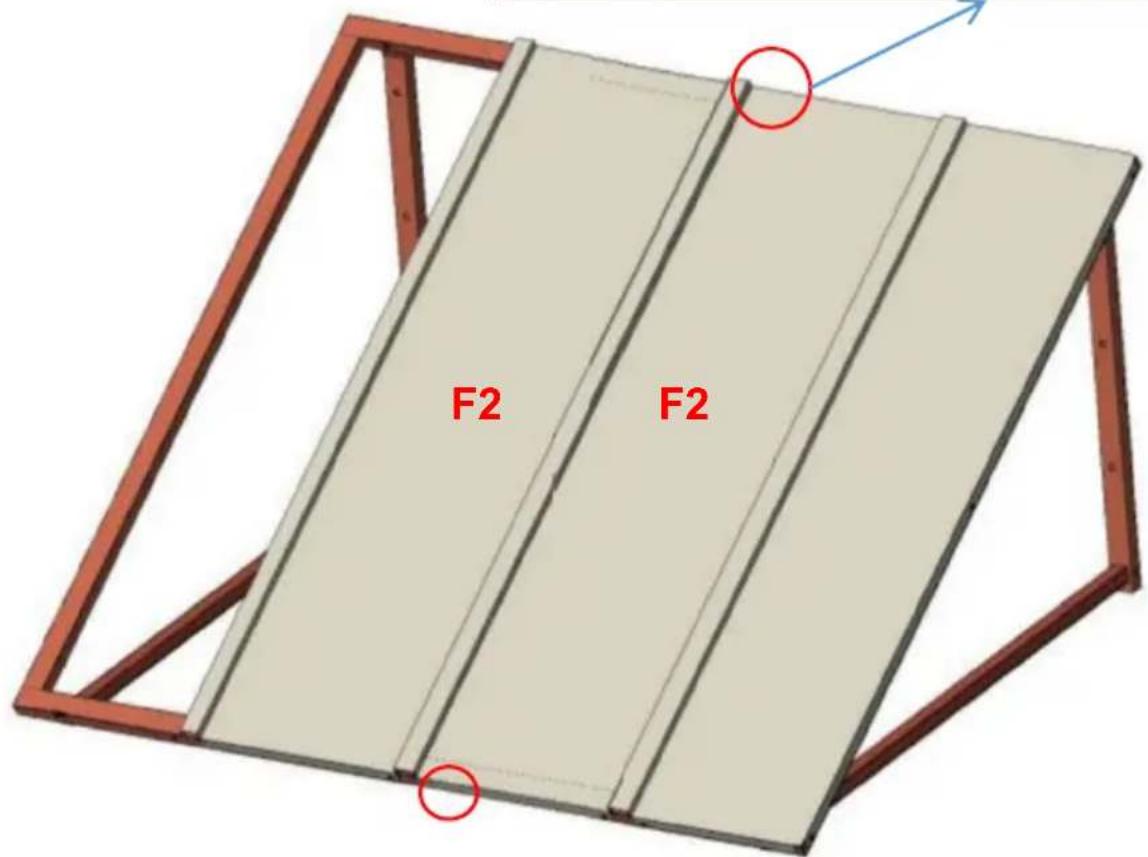
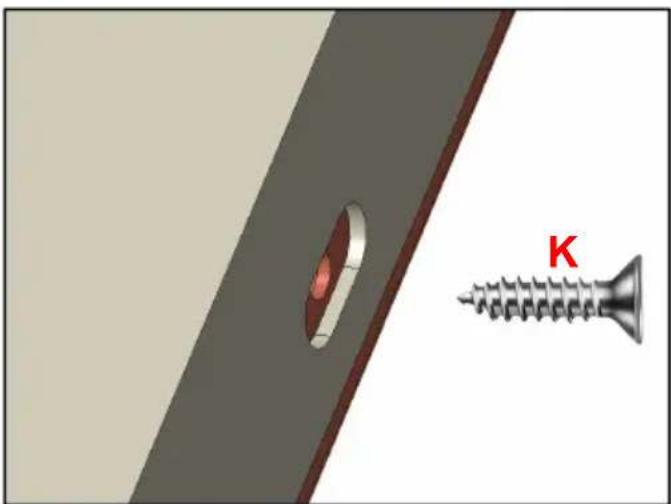
Install the metal tiles (F2) sequentially from the right side of the product and secure them with screws (K*4).
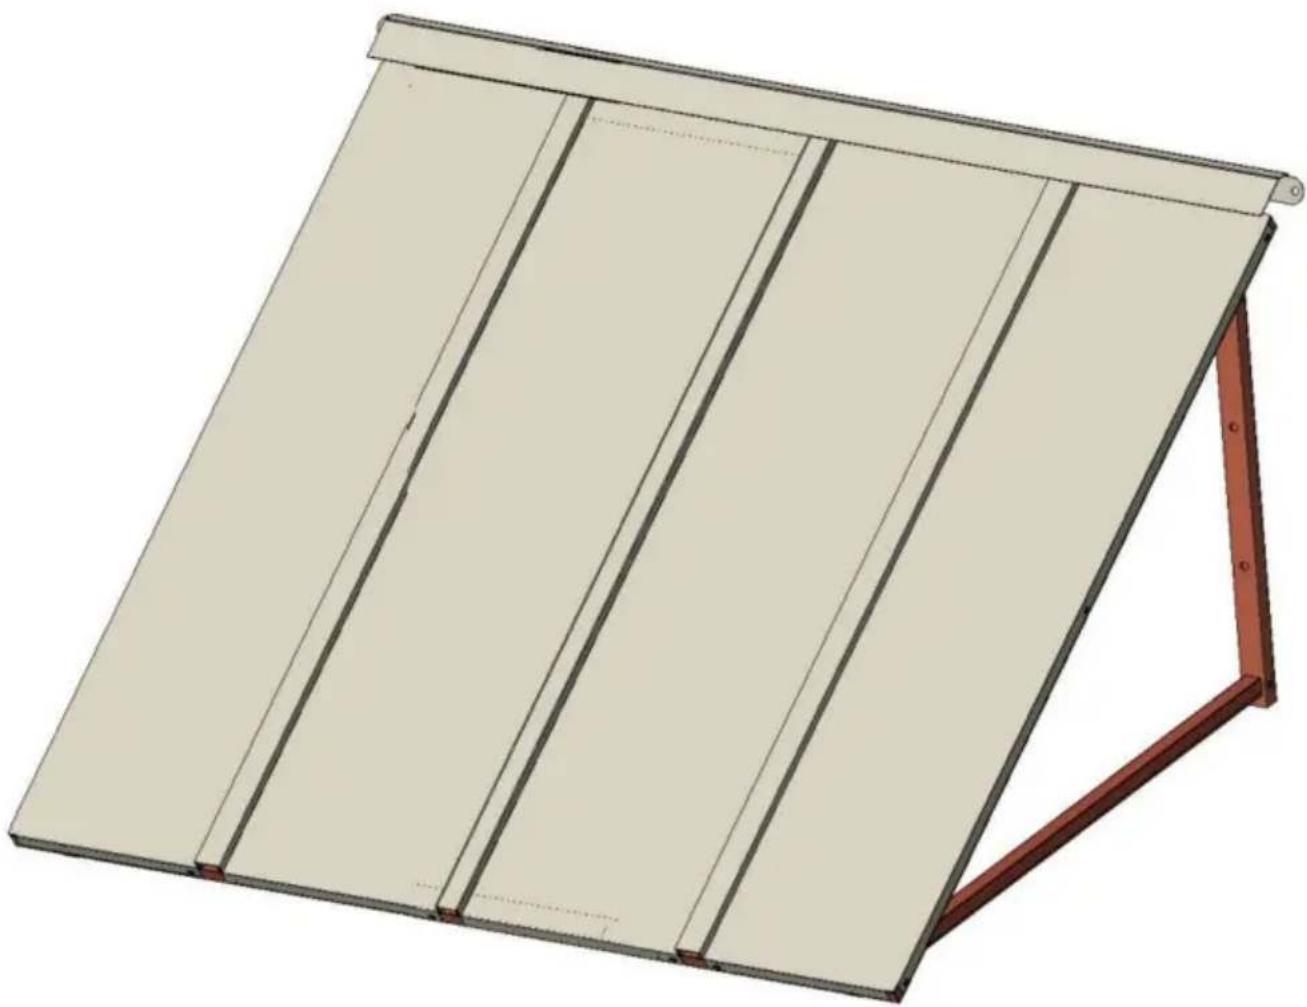
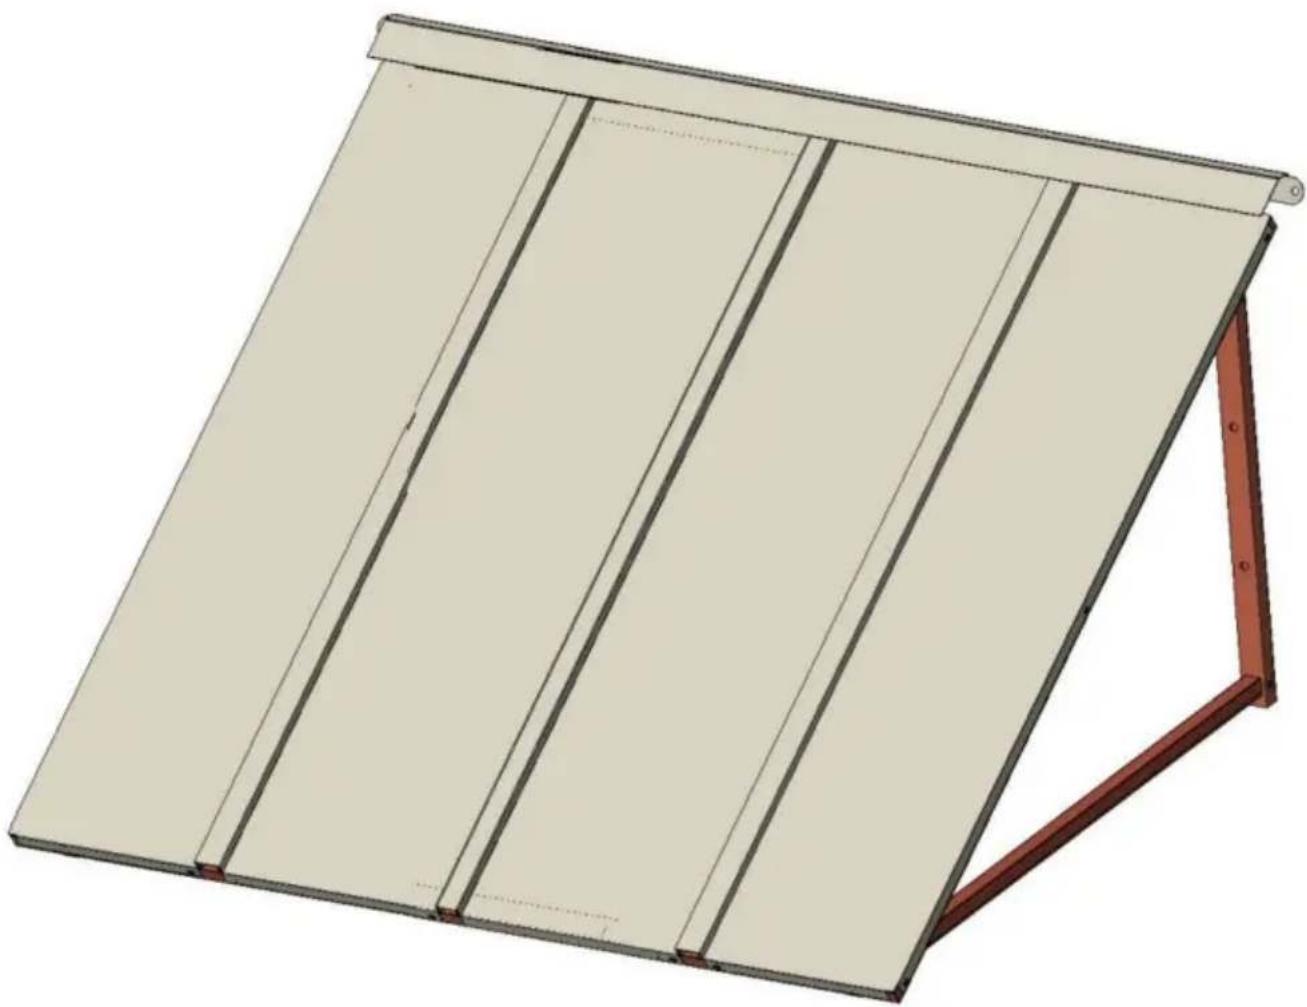
6 Installing the metal tiles.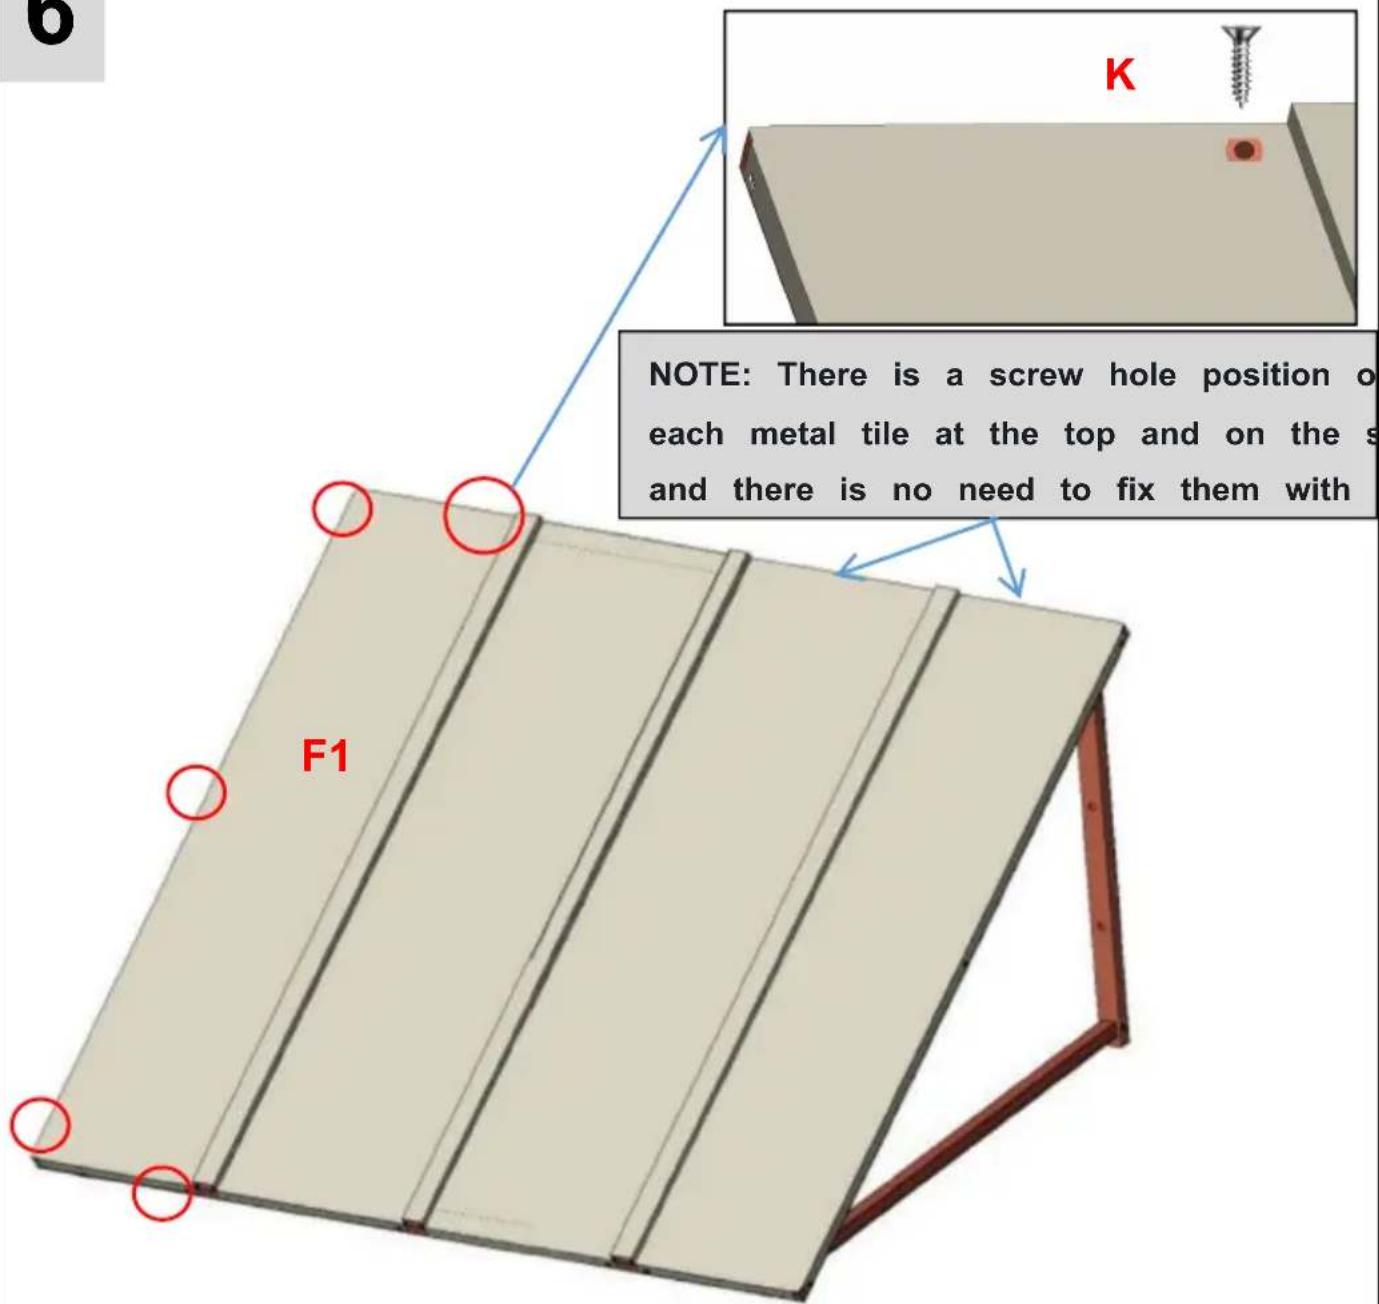
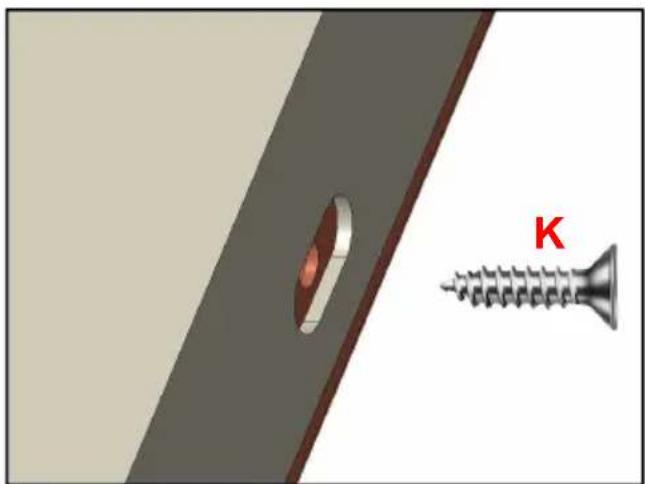
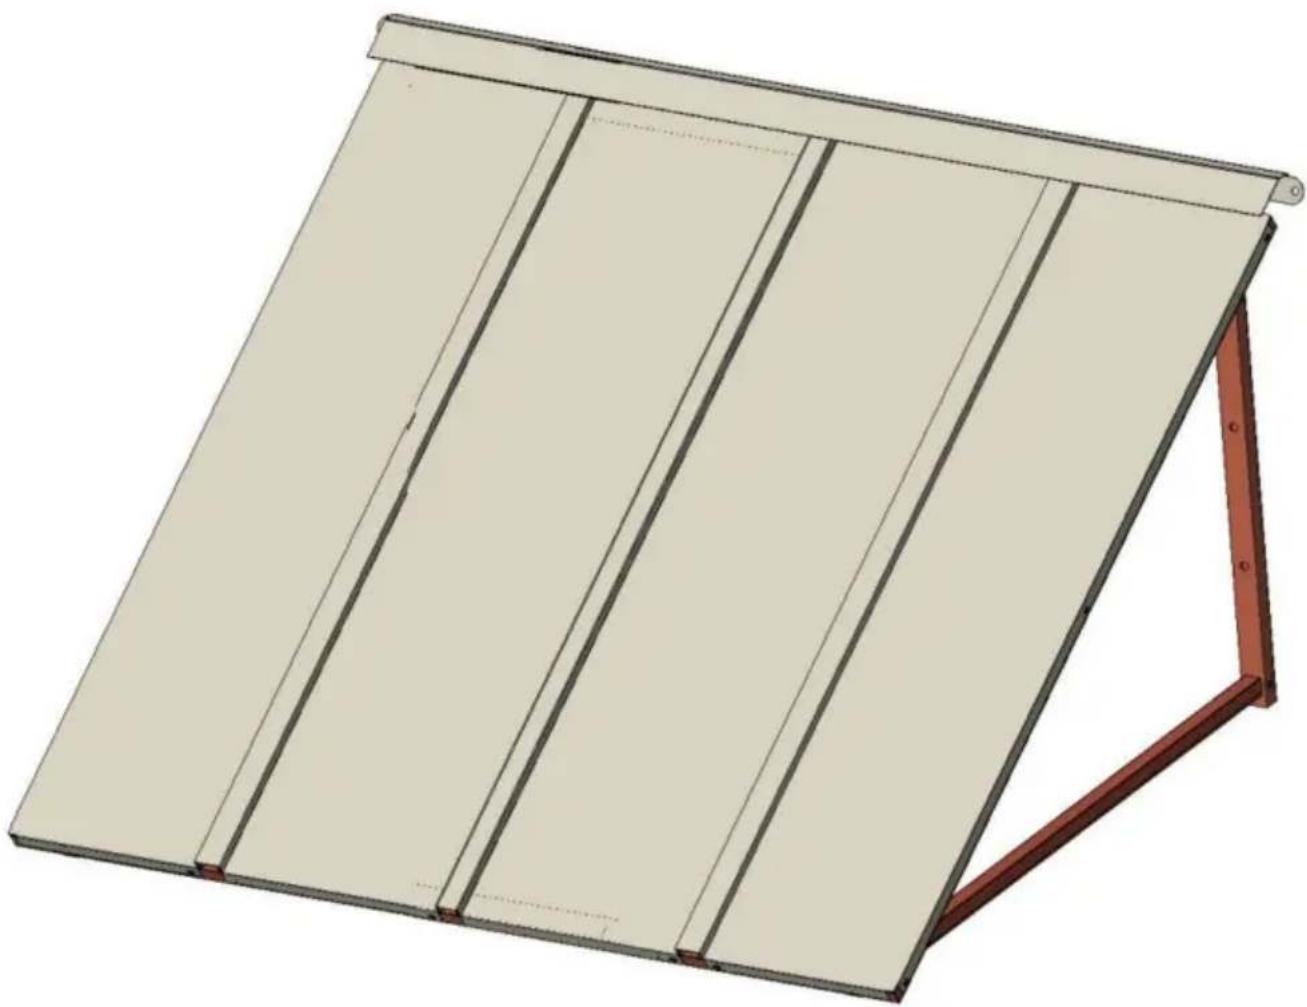
Install the last tile F1 and fix it with screws (K*5).
7
Fix the metal plates.
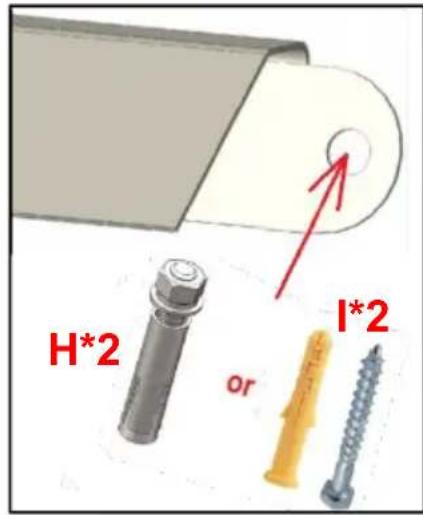
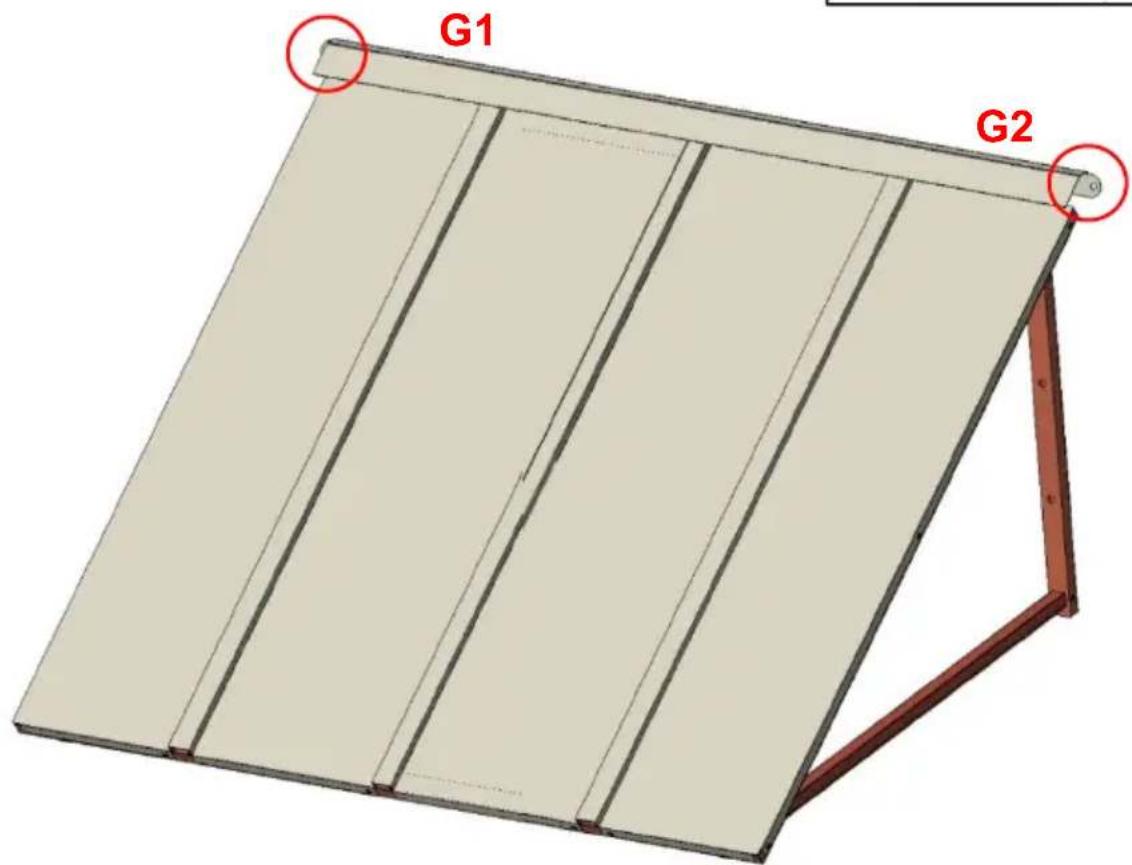
Fix the metal plates G1 and G2 with screws (H or I).
Plan 1 (Suitable for hard walls): Install with expansion screws using a drill bit with a diameter of 12 mm.
Plan 2 (Suitable for wooden walls): Install with wall nails (I*2), a drill bit with a diameter of 6 mm.
Metal plates (G1, G2): The height of the awning does not take metal plates into consideration. The metal plates can be made at any distance above the solid frame of the awning.
PRODUCT PARAMETER
| Model | CGW-44INCH |
| Material | Iron |
| Colour | Black |
| Shading area | 44*24inch(112.5*61cm) |
| Maximum suitable width for doors/windows | 31.5inch/80cm |
Snow Loads
The aluminum door canopies are manufactured from the highest-quality components available on the market today. They are designed to withstand normal weather conditions, including rain, sleet, snow, and wind. However, they are not designed to endure winds exceeding 30 miles per hour, snow loads of more than inches of heavy, wet snow, or 24 inches of snow. Additionally, they cannot withstand the impact force of snow and ice falling from upper roof or piling up. This product will perform excellently as long as it is installed correctly and used within its designed load-bearing limits.
Please remove snow promptly during use.
Manufacturer: Shanghai Muxin Wood Industry Co., Ltd.
Address: Shuangcheng Road 803 Nong 11 Hao 1602A-1609 Shi, Baoshan District, Shanghai 200000 CN.
EC REP: E-CrossStu GmbH.
Mainzer Landstr. 69, 60329 Frankfurt am Main.
UK REP: YH Consulting Limited.
C/O YH Consulting Limited Office 147, Centurion House, London Road,
Staines-upon-Thames, Surrey, TW184AX
Imported to AUS: SIHAO PTY LTD.
1 ROKEVA STREET EASTWOOD NSW 2122 Australia
Imported to USA: Sanven Technology Ltd.
Suite 250, 9166 Anaheim Place, Rancho Cucamonga, CA 91730

Technical Support and E-Warranty Certificate www.vevor.com/support
VEVOR
Affordable. Reliable. Home Improvement.
METAL AWNING FOR DOORS
INSTRUCTION MANUAL
MODEL: CGW-44 INCHES
Affordable. Reliable. Home Improvement.
METAL AWNING FOR DOORS
MODEL: CGW-44 INCHES
Required parts
1 ROKEVA STREET EASTWOOD NSW 2122 Australia
Imported from USA: Sanven Technology Ltd.
Suite 250, 9166 Anaheim Place, Rancho Cucamonga, CA 91730

Affordable. Reliable. Home Improvement.
METAL DOOR CANOPY
USER MANUAL
MODEL: CGW-44 INCHES
electronics www.vevor.com/support
VEVOR
Affordable. Reliable. Home Improvement.
METAL DOOR CANOPY
MODEL: CGW-44 INCHES
Required parts
Staines-upon-Thames, Surrey, TW18 4AX
Imported into AUS: SIHAO PTY LTD.
1 ROKEVA STREET, WOOD NSW 2122, Australia
Suite 250, 9166 Anaheim Place, Rancho Cucamonga, CA 91730

Affordable. Reliable. Home Improvement.
Affordable. Reliable. Home Improvement.
Parts needed
Place the last tile F1 and secure it with screws (K*5).
7
Office C/O YH Consulting Limited, 147, Centurion House, London Road, Staines-upon-Thames, Surrey, TW18 4AX
Imported to AUS: SIHAO PTY LTD.
1 ROKEVA STREET, EASTWOOD, NSW 2122, Australia
Suite 250, 9166 Anaheim Place, Rancho Cucamonga, CA 91730

Affordable. Reliable. Home Improvement.
MARKIS I METALLDÖRR
USER MANUAL
MODEL: CGW-44INCH
www.vevor.com/support
VEVOR
Affordable. Reliable. Home Improvement.
METAL DOOR CANOPY
MODEL: CGW-44INCH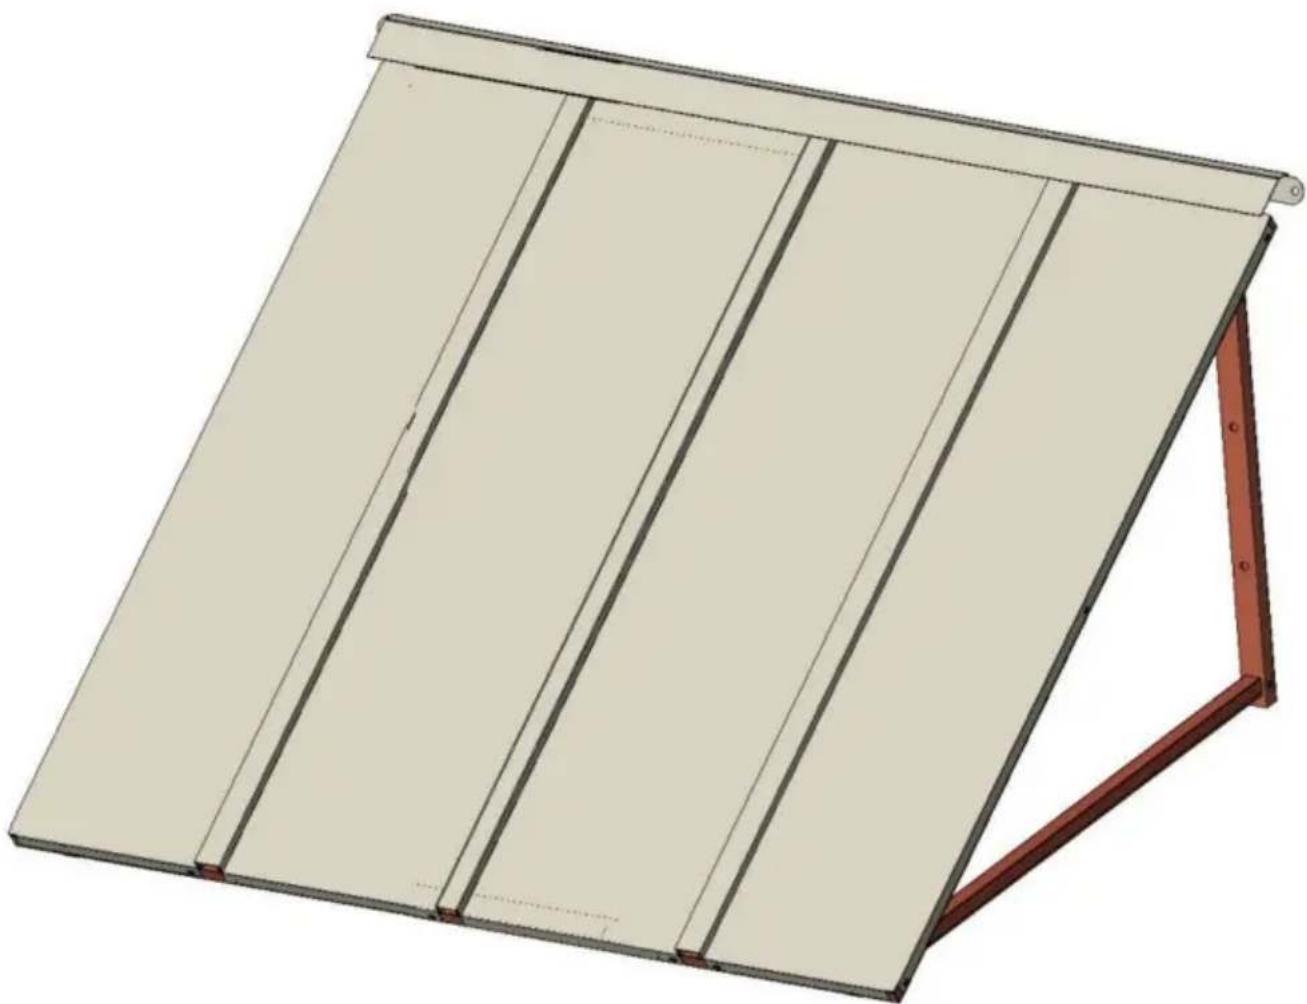
Parts required
| Borrnivå Mätband Krita/Grafit Stege |
C/OYHConsultingLimitedOffice147, CenturionHouse, LondonRoad, Staines-upon-Thames, Surrey, TW184AX
Imported to AUS:SIHAOPTYLTD.
1ROKEVASTREETEASTWOODNSW2122Australia
Imported to USA: SanvenTechnologyLtd.
Suite250,9166AnaheimPlace,RanchoCucamonga,CA91730

Affordable. Reliable. Home Improvement.
METAL DOOR CANOPY
USER MANUAL
MODEL:CGW-44INCH
www.vevor.com/support
VEVOR
Affordable. Reliable. Home Improvement.
METALEN DEURLUIFEL
MODEL:CGW-44INCH
Staines-upon-Thames, Surrey, TW184AX
Suite250,9166AnaheimPlace,RanchoCucamonga,CA91730

Technical support and e-warranty certificate www.vevor.com/support
VEVOR
Affordable. Reliable. Home Improvement.
METAL DOOR CANOPY
USER MANUAL
MODEL: CGW-44 INCH
Affordable. Reliable. Home Improvement.
METAL DOOR CANOPY
MODEL: CGW-44 INCH
Parts required
C/OYHConsultingLimited, office 147, Centurion House, London Road, Staines-
upon-Thames, Surrey, TW184AX
1ROKEVASTREETEASTWOODNSW2122Australia
Suite 250, 9166 Anaheim Place, Rancho Cucamonga, CA 91730

Affordable. Reliable. Home Improvement.
METAL DOOR CANOPY
USER MANUAL
MODEL: CGW-44INCH
www.vevor.com/support
VEVOR
Affordable. Reliable. Home Improvement.
METAL DOOR CANOPY
MODEL: CGW-44INCH
Required parts
Suite 250, 9166 Anaheim Place, Rancho Cucamonga, CA 91730

Brand : Vevor
Model : CGW-44INCH
Category : Outdoor blind