
HLX-FXX-17ft - Control cable Vevor - Free user manual and instructions
Find the device manual for free HLX-FXX-17ft Vevor in PDF.

| Brand | Vevor |
| Model | HLX-FXX-17ft |
| Product Type | Outboard steering cable |
| Length | 17 feet (approx. 5.18 m) |
| Outer diameter | 16 mm |
| Core diameter | 7.9 mm |
| Package contents | 1 steering cable |
| Usage | Steering control for outboard motor |
| Main functions | Transmits steering wheel movement to the motor to steer the boat |
| Safety precautions | Read manual before use, keep away from children, avoid sharp objects |
| Installation | Measure the appropriate length, remove the old cable, install the new one respecting the minimum bend radius of 200 mm |
| Maintenance | Clean mounting holes with a cleaner, lubricate the cable arm surface |
| Repairability | Full cable replacement in case of wear or corrosion |
| Material | Steel (estimated) |
| Compatibility | Outboard motors requiring a 17-foot cable |
| Warranty | Electronic warranty certificate available online |
Frequently Asked Questions - HLX-FXX-17ft Vevor
User questions about HLX-FXX-17ft Vevor
0 question about this device. Answer the ones you know or ask your own.
Ask a new question about this device
Download the instructions for your Control cable in PDF format for free! Find your manual HLX-FXX-17ft - Vevor and take your electronic device back in hand. On this page are published all the documents necessary for the use of your device. HLX-FXX-17ft by Vevor.
USER MANUAL HLX-FXX-17ft Vevor
Technical Support and E-Warranty Certificate www.vevor.com/support
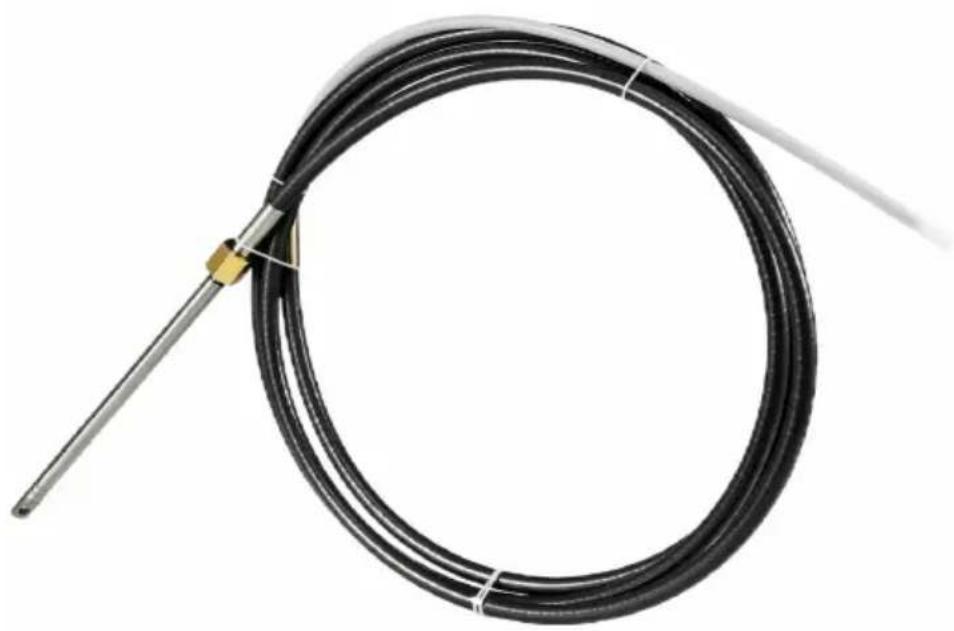
OUTBOARD STEERING CABLE
MODEL:HLX-FXX-17ft
We continue to be committed to provide you tools with competitive price. "Save Half", "Half Price" or any other similar expressions used by us only represent estimate of savings you might benefit from buying certain tools with us compared top brands and does not necessarily mean to cover all categories of tools offered are kindly reminded to verify carefully when you are placing an order with us actually saving half in comparison with the top major brands.
MODEL:HLX-FXX-17ft
natural_image
Black and white photo of a coiled electrical heating element with a metal rod and brass connector (no text or symbols visible)NEED HELP? CONTACT US!
Have product questions? Need technical support? Please feel fr contact us:
Technical Support and E-Warranty Certificate www.vevor.com/support
This is the original instruction, please read all manual instruction carefully before operating. VEVOR reserves a clear interpretation user manual. The appearance of the product shall be subject to product you received. Please forgive us that we won't inform you there are any technology or software updates on our product.
IMPORTANT SAFEGUARDS

WARNING: Read and understand this entire manual before operation or servicing this product. Failure to follow these warnings and instructions can cause personal injury or damage to valuable proper
- Avoid children using it. And this product is not a toy. Do not allow children play.
- Keep away from sharp points, blades and other items.
-
Assembly precautions
-
Assemble only according to these instructions. Improper assembly can create hazards.
- Keep the assembly area clean and well-lit.
- Keep bystanders out of the area during assembly.
- Do not install when tired or when under the influence of alcohol, drugs of medication.
- Product capabilities apply to properly and completely installed product only.
- For additional information regarding the parts listed in the following pages, please refer to the Assembly Diagram of this manual. Unwrap and separate parts in a clean work area. Please keep small spare parts out of children's
SAVE THESE INSTRUCTIONS
PRODUCT SPECIFICATIONS:
| Model | HLX-FXX-17ft |
| Length | 17ft |
| Diameter | 16 |
| Core diameter | 7.9 |
PACKAGE INCLUDE
| No | Components | Picture | Q'ty |
| 1 | Outboard steering cable |  | 1 |
REPLACEMENT PROCESS
Measure the cable length suitable for your boat.
Before you Replace your boat's cable, To work out what length cable need, add lengths 1, 2 and 3, subtract 10 cm for every 90 degree to another 30.5 cm to your total.
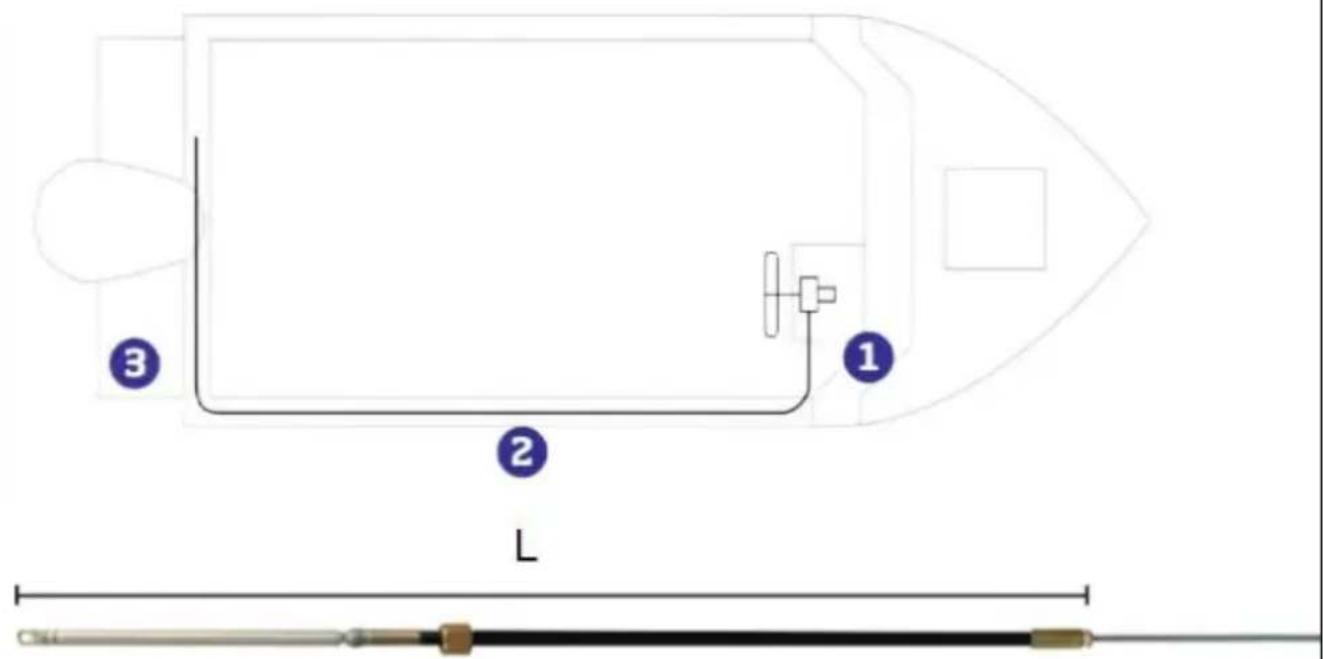
Compare your measured length with the cable length L to confirm that right cable for your boat.
Remove the old cable
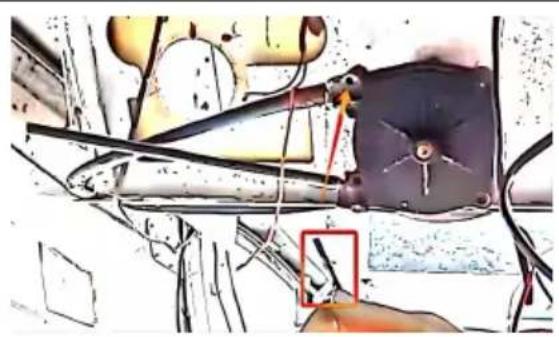
Step 1: Remove cable faster screws, which are on the side the steering rudder where the cable goes in.
natural_image
Technical illustration of a mechanical assembly with no visible text or symbols
natural_image
Close-up of industrial equipment with wiring and components, no visible text or symbolsStep 2: Exit the cable, turn the steering wheel clockwise, the cable with from the steering rudder, turn more until the cable is completely withheld.
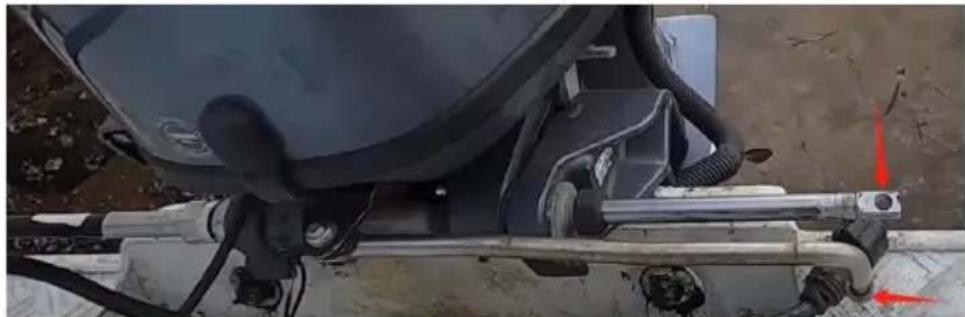
Step 3: Loosen the cable an fastening nut at the outer end the wire.
natural_image
Close-up of a damaged vehicle wheel assembly with visible wiring and structural components (no text or symbols)
natural_image
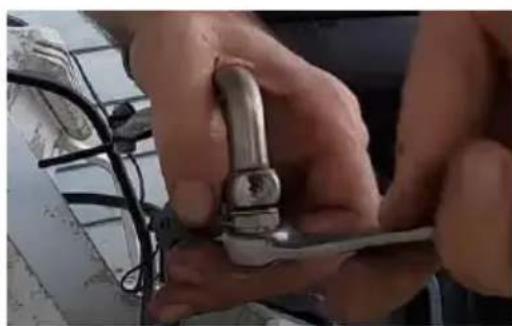
Close-up of hands holding a metallic tool with wires, no visible text or symbols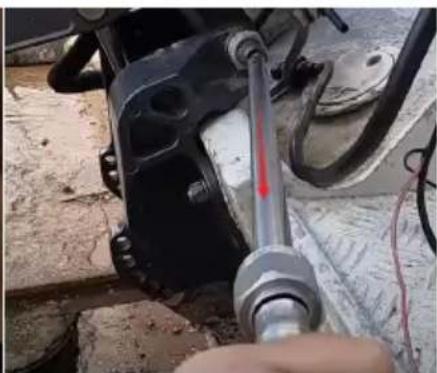
natural_image
Close-up of a hand using a tool to adjust or install a mechanical component (no visible text or symbols)Step 4: Remove the nut connecting of the cable arm so that can be pulled out of the mounting hole outside the string.
Replace the new cables
natural_image
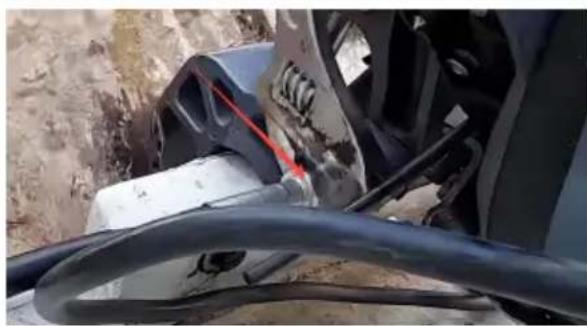
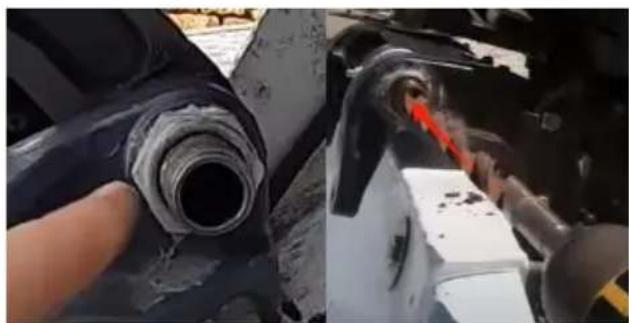
Close-up of a damaged mechanical component with a hand pointing to a hole, showing internal wiring and a red arrow indicating a dissection (no text or symbols visible)Step1: Clean cable fixing holes with cleaner.
Note: If the corrosion is severe or
natural_image
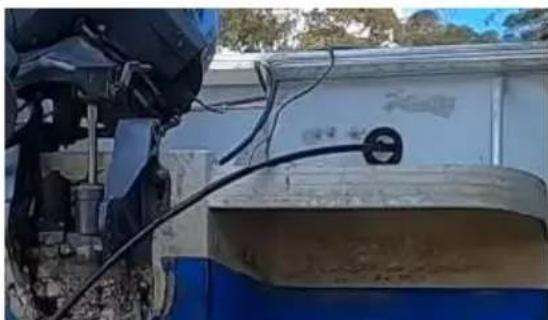
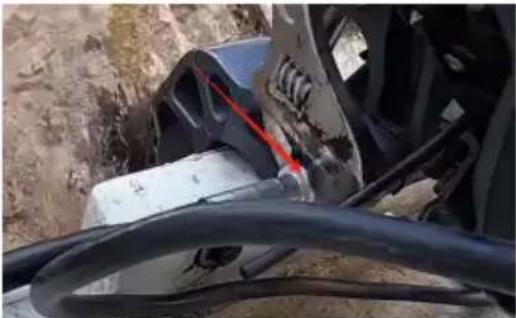
Exterior view of a utility vehicle with attached cables and a large wall (no visible text or symbols)Step2: Thread one end of the cable arm through the hull.
| adhesive is difficult to remove, a simple grinding process is performewith a suitable drill bit to remove | |
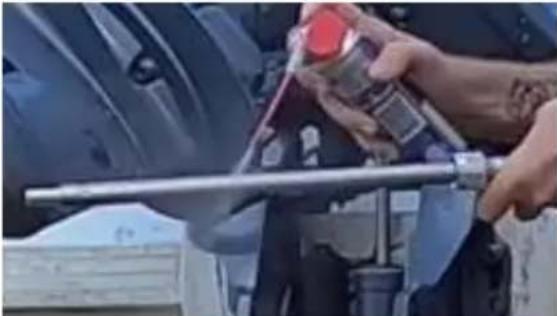 Step3: Spray lubricant on the surf of the cable arm. Step3: Spray lubricant on the surf of the cable arm. | 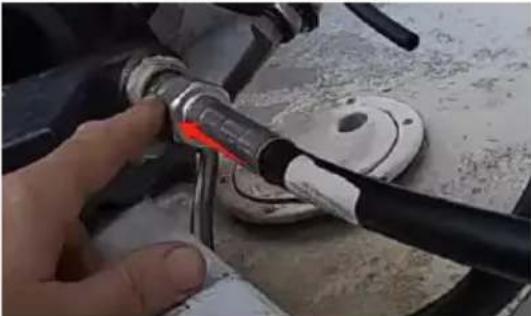 Step4: Insert the cable into the mounting hole. Step4: Insert the cable into the mounting hole. |
 Step5: Tighten the cable fastening at the outer end of the wire. Step5: Tighten the cable fastening at the outer end of the wire. | 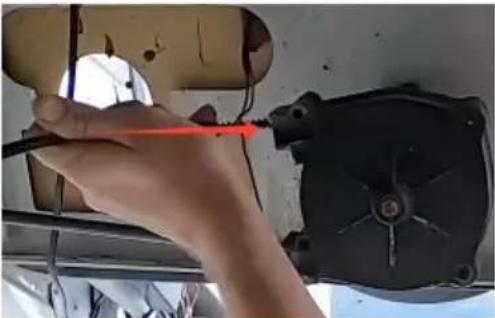 Step6: Insert the other end of the into the steering rudder and turn the steering wheel counterclockwise on one side so that the cable is fully place. Step6: Insert the other end of the into the steering rudder and turn the steering wheel counterclockwise on one side so that the cable is fully place. |
 Step7: Tighten cable fastening screws.Ensure that the bending radius of the cable is not less than R20 Step7: Tighten cable fastening screws.Ensure that the bending radius of the cable is not less than R20 | |
natural_image
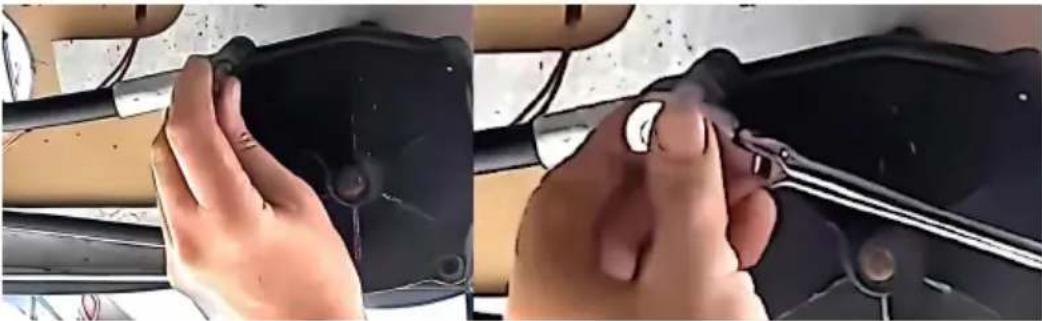
Close-up of a mechanical assembly with visible wiring and components (no text or symbols)Step8: Turn the steering wheel clockwise to adjust the cable end to the mounting position (so that the outer string engine is exactly in the for position).
Step9: Install the nut connecting the steering rod to the cable.
natural_image
Close-up of hands using a tool to adjust or install a metallic sink (no visible text or symbols)Step10: Operate the steering wheel and check that the replacement can properly installed.
Address: Baoshanqu Shuangchenglu 803long 11hao 1602A-1609shi Shanghai
Imported to AUS: SIHAO PTY LTD. 1 ROKEVA STREETEASTWOOD NSW : Australia
Imported to USA: Sanven Technology Ltd. Suite 250, 9166 Anaheim Place, Rancho Cucamonga, CA 91730
| UK | REP |
Pooledas Group Ltd
Unit 5 Albert Edward House, The Pavilions
Preston, United Kingdom
| EC | REP |
SHUNSHUN GmbH
Römeräcker 9 Z2021, 76351
Technical Support and E-Warranty Certificate www.vevor.com/support
VEVOR®
TOUGH TOOLS, HALF PRICE
natural_image
Black and white photo of a coiled wire with a metal rod and brass connector (no text or symbols visible)BESOIN D'AIDE? CONTACTEZ-NOUS!
natural_image
Technical illustration of a mechanical assembly with no visible text or symbols
natural_image
Two-panel photo showing industrial equipment with wiring and components, no visible text or symbolsnatural_image
Close-up of a damaged vehicle with visible wiring and damage, no text or symbols present
natural_image
Close-up of hands adjusting a metal clamp or tool on a surface, no visible text or symbols
natural_image
Close-up of a hand operating a mechanical assembly with a red liquid rod (no visible text or symbols)natural_image
Close-up of a damaged mechanical component with visible internal structure and red tool (no text or symbols)natural_image
Exterior view of a utility vehicle with hoses and equipment, no visible text or symbolsnatural_image
Close-up of a mechanical assembly with visible wiring and components, no text or symbols presentnatural_image
Close-up of hands adjusting a metal pipe fitting with wires (no visible text or symbols)natural_image
Black and white photo of a coiled electrical heating element with a metal rod and brass connector (no text or symbols visible)BRAUCHEN SIE HILFE? KONTAKTIERE UNS!
natural_image
Technical illustration of a mechanical assembly with no visible text or symbols
natural_image
Interior view of an electrical enclosure with exposed wiring and components (no visible text or symbols)natural_image
Close-up of a damaged car wheel assembly with visible red marking and black wiring (no text or symbols)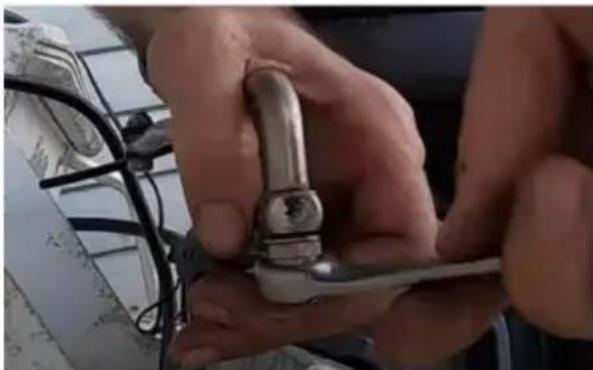
natural_image
Close-up of hands holding a metal wrench and tool, with no visible text or symbols
natural_image
Close-up of a hand using a tool to adjust or install a mechanical component, with no visible text or symbols.natural_image
Close-up of mechanical components with visible wiring and a red arrow indicating a specific part (no text or symbols)natural_image
Exterior view of a water tank with visible pipes and equipment (no text or symbols)natural_image
Close-up of a mechanical assembly with visible components and wiring (no text or symbols)natural_image
Close-up of hands using a tool to adjust or install a metal clamp (no visible text or symbols)natural_image
Black and white photo of a coiled electrical heating element with a metal rod and brass connector (no text or symbols visible)HO BISOGNO DI AIUTO? CONTATTACI!
natural_image
Technical illustration of a mechanical assembly with no visible text or symbols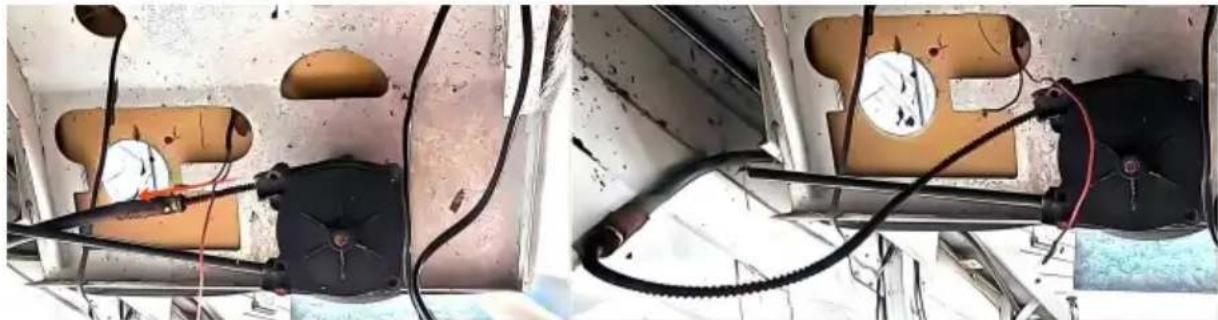
natural_image
Interior view of an electrical enclosure with exposed wiring and components (no visible text or symbols)natural_image
Close-up of a damaged vehicle wheel assembly with visible wiring and a red warning stripe (no text or symbols)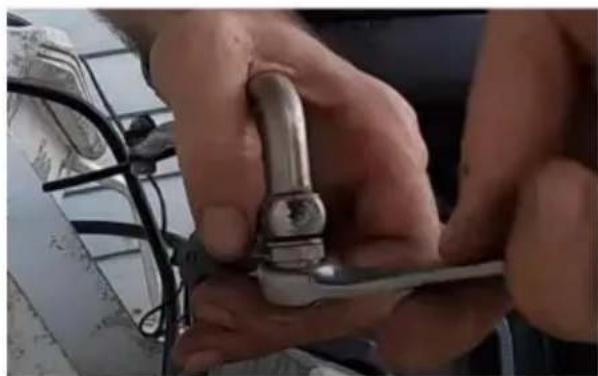
natural_image
Close-up of hands adjusting a metal switch handle on a mechanical component (no visible text or symbols)
natural_image
Close-up of a hand using a tool to adjust or install a mechanical component, with visible wiring and no text or symbols.natural_image
Close-up of a damaged mechanical component with visible internal structure and red tool (no text or symbols)natural_image
Exterior view of a blue industrial container with a black piping bag attached to a worker (no visible text or symbols)natural_image
Close-up of a mechanical assembly with visible components and wiring (no text or symbols)natural_image
Close-up of hands adjusting a metal pipe fitting with wires (no visible text or symbols)natural_image
Black and white photo of a coiled electrical heating element with a metal rod and brass connector (no text or symbols visible)natural_image
Technical illustration of a mechanical assembly with no visible text or symbols
natural_image
Interior view of an electrical enclosure with exposed wiring and components (no visible text or symbols)natural_image
Close-up of a car wheel assembly with visible wiring and components, no text or symbols present
natural_image
Close-up of hands adjusting a metal switch handle on a mechanical component (no visible text or symbols)
natural_image
Close-up of a hand using a tool to adjust or install a mechanical component, with visible wiring and no text or symbols.natural_image
Close-up of a damaged mechanical component with visible internal structure and red tool (no text or symbols)natural_image
Exterior view of a blue industrial container with a black piping bag attached to a worker (no visible text or symbols)natural_image
Close-up of a mechanical assembly with visible components and wiring (no text or symbols)natural_image
Close-up of hands adjusting a metal pipe fitting with wires (no visible text or symbols)natural_image
Black and white photo of a coiled electrical heating element with a metal rod and brass connector (no text or symbols visible)POTRZEBUJE POMOCY? SKONTAKTUJ SIĘ Z NAMI!
natural_image
Medical procedure image showing surgical tools and tubing (no visible text or labels)
natural_image
Close-up of industrial equipment components with wiring and wiring harnesses (no visible text or symbols)natural_image
Close-up of a mechanical component with visible wiring and a red arrow indicating a specific part (no text or symbols)
natural_image
Close-up of hands holding a metallic tool or wrench, with no visible text or symbols
natural_image
Close-up of a hand using a tool to adjust or install a mechanical component, with visible wiring and no text or symbols.natural_image
Close-up of a mechanical component with a red arrow pointing to a specific part (no visible text or symbols)natural_image
Exterior view of a utility vehicle with hoses and a large container (no visible text or symbols)natural_image
Close-up of a mechanical assembly with metal rods and wiring, no visible text or symbolsnatural_image
Close-up of hands adjusting a metal pipe fitting with wires (no visible text or symbols)www.vevor.com/support
VEVOR®
TOUGH TOOLS, HALF PRICE
Technische ondersteuning en e-garantiecertificaat www.vevor.com/support
BUITENBOORDMOTOR STUURKABEL
MODEL: HLX-FXX-17ft
natural_image
Black and white photo of a coiled electrical heating element with a metal rod and brass connector (no text or symbols visible)HULP NODIG? NEEM CONTACT MET ONS OP!
PRODUCT SPECIFICATIES:
| Model | HLX-FXX-17ft |
| Lengte | 17ft |
| Diameter | ÿ 16 |
| Kern diameter | ÿ 7,9 |
PAKKET BEVAT
natural_image
Medical or laboratory procedure image showing mechanical components and tissue (no visible text or symbols)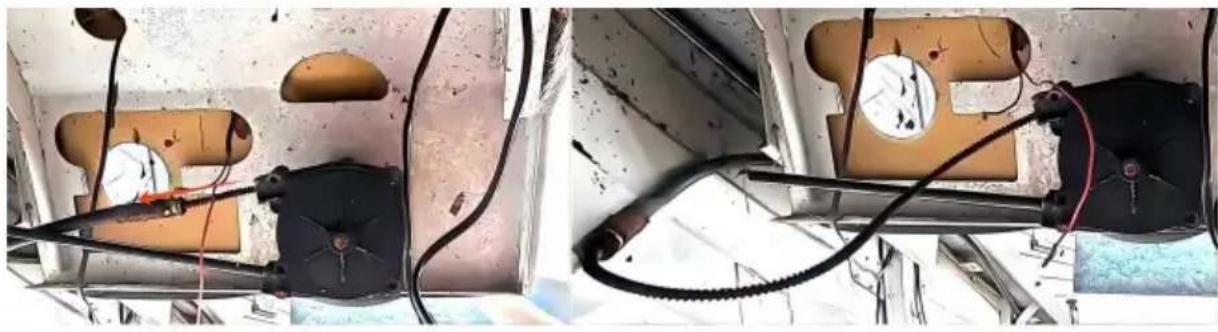
natural_image
Two-panel photo showing electrical wiring and components inside a vehicle or enclosure (no visible text or symbols)natural_image
Close-up of a damaged vehicle with visible wiring and damage, no text or symbols present
natural_image
Close-up of hands adjusting a metal clamp or tool on a surface, no visible text or symbols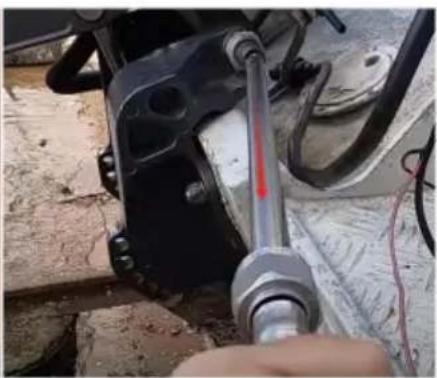
natural_image
Close-up of a hand operating a mechanical assembly with a red liquid rod (no visible text or symbols)natural_image
Close-up of a damaged mechanical component with visible internal structure and red tool (no text or symbols)natural_image
Exterior view of a utility vehicle with hoses and equipment, no visible text or symbolsnatural_image
Close-up of a mechanical assembly with metal rods and wiring, no visible text or symbolsnatural_image
Close-up of hands adjusting a metal pipe fitting with wires (no visible text or symbols)natural_image
Black and white photo of a coiled electrical heating element with a metal rod and brass connector (no text or symbols visible)BEHÖVS HJÄLP? KONTAKTA OSS!
natural_image
Technical diagram of a mechanical assembly with no visible text or symbols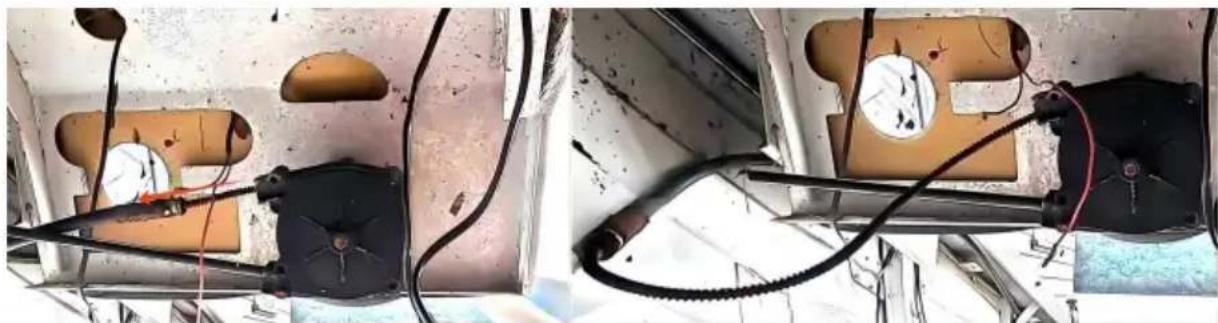
natural_image
Close-up of industrial equipment components with wiring and wiring harnesses (no visible text or symbols)natural_image
Close-up of a damaged vehicle wheel assembly with visible wiring and a red warning stripe (no text or symbols)
natural_image
Close-up of hands holding a metallic tool or switch, with wires and mechanical components visible (no text or symbols)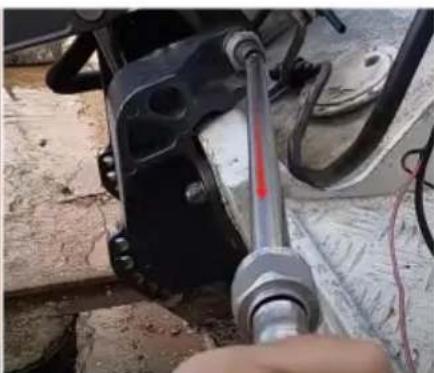
natural_image
Close-up of a hand using a tool to adjust or install a mechanical component, with visible wiring and no text or symbols.natural_image
Close-up of a mechanical component with a hand adjusting a cylindrical opening, showing internal components and a red arrow pointing to a specific part (no text or symbols visible)natural_image
Exterior view of a utility vehicle with hoses and equipment, no visible text or symbolsnatural_image
Close-up of a mechanical assembly with visible components and wiring (no text or symbols)natural_image
Close-up of hands adjusting a metal pipe fitting with wires (no visible text or symbols)Rancho Cucamonga, CA 91730
UK
REP
Pooledas Group Ltd
Enhet 5 Albert Edward House, The Pavilions


