7015FY - Shower panel Vevor - Free user manual and instructions
Find the device manual for free 7015FY Vevor in PDF.

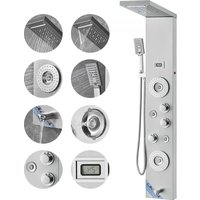
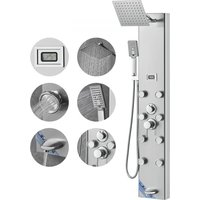
| Product type | Shower panel |
| Brand | Vevor |
| Model | 7015FY |
| Main material | Stainless steel 304, brass, PVC, ABS |
| Functions | 4 modes (hand shower, overhead shower, bathtub spout, etc.) |
| Power supply | None (mechanical) |
| Water connection | G1/2" |
| Installation type | Wall-mounted with wall bracket |
| Package contents | Main panel, hand shower with hose (1.5 m), overhead shower, water outlet arm, adapters, seals, screws, wall bracket |
| Hand shower | 1 setting |
| Bathtub spout | Included |
| Temperature display | No |
| LED lighting | No |
| Approximate weight | 5 kg |
| Maintenance and cleaning | Clean with a mild detergent and a soft cloth |
| Safety | Wear gloves during installation, tighten all seals to prevent leaks |
Frequently Asked Questions - 7015FY Vevor
User questions about 7015FY Vevor
0 question about this device. Answer the ones you know or ask your own.
Ask a new question about this device
Download the instructions for your Shower panel in PDF format for free! Find your manual 7015FY - Vevor and take your electronic device back in hand. On this page are published all the documents necessary for the use of your device. 7015FY by Vevor.
USER MANUAL 7015FY Vevor
Affordable. Reliable. Home Improvement.
SHOWER PANEL TOWER
MODEL:
Technical Support and E-Warranty Certificate
www.vevor.com/support
VEVOR
SHOWER PANEL TOWER
Affordable. Reliable. Home Improvement.
This is the original instruction, please read all manual instructions carefully before operating. VEVOR reserves a clear interpretation of o user manual. The appearance of the product shall be subject to the product you received. Please forgive us that we won't inform you ag there are any technology or software updates on our product.
 | Warning-To reduce the risk of injury, user must re instructions manual carefully. |
 | This device complies with Part 15 of the FCC Rules. Open subject to the following two conditions:(1)This device may not harmful interference, and (2)this device must accept any inter received, including interference that may cause undesired open |
 | This product is subject to the provision of European Direc 2012/19/EC. The symbol showing a wheelie bin crossed thr indicates that the product requires separate refuse collection European Union. This applies to the product and all acces marked with this symbol. Products marked as such may n discarded with normal domestic waste, but must be taken collection point for recycling electrical and electronic device |
INSTRUCTIONS
Warning Tips:

- During the installation process, it is best to wear gloves to prevent sharp
corners on the panel from scratching the palm of the - When installing the shower, ensure that all joints a tightened to avoid water leakage.
- Ensure that the red and blue water inlet pipes inside the panel are in a folded state to avoid affecting water pressure.
- When the shower is not in use, please close the switch valve of the sh
SAVE THESE INSTRUCTIONS
INSTALLATION INSTRUCTIONS
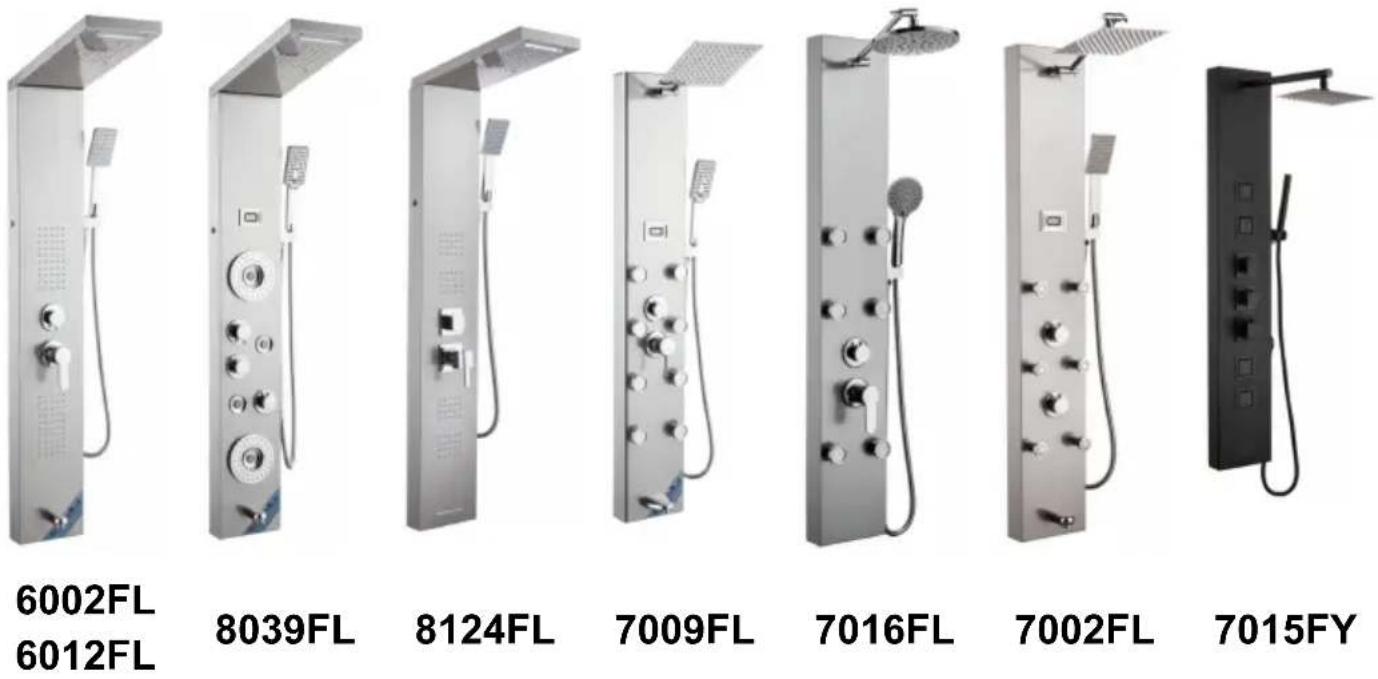
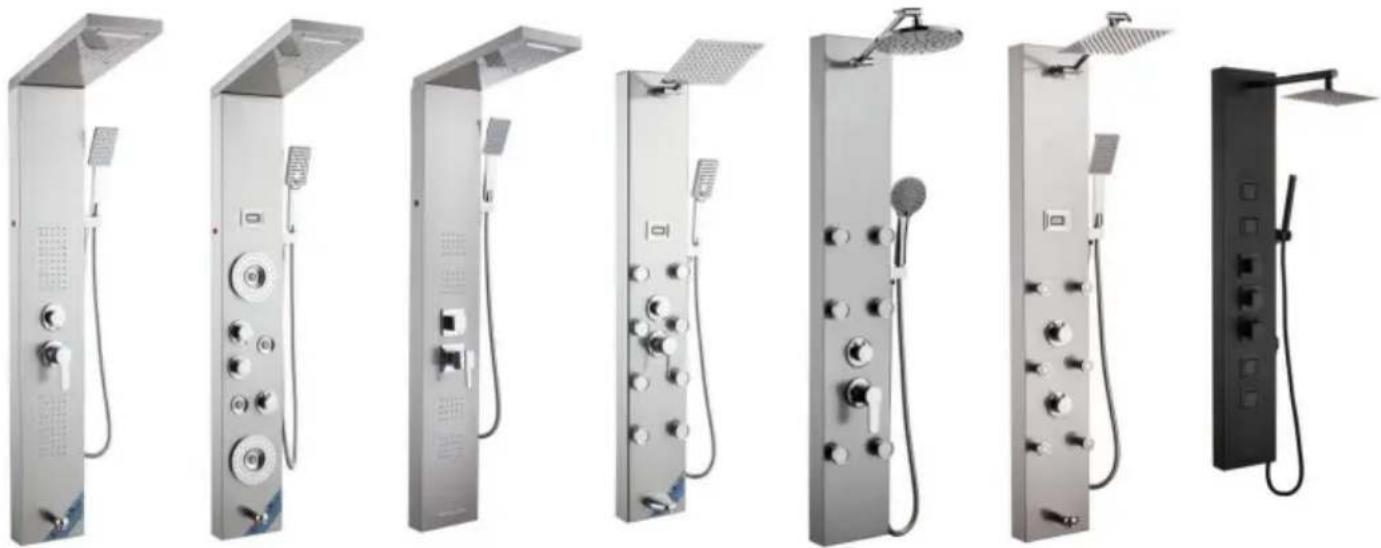
| Model | 6002FL | 8039FL | 6012FL | 8124FL | 7009FL | 7016FL | 7002FL | 7015FY |
| Mounting Type | Wall Mount | |||||||
| Connection Thread | G1/2" | |||||||
| Functions | Four Modes | Six Modes | Five Modes | Five Modes | Five Modes | Three Modes | Four Modes | Four Modes |
| Tub Spout | √ | √ | √ | √ | √ | × | √ | √ |
| Temperature Display | × | √ | × | × | √ | × | √ | × |
| LED Lamp | √ | √ | √ | √ | × | × | × | × |
| Power | Dry Cell (DC3V) | Dry Cell (DC3V) | Dry Cell (DC3V) | Dry Cell (DC3V) | Dry Cell (DC3V) | × | Dry Cell (DC3V) | × |
| Hand Shower | 1-Setting | 3-Setting | 1-Setting | 1-Setting | 3-Setting | 5-Setting | 1-Setting | 1-Setting |
| Finish | Fingerprint-free Brushed Nickel shower system | Black-Painting | ||||||
| Material | 304 Stainless Steel, Brass, PVC, ABS | 201 Stainless Steel, Brass, PVC, ABS | 304 Stainless Steel, Brass, PVC, | |||||
PARTS LIST
| MODEL | 8039FL | 6002FL 6012FL 8124FL | 7009FL | 7016FL | 7002FL | 7015FY | |
| Handheld Shower |  | 1pcs | 1pcs | 1pcs | 1pcs | 1pcs | 1pcs |
| 1.5 Meter Hand Spray Hose | 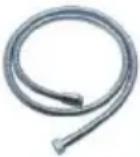 | 1pcs | 1pcs | 1pcs | 1pcs | 1pcs | 1pcs |
| Hand Spray Seat | 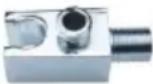 | 1pcs | 1pcs | 1pcs | 1pcs | 1pcs | 0pcs |
| 1/2 Right Angle Adapter | 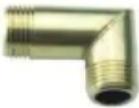 | 2pcs | 2pcs | 2pcs | 2pcs | 2pcs | 2pcs |
| 4-Point Rubber | 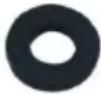 | 2pcs | 2pcs | 2pcs | 2pcs | 2pcs | 2pcs |
| Self Tapping Screw | 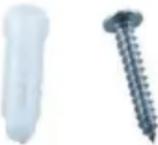 | 4pcs | 4pcs | 4pcs | 4pcs | 4pcs | 4pcs |
| Fastener | 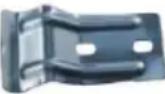 | 2pcs | 2pcs | 2pcs | 2pcs | 2pcs | 2pcs |
| Grommet | 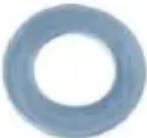 | 1pcs | 1pcs | 1pcs | 1pcs | 1pcs | 2pcs |
| Hexagon Nut | 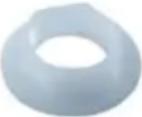 | 1pcs | 1pcs | 1pcs | 1pcs | 1pcs | 1pcs |
| M6 Nut | 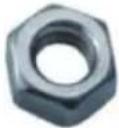 | 4pcs | 4pcs | 0pcs | 0pcs | 0pcs | 0pcs |
| M6*10 Screw | 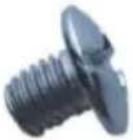 | 4pcs | 4pcs | 0pcs | 0pcs | 0pcs | 0pcs |
| Hose Clamp | 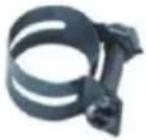 | 2pcs | 2pcs | 0pcs | 0pcs | 0pcs | 0pcs |
| Brass Shower Arm | 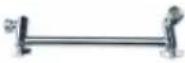 | 0pcs | 0pcs | 1pcs | 1pcs | 1pcs | 0pcs |
| Panel Cotton Bag |  | 1pcs | 1pcs | 1pcs | 1pcs | 1pcs | 1pcs |
| Top Spray Cotton Bag |  | 1pcs | 1pcs | 0pcs | 0pcs | 0pcs | 0pcs |
| Battery AA1.5V |  | 2pcs | 2pcs | 2pcs | 0pcs | 2pcs | 0pcs |
| Stainless Steel Water Outlet Arm |  | 0pcs | 0pcs | 0pcs | 0pcs | 0pcs | 1pcs |
| Brass Hex Nut | 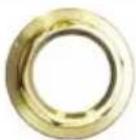 | 0pcs | 0pcs | 0pcs | 0pcs | 0pcs | 1pcs |
| Water Outlet Adapter | 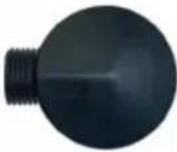 | 0pcs | 0pcs | 0pcs | 0pcs | 0pcs | 1pcs |
| Wall Mounted Spray Booth | 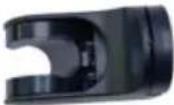 | 0pcs | 0pcs | 0pcs | 0pcs | 0pcs | 1pcs |
ASSEMBLY INSTRUCTIONS
MODEL 6012FL/6002FL/8039FL/8124FL
natural_image
Hand holding a white cable or wire against a plain gray background, no text or symbols visibleInsert the PVC pipe from the top openin to pierce out.
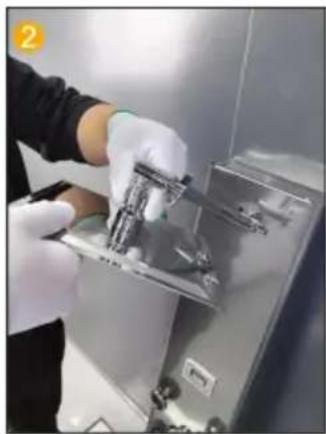
natural_image
Close-up of a hand holding a metallic electrical box with wires wrapped around it (no visible text or symbols)Route the LED light wire along the hole insert into the motherboard.
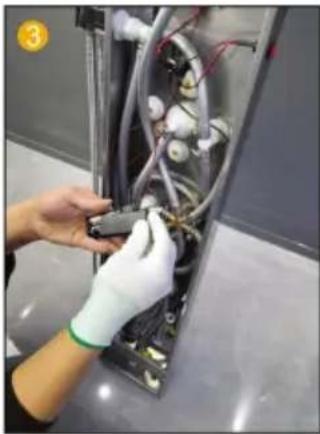
natural_image
Close-up of a white mechanical component with a rectangular cutout and four small bolts (no visible text or symbols)Fix the motherboard and top spray with pairs of M6 screws and nuts.
natural_image
Close-up of a metallic door with white insulation and black cables, no visible text or symbolsFix the PVC pipe a throat clamp on top spray joint.
natural_image
Close-up of hands connecting a cable to a wall-mounted cable, no visible text or symbolsConnect the LED light cable and pow supply line.
natural_image
Person in white gloves installing or adjusting electrical wiring inside a metal enclosure (no visible text or symbols)Load 2 AA batteries into the battery compartment.
natural_image
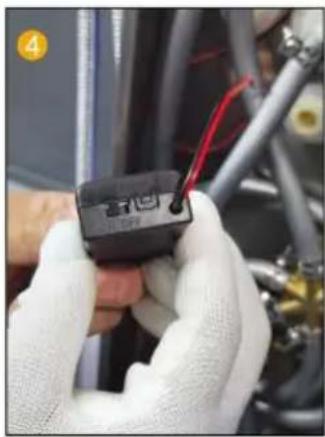
Close-up of hands holding a small black electronic component with red wires, next to mechanical components (no visible text or symbols)Switch the battery box to ON.
natural_image
Close-up of a metallic threaded connector with red and black wires attached, no visible text or symbolsInsert the hand spr nozzle into the pan And install the gasket.
natural_image
Close-up of industrial equipment with wiring and a metallic panel (no visible text or symbols)Insert the hand nozzle into the And install the gasket.
natural_image
Hand holding a hexagonal nut component in a car dashboard (no visible text or symbols)spr: Put the 4-point rubt Connect the water pane into the hand spray outlet connector and Inside the joint of t hand spray seat joi seat.
natural_image
Close-up of medical tubing and connectors with a red cable, no visible text or symbolsConnect the water outlet connector and hand spray seat joi

natural_image
Close-up of a metallic mechanical component with threaded pins and a numbered label '12' in the corner (no readable text or symbols on the main subject)Connect the hand spray hose to the handheld one shower head.
natural_image
Close-up of a gloved hand holding a metal rod inside a stainless steel enclosure (no visible text or symbols)Fix the water outlet to the main board.
natural_image
Person in gloves handling a metallic mechanical component inside a stainless steel enclosure (no visible text or symbols)a Connect the top spray and the water outlet a joint.
natural_image
Person in white gloves installing or adjusting electrical wiring inside an open industrial box (no visible text or symbols)Load 2 AA batteries the battery compartment.
natural_image
Close-up of hands holding a small black electronic component with red wires, next to mechanical components (no visible text or symbols)Switch the battery box to ON.
natural_image
Close-up of a metallic threaded connector with red cable, no visible text or symbolsInsert the hand spray nozzle into the panel and install the gasket.
natural_image
Close-up of industrial equipment with white cables and connectors, no visible text or symbolsInsert the hand spray nozzle into the panel and install the gasket.
natural_image
Close-up of gloved hands assembling or inspecting a mechanical component with visible wiring and components (no text or symbols)Put the 4-way rubber into the connector of hand spray seat.
natural_image
Close-up of a gloved hand inserting a small component into an electrical panel (no visible text or symbols)Connect the water out connector to the hand spray seat connector.
natural_image
Close-up of a medical or laboratory procedure setup with tubing and a digital scale (no visible text or symbols)Connect the hand-held shower hose and the hand-held shower head
Note:7016FL no step 3 and 4.
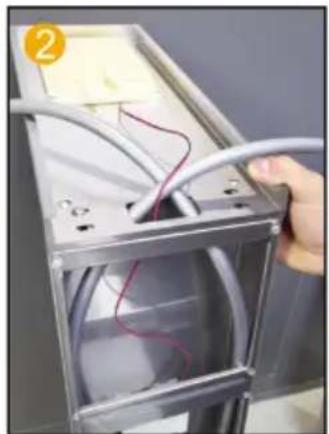
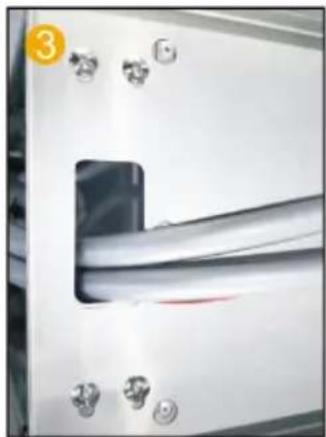
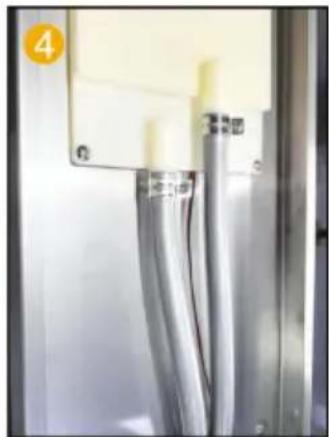
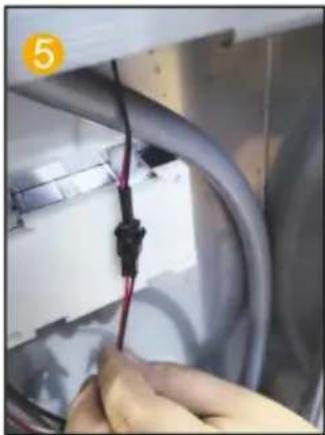
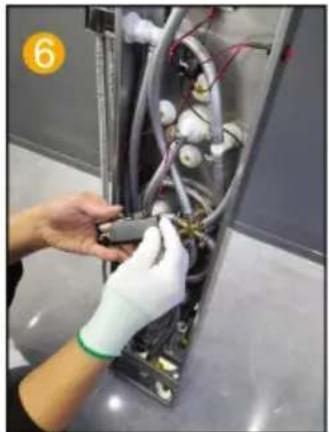
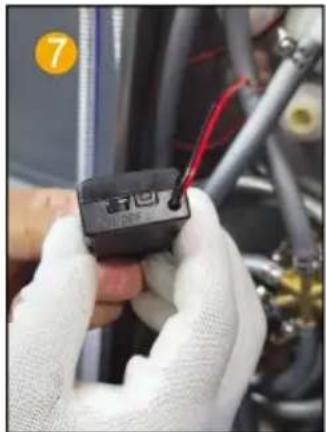
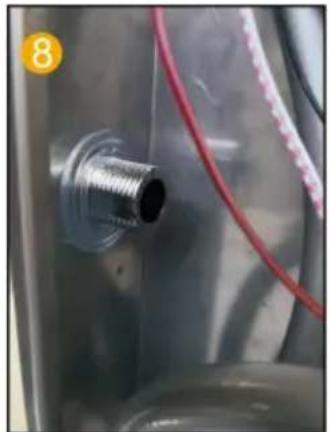
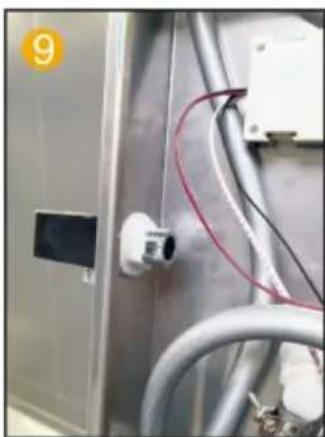
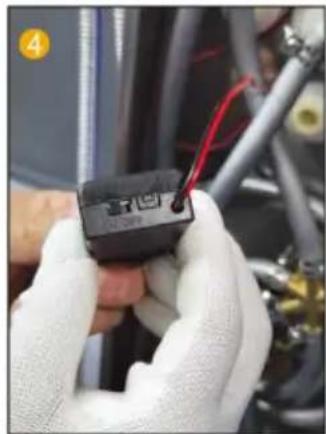
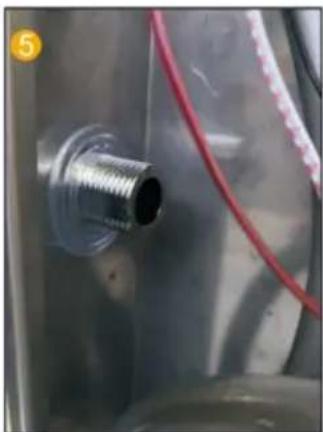
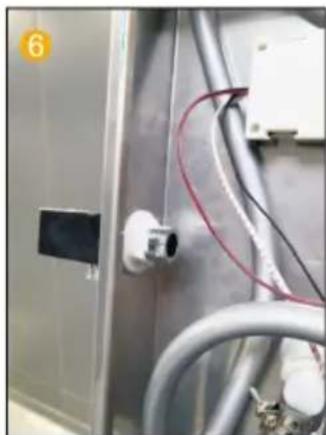
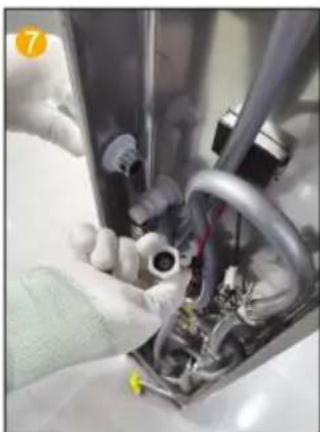
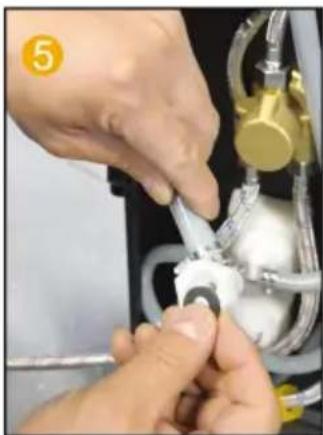
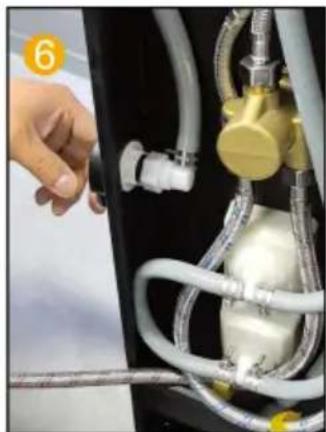
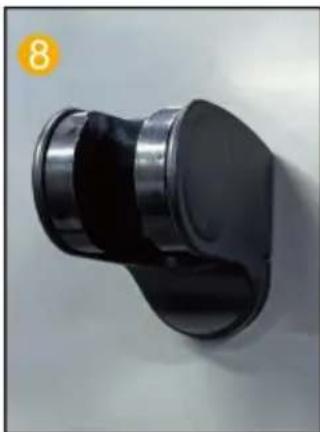
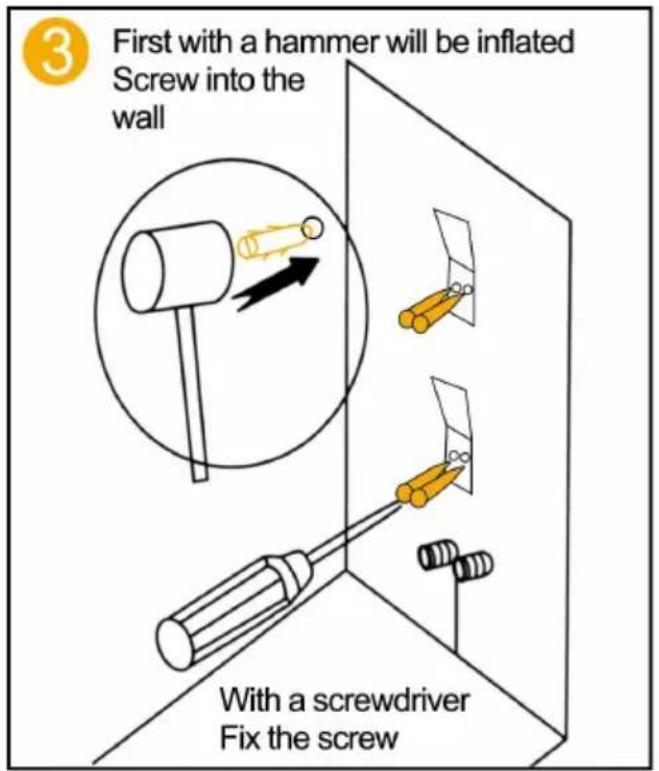
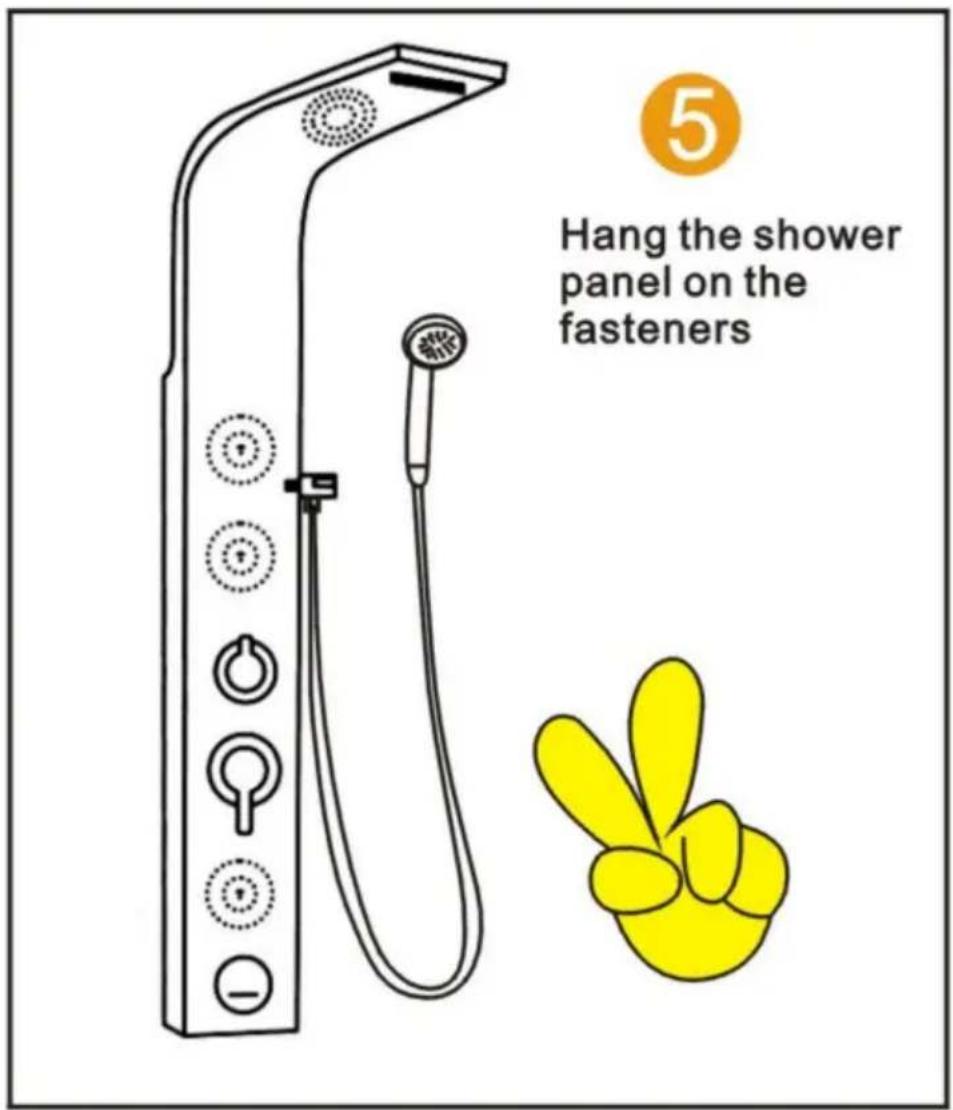
MODEL 7015FY
natural_image
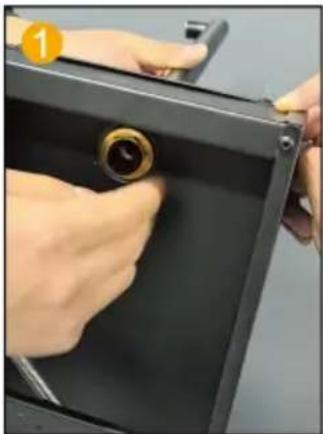
Close-up of hands installing a black panel with a gold-colored clip, no visible text or symbols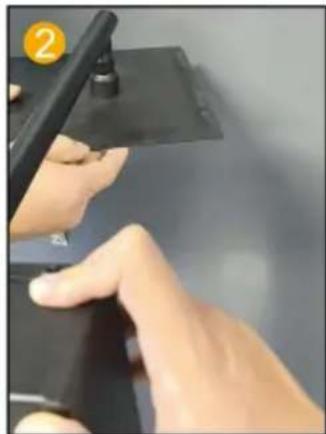
natural_image
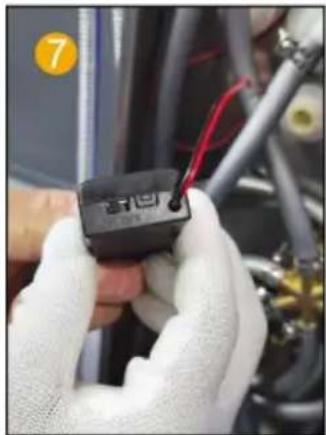
Close-up of hands holding a black electronic device with a lever, no visible text or symbols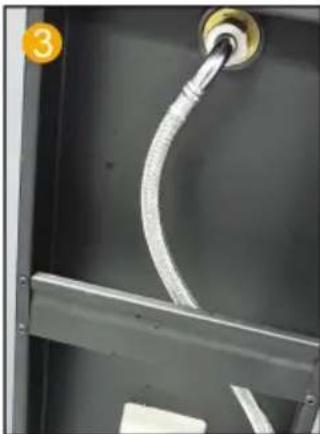
natural_image
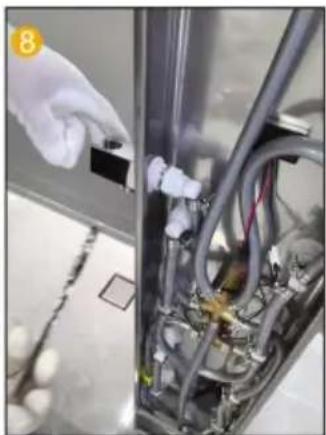
Close-up of a metallic pipe fitting attached to a wall-mounted fixture (no visible text or symbols)
natural_image
Close-up of hands adjusting a mechanical component with tubing and valves (no visible text or symbols)Fix the water outlet a Connect the top spray Connect the steel wire Fix the shower outlet to the main board wit and the water outlet a pipe and the shower connector to the pane nuts and washers. joint. arm and tighten it. with a nut.
natural_image
Close-up of hands adjusting a white mechanical component with a golden valve (no visible text or symbols)Put the 4-way rubber into the shower head connector.
natural_image
Close-up of a hand adjusting a white and gold tubing with a yellow valve, no visible text or symbolsConnect the water out connector and the shower head water outlet connector.

natural_image
Close-up of a black plastic mechanical component with circular features and central hub (no visible text or symbols)Fix the shower head Installation of the bracket to the wall at shower head bracket appropriate position will be completed. screws and nuts.
natural_image
Close-up of a black plastic contact lens with a circular base and metallic rim, against a plain white background (no text or symbols visible)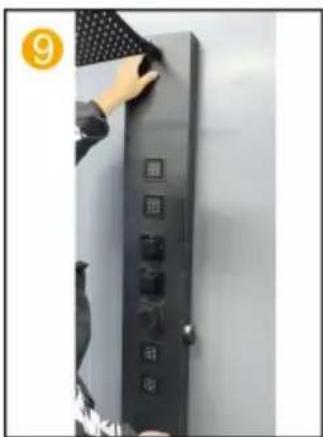
natural_image
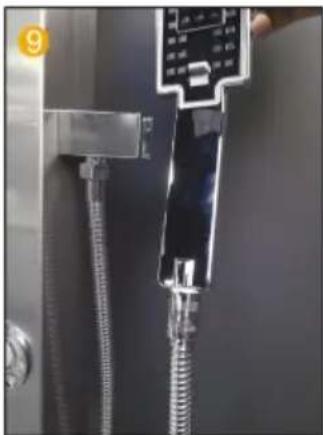
Person adjusting a black door panel with control buttons (no visible text or symbols)Fix the panel to the Connect the handheld at the appropriate heiç shower head to the with the bracket. hose.
natural_image
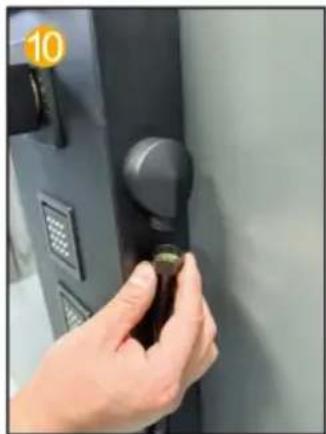
Hand inserting a small object into a door panel (no visible text or symbols)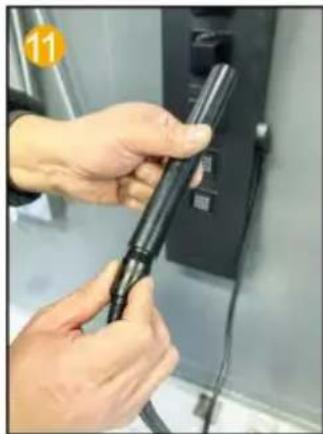
natural_image
Close-up of hands holding a black cable or connector with a switch, next to a metallic panel (no visible text or symbols)Connect to the handheld shower head
natural_image
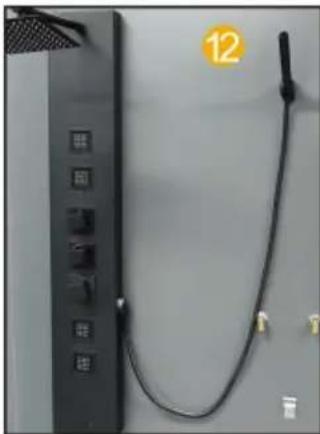
Close-up of a black cable with connector, mounted on a wall panel (no visible text or symbols)Installation completed.
INSTALLATION STEPS (GENERAL)
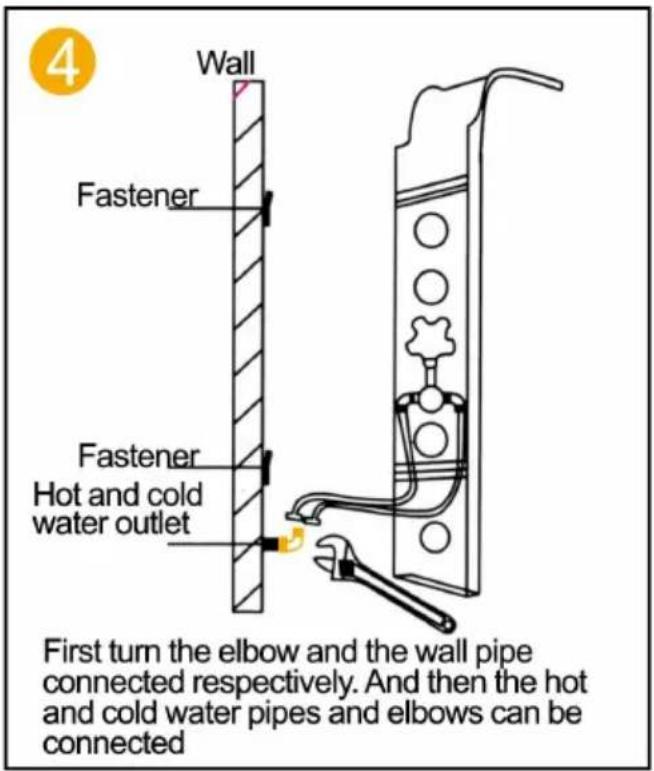
Installation Notes
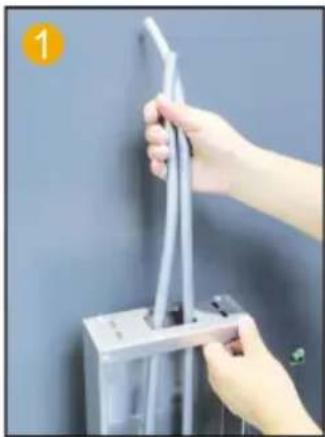
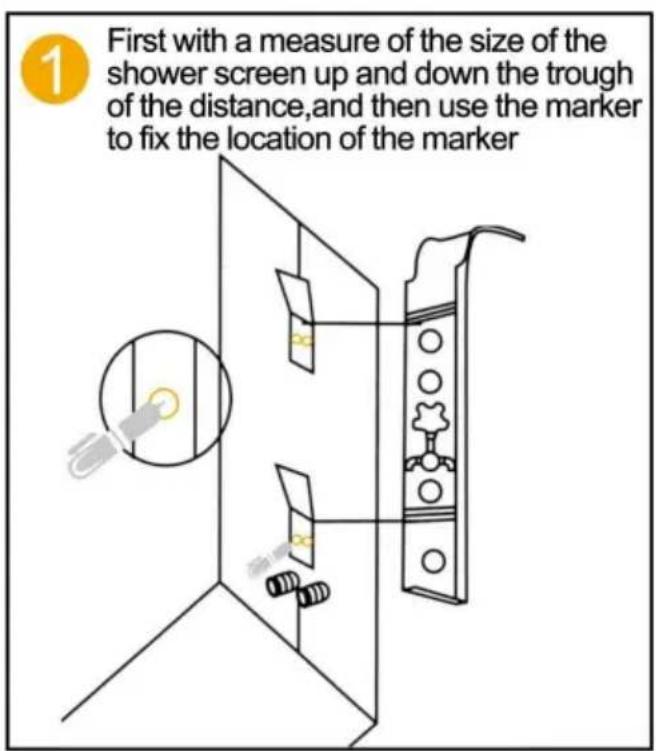
- According to the height of the family height budget shower system installation height, measure the shower system on the back of the bar Distance, mark a wall, in the corresponding position of the tag fixed hanging iron (up and down one).
- Connect the hot and cold water hose (be sure to clean the magazine and dirt in the wall Scale so as not to block, affect the water effect).
- Shower system hanging on the wall, the upper and lower two cards were clamped in two hanging pastes (Note: shower After the system wall, the main close to the wall is not shaking, do not need to use another glass glue and tools fixed).
Stainless steel shower system maintenance methods:
- Regular cleaning of the product in order to keep its appearance bright an clean;
- Clean the surface with water or a mild detergent and wipe it with a soft
- Note that the clean product of the hidden position, timely cleaning can make products lasting.
SHOWER PANEL SERIES INSTALLATION DIAGRAM

6002FL / 6012FL

8039FL
7009FL
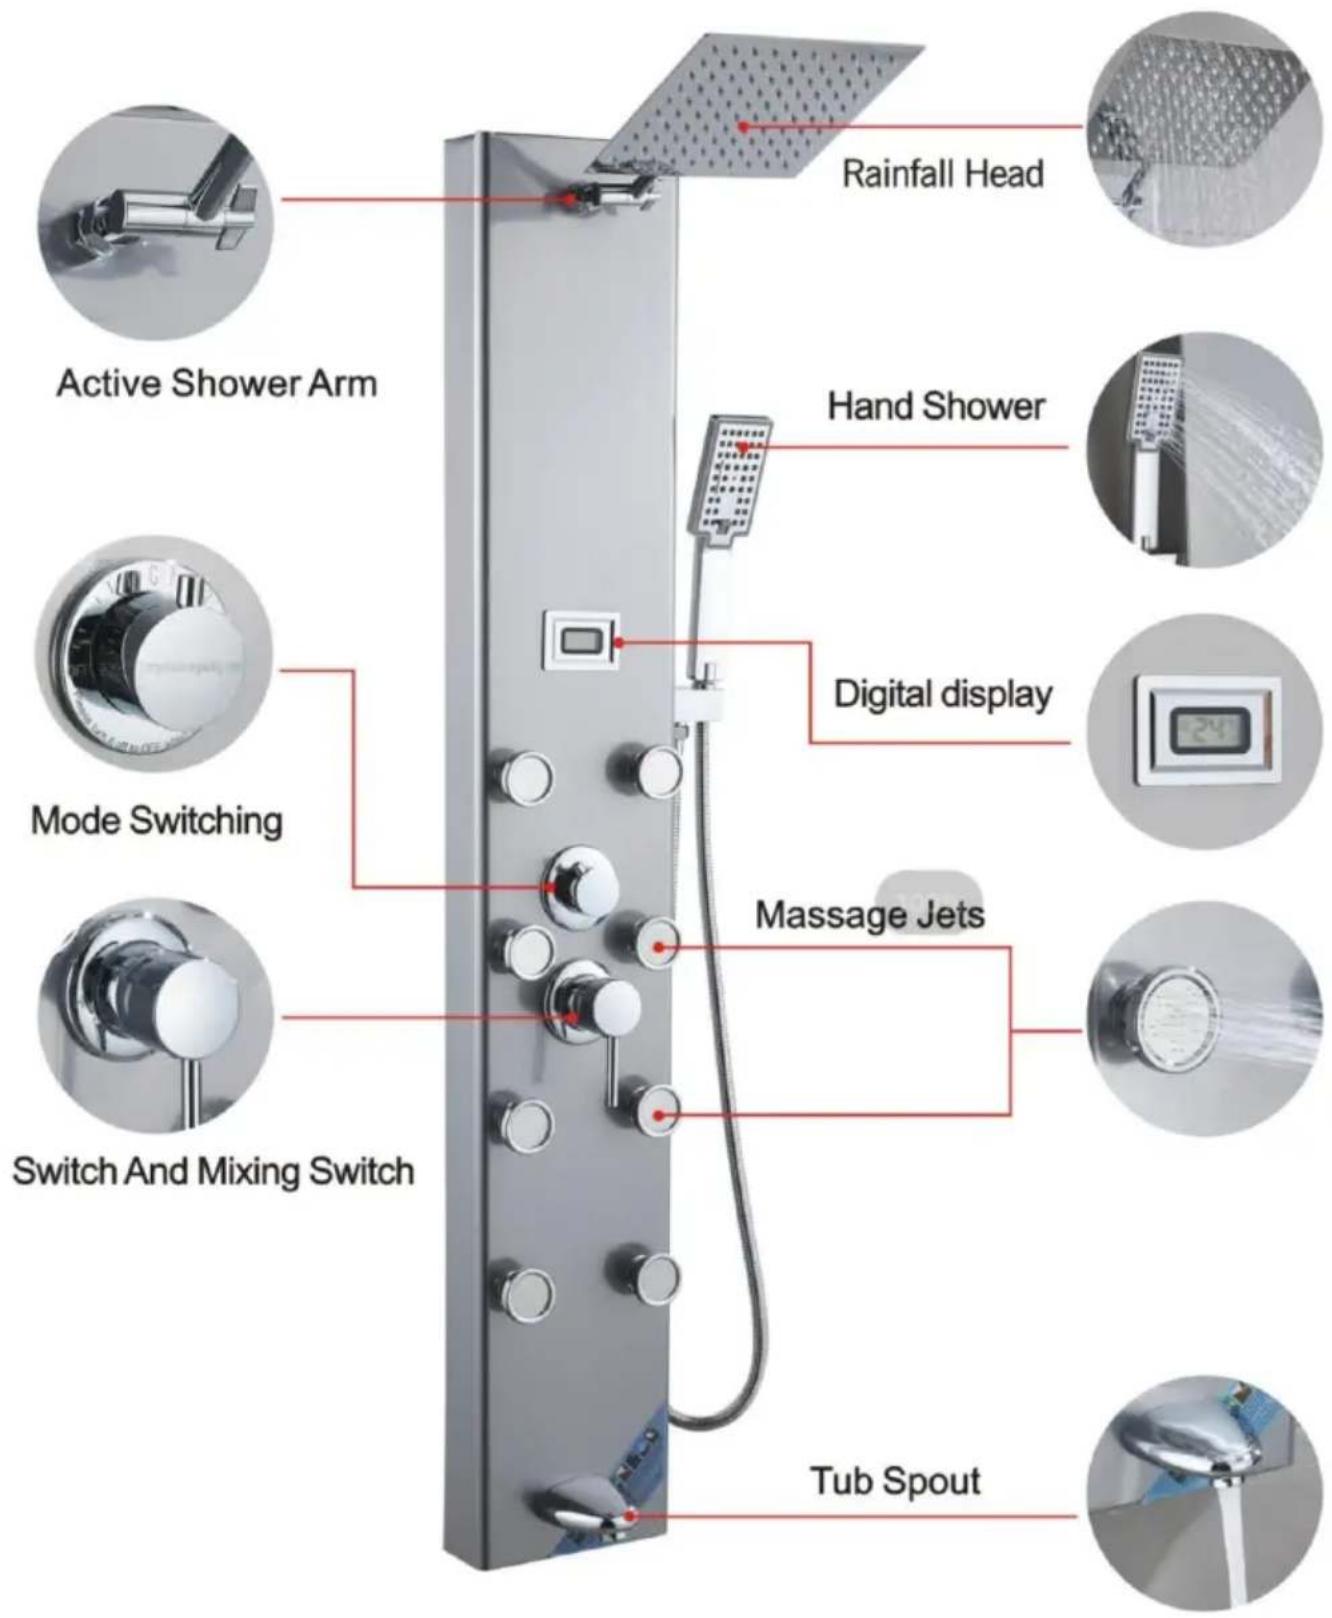
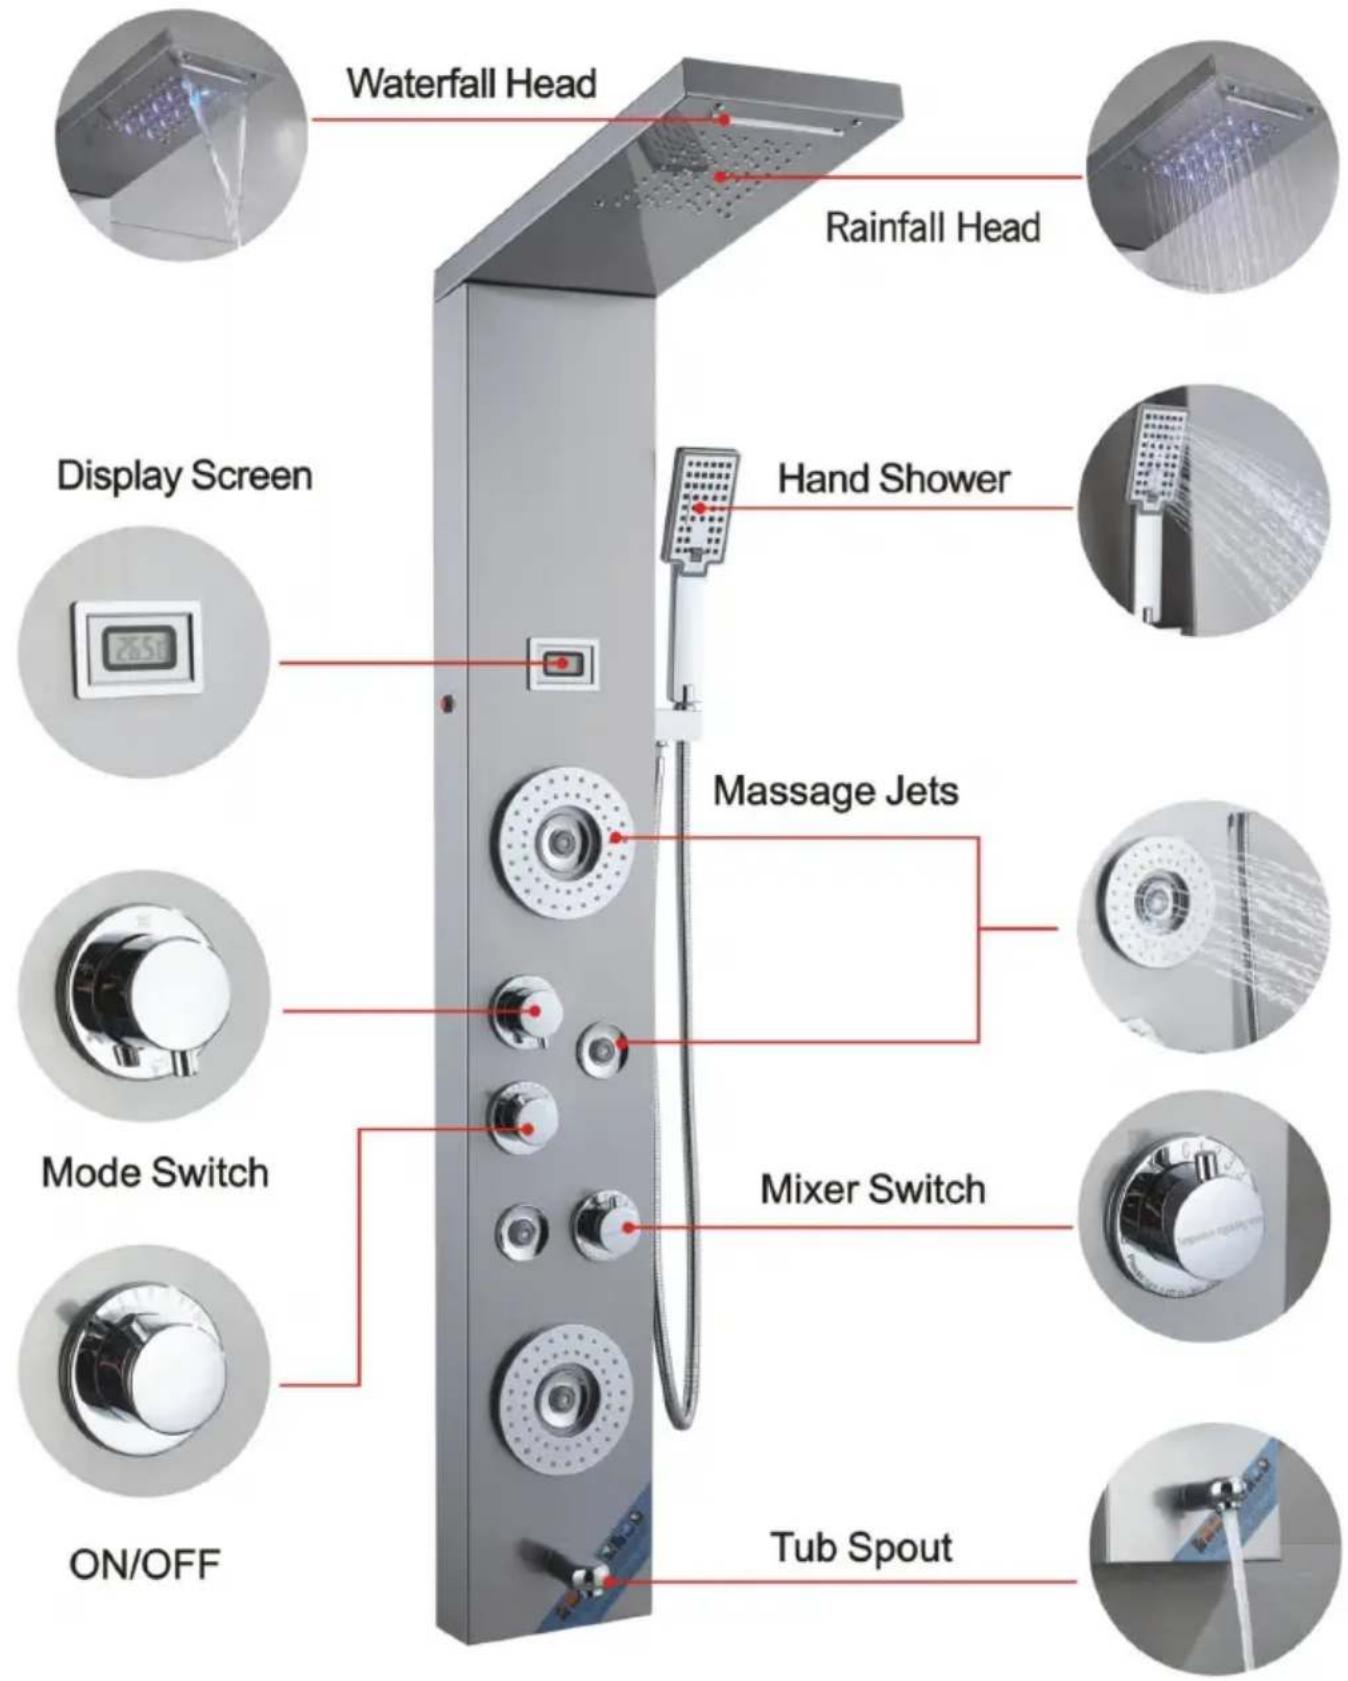
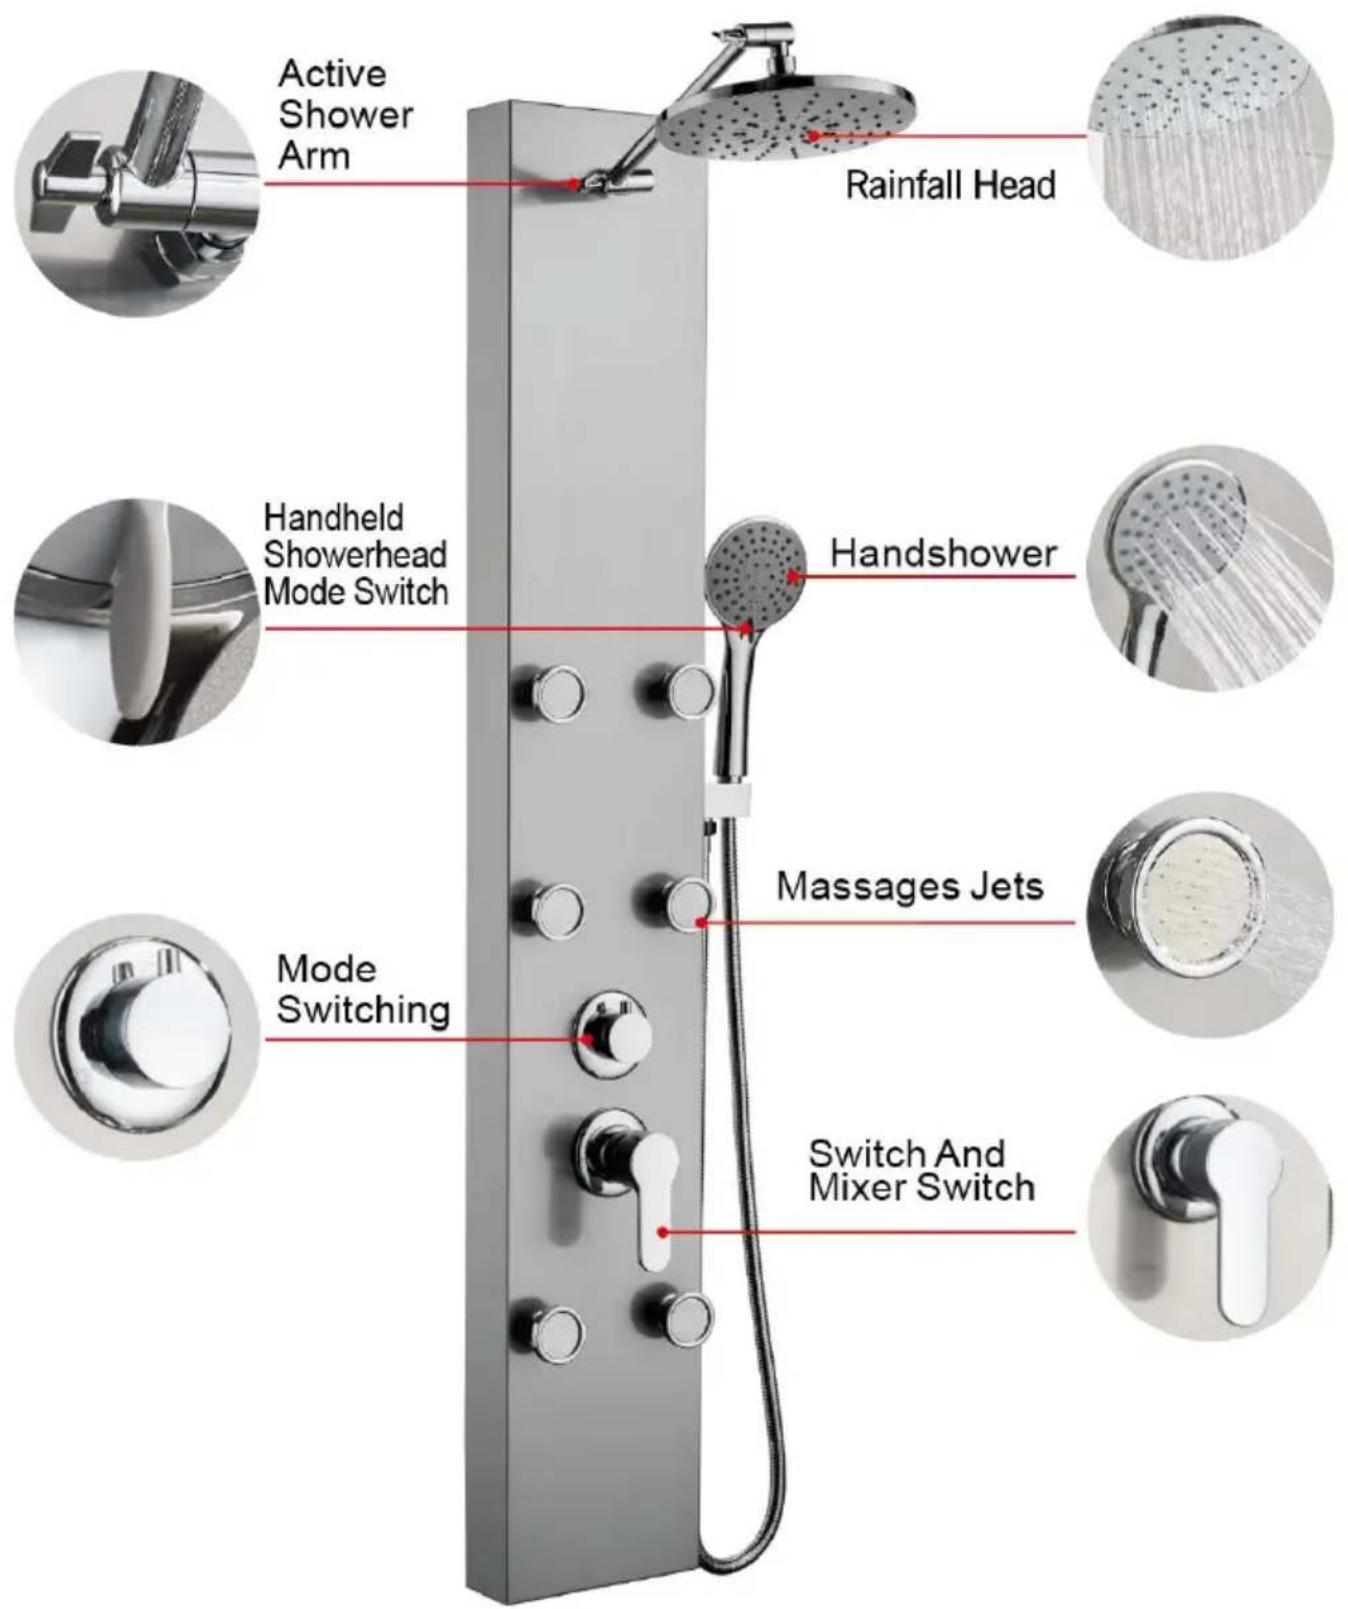
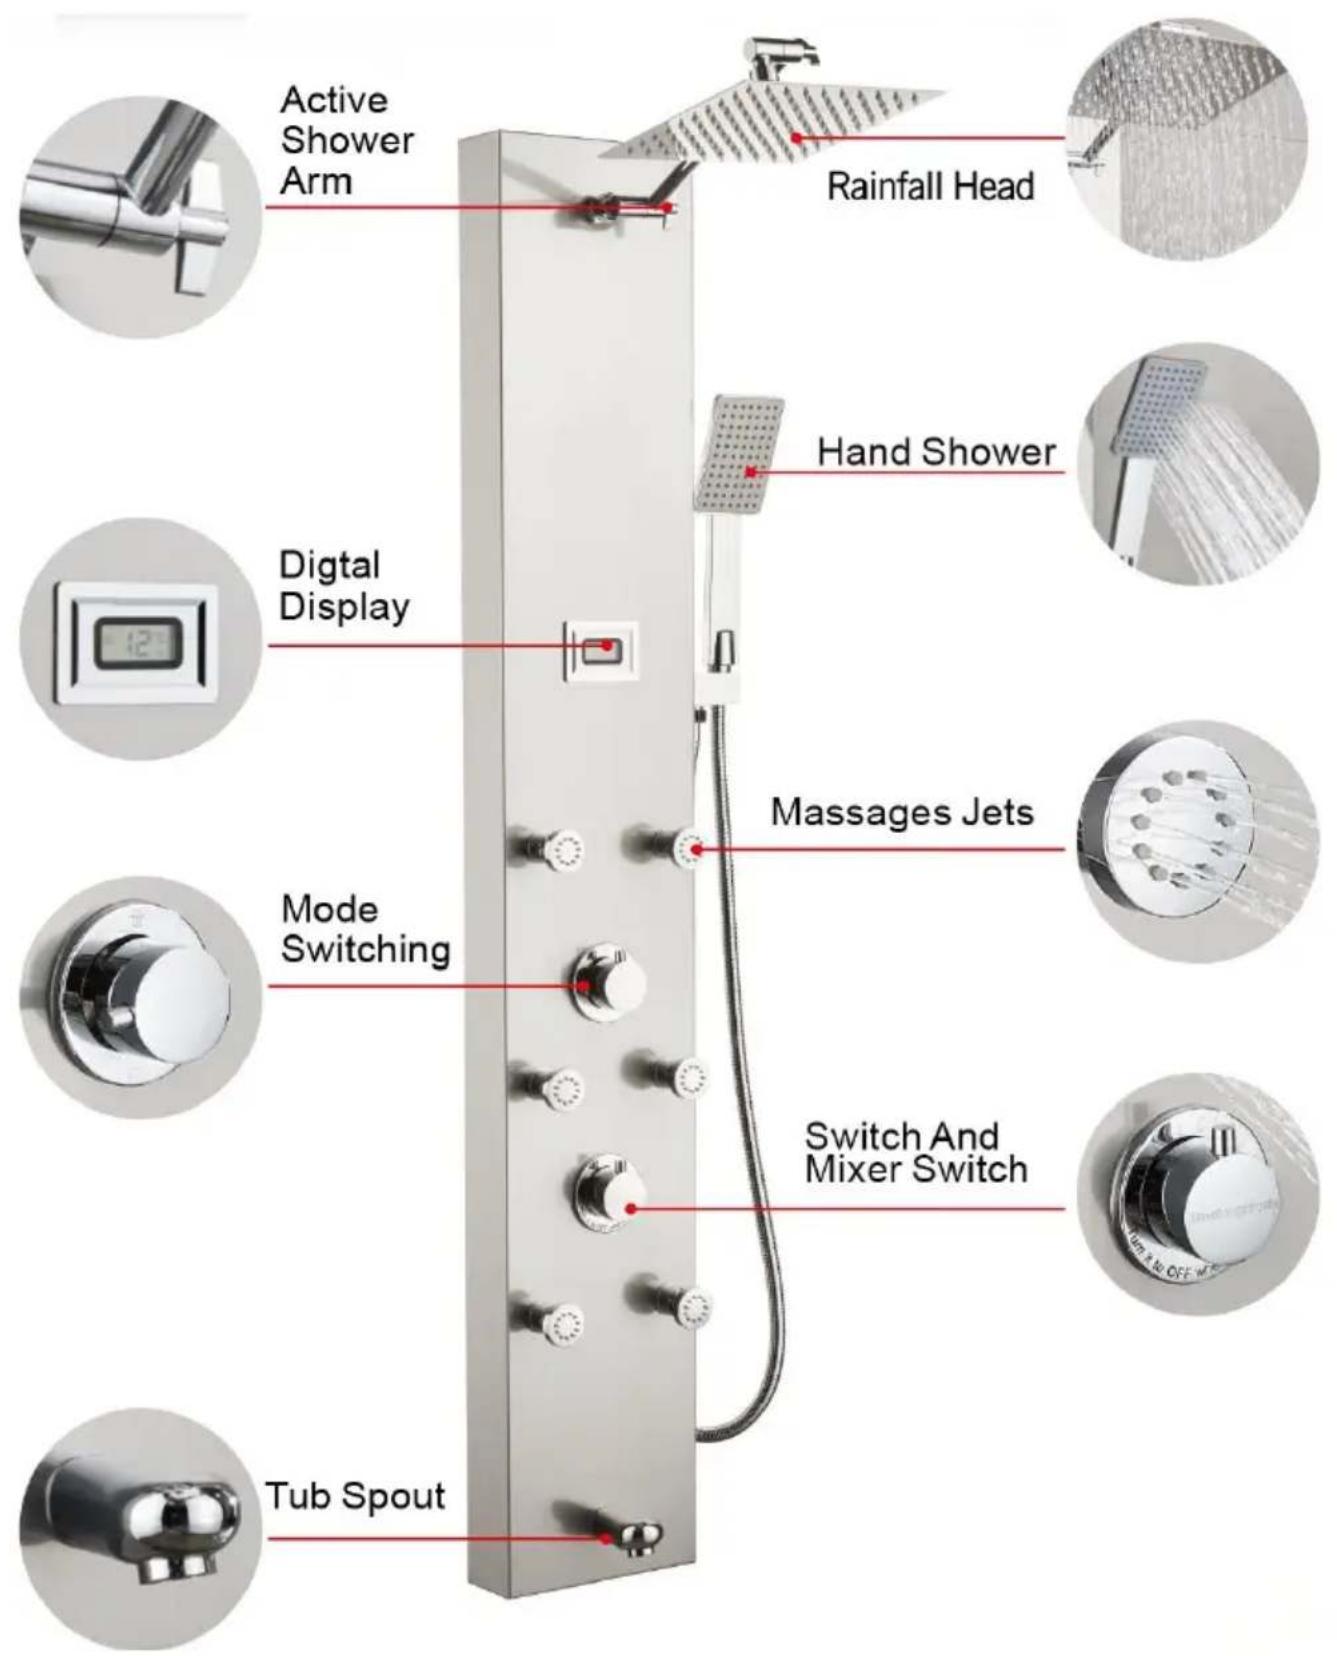
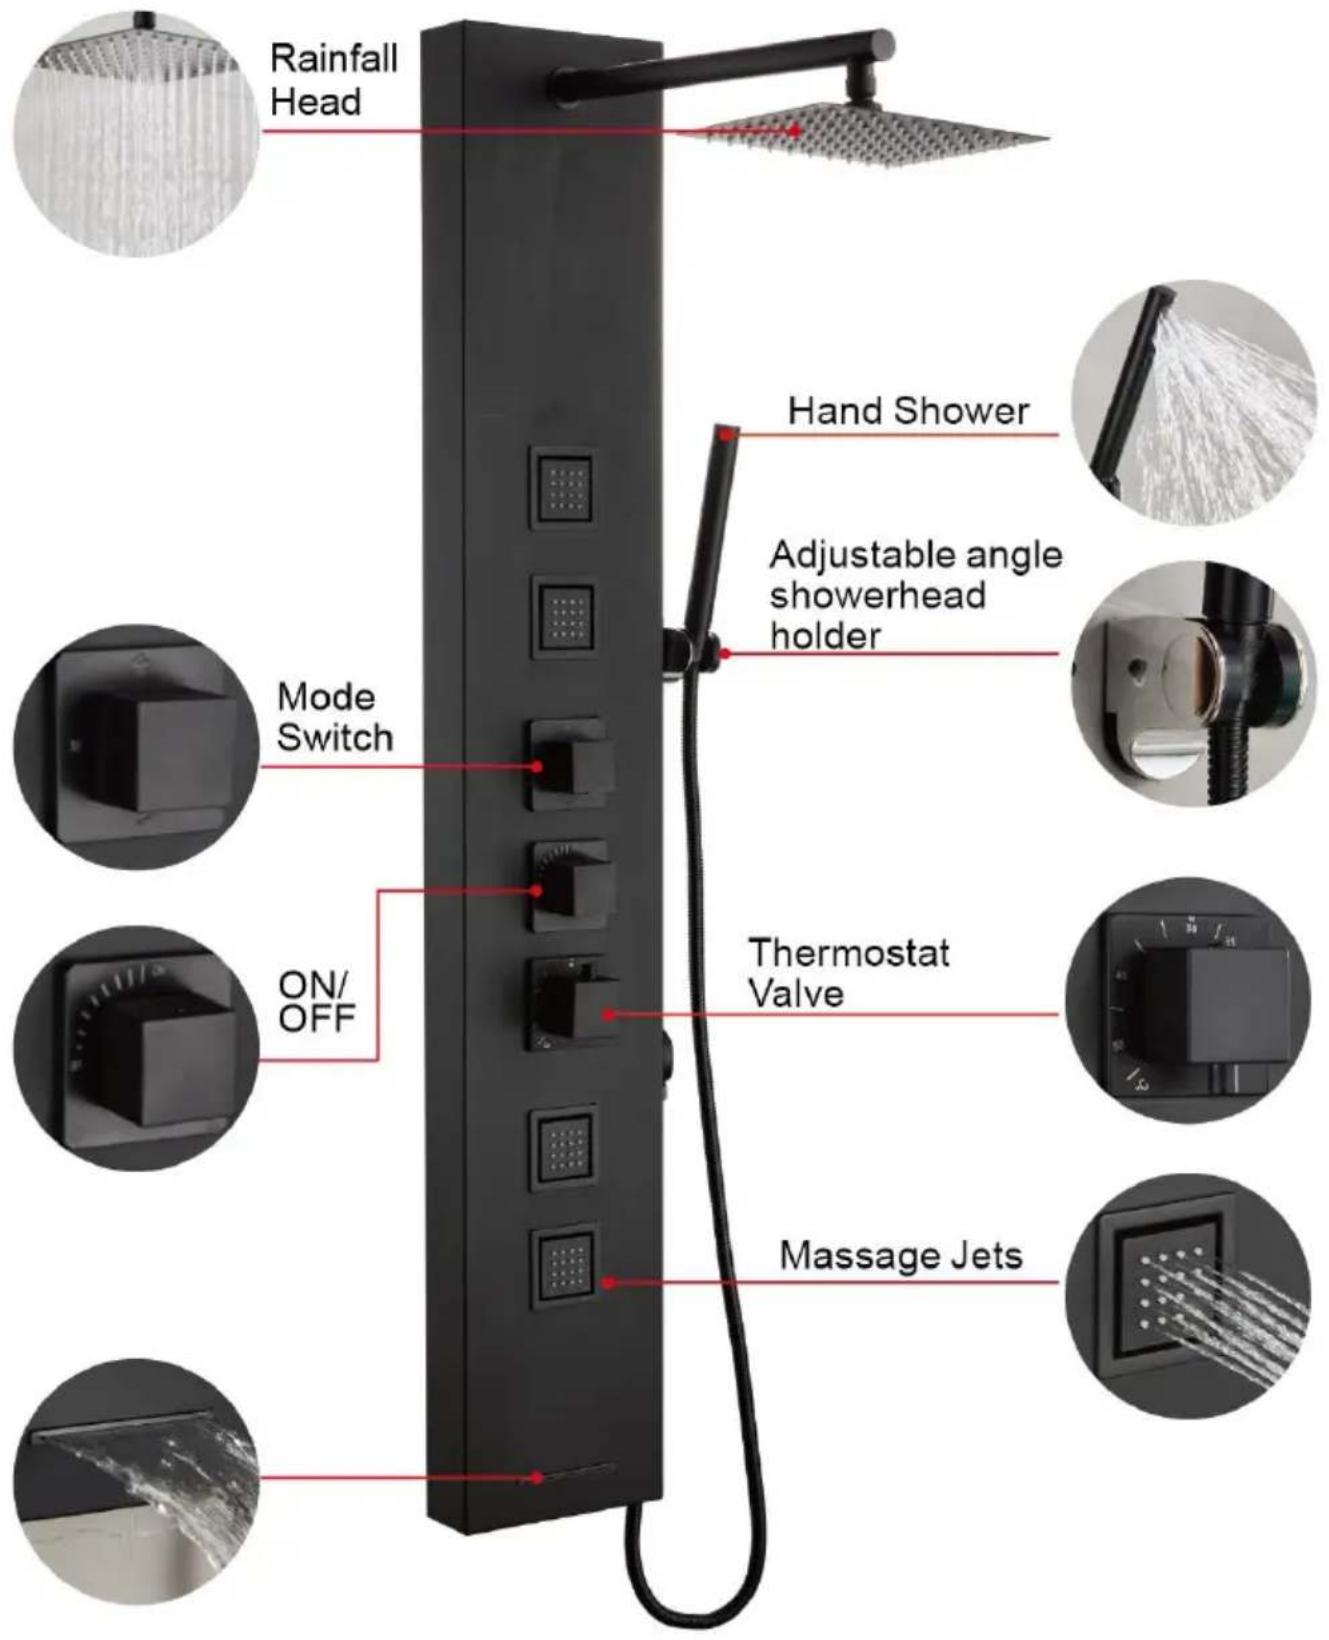
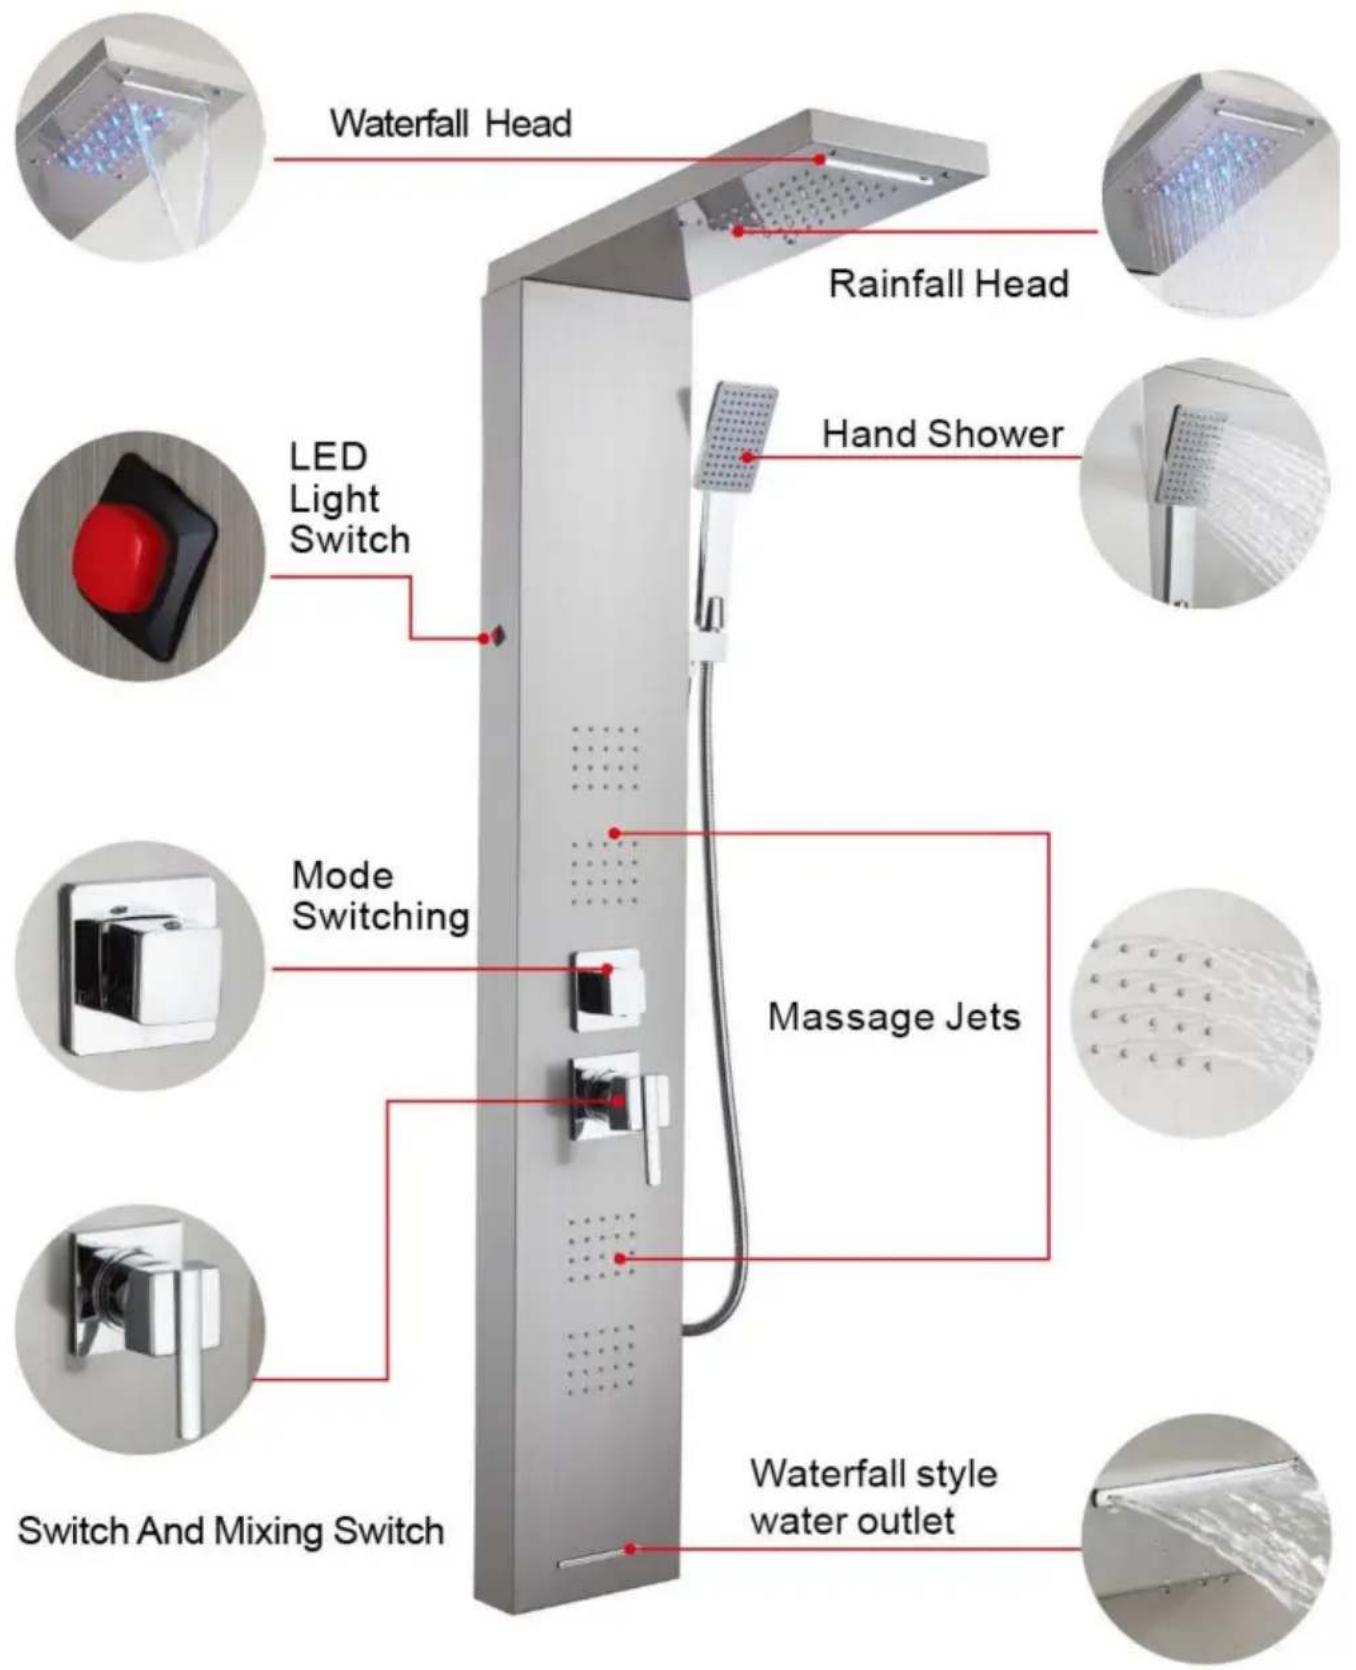
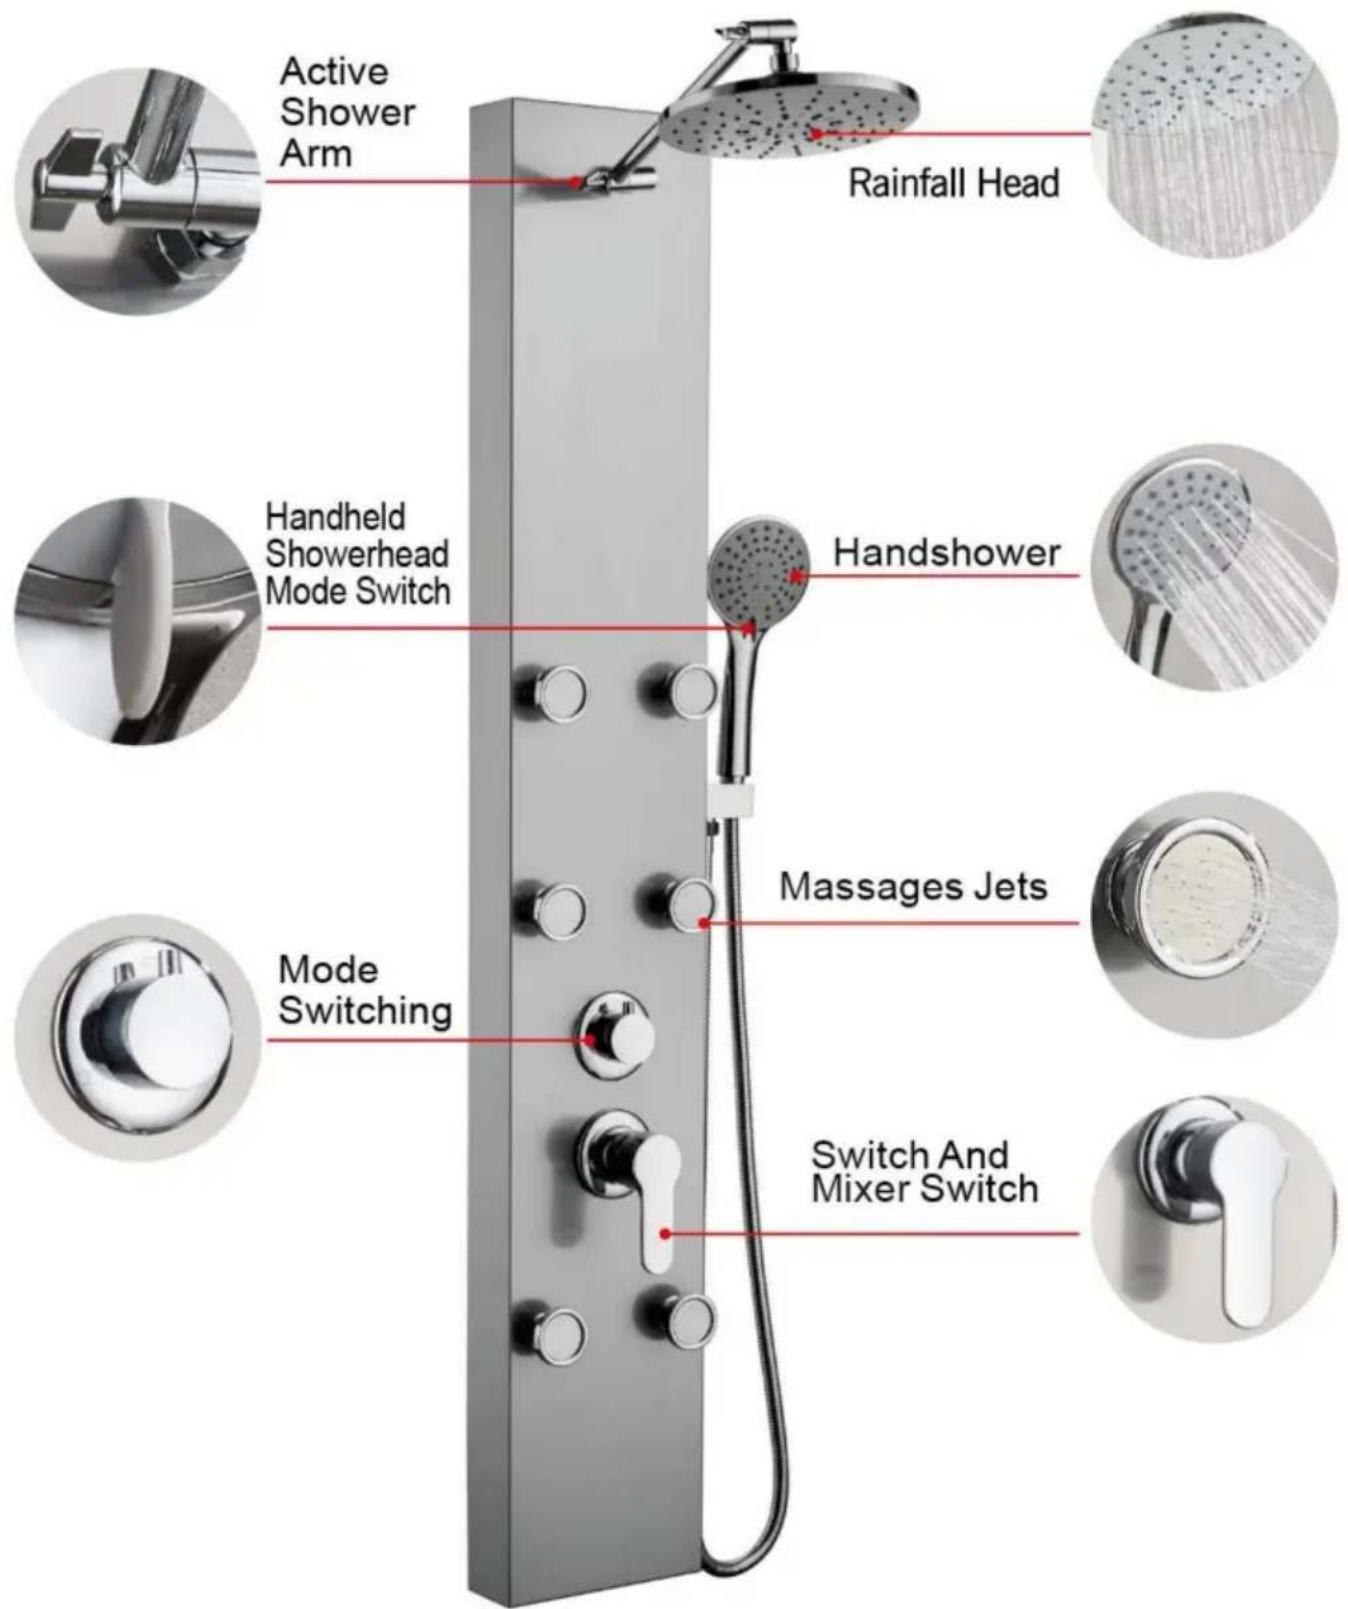
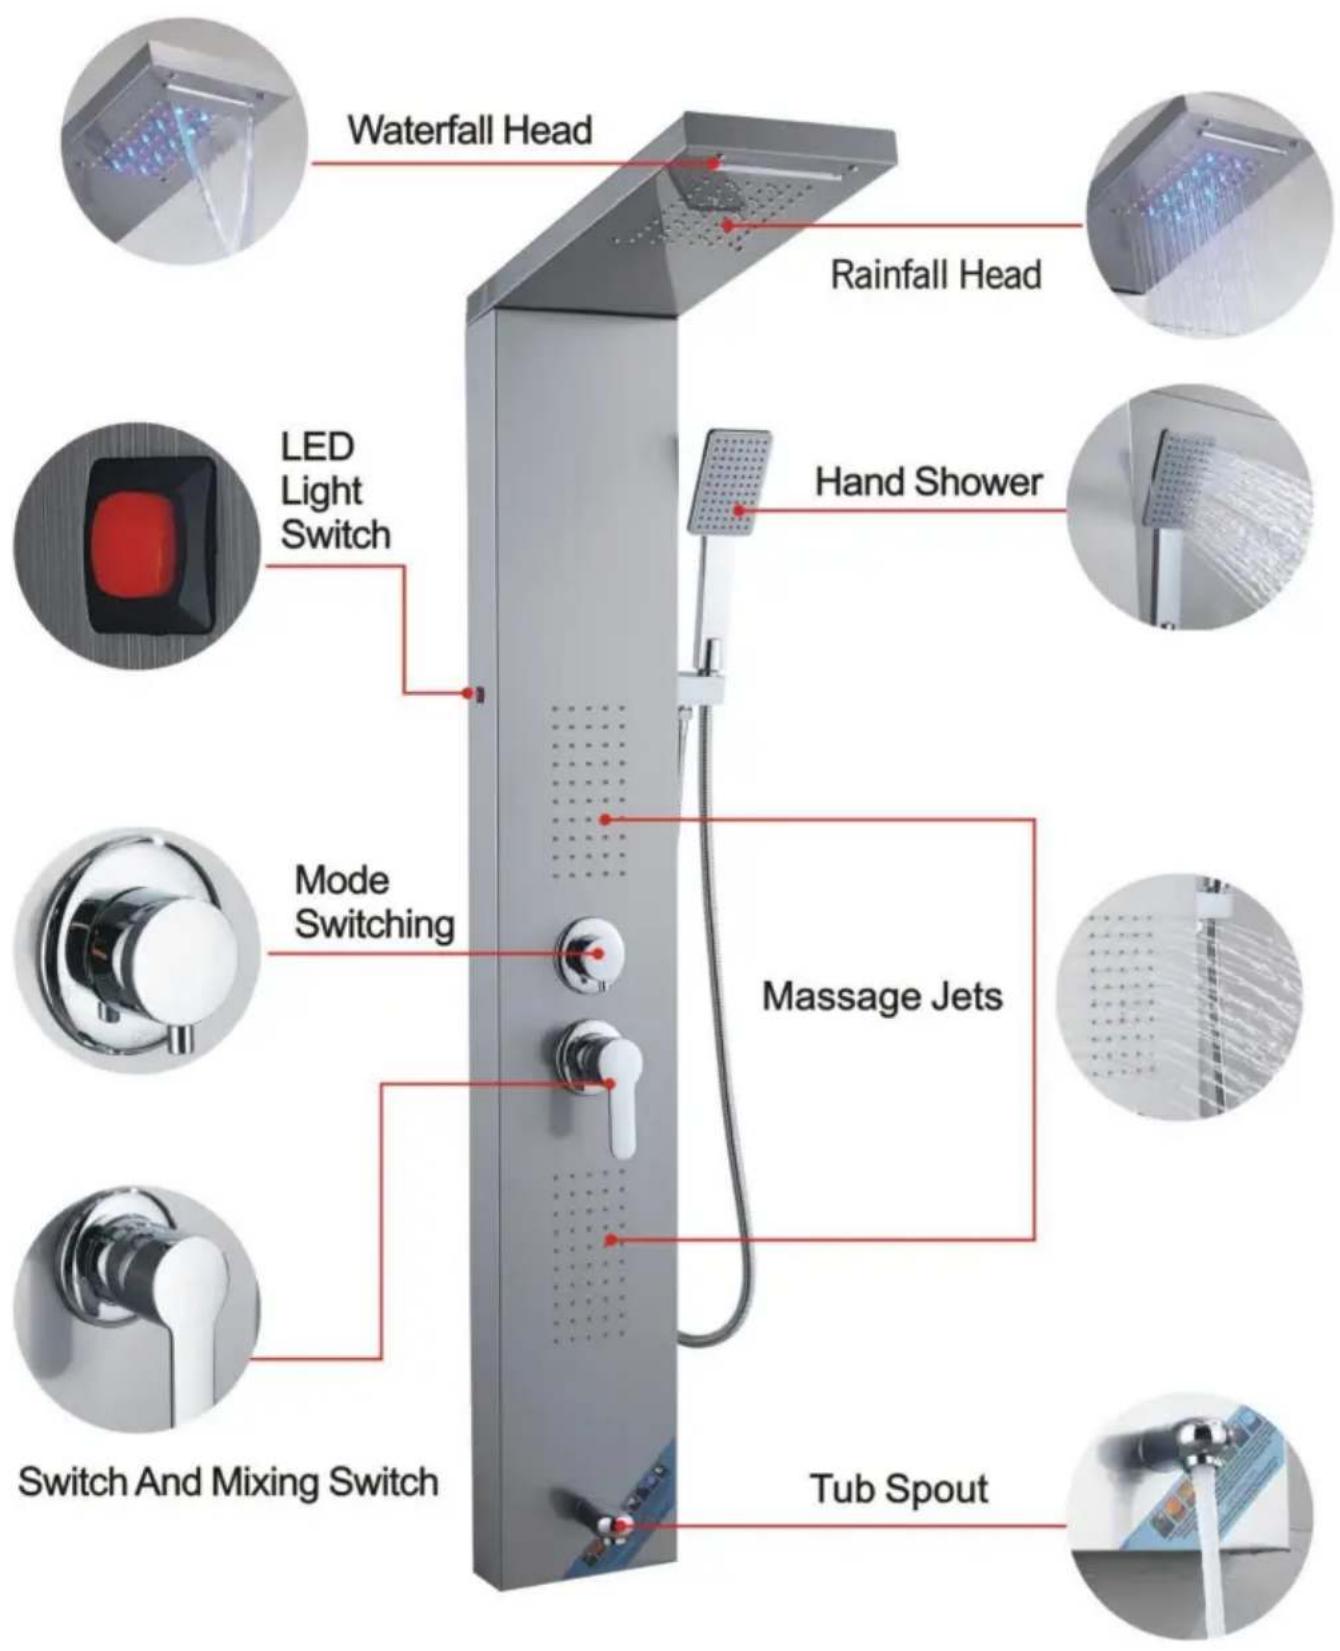
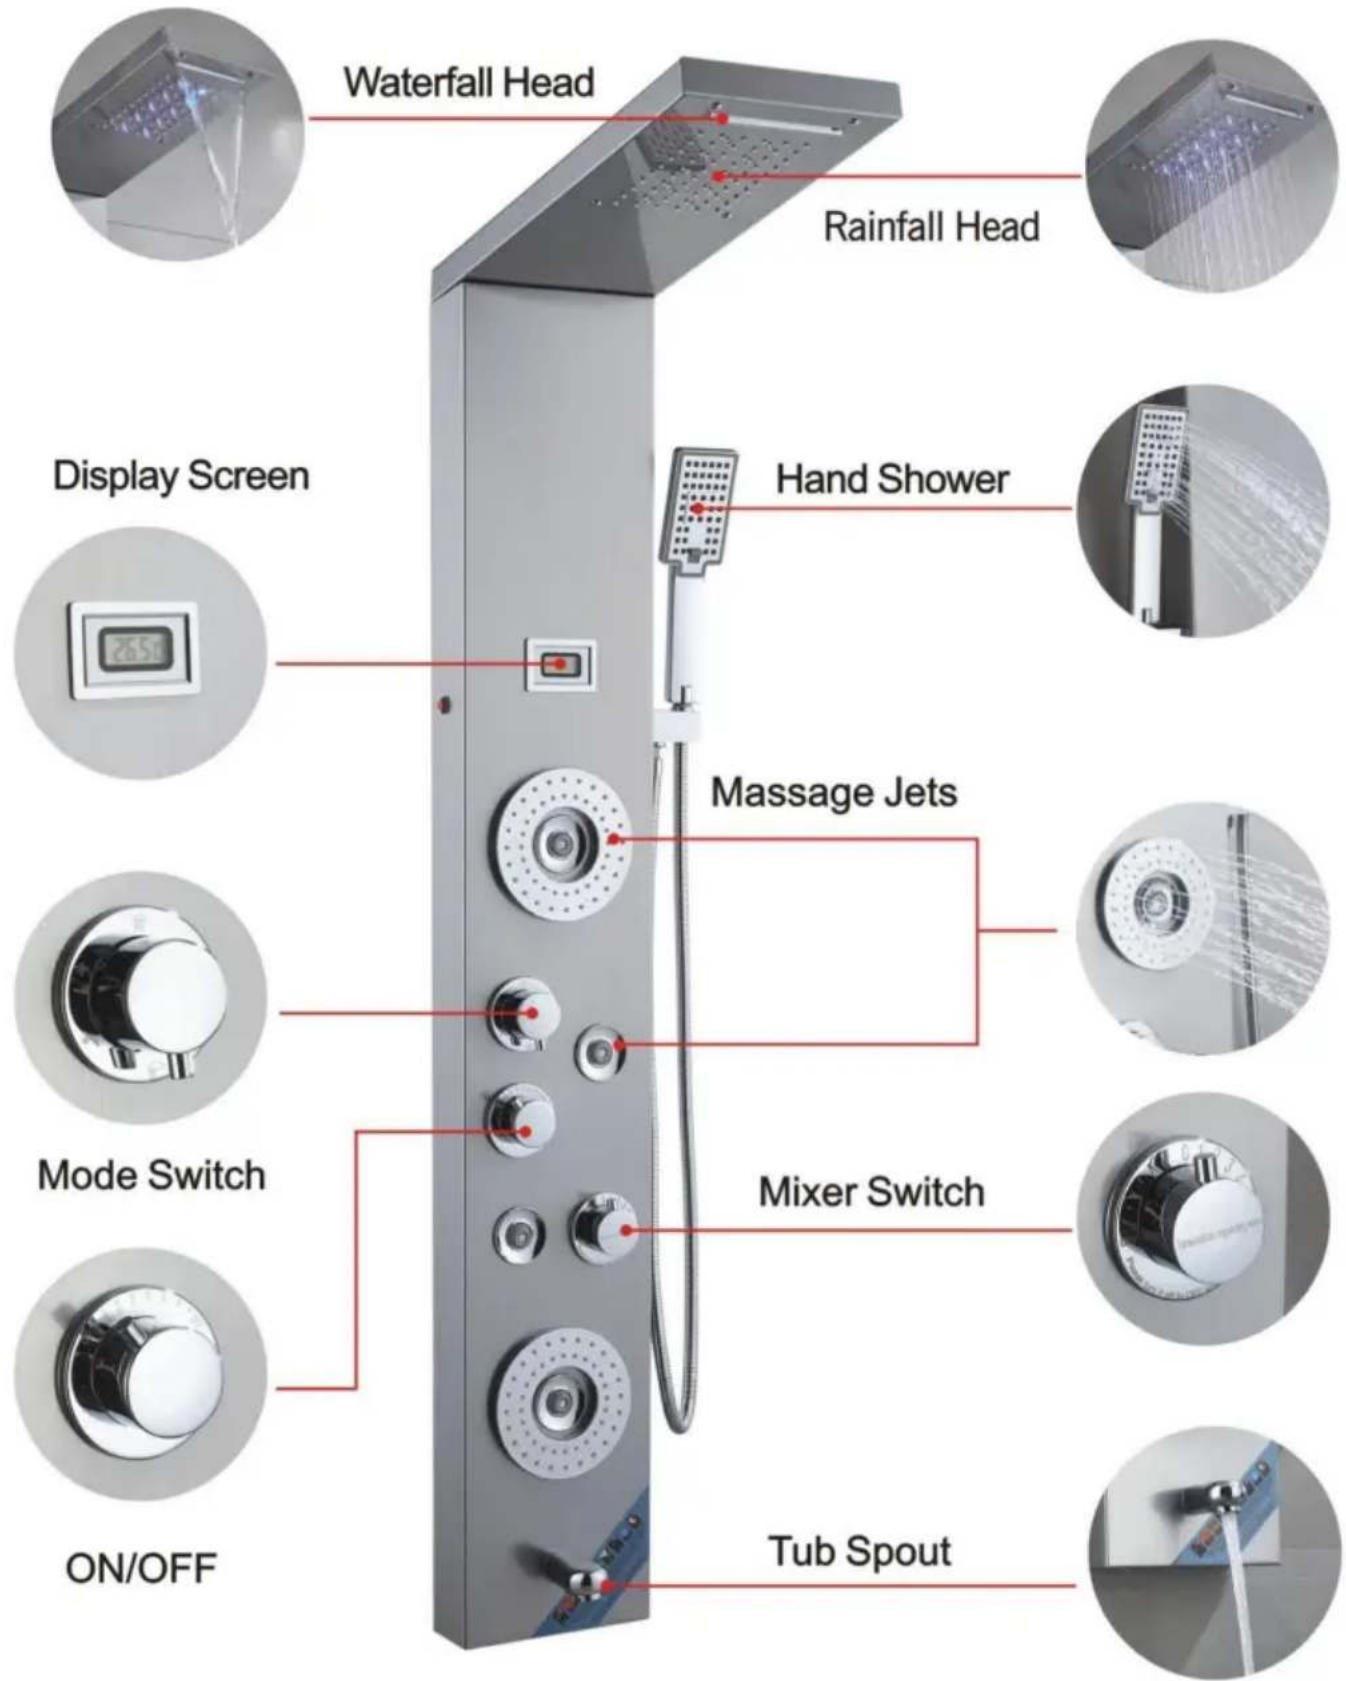
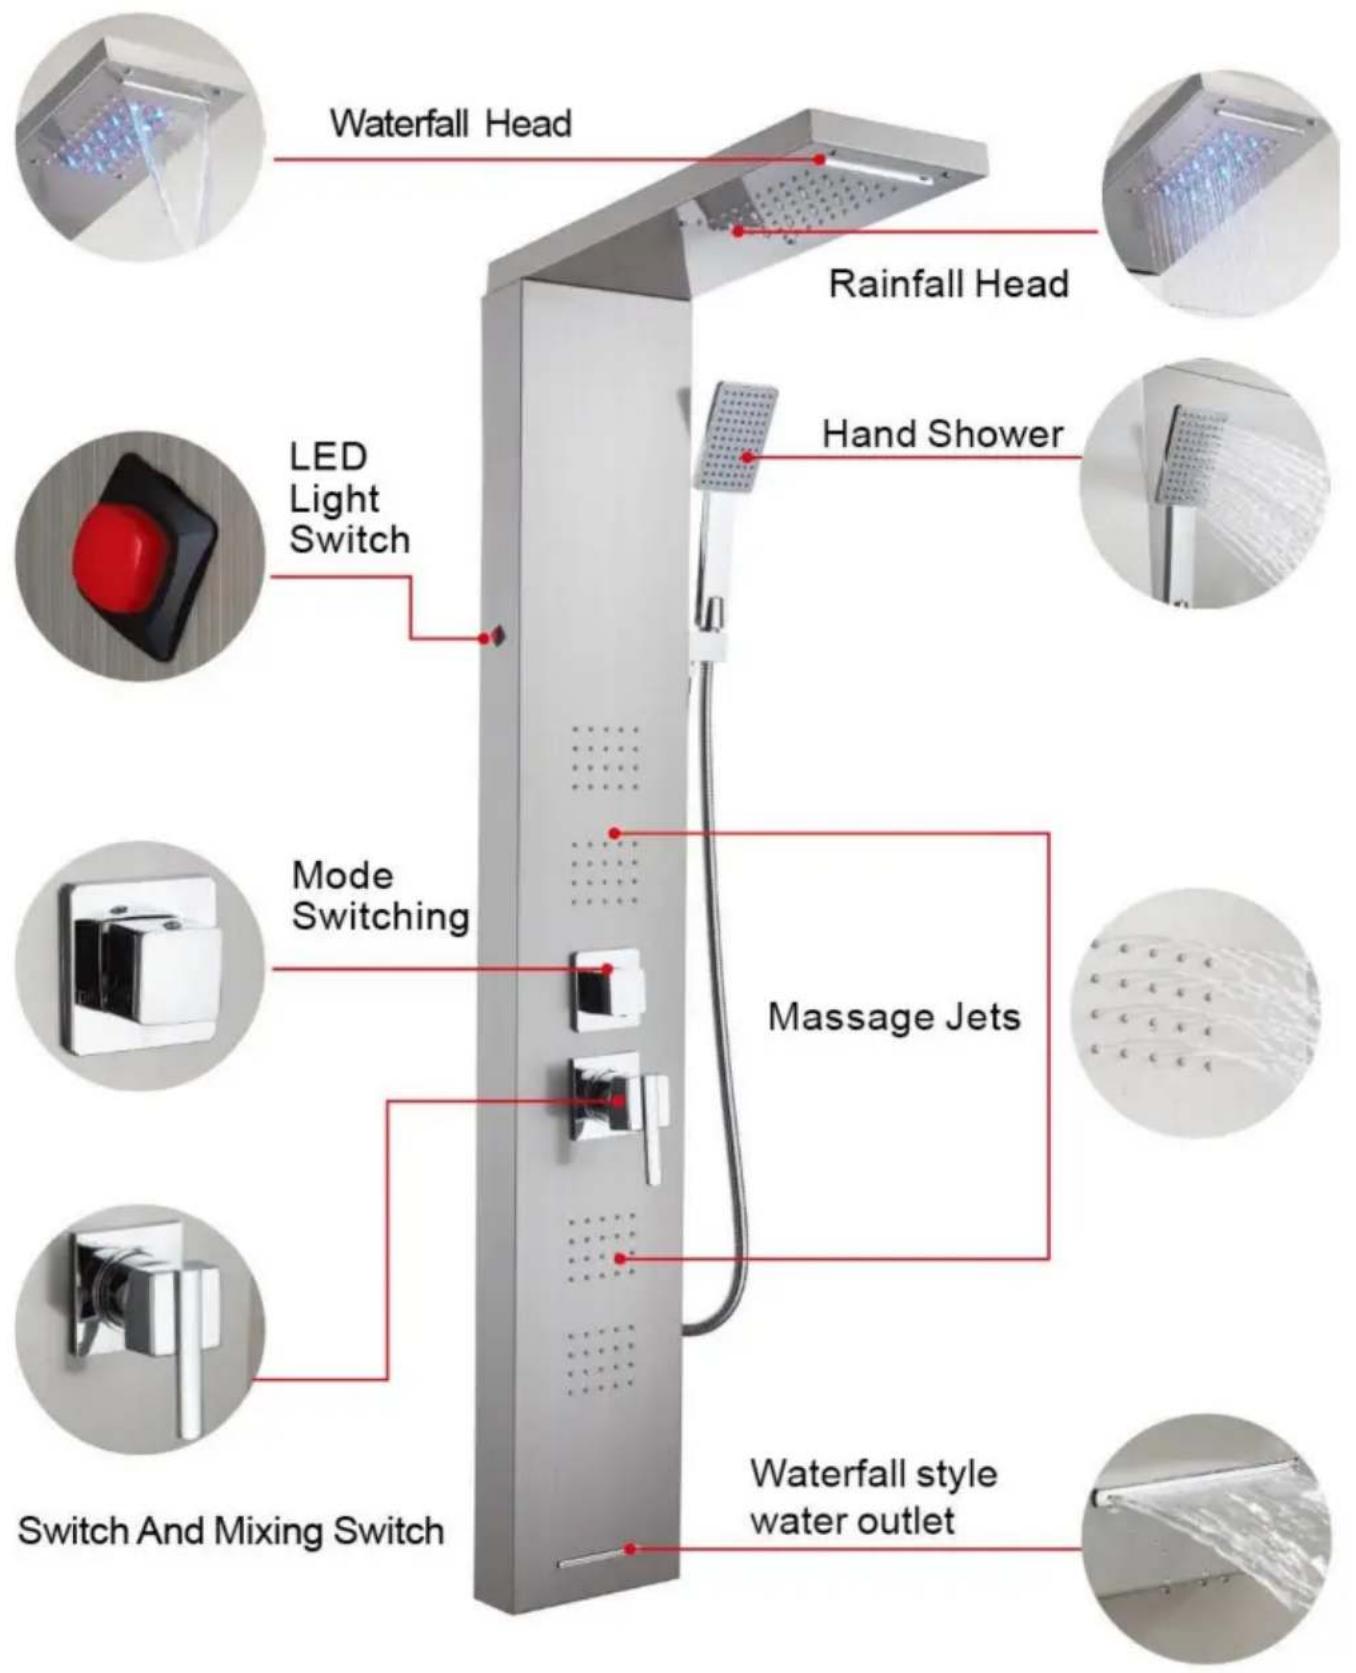
FUNCTION INTRODUCTION
8124FL
FUNCTION INTRODUCTION
7016FL
FUNCTION INTRODUCTION
7002FL
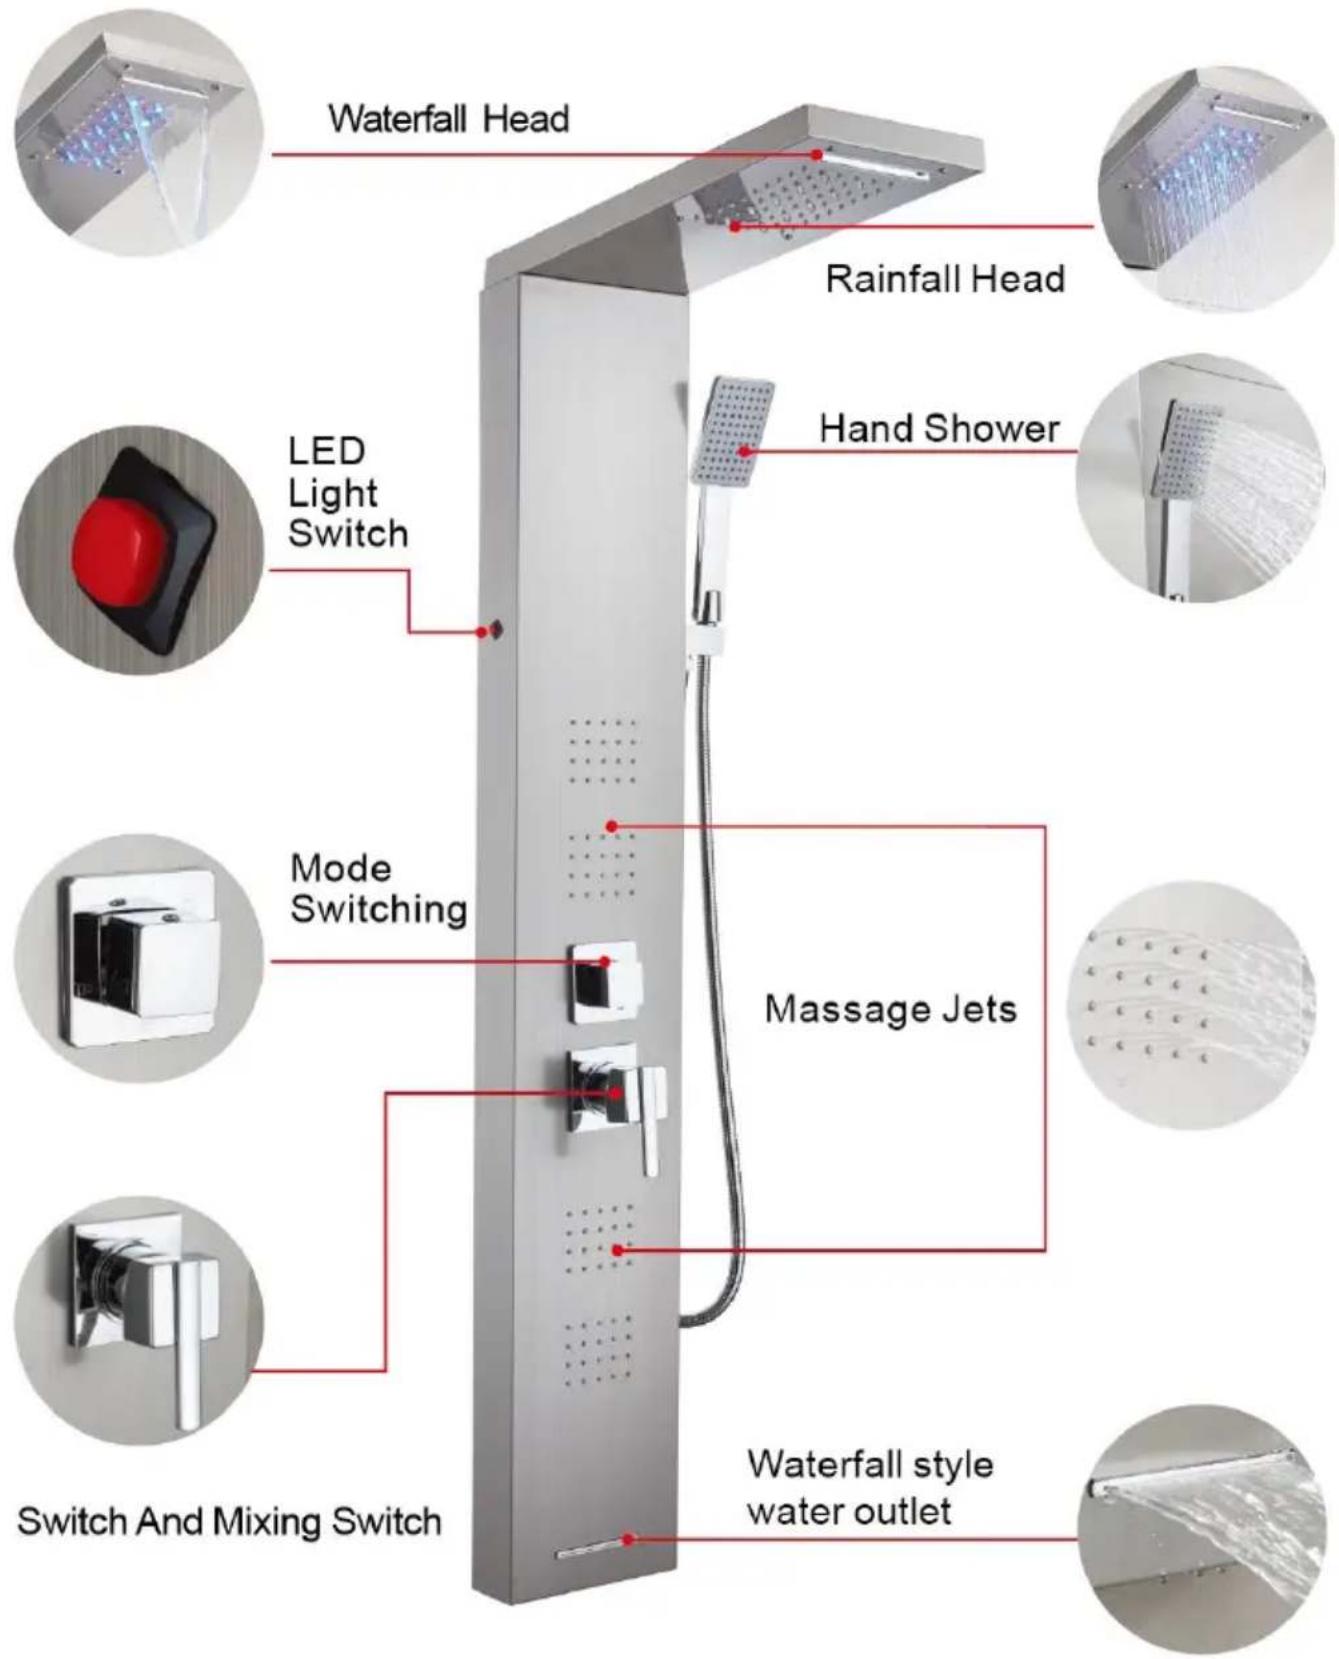
7015FY
Note: For the detailed installation video, please refer to the corresponding model and scan the QR code below to view.
6002FL / 6012FL

8039FL

8124FL

7009FL

7016FL

7002FL

7015FY


Technical Support and E-Warranty Certific www.vevor.com/support
VEVOR
Affordable. Reliable. Home Improvement.
Affordable. Reliable. Home Improvement.
natural_image
Hand holding a white cable against a dark wall, with no visible text or symbolsnatural_image
Close-up of a hand holding a metallic electrical box with wires and connectors (no visible text or symbols)natural_image
Close-up of a white mechanical component with a rectangular cutout and multiple mounting holes (no visible text or symbols)natural_image
Close-up of metallic electrical cables with a numbered label (4) in the corner, no readable text or symbols on the cables themselves.natural_image
Close-up of hands using a tool to adjust or install a cable or wire inside an electrical enclosure (no visible text or symbols)natural_image
Person in gloves installing or adjusting electrical wiring inside a metallic enclosure (no visible text or symbols)natural_image
Close-up of hands holding a small black electrical component with red wires, next to mechanical components (no visible text or symbols)natural_image
Close-up of a metallic connector with a threaded fitting and red cable, no visible text or symbolsnatural_image
Close-up of a metallic industrial electrical panel with wiring and connectors (no visible text or symbols)natural_image
Close-up of a hand holding a hexagonal nut component, no visible text or symbolsnatural_image
Close-up of a white plastic pipe fitting with red and black wires, no visible text or symbolsnatural_image
Close-up of a metallic industrial machine with coiled screw and mounting bracket (no visible text or symbols)natural_image
Person in gloves handling a small object inside a stainless steel enclosure (no visible text or symbols)natural_image
Person in gloves handling a metallic mechanical component inside a stainless steel enclosure (no visible text or symbols)natural_image
Person in gloves installing or adjusting electrical wiring inside a cabinet (no visible text or symbols)natural_image
Close-up of hands in white gloves holding a small black electronic component with red wires, next to mechanical components (no visible text or symbols)natural_image
Close-up of a metallic pipe fitting with a threaded connector and red cable, no visible text or symbolsnatural_image
Close-up of industrial equipment with white connectors and red wiring, no visible text or symbolsnatural_image
Close-up of gloved hands assembling or adjusting a mechanical component with visible tubing and wiring (no text or symbols)natural_image
Close-up of a gloved hand adjusting a small black component next to an open electrical panel with visible wiring and components (no text or symbols)natural_image
Close-up of a hand holding a digital pressure gauge connected to a coiled hose (no visible text or symbols)natural_image
Close-up of hands installing a black panel with a circular component, no visible text or symbolsnatural_image
Close-up of hands using a handheld device to adjust a black electronic device (no visible text or symbols)natural_image
Close-up of a metallic electrical panel with a coiled wire and a small connector (no visible text or symbols)natural_image
Close-up of hands adjusting a black tool with white tubing and yellow valves (no visible text or symbols)natural_image
Close-up of hands adjusting a white mechanical component with tubing and valves (no visible text or symbols)natural_image
Close-up of a hand adjusting a white and yellow piping system with tubing (no visible text or symbols)natural_image
Close-up of a black plastic mechanical component with two circular holes and a central hub, no visible text or symbols.natural_image
Close-up of a black cylindrical mechanical component with a circular base, displayed against a plain white background (no text or symbols visible)natural_image
Person adjusting a black wall-mounted device with control buttons (no visible text or symbols)natural_image
Hand holding a small circular object on a door panel, with a numbered badge showing '10' (no text or symbols on the object itself)natural_image
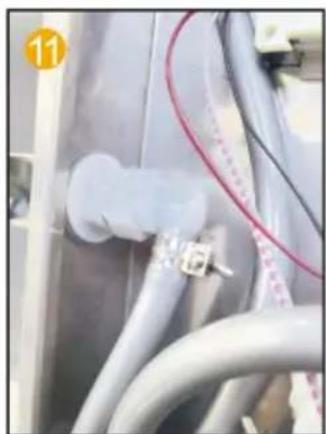
Close-up of hands holding a black cylindrical device with a yellow number 11 in the background (no visible text or symbols)natural_image
Close-up of a black cable with gold connectors attached to a device panel, labeled with number 12 (no text or symbols on the cable itself)


INTRODUCTION AUX FONCTIONS
6002FL / 6012FL

INTRODUCTION AUX FONCTIONS
8039FL

INTRODUCTION AUX FONCTIONS
7009FL

INTRODUCTION AUX FONCTIONS
8124FL
INTRODUCTION AUX FONCTIONS
7016FL

INTRODUCTION AUX FONCTIONS
7002FL

INTRODUCTION AUX FONCTIONS
7015FY

8039FL

8124FL

7009FL

7016FL

7002FL

7015FY


Affordable. Reliable. Home Improvement.
DUSCHPANEELTURM
MODELL:
6002FL, 8039FL, 7009FL, 6012FL, 8124FL, 7016FL, 7002FL, 7015FY
www.vevor.com/support
VEVOR
DUSCHPANEELTURM
Affordable. Reliable. Home Improvement.
6002FL 6012FL
8039FL 8124FL 7009FL 7016FL 7002FL 7015FY
natural_image
Hand holding a white cable against a dark wall, with no visible text or symbolsnatural_image
Close-up of a hand holding a metallic electrical box with wires and connectors (no visible text or symbols)natural_image
Close-up of a white mechanical component with a rectangular cutout and multiple mounting holes (no visible text or symbols)natural_image
Close-up of metallic electrical cables with wires, no visible text or symbolsnatural_image
Close-up of hands using a tool to adjust or install a cable or wire inside an electrical enclosure (no visible text or symbols)natural_image
Person in gloves installing or adjusting electrical wiring inside a metallic enclosure (no visible text or symbols)natural_image
Close-up of hands holding a small black electrical component with red wires, next to mechanical components (no visible text or symbols)natural_image
Close-up of a metallic connector with a red cable inserted, no visible text or symbolsnatural_image
Close-up of a metallic industrial electrical panel with wiring and connectors (no visible text or symbols)natural_image
Close-up of a hand holding a hexagonal nut component, no visible text or symbolsnatural_image
Close-up of a white plastic pipe fitting with red and black wires, no visible text or symbolsnatural_image
Close-up of a metallic industrial cabinet or enclosure with coiled metal components, no visible text or symbols.natural_image
Person in gloves handling a small object inside a stainless steel enclosure (no visible text or symbols)natural_image
Person in gloves handling a metallic mechanical component inside a stainless steel enclosure (no visible text or symbols)natural_image
Person in gloves installing or adjusting electrical wiring inside a cabinet (no visible text or symbols)natural_image
Close-up of hands in white gloves holding a small black electronic component with red wires, next to mechanical parts (no visible text or symbols)natural_image
Close-up of a metallic pipe fitting with a threaded connector and red cable, no visible text or symbolsnatural_image
Close-up of industrial equipment with white connectors and red wiring (no visible text or symbols)natural_image
Close-up of gloved hands assembling or adjusting a mechanical component with visible tubing and wiring (no text or symbols)natural_image
Close-up of a gloved hand adjusting a small black component next to an open electrical panel with visible wiring and components (no text or symbols)natural_image
Close-up of a hand holding a digital pressure gauge connected to a coiled hose (no visible text or symbols)natural_image
Close-up of hands installing or adjusting a black electronic device with a golden bulb (no visible text or symbols)natural_image
Close-up of hands using a handheld device to adjust a black panel (no visible text or symbols)natural_image
Close-up of a metal enclosure with a coiled white hose and a small yellow badge (no text or symbols visible)natural_image
Close-up of hands adjusting a black tool with white tubing and yellow valves (no visible text or symbols)natural_image
Close-up of hands adjusting a white mechanical component with tubing and valves (no visible text or symbols)natural_image
Close-up of a hand adjusting a white and yellow piping system with tubing (no visible text or symbols)natural_image
Close-up of a black plastic mechanical component with two central holes and mounting holes (no text or symbols visible)natural_image
Close-up of a black cylindrical mechanical component with a circular base, displayed against a plain white background (no text or symbols visible)natural_image
Person installing or adjusting a black wall-mounted device with control buttons (no visible text or symbols)natural_image
Hand inserting a coin into a door panel (no text or symbols visible)natural_image
Close-up of hands using a handheld device to adjust or install a device (no visible text or symbols)natural_image
Close-up of a black cable with gold connectors attached to a device panel, labeled with number 12 (no text or symbols on the cable itself)INSTALLATIONSSCHRITTE (ALLGEMEIN)


Installationshinweise
DUSCHPANEEL-SERIE - INSTALLATIONSDIAGRAMM


FUNKTION EINFÜHRUNG
6002FL / 6012FL

FUNKTION EINFÜHRUNG
8039FL

FUNKTION EINFÜHRUNG
7009FL
FUNKTION EINFÜHRUNG
8124FL

FUNKTION EINFÜHRUNG
7016FL

FUNKTION EINFÜHRUNG
7002FL

FUNKTION EINFÜHRUNG
7015FY

8039FL

8124FL

7009FL

7016FL

7002FL

7015FY


Affordable. Reliable. Home Improvement.
TORRE PANNELLO DOCCIA
MODELLO:
6002FLÿ8039FLÿ7009FLÿ6012FLÿ8124FLÿ7016FLÿ7002FLÿ7015FY
elettronica www.vevor.com/support
VEVOR
TORRE PANNELLO DOCCIA
Affordable. Reliable. Home Improvement.

6002FL
6012FL
Italiano:
natural_image
Hand holding a white cable against a dark wall, with no visible text or symbolsnatural_image
Close-up of a hand holding a metallic electrical box with wires and connectors (no visible text or symbols)natural_image
Close-up of a white mechanical component with a rectangular cutout and multiple mounting holes (no visible text or symbols)natural_image
Close-up of metallic electrical cables with wires, no visible text or symbolsnatural_image
Close-up of hands using a tool to adjust or install a cable or wire inside an electrical enclosure (no visible text or symbols)natural_image
Person in gloves installing or adjusting electrical wiring inside a metallic enclosure (no visible text or symbols)natural_image
Close-up of hands holding a small black electrical component with red wires, next to mechanical components (no visible text or symbols)natural_image
Close-up of a metallic connector with a threaded fitting and red cable, no visible text or symbolsnatural_image
Close-up of a metallic industrial electrical panel with wiring and connectors (no visible text or symbols)natural_image
Close-up of a hand holding a hexagonal nut component, no visible text or symbolsnatural_image
Close-up of a white plastic pipe fitting with red and black wires, no visible text or symbolsnatural_image
Close-up of a metallic industrial cabinet or enclosure with coiled metal components, no visible text or symbols.natural_image
Person in gloves handling a small object inside a stainless steel enclosure (no visible text or symbols)natural_image
Person in gloves handling a metallic mechanical component inside a stainless steel enclosure (no visible text or symbols)natural_image
Person in gloves installing or adjusting electrical wiring inside a cabinet (no visible text or symbols)natural_image
Close-up of hands in white gloves holding a small black electronic component with red wires, next to mechanical components (no visible text or symbols)natural_image
Close-up of a metallic pipe fitting with a threaded connector and red cable, no visible text or symbolsnatural_image
Close-up of a metallic industrial cabinet with white connectors and red wiring, no visible text or symbolsnatural_image
Close-up of gloved hands assembling or adjusting a mechanical component with visible tubing and wiring (no text or symbols)natural_image
Close-up of a gloved hand adjusting a small black component next to an electrical panel with visible wiring and components (no text or symbols)natural_image
Close-up of a medical or laboratory equipment setup with tubing and a digital display (no visible text or symbols)natural_image
Close-up of hands installing a black panel with a circular component, no visible text or symbolsnatural_image
Close-up of hands using a handheld device to adjust or install a black electronic device (no visible text or symbols)natural_image
Close-up of a metallic electrical panel with a coiled wire and a small connector (no visible text or symbols)natural_image
Close-up of hands adjusting a mechanical component with tubing and valves (no visible text or symbols)natural_image
Close-up of hands adjusting a white mechanical component with tubing and valves (no visible text or symbols)natural_image
Close-up of a hand adjusting a white and yellow piping system with tubing (no visible text or symbols)natural_image
Close-up of a black plastic mechanical component with two central holes and mounting holes, no visible text or symbols.natural_image
Close-up of a black and silver mechanical component with a circular base, displayed against a plain white background (no text or symbols visible)natural_image
Person placing a black wall-mounted device with multiple control buttons (no visible text or symbols)natural_image
Hand inserting a coin into a door panel (no visible text or symbols)natural_image
Close-up of hands using a handheld device to adjust or install a device (no visible text or symbols)natural_image
Close-up of a black cable with gold connectors attached to a device panel, labeled with number 12 (no text or symbols on the cable itself)


7009FL
8039FL

7016FL
8124FL

7002FL

7015FY


Affordable. Reliable. Home Improvement.
Affordable. Reliable. Home Improvement.

6002FL 6012FL
8039FL 8124FL 7009FL 7016FL 7002FL 7015FY
natural_image
Hand holding a white cable against a dark wall, with no visible text or symbolsnatural_image
Close-up of a hand holding a metallic electrical box with wires and connectors (no visible text or symbols)natural_image
Close-up of a white mechanical component with a rectangular cutout and multiple mounting holes (no visible text or symbols)natural_image
Close-up of metallic electrical cables with a numbered label (4) in the corner, no readable text or symbols on the cables themselves.natural_image
Close-up of hands using a tool to adjust or install a cable or wire inside an electrical enclosure (no visible text or symbols)natural_image
Person in gloves installing or adjusting electrical wiring inside a metallic enclosure (no visible text or symbols)natural_image
Close-up of hands holding a black electronic component with red wires, next to mechanical parts (no visible text or symbols)natural_image
Close-up of a metallic connector with a threaded fitting and red cable, no visible text or symbolsnatural_image
Close-up of a metallic industrial electrical panel with wiring and connectors (no visible text or symbols)natural_image
Close-up of a hand holding a hexagonal nut component, no visible text or symbolsnatural_image
Close-up of a white plastic hose with red cable and pipe, no visible text or symbolsnatural_image
Close-up of a metallic industrial machine with coiled screw and mounting bracket (no visible text or symbols)natural_image
Close-up of gloved hands installing or adjusting a metal component inside a stainless steel enclosure (no visible text or symbols)natural_image
Person in gloves handling a metallic mechanical component inside a stainless steel enclosure (no visible text or symbols)natural_image
Person in gloves installing or adjusting electrical wiring inside a cabinet (no visible text or symbols)natural_image
Close-up of hands in white gloves holding a small black electronic component with red wires, next to mechanical components (no visible text or symbols)natural_image
Close-up of a metallic pipe fitting with a threaded connector and red cable, no visible text or symbolsnatural_image
Close-up of a metallic industrial cabinet with white connectors and red wiring, no visible text or symbolsnatural_image
Close-up of gloved hands assembling or adjusting a mechanical component with visible tubing and wiring (no text or symbols)natural_image
Close-up of a gloved hand adjusting a small black component next to an electrical panel with visible wiring and components (no text or symbols)natural_image
Close-up of a medical or laboratory equipment setup with tubing and a digital display (no visible text or symbols)natural_image
Close-up of hands installing a black panel with a circular component, no visible text or symbolsnatural_image
Close-up of hands using a handheld device to adjust a black electronic device (no visible text or symbols)natural_image
Close-up of a metallic electrical panel with a coiled wire and a small connector (no visible text or symbols)natural_image
Close-up of hands adjusting a black tool with white tubing and yellow valves (no visible text or symbols)natural_image
Close-up of hands adjusting a white mechanical component with tubing and valves (no visible text or symbols)natural_image
Close-up of a hand adjusting a white and yellow piping system with tubing (no visible text or symbols)natural_image
Close-up of a black plastic mechanical component with two circular holes and a central hub, no visible text or symbols.natural_image
Close-up of a black and silver mechanical component with a circular base, displayed against a plain white background (no text or symbols visible)natural_image
Person adjusting a black wall-mounted device with control buttons (no visible text or symbols)natural_image
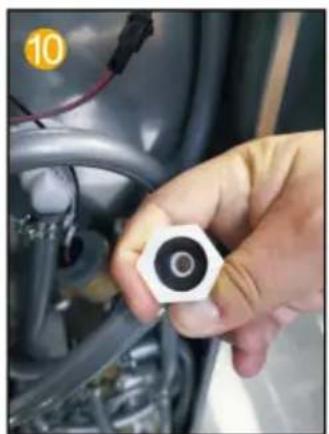
Hand holding a small circular object on a door panel, with a numbered badge showing '10' (no text or symbols on the object itself)
natural_image
Close-up of hands holding a black cylindrical device with a yellow number 11 in the background (no visible text or symbols)natural_image
Close-up of a black cable with gold connectors attached to a device panel, labeled with number 12 (no text or symbols on the cable itself)


7009FL
8039FL

7016FL 7002FL
8124FL


Año fiscal 7015


Affordable. Reliable. Home Improvement.
PANEL PRYSZNICOWY WIEŻA
MODEL:
6002FL, 8039FL, 7009FL, 6012FL, 8124FL, 7016FL, 7002FL, 7015FY
Affordable. Reliable. Home Improvement.
PANEL PRYSZNICOWY WIEŻA
natural_image
Series of seven different shower unit designs, each shown in a separate panel with no visible text or labels.6002FL 6012FL
8039FL 8124FL 7009FL 7016FL 7002FL 7015FY
natural_image
Hand holding a white cable against a dark wall, with no visible text or symbolsnatural_image
Close-up of a hand holding a metallic electrical box with wires and connectors (no visible text or symbols)natural_image
Close-up of a white mechanical component with a rectangular cutout and multiple mounting holes (no visible text or symbols)natural_image
Close-up of metallic electrical cables with a numbered label (4) in the corner, no readable text or symbols on the cables themselves.natural_image
Close-up of hands using a tool to adjust or install a cable or wire inside an electrical enclosure (no visible text or symbols)natural_image
Person in gloves installing or adjusting electrical wiring inside a metallic enclosure (no visible text or symbols)Włóż 2 baterie AA do komory baterii.
natural_image
Close-up of hands holding a small black electrical component with red wires, next to mechanical components (no visible text or symbols)natural_image
Close-up of a metallic connector with a red cable and blue wire, no visible text or symbolsnatural_image
Close-up of a metallic industrial electrical panel with wiring and connectors (no visible text or symbols)natural_image
Close-up of a hand holding a hexagonal nut component, no visible text or symbols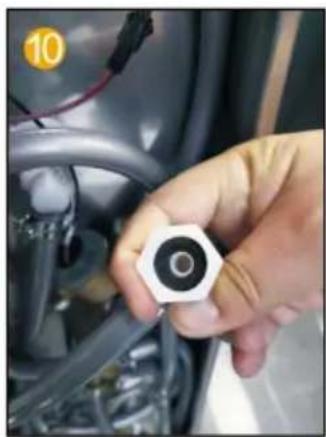
natural_image
Close-up of a hand holding a hexagonal nut component, no visible text or symbols
natural_image
Close-up of a white plastic pipe fitting with red and black wires, no visible text or symbols
natural_image
Close-up of a white plastic pipe fitting with red and black wires, no visible text or symbols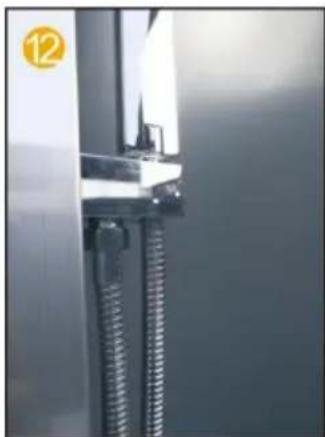
natural_image
Close-up of a metallic mechanical component with threaded spring and mounting bracket (no visible text or symbols)natural_image
Close-up of gloved hands installing or adjusting a metal component inside a stainless steel enclosure (no visible text or symbols)natural_image
Person in gloves handling a metallic mechanical component inside a stainless steel enclosure (no visible text or symbols)natural_image
Person in gloves installing or adjusting electrical wiring inside an open industrial box (no visible text or symbols)natural_image
Close-up of hands in white gloves holding a small electronic component with red wires, next to mechanical parts (no visible text or symbols)natural_image
Close-up of a metallic pipe fitting with a threaded connector and red cable, no visible text or symbolsnatural_image
Close-up of a metallic industrial cabinet with white connectors and red wiring, no visible text or symbolsnatural_image
Close-up of gloved hands assembling or adjusting a mechanical component with visible tubing and components (no text or symbols)natural_image
Close-up of a gloved hand adjusting a small black component next to an electrical panel with visible wiring and components (no text or symbols)natural_image
Close-up of a hand holding a digital pressure gauge connected to a coiled hose (no visible text or symbols)natural_image
Close-up of hands installing or adjusting a black electronic device with a golden bulb (no visible text or symbols)natural_image
Close-up of hands using a handheld device to adjust a black panel (no visible text or symbols)natural_image
Close-up of a metal enclosure with a coiled white hose and a small yellow badge (no text or symbols visible)natural_image
Close-up of hands adjusting a black tool with white tubing and yellow valves (no visible text or symbols)natural_image
Close-up of hands adjusting a white mechanical component with tubing and valves (no visible text or symbols)natural_image
Close-up of a hand adjusting a white and yellow medical tubing with tubing, no visible text or symbolsnatural_image
Close-up of a black plastic mechanical component with two central holes and mounting holes (no text or symbols visible)natural_image
Close-up of a black cylindrical mechanical component with a circular base and metallic rim, displayed against a plain white background (no text or symbols visible)natural_image
Person adjusting a black wall-mounted device with control buttons (no visible text or symbols)natural_image
Hand inserting a coin into a door panel with control buttons (no text or symbols visible)natural_image
Close-up of hands using a handheld device to adjust or install a device (no visible text or symbols)natural_image
Close-up of a black cable with gold connectors attached to a device panel, labeled with number 12 (no text or symbols on the cable itself)


WPROWADZENIE DO FUNKCJI
6002FL / 6012FL

WPROWADZENIE DO FUNKCJI
8039FL

WPROWADZENIE DO FUNKCJI
7009FL

WPROWADZENIE DO FUNKCJI
8124FL

WPROWADZENIE DO FUNKCJI
7016FL
WPROWADZENIE DO FUNKCJI
7002FL

WPROWADZENIE DO FUNKCJI
7015rok podatkowy
8039FL

8124FL

7009FL

7016FL

7002FL

7015rok podatkowy


Affordable. Reliable. Home Improvement.
DUSCHPANELTORN
MODELL:
6002FL, 8039FL, 7009FL, 6012FL, 8124FL, 7016FL, 7002FL, 7015FY
www.vevor.com/support
VEVOR
DUSCHPANELTORN
Affordable. Reliable. Home Improvement.

natural_image
Series of seven different shower models with various device configurations, shown from different angles and sizes (no text or labels visible)6002FL 6012FL
8039FL 8124FL 7009FL 7016FL 7002FL 7015FY
natural_image
Hand holding a white cable against a dark wall, with no visible text or symbolsnatural_image
Close-up of a hand holding a metallic electrical box with wires and connectors (no visible text or symbols)natural_image
Close-up of a white mechanical component with a rectangular cutout and multiple mounting holes (no visible text or symbols)natural_image
Close-up of metallic electrical cables with a numbered label (4) in the corner, no readable text or symbols on the cables themselves.natural_image
Close-up of hands using a tool to adjust or install a cable or wire inside an electrical enclosure (no visible text or symbols)natural_image
Person in gloves installing or adjusting electrical wiring inside a metallic enclosure (no visible text or symbols)natural_image
Close-up of hands holding a small black electrical component with red wires, next to mechanical components (no visible text or symbols)natural_image
Close-up of a metallic connector with a red cable inserted, no visible text or symbolsnatural_image
Close-up of a metallic industrial electrical panel with wiring and connectors (no visible text or symbols)natural_image
Close-up of a hand holding a hexagonal nut component, no visible text or symbolsnatural_image
Close-up of a white plastic pipe fitting with red and black wires, no visible text or symbolsnatural_image
Close-up of a metallic mechanical component with threaded spring and mounting bracket (no visible text or symbols)natural_image
Close-up of gloved hands installing or adjusting a metal component inside a stainless steel enclosure (no visible text or symbols)natural_image
Person in gloves handling a metallic mechanical component inside a stainless steel enclosure (no visible text or symbols)natural_image
Person in gloves installing or adjusting electrical wiring inside an open industrial box (no visible text or symbols)natural_image
Close-up of hands in white gloves holding a small electronic component with red wires, next to mechanical parts (no visible text or symbols)natural_image
Close-up of a metallic pipe fitting with a threaded connector and red cable, no visible text or symbolsnatural_image
Close-up of a metallic industrial cabinet with white connectors and red wiring, no visible text or symbolsnatural_image
Close-up of gloved hands assembling or adjusting a mechanical component with visible tubing and components (no text or symbols)natural_image
Close-up of a gloved hand adjusting a small black component next to an electrical panel with visible wiring and components (no text or symbols)natural_image
Close-up of a hand holding a digital pressure gauge connected to a coiled hose (no visible text or symbols)natural_image
Close-up of hands installing a black panel with a circular component, no visible text or symbolsnatural_image
Close-up of hands using a handheld device to adjust or install a black electronic device (no visible text or symbols)natural_image
Close-up of a metallic electrical panel with a coiled wire and a terminal outlet (no visible text or symbols)natural_image
Close-up of hands adjusting a black tool with white tubing and yellow valves (no visible text or symbols)natural_image
Close-up of hands adjusting a white plastic component with tubing and valves (no visible text or symbols)natural_image
Close-up of a hand adjusting a white and yellow piping system with tubing (no visible text or symbols)natural_image
Close-up of a black plastic mechanical component with two central holes and mounting holes, no visible text or symbols.natural_image
Close-up of a black and silver mechanical component with a circular base, displayed against a plain white background (no text or symbols visible)Installation av
natural_image
Person adjusting a black wall-mounted device with control buttons (no visible text or symbols)natural_image
Hand inserting a coin into a door panel (no text or symbols visible)natural_image
Close-up of hands using a handheld device to adjust or install a device (no visible text or symbols)natural_image
Close-up of a black cable with gold connectors attached to a device panel, labeled with number 12 (no text or symbols on the cable itself)


FUNKTION INTRODUKTION
6002FL / 6012FL
FUNKTION INTRODUKTION
8039FL
FUNKTION INTRODUKTION
7009FL

FUNKTION INTRODUKTION
8124FL

FUNKTION INTRODUKTION
7016FL

FUNKTION INTRODUKTION
7002FL

FUNKTION INTRODUKTION
7015FY

8039FL

8124FL

7009FL

7016FL

7002FL

7015FY


Affordable. Reliable. Home Improvement.
DOUCHEPANEEL TOREN
MODEL:
6002FL, 8039FL, 7009FL, 6012FL, 8124FL, 7016FL, 7002FL, 7015FY
VEVOR
DOUCHEPANEEL TOREN
Affordable. Reliable. Home Improvement.

6002FL 6012FL
8039FL 8124FL 7009FL 7016FL 7002FL 7015FY
natural_image
Hand holding a white cable against a dark wall, with no visible text or symbolsnatural_image
Close-up of a hand holding a metallic electrical box with wires and connectors (no visible text or symbols)natural_image
Close-up of a white mechanical component with a rectangular cutout and multiple mounting holes (no visible text or symbols)natural_image
Close-up of metallic electrical cables with a numbered label (4) in the corner, no readable text or symbols on the cables themselves.natural_image
Close-up of hands using a tool to adjust or install a cable or wire inside an electrical enclosure (no visible text or symbols)natural_image
Person in gloves installing or adjusting electrical wiring inside a metallic enclosure (no visible text or symbols)natural_image
Close-up of hands holding a small black electrical component with red wires, next to mechanical components (no visible text or symbols)natural_image
Close-up of a metallic connector with a threaded fitting and red cable, no visible text or symbolsnatural_image
Close-up of a metallic industrial cabinet with white connectors and red cables, no visible text or symbolsnatural_image
Close-up of a hand holding a hexagonal nut component, no visible text or symbolsnatural_image
Close-up of a white plastic pipe fitting with red and black wires, no visible text or symbols
natural_image
Close-up of a metallic industrial cabinet with coiled metal components (no visible text or symbols)natural_image
Person in gloves handling a small object inside a stainless steel enclosure (no visible text or symbols)natural_image
Person in gloves handling a metallic mechanical component inside a stainless steel enclosure (no visible text or symbols)natural_image
Person in gloves installing or adjusting electrical wiring inside an open industrial box (no visible text or symbols)Plaats 2 AA-batterijen in de batterij compartiment.
natural_image
Close-up of hands in white gloves holding a small electronic component with red wires, next to mechanical parts (no visible text or symbols)natural_image
Close-up of a metallic pipe fitting with a threaded connector and red cable, no visible text or symbolsnatural_image
Close-up of a metallic industrial cabinet with white connectors and red wiring, no visible text or symbolsnatural_image
Close-up of gloved hands assembling or adjusting a mechanical component with visible tubing and components (no text or symbols)natural_image
Close-up of a gloved hand adjusting a small black component next to an electrical panel with visible wiring and components (no text or symbols)natural_image
Close-up of a hand holding a digital pressure gauge connected to a coiled hose (no visible text or symbols)Sluit de handbediende doucheslang en de handdouchekop.
natural_image
Close-up of hands installing a black panel with a circular component, no visible text or symbolsnatural_image
Close-up of hands using a handheld device to adjust or install a black rectangular object (no visible text or symbols)natural_image
Close-up of a metallic electrical panel with a coiled wire and a terminal outlet (no visible text or symbols)natural_image
Close-up of hands adjusting a black tool with white tubing and yellow valves (no visible text or symbols)natural_image
Close-up of hands adjusting a white mechanical component with tubing and valves (no visible text or symbols)natural_image
Close-up of a hand adjusting a white and yellow piping system with tubing (no visible text or symbols)natural_image
Close-up of a black plastic mechanical component with two central holes and mounting brackets (no visible text or symbols)natural_image
Close-up of a black cylindrical mechanical component with a circular base, displayed against a plain white background (no text or symbols visible)natural_image
Person adjusting a black wall-mounted device with control buttons (no visible text or symbols)natural_image
Hand inserting a coin into a door panel (no text or symbols visible)
natural_image
Close-up of hands using a handheld device to adjust or install a device (no visible text or symbols)natural_image
Close-up of a black cable with gold connectors attached to a device panel, labeled with number 12 (no text or symbols on the cable itself)


FUNCTIE INLEIDING
6002FL / 6012FL

FUNCTIE INLEIDING
8039FL

FUNCTIE INLEIDING
7009FL

FUNCTIE INLEIDING
8124FL
FUNCTIE INLEIDING
7016FL

FUNCTIE INLEIDING
7002FL

FUNCTIE INLEIDING
7015FJ

8124FL8039FL


7009FL

7016FL

7002FL

7015FJ


Technische ondersteuning en e-garantiecertificaat
www.vevor.com/support