1050269 - Fire pit Vevor - Free user manual and instructions
Find the device manual for free 1050269 Vevor in PDF.

| Product Type | Burner/Stove for Fireplace |
| Brand | Vevor |
| Model | 1050269 |
| Material | Steel |
| Burner Dimensions | 45.7 x 15.2 cm (18 x 6 in) |
| Fuel Type | Natural Gas |
| Gas Supply Pressure | 5.5 to 10.5 inches of water column |
| Gas Connection | 1/2 in FPT |
| Flexible Connector | Included, no whistle |
| Flame Type | Decorative yellow flames |
| Usage | Indoor (vented fireplace) |
| Ventilation Requirements | Non-combustible fireplace, flue damper open, clear chimney |
| Installation | By a qualified technician |
| Safety | Leak detection; do not store flammable liquids nearby |
| Maintenance | Regular cleaning; chimney sweeping before use |
| Included Parts | Hose clamp, 90° elbow, adapter fittings |
| Country of Manufacture | China |
| Customer Service | ServiceClient@vevor.com; technical support at www.vevor.com/support |
| Warranty | Electronic warranty certificate |
Frequently Asked Questions - 1050269 Vevor
User questions about 1050269 Vevor
0 question about this device. Answer the ones you know or ask your own.
Ask a new question about this device
Download the instructions for your Fire pit in PDF format for free! Find your manual 1050269 - Vevor and take your electronic device back in hand. On this page are published all the documents necessary for the use of your device. 1050269 by Vevor.
USER MANUAL 1050269 Vevor
Technical Support and E-Warranty Certificate
www.vevor.com/support
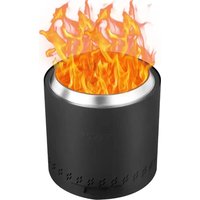
FIRE PIT BURNER/PAN
MODEL:1050269
We continue to be committed to provide you tools with competitive price. "Save Half", "Half Price" or any other similar expressions used by us only represents an estimate of savings you might benefit from buying certain tools with us compared to the major top brands and doses not necessarily mean to cover all categories of tools offered by us. You are kindly reminded to verify carefully when you are placing an order with us if you are actually saving half in comparison with the top major brands.
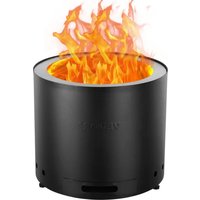
FIRE PIT BURNER/PAN
MODEL:1050269
NEED HELP? CONTACT US!
Have product questions? Need technical support? Please feel free to contact us:
CustomerService@vevor.com
This is the original instruction, please read all manual instructions carefully before operating. VEVOR reserves a clear interpretation of our user manual. The appearance of the product shall be subject to the product you received. Please forgive us that we won't inform you again if there are any technology or software updates on our product.
INSTALLATION fireplace Requirements
- Check to ensure your fireplace meets this H-Burner's venting requirements. Then, consult a qualified gas installer or technician.
- This fireplace H-Burner kit is only to be installed in a fully vented, non-combustible fireplace with an open flue damper. The chimney must be free of obstructions. The fireplace must be designed and approved for burning solid fuel, like wood. This H-Burner system is designed to produce yellow flames and may also produce smoke. For this reason the fireplace must be adequately vented.
- The fireplace must have a gas supply line installed by a qualified technician following all local codes. The gas supply line must be a minimum of 1/2"interior diameter.
- When glass doors are present on your fireplace, they must always remain open when using this appliance. Failure to leave these doors completely open will result in improper drafting and may even result in the glass doors cracking or exploding. A fireplace screen must be present when the system is burning.
- Gas Pressure Requirements: The minimum inlet gas supply pressure is approximately 5.5" of the water column, and the maximum inlet gas supply pressure is 10.5" for Natural Gas.
- Ensure that your gas burner system is the correct size for your fireplace Improper sizing may negatively impact the proper drafting of the fireplace. Too large a burner system will adversely affect the bum and hamper the proper operation of the control system (if using one).
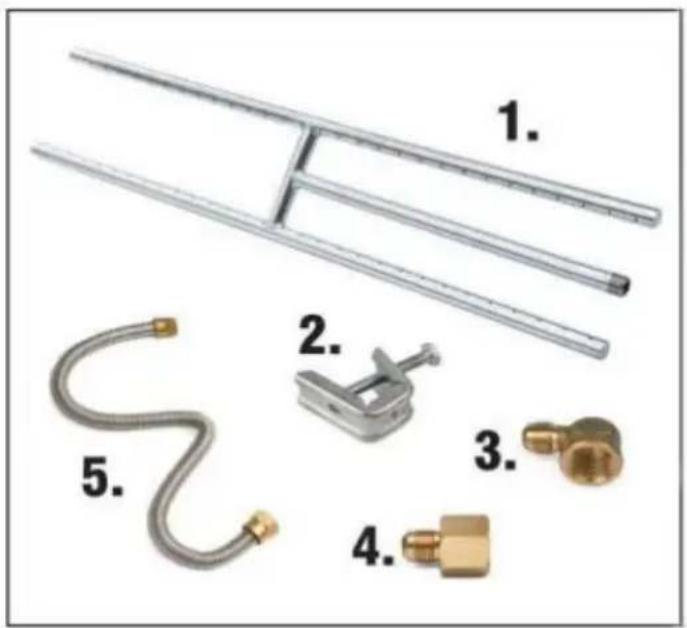
- H-Burner 18"x 6"
- Whistle-Free Flexible Gas
- 1 / 2'' DP x 3/8" MFLR 90 Elbow Adapter Fitting
- 1 / 2'' FPT × 3 / 8'' MFL Adapter Fitting
- Flue Damper Clamp
Step 1: Install the Damper Clamp:
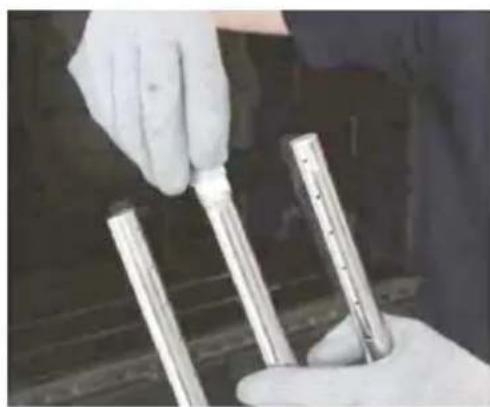
The damper clamp with set screw is provided to prevent the full closure of your flue damper blade. The clamp must be permanently installed (see Img.3-1). Should the provided clamp does not work with your exact fireplace damper blade, have a permanent stop installed, remove the damper blade, or have the damper cut to provide the minimum permanent opening required.
NOTE: This damper clamp is designed to prevent total closure of your fireplace, but your damper must remain fully open when the burner is in use.
Step 2: Install the Burner
- Ensure that the gas supply to the fireplace is shut off.
- Locate the gas supply stub inside your fireplace and remove the cap. Make sure the gas pipe does not loosen inside your wall.
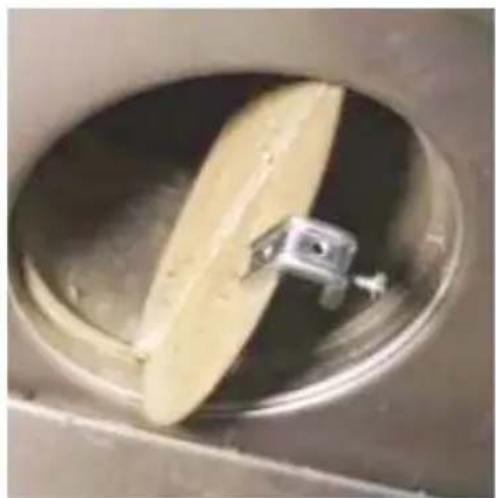
Img.3-1
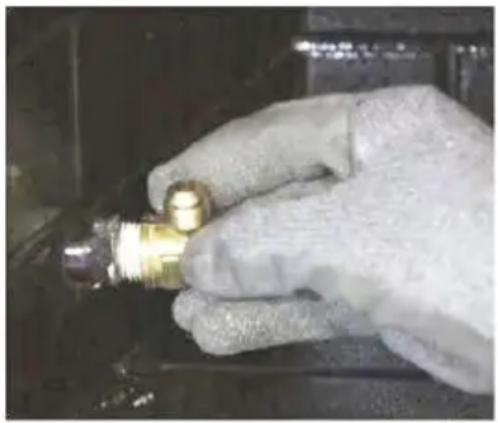
Img.3-2
- Attach the 1/2" FPT X 3/8" MFLR 90 Elbow to your gas supply pipe (see Img.3-2).
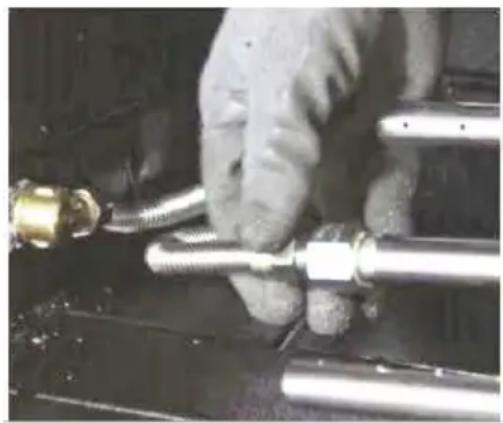
- Thread the 12" FPT X 3/8" MFLR Adapter Fitting to the 1/2" threaded pipe on your H-Burner (see Img.3-3).
- Place your H-Burner on the floor of your fireplace and center it. The gas inlet on the H-burner should be on the same side of your fireplace as the gas supply line.
- Connect the Whistle-Free Flex Connector to the 1/2"FPT X 3/8" MFLR 90 Elbow that is located on the fireplace gas supply line.
- Connect the opposite end of the Whistle-Free Flex Connector to the 1/2" FPT x3/8" MFLR Adapter Fitting which is located on the H-Burner.
- Position the Whistle-Free Flex Connector so that it is not overlapping the burner (see Img.3-4) being careful not to kink the line.
Img.3-3
Img.3-4
Step 3: Ensure that all fittings are properly tightened.
Apply a soapy water solution or leak detector solution to all connections. Next, using a long-necked butane lighter, hold a flame over the H-Burner. After the fame is present, slowly turn the gas supply on and ignite your H-Burner. Inspect the soapy solution on your connections, if bubbles are appearing, a gas leak is present. Turn off the gas and re-tighten all connections. Repeat the leak detection process until no leaks are present.
NOTE: NEVER HOLD A FLAME OVER YOUR CONNECTIONS TO CHECK FOR LEAKS.
1. Attention: What to do if you smell gas?
Do not attempt to ignite your appliance.
Do not touch any electrical switch.
Contact your gas supplier immediately from an of-site location.
Contact your local fire department.
2. Important:
This is a vented gas-burning appliance and is for use with solid-fuel burning fireplaces built of non-combustible material with a fully functional chimney flue. Damper clamp is included with this kit to prevent the complete closure of the flue damper; however, during the operation of this burner, your chimney damper must be fully open.
Warning:
Do not store flammable liquids or vapors anywhere near this appliance.
Solid fuels must not be burned in a fireplace where a decorative appliance is installed.
Do not use this appliance if any part of it has been submerged beneath the water.
Warning: Your chimney must be cleaned before installing or using this product. Call a chimney sweep.
Avoid drafts that may alter the flame patterns of this burner. Do not point fans into the fireplace while the unit is in use.
Sanven Technology Ltd.
Address: Suite 250, 9166 Anaheim Place, Rancho Cucamonga, CA 91730
Made In China
VEVOR®
TOUGH TOOLS, HALF PRICE
Technical Support and E-Warranty Certificate
www.vevor.com/support
VEVOR®
TOUGH TOOLS, HALF PRICE
Kundenservice@vevor.com
HULP NODIG? NEEM CONTACT MET ONS OP!
Klantenservice@vevor.com
garantiecertificaat www.vevor.com/support
VEVOR®
TOUGH TOOLS, HALF PRICE
www.vevor.com/support
BRANDGRÄNSBRÄNNARE/PANOR
MODELL: 1050269
Adress: Suite 250, 9166 Anaheim Place, Rancho Cucamonga, CA 91730
Tillverkad i Kina
VEVOR
TOUGH TOOLS, HALF PRICE
www.vevor.com/support