
W01-0.8X610 - Industrial machine Vevor - Free user manual and instructions
Find the device manual for free W01-0.8X610 Vevor in PDF.
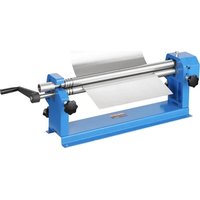


| Product Type | Slip Roll Forming Machine |
| Brand | Vevor |
| Model | W01-0.8X610 |
| Minimum Roll Diameter | 60 mm |
| Maximum Roll Length | 610 mm |
| Maximum Sheet Thickness | 1 mm |
| Drive Type | Manual (Handle) |
| Number of Shafts | 3 |
| Shaft Gap Adjustment | By Adjusting Bolts |
| Frame Material | Steel |
| Approximate Weight | 20 kg (estimated) |
| Approximate Dimensions (L x W x H) | 700 x 300 x 300 mm (estimated) |
| Main Functions | Roll forming, sheet bending, ring forming |
| Included Accessories | Handle, adjusting bolts, wrenches |
| Recommended Maintenance | Regular cleaning of shafts, lubrication of gears |
| Safety Instructions | Wear safety goggles, keep children away, do not wear loose clothing |
| Spare Parts Available | Yes (full list in manual, Vevor spare parts) |
| Repairability | User repairable (standard parts, diagrams provided) |
| Warranty | Manufacturer warranty (see certificate) |
| Intended Use | Forming thin sheets, artisanal metalwork |
Frequently Asked Questions - W01-0.8X610 Vevor
User questions about W01-0.8X610 Vevor
0 question about this device. Answer the ones you know or ask your own.
Ask a new question about this device
Download the instructions for your Industrial machine in PDF format for free! Find your manual W01-0.8X610 - Vevor and take your electronic device back in hand. On this page are published all the documents necessary for the use of your device. W01-0.8X610 by Vevor.
USER MANUAL W01-0.8X610 Vevor
Technical Support and E-Warranty Certificate www.vevor.com/support
VENEER REELING MACHINE OPERATION MANUAL
MODEL: W01-0.8X610
We continue to be committed to providing you with tools at competitive prices. "Save Half", "Half Price", or any other similar expressions used by us only represent an estimate of savings you might benefit from buying certain tools with us compared to top brands, and does not necessarily mean that all categories of tools offered are covered. We kindly remind you to verify carefully when placing an order with us whether you are actually saving half in comparison with the top major brands.
MODEL: W01-0.8X610
NEED HELP? CONTACT US!
Have product questions? Need technical support? Please feel free to contact us:
Technical Support and E-Warranty Certificate www.vevor.com/support
This is the original instruction. Please read all manual instructions carefully before operating. VEVOR reserves a clear interpretation of the user manual. The appearance of the product shall be subject to the product you received. Please forgive us that we won't inform you of any technology or software updates on our product.
SPECIFICATIONS
Model......W01-0.8X610
Minimum Roll Diameter....60mm
Maximum Roll Length....610mm
Max. Thickness....1mm
Standard accessories
Save This Manual
You will need the manual for the safety warnings and precautions, assembly instructions, operating and maintenance procedures, parts list and diagram. Keep your invoice with this manual. Write the invoice number on the inside of the front cover. Keep the manual and invoice in a dry place for future reference.
READ THESE INSTRUCTIONS BEFORE USING THIS TOOL
- KEEP WORK AREA CLEAN. Cluttered areas invite injuries.
- CONSIDER WORK AREA CONDITIONS. Don't use tools in damp, wet, or poorly lit locations. Don't expose to rain. Keep work area well lit.
- KEEP CHILDREN AWAY. All children should be kept away from the work area.
- STORE IDLE EQUIPMENT. When not in use, tools should be locked in a dry location to inhibit rust. If possible, store in an area out of children's reach.
- USE THE RIGHT TOOL. Don't force a small tool or attachment to do the work of a larger industrial tool. Don't use a tool for a purpose for which it was not intended.
- DRESS PROPERLY. Don't wear loose clothing or jewelry. Non-skid footwear is recommended when working to prevent slipping. Wear protective hair covering to contain long hair.
- USE EYE PROTECTION. Wear approved impact goggles at all times when using this tool.
- SECURE WORK. Use clamps or a vise to hold the work if possible. It is safer than using your hands and it frees both hands to operate the tool.
- DON'T OVERREACH. Keep proper footing and balance at all times.
- MAINTAIN TOOL WITH CARE. Keep handles dry, clean, and free from oil and grease. Follow instructions for lubricating and changing accessories.
- CHECK DAMAGED PARTS. Before using any tool, any parts that appear damaged should be carefully checked to determine that it will operate properly and perform its intended function. Check for alignment of moving parts, binding of moving parts, breakage of parts, mounting, and any other conditions that may affect its operation. Any part that is damaged should be properly repaired or replaced by an authorized service center unless otherwise indicated elsewhere in the instruction manual.
- REPLACEMENT PARTS AND ACCESSORIES. When servicing, use only identical replacement parts. Use only accessories intended for use
with this tool.
- DO NOT OPERATE TOOL IF UNDER THE INFLUENCE OF ALCOHOL OR DRUGS. Read warning labels on prescriptions to determine if your judgment or reflexes are impaired while taking drugs. If there is any doubt, do not operate the machine.
- NEVER STAND ON TOOL. If the tool is tipped over, serious injury or product damage could result.
UNPACKING
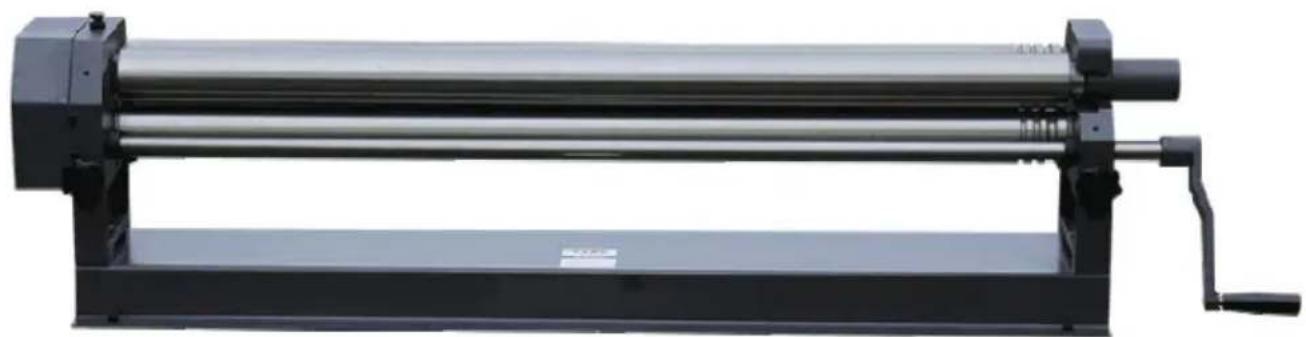
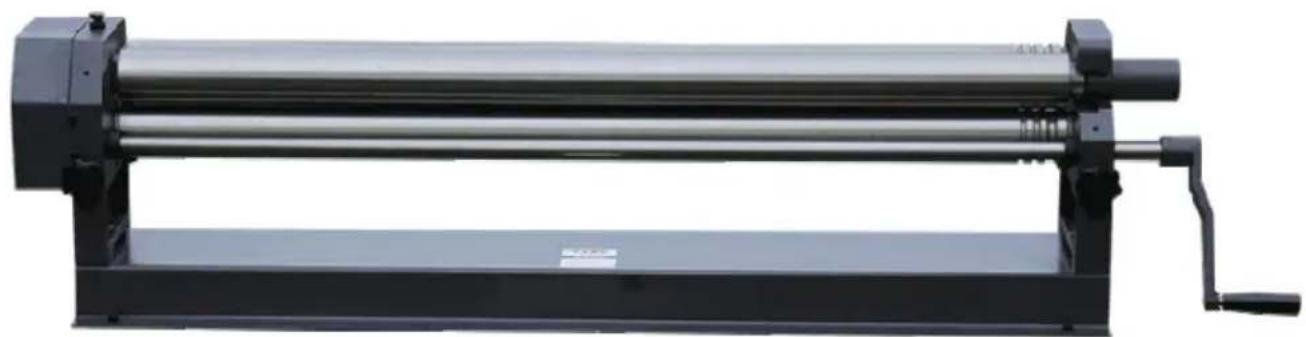
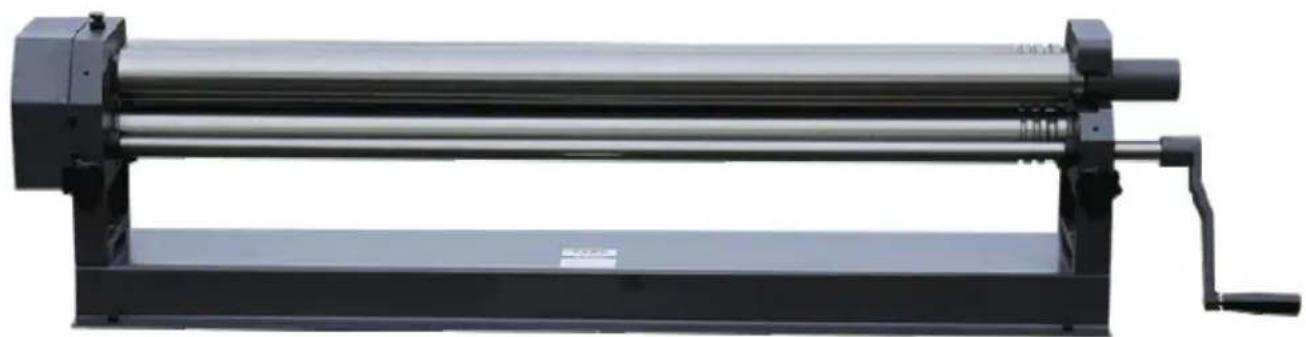
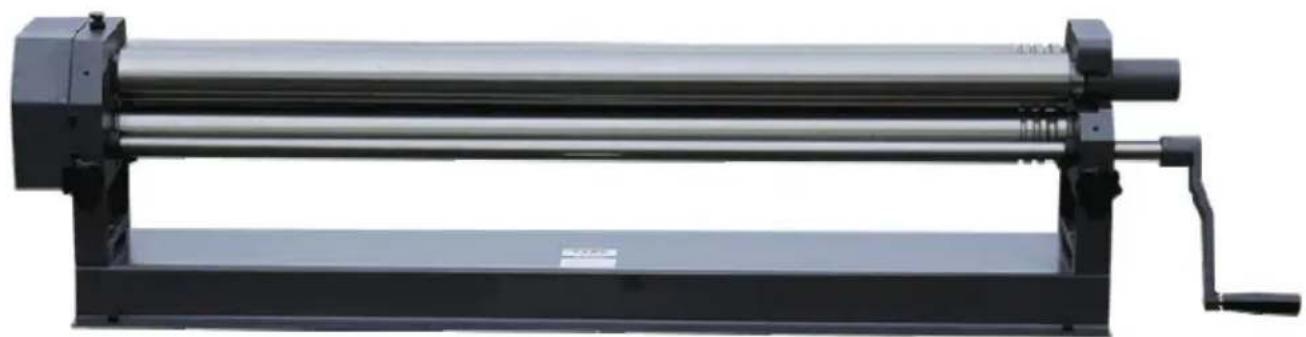
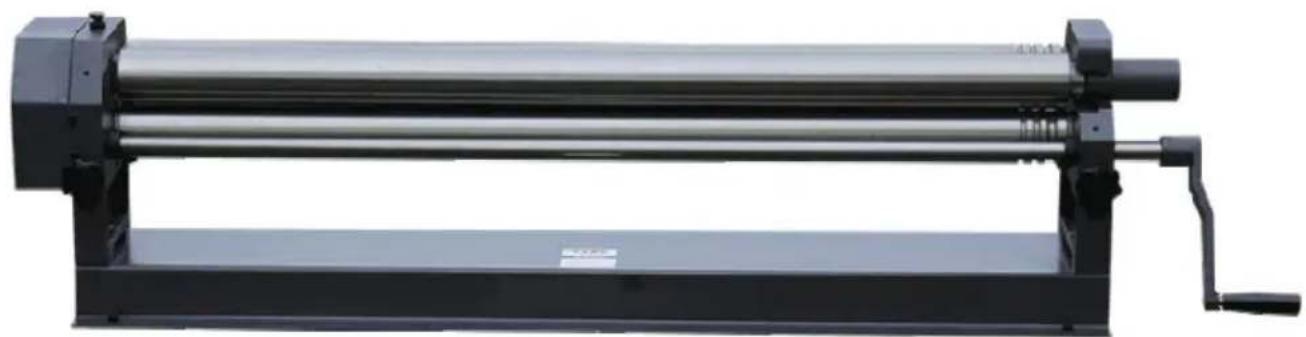
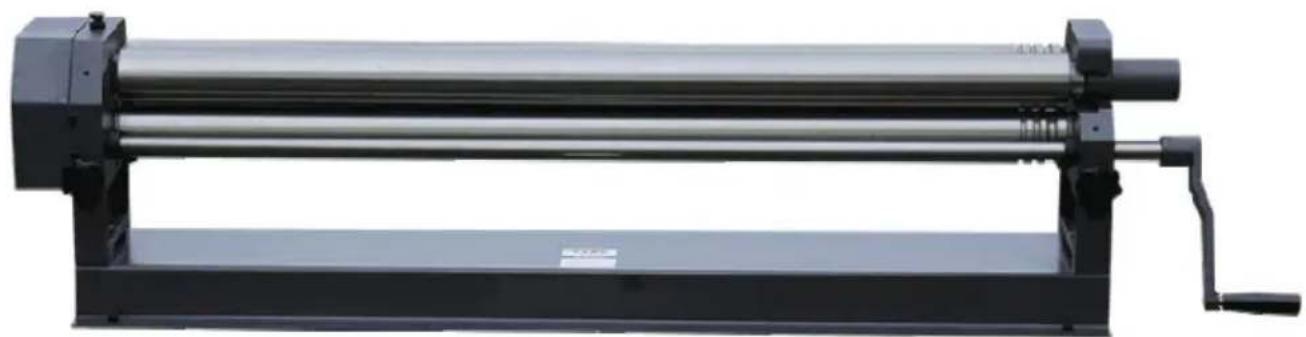
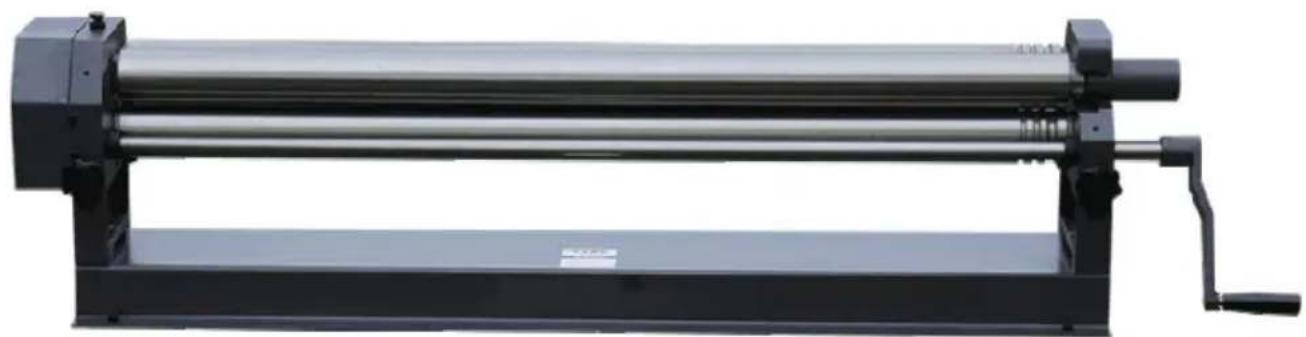
The Slip Roll machine should come assembled when unpacked. Look for any loose parts in the packing material before discarding. If any part is missing or broken, please call the Distributor as soon as possible.
- Mount the Slip Roll machine to a bench by bolting the base of the machine (#21) to the bench. Refer to the Parts Diagram.
- Adjust the distance between Shaft 1 (#8) and Shaft 2 (#20) if necessary. a. The distance between Shaft 2 (#20) and Shaft 1 (#8) can be adjusted by turning the Adjusting Bolts (#35). b. To decrease the distance between the two shafts, turn the Adjusting Bolt (#35) clockwise. c. To increase the distance, turn the Adjusting Bolt (#35) counterclockwise.
- Adjust the distance between Shaft 1 (#8) and Shaft 3 (#7) if necessary. a. The distance between Shaft 3 (#7) and Shaft 1 (#8) can be affected by turning the Adjusting Bolts (#22). b. To decrease the distance between the two shafts, turn the Adjusting Bolts (#22) clockwise. c. To increase the distance, turn the Adjusting Bolts (#22) counterclockwise.
- Removal of Shaft 1 (#8) if necessary. The left end of Shaft 1 is on a Square Bushing (#5), and the right end of Shaft 1 is mounted through the Right Stand (#9) into the Sleeve (#10).
a. To remove Shaft 1, remove the Sleeve (#10) off the right end. b. Next, at the top of the Left Stand, loosen Hex Bolt (#3). c. Pull the right end of Shaft 1 outward.
- Remounting Shaft 1
a. Reinsert the right end of Shaft 1 into the hole in the Right Stand. b. Tighten Hex Bolt (#3) on the top of the Left Stand. c. Push the Sleeve (#10) onto the end of Shaft 1.
OPERATION
Before using, check the mounting and adjustment of this machine. Rotate the Handle (#23) and check whether the four gears (#19, #30) have firm contact with each other. Shafts 1, 2 and 3 should be clean and free of metal debris. Refer to the Parts Diagram.
Forming Rolls
- Insert the steel plate between Shaft 1 (#8) and Shaft 2 (#20).
- Rotate the Handle (#23) to form the metal roll.
- If the diameter of the metal roll is not correct, turn the Adjusting Screw (#22) clockwise to decrease the diameter, or counterclockwise to increase the diameter of the roll.
- To remove the finished roll, pull out Sleeve (#10) on the end of Shaft 1 (#8), nearest the Handle (#23), and swing Shaft 1 out of the Right Stand. Then remove the steel roll from Shaft 1.
Forming Rings
The half-round slots on the right side of Shaft 2 (#20) and Shaft 3 (#7) can be used to form rings of various dimensions.
- Insert the steel in the half-round slot of Shaft 2 (#20) or Shaft 3 (#7).
- Rotate the Handle (#23) to form the metal ring.
WARNING: Keep the hands away from the shafts and metal plate during operation. Do not attempt to form rolls from materials other than those specified.
PARTS LIST
| Part # | Description | Qty |
| 1 | Left Stand | 1 |
| 2 | Nut M12 | 1 |
| 3 | Hex Bolt M12x40 | 1 |
| 4 | Support Bushing | 4 |
| 5 | Square Bushing | 1 |
| 6 | Flat Key 4x20 | 2 |
| 7 | Shaft 3 | 1 |
| 8 | Shaft 1 | 1 |
| 9 | Right Stand | 1 |
| 10 | Sleeve | 1 |
| 11 | Washer | 1 |
| 12 | Spring Washer | 1 |
| 13 | Screw M8x16 | 1 |
| 14 | Cover | 1 |
| 15 | Hex Bolt M8x16 | 4 |
| 16 | Spring Washer | 4 |
| 17 | Washer | 4 |
| 18 | Bearing | 2 |
| 19 | Small Gear | 2 |
| 20 | Shaft 2 | 1 |
| 21 | Base | 1 |
| 22 | Adjusting Bolt | 2 |
| 23 | Handle | 1 |
| 24 | Locking Screw M6x10 | 1 |
| 25 | Hex Nut M10 | 1 |
| 26 | Handle Bushing | 1 |
| 27 | Hex Bolt M10x10 | 1 |
| 28 | Washer | 2 |
| 29 | Spring Washer | 2 |
| 30 | Large Gear | 2 |
| 31 | Small Shaft | 2 |
| 32 | Hex Bolt M6x10 | 2 |
| 33 | Locking Screw M8x30 | 2 |
| 34 | Pin | 2 |
| 35 | Adjusting Bolt | 2 |
| 36 | Hex Bolt M12x20 | 4 |
| 37 | Spring Washer | 4 |
| 38 | Flat Washer | 4 |
Assembly Drawing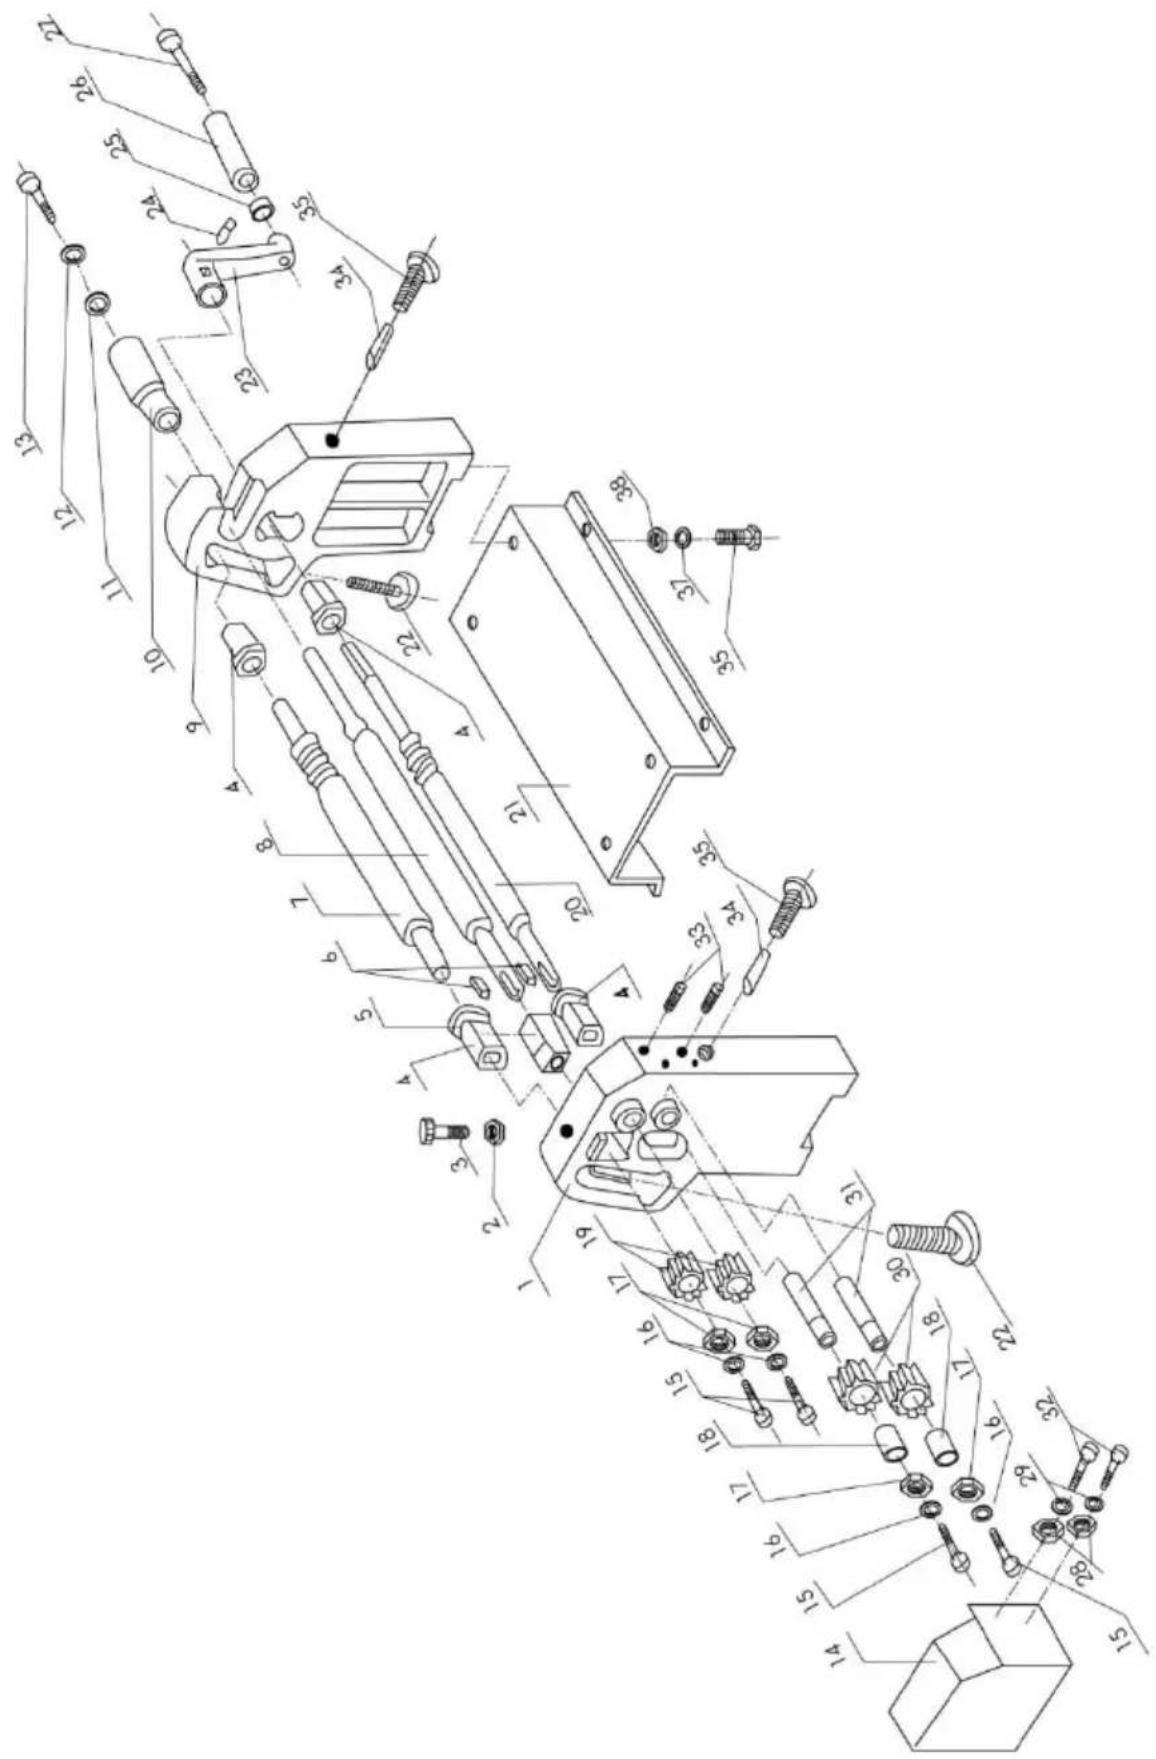
VEVOR®
TOUGH TOOLS, HALF PRICE
Technical Support and E-Warranty Certificate
www.vevor.com/support
VEVOR®
TOUGH TOOLS, HALF PRICE
We continue to be committed to providing you with tools at competitive prices. "Save Half", "Half Price", or any other similar expressions used by us only represent the savings you might benefit from buying certain tools with us compared to top brands, and does not necessarily mean to cover all categories of tools offered. We kindly remind you to verify carefully when placing an order with us to ensure you are actually saving half in comparison with the top major brands.
NEED HELP? CONTACT US!
Have product questions? Need technical support? Please feel free to contact us:
Technical Support and E-Warranty Certificate www.vevor.com/support
This is the original instruction. Please read all manual instructions carefully before operating. VEVOR reserves a clear interpretation of the user manual. The appearance of the product shall be subject to the product you received. Please forgive us that we won't inform you of any technology or software updates on our product.
SPECIFICATIONS
Model....
W01-0.8X610
Standard accessories
Glider .... 1
ASSEMBLY AND ADJUSTMENT
VEVOR®
TOUGH TOOLS, HALF PRICE
We continue to be committed to providing you with tools at competitive prices. "Save Half", "Half Price", or any other similar expressions used by us only represent an estimate of savings you might benefit from buying certain tools with us compared to top brands and does not necessarily mean to cover all categories of tools offered. We kindly remind you to verify carefully when placing an order with us whether you are actually saving half in comparison with the top major brands.
MODEL: W01-0.8X610
NEED HELP? CONTACT US!
Have product questions? Need technical support? Please feel free to contact us:
Technical Support and E-Warranty Certificate www.vevor.com/support
This is the original instruction. Please read all manual instructions carefully before operating. VEVOR reserves a clear interpretation of the user manual. The appearance of the product shall be subject to the product you received. Please forgive us that we won't inform you if there are any technology or software updates on our product.
SPECIFICATIONS
Model....
W01-0.8x610
Minimum
VEVOR®
TOUGH TOOLS, HALF PRICE
www.vevor.com/support
VEVOR®
TOUGH TOOLS, HALF PRICE
We continue to be committed to provide you tools with competitive price. "Save Half", "Half Price" or any other similar expressions used by us only represent the savings you might benefit from buying certain tools with us compared to top brands and does not necessarily mean to cover all categories of tools offered. We kindly remind you to verify carefully when you are placing an order with us that you are actually saving half in comparison with the top major brands.
MODEL: W01-0.8X610
NEED HELP? CONTACT US!
Have product questions? Need technical support? Please feel free to contact us:
Technical Support and E-Warranty Certificate www.vevor.com/support
This is the original instruction. Please read all manual instructions carefully before operating. VEVOR reserves the right to interpret the user manual. The appearance of the product shall be subject to the product you received. Please forgive us that we won't inform you of any technology or software updates on our product.
SPECIFICATIONS
Model:
W01-0.8X610
ASSEMBLY AND ADJUSTMENT
VEVOR®
TOUGH TOOLS, HALF PRICE
www.vevor.com/support
VEVOR®
TOUGH TOOLS, HALF PRICE
We continue to be committed to provide you tools with competitive price. "Save Half", "Half Price" or any other similar expressions used by us only represent estimate of savings you might benefit from buying certain tools with us compared to top brands and does not necessarily mean to cover all categories of tools offered. We kindly remind you to verify carefully when you are placing an order with us that you are actually saving half in comparison with the top major brands.
MODEL: W01-0.8X610
NEED HELP? CONTACT US!
Have product questions? Need technical support? Please feel free to contact us:
Technical Support and E-Warranty Certificate www.vevor.com/support
This is the original instruction. Please read all manual instructions carefully before operating. VEVOR reserves a clear interpretation of the user manual. The appearance of the product shall be subject to the product you received. Please forgive us that we won't inform you if there are any technology or software updates on our product.
SPECIFICATIONS
Model....
W01-0.8X610
ASSEMBLY AND ADJUSTMENT
VEVOR®
TOUGH TOOLS, HALF PRICE
www.vevor.com/support
VEVOR®
TOUGH TOOLS, HALF PRICE
We continue to be committed to provide you tools with competitive price. "Save Half", "Half Price" or any other similar expressions used by us only represent estimate of savings you might benefit from buying certain tools with us compared top brands and does not necessarily mean to cover all categories of tools offered are kindly reminded to verify carefully when you are placing an order with us actually saving half in comparison with the top major brands.
MODEL: W01-0.8X610
NEED HELP? CONTACT US!
Have product questions? Need technical support? Please feel free to contact us:
Technical Support and E-Warranty Certificate www.vevor.com/support
This is the original instruction, please read all manual instruction carefully before operating. VEVOR reserves a clear interpretation user manual. The appearance of the product shall be subject to product you received. Please forgive us that we won't inform you there are any technology or software updates on our product.

ASSEMBLY AND ADJUSTMENT
VEVOR®
TOUGH TOOLS, HALF PRICE
www.vevor.com/support
VEVOR®
TOUGH TOOLS, HALF PRICE
Technical Support and E-Warranty Certificate www.vevor.com/support
VENEER EDGE BANDING MACHINE
USER MANUAL
MODEL: W01-0.8X610
We continue to be committed to provide you tools with competitive price. "Save Half", "Half Price" or any other similar expressions used by us only represent estimate of savings you might benefit from buying certain tools with us compared to top brands and does not necessarily mean to cover all categories of tools offered. We are kindly reminded to verify carefully when you are placing an order with us that you are actually saving half in comparison with the top major brands.
MODEL: W01-0.8X610
NEED HELP? CONTACT US!
Have product questions? Need technical support? Please feel free to contact us:
Technical Support and E-Warranty Certificate www.vevor.com/support
This is the original instruction. Please read all manual instructions carefully before operating. VEVOR reserves a clear interpretation of the user manual. The appearance of the product shall be subject to the product you received. Please forgive us that we won't inform you if there are any technology or software updates on our product.
SPECIFICATIONS
Model..... W01-0.8X610
Minimum roller diameter.... .... 60 mm
Maximum roll length.... 610 mm
Maximum
thickness....1mm
Standard accessories
Shelf .... 1
ASSEMBLY AND ADJUSTMENT
VEVOR®
TOUGH TOOLS, HALF PRICE
www.vevor.com/support
VEVOR®
TOUGH TOOLS, HALF PRICE
We continue to be committed to provide you tools with competitive price. "Save Half", "Half Price" or any other similar expressions used by us only represent estimate of savings you might benefit from buying certain tools with us compared to top brands and does not necessarily mean to cover all categories of tools offered. We are kindly reminded to verify carefully when you are placing an order with us if you are actually saving half in comparison with the top major brands.
MODEL: W01-0,8X610
NEED HELP? CONTACT US!
Have product questions? Need technical support? Please feel free to contact us:
Technical Support and E-Warranty Certificate www.vevor.com/support
This is the original instruction. Please read all manual instructions carefully before operating. VEVOR reserves a clear interpretation of the user manual. The appearance of the product shall be subject to the product you received. Please forgive us that we won't inform you of any technology or software updates on our product.
SPECIFICATIONS
Model....
W01-0.8X610
Minimum roll diameter 60
mm
ASSEMBLY AND ADJUSTMENT
VEVOR®
TOUGH TOOLS, HALF PRICE
www.vevor.com/support
- VENEER REELING MACHINE OPERATION MANUAL
- NEED HELP? CONTACT US
- SPECIFICATIONS
- STANDARD ACCESSORIES
- SAVE THIS MANUAL
- READ THESE INSTRUCTIONS BEFORE USING THIS TOOL
- UNPACKING
- OPERATION
- FORMING ROLLS
- FORMING RINGS
- VEVOR®
- TOUGH TOOLS, HALF PRICE
- ASSEMBLY AND ADJUSTMENT
- VENEER EDGE BANDING MACHINE
- USER MANUAL
Brand : Vevor
Model : W01-0.8X610
Category : Industrial machine