
W1.5x610Z - Industrial machine Vevor - Free user manual and instructions
Find the device manual for free W1.5x610Z Vevor in PDF.
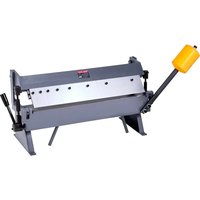


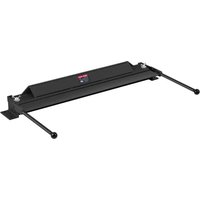
| Product Type | Manual Sheet Metal Bender (Sheet Metal Brake) |
| Brand | Vevor |
| Model | W1.5x610Z |
| Bending Length | 610 mm (24 in) |
| Maximum Bending Thickness | 1.5 mm (16 Ga) |
| Bending Angle | 0° to 135° |
| Machine Material | Painted Steel |
| Power Supply | None (manual) |
| Dimensions (L x W x H) | Approximately 800 x 400 x 300 mm (estimated) |
| Weight | Approximately 60 kg (estimated) |
| Main Functions | Sheet metal bending, box and pan forming |
| Maintenance | Weekly lubrication with #30W oil, regular cleaning |
| Safety | Safety glasses, gloves, fitted clothing, clean work area |
| Assembly | Requires floor anchoring and counterweight adjustment |
| Spare Parts | Complete list provided in the manual (ref. 1 to 39) |
| Repairability | User-adjustable; parts available |
| Manufacturer | Shanghaimuxinmuyeyouxiangongsi (Shanghai, China) |
| Importer (USA) | Sanven Technology Ltd., Suite 250, 9166 Anaheim |
| Importer (Australia) | SIHAO PTY LTD, 1 Rokeva Street, Astv NSW 2122 |
| Compliance | European Directive 2012/19/EC (WEEE) |
Frequently Asked Questions - W1.5x610Z Vevor
User questions about W1.5x610Z Vevor
0 question about this device. Answer the ones you know or ask your own.
Ask a new question about this device
Download the instructions for your Industrial machine in PDF format for free! Find your manual W1.5x610Z - Vevor and take your electronic device back in hand. On this page are published all the documents necessary for the use of your device. W1.5x610Z by Vevor.
USER MANUAL W1.5x610Z Vevor
Bending Machine
MODEL: W1.5×610Z / W1.5×915Z / W1.5×1220Z / W1.5×1270Z / W1.0×305A
MODEL: W1.5×610Z / W1.5×915Z / W1.5×1220Z / W1.5×1270Z / W1.0×305A

This is the original instruction. Please read all manual instructions carefully before operating. VEVOR reserves a clear interpretation of the user manual. The appearance of the product shall be subject to the product you received. Please forgive us that we won't inform you again if there are any technology or software updates on our product.
Unpacking
The Pan & Box Brake is shipped from the manufacturer in a carefully packed plywood case. Thoroughly inspect the product upon opening the package.
After unpacking the unit, carefully inspect for any damage that may have occurred during transit. Check for loose, missing, or damaged parts. Immediately report missing parts to dealer.
If damage has occurred, shipping damage claims must be filed with the carrier and are the responsibility of the user.
Specifications
| Model | W1.5×610Z | W1.5×915Z | W1.5×1220Z | W1.5×1270Z | W1.0×305A |
| Bending Length | 24" (610mm ±10mm) | 36" (910mm ±10mm) | 48" (1220mm ±15mm) | 50" (1270mm ±15mm) | 12" (305mm ±10mm) |
| Bending Thickness | 1.5/16Ga | 1/20Ga | |||
| Bending Angle | 0—135° | ||||
SAVE THESE INSTRUCTIONS
Thank you for purchasing our Bending Machine. Before attempting to operate your new tool, please read these instructions thoroughly. You need these instructions for the safety warnings, precautions, assembly, operation, maintenance procedures, parts list and diagrams. Keep your invoice number with these instructions. Write the invoice number on the inside of front cover. Keep the instructions and invoice in a safe, dry place for future reference.
General Safety Information

CAUTION
For your own safety, read all of the instructions and precautions before operating tool.
SAFETY RULES
- Wear proper apparel. Do not wear loose clothing, gloves, neckties, bracelets, or other jewelry that may get caught in moving parts of the machine.
- Wear protective hair covering to contain long hair.
- Wear safety shoes with non-slip soles.
- Wear safety glasses. Everyday glasses have only impact-resistant lenses. They are NOT safety glasses.
- Be alert and think clearly. Never operate tools when tired, or when under the influence of alcohol or medications that cause drowsiness.
- Keep the work area clean. Cluttered work areas invite accidents.
- The work area should be properly lit.
- Keep visitors at a safe distance from the work area.
- Keep children out of the workplace. Make the workshop childproof. Use padlocks to prevent any unintentional use of tools.
- Assemble only according to these instructions. Improper assembly can create hazards.
- When tools are not in use, store them in a dry, secure place out of reach of children. Inspect the tools prior to storage and before reuse.
- Maintain product labels and nameplates. These carry important safety information.
KNOW HOW TO USE THE TOOL
- Use the right tool for the job. DO NOT attempt to force a small attachment to do the work of a large industrial tool. DO NOT use a tool for a purpose for which it was not intended.
- Do not force the tool. Your machine will do a better and safer job if it is used as intended. DO NOT use inappropriate attachments in an attempt to exceed the machine's rated capacity.
- Overloading the machine. By overloading the machine, you may cause injury from flying parts. DO NOT exceed the specified machine's capacities.
- Machine usage. DO NOT use the brake as a press or crushing tool.
- Dressing material edges. Before bending sheet metal, always chamfer and deburr all sharp edges.
6. Blade adjustments and maintenance. Always keep blades sharp and properly adjusted for optimum performance. 7. Check for damaged parts. Before using any tool or machine, carefully check any part that appears damaged. Check for alignment and binding of moving parts that may affect proper machine operation.

WARNING
The warnings, cautions, and instructions discussed in this instruction manual cannot cover all possible conditions or situations that could occur. It must be understood by the operator that common sense and caution are factors that cannot be built into this product, but must be supplied by the operator.
Important:
Your machine may be shipped with a rustproof waxy oil coating on the exposed unpainted metal surfaces. To remove this protective coating, use a degreaser or solvent cleaner. For a thorough cleaning, parts will occasionally have to be removed. DO NOT USE acetone or other cleaners as they may damage painted surfaces.
Follow manufacturer's label instructions when using any type of cleaning product. After cleaning, wipe unpainted metal surfaces with a light coat of quality oil or grease for protection.

WARNING
DO NOT USE gasoline or other petroleum products to clean the machine.
They have low flash points and can explode or cause fire.

CAUTION
When using cleaning solvents work in a well-ventilated area. Many cleaning solvents are toxic if inhaled.
Assembly
IMPORTANT: Consider the following when looking for a suitable location place the machine:
- Overall weight of the machine.
- Weight of material being processed.
- Sizes of material to be processed through the machine.
- Space needed for auxiliary stands, work tables, or other machinery
- Clearance from walls and other obstacles.
- Maintain an adequate working area around the machine for safety.
- Have the work area well illuminated with proper lighting.
- Keep the floor free of oil and make sure it is not slippery.
- Remove scrap and waste materials regularly, and make sure the area is free from obstructing objects.
- If long lengths of material are to be fed into the machine, make sure that they will not extend into any aisles.
Before beginning assembly, take note of the following precautions and suggestions.
- Is the machine bolted to the pallet? Before attempting any of the assembly procedures, remove all of the loose parts and hardware and unbolt the machine from the pallet.
- LEVELING: The machine should be sited on a level, concrete floor. Provisions for securing it should be in position prior to placing the machine. The accuracy of any machine depends on its precise placement on the mounting surface.
- FLOOR: This tool distributes a large amount of weight over a small area. Make certain that the floor is capable of supporting the weight of the machine, work stock, and the operator. The floor should also be a level surface. If the unit wobbles or rocks once in place, be sure to eliminate it by using shims.
- WORKING CLEARANCES: Take into consideration the size of the material to be processed. Make sure that you allow enough space to operate the machine freely.
Anchoring the Machine
- Position the machine on a firm and level concrete floor.
- Maintain a safe operator distance around the machine.
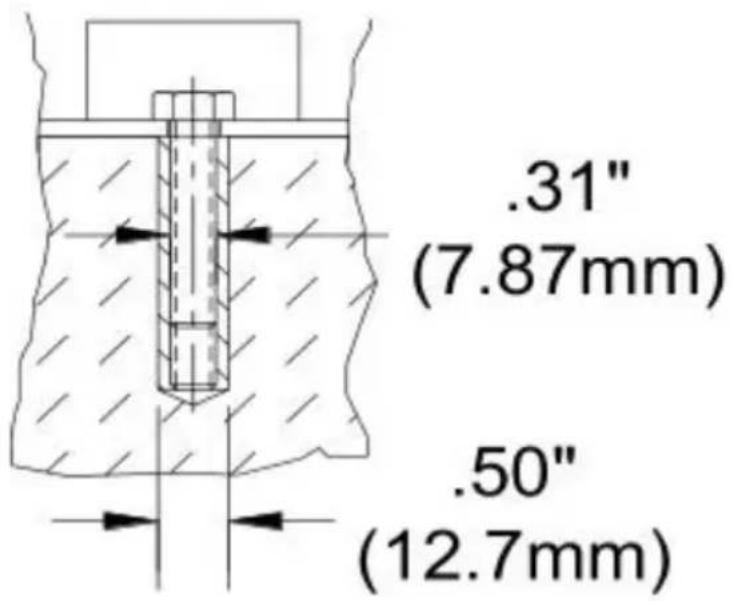
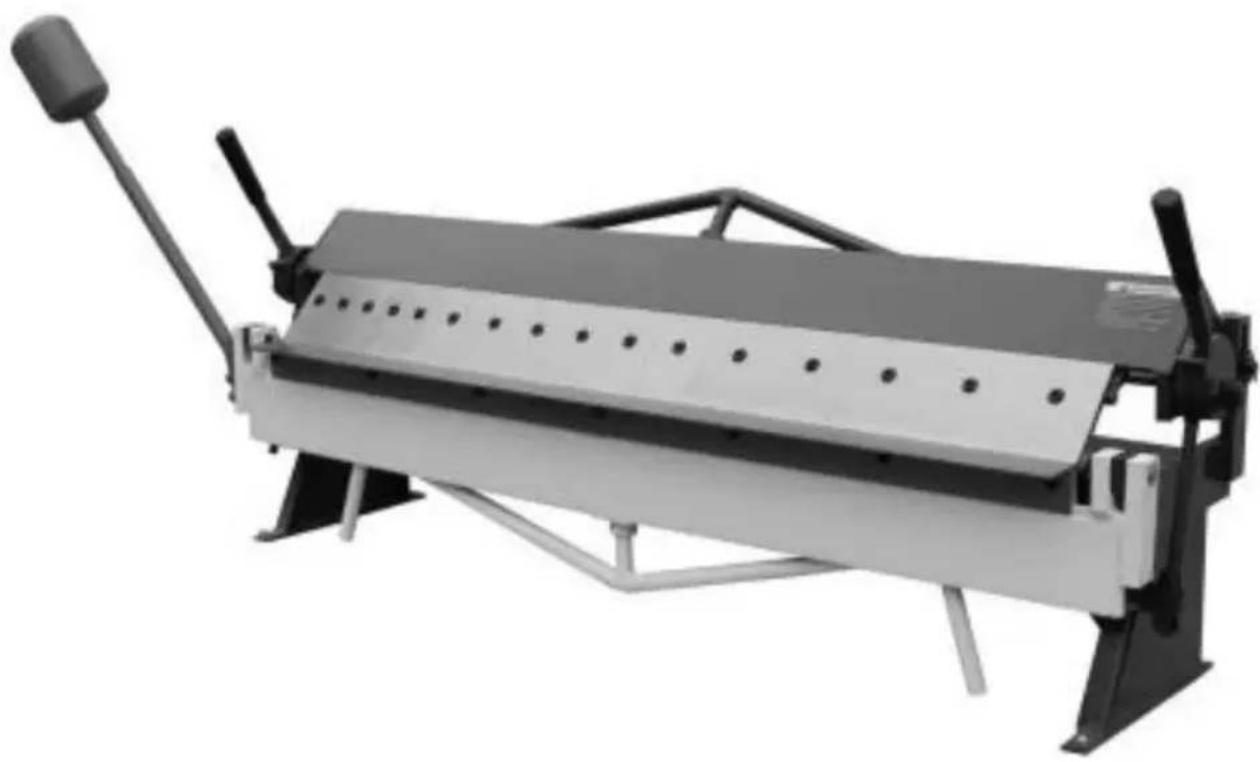
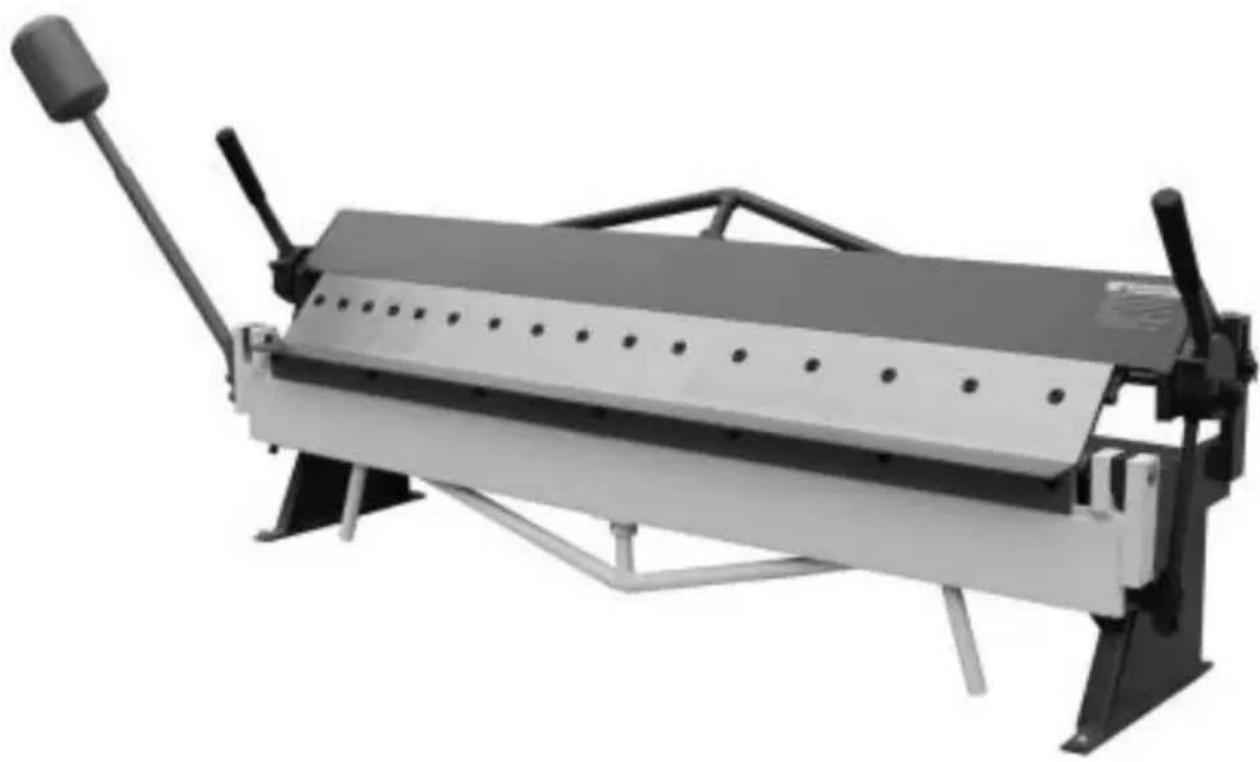
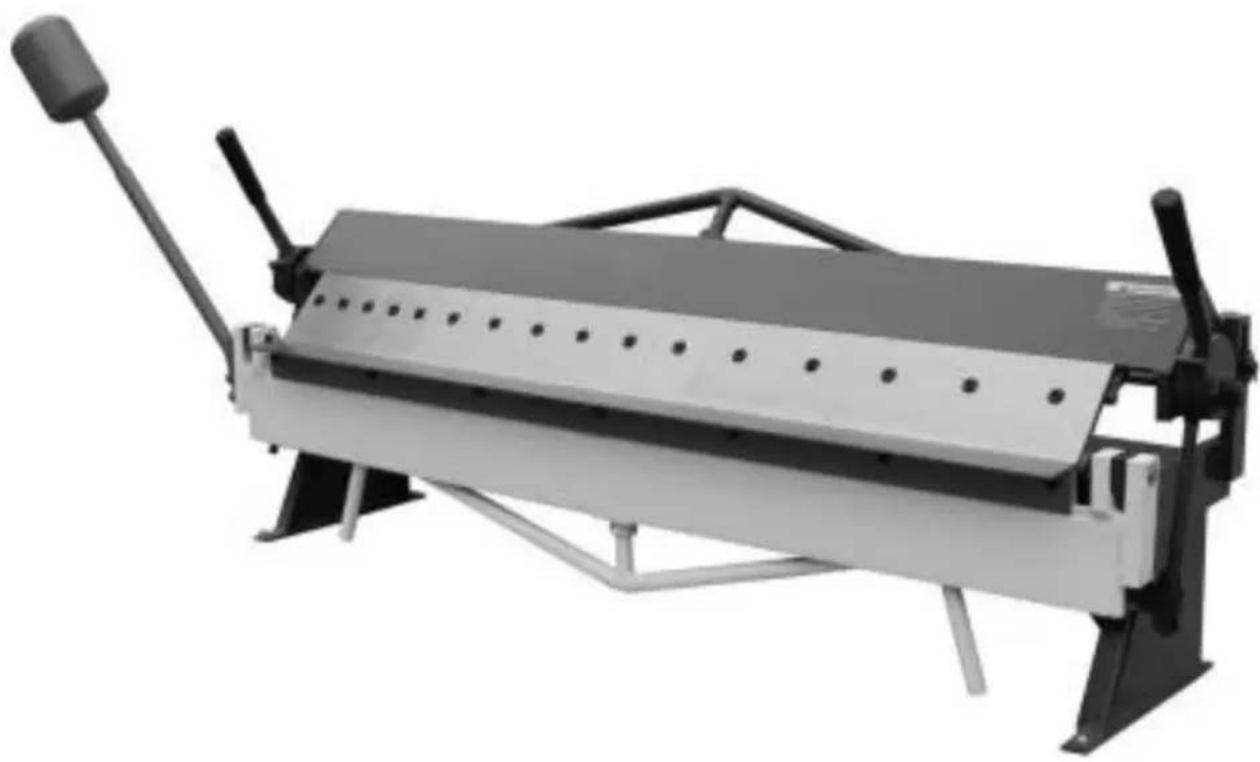
- Anchor the machine to the floor, as shown in the diagram, using bolts and expansion plugs or sunken tie rods to connect through holes in the base of the stand. (Pic. 1)
Attaching the Counterweight
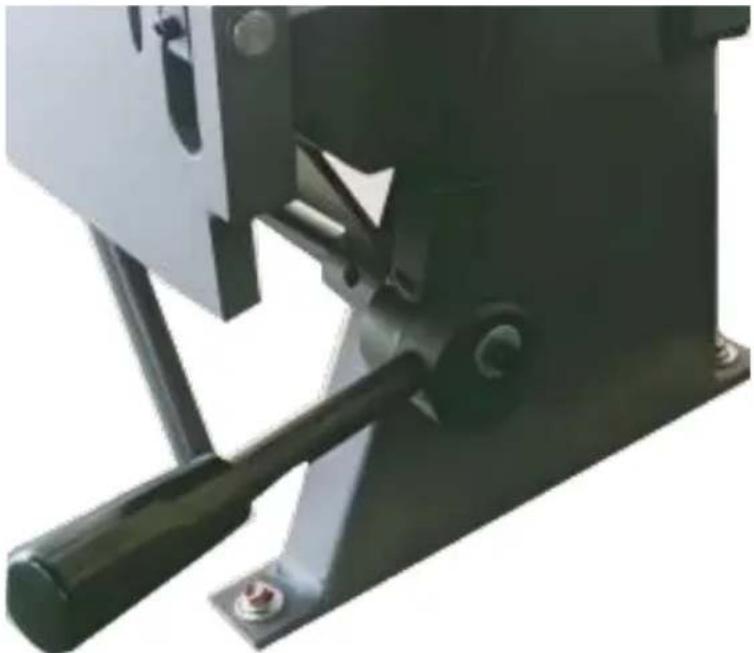
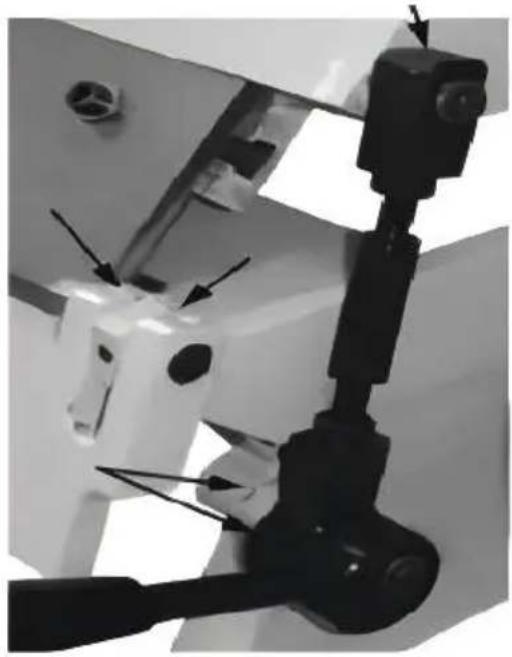
- Have a helper hold the counterweight.
- Back off the two hex bolts and slide the counterweight rod into the receiver.
- When the rod is flush with the bottom of the receiver, tighten the hex bolts. (Pic. 2)
NOTE
DO NOT use the counterweight handle to raise the bending leaf. You damage the hinges or the bending leaf.
Adjusting the Stop Rod
The stop rod is used for repeat bending when you want the bending stop at the same position each time.
- Loosen the stop nut and washer and make your bend, stopping at the top of the bend.
- Tighten the nut and washer up to the stop block.
- The bending angle can now be repeated until reset by the operator.
Adjusting the Setback
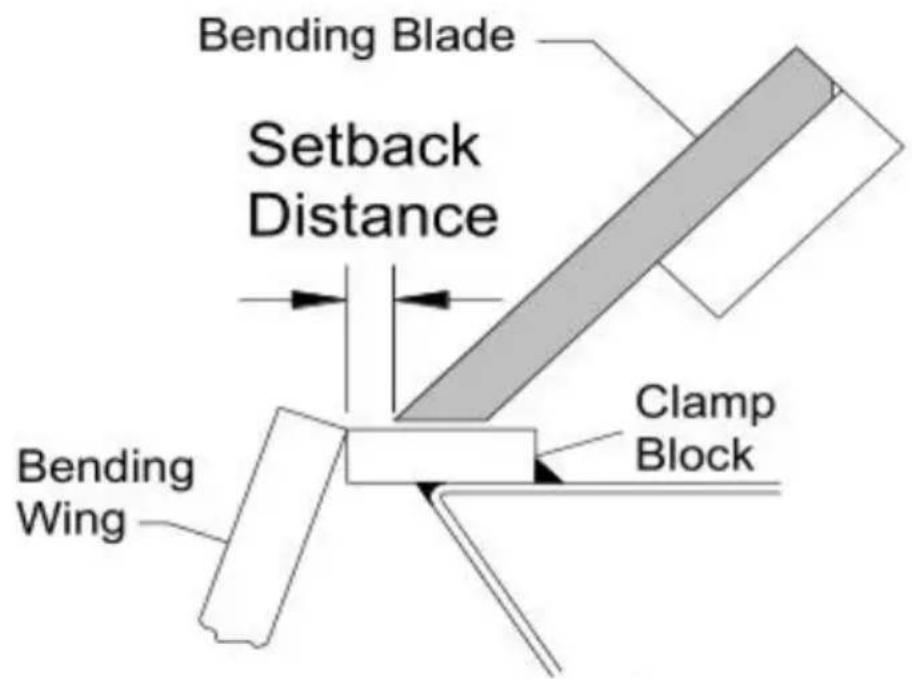
Setback is the distance from the front edge of the finger to the front of the clamp block as shown in the picture. This distance is determined by the gauge (thickness) of the piece part and the inside radius of the bend. Setback is typically 1-1/2 to 2 times the material thickness. (Pic. 4)
- To adjust, make sure all the fingers are properly aligned with each other and the hold down assembly is not locked in the down position.
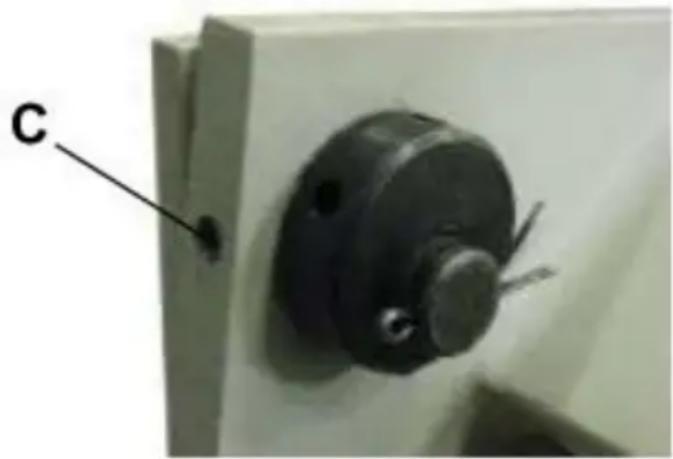
- Loosen the setscrews (C) at the back of the hold down assembly (Pic. 5).
- Insert a tool, such as an Allen wrench, into one of the spoke holes of the eccentric hub and rotate it, which moves the hold down assembly either forward or back.
- When the fingers are at the correct setback distance and parallel to the clamp block edge, tighten the setscrews (C).
Adjusting the Clamping Pressure

CAUTION
- Excessive clamping pressure can "pre-load" and permanently distort the material. Do not bend material heavier than the rated capacity, even in short lengths.
- Use material with square-sheared edges. (A rolled edge will cause bowing.) Bending a round object will warp or nick the clamp edge.
- Adjust the clamp pressure accordingly for different metal gauges. Do not use a pipe extension on the clamp bars to get more leverage.
The clamping pressure may have to be adjusted as the thickness of the piece part changes. A suitable pressure should have a medium resistance when pulling back on the hold-down handle(s). At the end of the stroke, there should be a definite locking of the piece part under the clamping leaf. To adjust the pressure, move the nuts on the threaded link shaft either up or down.
- To adjust the clamping pressure, tighten both sides of the clamping leaf with a piece part in the brake.
a. If the clamping pressure seems light and the piece part is loose under the clamp, move the adjusting nuts UP.
b. If the clamping pressure seems hard and you can't lock the handle, move the adjusting nuts DOWN.
c. Once the pressure feels right, no further adjustments are necessary for this thickness of piece part. (When changing thickness, it may become necessary to adjust again.) 2. Remove the piece part from under the clamping leaf, lock down the leaf with the handles, and loosen pressure on the top nut. 3. Unlock the clamping leaf and turn the bottom nut 1/2 turn in the desired direction. 4. Lock the clamping leaf, re-tighten the top nut, and repeat Step 1 until the desired pressure is reached.

Clamp Alignment (End to End)
Make a 90° test bend about 2" (50.8 mm) from each end of the machine. Stack the bent strips on top of each other and check that they are bent to the same degree.
If a strip is over bent, increase the setback distance on that side. If a strip is under bent, decrease the setback distance on that side. Again, move the setback adjustment past the desired set back point, and then forward to remove the slack.
Bending Wing Alignment
Bending accuracy is dependent on the top surface of the bending leaf, the attached bending wing being flush with the top face of the clamp block when the bending leaf is in the lowered position. If it appears that adjustment is necessary, contact the local service team or the manufacturer.
Operation
When performing basic bending operations, it is important that the fingers of the brake are parallel with the edge of the clamping block. Also, make sure you have the proper setback and clamping pressure set for the thickness of the material being bent.

CAUTION
Always wear proper eye protection with side shields, safety footwear, and gloves to protect from burrs and sharp edges.

CAUTION
Keep hands and fingers clear of the clamping beam. Stand off to the machine to avoid getting hit with the bending apron as it comes up.

CAUTION
When handling large heavy sheets, make sure they are properly supported.
Bending Sheet Metal
- Lift and rotate the clamping handle (clockwise) to raise the clamp assembly.
- Insert the piece part between the clamp block and the brake finger.
- Align the fingers of the hold-down assembly to the scribed bend line on the piece part and clamp in place by pulling the clamp handle back.
NOTE
DO NOT force the clamping handle. The holding pressure only needs to be tight enough to hold the sheet metal from moving when bending.
- Pull up on the bending leaf handles until the piece part has reached the desired bend angle.
- Lower the bending leaf, raise the hold-down assembly, and remove the bent piece part.
- If you are doing box and pan bending, choose fingers that closely match the dimensions of the finished piece.
BENDING ALLOWANCE
In order to bend sheet metal accurately, you will need to consider the length of each bend. This is referred to as bend allowance. Subtract the bend allowance from the sum of the outside dimensions of the piece to obtain the actual overall length or width of the piece. Because of differences in sheet metal hardness, and whether the bend is made with the grain against it, exact allowances must sometimes be made by trial and error. However, bend allowances for general use can be obtained from metalworking books or from the Internet.
UNDERSTANDING SPRINGBACK
Springback, also known as elastic recovery, is the result of the metal wanting to return to its original shape after undergoing compression and stretch. After the bending leaf is removed from the metal and the pressure is released, the piece part relaxes, forcing the bent portion of the metal to return slightly to its original shape.
The key to obtaining the correct bend angle is to overbend the metal and allow it to spring back to the desired angle. All metals exhibit some amount of springback.
MATERIAL SELECTION

CAUTION
It must be determined by the customer that materials being processed through the machine are NOT potentially hazardous to the operator or persons working nearby.
When selecting materials, keep these instructions in mind:
- Material must be clean and dry (without oil).
- Material should have a smooth surface so it processes easily.
- Dimensional properties of material must be consistent and not exceed the machine capacity values.
- Chemical structure of material must be consistent.
- Buy certified steel from the same vendor when possible.
LUBRICATION AND MAINTENANCE

WARNING
Maintenance should be performed on a regular basis by qualified personnel. Always follow proper safety precautions when working on or around machinery.
- Check daily for any unsafe conditions and fix immediately.
- Check that all nuts and bolts are properly tightened.
- On a weekly basis, clean the machine and the area around it.
- Lubricate threaded components and sliding devices.
- Apply rust inhibitive lubricant to all non-painted surfaces.
Oil Ports
Using an oil can with a good quality #30W oil, apply 5-6 drops into the ports on both ends of the machine. Repeat weekly or more often depending on usage. Wipe off any excess oil.
NOTE
Proper maintenance can increase the life expectancy of your machine.
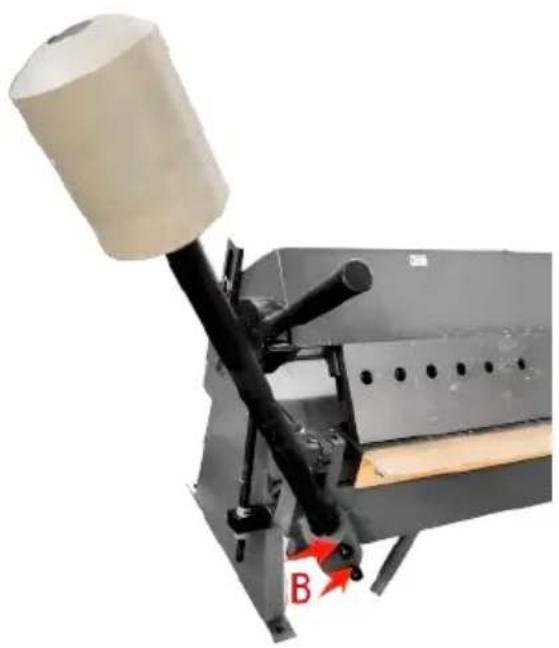
Machine assembly
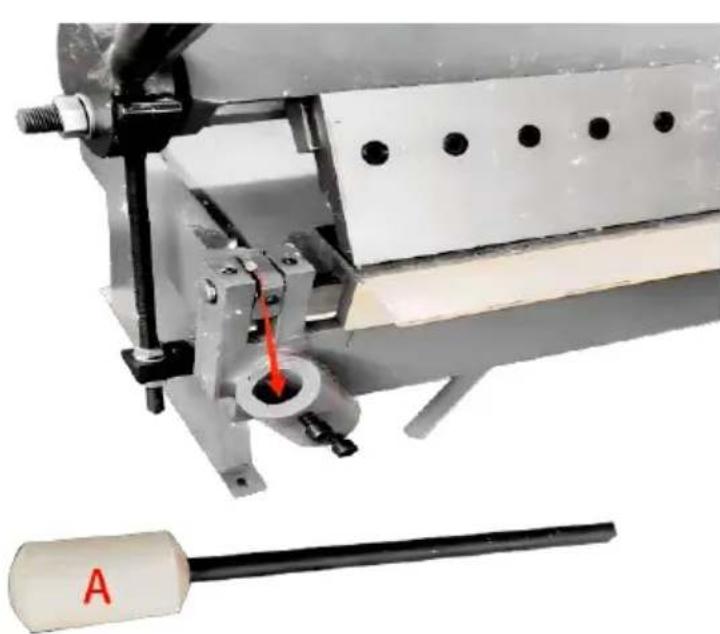
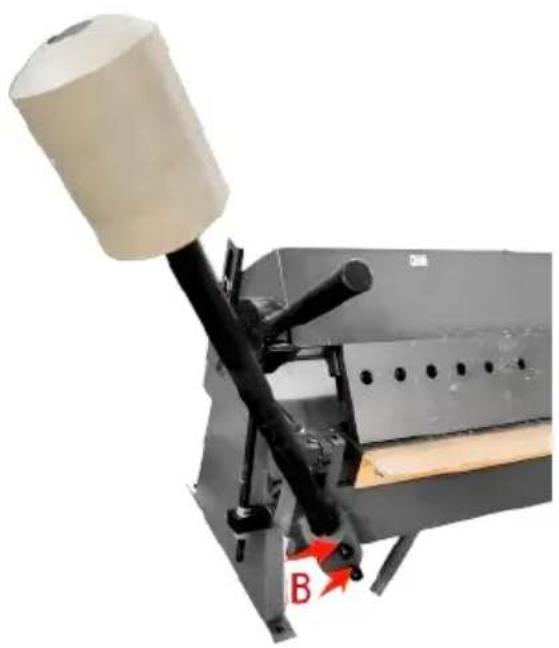
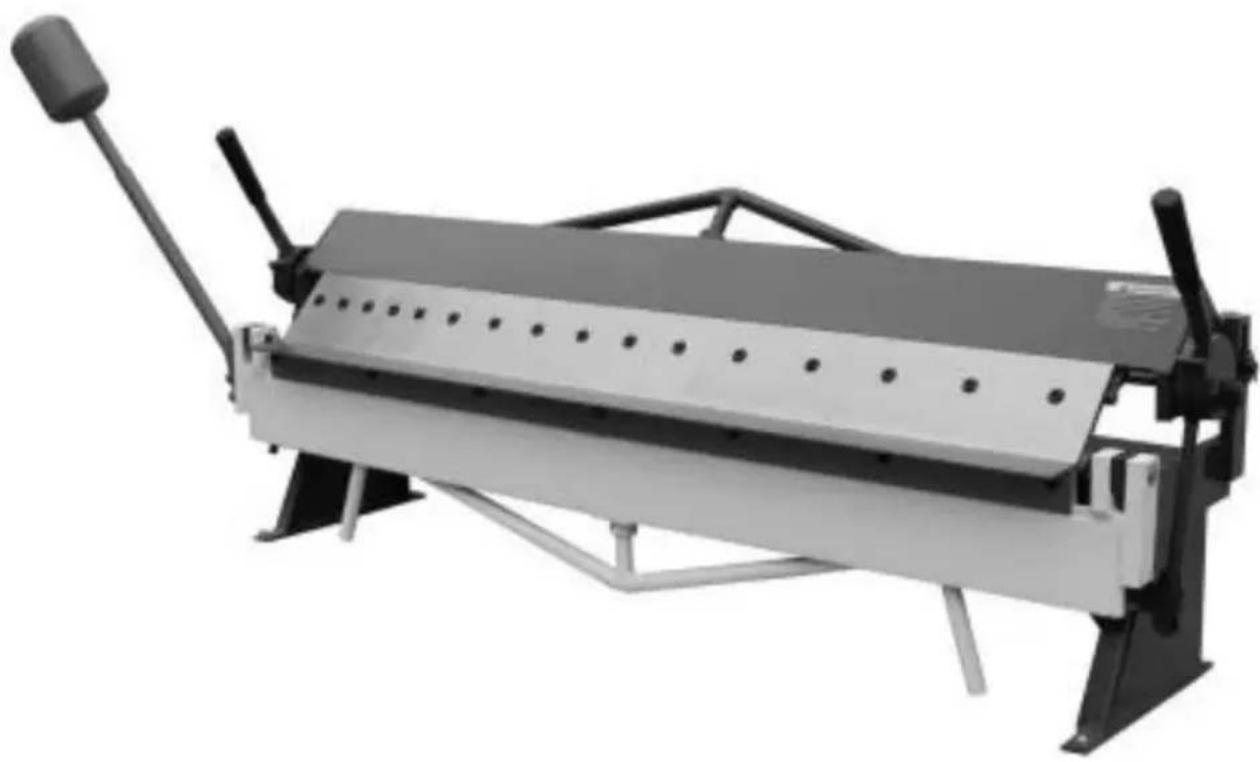
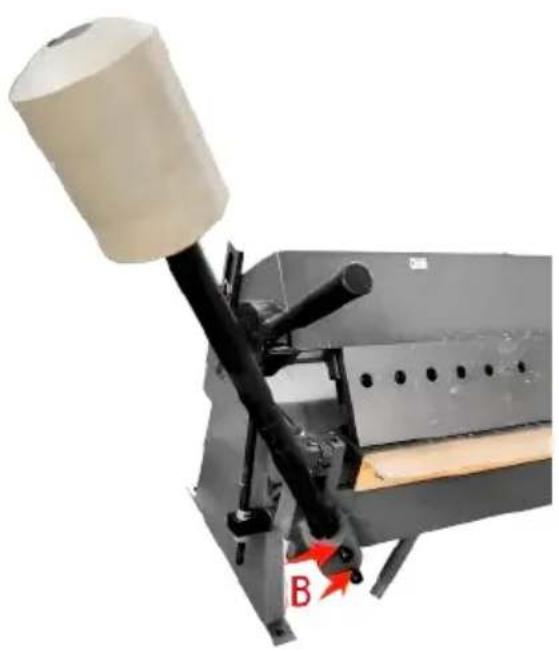
Place the counterweight hammer (A) at the position indicated by the arrow (as shown in the figure below).
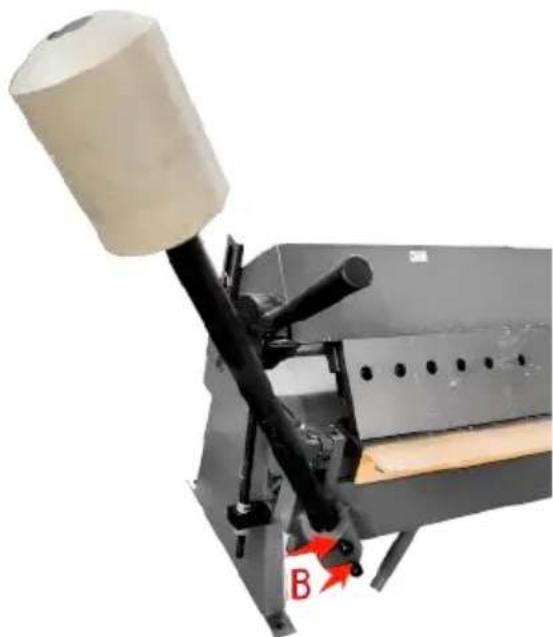
Tighten the two screws (B)
TROUBLESHOOTING
| FAULT | PROBABLE CAUSE | REMEDY |
| INACCURATE BENDS | 1. Fingers are not aligne2. Setback distance is no equal from one side to t other3. Clamping assembly is holding piece part secure | Follow proper finger alignment procedure.Accurately measure distand and set accordingly.Re-adjust the clamping pressure. |
| BENDING LEAF HARD TO LIFT AND BEND. | 1. Exceeding the bending limits of the brake.2. Counterweight is not c leaf. | Do not bend material thic than the machine was designed for.Attach the counterweight t lessen force needed to lif bending leaf. |
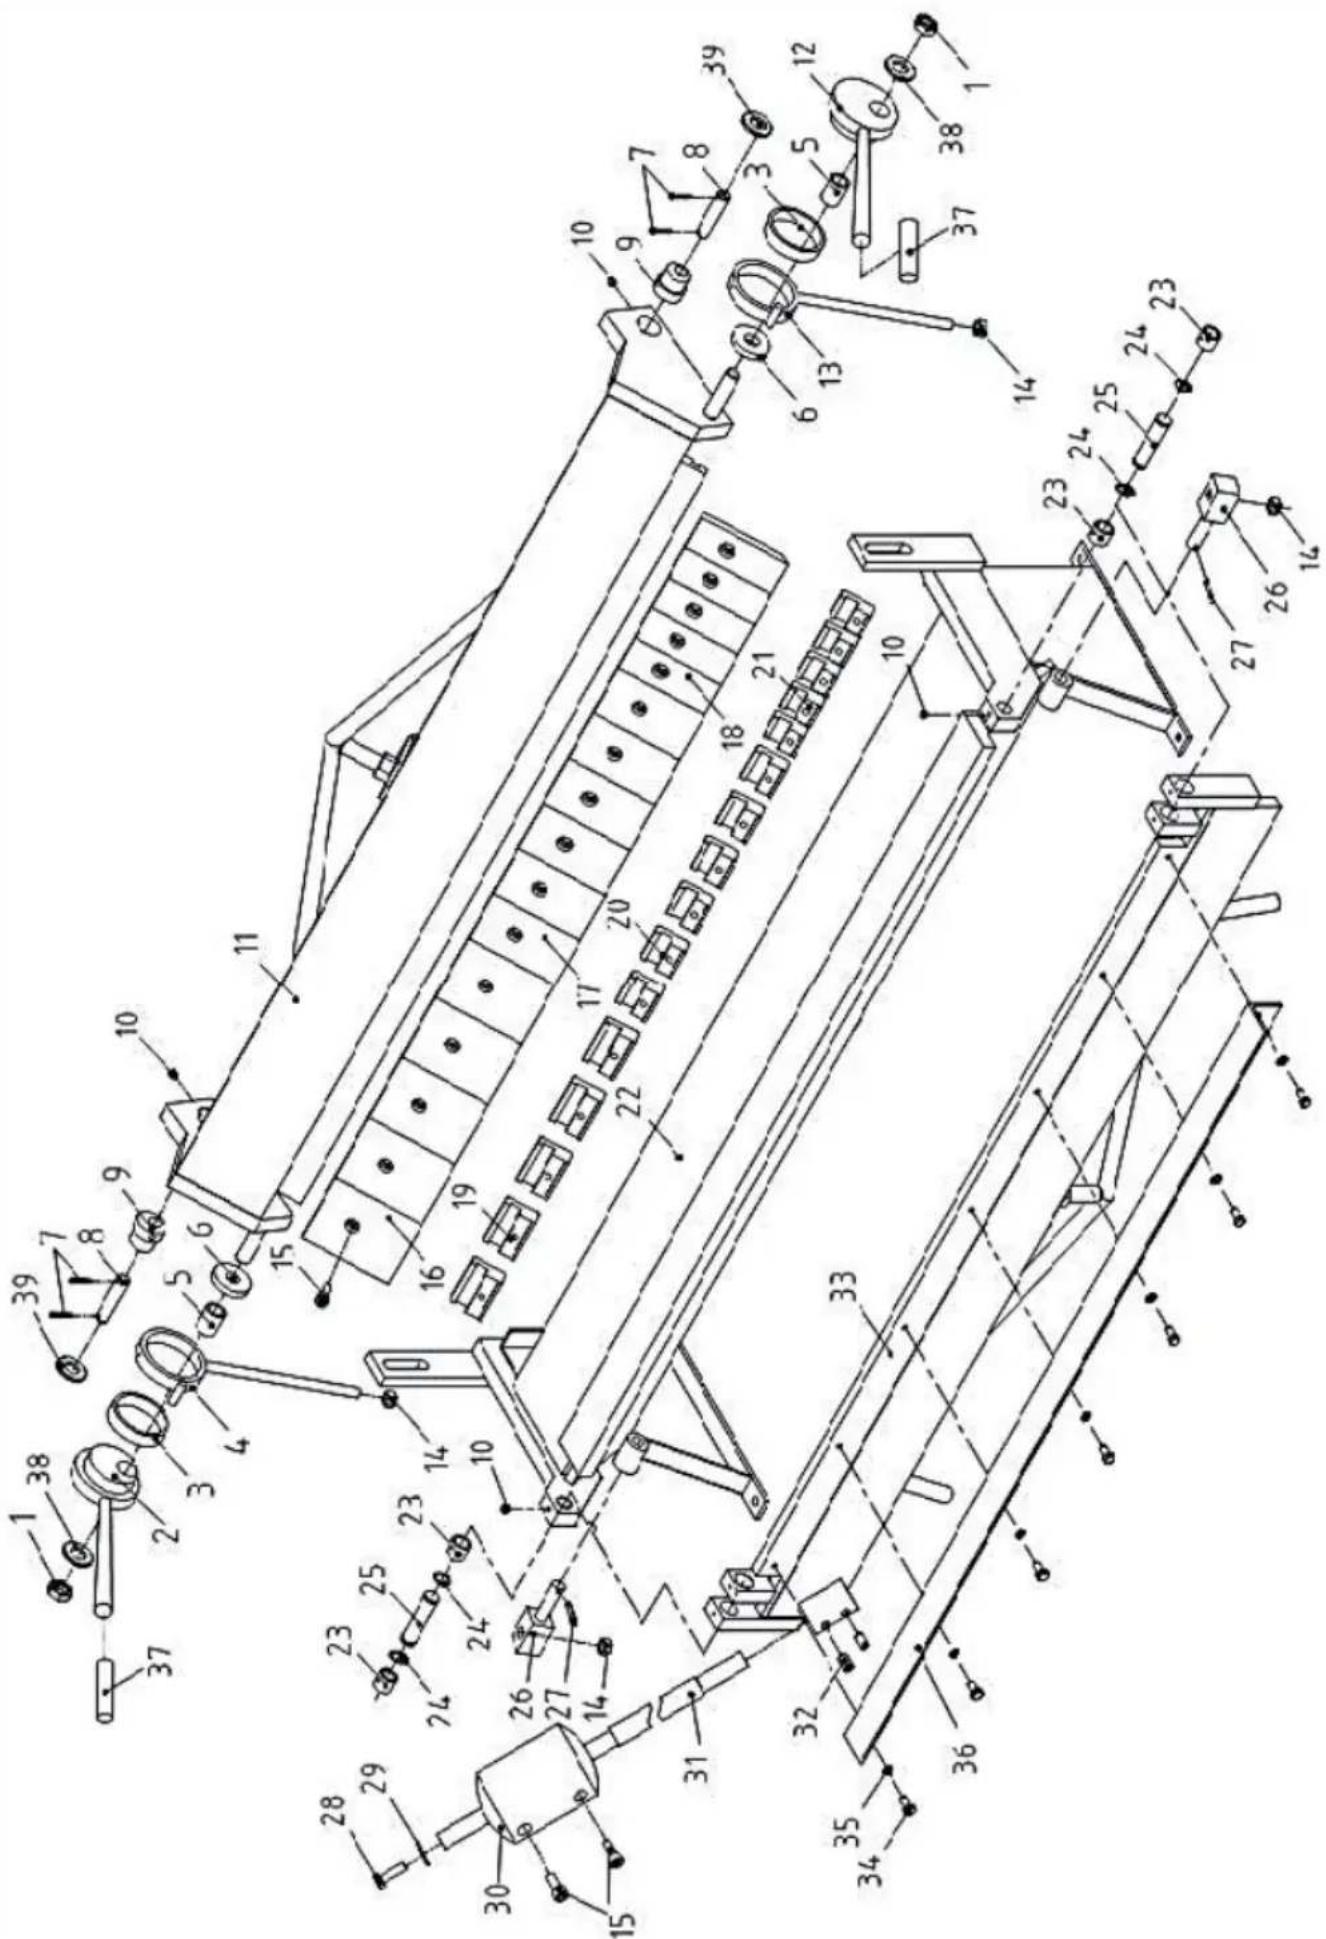
| Ref. | Description | QTY. |
| 1 | Nut M18 | 2 |
| 2 | Left Eccentric Handle | 1 |
| 3 | Big Washer | 2 |
| 4 | Left Connecting Rod | 1 |
| 5 | Washer | 2 |
| 6 | Spacer Bush | 2 |
| 7 | Cotter Pin φ4X25 | 4 |
| 8 | Pin φ16X70 | 2 |
| 9 | Eccentric Shaft | 2 |
| 10 | Set Screw M8X8 | 4 |
| 11 | Upper Die Framework | 1 |
| 12 | Right Eccentric Handle | 1 |
| 13 | Right Connecting Rod | 1 |
| 14 | M12 | 4 |
| 15 | M10X25 | 18 |
| 16 | Brake Dies 4" | 5 |
| 17 | Brake Dies 3" | 6 |
| 18 | Brake Dies 2" | 5 |
| 19 | Clamp Plate 63mm | 5 |
| 20 | Clamp Plate 45mm | 6 |
| Ref. | Description | QTY. |
| 21 | Clamp Plate 34mm | 5 |
| 22 | Frame | 1 |
| 23 | Case | 4 |
| 24 | Shaft Ring Φ18 | 4 |
| 25 | Shaft | 2 |
| 26 | Shaft | 2 |
| 27 | Cotter Pin φ5X25 | 2 |
| 28 | Hex. Bolt M10X35 | 1 |
| 29 | Flat Gasket Φ10 | 1 |
| 30 | Counterweight | 1 |
| 31 | Counterweight Rod | 1 |
| 32 | Set Screw M12X20 | 2 |
| 33 | Bending Leaf | 1 |
| 34 | Hex. Bolt M8X16 | 7 |
| 35 | Φ8 | 7 |
| 36 | Limit Angle plate | 1 |
| 37 | Handle Grip | 2 |
| 38 | Φ18 | 2 |
| 39 | Φ16 | 2 |
 | Warning-To reduce the risk of injury, user must read instructions manual carefully. |
 | This product is subject to the provision of European D 2012/19/EC. The symbol showing a wheelie bin crossed through indicates that the product requires separate refu collection in the European Union. This applies to the p and all accessories marked with this symbol. Products as such may not be discarded with normal domestic w must be taken to a collection point for recycling electri electronic devices |
Manufacturer: Shanghai Muxin Muye Youxian Gongsi
Address: Shuangcheng Road 803, Nong 11, Hao 1602A-1609 Shi, Baoshan District, Shanghai 200000 CN.
Imported to AUS: SIHAO PTY LTD. 1 ROKEVA STREET EASTWOOD NSW 2122 Australia
Imported to USA: Sanven Technology Ltd. Suite 250, 9166 Anaheim Place, Rancho Cucamonga, CA 91730
| UK | REP |
YH CONSULTING LIMITED. C/O YH Consulting Limited Office 147, Centurion House, London Road, Staines-upon-Thames, Surrey, TW18 4A
| EC | REP |
| Model. | Description | Qty |
| W1.5×610Z | Counterweight | 1 |
| W1.5×915Z | Counterweight | 1 |
| W1.5×1220Z | Counterweight | 1 |
| W1.5×1270Z | Counterweight | 1 |
| W1.0×305A | - | - |
| W1.0×610A | - | - |

VEVOR
Affordable. Reliable. Home Improvement.
Bending machine
MODEL: W1.5 × 610Z / W1.5 × 915Z / W1.5 × 1220Z / W1.5 × 1270Z / W1.0 × 305A
MODEL: W1.5×610Z / W1.5×915Z / W1.5×1220Z / W1.5 × 1270Z / W1.0 × 305A
NOTE
NOTE
Place, Rancho Cucamonga, CA 91730
| UK | REP |
| EC | REP |
Bending machine
MODEL: B1.5×610Z / B1.5×915Z / B1.5×1220Z / W1.5×1270Z / W1.0×305A
MODEL: W1.5×610Z / W1.5×915Z / W1.5×1220Z / W1.5×1270Z / W1.0×305A
.31" (7.87mm)
.50" (12.7mm)
NOTE
NOTE
| EC | REP |
Bending machine
MODEL: L1.5×610Z / L1.5×915Z / L1.5×1220Z /
WIDTH 1.5×1270Z / WIDTH 1.0×305A
MODEL: W1.5×610Z / W1.5×915Z / W1.5×1220Z /
WIDTH 1.5×1270Z / WIDTH 1.0×305A
.31" (7.87mm)
.50" (12.7mm)
NOTE
NOTE
YH CONSULTING LIMITED. C/O YH Consulting Limited Office 147, Centurion House, London Road, Staines-upon-Thames, Surrey, TW18 4A>
| EC | REP |
Affordable. Reliable. Home Improvement.
Bending machine
MODEL: W1.5×610Z / W1.5×915Z / W1.5×1220Z /
WIDTH 1.5×1270Z / WIDTH 1.0×305A
MODEL: W1.5×610Z / W1.5×915Z / W1.5×1220Z / WIDTH 1.5×1270Z / WIDTH 1.0×305A
NOTE
NOTE
YH CONSULTING LIMITED. C/O YH Consulting Limited Office 147, Centurion House, London Road, Staines-upon-Thames, Surrey, TW18 4A>
| EC | REP |
Affordable. Reliable. Home Improvement.
Bending machine
MODEL: W1.5×610Z / W1.5×915Z / W1.5×1220Z / W1.5×1270Z / W1.0×305A
MODELS: W1.5×610Z / W1.5×915Z / W1.5×1220Z / W1.5×1270Z / W1.0×305A
.31" (7.87mm)
.50" (12.7mm)
NOTE
NOTE
YH CONSULTING LIMITED. C/O YH Consulting Limited Office 147, Centurion House, London Road, Staines-upon-Thames, Surrey, TW18 4A>
| EC | REP |
Affordable. Reliable. Home Improvement.
Bending machine
MODEL: W1.5×610Z / W1.5×915Z / W1.5×1220Z / B1.5×1270Z / B1.0×305A
MODEL: B1.5×610Z / B1.5×915Z / B1.5×1220Z / B1.5×1270Z / B1.0×305A
NOTE
NOTE
YH CONSULTING LIMITED. C/O YH Consulting Limited Office 147, Centurion House, London Road, Staines-upon-Thames, Surrey, TW18 4A>
| EC | REP |
Affordable. Reliable. Home Improvement.
Bending machine
MODEL: W1.5×610Z / W1.5×915Z / W1.5×1220Z /
B1.5×12" /7"Z / B1.0×305A
MODEL: B1.5×610Z / B1.5×915Z / B1.5×1220Z /
B1.5×12" /7"Z / B1.0×305A
NOTE
NOTE
YH CONSULTING LIMITED. C/O YH Consulting Limited Office 147, Centurion House, London Road, Staines-upon-Thames, Surrey, TW18 4A>
| EC | REP |
- BENDING MACHINE
- UNPACKING
- SAVE THESE INSTRUCTIONS
- GENERAL SAFETY INFORMATION
- CAUTION
- SAFETY RULES
- KNOW HOW TO USE THE TOOL
- WARNING
- IMPORTANT
- ASSEMBLY
- ANCHORING THE MACHINE
- ATTACHING THE COUNTERWEIGHT
- NOTE
- ADJUSTING THE STOP ROD
- ADJUSTING THE SETBACK
- ADJUSTING THE CLAMPING PRESSURE
- CLAMP ALIGNMENT (END TO END)
- BENDING WING ALIGNMENT
- OPERATION
- BENDING SHEET METAL
- BENDING ALLOWANCE
- UNDERSTANDING SPRINGBACK
- MATERIAL SELECTION
- LUBRICATION AND MAINTENANCE
- OIL PORTS
- MACHINE ASSEMBLY
- VEVOR
- AFFORDABLE. RELIABLE. HOME IMPROVEMENT
Brand : Vevor
Model : W1.5x610Z
Category : Industrial machine