HXCZDJ-01 - Hoist Vevor - Free user manual and instructions
Find the device manual for free HXCZDJ-01 Vevor in PDF.

| Product Type | Truck Crane (Hoist) |
| Model | HXCZDJ-01 |
| Brand | Vevor |
| Maximum Load Capacity | 1100 lb (approx. 500 kg) |
| Lifting Height | 110 to 210 cm |
| Rotation Angle | 360 degrees |
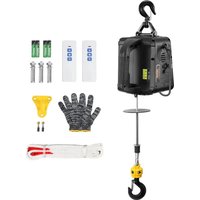
| Electric Winch | Max. 3500 lb, DC 12V, 0.9 kW |
| Manual Winch | Not included |
| Material | Steel with powder coating |
| Power Supply | 12V DC Battery (vehicle) |
| Main Functions | Lifting, 360° rotation, telescopic boom |
| Number of Boom Positions | 3 load adjustment positions |
| Safety | Hook safety latch, do not overload, wear protective equipment |
| Maintenance and Cleaning | Lubricate moving parts, inspect cable and hook before each use |
| Spare Parts and Repairability | Winch, boom, hook, wired controller available |
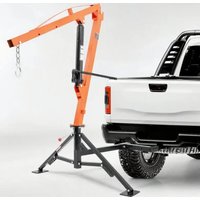
| Installation | Mount on truck receiver hitch, bolt fixation |
| General Information | Intermittent use, do not lift people |
| Standards | Compliant with FCC Part 15, WEEE Directive 2012/19/EU |
| Warranty | Technical support and electronic warranty certificate at www.vevor.com/support |
Frequently Asked Questions - HXCZDJ-01 Vevor
User questions about HXCZDJ-01 Vevor
0 question about this device. Answer the ones you know or ask your own.
Ask a new question about this device
Download the instructions for your Hoist in PDF format for free! Find your manual HXCZDJ-01 - Vevor and take your electronic device back in hand. On this page are published all the documents necessary for the use of your device. HXCZDJ-01 by Vevor.
USER MANUAL HXCZDJ-01 Vevor
Technical Support and E-Warranty Certificate www.vevor.com/support
TRUCK CRANES USER MANUAL
Model: HXCZDJ-01/ HXCZDJ-02
We continue to be committed to provide you tools with competitive price. "Save Half", "Half Price" or any other similar expressions used by us only represents a estimate of savings you might benefit from buying certain tools with us compared to the top brands and does not necessarily mean to cover all categories of tools offered by us are kindly reminded to verify carefully when you are placing an order with us if you actually saving half in comparison with the top major brands.
Model: HXCZDJ-01/ HXCZDJ-02
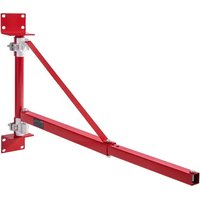
natural_image
Technical line drawing of a crane with hook and base mount (no text or symbols)Photo for reference
NEED HELP? CONTACT US!
Have product questions? Need technical support? Please feel fr contact us:
Technical Support and E-Warranty Certificate www.vevor.com/support
This is the original instruction, please read all manual instruction carefully before operating. VEVOR reserves a clear interpretation user manual. The appearance of the product shall be subject to product you received. Please forgive us that we won't inform you there are any technology or software updates on our product.
WARNING
-
Read carefully and understand all ASSEMBLY AND OPERATION INSTRUCTIONS before operating.
-
Failure to follow the safety rules and other basic safety precaution may result in serious personal injury.
GENERAL SAFETY RULES
- Never overload.
- The load is maximum when the arm of the product is adjusted to the shortest. The load of the product decreases as the arm increases.
-
Always wear ANSI-approved safety goggles.
-
Always wear hearing protection when working in noisy environments. Prolonged exposure to high-intensity noise can cause hearing loss.
-
Use safety equipment. Safety shoes, hard hat and work gloves must be used for applicable conditions.
-
Dress appropriately. Never wear loose contain long hair, and keep clothing and gloves away from moving parts
-
Use common sense when working. Stay alert and concentrate when setting up and using this Crane. Never work while under the influence of alcohol, drugs or medications
-
Keep the work area clean and well-lighted while assembling and using the Crane. Keep spectators and children out of the work area.
-
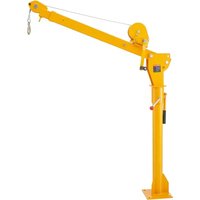
This Crane is designed to be positioned outside the truck bed, an attached to the vehicle via the receiver hitch. It is portable and easy adjust to different boom positions for 275, 550 and 1100 Lbs. maximum capacity. Please do not modify the Crane or use this product for pur it was not designed for.
-
Never exceed the maximum of 1,000 Lbs. boom capacity. When attaching the load to Hook with Chain, use appropriate couplings rated to handle the load. Couplings must be fully engaged on the Hook, with the Hook's safety latch closed.
-
Never lift people or animals. Keep children and spectators clear
area under and around the lifted cargo. When operating the Crane, s clear of the area between the Crane and the load.
-
Before each use, inspect the Crane, the Long Ram Jack and the Hook for damage, corrosion and any other condition that might be the safe performance of this product.
-
Only set up the Crane when the pickup truck is off the highway clear location that is away from oncoming traffic.
-
Before lifting cargo into the truck bed, make sure the truck's eng OFF with automatic transmission in PARK. Manual transmission vehicle should be in gear. Chock all wheels for added safety.
-
Adhere to all Department of Transportation (D.O.T.) requirements using this product.
-
Note the position of the vehicle's exhaust pipes before setting up Crane. Flammable goods being lifted by the Crane could come in co with still-hot exhaust pipes and catch fire.
-
Setting up the Crane, and maneuvering heavy cargo on the Crar be strenuous and dangerous. This should only be done by individuals can physically handle the demands of these tasks.
-
The Crane is for lifting purposes only, not for supporting loads. (I support the load with appropriate jack stands or equivalent, if immediate loading or unloading is not possible. Do not leave a suspended load unattended.
-
Remove the Crane from the vehicle's receiver hitch when Crane in use.
-
Always be aware of dynamic loading. An excess load may be cr for a brief instant by a sudden tug or weight gain, which can result damage to the Crane, the cargo, and/or personal injury.
-
Keep in mind that the warnings previously discussed cannot cover possible events and circumstances. It is important that the person set up, loading/ unloading and using this product use common sense at times.
SAVE THESE INSTRUCTIONS
MODEL AND PARAMETERS
| Model | HXCZDJ-01 | HXCZDJ-02 |
| Bracket Capacity | Max. 1100lbs | Max. 2200lbs |
| Hoisting Height | 110~210cm | 120-215CM |
| Electric Winch | Max.3500lbsDC12V 0.9KW | Max6000lbsDC12V 1.5KW |
| Hand Winch | / | / |
| Rotation Angle | 360 degree | 360 degree |
| Material | Powder-coated Steel | Powder-coated Steel |
STRUCTURE DIAGRAM
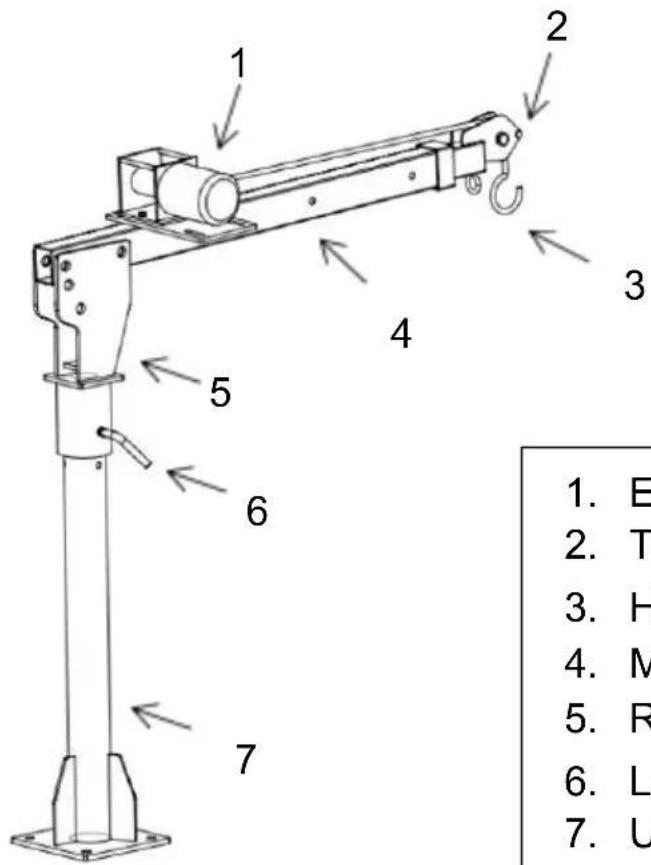
- Electric winch
- Telescopic Boom
- Hook
- Movable Boom
- Rotating head
- Long Bolt
- Upright Rod
COMPONENTS
| NO. | Name | Picture | Q’ty of HXCZDJ-01 | Q’ty of HXCZDJ-02 |
| 1 | A | 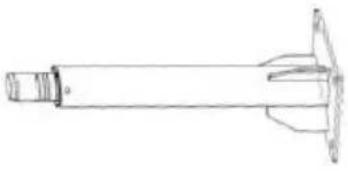 | 1 | 1 |
| 2 | B | 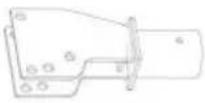 | 1 | 1 |
| 3 | C | 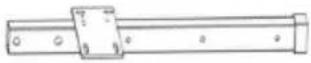 | 1 | 1 |
| 4 | D | 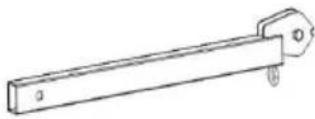 | 1 | 1 |
| 5 | E | 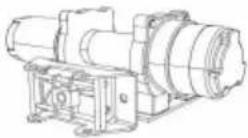 Electric winch Electric winch | 1 | 1 |
| 6 | F | 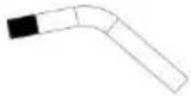 | 1 | 1 |
| 7 | G |  | 0 | 0 |
| 8 | H | 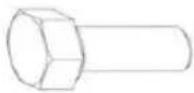 M8 M8 | 2 | 2 |
| 9 | I | 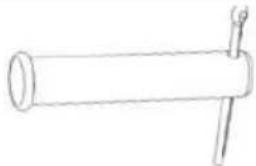 Φ20*90/Φ23*150 Φ20*90/Φ23*150 | 2 | 2 |
| 10 | J | 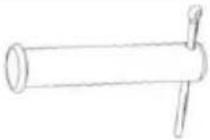 Φ12*70/Φ20*120 Φ12*70/Φ20*120 | 1 | 1 |
| 11 | K | 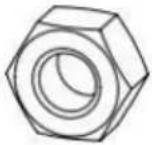 | 2 | 2 |
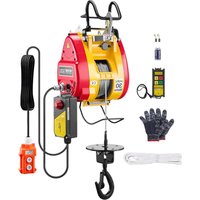
| 12 | L | 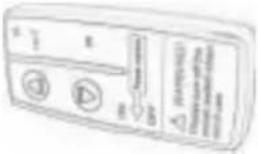 Remote Control Remote Control | / | 1 |
| 13 | M | 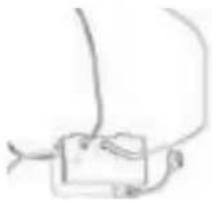 Control Box Control Box | / | 1 |
| 14 | N |  Wired Controller Wired Controller | / | 1 |
| 15 | O | 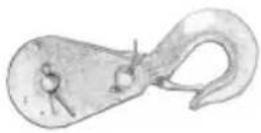 | 1 | 1 |
| 16 | P | 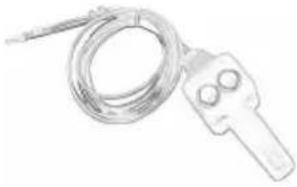 Wired Controller Wired Controller | 1 | / |
ASSEMBLY
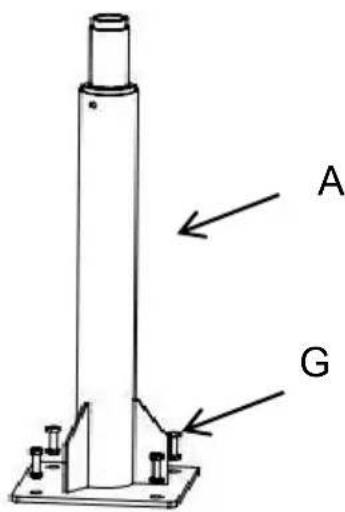
Step 1: Step 1: Install the upright pole (A) onto the sturdy truck floor, a choose the appropriate bolts and nuts (G) for locking according to different vehicle models and installation methods. (G needs to purchase it by yours you need)
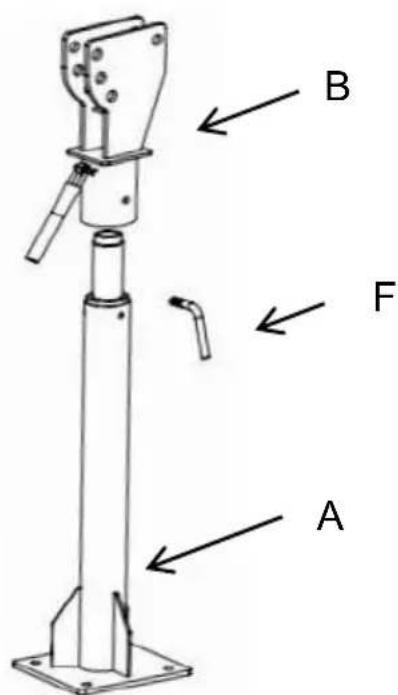
Step 2: Slowly slip the rotating head(B) onto the upright rod; Locking the long screw can make the rotating head(B) not rotate.
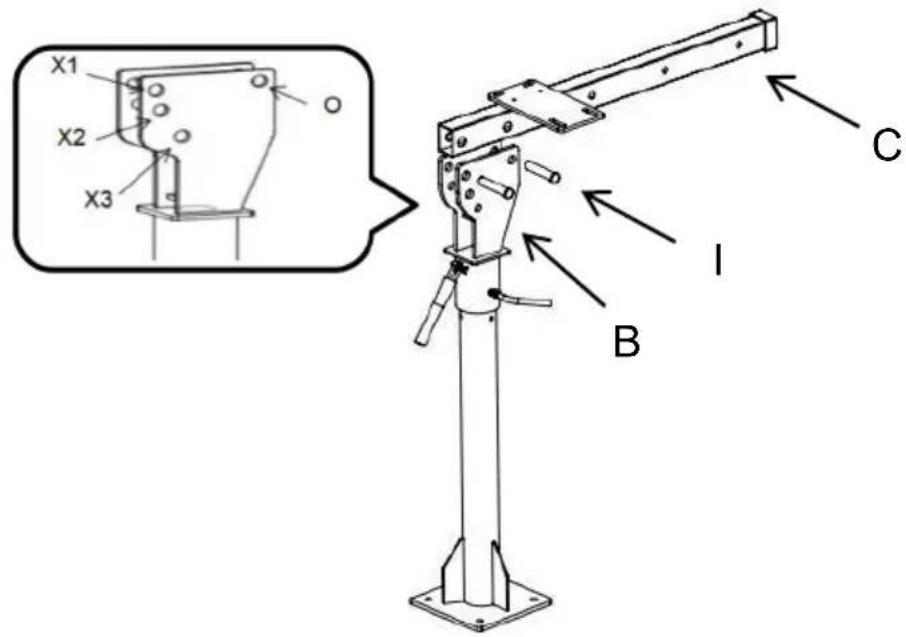
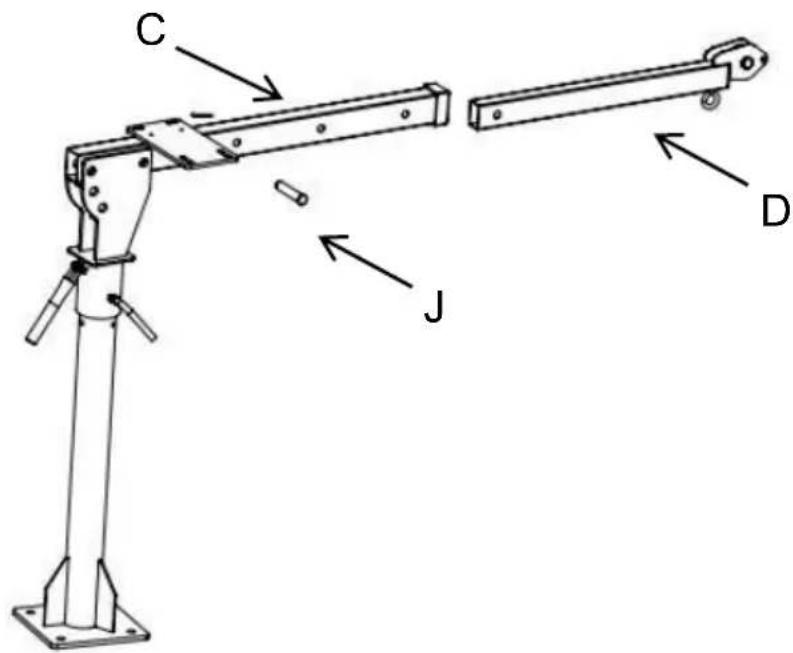
Step 3: Install the movable boom(C).Connect B and C with two pins (the pin end is stuck into the cotter pin.
Note: The rotating head(B) has three holes(X1, X2, X3) for adjusting angles.
The movable boom(C) can rotate around O to adjust the angle.
Step 4: Insert the telescopic boom(D) into the movable boom(C), then connect with a pin(J).
Note: For D, there are three different load positions to be adjusted.
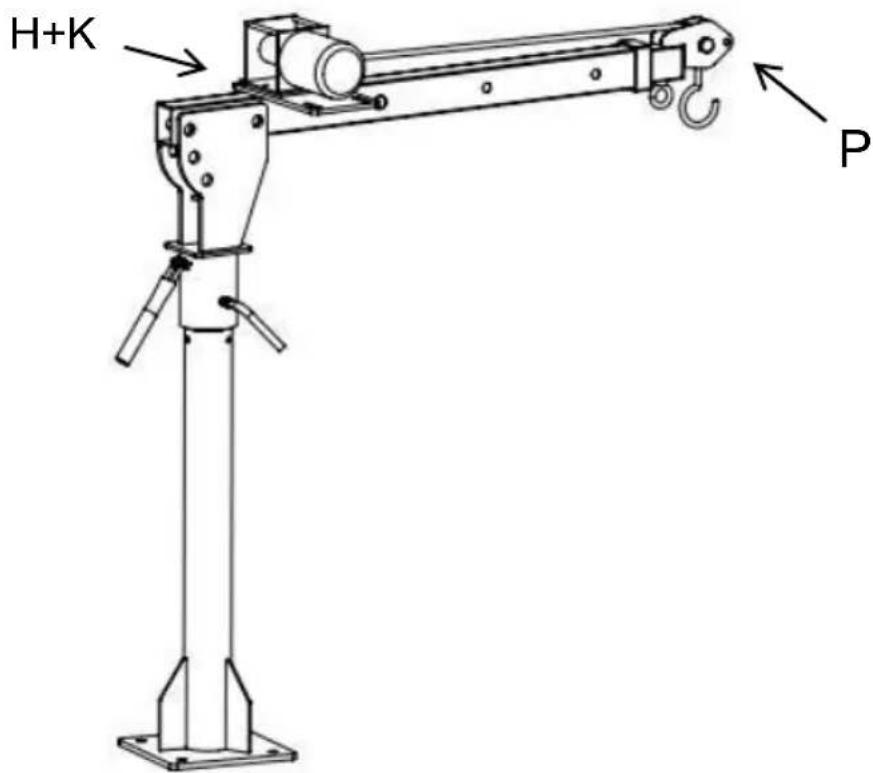
Step 5: Install the electric winch, and lock it with bolts and nuts(H+K Remove the limit pin at P, pull out the hook, place the wire in the groove and reinstall the limit pin a(E) shown below.
Electric Winch operation:
WARNING:
The electric winch is a very powerful machine. If used unsafely or improperly, it could result in property damage or personal injury.
The responsibility for the safe installation and operation of the winch prevention of personal injury and property damage ultimately rests with the operator. There is no substitute for the use of good judgment an caution in operating a winch.
- Maximum working load capacity is on the wire rope layer closest the drum. Do not overload. Do not attempt prolonged pulls at heavy loads.
Overloads can damage the winch and/or the wire rope and create unsafe operating conditions. For loads over 1/2 rated capacity, we recommend using the optional pulley block to double-line the wire rope
This reduces the load on the winch and the strain on the wire rope approximately 50%.
- Inspect wire rope and equipment frequently. A frayed wire rope with broken strands should be replaced immediately.
- Use heavy leather gloves when handling wire rope. Do not let wir slide through your hands.
- Never winch with less than 5 turns of wire rope around the winch since the wire rope end fastener may NOT withstand the full load.
- Never release the free-spool clutch when there is a load on the v
- Do not machine or weld any part of the winch. Such alterations are weaken the structural integrity of the winch.
- Do not connect winch to AC110V house current or 220V mains as burnout or fatal shock may occur.
- Never allow shock loads to be applied to the winch or wire rope.
- The switch assembly must be kept free of dirt and moisture to enter safe operation.
- Dress properly. Do not wear loose clothing or jewelry. Protective, electrically non-conductive clothes and non-skid footwear are recommended when working. Wear restrictive hair covering to contain hair.
- Never use your winch for lifting or moving people.
- Winch is designed primarily for intermittent applications.
- Keep clear of the winch, wire rope and hook while operating.
- Do not let the wire rope knot, so as not to cause damage to the rope.
- To pull the cable, turn the clutch knob counterclockwise to loosen and then pull out the cable you need always leave at least five turn cable on the spool to prevent pulling the cable out of the winch.
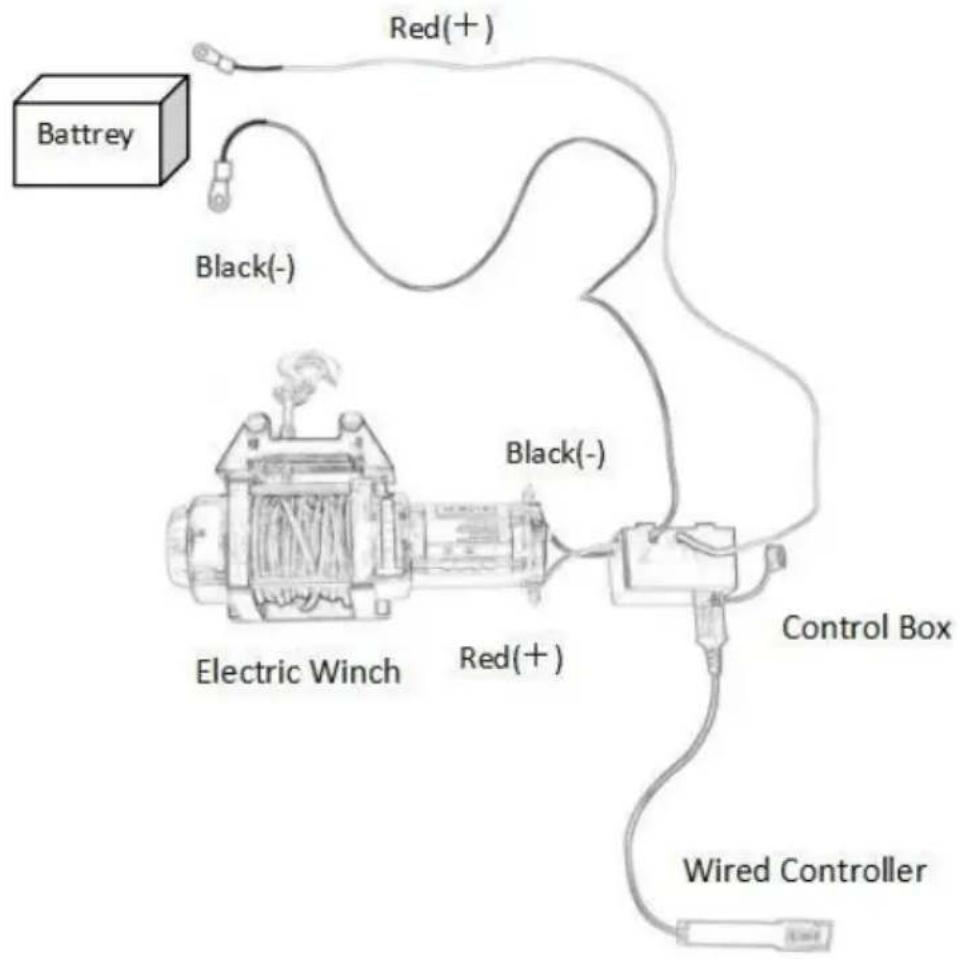
WIRING INSTALLATION
1) Route the short red and black color-coded wires to the motor.
2) Route the long red and black color-coded wires to the battery.
3) Connect the wired controller to the control box
4) Check that all wiring is clear of sharp edges and pinch points.
5) Secure loose wiring with tie wraps or electrical tape.
6) Never leave the switch plugged in when the winch is not in use.
MAINTENANCE
- Frequently check the condition of the truck-mounted crane.
- Do not use the damaged crane.
- Make sure all components are in good condition. If the crane or receiver hitch becomes damaged by an accident or any other type of damage is noted, it should be replaced.
- Check to make sure that all hardware is tightly secured in place.
- Keep the Crane clean and periodically lubricate moving parts.
- If the wire rope has become worn or is beginning to show signs of strands breaking it must be replaced before being used again.
| Symptoms | Possible Causes | Corrective Action |
| The motor does not turn on | 1.Switch inoperative2.Broken wires or bad connection3.Damaged motor | 1.Replace switch2.Check for poor connections3.Replace or repair the motor |
| The motor runs extremely hot | 1.Long period of operation2.Overload3.Damaged motor | 1.Let the winch cool down periodically.2.Do not overload3.Replace or repair the motor |
| The motor runs, but with insufficient power or line speed | 1.Weak battery2.Battery to winch wire long3.Poor battery connection4.Damaged motor | 1.Recharge or replace the battery and check the charging system2.Keep the winch within the distance allowed by lead wire3.Check battery terminals for corrosion and clean them as required4.Replace or repair the motor |
| The winch runs backward. | 1.Wires reversed2. The battery is incorrectly connected | 1.Check wiring2.Check battery connections |
| The motor runs but the drum doesn't turn | Clutch not engaged | Engage clutch |
FCC Information:
CAUTION: Changes or modifications not expressly approved by the party responsible for compliance could void the user's authority to operate the equipment!
This device complies with Part 15 of the FCC Rules. Operation is subject to the following two conditions:
1) This product may cause harmful interference.
2) This product must accept any interference received, including interference that may cause undesired operation.
WARNING: Changes or modifications to this product not expressly approve by the party responsible for compliance could void the user's authority to operate the product.
Note: This product has been tested and found to comply with the limits Class B digital device pursuant to Part 15 of the FCC Rules, These limi designed to provide reasonable protection against harmful interference in a residential installation.
This product generates, uses and can radiate radio frequency energy, and not installed and used in accordance with the instructions, it may cause harmful interference to radio communications. However, there is no guarantee that interference will not occur in a particular installation. If this product cause harmful interference to radio or television reception, which can be determined by turning the product off and on, the user is encouraged to correct the interference by one or more of the following measures.
- Reorient or relocate the receiving antenna.
- Increase the distance between the product and receiver.
- Connect the product to an outlet on a circuit different from that to whi receiver is connected.
- Consult the dealer or an experienced radio/TV technician for assistance.
CORRECT DISPOSAL

This product is subject to the provision of European Directive 2012/19/EU. The symbol showing a wheelie bin crossed through indicates that the product requires separate refuse collection in the European Union. This applies to the product and all accessories marked with this symbol. Products marked as such may not be
discarded with normal domestic waste, but must be taken to a collection for recycling electrical and electronic devices.
 | Warning - To reduce the risk of injury, user must read instructions manual carefully |
 | Wear head protection |
VEVOR®
TOUGH TOOLS, HALF PRICE
Technical Support and E-Warranty Certificate www.vevor.com/support
VEVOR®
TOUGH TOOLS, HALF PRICE
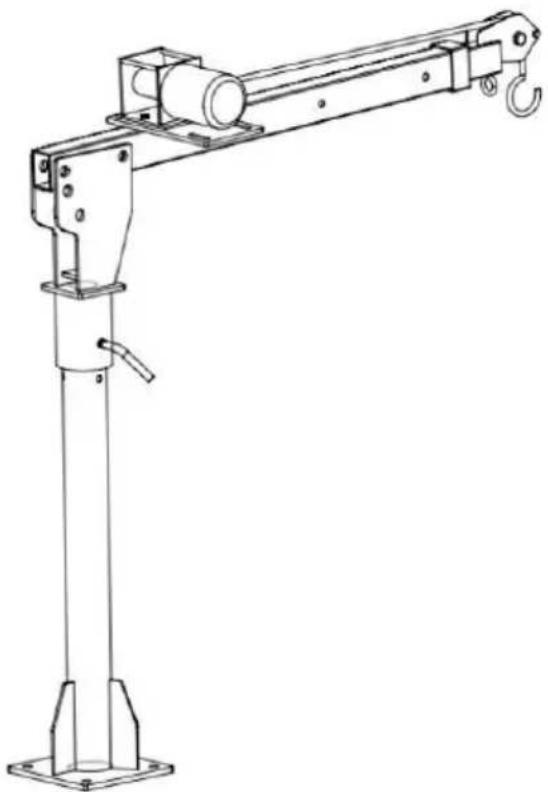
natural_image
Technical line drawing of a mechanical crane with hook and base mount (no text or symbols)natural_image
Technical line drawing of a mechanical crane with hook and base mount (no text or symbols)Foto als Referenz
www.vevor.com/support
VEVOR®
TOUGH TOOLS, HALF PRICE
natural_image
Technical line drawing of a mechanical crane with hook and base mount (no text or symbols)Foto di riferimento
www.vevor.com/support
natural_image
Technical line drawing of a mechanical crane with hook and base mount (no text or symbols)Foto de referencia
www.vevor.com/support
VEVOR®
TOUGH TOOLS, HALF PRICE
natural_image
Technical line drawing of a mechanical crane with hook and base mount (no text or symbols)natural_image
Technical line drawing of a mechanical crane with hook and base mount (no text or symbols)Foto ter referentie
HULP NODIG? NEEM CONTACT MET ONS OP!
natural_image
Technical line drawing of a mechanical crane with hook and base mount (no text or symbols)Foto för referens
BEHÖVER HJÄLP? KONTAKTA OSS!
www.vevor.com/support