
F18 - Clock Vevor - Free user manual and instructions
Find the device manual for free F18 Vevor in PDF.
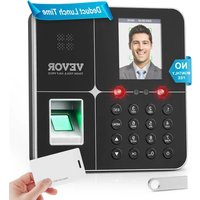


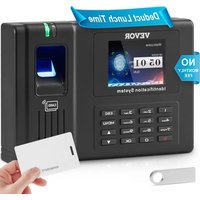
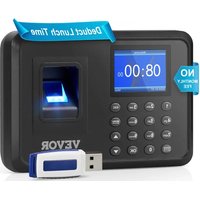
| Brand | Vevor |
| Model | F18 |
| Product Type | Biometric Time Clock |
| Dimensions (L x W x H) | 154 x 158 x 78 mm |
| Power Supply | DC 5V, 1A, 5W |
| Clocking Methods | Fingerprint, facial recognition, RFID card, password |
| User Capacity | Not specified (estimated: several hundred) |
| Supported Languages | English, German, French, Spanish, Italian |
| Display | Not specified (estimated: LCD screen) |
| Operating Modes | Clocking, employee management, report download |
| Shift Management | Up to 24 teams, customizable schedules |
| Data Export | Via USB key (FAT32 format) |
| Admin Functions | Administrator rights, menu lock |
| Operating Temperature | 0°C to 45°C |
| Operating Humidity | Dry and clean environment recommended |
| Maintenance | Clean the surface with a soft, dry cloth; avoid dust and moisture |
| Security | Administrator passwords, data protection |
| Package Contents | Power adapter, 5 RFID cards, USB key, 4 screws, 4 wall plugs |
| Repairability | Spare parts not specified; contact technical support |
| Certifications | Compliant with FCC Part 15 rules |
Frequently Asked Questions - F18 Vevor
User questions about F18 Vevor
0 question about this device. Answer the ones you know or ask your own.
Ask a new question about this device
Download the instructions for your Clock in PDF format for free! Find your manual F18 - Vevor and take your electronic device back in hand. On this page are published all the documents necessary for the use of your device. F18 by Vevor.
USER MANUAL F18 Vevor
Technical Support and E-Warranty Certificate
www.vevor.com/support
TIME CLOCK
USER MANUAL
MODEL:F18
We continue to be committed to provide you tools with competitive price. "Save Half", "Half Price" or any other similar expressions used by us only represents an estimate of savings you might benefit from buying certain tools with us compared to the major top brands and does not necessarily mean to cover all categories of tools offered by us. You are kindly reminded to verify carefully when you are placing an order with us if you are actually saving half in comparison with the top major brands.
VEVOR®
TOUGH TOOLS, HALF PRICE
TIME CLOCK
MODEL:F18
NEED HELP? CONTACT US!
Have product questions? Need technical support? Please feel free to contact us:
Technical Support and E-Warranty Certificate www.vevor.com/support
This is the original instruction, please read all manual instructions carefully before operating. VEVOR reserves a clear interpretation of the user manual. The appearance of the product shall be subject to the product you received. Please forgive us that we won't inform you again if there are any technology or software updates on our product.
 | Warning-To reduce the risk of injury, user must read instructions manual carefully. |
 | This device complies with Part 15 of the FCC Rules. Operat subject to the following two conditions:(1)This device may not harmful interference, and (2)this device must accept any inter received, including interference that may cause undesired oper |
 | This product is subject to the provision of European Directive 2012/19/EC. The symbol showing a wheelie bin crossed through indicates that the product requires separate refuse collection in European Union. This applies to the product and all accessor marked with this symbol. Products marked as such may not discarded with normal domestic waste, but must be taken to collection point for recycling electrical and electronic devices |
INSTALLATION CAUTIONS
- Do not install the machine in an extremely bad temperature environment. Please keep the device working at a temperature of 0°C to 45°C.
- Do not install the machine in a dirty or humid place. Please keep the device in a dry and clean environment for a longer lifetime.
- Keep the device far away from dust, water, and fire. All the elements may short circuit and cause mainboard damage.
- Back up data regularly to avoid unexpected situations of data loss.
- Use the matched stable voltage power adapter from the default package unit. The machine may be damaged because of current differences from other types of power adapters.
- Please don't leave the machine in direct light, because light shine impacts the fingerprint and may lead to failure to verify the fingerprint.
- The facial identification module uses special technology; the facial can be verified whether the light is dark or bright.
- Please do not use the time attendance machine outdoors, because long working outdoors will have a bad influence on the device. If the device must be used outdoors, shading and radiation equipment are required for protection in the summer, and insulation facilities are required in the winter.
TECHNICAL PARAMETERS
| Model | F18 |
| Working Power | DC5V 1A 5W |
| Language Selection | Supports 5 languages(English, German, French, Spanish, Italian) |
| Product Size | 154*158*78mm (Inclusion plate) |
PARTS LIST
| 1 | Adapter (with adapter plug) | 1 |
| 2 | RFID Card | 5 |
| 3 | Flash Drive | 1 |
| 4 | Self-tapping Screw | 4 |
| 5 | Plastic Expansion Sleeve | 4 |
ASSEMBLY STEP
- Remove the holder from the instrument.
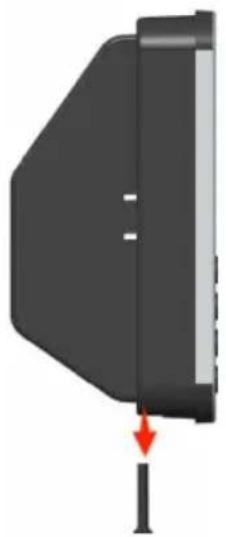
2. Fix the [holder] on the wall.
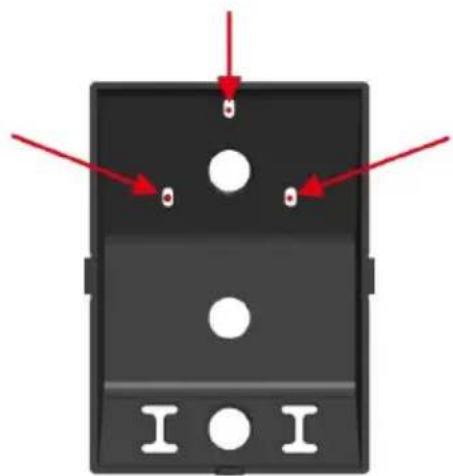
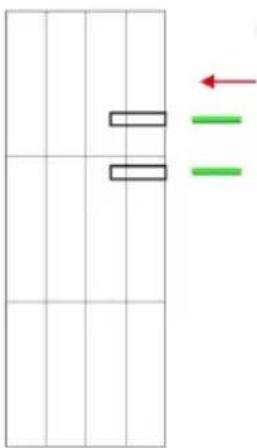
- Drill three holes
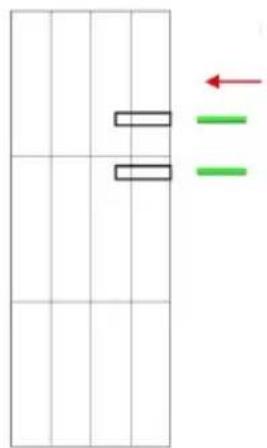
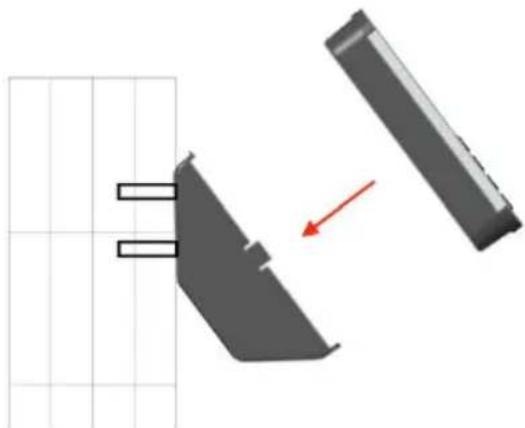
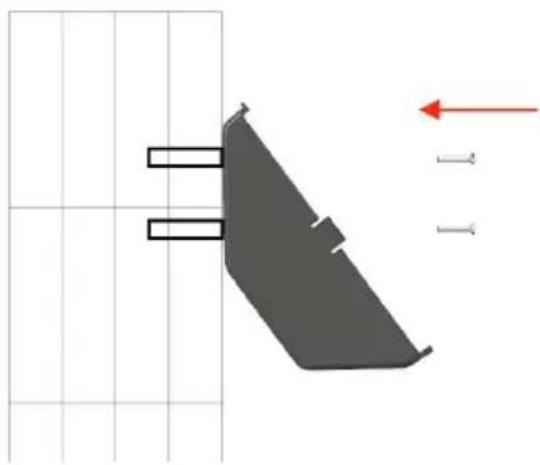
- Hang the back plate
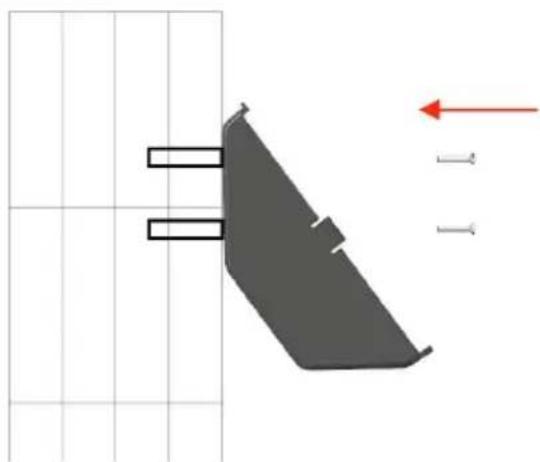
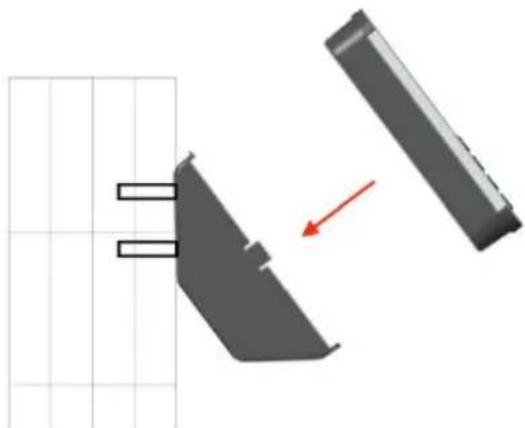
- Hang the machine
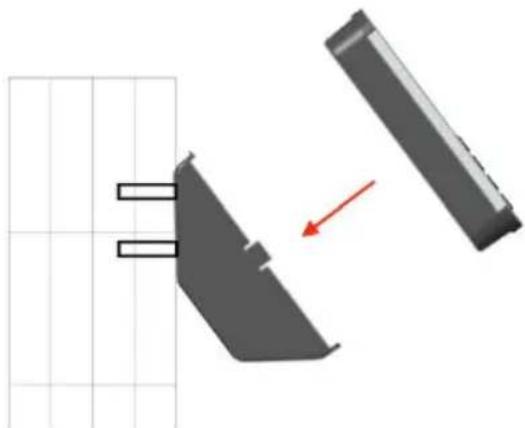
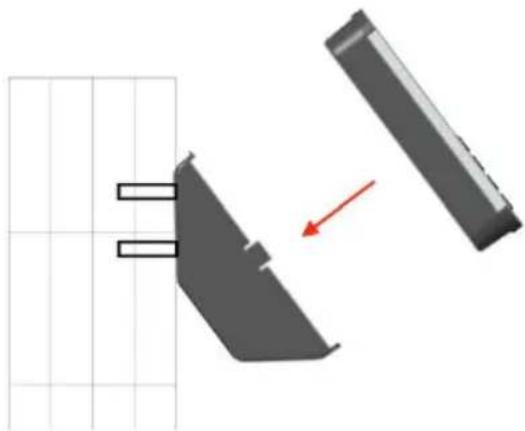
- Tighten the screws on the machine
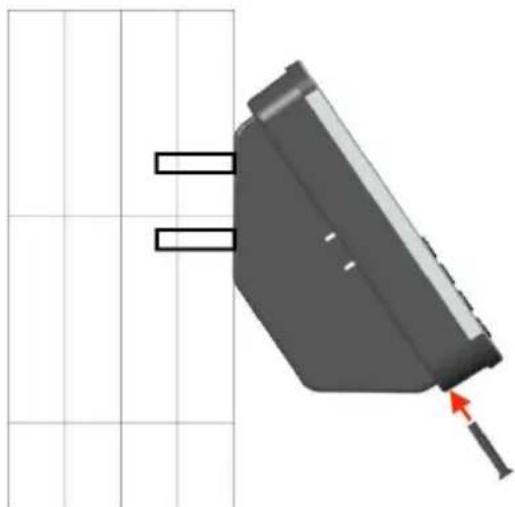
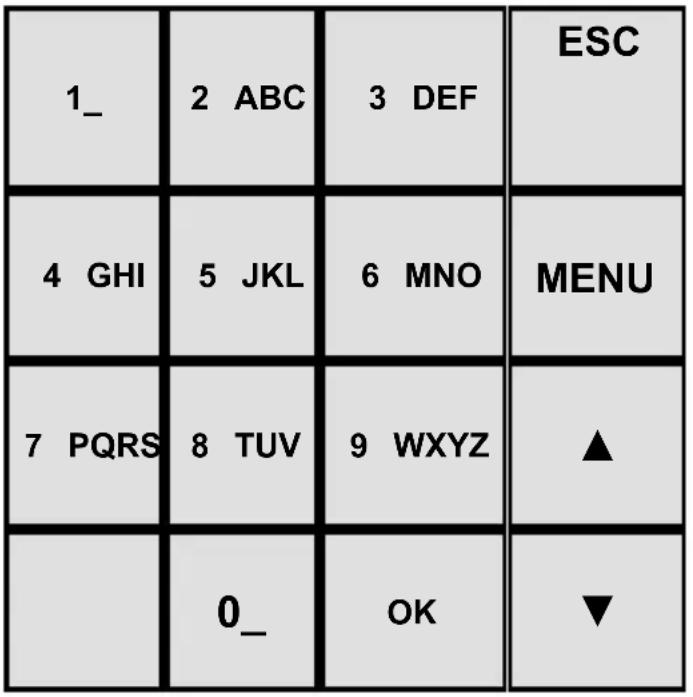 |
ESC
Exit current settings
MENU
Enter menu management
OK
Confirm the current settings

Switching input method and power on/off key

number 0 and space key

Move the cursor up

Move the cursor downward
- ..9
Input number and 26
English Letters
DEPARTMENT SETTING
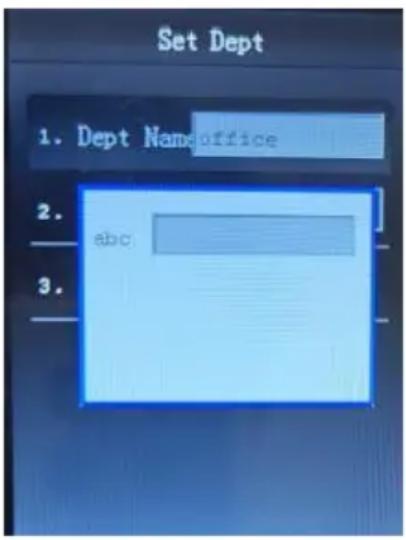
Press ▼ to select "Set Dept" to select the department, or use the T9 key to enter the department, then press the OK key to confirm.
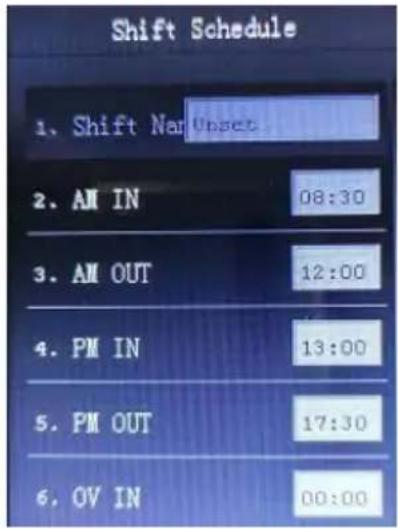
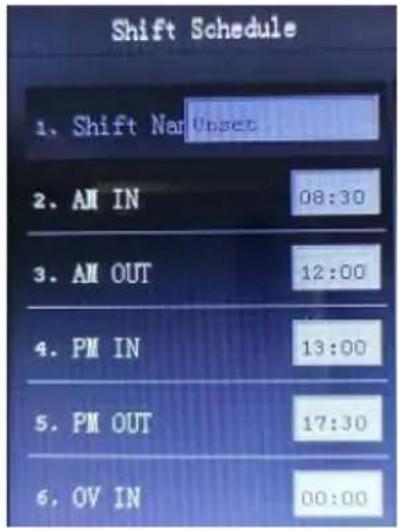
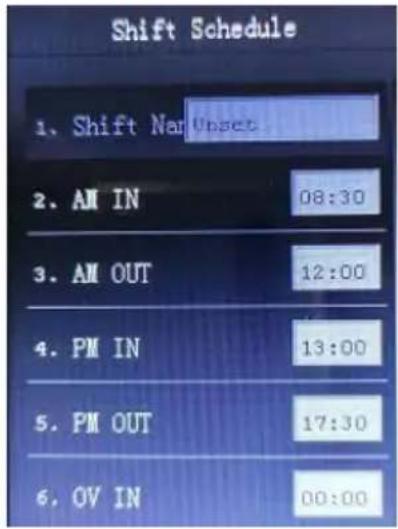
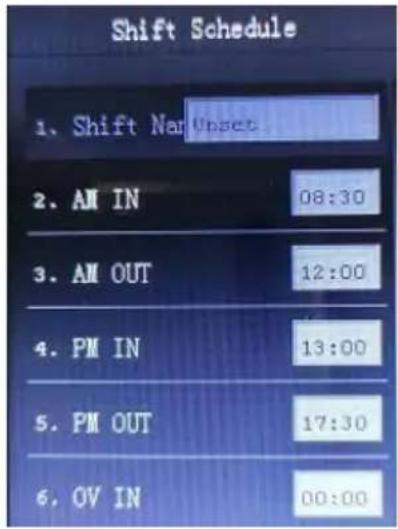
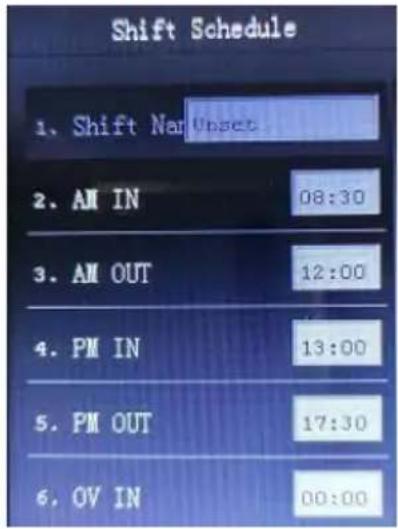
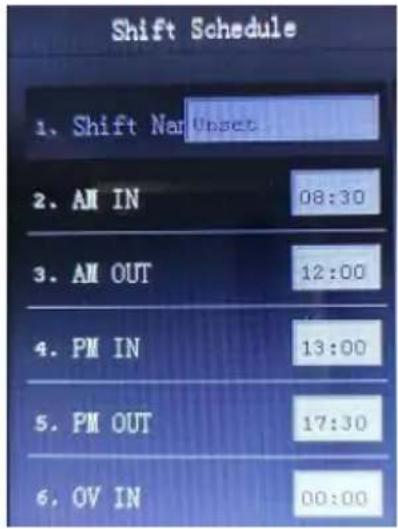
1. Press [MENU] to enter the main menu, press ▼ to select "Att.Rule" → "Shift Schedule" - input the shift name (up to 24 shifts can be set). 2. According to the company shift schedule, set the shift time. Different shift names and times should be set up if employees' commute times are inconsistent.
Press ▲▼→OK to set the time for AM IN/OUT (morning work time / morning out time), PM IN/OUT (afternoon work time / afternoon out time), OV IN/OUT (overtime in/out) → OK to confirm and save.
Note: The default is shift 1. If only punching twice a day, just set the starting work time in "AM IN" and the ending time in "AM OUT". For example, if work start time is 09:00 AM and ending time is 17:00 PM, the setting should be AM IN: 09:00, AM OUT: 17:00, and PM IN/OUT and OV should be set to 00:00.
ARRANGE SHIFT
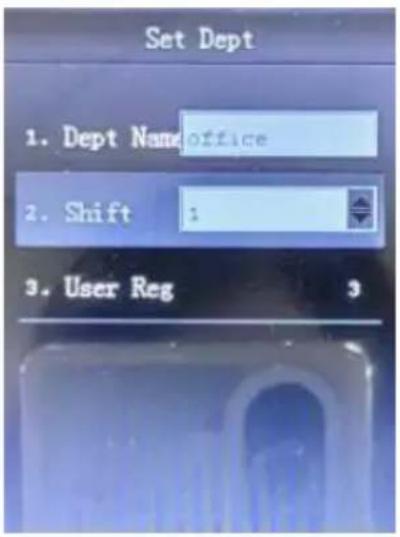
Press [MENU] to enter the main menu, press ▼ to select "Att.Rule", press [OK] to enter, press ▼ to select "Set Dept" to select the department, press OK → ▼ to choose the shift name.
EMPLOYEE REGISTRATION
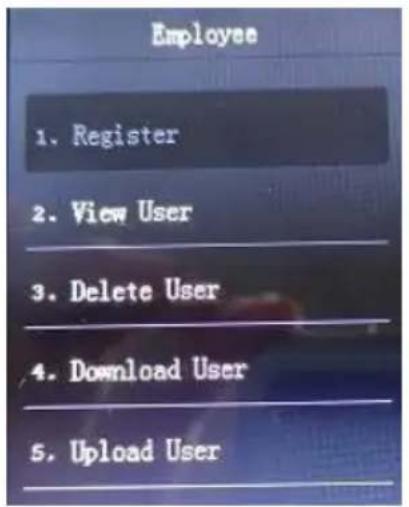
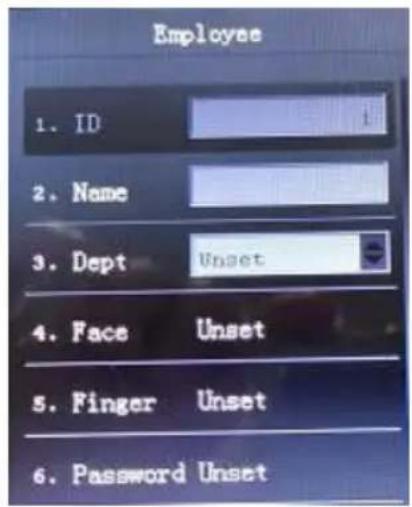
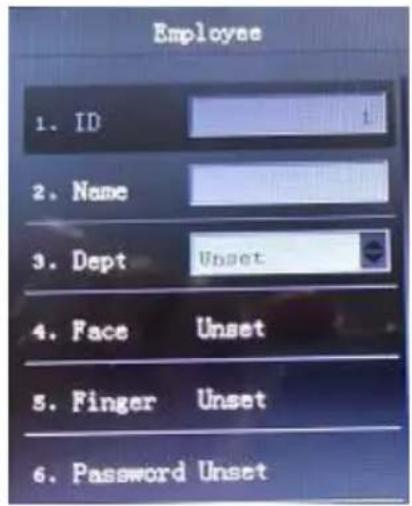
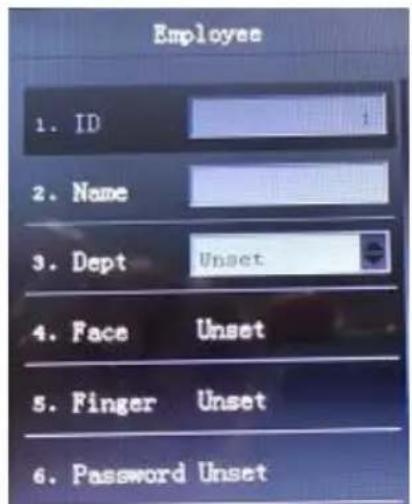
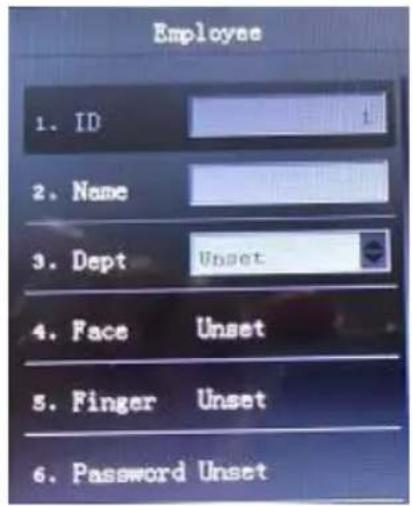
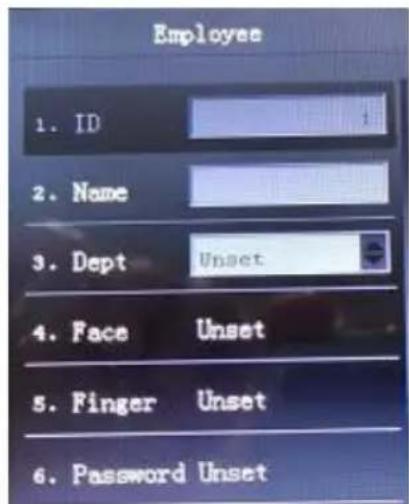
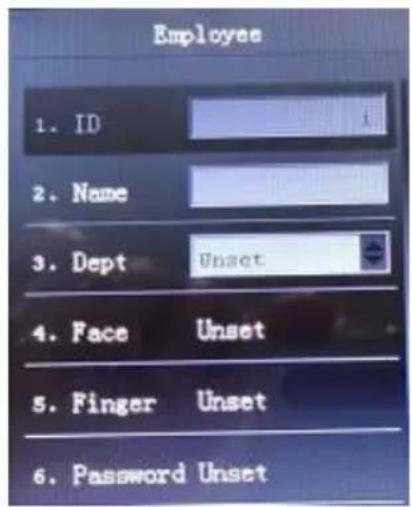
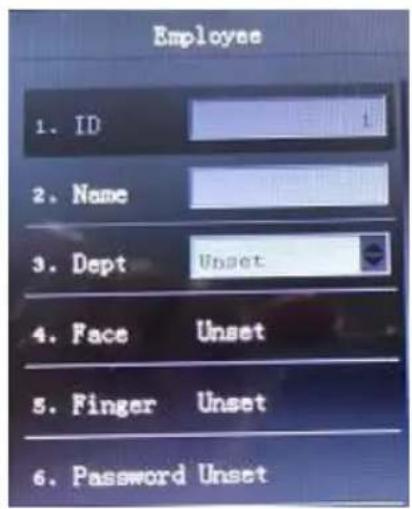
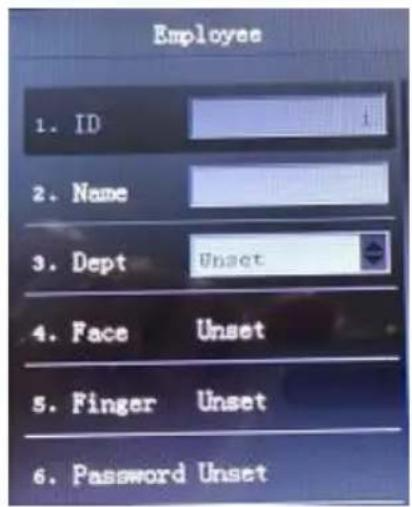
Press [MENU] to enter the main menu, select [Employee], press OK to select [Register].
ID: System default.
Name: Use the numeric keys to enter.
Dept: Press ▼ to select departments from the list.
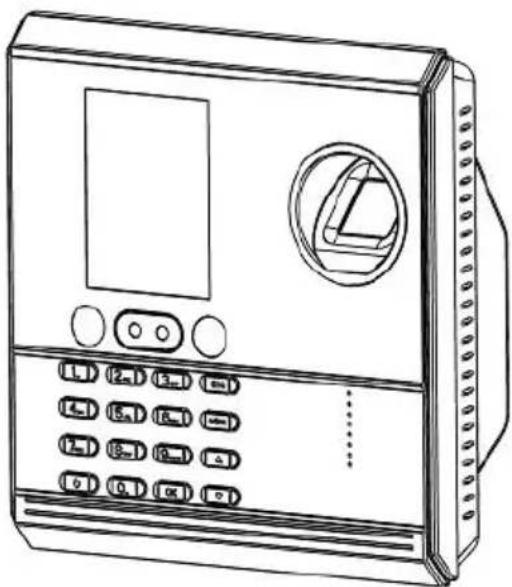
Face: Register face, pay attention to the distance between your face and the camera and keep your eyes in the green pane.
Finger: The fingerprint collector was pressed three times by the finger, and the fingerprint was registered successfully.
Card: Put the card in the swipe area, the device will recognize the card number.
Password: Input a password two times.
Privilege: Press ▼ to select Jurisdiction from the list. User only can punch time, admin can operate the attendance device.
Note: After setting the attendance machine administrator, the menu will be locked, only the administrator can operate the machine; C users cannot enter menu to modify the attendance machine setting. Please set up at least two administrators. When one administrator is not in the company or leaves the company, another one can open the attendance machine.
ATTEND.RULES
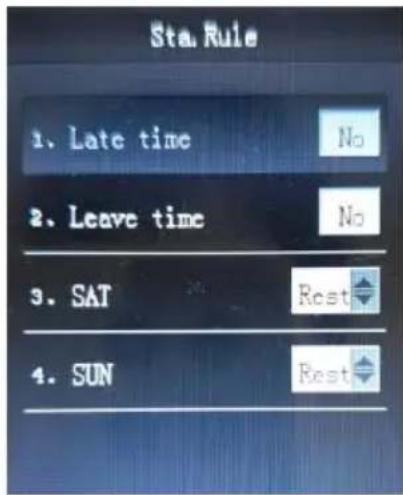
Press【MENU】to enter main menu, press ▼ to select "Att.rule". It can set up the
company name, Statistic Rule, bell ring time. Sta.Rule means Statistic Rule. Time: allowable late time. Leave time: allowable early leave time. Saturday and Sunday rest or not.
DEVICE SETTINGS
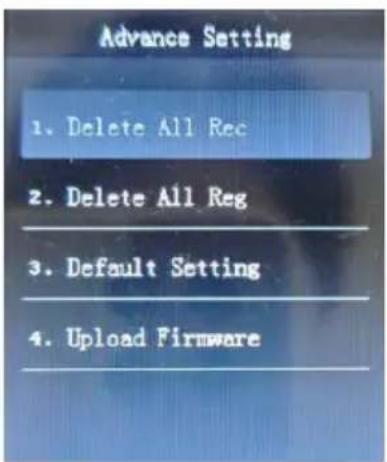
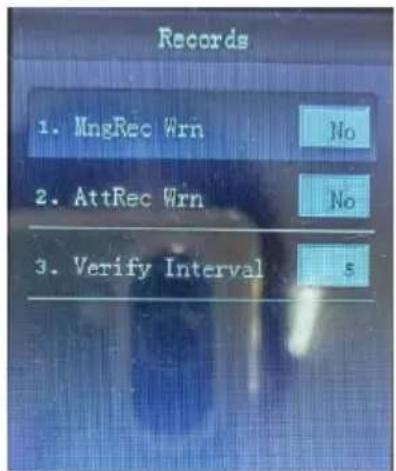
Press【MENU】to enter main menu, press ▼ to select "DevSet" → General Setting: It can modify device language, date format, volume, etc.
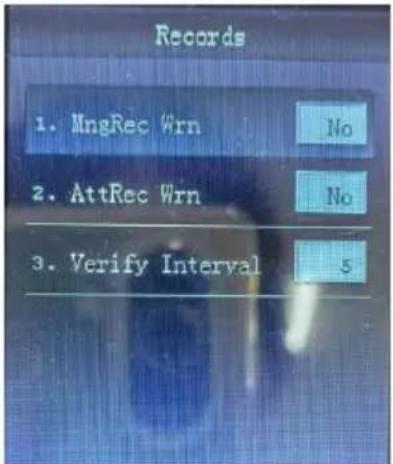
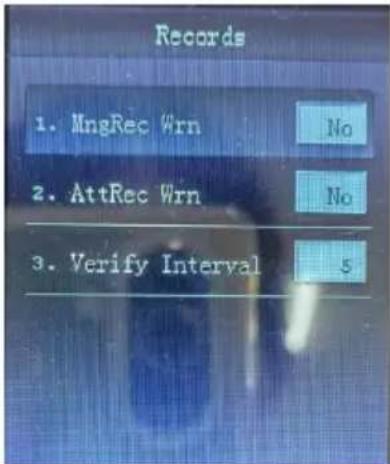
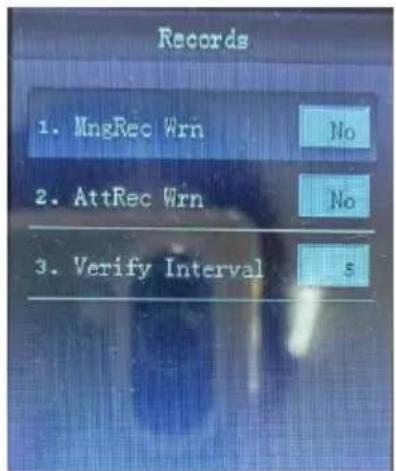
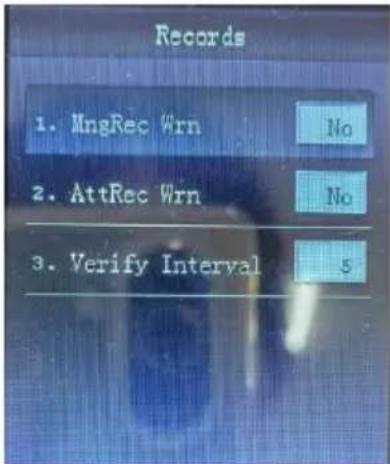
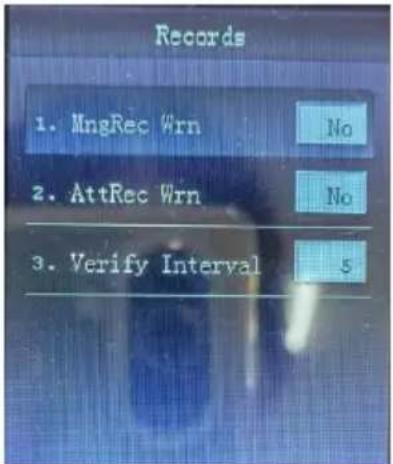
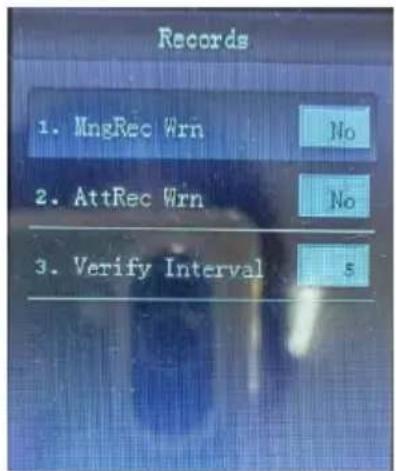
Delete All Rec: Delete all records of the device. Delete All Reg: Delete all registers of the device. Default Setting: Restore factory settings. Upload Firmware: Update device firmware. MngRec Wrn: Management Record Warning.
AttRec Wrn: Attendance Record Warning. Verify Interval: Within a period, only the earliest record counted, initial setting is 5 minutes.
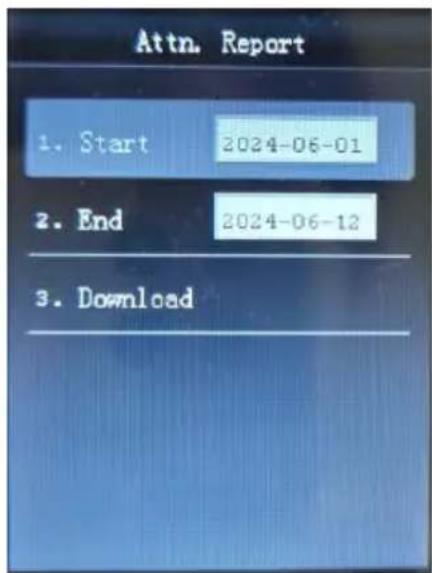
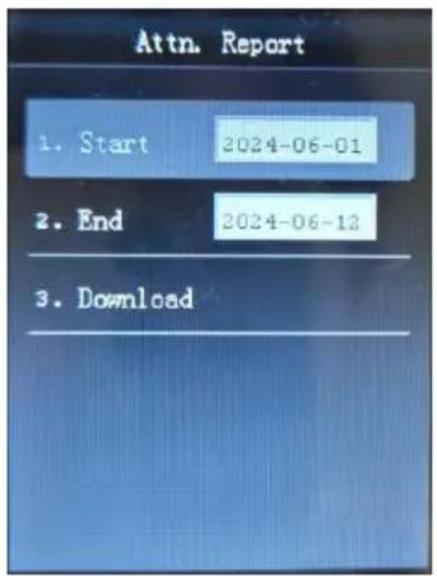
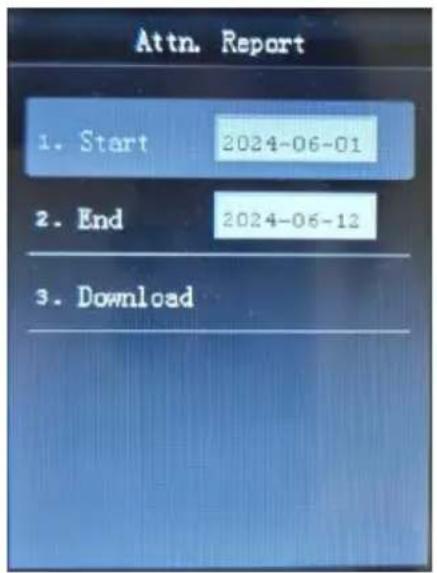
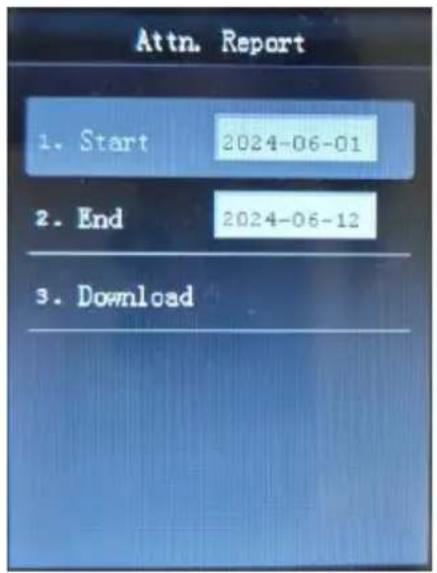
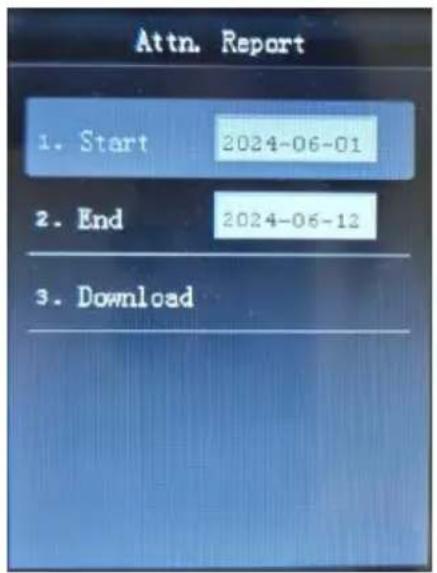
1. Insert U disk into machine's USB slot; 2. Press【MENU】to enter main menu, press ▼ to select "U-Down". 3. Press【OK】to enter, press ▼ to select "Attn.Report". Press [OK] to input the time period, and press the [OK] key to download. 4. Pull out the U-disk from the device and insert it into your computer, open this file in the U-disk (file name will change with the month).
Download Userinfo: Download user information.
Upload UserInfo: When the number of employees is large, this method is used to import employee lists and shifts in bulk.
Steps: Download Userinfo will get an "INFO" file. The file can edit shift time, user name and department, upload userinfo through U-disk after edit.
Att Rec: Download attendance original record.
View Log: check attendance logs on device
Warm Tip: Please use FAT32 format U disk, if the attendance may can not recognize your U disk, please first convert the U disk in FAT32 format, and then operate.
ATTENTION TO REGISTER FACIAL
- Please avoid strong rays and Simple background behind for enroll
- Don't veil your forehead with hair while registered or identified, If wearing glasses, glasses do not reflect light.
- Please act as voice-prompted while making registration.
- It is recommended to use it indoors.
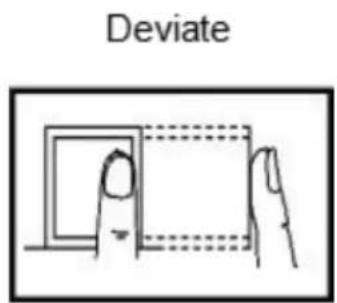
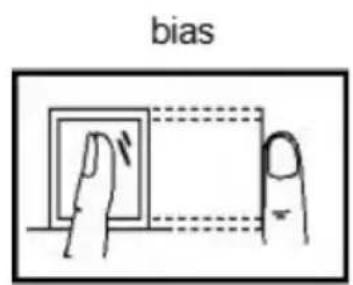
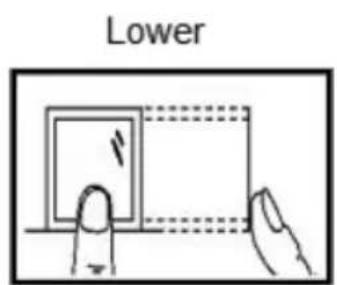
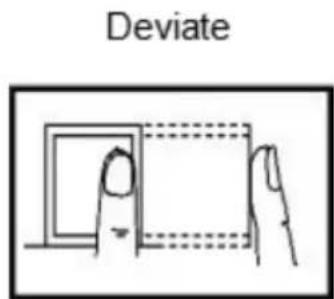
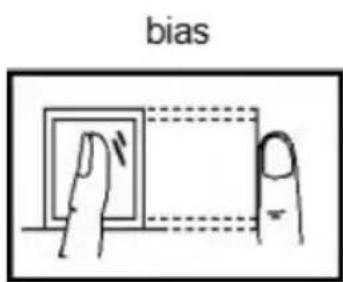
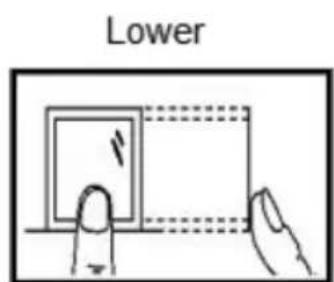
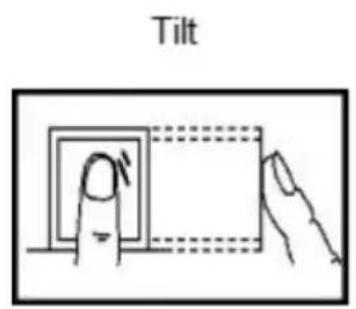
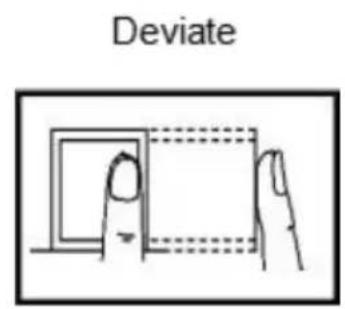
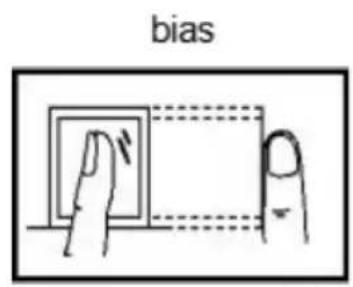
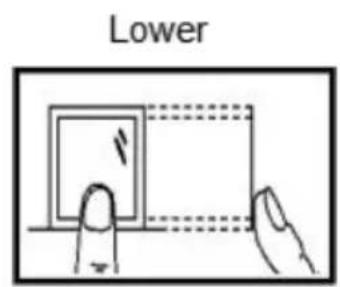
ATTENTION TO REGISTER FINGERPRINT
The right way:
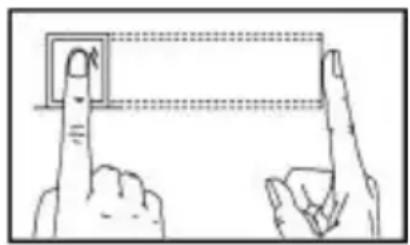
The wrong way:
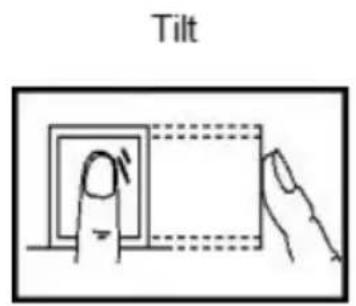
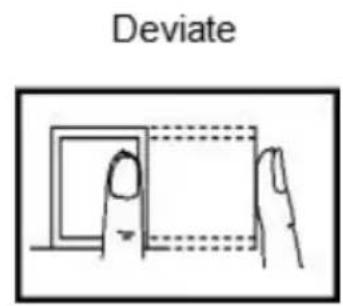
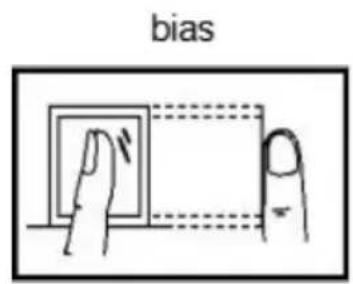
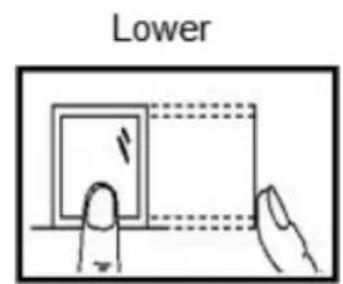
Note: Try to put the finger in the middle of the reading window keep your fingerprint clean. If the device doesn't respond when you verified, please check your finger and increase the humidity of your fingerprint.
Manufacturer: Shanghaimuxinmuyeyouxiangongsi
Address: Shuangchenglu 803nong11hao1602A-1609shi, baoshanqu, shanghai 200000 CN.
Imported to AUS: SIHAO PTY LTD. 1 ROKEVA STREET EASTWOOD NSW 2122 Australia
Imported to USA: Sanven Technology Ltd. Suite 250, 9166 Anaheim Place, Rancho Cucamonga, CA 91730
| EC | REP |
E-CrossStu GmbH
Mainzer Landstr.69, 60329 Frankfurt am Main
| UK | REP |
YH CONSULTING LIMITED.
C/O YH Consulting Limited Office 147, Centurion House, London Road, Staines-upon-Thames, Surrey TW18 4AX
VEVOR®
TOUGH TOOLS, HALF PRICE
Technical Support and E-Warranty Certificate
www.vevor.com/support
VEVOR®
TOUGH TOOLS, HALF PRICE
NEED HELP? CONTACT US!
2. Fix it to the wall
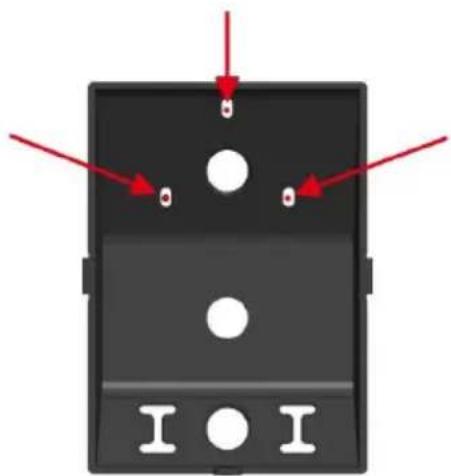
3. Drill three holes
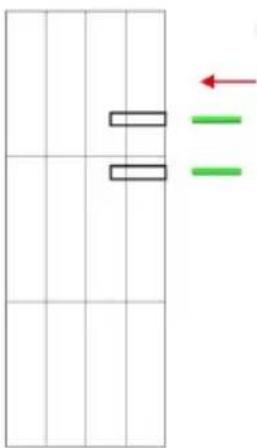
- Hang the machine
| 1_ | 2ABC | 3 DEF |  |
| 4 IGH | 5JKL | 6 ORM | MENU |
| 7PQRS | 8 TUV | 9 WXYZ | ▲ |
| 0_ | D'ACCORD | ▼ |
ESC
Exit current settings
MENU
Enter menu management
OK
Confirm the current settings

Switching input method and power on/off key

number 0 and space key

Move the cursor up

Move the cursor downward
- ..9
Input number and 26
English Letters
DEPARTMENT SETTING
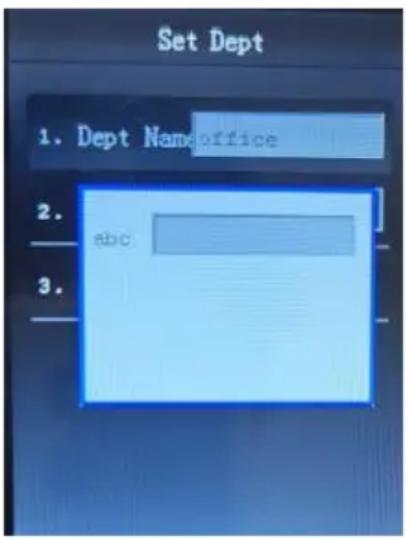
Press ▼ to select "Set Dept" to select the department, or use the T9 key to enter the department, then press the OK key to confirm.

TIME CLOCK
USER MANUAL
MODEL: F18
KEY CONFIGURATION AND INPUT METHOD DESCRIPTION
| 1_ | 2ABC | 3 DEF | ESC |  Exit current settingsMENU Exit current settingsMENU |
| 4 WH | 5JKL | 6Mobilfunknetzbetreiber | SPEISEKARTFOK | Enter menu managementConfirm the current settings |
| 7PQRS | 8TÜV | 9WXYZ | ▲ | Switching input method and power on/off key |
| 0_ | OK | ▼ | 0number 0 and space key |
Move the cursor up
Move the cursor downward
- ..9
Input number and 26
English Letters
DEPARTMENT SETTING
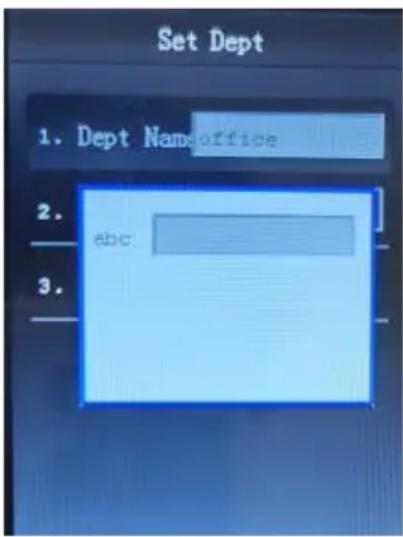
Press ▼ to select "Set Dept" to choose the department, or use the T9 key to enter the department, then press the OK key to confirm.
The wrong way: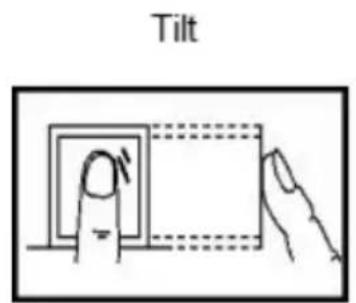
C/O YH Consulting Limited Office 147, Centurion House, London Road, Staines-upon-Thames, Surrey TW18 4AX
VEVOR®
TOUGH TOOLS, HALF PRICE
www.vevor.com/support
VEVOR®
TOUGH TOOLS, HALF PRICE
www.vevor.com/support
CLOCK
USER MANUAL
MODEL: F18
NEED HELP? CONTACT US!
2. Fix it to the wall
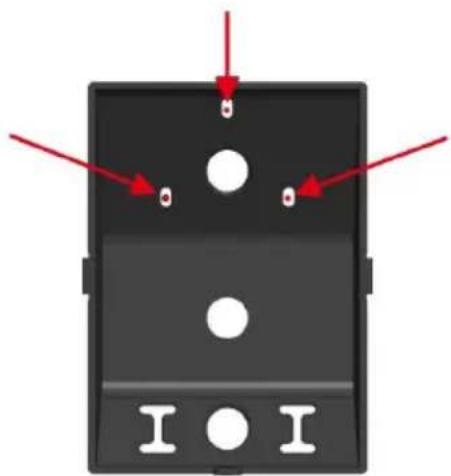
- Drill three holes
- Hang the rear panel
- Hang the machine
| 1_ | 2ABC | 3 DEF |  |
| 4 GHI | 5JKL | 6 MNO |  |
| 7PQRS | 8 TÜV | 9 WXYZ |  |
| 0_ | OK | [VZW0] |
ESC
Exit current settings
MENU
Enter menu management
OK
Confirm the current settings

Switching input method and power on/off key

number 0 and space key

Move the cursor up

Move the cursor downward
- ..9
Input number and 26
English Letters
DEPARTMENT SETTING
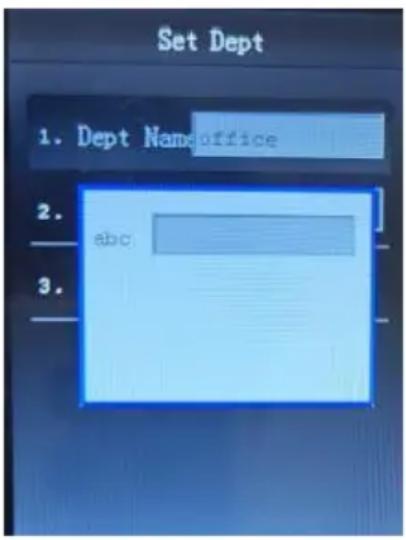
Press ▼ to select "Set Dept" to select the department, or use the T9 key to enter the department, then press the OK key to confirm.
Imported into AUS: SIHAO PTY LTD. 1 ROKEVA STREET EASTWOOD NSW 2122 Australia
C/O YH Consulting Limited Office 147, Centurion House, London Road, Staines-upon-Thames, Surrey TW18 4AX
VEVOR®
TOUGH TOOLS, HALF PRICE
www.vevor.com/support
VEVOR®
TOUGH TOOLS, HALF PRICE
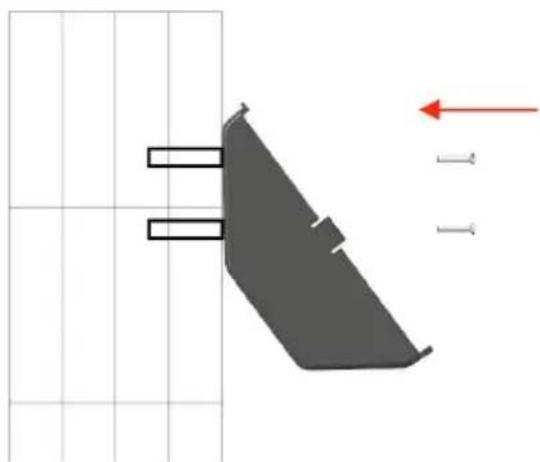
16. Hang the back plate
| 1_ | 2ABC | 3 DEF |  |
| 4 GHI | 5 JKL | 6 MNO |  |
| 7PQRS | 8 TUV | 9WXYZ |  |
| 0_ | DEACUERDO |  |
ESC
Exit current settings
MENU
Enter menu management
OK
Confirm the current settings

Switching input method and power on/off key

number 0 and space key

Move the cursor up

Move the cursor downward
- ..9
Input number and 26
English Letters
DEPARTMENT SETTING
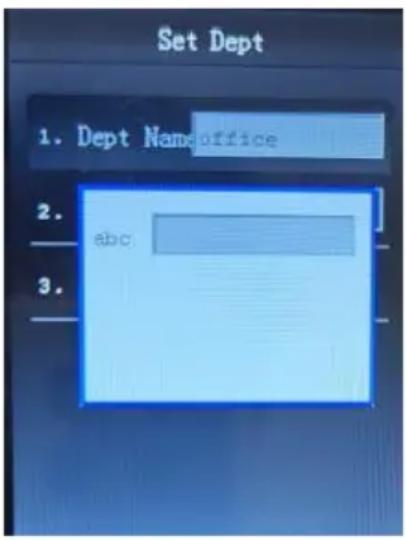
Press ▼ to select "Set Dept" to select the department or use the T9 key to enter the department, press the OK key to

VEVOR®
TOUGH TOOLS, HALF PRICE
www.vevor.com/support
CLOCK
OPERATING INSTRUCTIONS
MODEL: F18
NEED HELP? CONTACT US!
www.vevor.com/support
- Mount on the wall
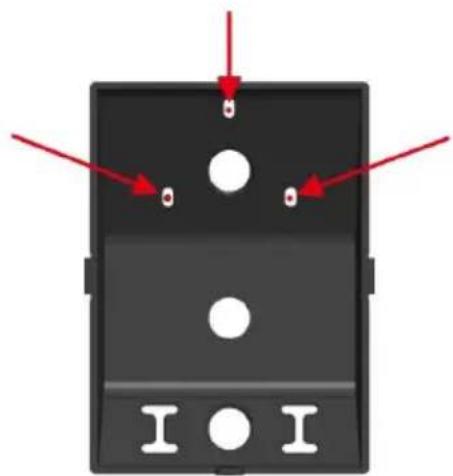
- Drill three holes
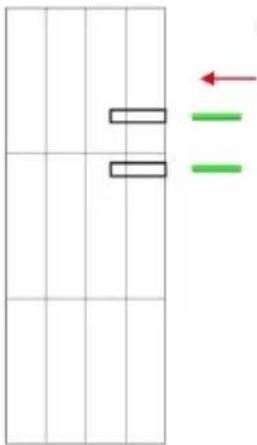
20. Hang the machine
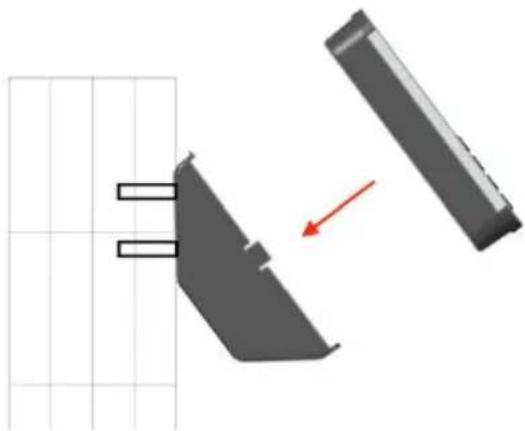
| 1_ | 2 ABC | 3 OBR |  |
| 4 GHI | 5 JKL | 6 MNO | MENU |
| 7 PQRS | 8 TUV | 9 WXYZ | ▲ |
| 0_ | OK | ▼ |
ESC
Exit current settings
MENU
Enter menu management
OK
Confirm the current settings

Switching input method and power on/off key

number 0 and space key

Move the cursor up

Move the cursor downward 5. ..9
Input number and 26
English Letters
DEPARTMENT SETTING
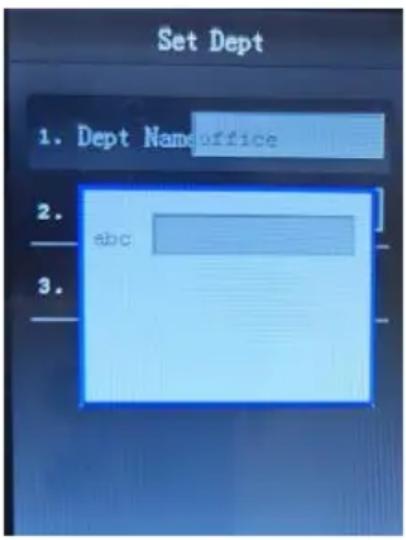
press▼to select "Set Dept" to select the department or use the T9 key to enter of the department, press the OK key to
Wrong direction: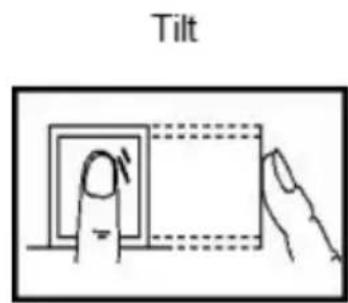
C/O YH Consulting Limited Office 147, Centurion House, London Road, Staines-upon-Thames, Surrey TW18 4AX
VEVOR®
TOUGH TOOLS, HALF PRICE
www.vevor.com/support
VEVOR®
TOUGH TOOLS, HALF PRICE
www.vevor.com/support
TIME CLOCK
USER MANUAL
MODEL: F18
NEED HELP? CONTACT US!
- Drill three holes
| 1_ | 2ABC | 3 DEF | |
| 4 GHI | 5JKL | 6 MNO |  |
| 7 PQRS | 8 TUV | 9 WXYZ | [360A] |
| 0_ | OK |  |
ESC
Exit current settings
MENU
Enter menu management
OK
Confirm the current settings

Switching input method and power on/off key

number 0 and space key

Move the cursor up

Move the cursor downward
- ..9
Input number and 26
English Letters
DEPARTMENT SETTING
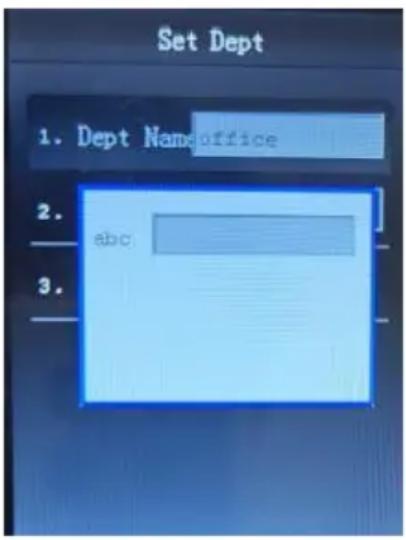
press▼to select "Set Dept" to select the department or use the T9 key to enter of the department, press the OK key to
Firmware upload: Update device firmware
bias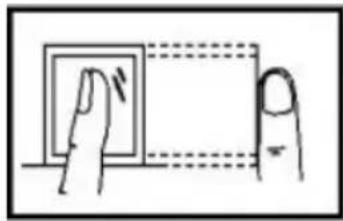
Deviate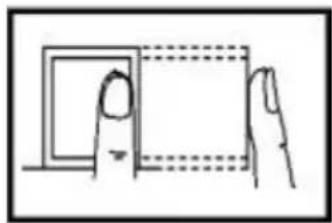
Lower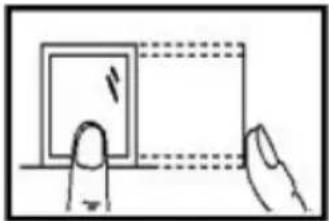
C/O YH Consulting Limited Office 147, Centurion House, London Road, Staines-upon-Thames, Surrey TW18 4AX
VEVOR®
TOUGH TOOLS, HALF PRICE
www.vevor.com/support
VEVOR®
TOUGH TOOLS, HALF PRICE
www.vevor.com/support
TID KLOCKA
USER MANUAL
MODEL: F18
NEED HELP? CONTACT US!
2. Fix on the wall
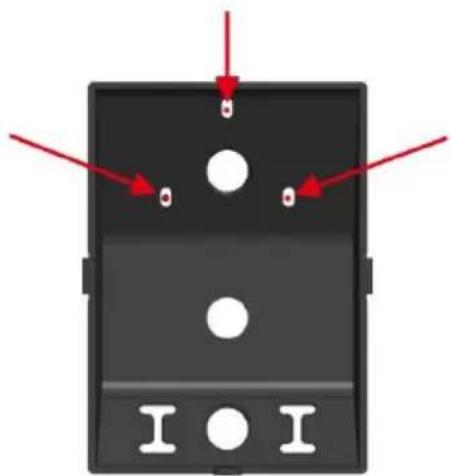
- Drill three holes
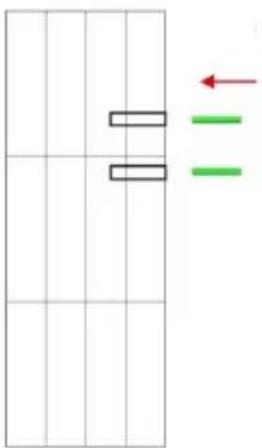
25. Hang the back plate
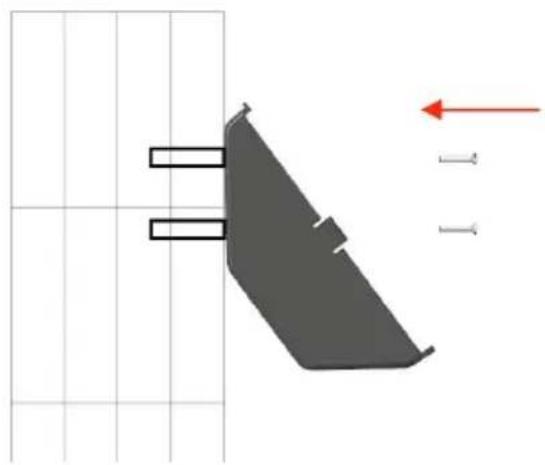
26. Hang the machine
| 1_ | 2 ABC | 3 DEF | |
| 4 GHI | 5 JKL | 6 MNO |  |
| 7 PQRS | 8 TUV | 9 WXYZ | [WHXH] |
| 0_ | OK | [AZTR] |
ESC
Exit current settings
MENU
Enter menu management
OK
Confirm the current settings

Switching input method and power on/off key

number 0 and space key

Move the cursor up

Move the cursor downward
- ..9
Input number and 26
English Letters
DEPARTMENT SETTING
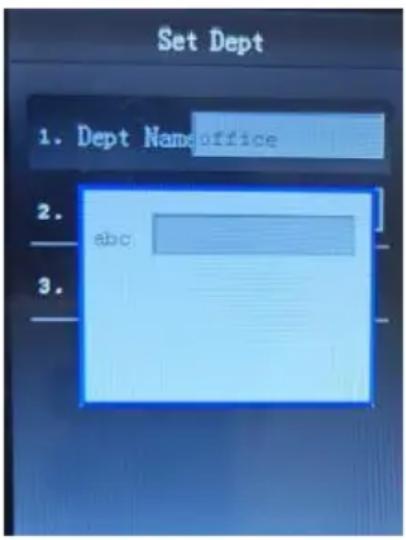
press▼to select "Set Dept" to select the department or use the T9 key to enter of the department, press the OK key to
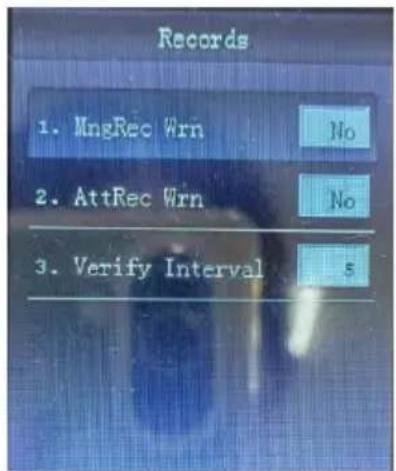
MngRec Wrn: Management Record Warning.
Fel väg:
C/O YH Consulting Limited Office 147, Centurion House, London Road, Staines-upon-Thames, Surrey TW18 4AX
VEVOR®
TOUGH TOOLS, HALF PRICE
www.vevor.com/support

- TIME CLOCK
- USER MANUAL
- VEVOR®
- NEED HELP? CONTACT US
- INSTALLATION CAUTIONS
- ASSEMBLY STEP
- ESC
- MENU
- OK
- DEPARTMENT SETTING
- ARRANGE SHIFT
- EMPLOYEE REGISTRATION
- ATTEND.RULES
- DEVICE SETTINGS
- ATTENTION TO REGISTER FACIAL
- ATTENTION TO REGISTER FINGERPRINT
- TOUGH TOOLS, HALF PRICE
- FIX IT TO THE WALL
- DRILL THREE HOLES
- KEY CONFIGURATION AND INPUT METHOD DESCRIPTION
- CLOCK
- OPERATING INSTRUCTIONS
- TID KLOCKA
Brand : Vevor
Model : F18
Category : Clock