AE988D - Soldering station Vevor - Free user manual and instructions
Find the device manual for free AE988D Vevor in PDF.

| Model | AE988D |
| Brand | Vevor |
| Product Type | Intelligent Soldering Station |
| Total Power | 70 W |
| Output Voltage | 25 VAC |
| Temperature Range | 50 to 500 °C (122 to 932 °F) |
| Temperature Stability | ±2 °C (±3.6 °F) at 200 °C (400 °F) |
| Tip-to-Ground Impedance | < 2 Ω |
| Tip-to-Ground Voltage | < 2 mV |
| Heating Element | PTC Ceramic Heating Element |
| Display | Digital LED Segment |
| Temperature Adjustment | By Rotary Knob |
| Special Functions | Sleep, Hibernation, Temperature Lock, °C/°F Conversion, Brightness Adjustment |
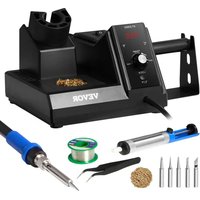
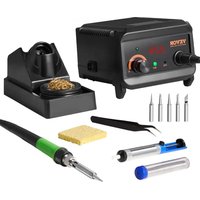
| Package Contents | Main unit, handle, iron stand, 5 tips, tweezers, desoldering pump, brass wool with box, sponge, 10g solder wire (lead-free), manual |
| Safety | FCC Part 15 compliance, overheat protection, fuse |
| Maintenance | Regular tip cleaning with brass wool, tinning, tip replacement |
| Compatible Tips | T900M series (various shapes: 1, B, K, 1.2D, etc.) |
| Power Supply | Mains (power cable included) |
| Dimensions (approx.) | Not specified, standard station size |
| Weight (approx.) | Approximately 1.5 kg (with accessories) |
Frequently Asked Questions - AE988D Vevor
User questions about AE988D Vevor
0 question about this device. Answer the ones you know or ask your own.
Ask a new question about this device
Download the instructions for your Soldering station in PDF format for free! Find your manual AE988D - Vevor and take your electronic device back in hand. On this page are published all the documents necessary for the use of your device. AE988D by Vevor.
USER MANUAL AE988D Vevor
Technical Support and E-Warranty Certificate www.vevor.com/support
SMART SOLDERING STATION
MODEL: AE988D
We continue to be committed to provide you tools with competitive price. "Save Half", "Half Price" or any other similar expressions used by us only represents an estimate of savings you might benefit from buying certain tools with us compared to the major top brands and does not necessarily mean to co all categories of tools offered by us. You are kindly reminded to verify carefully when you are placing an order with us if you are actually Saving Half in comparison with the top major brands.
MODEL: AE988D

NEED HELP? CONTACT US!
Have product questions? Need technical support? Please feel free to contact us:
Technical Support and E-Warranty Certificate www.vevor.com/support
This is the original instruction, please read all manual instructions carefully before operating. VEVOR reserves a clear interpretation of o user manual. The appearance of the product shall be subject to the product you received. Please forgive us that we won't inform you ag there are any technology or software updates on our product.
SPECIFICATIONS
| Model No. | AE988D |
| Total Power | 70W |
| Output voltage | 25VAC |
| Temperature range | 50 - 500°C(122-932°F) |
| Temperature stability | ±2°C(±3.6°F) { } > 200°C(400°F) |
| Tip to ground impedance | <2Ω |
| Tip to ground voltage | <2mV |
| Heating element | PTC ceramic heater |
| Note: specifications and appearance are subject to change for product improvement without prior notice | |
PACKING LIST
Main Unit1 Handle1 Iron Stand*1
Solder Tips5 Tweezer 1 Desoldering Pump*1
Brass Wool with Box1 Sponge1
10g Soldering Wire (Lead Free)1 User Manual1
Safety and Precautions
The precautions in this manual are divided into the following [warning] and [attention]. Please fully understand the content.
Warning: misuse may cause death or serious injury to the user
Note: misuse may cause injury to users or substantial damage to objects inv
For your own safety, please strictly abide by the following precautions
| Warning |
| When power is on, the temperature of the soldering iron tip migh 50 ~ 500 °C (122 ~ 932°F). Misuse may cause burns and fire, please strictly observe the follo precautions: |
| • Do not touch the soldering iron tip or the metal part around it whi |
- Do not use it around combustibles
Inform the people around of the potential risk caused by high temp - Turn the power off when not in use
- Before replacing parts or tip, turn off the power and wait till the in down
- Do not use this product if you are inexperienced or have no sufficient knowledge without the guidance of related qualified personnel
- Please keep it out of reach of children
- If the power cord is damaged, please ask the manufacturer or its agent or similar qualified personnel to repair it, so as to avoid person damage to product
- This appliance can be used by children aged from 8 years and ab persons with reduced physical, sensory or mental capabilities or lack of experience and knowledge if they have been given supervision or instr concerning use of the appliance in a safe way and understand the ha involved. Children shall not play with the appliance. Cleaning and user maintenance shall not be made by children without supervision.
Please strictly observe the following precautions, otherwise it may cause injuries or death
- Do not use this product for works other than soldering
- Do not hit the handle hard for removing the tin on the iron tip
- Do not modify this product
- When replace parts, must use original ATETOOL parts
- Do not soak the product in water or use it with wet hands
- Unplug it properly after using
- Smoke will be emitted during soldering, please use it in open space
- Do not engage in other dangerous acts with this product
Using Method(AE988D)
1. Operation and display instructions
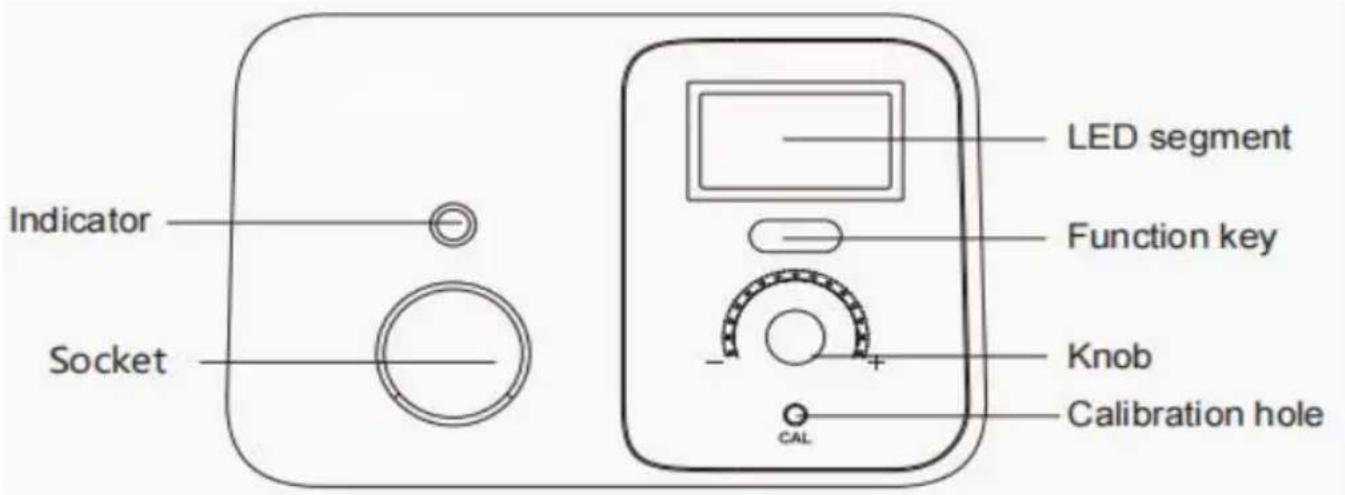
Panel display:
LED segment: digital display
Indicator: indicates the statement of heater (light on/off means power on/off)
Function key: function operation
Knob: to adjust temperature
Calibration hole: for calibrate the temperature
2. Turn on the power switch
After switching on, indicator lights up and LED segment displays After switchi indicator lights up and LED segment displays "888"for 1 second, now power And then it displays the temperature unit or for 1 second, so you know which unit is used right now. If the standby function is enabled in this solde station, will be displayed for 1 second to show standby function is available. Then displays the set temperature for 1.5 seconds, and finally displays the re time temperature. When the temperature is stable, indicator will flash.
Note: when not in use, please put the soldering iron on the holder. If it was used for a while, please cut off the power supply.
3. After use
After use, please clean the soldering iron tip and apply new solder on it.
4. Temperature unit conversion
First press function key, in the meanwhile switch on the power, till LED segr displays, release the function key, now the temperature unit changes. If it was Fahrenheit, now switch to Celsius, and vice versa.
5. Temperature adjustment
Temperature range
AE988D: 50-500°C (122-932°F)
Temperature adjusted by knob.
6. Screen brightness setting
1) Press and hold the function key till the screen displays, to enter the brightness setting.
2) Show the current digital display brightness level
3) Adjust the brightness level through the knob: gear 1-6.
4) Press the function key or wait for 10s to automatically save to complete setting.
7. Standby and sleep functions
Standby function on and off:
1) Press and hold the function key till display on LED segment to enter the standby function on/off setting:
2) Display the current setting or OFF
3) Adjust by knob or to turn on/off the standby and sleep function.
4) Press the function key or wait for 10s to automatically save to complete setting.
Standby function
1) When standby function is turned on, the soldering station will enter standby mode after not in use for 10 minutes.
2) In standby mode, LED segment displays and temperature drops to 250^ (482^) .
3) When any operation is detected, such as using the soldering iron, adjusting knob or pressing the function key, it will return to the work mode.
4) When in standby mode, if no further operation is detected for 10 minutes enter sleep mode.
Sleep function:
1) That short press the function key or longtime in standby mode can makesleepmode.
2) When entering sleep mode, screen displays and heating is turn off.
3) Press the function key to return to normal heating work mode.
8. Temperature locking function:
Temperature locking function on and off:
1) Turning the knob to adjust the temperature to be set.
2) Long press the function key till is displayed.
3) Now LED segment displays or OFF
4) Turn the knob to set the locking function to be or
5) Press the function key or wait for 10s to automatically save to complete setting.
6) When the temperature is locked, adjusting the knob does not change the temperature, it will display for 1 second to show that the current temperature is locked.
Maintenance
In order to make this product durable, please maintain it regularly. The lifespan of this product depends on the used temperature, quality of solder wire and solder paste, frequency of use etc. Please repair and maintain it according to specific conditions.
| Warning |
| Please pay close attention when the soldering station is in use at temperature, cut off the power and unplug the power cord after |
Soldering iron tip maintenance
- Set the temperature to 250^ (480 F).
- After the temperature is stable, clean the soldering iron tip with a brass wire check its condition.
- If black oxide is attached to it, please apply new solder (including flux) at it repeatedly with a brass wool until it's clean, then apply some new solder.
- If the soldering iron tip has been deformed, perforated or worn out, please replace it with a new one.

900M-T-1
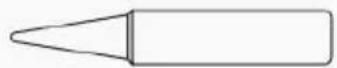
900M-T-B

900M-T-K

900M-T-1.2D

900M-T-1.6D

900M-T-2.4D

900M-T-3.2D
900M-T-4.6D
900M-T-6.5D

900M-T-0.8C

900M-T-3C

900M-T-5C

900M-T-6.4C
(More soldering tips information please contact us)
Troubleshooting Guide
| Warning |
| ·When checking or replacing parts, be sure to pull out the power p prevent electric shock ·If the power cable is damage, it must be sent to the manufacturer store or maintenance personnel with the same qualification for repair to accidents |
| Failure phenomenon | Examination | Dealing method |
| Not working after power is on | Check whether the power cord good, or plug falls off | Connect the power supply well |
| Is the fuse OK | Figure out the cause of damage: 1. Short circuit inside the station. 2. Inside the handle, the spring might meets the heating element. 3. Check whether the pir | |
| heating element is twisted or short circuited. Even if the cause is unknown, please replace the fuse. If the fuse get burnt out again, please return the handle with the main unit for maintenance | ||
| The display shows "S-E" | Whether the handle cable is w connected with main unit | Reconnected |
| Whether the wire connecting to handle is broken | If so please replace it with new handle | |
| Whether the heater is damaged (the resistance of the blue lead wire shall be less than 100 Ω room temperature). | If damaged, replace the heater | |
| The display shows "H-E" | Whether the wire connecting to handle is broken | If so please replace it with new handle |
| Whether the heater is damaged (the resistance of the red lead shall be less than 100 Ω at room temperature) | If damaged, replace the heater | |
| Iron tip heating is on and off | Whether the wire connecting to handle is broken | If so please replace it with new handle |
| The solder won't get on the iron tip | Check whether the temperature the iron tip is too high | Adjust to the proper temperature |
| Check whether there is oxide of the tip | Clean the oxide with a cloth wool | |
| Iron tip temperature is too low | Check whether there is oxide of the tip | Clean the oxide with a cloth wool |
| Whether the temperature is proat | Adjust to the proper temperature | |
| The iron tip won't fit | Whether there is oxide inside ti soldering iron tip expands | Change the tip and heat |
| Not original tip or not same ty | use original factory tip or same type tips | |
| The actual temperature can't reach | Is the temperature adjusted correctly | Adjust the set temperature again |
| Haven't done temperature calibration for a long time | Re-calibrate temperature accordingly |
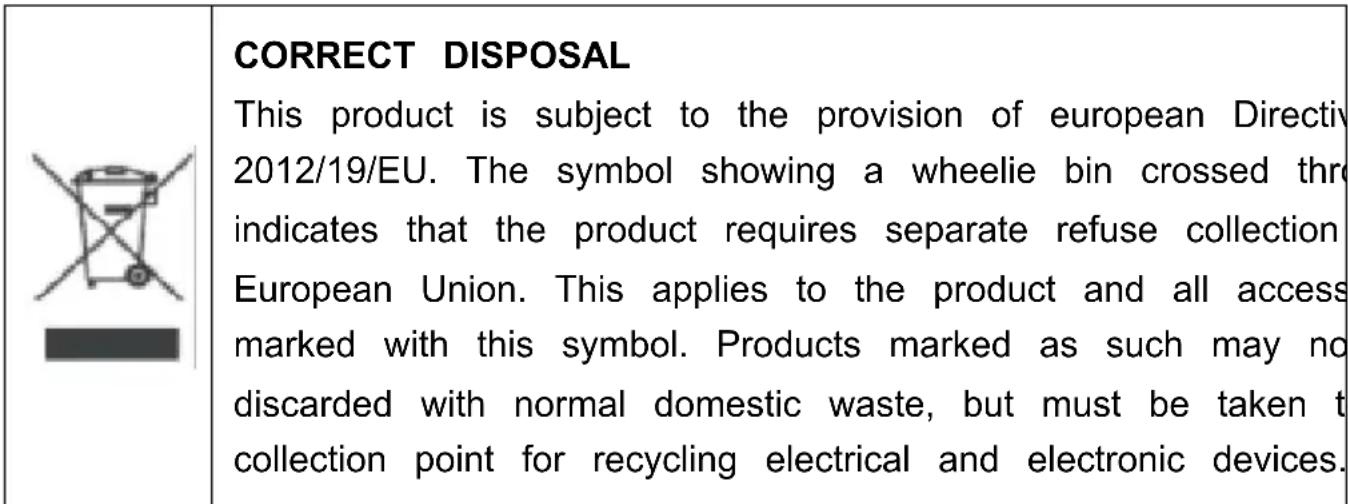
FCC Information
CAUTION: Changes or modifications not expressly approved by the party responsible for compliance could void the user's authority to operate the equipment!
This device complies with Part 15 of the FCC Rules. Operation is subject to following two conditions:
1) This product may cause harmful interference.
2) This product must accept any interference received, including interference that may cause undesired operation.
WARNING: Changes or modifications to this product not expressly approved by the party.responsible for compliance could void the user's authority to operate product.
Note: This product has been tested and found to comply with the limits for B digital device pursuant to Part 15 of the FCC Rules, These limits are des provide reasonable protection against harmful interference in a residential installation.
This product generates, uses and can radiate radio frequency energy, and if installed and used in accordance with the instructions, may cause harmful interference to radio communications. However, there is no guarantee that interference will not occur in a particular installation. If this product does cause harmful interference to radio or television reception, which can be determined by
turning the product off and on, the user is encouraged to try to correct the interference by one or more of the following measures.
- Reorient or relocate the receiving antenna.
- Increase the distance between the product and receiver.
- Connect the product to an outlet on a circuit different from that to which receiver is connected.
- Consult the dealer or an experienced radio/TV technician for assistance
Manufacturer: Shanghaiuxinmuyeyouxianggsi
Address: Shuangchenglu 803nong11hao1602A-1609shi, baoshanqu, shanghai 200000 CN.
Imported to AUS: SIHAO PTY LTD. 1 ROKEVA STREETEASTWOOD NSW 2122 Australia
Imported to USA: Sanven Technology Ltd. Suite 250, 9166 Anaheim Place, Rancho Cucamonga, CA 91730
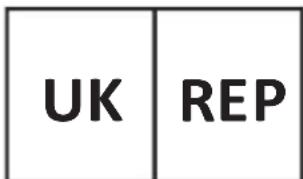
YH CONSULTING LIMITED. C/O YH Consultin Limited Office 147, Centurion House, London Road, Staines-upon-Thames, Surrey, TW18 4A
Technical Support and E-Warranty Certificate
www.vevor.com/support
VEVOR®
TOUGH TOOLS, HALF PRICE
Assistance technique et certificat de garantie electronique www.vevor.com/support
STATION DE SOUDURE INTELLIGENTE
MODELE:AE988D
YH CONSULTING LIMITED. C/O YH Consulting
Nota: Anything to do or said in this way is not intended for use in any way, except for the following items.
Importato in AUS: SIHAO PTY LTD. 1 ROKEVA STREETEASTWOOD
Nuovo Galles del Sud 2122 Australia
Strada, Staines-upon-Thames, Surrey, TW18 4AX
E-CrossStu GmbH
Mainzer Landstr.69,
60329 FrancofortesulMeno.
VEVOR
TOUGH TOOLS, HALF PRICE
www.vevor.com/support
YH CONSULTING LIMITADA. A LA CARGO DE YH Consulting
Carretera, Staines-upon-Thames, Surrey, TW18 4AX
E-CrossStu GmbH
Mainzer Landstr.69,
YH CONSULTING LIMITED. C/O YH Consulting Biuro Limited 147, Centurion House, Londyn Droga, Staines-upon-Thames, Surrey, TW18 4AX
| Przedstawciel UE |
E-CrossStu GmbH
Mainzer Landstr.69, 60329 Frankfurt nad Menem.
VEVOR
TOUGH TOOLS, HALF PRICE
HULP NODIG? NEEM CONTACT MET ONS OP!
garantiecertificaat www.vevor.com/support
VEVOR®
TOUGH TOOLS, HALF PRICE
YH CONSULTING LIMITED. C/O YH Consulting
Limited Office 147, Centurion House, London
Road, Staines-upon-Thames, Surrey, TW18 4AX
E-CrossStu GmbH
Mainzer Landstr.69,
60329 Frankfurt am Main.
VEVOR
TOUGH TOOLS, HALF PRICE