
F26A - Surveillance Camera Vevor - Free user manual and instructions
Find the device manual for free F26A Vevor in PDF.
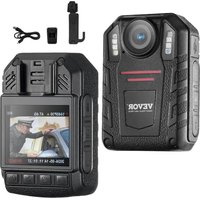


| Product Type | Body Worn Camera |
| Brand | Vevor |
| Model | F26A |
| Maximum Video Resolution | 2560 × 1440 at 30 fps (16:9) |
| Maximum Photo Resolution | 14 MP (4352 × 3264) |
| Viewing Angle | Not specified |
| Storage | Memory card (not included) |
| Power Supply | Rechargeable battery via USB (5 V charger) |
| Battery Life | Approximately 10 hours (estimated) |
| Dimensions | Approximately 80 × 55 × 30 mm (estimated) |
| Weight | Approximately 150 g (estimated) |
| Connectivity | USB, Wi-Fi |
| Night Vision | Infrared (IR) and white light |
| Recording Functions | Video, audio, photo, pre/post-recording, motion detection, car mode, secret mode |
| Display | Built-in LCD screen |
| Maintenance | Clean with a soft cloth; avoid moisture and high temperatures |
| Security | Password protection; do not disassemble; use original accessories |
| Spare Parts Available | Back clip (short and long), USB cable, charger |
| Warranty | Electronic warranty (certificate included) |
Frequently Asked Questions - F26A Vevor
User questions about F26A Vevor
0 question about this device. Answer the ones you know or ask your own.
Ask a new question about this device
Download the instructions for your Surveillance Camera in PDF format for free! Find your manual F26A - Vevor and take your electronic device back in hand. On this page are published all the documents necessary for the use of your device. F26A by Vevor.
USER MANUAL F26A Vevor
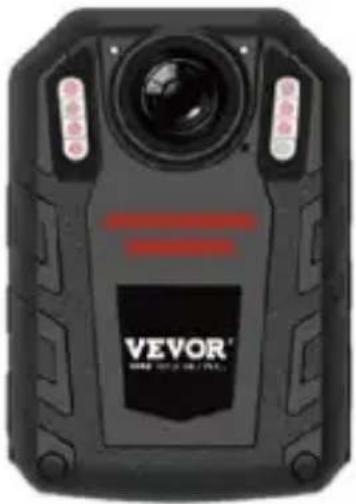
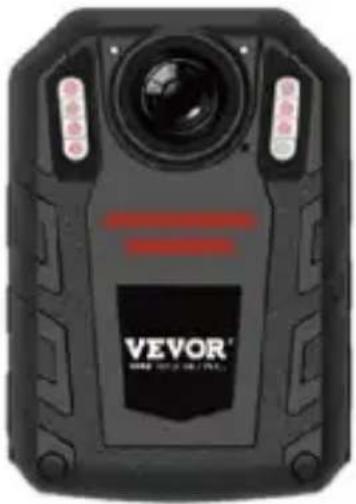
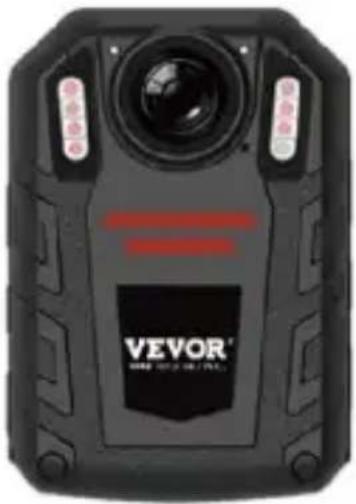
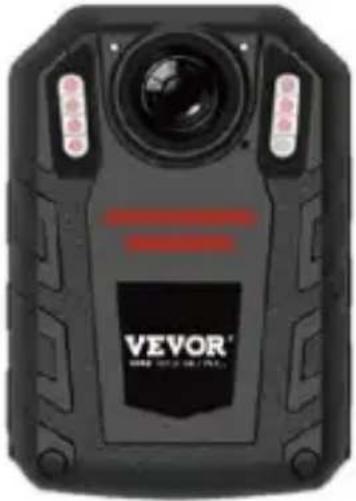
POLICE BODY CAMERA MODEL: F26A
We continue to be committed to provide you with tools at competitive prices.
"Save Half", "Half Price" or any other similar expressions used by us only represent an estimate of savings you might benefit from buying certain tools compared to the major top brands and do not necessarily mean to cover all categories of tools by us. You are kindly reminded to verify carefully when placing an order with us if you are saving half in comparison with the top major brands.
MODEL: F26A
NEED HELP? CONTACT US!
Have product questions? Need technical support?
Please feel free to contact us:
This is the original instruction. Please read all manual instructions carefully before operating. VEVOR reserves clear interpretation of our user manual. The appearance of the product shall be subject to the product you receive. Please forgive us that we won't inform you again about any technology or software updates on our products.

Thank you for selecting our VEVOR product. Please carefully read this operation manual before use to understand the correct use of the product and pay attention to the important safety warnings especially. Please keep this manual nearby so that you can refer to it anytime.
PREFACE
Thank you for using our Body Cameras. This manual is applicable for F26A series Body Cameras. Please read the manual carefully before using the devices. Please keep the manual for reference in the future. The content of this manual is subject to change without notice.
IMPORTANT NOTICE
- Please keep ventilation for the device to prevent overheating.
- When smoke, smell, or noise comes out from the device, shut down the power and remove the power cable immediately, and then contact us in time.
cable immediately, and then contact us in time.
- Please contact us if the device is not working properly.
- Please do not disassemble or modify the device in any way.
- Please do not charge the device at high temperature over 45 degrees Celsius, or else it could cause the explosion of the battery.
- Do not use other type of battery.
- Please read this manual carefully before using the device and follow the instructions in this manual when using the device.
- Please do not use the device under the circumstance of over humidity or high temperature, avoid using the device around the place: strong signal interference source and shielding-barrier equipment.
- Avoid putting the device under sunlight exposure and stuffy place (ignoring it could cause fire accident).
- Please backup the data in the device timely.
- Please keep the camera clean to get the best recording file and pictures.
- Please keep your password and user name in a safe place.
1. STRUCTURE DIAGRAM
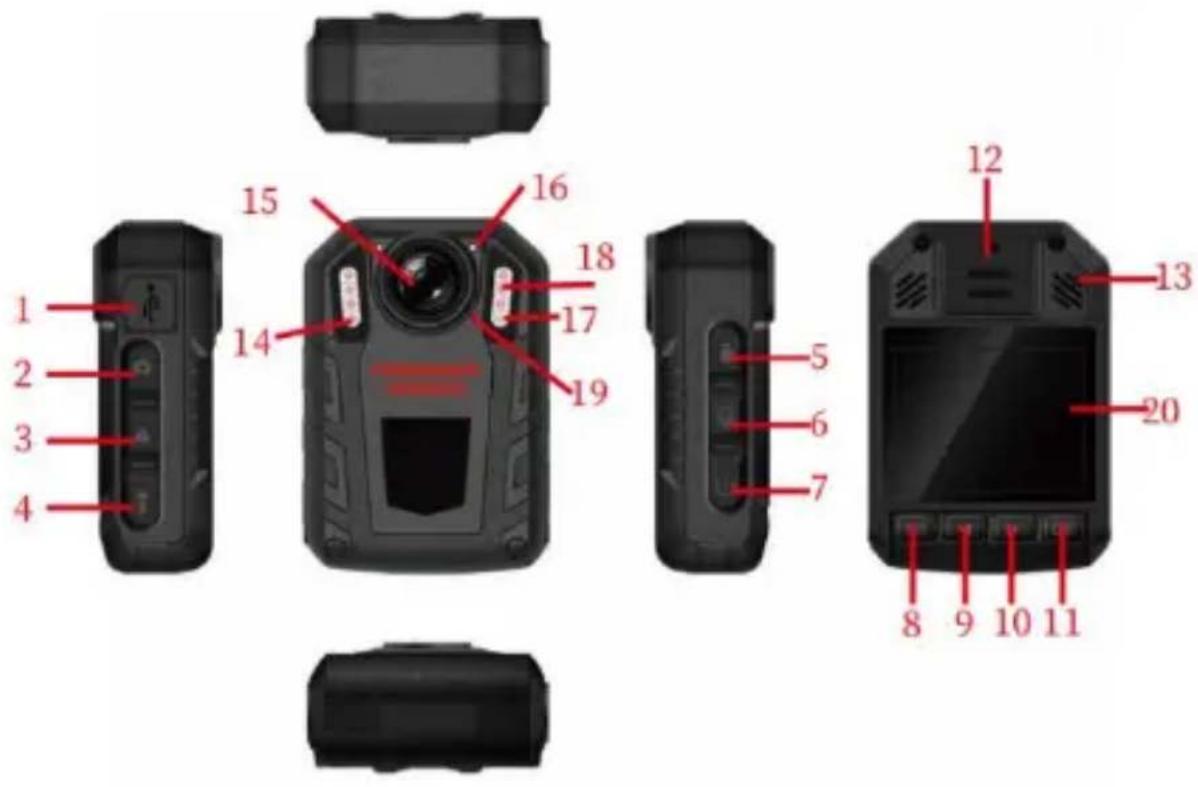
| NO. | Name | NO. | Name |
| 1 | USB | 11 | Enter/Playback |
| 2 | Photograph Button | 12 | Horn |
| 3 | File Protection | 13 | Reset Key |
| 4 | Light Button | 14 | Light Sensor |
| 5 | Video Recording | 15 | Pickup |
| 6 | Audio Recording | 16 | Indicator Light |
| 7 | Power on/off | 17 | White Light |
| 8 | Menu/Back | 18 | Infrared Light |
| 9 | Up Button | 19 | Pickup |
| 10 | Down Button | 20 | Display Screen |
2. BUTTONS INSTRUCTION
2.1 ·Power On/Off【 】: Long press the "power" button to turn on or turn off camera. When the camera is on, short press power button to shut off screen.
2.2 Audio Recording [ ] When the camera is off, long press to turn on the video and start audio recording. On the monitoring interface, short press to record separately.
2.3 Video Recording [▶] When the camera is off, long press to turn on the video and start audio recording. On the monitoring interface, short press to start or stop recording.
2.4 Take Picture On the monitoring interface, short press to take a photo. When recording video, short press the p button to capture a picture.
2.5 File Protection [△] When on video recording, short press to turn on/off file protection. There will be a yellow "Lock" signal on the LCD screen. It can be revoked by short press. When the △ signal disappears from the LCD screen, the protection of the current file is finished. Long press to turn on/off the WIFI function.
2.6 Light Button [ ] When on monitoring and recording
interface, short press the light button once to turn on/off the white light. Long press the light button once to turn on (white light off), long press once again to turn off the IR light.
2.7 Menu/Return Button [ ]: Short press to turn on/off
the menu. When in menu and playback mode, it is equivalent to the return button.
2.8 Up/Left Button [ ] When on the setting menu or playback
list, use the down and right buttons to choose the items you want.
① When on video playback, short press is the fast-backward function. ② When on picture playback, short press to browse the last picture.
2.9 Down/Right Button [ ]: When on the setting menu or
playback list, use the down and right buttons to choose the items you want.
① When on video playback, short press is the fast-forward function. ② When on picture playback, short press to browse the next picture.
2.10 Playback/OK Button [OK] Short press to turn on
In the playback menu, you can choose video, audio, picture, and other types. When in the menu and playback mode, press the confirm button.
2.11 Reset Button/Hole【】When specific factors cause
the device to crash or stop responding, use the button to reset. Please use a toothpick, thimble, or similar items to operate. The parameter settings will be changed after resetting.
Remark: The term "long press" in this manual generally refers to pressing and holding the button for 2 to 3 seconds. "Short press" and "Press" mean press the button and release it. There will be no further special instructions in the following text.
3. STATUS INDICATOR LIGHT
The status indicators of this device are shown in the table below:
| StatusInstruction light 1 | StatusInstruction light 2 | |
| Power ON | / | Green |
| Video Recording | / | Red light flash |
| Power | White | / |
| Charging(Power OFF) | White | / |
| Full charging | White (OFF) | / |
| Photograph | / | Red light flashone time |
| Audio Recording | / | Yellow light flash |
Long press the "ON/OFF" button【】, the boot animation will be displayed, then enter the monitoring interface. When the device is on, long press【】for 3 seconds, the shutdown animation will be displayed, and then the device will power off.
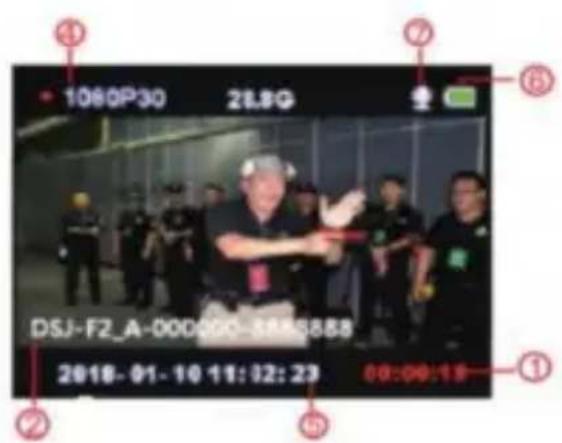
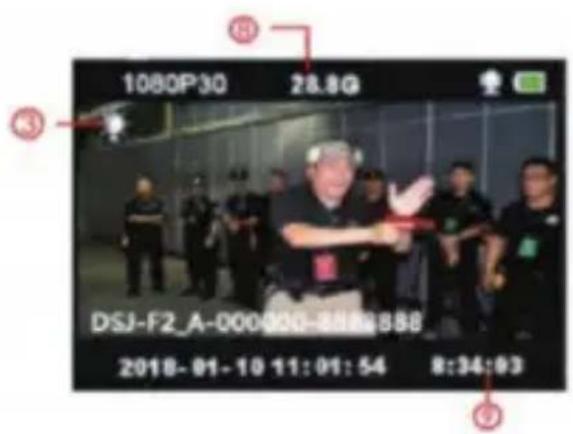
On the monitoring or video recording status screen, the following is displayed:
① Video recording time (Red point【】indicates normal video recording, Blue point【】indicates pre-record starting.) ② Device's ID and police's ID number ③ White Light ④ Video recording resolution ⑤ System date and time ⑥ Battery logo
⑦ Video sound symbol ⑧ Residual capacity of memory card ⑨ Current remaining recording time
4.2 Screen Protection/Power Saving
① Screen Protection: When the device is on and without operation, it will enter the screen protection mode automatically after 60 seconds, and the LCD will be closed. ② Power saving: On the standby status, if there are no operations, the device will automatically turn off (the default can be changed in the menu). On the working status, if not activated, the device will automatically turn off (such as: record, audio record).
4.3 System Setting
Short press the "Menu" button【】to enter system settings, displayed as below:
| Menu | |
| Resolution | 1296P/30 |
| Photo Size | 14M |
| Photo Burst Mode | Off |
| Pre-Record | On |
| Post-Record | Off |
① In the menu main interface, short press "up/down/OK"
Button or touch operation to set parameters. Touch operation can quickly turn the page to the previous or next page.
② Short press the "Menu" button [ ] to go back to the upper menu, until exiting the menu interface.
| Parameter Options | Default Data | |
| Video Resolution | 2560*1440 30P16:92304*1296 30P16:9 1920*108030P 16:9 1280*72030P 16:9 848*48030P 16:9 | 1280*72030P 16:9 |
| Picture Resolution | 14M(4352X326416:9)12M(4000x300016:9)8M(3264X244816:9)4M(2048x153616:9) | 14M(4352X3264 16:9) |
| Snapshot | Off/3pcs/5pcs/10pcs/20pcs | OFF |
| Video | ON/OFF | OFF |
| Pre-record | ||
| Delayed Video record | ON/5 sec/30 sec/1min/5min | OFF |
| Super storage | ON/OFF | OFF |
| Exposure adjustment Segmented | -2~2 | 0 |
| Recording | 5/10/15/20Min | 20Min |
| Motion Detection | ON/OFF | OFF |
| Automatically screen turn off | OFF/30sec/60sec | 60sec |
| Automatically device turn off | OFF/ 1/3/5Min | 5Min |
| Voice Prompt | ON/OFF | ON |
| Video Voice | ON/OFF | ON |
| Volume Adjustment | High/Medium/Low | High |
| Car Mode | ON/OFF | OFF |
| Virus Firewall | ON/OFF | OFF |
| File Check Mode | File Mode/Picture Mode | Picture Mode |
| Device Number | It can be edited at replaced with a new number after validating password | 8888888 |
| Password Protection | ON/OFF | ON |
| Change Password | Password can be edited and placed with a new number after validating password | 000000 |
| Secret Photo shoot Mode | ON/OFF | OFF |
| IR Light Control | Manual/Auto | Manual |
| Voice Broadcast | ON/OFF | OFF |
| Language | Simplified Chinese/traditional Chinese/English, etc. | English |
| Factory Reset | Restore to default after validating password | / |
| Date/Time | Encryption, it can beedited after inputcorrect password | / |
| SoftwareVersion | Model + Version + Date | / |
Note: The software update causes parameter changes, please take the real object as the standard.
4.4 Auxiliary light
① IR night vision light:
On the video record and monitoring interface, short press the light button 📁 to turn on/off the IR light, and the interface will display the icon. If the menu "IR control" is set to Auto, the device will automatically detect changes in the environment's brightness and darkness and turn on/off automatically.
② White light:
On the video record and monitoring interface, short press the light button to turn on/off the white light, press again to switch to white flash, and the interface will display the icon. IR light and white light can switch freely, but only one function can be active at the same time.
4.5 Photograph:
① Single shot: Under monitor status, press the "Photograph" button [ ] to take photos. The green indicator light will
flash once and make a rubbing sound. One photo is taken per press, and the photo is named by date and time in JPG format, and saved in the memory card.
② Continuous shooting: Set up the number of shots in the menu. When under monitor status, press the "Photograph" button [ ] to take photos. The right indicator light will flash once and make a rubbing sound. The method of picture saving and naming is the same as above.
③ Snapshot: Press the "Photograph" button [ ] to snapshot a photo during video recording. Continuous shooting and snapshot can be set.
4.6 Video recording:
① Video recording: When under monitor status, press the "Video record" button to start recording. A flashing point will be displayed on the upper left corner of the screen, and the indicator light is red. Stop recording by pressing the button again. The video is named by date and time, in format, and saved in the memory card.
② Motion detection: Turn ON the motion detection in the menu, and go back to the monitoring interface. It will enter a seven-second countdown and start recording when a moving object is detected. When in a still picture status (no moving object detected), it will stop recording after
and the detection function will still be on.
③ Pre-record: Turn ON "pre-record" in the menu, and start pre-record by long pressing the Photograph button【】. A blue flashing dot will be displayed on the upper left corner of the screen. The maximum time for pre-recording is the last minute before starting the recording.
④ Post-recording: Turn ON "post-recording" in system settings. Short press the video recording button once to start recording, and it will enter video time-lapse automatically. Pressing the video button again, the time can be set up in menu settings. You can set it as: 5s/30s/1min/5min and stop recording. You can also stop the video time-lapse by short pressing the video button.
⑤ Video sound: Can turn ON/OFF the sound in the menu. Default setting is "ON" and records audio with video. When OFF, the video will be silent.
⑥ Secret shooting mode: Turn on the secret shooting mode. The device's acousto-optic will be shielded during video, audio recording, and photo shooting.
⑦ Car mode: Turn on this function in Menu settings. It starts recording while detecting USB power supply, and it only charges the device when the function is turned off.
4.7 Audio recording: The device can record audio individually. When under monitoring status, press the "Record button" to record. The microphone icon will be displayed in the middle of the screen, and press the button again to stop recording. The audio will be named by date and time, in MP3 format, and saved in the memory card. 4.8 Review/play back the video: When under monitor status, press the button【OK】to enter the playback interface, and select browsing files by pressing "UP, DOWN, OK" buttons. During playing back the video, you can fast forward or rewind by pressing "UP, DOWN" buttons.
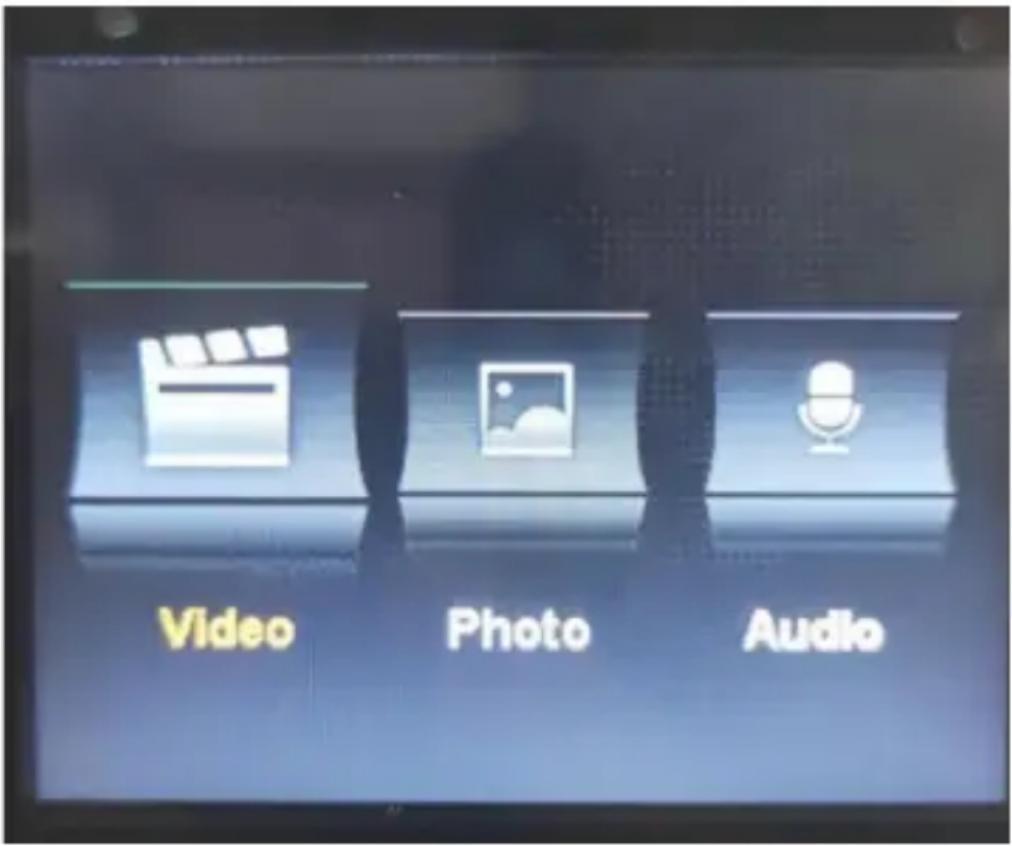
4.9 File deletion: Any files saved in the memory of the device cannot be deleted. You can delete the files
by connecting the device to the computer with a USB cable.
4.10 Reset button: Any improper operation or other reasons that caused the device to freeze or not respond can be recovered by the reset button. All specifications of the device will remain the same as before. 4.11 Input/output: Connect to PC using the included USB cable to transmit files on the device. 4.12 Connect to Computer: Connect the device to the computer using the included USB cable, and the device will show a dialog and then enter password 000000 (default setting is 000000, a new password needs to be inputted if you re...). When connecting to the software, input admin password 000000 and can revise device info (such as login password, unit number, unit name, police name, police number, department number), and enter the U disk mode, correct time, and factory reset.
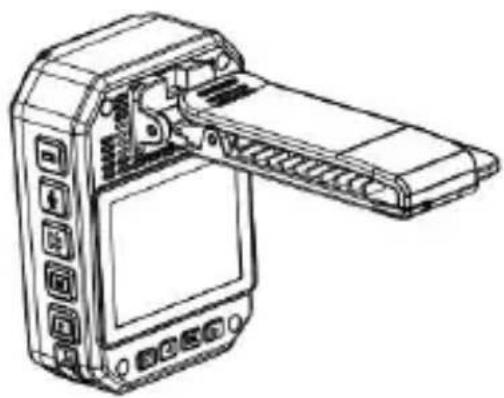
5. ASSEMBLY OF BACK CLIP
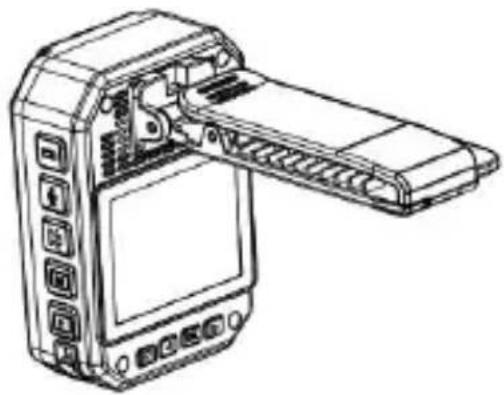
The assembly of the back clip: As shown in the figure, first put the device hopper chute ① according to direction ②, and take it out by pulling upwards in the opposite direction.
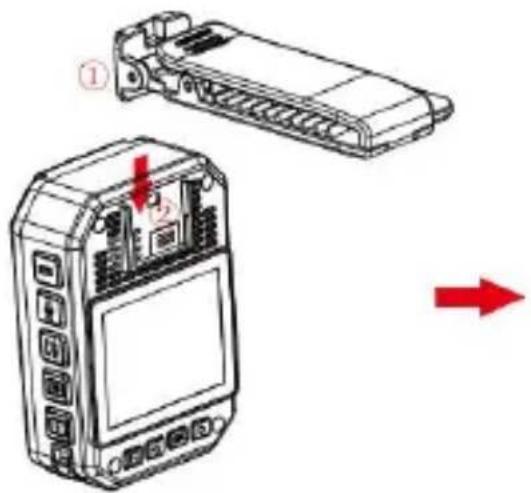
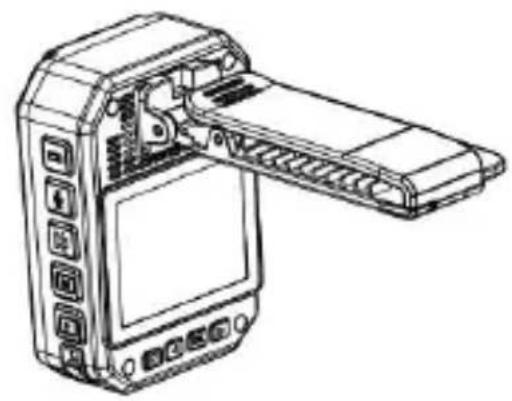
Notice: The clip is fixed by the buckling position of the device. We advise you to keep assembly time as short as possible to avoid damage that could be caused by repeated installation. At the same time, please do not push it hard.
6. ACCESSORY LIST
| Body Camera | 1pcs |
| Charging Adaptor | 1pcs |
| USB Cable | 1pcs |
| Short back clip | 1pcs |
| Long back clip | 1pcs |
| User Manual | 1pcs |
7. DEVICE CHARGING
Low battery display: When the battery is low, the
icon on the upper right corner of the screen will flash, the speaker will make a chime every 10 seconds, and the device will shut down after 10 minutes. Please charge the device promptly when the battery is low.
① You can charge the device by connecting it to a computer with a USB cable. The charging status can be seen from the icon and status indicator. ② Please charge the device with the USB cable and dedicated charger.
Note: This machine has a quick charging function and requires the use of the special USB cable and charger delivered with the device. Other non-original parts may not realize the fast charging function.
8. SIMPLE TROUBLESHOOTING AND TREATMENT
The device cannot be turned on and is unresponsive to operations.
① Please connect the charger and press the power button to see if it can be started. ② Charge the device and check if the problem is solved after a few hours of charging. ③ Please check if the charger and the cable are normal.
④ Please restore the device to factory settings or reset the button on the machine to check whether the problem is solved. ⑤ If the problem cannot be solved, please contact the after-sales staff to return the device to the factory for maintenance.
The device failed to connect to the computer and to enter upload mode. Please contact the after-sales service staff for a remote network solution.
⚠️ Forgotten password: Please contact the after-sales staff for a remote network solution (initial password: 000000).
⚠️ Unsynchronized time: The "date/time" in the menu settings is set manually, and the time of the device can be synchronized using the PC software "BodyCam". If you cannot change the time, please contact after-sales staff for a remote networking solution.
FCC Information:
CAUTION: Changes or modifications not expressly
approved by the party responsible for compliance could void the user's authority to operate the equipment!
This device complies with Part 15 of the FCC Rules.
Operation is subject to the following two conditions:
1) This product may cause harmful interference.
2) This product must accept any interference received, including interference that may cause undesired operation. WARNING: Changes or modifications to this product not expressly approved by the party responsible for compliance could void the user's authority to operate the product.
Note: This product has been tested and found to comply with the limits for a Class B digital device, pursuant to Part 15 of the FCC Rules. These limits are designed to provide reasonable protection against harmful interference in a residential installation.
This product generates, uses and can radiate radio frequency energy, and if not installed and used in accordance with the instructions, may cause harmful interference to radio communications. However, there is no guarantee that interference will not occur in a particular installation. If this product does cause harmful interference to radio or television reception, which can be determined by turning the product off and on, the user is encouraged to correct the interference by one or more of the following measures.
- Reorient or relocate the receiving antenna.
- Increase the distance between the product and receiver.
- Connect the product to an outlet on a circuit different
from that to which the receiver is connected.
- Consult the dealer or an experienced radio/TV technician for assistance.
Manufacturer: Shanghai Muxin Muye Youxiangongsi
Address: Shuangchenglu 803nong11hao1602A-1609shi, Baoshan District, Shanghai 200000 CN.
Imported to AUS: SIHAO PTY LTD. 1 ROKEVA
STREET EASTWOOD NSW 2122 Australia
Imported to USA: Sanven Technology Ltd. Suite 250, 9
Anaheim Place, Rancho Cucamonga, CA 91730
| UK | REP |
E-CrossStu GmbH
Mainzer Landstr.69, 60329 Frankfurt am Main.
| EC | REP |
YH CONSULTING LIMITED.
C/O YH Consulting Limited Office 147
Centurion House,
London Road, Staines-upon-Thames,
Surrey, TW18 4AX
VEVOR®
TOUGH TOOLS, HALF PRICE
Technical Support and E-Warranty Certificate
www.vevor.com/support
VEVOR®
TOUGH TOOLS, HALF PRICE
www.vevor.com/support
POLICE BODY CAMERA
MODEL: F26A
We continue to be committed to provide you tools at competitive prices.
"Save Half", "Half Price" or any other similar expressions used by us only represent an estimate of savings you might benefit from buying certain tools from us compared to the major top brands and does not necessarily mean to cover all categories of tools by us. You are kindly reminded to verify carefully, when you are placing an order with us, if you are saving half in comparison with the top major brands.
MODEL: F26A
NEED HELP? CONTACT US!
Have product questions? Need technical support?
Please feel free to contact us:
Technical Support and E-Warranty Certificate www.vevor.com/support
This is the original instruction. Please read all manual instructions carefully before operating. VEVOR reserves clear interpretation of our user manual. The appearance of the product shall be subject to the product you receive. Please forgive us that we won't inform you again if there are any technology or software updates on our products.

Imported in AUS: SIHAO PTY LTD. 1 ROKEVA
STREET EASTWOOD NSW 2122 Australia
250, 9166 Anaheim Place, Rancho Cucamonga, CA 917
| UK | REP |
E-CrossStu GmbH
Mainzer Landstr.69, 60329 Frankfurt a
Main.
| EC | REP |
YH CONSULTING LIMITED.
C/O YH Consulting Limited Office 147
Centurion House,
London Road, Staines-upon-Thames,
Surrey, TW18 4AX
VEVOR®
TOUGH TOOLS, HALF PRICE
www.vevor.com/support
VEVOR®
TOUGH TOOLS, HALF PRICE
We continue to be committed to providing you with competitive prices on tools.
"Save Half", "Half Price" or any other similar expressions used by us only represent an estimated savings you might benefit from buying certain tools from us compared to the major top brands, and does not necessarily mean to cover all categories of tools by us. You are kindly reminded to verify carefully before placing an order with us if you are also saving half in comparison with the top major brands.
MODEL: F26A
NEED HELP? CONTACT US!
Have product questions? Need technical support?
Please feel free to contact us:
Technical Support and E-Warranty Certificate www.vevor.com/support
This is the original instruction, please read all manual instructions carefully before operating. VEVOR reserves clear interpretation of our user manual. The appearance of the product shall be subject to the product you receive. Please forgive us that we won't inform you again about any technology or software updates on our products.

STREET EASTWOOD NSW 2122 Australia
Import to USA: Sanven Technology Ltd. Suite 250, 916
Anaheim Place, Rancho Cucamonga, CA 91730
| UK | REP |
E-CrossStu GmbH
Mainzer Landstr.69, 60329 Frankfurt a Main.
| EC | REP |
YH CONSULTING LIMITED.
C/O YH Consulting Limited Office 147
Centurion House,
London Road, Staines-upon-Thames,
Surrey, TW18 4AX
VEVOR®
TOUGH TOOLS, HALF PRICE
www.vevor.com/support
VEVOR®
TOUGH TOOLS, HALF PRICE
We continue to be committed to provide you tools at competitive prices.
"Save Half", "Half Price" or any other similar expressions used by us only represent an estimate of the savings you might benefit from buying certain tools from us compared to the major top brands and do not necessarily mean to cover all categories of tools offered by us. You are kindly reminded to verify carefully when placing an order with us if you are also saving half in comparison with the top major brands.
MODEL: F26A
NEED HELP? CONTACT US!
Have product questions? Need technical support?
Please feel free to contact us:
Technical Support and E-Warranty Certificate www.vevor.com/support
This is the original instruction, please read all manual instructions carefully before operating. VEVOR reserves clear interpretation of our user manual. The appearance of the product shall be subject to the product you receive. Please forgive us that we won't inform you again of any technology or software updates on our products.

9166 Anaheim Place, Rancho Cucamonga, CA 91730
| UK | REP |
E-CrossStu GmbH
Mainzer Landstr.69, 60329 Frankfurt a Main.
| EC | REP |
YH CONSULTING LIMITED.
C/O YH Consulting Limited Office 147 Centurion House,
London Road, Staines-upon-Thames,
Surrey, TW18 4AX
VEVOR®
TOUGH TOOLS, HALF PRICE
www.vevor.com/support
VEVOR®
TOUGH TOOLS, HALF PRICE
www.vevor.com/support
POLICE BODY CAMERA
MODEL: F26A
We continue to be committed to providing you with tools at competitive prices.
"Save Half", "Half Price" or any other similar expressions used by us only represent an estimate of the savings you might benefit from buying certain tools from us compared to the major top brands, and do not necessarily mean to cover all categories of tools by us. You are kindly reminded to verify carefully before placing an order with us if you are saving half in comparison with the top major brands.
MODEL: F26A
NEED HELP? CONTACT US!
Have product questions? Need technical support?
Please feel free to contact us:
Technical Support and E-Warranty Certificate www.vevor.com/support
This is the original instruction. Please read all manual instructions carefully before operating. VEVOR reserves clear interpretation of our user manual. The appearance of the product shall be subject to the product you receive. Please forgive us that we won't inform you again of any technology or software updates on our products.

C/O YH Consulting Limited Office 147
Centurion House,
London Road, Staines-upon-Thames,
Surrey, TW18 4AX
VEVOR®
TOUGH TOOLS, HALF PRICE
www.vevor.com/support
VEVOR®
TOUGH TOOLS, HALF PRICE
www.vevor.com/support
POLICE BODY CAMERA
MODEL: F26A
We continue to be committed to provide you tools at competitive prices.
"Save Half", "Half Price" or any other similar expressions used by us only represent an estimate of savings you might benefit from buying certain tools compared to the major top brands, and do not necessarily mean to cover all categories of tools by us. You are kindly reminded to verify carefully when placing an order with us if you are saving half in comparison with the top major brands.
MODEL: F26A
NEED HELP? CONTACT US!
Have product questions? Need technical support?
Please feel free to contact us:
Technical Support and E-Warranty Certificate www.vevor.com/support
This is the original instruction. Please read all manual instructions carefully before operating. VEVOR reserves clear interpretation of our user manual. The appearance of the product shall be subject to the product you receive. Please forgive us that we won't inform you again about any technology or software updates on our products.

250, 9166 Anaheim Place, Rancho Cucamonga, CA 917
| UK | REP |
E-CrossStu GmbH
Mainzer Landstr. 69, 60329 Frankfurt am Main.
Main.
| EC | REP |
YH CONSULTING LIMITED.
C/O YH Consulting Limited Office 147
Centurion House,
London Road, Staines-upon-Thames,
Surrey, TW18 4AX
VEVOR®
TOUGH TOOLS, HALF PRICE
www.vevor.com/support
VEVOR®
TOUGH TOOLS, HALF PRICE
We continue to be committed to provide you tools at competitive prices.
"Save Half", "Half Price" or any other similar expressions used by us only represent an estimate of the savings you might benefit from buying certain tools from us compared to the major top brands and does not necessarily mean to cover all categories of tools offered by us. You are kindly reminded to verify carefully when placing an order with us if you are saving half in comparison with the top major brands.
MODEL: F26A
NEED HELP? CONTACT US!
Have product questions? Need technical support?
Please feel free to contact us:
Technical Support and E-Warranty Certificate www.vevor.com/support
This is the original instruction. Please read all manual instructions carefully before operating. VEVOR reserves clear interpretation of our user manual. The appearance of the product shall be subject to the product you receive. Please forgive us that we won't inform you again of any technology or software updates on our products.


C/O YH Consulting Limited Office 147, Centurion House,
London Road, Staines-upon-Thames, Surrey, TW18 4AX
VEVOR®
TOUGH TOOLS, HALF PRICE
www.vevor.com/support
VEVOR®
TOUGH TOOLS, HALF PRICE
www.vevor.com/support
POLICE BODY CAMERA MODEL: F26A
We continue to be committed to providing you with tools at competitive prices.
"Save Half", "Half Price" or any other similar expressions used by us only represent an estimated savings you might benefit from buying certain tools from us compared to the major top brands and does not necessarily mean to cover all categories of tools by us. You are kindly reminded to verify carefully before placing an order with us if you are saving half in comparison with the top major brands.
MODEL: F26A
NEED HELP? CONTACT US!
Have product questions? Need technical support?
Please feel free to contact us:
Technical Support and E-Warranty Certificate www.vevor.com/support
This is the original instruction. Please read all instructions carefully before operating. VEVOR reserves the right to interpret our user manual. The appearance of the product shall be subject to the product you receive. Please forgive us that we won't inform you again of any technology or software updates on our products.

ASTWOOD NSW 2122 Australia
C/O YH Consulting Limited Office 147
Centurion House,
London Road, Staines-upon-Thames,
Surrey, TW18 4AX
VEVOR®
TOUGH TOOLS, HALF PRICE
www.vevor.com/support
- POLICE BODY CAMERA MODEL: F26A
- MODEL: F26A
- NEED HELP? CONTACT US
- PREFACE
- IMPORTANT NOTICE
- STRUCTURE DIAGRAM
- BUTTONS INSTRUCTION
- MENU/RETURN BUTTON [ ]: SHORT PRESS TO TURN ON/OFF
- UP/LEFT BUTTON [ ] WHEN ON THE SETTING MENU OR PLAYBACK
- DOWN/RIGHT BUTTON [ ]: WHEN ON THE SETTING MENU OR
- PLAYBACK/OK BUTTON [OK] SHORT PRESS TO TURN ON
- RESET BUTTON/HOLE【】WHEN SPECIFIC FACTORS CAUSE
- STATUS INDICATOR LIGHT
- SCREEN PROTECTION/POWER SAVING
- SYSTEM SETTING
- AUXILIARY LIGHT
- PHOTOGRAPH
- VIDEO RECORDING
- ASSEMBLY OF BACK CLIP
- ACCESSORY LIST
- DEVICE CHARGING
- SIMPLE TROUBLESHOOTING AND TREATMENT
- FCC INFORMATION
- VEVOR®
- POLICE BODY CAMERA
Brand : Vevor
Model : F26A
Category : Surveillance Camera