AB1600x - Jackhammer SCHEPPACH - Free user manual and instructions
Find the device manual for free AB1600x SCHEPPACH in PDF.


User questions about AB1600x SCHEPPACH
0 question about this device. Answer the ones you know or ask your own.
Ask a new question about this device
Download the instructions for your Jackhammer in PDF format for free! Find your manual AB1600x - SCHEPPACH and take your electronic device back in hand. On this page are published all the documents necessary for the use of your device. AB1600x by SCHEPPACH.
USER MANUAL AB1600x SCHEPPACH
natural_image
Exterior view of a modern office building (no signage)
text_image
https://www.scheppach.com/sde/service scheppachAB1600x
| DE | AbbruchhammerOriginalbedienungsanleitung | 06 |
| GB | Demolition HammerTranslation of original instruction manual | 17 |
| FR | Marteau Burineur PiqueurTraduction des instructions d'origine | 28 |
| IT | Martello demolitoreLa traduzione dal manuale di istruzioni originale | 39 |
| NL | SloophamerVertaling van de originele gebruikshandleiding | 50 |
| ES | Martillo de demoliciónTraducción del manual de instrucciones original | 61 |
| PT | Martelo demolidorTradução do manual de operação original | 72 |
text_image
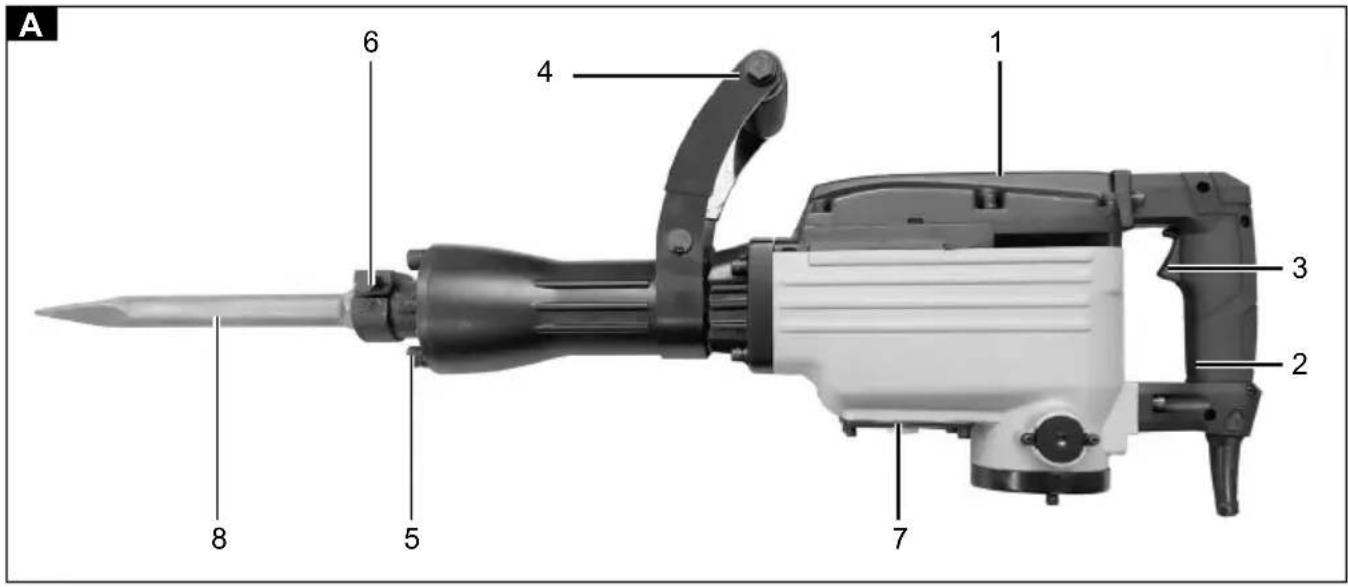
A 1 2 3 4 5 6 7 8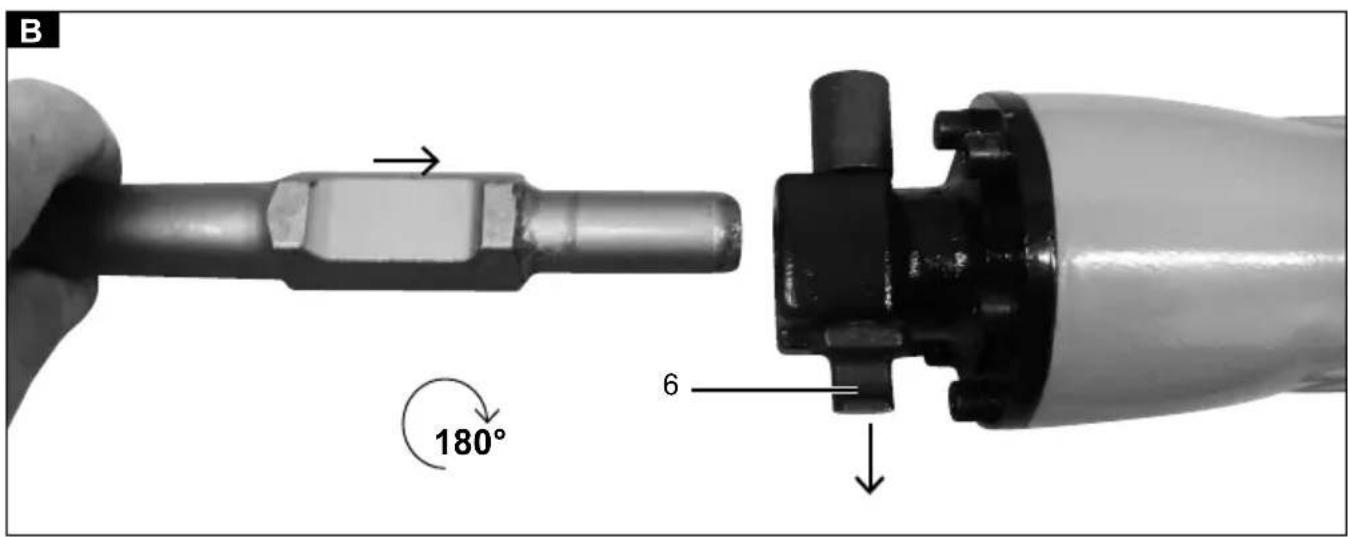
text_image
B 180° 6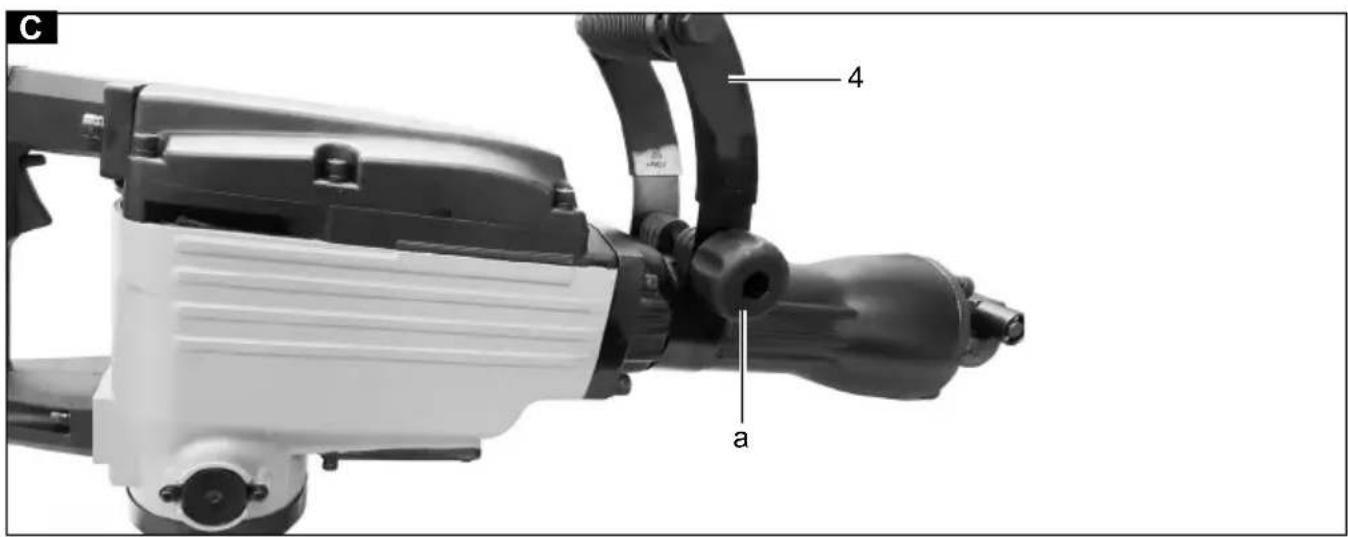
text_image
C 4 a
text_image
D 3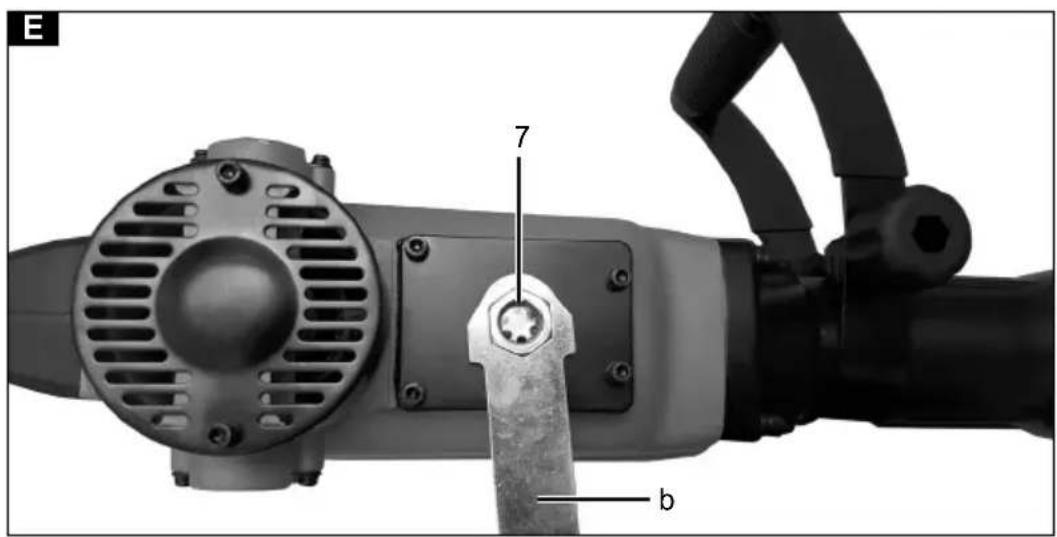
text_image
E 7 b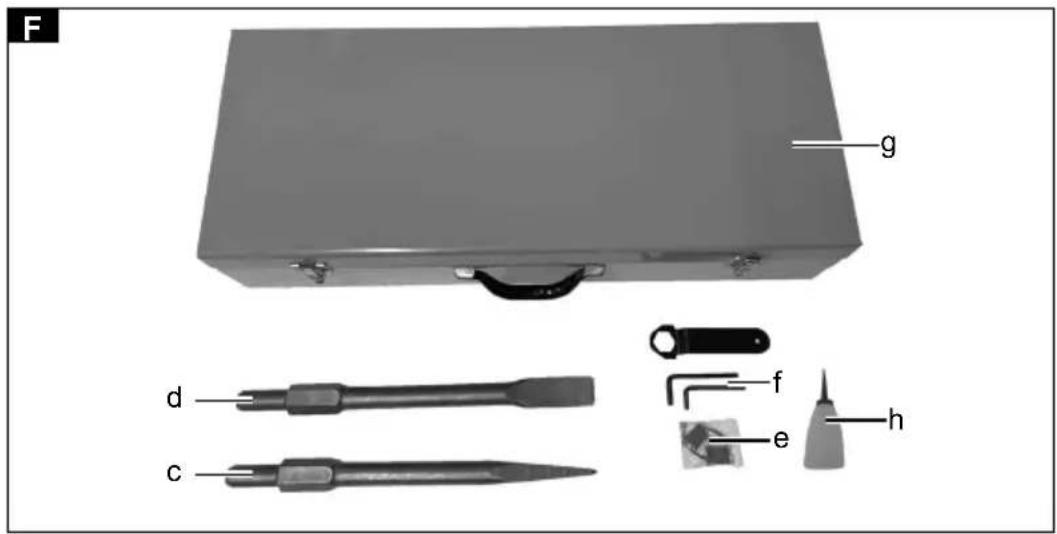
text_image
F g d c f e hGünzburger Straße 69
D-89335 Ichenhausen
Verehrter Kunde
natural_image
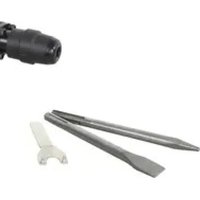
Two black mechanical tools with pointed tips and flanges, shown from different angles (no text or symbols visible)Flachmeißel
Art. Nr.: 3908201108
Spitzmeißel
Art. Nr.: 3908201109
Homepage: https://www.scheppach.com/de/service
text_image
https://www.scheppach.com/de/service scheppachDescription of the symbols
The use of symbols in this handbook is designed to direct your attention to possible risks. You must make sure that you understand the safety symbols and explanations accompanying them. Warnings themselves cannot remove risks and cannot substitute correct action for the prevention of accidents.
 | Read instruction manual and safety instructions before starting up and pay attention! |
 | Wear hearing protection |
 | Wear dust respirator |
 | Wear eye protection |
 | Wear safety gloves |
 | Wear safety shoes |
| △Caution! | We have designated parts (of this operating manual) concerning your safety with this sign: |
Table of contents: Page:
- Introduction.... 19
- Device description (Fig. A) 19
- Scope of delivery 19
- Proper use 19
- General Power Tool Safety Warnings 20
- Technical Data 22
- Unpacking....23
- Before getting started 23
- Work instructions....23
- Getting started 23
- Operation 24
- Electrical connection 24
- Maintenance 25
- Accessories 25
- Disposal & recycling 26
- Troubleshooting 27
1. Introduction
Manufacturer:
scheppach GmbH
Günzburger Straße 69
D-89335 Ichenhausen
Dear customer,
We hope your new tool brings you much enjoyment and success.
Note:
According to the applicable product liability laws, the manufacturer of the device does not assume liability for damages to the product or damages caused by the product that occurs due to:
- Improper handling
• Non-compliance of the operating instructions
• Repairs by third parties, not by authorized service technicians
• Installation and replacement of non-original spare parts
• Application other than specified
• A breakdown of the electrical system that occurs due to the non-compliance of the electric regulations and VDE regulations 0100, DIN 57113 / VDE0113
We recommend:
Read through the complete text in the operating instructions before installing and commissioning the device.
The operating instructions are intended to help the user to become familiar with the machine and take advantage of its application possibilities in accordance with the recommendations.
The operating instructions contain important information on how to operate the machine safely, professionally and economically, how to avoid danger, costly repairs, reduce downtimes and how to increase reliability and service life of the machine.
In addition to the safety regulations in the operating instructions, you have to meet the applicable regulations that apply for the operation of the machine in your country.
Keep the operating instructions package with the machine at all times and store it in a plastic cover to protect it from dirt and moisture. Read the instruction manual each time before operating the machine and carefully follow its information.
The machine can only be operated by persons who were instructed concerning the operation of the machine and who are informed about the associated dangers. The minimum age requirement must be complied with.
In addition to the safety notes contained in the present operating instructions and the special regulations of your country, the generally recognized technical rules for the operation of woodworking machines must be observed.
We accept no liability for damage or accidents which arise due to non-observance of these instructions and the safety information.
2. Device description (Fig. A)
- Motor housing
- Handle
- On / Off switch
- Additional handle
- Tool holder
- Locking bolt
- Oil fill opening / sight glass
- Point chisel
3. Scope of delivery
- Demolition Hammer
- Point chisel ∅ 30 L390 (c)
- Flat chisel ø 30 L390 (d)
- Carrying case
- Mounting key
- Maintenance tool (f)
• Carbon brushes (2x) (e) - Oil can (h)
- Operating manual
4. Proper use
The machine is intended for heavy chiselling and demolition work as well as for driving in and compacting with the appropriate accessories.
The equipment is allowed to be used only for its prescribed purpose. Any other use is deemed to be a case of misuse. The user/operator and not the manufacturer will be liable for any damage or injuries of any kind resulting from such misuse.
An element of the intended use is also the observance of the safety instructions, as well as the assembly instructions and operating information in the operating
manual.
Persons who operate and maintain the machine must be familiar with the manual and must be informed about potential dangers.
In addition, the applicable accident prevention regulations must be strictly observed.
Other general occupational health and safety-related rules and regulations must be observed.
The liability of the manufacturer and resulting damages are excluded in the event of modifications of the machine.
The machine may be operated only with original parts and original accessories of the manufacturer.
The safety, work and maintenance instructions of the manufacturer as well as the dimensions indicated in the Technical Data section must be adhered to.
Please note that our equipment has not been designed for use in commercial, trade or industrial applications. Our warranty will be voided if the equipment is used in commercial, trade or industrial businesses or for equivalent purposes.
5. GeneralPower Tool Safety Warnings
ATTENTION! The following basic safety measures must be observed when using electric tools for protection against electric shock, and the risk of injury and fire. Read all these notices before using the electric tool and keep the safety instructions for later reference
- Work area safety
a) Keep work area clean and well lit. Cluttered or dark areas invite accidents.
b) Do not operate power tools in explosive atmospheres, such as in the presence of flammable liquids, gases or dust. Power tools create sparks which may ignite the dust or fumes.
c) Keep children and bystanders away while operating a power tool. Distractions can cause you to lose control.
- Electrical safety
a) Power tool plugs must match the outlet. Never modify the plug in any way. Do not use any adapter plugs with earthed (grounded) power tools. Unmodified plugs and matching outlets will reduce risk of electric shock.
b) Avoid body contact with earthed or grounded surfaces, such as pipes, radiators, ranges and refrigerators. There is an increased risk of electric shock if your body is earthed or grounded.
c) Do not expose power tools to rain or wet conditions. Water entering a power tool will increase the risk of electric shock.
d) Do not abuse the cord. Never use the cord for carrying, pulling or unplugging the power tool. Keep cord away from heat, oil, sharp edges or moving parts. Damaged or entangled cords increase the risk of electric shock.
e) When operating a power tool outdoors, use an extension cord suitable for outdoor use. Use of a cord suitable for outdoor use reduces the risk of electric shock.
f) If operating a power tool in a damp location is unavoidable, use a residual current device (RCD) protected supply. Use of an RCD reduces the risk of electric shock.
- Personal safety
a) Stay alert, watch what you are doing and use common sense when operating a power tool. Do not use a power tool while you are tired or under the influence of drugs, alcohol or medication. A moment of inattention while operating power tools may result in serious personal injury.
b) Use personal protective equipment. Always wear eye protection. Protective equipment such as dust mask, non-skid safety shoes, hard hat, or hearing protection used for appropriate conditions will reduce personal injuries.
c) Prevent unintentional starting. Ensure the switch is in the off position before connecting to power source and/or battery pack, picking up or carrying the tool. Carrying power tools with your finger on the switch or energising power tools that have the switch on invites accidents.
d) Remove any adjusting key or wrench before turning the power tool on. A wrench or a key left attached to a rotating part of the power tool may result in personal injury.
e) Do not overreach. Keep proper footing and balance at all times. This enables better control of the power tool in unexpected situations.
f) Dress properly. Do not wear loose clothing or jewellery. Keep your hair, clothing and gloves away from moving parts. Loose clothes, jewellery or long hair can be caught in moving parts.
g) If devices are provided for the connection of dust extraction and collection facilities, ensure these are connected and properly used. Use of dust collection can reduce dust-related hazards.
- Power tool use and care
a) Do not force the power tool. Use the correct power tool for your application. The correct power tool will do the job better and safer at the rate for which it was designed.
b) Do not use the power tool if the switch does not turn it on and off. Any power tool that cannot be controlled with the switch is dangerous and must be repaired.
c) Disconnect the plug from the power source and/or the battery pack from the power tool before making any adjustments, changing accessories, or storing power tools. Such preventive safety measures reduce the risk of starting the power tool accidentally.
d) Store idle power tools out of the reach of children and do not allow persons unfamiliar with the power tool or these instructions to operate the power tool. Power tools are dangerous in the hands of untrained users.
e) Maintain power tools. Check for misalignment or binding of moving parts, breakage of parts and any other condition that may affect the power tool's operation. If damaged, have the power tool repaired before use. Many accidents are caused by poorly maintained power tools.
f) Keep cutting tools sharp and clean. Properly maintained cutting tools with sharp cutting edges are less likely to bind and are easier to control.
g) Use the power tool, accessories and tool bits etc. in accordance with these instructions, taking into account the working conditions and the work to be performed. Use of the power tool for operations different from those intended could result in a hazardous situation.
- Service
a) Have your power tool serviced by a qualified repair person using only identical replacement parts. This will ensure that the safety of the power tool is maintained.
Appliance-Specific Safety Instructions for Hammers
- Wear ear protectors. Exposure to noise can cause hearing loss.
- Use auxiliary handle(s), if supplied with the tool. Loss of control can cause personal injury.
- Hold power tool by insulated gripping surfaces, when performing an operation where the cutting accessory may contact hidden wiring or its own cord. Cutting accessory contacting a "live" wire may make exposed metal parts of the power tool "live" and could give the operator an electric shock.
- Use suitable detectors to determine if utility lines are hidden in the work area or call the local utility company for assistance. Contact with electric lines can lead to fire and electric shock. Damaging a gas line can lead to explosion. Penetrating a water line causes property damage or may cause an electric shock.
- When working with the machine, always hold it firmly with both hands and provide for a secure stance. The power tool is guided more secure with both hands.
- Secure the workpiece. A workpiece clamped with clamping devices or in a vice is held more secure than by hand.
- Wear a dust mask.
Additional Safety and Working Instructions
WARNING ≥ 16 kg
- Do not overreach. Keep proper footing and balance at all times.
- Use protective equipment. Always wear safety glasses when working with the machine. The use of protective clothing is recommended, such as dust mask, protective gloves, sturdy non-slip footwear and ear defenders.
- The dust produced when using this tool may be harmful to health. Do not inhale the dust. Use a dust absorption system and wear a suitable dust protection mask. Remove deposited dust thoroughly, e.g. with a vacuum cleaner.
• Always keep the connection cable from the working area of the device. Always guide the cable backwards, away from the device!
- Do not machine any materials that present a danger to health (e.g. asbestos).
- When working in walls ceiling, or floor, take care to avoid electric cables and gas or waterpipes.
-
Please turn the device immediately off when the tool used gets blocked! Do not turn the device on again when the tool is still blocked. This could cause bounce back with a high reaction moment. Determine and remove the cause of the blocking of the tool used while respecting the safety instructions.
• The possible causes may be: -
it is tilted in the workpiece to be machined
- it has pierced through the material to be machined
-
the power tool is overloaded
-
Do not reach into the machine while it is running.
- Chips and splinters must not be removed while the machine is running.
⚠ WARNING! Danger of burns
The insertion tool may become hot during use.
- when changing tools
- when setting the device down
⚠ WARNING! This electric tool generates an electromagnetic field during operation. This field can impair active or passive medical implants under certain conditions. In order to prevent the risk of serious or deadly injuries, we recommend that persons with medical implants consult with their physician and the manufacturer of the medical implant prior to operating the electric tool.
Residual risks
Even when this electric tool is used properly, residual risks still remain.
The following hazards may arise in connection with the design and construction of this electric tool:
- Lung damage if suitable dust protection mask is not worn.
- Hearing damage if suitable hearing protection is not worn.
- Damage to health resulting from hand/arm vibration if the device is used over an extended period of time or if it is not properly operated and maintained.
6. Technical Data
| Dimensions(L x B x H) | 652 x 130 x 265 mm |
| Stroke rate 1900 bpm | |
| Impact force 50 Joule | |
| Weight appr.14,7 kg | |
| Motor 220 - 240 V / 50 Hz | |
| Rated input P1 1600 W | |
| Protection class II | |
| Protection category IP20 | |
Technical changes reserved!
Noise & vibration
⚠ WARNING: Noise can have serious effects on your health. If the machine noise exceeds 85 dB (A), please wear suitable hearing protection.
Noise data
Sound power level L_WA 104,06 dB(A)
Sound pressure level L_pA 98,6 dB(A)
Uncertainty K_wa/pA 3 dB(A)
Vibration parameters
Main Handle:
Vibration emissions value
$$ a _ {h, N L} = 1 4, 1 0 4 \mathrm{m} / \mathrm{s} ^ {2} $$
$$ a _ {h, C H} = 2 0, 2 9 2 \mathrm{m} / \mathrm{s} ^ {2} $$
$$ a _ {h, \text { Cheq }} = 1 9, 2 1 4 \mathrm{m} / \mathrm{s} ^ {2} $$
$$ \text { Uncertainty } K = 1, 5 \mathrm{m} / \mathrm{s} ^ {2} $$
Additional handle:
Vibration emissions value
$$ a _ {h, N L} = 1 3, 5 4 7 \mathrm{m} / \mathrm{s} ^ {2} $$
$$ a _ {h, C H} = 1 8, 0 3 4 \mathrm{m} / \mathrm{s} ^ {2} $$
$$ a _ {h, \text { Cheq }} = 1 7, 2 3 0 \mathrm{m} / \mathrm{s} ^ {2} $$
$$ \text { Uncertainty } K = 1, 5 \mathrm{m} / \mathrm{s} ^ {2} $$
Additional information for electric power tools ⚠ WARNING!
The specified vibration value was established in accordance with a standardized testing method. It may change according to how the electric equipment is used and may exceed the specified value in exceptional circumstances.
The specified vibration value can be used to compare the equipment with other electric power tools.
The specified vibration value can be used for initial assessment of a harmful effect.
Keep the noise emissions and vibrations to a minimum!
- Only use appliances which are in perfect working order.
• Service and clean the appliance regularly. - Adapt your working style to suit the appliance.
- Do not overload the appliance.
- Have the appliance serviced whenever necessary.
- Switch the appliance off when it is not in use.
- Wear protective gloves.
7. Unpacking
⚠ WARNING!
The device and packaging materials are not toys! Children must not be allowed to play with plastic bags, film and small parts! Risk of swallowing and suffocation!
- Open the packaging and remove the device carefully.
- Remove the packaging material as well as the packaging and transport bracing (if available).
- Check that the delivery is complete.
- Check the device and accessory parts for transport damage. When complaints the dealer must be informed immediately. Subsequent complaints will not be accepted.
- If possible, store the packaging until the warranty period has expired.
- Read the operating instructions to make yourself familiar with the device prior to using it.
- Only use original parts for accessories as well as for wearing and spare parts. Spare parts are available from your specialized dealer.
- Specify our part numbers as well as the type and year of construction of the device in your orders.
8. Before getting started
Make sure before starting that the data on the type plate coincide with the mains specifications.
Always disconnect the power supply before making any adjustments to the device
- Get to know your machine. Familiarise yourself with its application and limitations, as well as the specific potential hazards.
- Make sure that the switch is OFF before inserting the plug into the socket.
- Make sure that the machine is assembled completely and properly.
- Check the machine before use for damaged parts and determine whether these parts work properly and perform its intended function; in case of doubt, the part is to be replaced.
- Check the alignment of all moving parts, broken or mounting parts, and other conditions that could impair proper operation. Any damaged part should be repaired or replaced by a qualified technician.
- Do not use the machine if a switch cannot be switched on and off correctly.
△ CAUTION! Before beginning the operation, check the installation site for concealed electrical cables, gas and water pipes using a pipe locator.
9. Work instructions
- Use only proper equipment.
- Make all machine adjustments only with the machine switched off.
- Never leave the machine unattended while it is running.
- When switching off, leave the machine only after it comes to a complete standstill.
- Turn the machine off before you unplug it.
• Always unplug the mains cord. Never pull out the plug from the wall outlet by holding the cable. - Perform maintenance and cleaning of the device regularly.
10. Getting started
Using the chisel (Fig. B)
- Clean chisel always before inserting it and lubricate the shaft slightly.
- Pull out the locking bolts (6) up to the end stop, turn by 180° and release.
- Insert chisel into the tool holder (5) and slide it up to the end stop.
- Pull out the locking bolts (6) once again, turn by 180^ and release.
- Check lock on the tool.
Remove chisel
Pull out the locking bolts (6) up to the end stop, turn by 180^ and release, and remove the chisel.
Additional handle (Fig. C)
For safety reasons, use the demolition hammer only with the additional handle!
- The additional handle (4) provides you safe grip while using the demolition hammer.
- The additional handle (4) can be rotated to any position.
- Loosen the screw (a).
- Turn the additional handle (4) to a convenient and safe working position and tighten the screw (a) again.
Switching on / off (Fig. D)
Switching on: Press the operating switch (3).
Switching off: Release the operating switch (3).
11. Operation
△ CAUTION! For your safety, the machine must be held only at the two handles (2 and 4, Fig. A)!
This will avoid the danger of an electric shock through contact of lines during chiselling.
Always keep the chiselling tools sharp.
NOTE:
• Work only at low pressure when chiselling.
- Excessive pressure loads the motor unnecessarily.
- Sharpen the chisels in time and replace, if necessary.
Dust/Chip Extraction
Dusts from materials such as lead-containing coatings, some wood types, minerals and metal can be harmful to one's health. Touching or breathing-in the dusts can cause allergic reactions and/or lead to respiratory infections of the user or bystanders.
Certain dusts, such as oak or beech dust, are considered as carcinogenic, especially in connection with wood-treatment additives (chromate, wood preservative). Materials containing asbestos may only be worked by specialists.
- Provide for good ventilation of the working place.
- It is recommended to wear a P2 filter-class respirator.
Observe the relevant regulations in your country for the materials to be worked.
12. Electrical connection
The electrical motor installed is connected and ready for operation. The connection complies with the applicable VDE and DIN provisions.
The customer's mains connection as well as the extension cable used must also comply with these regulations.
Important information
In the event of an overloading the motor will switch itself off. After a cool-down period (time varies) the motor can be switched back on again.
Faulty power supply cables
Insulation damage often occurs at power supply cables.
Causes are:
- Pressure points when power supply cables are routed through the window or door gaps.
- Bends due to improper fastening or guiding of the power supply cables.
- Interfaces by running over the power supply cables.
• Insulation damage by pulling off the wall outlet.
- Cracks due to ageing of the insulation.
Such defective power supply cables must not be used and are extremely dangerous to life because of the insulation damage!
Check power supply cables regularly for damage. Make sure that the power cable is not connected to the mains supply when you check.
Electrical connections must comply with the relevant VDE and DIN regulations. Only use connecting cables with H07RN-F mark.
An imprint of the type designation on the power cable is mandatory.
Connection type X
If the mains connection cable of this device is damaged, it must be replaced by a special connection cable which can be obtained from the manufacturer or its service department.
AC motor
• The mains voltage must be 230 V\~ / 50 Hz
- Extension cables up to 25 m length must have a cross section of 1.5 mm ^2 .
Power supply and extension cord must be 3-wire = P + N + SL. - (1/N/PE).
The mains supply is secured up to 16 A.
Connections and repairs of electrical equipment may only be carried out by an electrician.
Please provide the following information in the event of any enquiries:
• Type of current for the motor
• Machine data - type plate
- Motor data - type plate
13. Maintenance
If personnel qualified for unusual maintenance tasks or repairs must be obtained during of after the warranty period, please always contact a service point recommended by us or contact the manufacturer.
- Only perform repair, maintenance and cleaning work as well as the correction of malfunctions with the drive switched off as a basic rule.
- All protective and safety equipment must be reassembled immediately after repair, maintenance is completed.
Cleaning
⚠️ CAUTION! Disconnect the mains plug.
- Clean the machine each time after completing work.
- The machine should be cleaned regularly to remove dust and dirt.
- Keep safety devices, air vents and the motor housing as dust and dirt-free as possible.
- Clean the device with a clean cloth, or blow it out with compressed air at low pressure.
- All moving parts are to be re-greased at periodic intervals.
- Do not use detergents or solvents as these might damage the plastic parts of the device. Make sure that no water can get inside the device.
Carbon brushes
In case of excessive sparking, have the carbon brushes checked by a qualified electrician.
△ CAUTION! The carbon brushes should be replaced only by a qualified electrician.
Check the oil level
The oil level should be checked before each use of the device. Place the device with the tool holder in the down position on the floor.
The oil must be at least 4 mm above the bottom edge of the sight glass. Refill oil, if required.
Oil change (Fig. E)
The oil should be changed after about 40-50 hours of operation.
Recommended oil: 30 ml SAE 15W/40 or similar.
△ CAUTION! Switch off the device. Disconnect the mains plug!
- Unscrew the sight glass (7) using the Allen wrench (b) and drain the oil.
- To prevent uncontrolled drainage of oil, place the container under the drain plug and collect the oil in it.
Note: Waste oil must be disposed of at the appropriate collection point for used oil! - Fill the new oil has reached (about 30 ml) into the oil filler opening, until the oil level has reached the specified level.
-
Tighten the sight glass again.
-
Check the oil level again after a short period
Service information
Please note that the following parts of this product are subject to normal or natural wear and that the following parts are therefore also required for use as consumables.
Wear parts*: Chisel, carbon brushes
* Not necessarily included in the scope of delivery!
14. Accessories
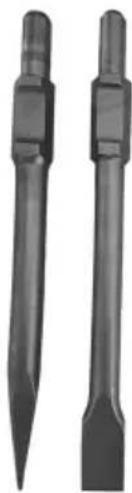
natural_image
Two black mechanical tools with pointed tips and rectangular end caps, no visible text or symbolsFlat chisel
item no.: 3908201108
Point chisel
item no.: 3908201109
15. Disposal & recycling

The equipment is supplied in packaging to prevent it from being damaged in transit. The raw materials in this packaging can be reused or recycled. The equipment and its accessories are made of various types of material, such as metal and plastic. Defective components must be disposed of as special waste. Ask your dealer or your local council.

Old devices must not be disposed of with household waste!
This symbol indicates that this product must not be disposed of together with domestic waste in compliance with the Directive (2012/19/EU) pertaining to waste electrical and electronic equipment (WEEE). This product must be disposed of at a designated collection point. This can occur, for example, by handing it in at an authorised collecting point for the recycling of waste electrical and electronic equipment. Improper handling of waste equipment may have negative consequences for the environment and human health due to potentially hazardous substances that are often contained in electrical and electronic equipment. By properly disposing of this product, you are also contributing to the effective use of natural resources. You can obtain information on collection points for waste equipment from your municipal administration, public waste disposal authority, an authorised body for the disposal of waste electrical and electronic equipment or your waste disposal company.
16. Troubleshooting
The following table shows fault symptoms and describes remedial measures in the event of your machine failing to work properly. If you cannot localise and rectify the problem with this, please contact your service workshop.
| Fault Possible cause Remedy | ||
| Motor does not start | Failure of mains fuse Check the mains fuse | defective extension cable |
| Extension cable defective Replace | ||
| Connections at the motor or switch out of order | Check with the help of an electrician | |
| Motor or switch defective Check with the help of an electrician | ||
| Motor does not work, the fuse responds | Cross-section of the extension line is insufficient | Refer to Electrical Connection |
| Overload Check tool | ||
Günzburger Straße 69
D-89335 Ichenhausen
Cher client,
natural_image
Two black mechanical tools with pointed tips and flanges, shown from different angles (no text or symbols visible)Burin plat
Réf.: 3908201108
Burin pointu
Réf.: 3908201109
Günzburger Straße 69
D-89335 Ichenhausen
Egregio cliente,
natural_image
Two black mechanical tools with pointed tips and flanges, shown side by side (no text or symbols visible)Scalpello piatto
Oggetto numero: 3908201108
Scalpello a punta
Oggetto numero: 3908201109
Günzburger Straße 69
D-89335 Ichenhausen
Geachte klant,
WAARSCHUWING ≥ 16 kg
Stof-/spanenafzuiging
natural_image
Two black mechanical tools with pointed tips and flanges, shown side by side (no text or symbols visible)Vlakbeitel
Art. nr.: 3908201108
Puntbeitel
Art. nr.: 3908201109
Günzburger Straße 69
D-89335 Ichenhausen
Estimado cliente:
natural_image
Two black mechanical tools with pointed tips and flanges, shown from different angles (no text or symbols visible)Cincel plano
N.° de art.: 3908201108
Cincel puntiagudo
N.° de art.: 3908201109
Günzburger Straße 69
D-89335 Ichenhausen
Estimado cliente,
natural_image
Two black mechanical tools with pointed tips and flanges, no visible text or symbolsTalhadeira plana
N.° art.: 3908201108
Ponteiro
N.° art.: 3908201109
text_image
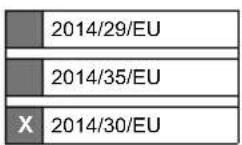
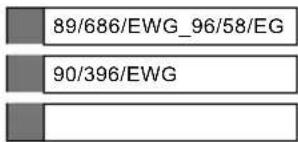
Exploded view diagram of an industrial machine with numbered components for identificationEC Declaration of Conformity
DEMOLITION HAMMER - AB1600X
MARTEAU BURINEUR PIQUEUR - AB1600X
5908208901

text_image
89/686/EWG_96/58/EG 90/396/EWG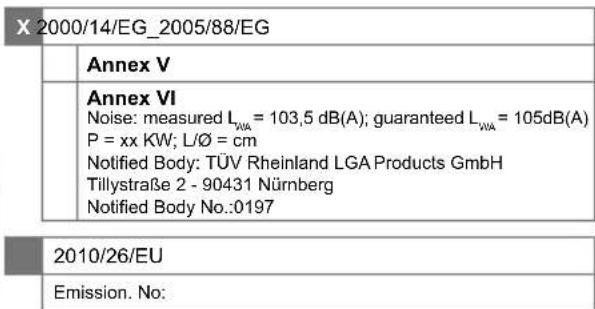
text_image
X 2000/14/EG_2005/88/EG Annex V Annex VI Noise: measured LWA = 103,5 dB(A); guaranteed LWA = 105dB(A) P = xx KW; LØ = cm Notified Body: TÜV Rheinland LGA Products GmbH Tillystraße 2 - 90431 Nürnberg Notified Body No.:0197 2010/26/EU Emission. No:| x 2006/42/EG | |
| Annex IV Notified Body: Notified Body No.: Certificate No.: | |
Standard references:
EN 60745.1:2009+A11; EN 60745-2-6:2010; EN 55014-1:2017; EN 55014-2:2015; EN 61000-3-3:2013; EN 61000-3-2:2014
This declaration of conformity is issued under the sole responsibility of the manufacturer.
The object of the declaration described above fulfils the regulations of the directive 2011/65/EU of the European Parliament and Council from 8th June 2011, on the restriction of the use of certain hazardous substances in electrical and electronic equipment.
Subject to change without notice
Documents registrar: Viktor Härtl
Günzburger Str. 69, D-89335 Ichenhausen
Garantie DE
Apparent defects must be notified within 8 days from the receipt of the goods. Otherwise, the buyer's rights of claim due to such defects are invalidated. We guarantee for our machines in case of proper treatment for the time of the statutory warranty period from delivery in such a way that we replace any machine part free of charge which provably becomes unusable due to faulty material or defects of fabrication within such period of time. With respect to parts not manufactured by us we only warrant insofar as we are entitled to warranty claims against the upstream suppliers. The costs for the installation of the new parts shall be borne by the buyer. The cancellation of sale or the reduction of purchase price as well as any other claims for damages shall be excluded.