NY2009-24UR - Heating MIDEA - Free user manual and instructions
Find the device manual for free NY2009-24UR MIDEA in PDF.

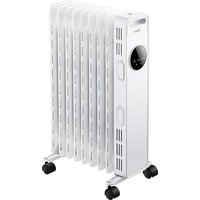
| Product type | Oil-filled radiator |
| Brand | Midea |
| Model | NY2009-24UR |
| Rated power | 2000 W |
| Supply voltage | 220-240 V~, 50 Hz |
| Rated heat output | 1,184 kW |
| Temperature range | 5 to 35 °C |
| Power modes | 3 levels (high, medium, low) |
| Programmable timer | Automatic shut-off after 12 h, timer up to 24 h |
| Remote control | Infrared remote control (AAA battery not included) |
| Display | LED display with indicators |
| Safety | Overheat protection, automatic shut-off, hot surface warning |
| Recommended use | Indoor room, stable horizontal surface, 1 m distance from flammable materials |
| Maintenance | Clean with a soft damp cloth, without abrasive detergent |
| Mobility | 4 swivel casters included |
| Accessories supplied | Casters, remote control, user manual |
| Warranty | 24 months manufacturer |
Frequently Asked Questions - NY2009-24UR MIDEA
User questions about NY2009-24UR MIDEA
0 question about this device. Answer the ones you know or ask your own.
Ask a new question about this device
Download the instructions for your Heating in PDF format for free! Find your manual NY2009-24UR - MIDEA and take your electronic device back in hand. On this page are published all the documents necessary for the use of your device. NY2009-24UR by MIDEA.
USER MANUAL NY2009-24UR MIDEA
natural_image
Line drawing of a heat exchanger with multiple cooling fins and mounting base (no text or symbols)OIL FILLED HEATER
USER MANUAL
NY2009-24UR
Warning notices: Before using this product, please read this manual carefully and keep it for future reference. The design and specifications are subject to change without prior notice for product improvement.
Consult with your dealer or manufacturer for details.
The diagram above is just for reference. Please take the appearance of the actual product as the standard.
The device is only suitable for well insulated spaces or occasional use.
LANGUAGES
EN English
DE German
ES Spanish
FR French
IT Italian
THANK YOU LETTER
Thank you for choosing Midea! Before using your new Midea product, please read this manual thoroughly to ensure that you know how to operate the features and functions that your new appliance offers in a safe way.
CONTENTS
THANK YOU LETTER 01
SAFETY INSTRUCTIONS 02
SPECIFICATIONS 05
PRODUCT OVERVIEW 07
PRODUCT INSTALLATION 08
OPERATION INSTRUCTIONS 09
CLEANING AND MAINTENANCE 13
TROUBLESHOOTING 14
TRADEMARKS, COPYRIGHTS AND LEGAL STATEMENT 15
DISPOSAL AND RECYCLING 16
DATA PROTECTION NOTICE 17
SAFETY INSTRUCTIONS
Intended Use
The following safety guidelines are intended to prevent unforeseen risks or damage from unsafe or incorrect operation of the appliance. Please check the packaging and appliance on arrival to make sure everything is intact to ensure safe operation. If you find any damage, please contact the retailer or dealer. Please note modifications or alterations to the appliance are not allowed for your safety concern. Unintended use may cause hazards and loss of warranty claims.
Explanation of Symbols

Danger
This symbol indicates that there are dangers to the life and health of persons due to extremely flammable gas.

Warning of electrical voltage
This symbol indicates that there is a danger to life and health of persons due to voltage.

Warning
The signal word indicates a hazard with a medium level of risk which, if not avoided, may result in death or serious injury.

Caution
The signal word indicates a hazard with a low degree of risk which, if not avoided, may result in minor or moderate injury.

Attention
The signal word indicates important information (e.g. damage to property), but not danger.

Observe instructions
This symbol indicates that a service technician should only operate and maintain this appliance in accordance with the operating instructions.
Read these operating instructions carefully and attentively before using/commissioning the unit and keep them in the immediate vicinity of the installation site or unit for later use!

CAUTION
- Read Rules for Safe Operation and Instructions Carefully.
- This appliance can be used by children aged from 8 years and above and persons with reduced physical, sensory or mental capabilities or lack of experience and knowledge if they have been given supervision or instruction concerning use of the appliance in a safe way and understand the hazards involved. Children shall not play with the appliance. Cleaning and user maintenance shall not be made by children without supervision.
- Children of less than 3 years should be kept away unless continuously supervised. Children aged from 3 years and less than 8 years shall only switch on/off the appliance provided that it has been placed or installed in its intended normal operating position and they have been given supervision or instruction concerning use of the appliance in a safe way and understand the hazards involved. Children aged from 3 years and less than 8 years shall not plug in, regulate and clean the appliance or perform user maintenance.
- CAUTION — Some parts of this product can become very hot and cause burns. Particular attention has to be given where children and vulnerable people are present.
Warning: In order to avoid overheating, do not cover the heater.
- If the supply cord is damaged, it must be replaced by the manufacturer or its service agent or a similarly qualified person in order to avoid a hazard.
- The heater must not be located immediately below a socket-outlet.
- Do not use this heater in the immediate surroundings of a bath, a shower or a swimming pool.
- This heater is filled with a precise quantity of special oil. Repairs requiring opening of oil-container are only to be made by the manufacturer or his service agent who should be contacted if there is an oil leak. When scrapping the heater, follow the regulations concerning the disposal of oil.
- This heater cannot achieve accurate temperature control of the environment, and thus cannot be used as insulation device for storage environment, items, animals and plants.
- Do not use this heater if it has been dropped.
- Do not use if there are visible signs of damage to the heater.
- Use this heater on a horizontal and stable surface, or fix it to the wall, as applicable.
- WARNING: Do not use this heater in smallrooms when they are occupied by persons not capable of leaving the room on their own, unless constant supervision is provided.
- WARNING: To reduce the risk of fire, keep textiles, curtains, or any other flammable material a minimum distance of 1 m from the air outlet.
- Do not use outdoors.
SPECIFICATIONS
| Product Model | NY2009-24UR |
| Voltage | 220-240V~ |
| Frequency | 50Hz |
| Rated Power | 2000W |
| Symbol | Value Unit | Item | UnitItem | ||
| Heat output | Type of heat output / room temperature control (select one) | ||||
| Nominal heat output | Pnom 1,184 kW [no] | single stage heat output and no room temperature control | |||
| Minimum heat output (indicative) | Pmin 0,773 kW | two or more manual stages, no room temperature control | [no] | ||
| Maximum continuous heat output | Pmax 1,184 kW | with mechanic thermostat room temperature | [no] | ||
| Power consumption | with electronic thermostat room temperature | [yes] | |||
| In off mode | Po N.A. W | electronic room temperature control plus day timer | [no] | ||
| In standby mode | Psm 0,25 W | electronic room temperature control plus week timer | [no] | ||
| In idle mode | Pidle 0,28 W | Other control options (multiple selections possible) | |||
| In network standby | Pnsm | N.A. W | room temperature control, with presence detection | [no] | |
| Standby mode with display of information or status | room temperature control, with open window detection | [no][n] | |||
| Seasonal space heating energy efficiency in active mode | ηs,on | 48,2 | % | [no]dis | |
EN
| Symbol | Value Unit | Item | UnitItem | ||
| adaptive start control | [no] | ||||
| working time limitation | [yes] | ||||
| black bulb sensor | [no] | ||||
| self-learning functionality | [no] | ||||
| control accuracy | [no] | ||||
EN
PRODUCT OVERVIEW
Part Name
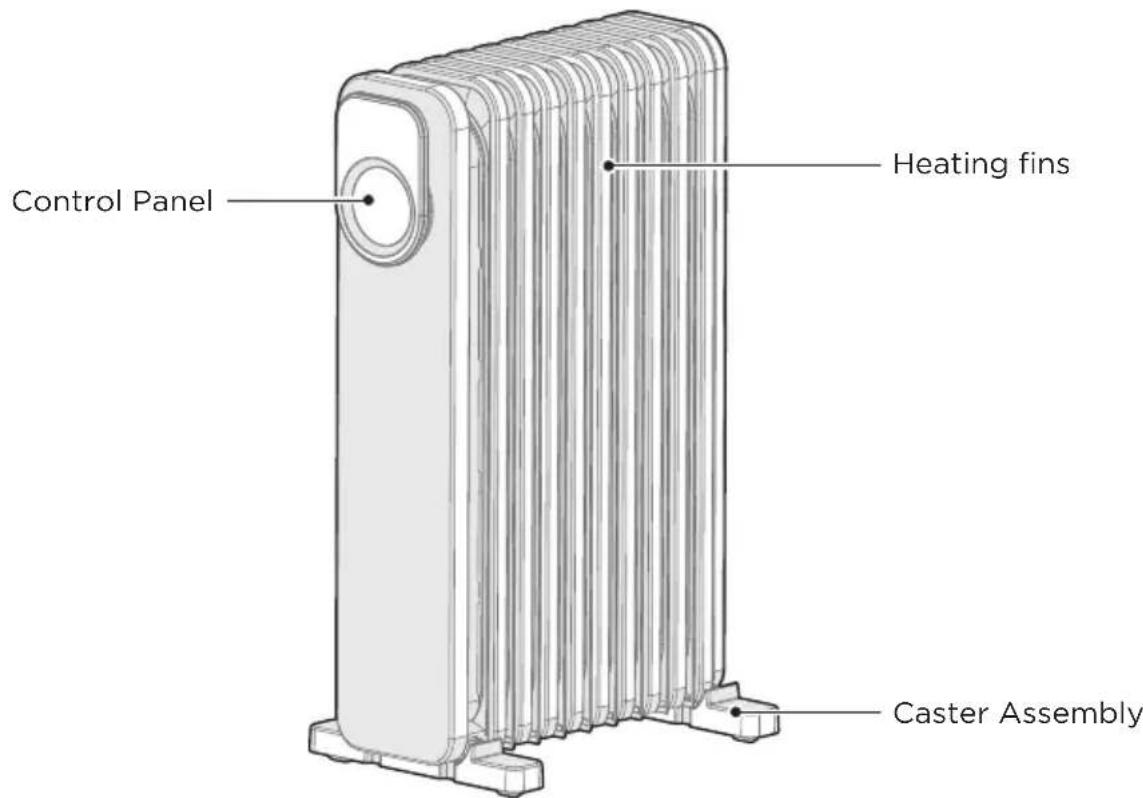
EN
Accessories

NOTE
All the pictures in this manual are for explanation purpose only. Any discrepancy between the real object and the illustration in the drawing shall be subject to the real subject.
PRODUCT INSTALLATION
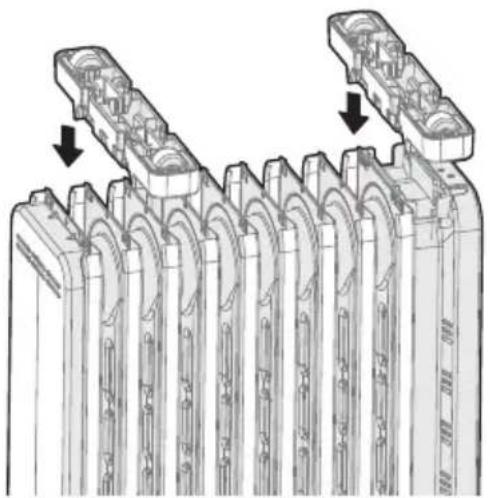
1 Turn the heater body upside down with the bottom facing up.
2 As shown in Figure 1, align the mounting buckles of a set of foot components. The hole of the heat sink, press in the direction of the arrow, the buckle on the foot. Just drop into the hole of the heat sink.
natural_image
Technical illustration of a mechanical component with multiple grooves and mounting holes, showing internal structure and alignment arrows (no text or symbols)Figure 1
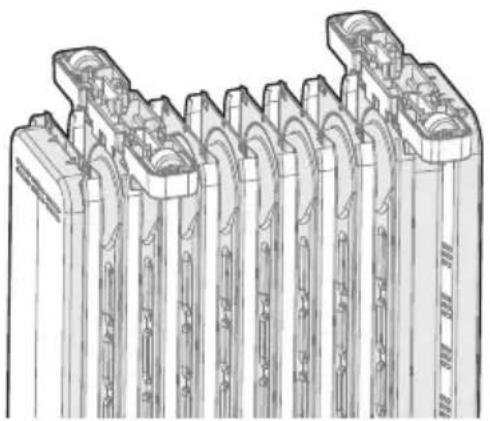
3 As shown in Figure 2, align the mounting groove of the foot with the one-way wheel and Clamped on the second heat sink, the other foot mounting slot is aligned. It is stuck on the penultimate heat sink. Install it firmly before heating. Place the device upright and the wheels can be on the ground.
natural_image
Technical line drawing of a mechanical component with multiple cylindrical cavities and mounting holes (no text or symbols)Figure 2
OPERATION INSTRUCTIONS
Inspection Before Start
- The power cord shall not be damaged or fractured.
- Please verify the rated current of the power socket is in line with the requirements in the table above and is equipped with a safety grounding device before use; otherwise, replace the socket.

NOTE
- To use the machine for the first time or to re-insert the socket, please pay attention to check whether the plug and the socket are fitted well.
-
Insert the power plug into the socket and start for use; after about half an hour, turn off and pull out the plug. Check whether the plug pins are hot; replace the socket if so (more than about 50^ C) to avoid burning the plug or even causing a fire caused by overheating of the socket due to poor contact.
Start and Power Selection
EN
Start
- Press the “⏻” key in the standby state to enter the power-on state.
Power selection
- When the machine is running, press the “-” key repeatedly, and the machine will switch in the cyclic sequence of “high-grade→low-grade→mid-grade→high-grade”.
Temperature Adjustment
- In the power-on state, short press the “ 🔊 ” key to enter the temperature setting state, press the key repeatedly to switch in the cyclic order of “18, 22, 26, 30, 35”. Long press the “ 🔊 ” button, the temperature will increase continuously and rapidly (range 5-35°C).
If there is no key action within 5 seconds, confirm the temperature setting value.
Stop
- Press the “⏻” key in the power-on state to enter the standby state.
Movement of the Heater
- To move the heater, turn it off first, and pull out the power plug; then push the body to make the four casters below the body to roll.
Auto off Function
- After the machine is powered on and started, it will be shut down forcibly in case of no valid operation after 12h continuous operation with no timer.
Button Function Description
| Button Function Description | |
 | Press the “💡” key in the standby state to enter the power-on state.Press the “💡” key in the power-on state to enter the standby state. |
 | When the machine is running, press the “-💡-” key repeatedly, and the machine will switch in the cyclic sequence of “high-grade → low-grade → mid-grade → high-grade”. |
| [YS3Z] | In the power-on state, short press the “💡” key to enter the temperature setting state, press the key repeatedly to switch in the cyclic order of “18, 22, 26, 30, 35”. Long press the “💡” button, the temperature will increase continuously and rapidly (range 5-35°C). If there is no key action within 5 seconds, confirm the temperature setting value. |
 | In the power-on state, short press the “💡” button to enter the timer standby setting, press the button repeatedly to switch in the cyclic order of “0, 2, 4, 8, 16, 24”. If there is no key action within 3 seconds, confirm the time setting value.In the standby state, short press the “💡” button to enter the scheduled power-on setting, press the button repeatedly to switch in the cyclic sequence of “0, 2,..., 24”.If there is no key action within 3 seconds, confirm the time setting value. |
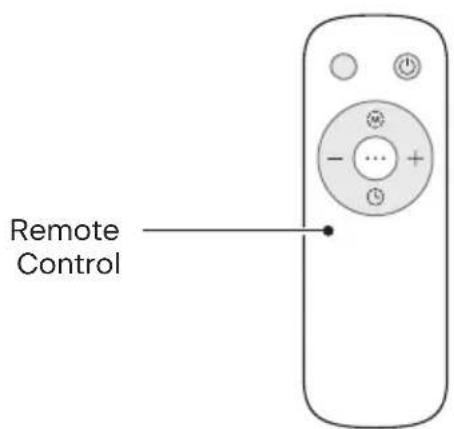
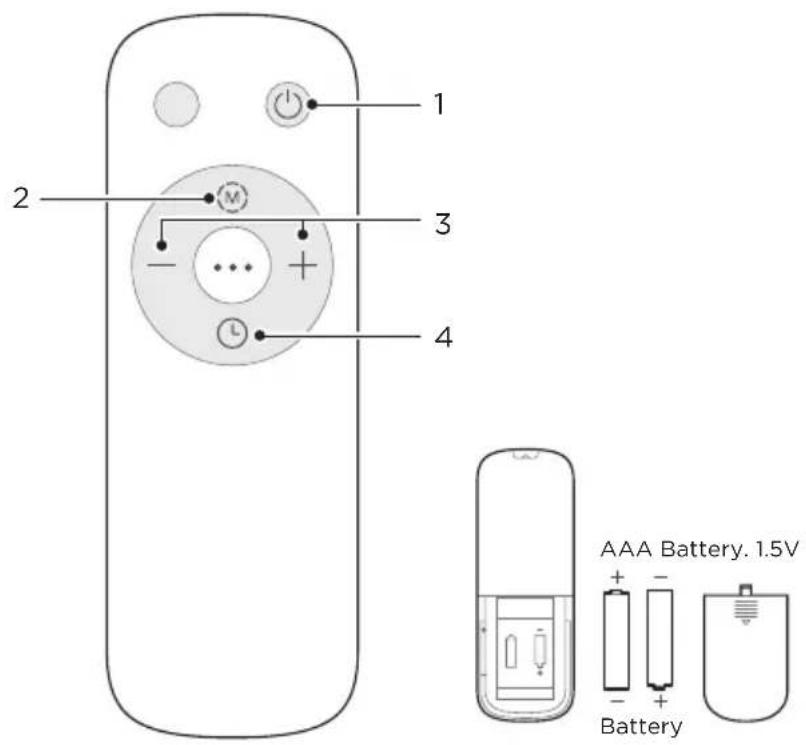
Remote Controller
- Instructions for remote-control unit Button function are basically consistent with the operation panel of the body, and the remote-control unit cannot control the combination key.
- The remote controller should be normally used within 5m of the front of the product and 30 degrees of the deviation angle.
- The battery contains many heavy metals, acids and bases, etc., which may threaten human's health; Waste batteries should be recycled separately.
EN
| KeyNO | Function description | |
| 1 |  | • ON/OFF key |
| 2 |  | • MODE key |
| 3 | 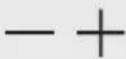 | • “—” key or “+” key |
| 4 |  | • Timer key |
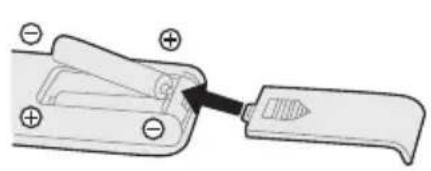
Batteries (Battery not Included in the Packaging)
- Slide the battery compartment cover.
- Insert the batteries, and make sure that the batteries are placed as shown in the Fig.1.
- Slide back the battery cover as shown in the Fig.2.
natural_image
Diagram of a mechanical clamp or clip assembly with no visible text or symbols
natural_image
Illustration of two hands holding a handheld device with an arrow indicating motion (no text or symbols)Fig.1Fig.2

NOTE
- Use manganese or alkaline batteries of type "AAA". DO not use rechargeable batteries.
- Do not dispose of batteries in fire, batteries may explode or leak.
- Do not mix old and new batteries.
- Do not mix alkaline, standard (carbon-zinc) or rechargeable (nickel-cadmium) batteries.
• Non-rechargeable batteries are not to be recharged. - Batteries are to be inserted with the correct polarity.
- Exhausted batteries are to be removed from the product.
- The batteries must be removed from the remote controller before it is scrapped and that they are disposed of safely.
CLEANING AND MAINTENANCE
Precautions
- The electric heater should be cleaned regularly to wipe out the dust on the surface of heating fins. As this may influence the radiating efficiency.
- Disconnect electricity supply and allow radiator to cool, wipe out dust with a soft damp cloth. Do not use detergent or abrasives.
- Do not scrap the surfaces of heating fins with sharp hard tools, to avoid surfaces getting rusty, because of damage of the paint coat.
EN
TROUBLESHOOTING
Operation of your appliance can lead to errors and malfunctions. The following tables contain possible causes and notes for resolving an error message or malfunction. It is recommended to read the table below carefully in order to save your time and money that may cost for calling to the service center.
| Cause SolutionProblem | ||
| The machine does not work properly after installed | • The power cable is not plugged in or has poor contact. | Make sure the plug is properly inserted into the socket. |
| • The switch on the body is not turned on. | Turn on the switch on the body. | |
EN
TRADEMARKS, COPYRIGHTS AND LEGAL STATEMENT
Midea logo, word marks, trade name, trade dress and all versions there of are valuable assets of Midea Group and/or its affiliates (“Midea”), to which Midea owns trademarks, copyrights and other intellectual property rights, and all goodwill derived from using any part of an Midea trademark. Use of Midea trademark for commercial purposes without the prior written consent of Midea may constitute trademark infringement or unfair competition in violation of relevant laws.
This manual is created by Midea and Midea reserves all copyrights thereof. No entity or individual may use, duplicate, modify, distribute in whole or in part this manual, or bundle or sell with other products without the prior written consent of Midea.
All the described functions and instructions were up to date at the time of printing this manual. However, the actual product may vary due to improved functions and designs.
EN
DISPOSAL AND RECYCLING
Important Instructions for Environment
Compliance with the WEEE Directive and Disposing of the Waster Product: This product complies with EU WEEE Directive (2012/19/EU). This product bears a classification symbol for waster electrical and electronic equipment (WEEE).
This symbol indicates that this product shall not be disposed with other household wastes at the end of its service life. Used device must be returned to official collection point for recycling of electrical electronic devices. To find these collection systems please contact to your local authorities or retailer where the product was purchased. Each household performs important role in recovering and recycling of old appliance. Appropriate disposal of used appliance helps prevent potential negative consequences for the environment and human health.
natural_image
Symbol of a trash bin crossed with no text or numbers, representing waste sorting or restriction (no text present)EN
Compliance with RoHS Directive
The product you have purchased complies with EU RoHS Directive (2011/65/EU). It does not contain harmful and prohibited materials specified in the Directive.
Package Information
Packaging materials of the product are manufactured from recyclable materials in accordance with our National Environment Regulations. Do not dispose of the packaging materials together with the domestic or other wastes. Take them to the packaging material collection points designated by the local authorities.

natural_image
Recycling symbol with four arrows forming a triangle (no text or labels)DATA PROTECTION NOTICE
For the provision of the services agreed with the customer,
we agree to comply without restriction with all stipulations of applicable data protection law, in line with agreed countries within which services to the customer will be delivered, as well as, where applicable, the EU General Data Protection Regulation (GDPR).
Generally, our data processing is to fulfil our obligation under contract with you and for product safety reasons, to safeguard your rights in connection with warranty and product registration questions. In some cases, but only if appropriate data protection is ensured, personal data might be transferred to recipients located outside of the European Economic Area.
Further information are provided on request. You can contact our Data Protection Officer via MideaDPO@midea.com. To exercise your rights such as right to object your personal date being processed for direct marketing purposes, please contact us via MideaDPO@midea.com. To find further information, please follow the QR Code.
EN
After sales service & your product warranty
We would like to thank you for choosing a Midea appliance.
We are confident that you will be happy with your purchase, and that your new appliance will provide a long & reliable service.
We are here to help!
If you have any questions about setting up your appliance, it's functions, or if you are
| Midea | +49 6196-90 20 -0 | kundenservice@midea.com | www.midea.com/de |
experiencing any problems then please contact our Midea Aftersales Team.
Appliance Fault
If you suspect that your appliance may have a fault, then please check the User Manual to ensure that the correct setup steps have been followed and your appliance is being used in line with our guidelines.
If you are still experiencing problems, then please contact our Aftersales Team.
To help the team support you, please make sure that you have the following information available when you contact them:
- Your proof of purchase
• The serial number of your appliance
• A description of the fault
Your Midea appliance has been manufactured and tested to the highest standards. It is supported with a 24-month manufacturer's warranty from the date it was purchased. The warranty covers any material or component defects that were present in the manufacturing process.
The appliance is not suitable for commercial use. The claim under warranty lapses in the event of intervention by the Buyer or by a third party. Damage caused as a result of improper handling or operation, incorrect installation or storage, improper connection or installation as well as an act [...] of God or other external factors shall not be covered by this warranty.
When claims are submitted, the manufacturer reserves the right to make improvements to defective parts or to replace or exchange the device. Only if it is not possible to achieve the intended use of the device by repairing or replacing the device, the buyer can demand a reduction of the purchase price or the cancellation of the purchase contract within 6 months from the date of purchase. Claims for damages, including consequential damages, are excluded unless they are based on intent or gross negligence. The guarantee claim exists only with submission of the product and the purchase receipt. This warranty is valid within the United Kingdom only.
VIELEN DANK
natural_image
Technical illustration of a mechanical component with multiple grooves and mounting holes, showing internal structure and alignment arrows (no text or symbols)Abbildung 1
DE
natural_image
Technical line drawing of a mechanical component with multiple grooves and flanges (no text or symbols)Abbildung 2
BEDIENUNGSHINWEISE
natural_image
Diagram of a mechanical tool or bracket with a handle and base, showing no text or symbols.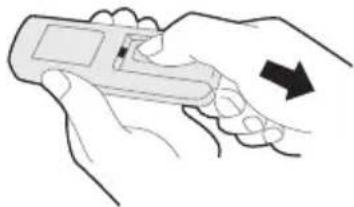
natural_image
Illustration of a hand holding a handheld device with an arrow indicating motion (no text or symbols)Abb. 1 Abb. 2
HINWEIS
natural_image
Symbol of a trash bin crossed out by two crossed lines, with a blank rectangular base below (no text or symbols)DE
natural_image
Recycling symbol with three chasing arrows forming a triangle (no text or labels)natural_image
Technical illustration of a mechanical component with multiple cylindrical parts and internal channels, showing two cross-sectional views (no text or symbols)Figura 1
natural_image
Technical line drawing of a mechanical component with multiple grooves and flanges (no text or symbols)Figura 2
natural_image
Diagram of a mechanical clamp or clip assembly with no visible text or symbols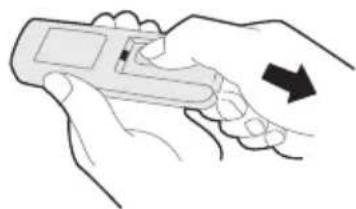
natural_image
Illustration of a hand holding a handheld device with an arrow indicating direction (no text or symbols present)Fig. 1 Fig. 2

NOTA
natural_image
Symbol of a trash bin crossed with no visible text or labelsES
natural_image
Recycling symbol with three chasing arrows forming a triangle (no text or labels)APERÇU DU PRODUIT 07
INSTALLATION DU PRODUIT 08
INSTRUCTIONS D'UTILISATION 09
NETTOYAGE ET ENTRETIEN 13
DÉPANNAGE 14
MARQUES, DROITS D'AUTEUR ET DÉCLARATION LÉGALE 15
ÉLIMINATION ET RECYCLAGE 16
AVIS DE PROTECTION DES DONNÉES 17
CONSIGNES DE SÉCURITÉ
Utilisation prévue
INSTALLATION DU PRODUIT
natural_image
Technical illustration of a mechanical component with multiple cylindrical parts and internal channels, showing two cross-sectional views (no text or symbols)Figure 1
natural_image
Technical line drawing of a mechanical component with multiple grooves and flanges (no text or symbols)Figure 2
INSTRUCTIONS D'UTILISATION
natural_image
Diagram of a mechanical clamp or clip assembly with no visible text or symbols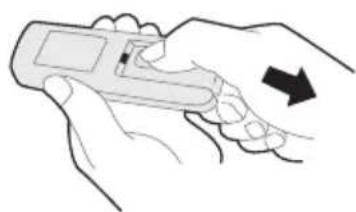
natural_image
Line drawing of two hands holding a handheld device with an arrow indicating motion (no text or symbols)Fig.1 Fig.2
REMARQUE
natural_image
Symbol of a trash bin crossed with no visible text or labelsFR
natural_image
Recycling symbol with three chasing arrows forming a triangle (no text or labels)AVIS DE PROTECTION DES DONNÉES
natural_image
Technical illustration of a mechanical component with multiple curved grooves and two side views showing internal features (no text or symbols)Figura 1
natural_image
Technical line drawing of a mechanical component with multiple cylindrical sections and internal channels (no text or symbols)Figura 2
ISTRUZIONI PER L'USO
natural_image
Diagram of a mechanical clamp or lever mechanism with no visible text or symbols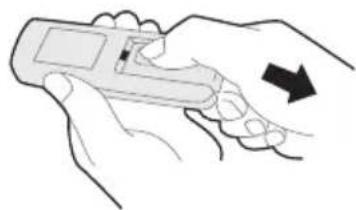
natural_image
Illustration of a hand holding a handheld device with an arrow indicating direction (no text or symbols present)Fig.1 Fig.2

NOTA
natural_image
Symbol of a trash bin crossed with no text or labels, accompanied by a solid black rectangle below (no text or symbols present)natural_image
Recycling symbol with four chasing arrows forming a triangle (no text or labels)make yourself at home