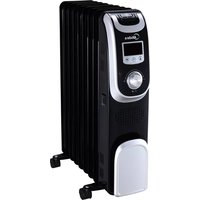
USER MANUAL NY2009-13A1L MIDEA
natural_image
Line drawing of a multi-tiered electric heater with wheels and control panel (no text or symbols)
GD Midea Environment Appliances MFG. Co.Ltd.
No.28, Dong Fu Road, HeSui East Industrial Area, Dong Feng Town, ZhongShan, GuangDong, China.
READ AND SAVE THESE INSTRUCTIONS
Attention: Pictures in the IM are for reference only.
IMPORTANT SAFEGUARDS
When using any electrical appliance, basic precautions should always be followed to reduce the risk of fire, electrical shock and injury to persons, including the following:
-
Read all instructions before using heater.
-
This heater is hot when in use. To avoid burns, do not let bare skin touch hot surfaces. Keep combustible materials such as furniture, pillows, bedding, papers, clothes and curtains at least 3 feet (0.9m) from the heater. Allow heater to cool before moving and then use the built-in handle for easy movement.
-
Extreme caution is necessary when heater is used by or near children and whenever heater is left unattended.
-
Always unplug the heater when it is not in use.
-
Do not operate any heater with a damaged cord or plug, or after the heater malfunctions, or has been dropped or damaged in any manner. Return heater to the manufacturer for examination, electrical or mechanical adjustment, or repair.
-
Do not use heater outdoors. This product is intended for normal household indoor use only.
-
This heater is not intended for use in bathrooms, laundry areas or similar moist indoor locations. Never locate heater where it may fall into a bathtub or other water container.
-
Do not run power cord under carpeting. Do not cover cord with throw rugs, runners or the like. Arrange cord away from traffic areas and where it will not be tripped over.
-
To disconnect heater, set controls to OFF, then remove plug from outlet.
-
Keep this heater clean. DO NOT allow foreign objects to enter any ventilation or exhaust opening as this may cause electric shock, or fire, or damage the heater.
-
To prevent a possible fire, do not block air intakes or exhaust in any manner. Do not use on soft surfaces, like a bed, where openings may become blocked.
-
A heater has hot and arcing or sparking parts inside. Do not use it in areas where gasoline, paint, or flammable liquids are used or stored.
-
Use this heater only as described in this manual. Any other use not recommended by the manufacturer may cause fire, electric shock, or injury to persons.
-
Ⓞ Warning: In order to avoid overheating, do not cover the heater.
- Do not use this heater in the immediate surroundings of a bath, a shower or a swimming pool.
- The heater must not be located immediately below a socket-outlet.
- If the supply cord is damaged, it must be replaced by the manufacturer or its service agent or a similarly qualified person in order to avoid a hazard.
- This appliance can be used by children aged from 8 years and above and persons with reduced physical, sensory or mental capabilities or lack of experience and knowledge if they have been given supervision or instruction concerning use of the appliance in a safe way and understand the hazards involved. Children shall not play with the appliance. Cleaning and user maintenance shall not be made by children without supervision.
- Children of less than 3 years should be kept away unless continuously supervised. Children aged from 3 years and less than 8 years shall only switch on/off the appliance provided that it has been placed or installed in its intended normal operating position and they have been given supervision or instruction concerning use of the appliance in a safe way and understand the hazards involved. Children aged from 3 years and less than 8 years shall not plug in, regulate and clean the appliance or perform user maintenance.
- CAUTION — Some parts of this product can become very hot and cause burns. Particular attention has to be given where children and vulnerable people are present.
- This heater is filled with a precise quantity of special oil. Repairs requiring opening of oil-container are only to be made by the manufacturer or his service agent who should be contacted if there is an oil leak. When scrapping the heater, follow the regulations concerning the disposal of oil.
- Correct Disposal of this product:

This marking indicates that this product should not be disposed with other household wastes. To prevent possible harm to the environment or human health from uncontrolled waste disposal, recycle it responsibly to promote the sustainable reuse of material resources. To return your used device, please use the return and collection systems or contact the retailer where the product was purchased. They can take this product for environmental safe recycling.
WARNING: IN ORDER TO AVOID OVERHEATING, DO NOT COVER THE HEATER.
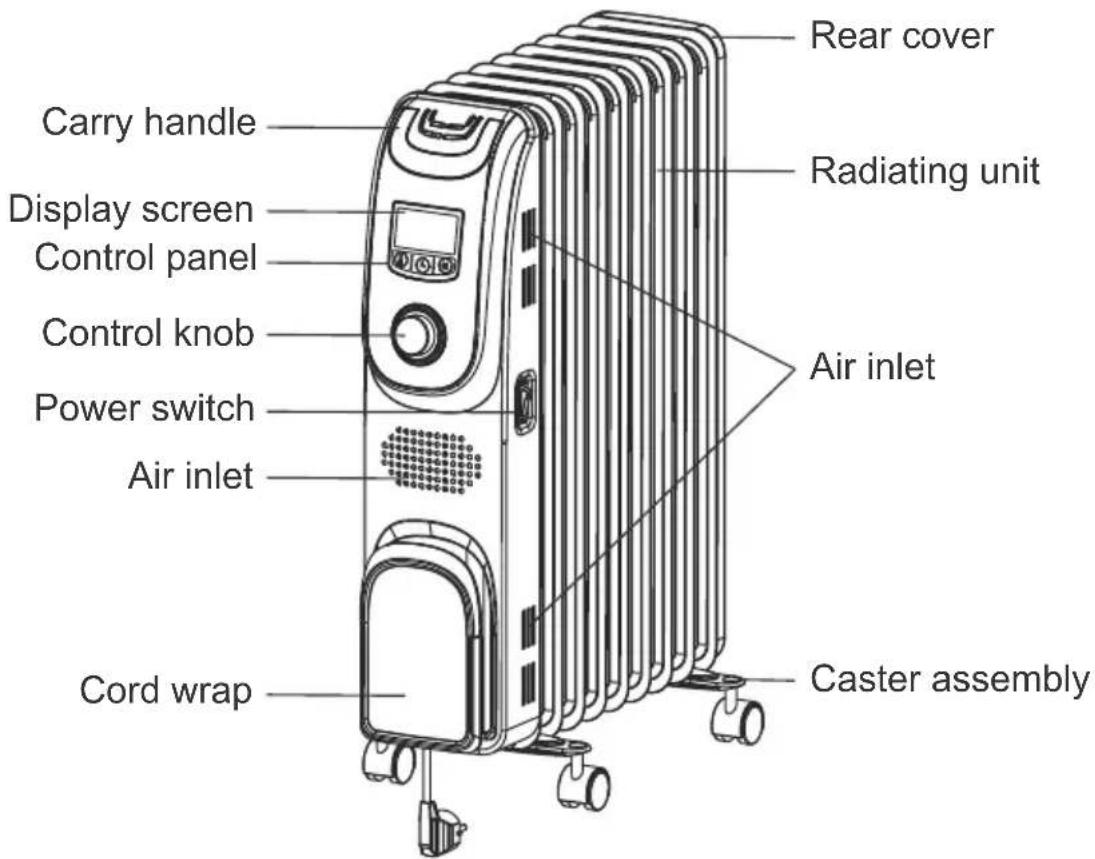
ASSEMBLY INSTRUCTIONS
Unpack your heater and find the wheel-holding plate and butterfly nuts between the fins assemblies.
- Make sure the heater is unplugged and in the "OFF" position.
- Turn the heater upside down.
- Attach the wheel-holding plates onto the heater as
Fig.1 shows. The U plate is fixed between the last tow fins and the other one is fixed under metal control box.
Fix the castors to the vertical axis of both the wheel holding plates.
- Insert the butterfly nuts and tighten them securely.
- Turn the heater upright.
Your heater is now ready to use.

natural_image
Technical line drawing of a mechanical component with curved grooves and a top view showing a circular feature (no text or symbols)

WARNING: Risk of fire. Do not operate heater without wheel assemblies attached. Operate heater in upright position only (wheels on bottom, controls on top). Any other position could create a hazardous situation. Ensure that the surface beneath the heater is clean and free of any obstructions. It is not recommended that this heater be placed on high-pile carpeting or any other surface that impedes the flow of air underneath the heater.
OPERATING INSTRUCTIONS
Power on the heater, press the Power Switch at the lower side to ON position, the power indicator lights on and buzzer makes sound to enter into the Standby mode.
I. CONTROL PANEL

[ON/OFF]
Under Standby mode, press the ⏻ knob, the heater enters into the Normal mode, works with highest power, and automatically set the temperature at 35^ C, or recover to the state of the last Standby state (Note: when the power is not cut off). Repeatedly press the knob until the heater recovers to the Standby state.
[Mode Setting]
Under working state, press the Ⓜ button, the heater switches between Normal mode – Fast-Heating mode – Energy-Saving mode – Anti-Freezing mode.
Normal Mode: under this mode, power level and temperature can be adjusted. After reaching the setting temperature, it stops heating and the setting temperature flashes.
Fast-Heating Mode ⚙: under this mode, the power level and setting temperature are not adjustable, the heater works at default setting temperature (35°C). The indicator light circle indicates orange.
Energy-Saving Mode ECO : under this mode, the power level and setting temperature are not adjustable, the heater works at default setting temperature (22°C). (In Energy Saving Mode, if the setting temperature flashes, it means the heater is under energy saving heat preservation work state). The indicator light circle indicates green.
Anti-Freezing Mode ☐: under this mode, the power level and setting temperature are not adjustable, the heater works at default anti-freezing temperature (5°C). (In Anti-Freezing Mode, if the setting temperature flashes, it means the heater is under anti-freezing heat preservation work state). The indicator light circle indicates red.
[Power Level Setting]
Under Normal mode, repeatedly press the knob 🔊 to switch between High (orange) - Middle (green) - Low (red) - OFF.
[Temperature Setting]
Under Normal mode, press the button to check the current setting temperature, and the temperature icon flashes. Turn the knob to adjust the setting temperature, it will automatically exit the enquiry setting interface if it is not operated within 3s, and display the setting temperature.
[Timer ON/OFF]
The time setting range is 0-24H, the adjustment unit in hour.
Timing ON: Under OFF state, press the button to enter into the timing enquiry interface, the setting time and timing icon flashes, turn the knob to adjust the setting time, it will automatically exit the enquiry setting interface if it is not operated within 3s. When the setting is 0, it cancels timing ON. After reaching the timing ON time, the heater automatically turns on and works at the last Working state.
Timing OFF: Under ON state, press the ⏻ button to enter into the timing enquiry interface, turn the knob to adjust the setting time, it will automatically exit the enquiry setting interface if it is not operated within 3s. When the setting is 0, it cancels timing OFF. After reaching the timing OFF time, the heater automatically enters into the Standby state and stops work.
II. REMOTE CONTROL
Power Level button
Temperature/Timing Increase button
Temperature/Timing Decrease button

ON/OFF button
Timer button
Mode button
[ON/OFF]
Same as ON/OFF knob on control panel. Press the button ⏻ to enter Working mode or Standby state.
[Power Level Setting]
Under Normal mode, repeatedly press the button ≈ to switch between High - Middle - Low.
[Temperature Setting]
Under Normal working mode, press ⚠ or ⏰ to adjust temperature within 5°C to 35°C.
[Timer Setting]
Same as Timer button on control panel. Press the button ⏻, press ⚠ or ⏱ to adjust time within 0 to 24 hours.
[Mode Setting]
Same as Mode button on control panel.
III. MEMORY FUNCTION
When the power of the heater is not cut off or the heater keeps under Standby Mode, it can memorize the last working mode and setting temperature and works at the setting temperature after turning on, the memory data will be reset if the power supply of the heater is cut off, and the setting temperature of the heater recovers to the default setting (Normal Mode, high, setting temperature is 35^ C) when turning on.
SAFETY FEATURES
Thermal cut-off: This heater includes a thermal cut-off that shuts the heater off if it overheats due to abnormal conditions. If this occurs, turn the heater off, unplug it, and inspect and remove any objects on or adjacent to the heater. Allow it to cool for a few minutes, and then plug it back in and resume normal operation.
Tip-over switch: This heater includes a safety tip-over protection feature that will shut the heater off in case it is tipped over. If, at any time, the heater tips over, please put the heater back in the upright position. The heater will resume its normal operation.
CLEANING AND MAINTENANCE INSTRUCTIONS
- The electric heater should be cleaned regularly to wipe out the dust on the surface of flanges. As this may influence the radiating efficiency.
- Disconnect electricity supply and allow radiator to cool, wipe out dust with a soft damp cloth. Do not use detergent or abrasives.
- Do not scrap the surfaces of flanges with sharp hard tools, to avoid surfaces getting rusty, because of damage of the paint coat.
TECHNICAL SPECIFICATIONS
| Model No. | NY2009-13A1L |
| Voltage | 220-240V AC |
| Frequency | 50Hz |
| Power | Low 800W / Middle 1200W / High 2000W |