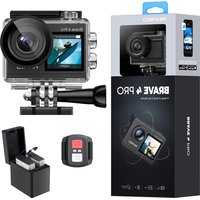
4 Pro Action Cam - Camera Akaso - Free user manual and instructions
Find the device manual for free 4 Pro Action Cam Akaso in PDF.


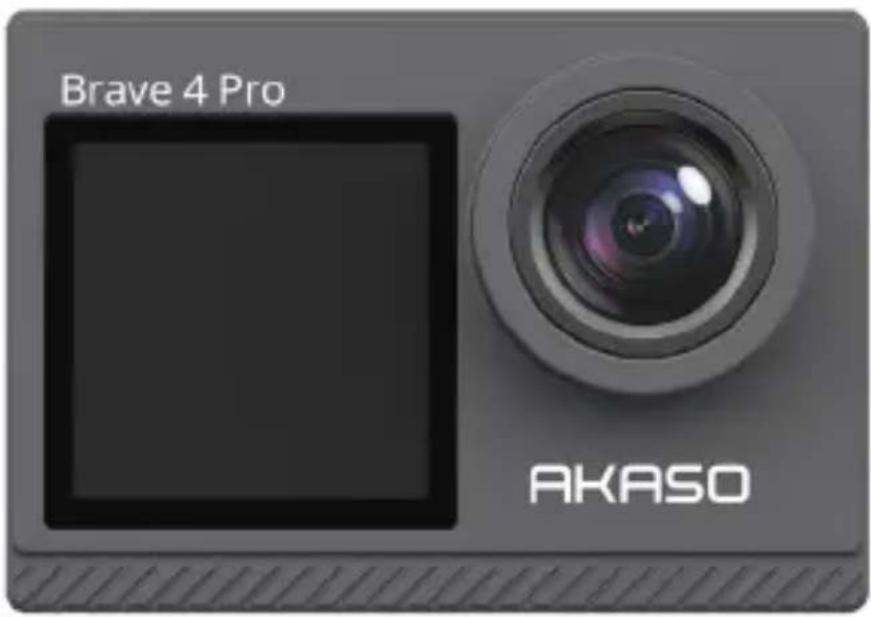
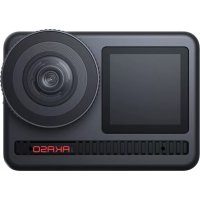
| Product type | 4K Action Camera |
| Brand | AKASO |
| Model | Brave 4 Pro |
| Max video resolution | 4K (3840x2160) at 30fps |
| Max photo resolution | 20 Megapixels (20MP) |
| Dimensions | 66 x 44 x 34 mm |
| Net weight | 112g |
| Battery capacity | 1350mAh (Lithium-ion) |
| Battery life | Up to 110 minutes of 4K recording |
| Storage | microSD card up to 256GB (U3, FAT32) |
| Display | Front (1.4 inch) and rear (2.0 inch) touch screens |
| WiFi | Yes, 2.4GHz |
| Remote control | Included (2.4G RF, 10m range) |
| Waterproof rating | With included waterproof case (up to 40m) |
| Image stabilization | Electronic (EIS) |
| Digital zoom | 5x |
| External microphone | Compatible (sold separately, via USB port) |
| Operating temperature | -5°C to 45°C (23°F to 113°F) |
| Connectivity | USB Type-C, micro HDMI |
| Included accessories | Waterproof case, charger, 2 batteries, USB cable, remote control, mounts, cloth, etc. |
Frequently Asked Questions - 4 Pro Action Cam Akaso
User questions about 4 Pro Action Cam Akaso
0 question about this device. Answer the ones you know or ask your own.
Ask a new question about this device
Download the instructions for your Camera in PDF format for free! Find your manual 4 Pro Action Cam - Akaso and take your electronic device back in hand. On this page are published all the documents necessary for the use of your device. 4 Pro Action Cam by Akaso.
USER MANUAL 4 Pro Action Cam Akaso
Important Messages 01
Your Brave 4 Pro 02
What's in the Box 04
Camera Specifications 05
Getting Started 06
- First Use 06
- Operation Instructions 10
- Indicators 12
- Memory card use 13
Video Menu 14
- Video Modes 14
- Video Settings 16
Photo Menu 20
- Photo Modes 20
- Photo Settings 22
System Settings 25
Connecting to the AKASO GO App 29
Playing Back Your Content 31
- Playing Back Files on Your Brave 4 Pro 31
- Playing Back Files on the AKASO GO App 31
Offloading Your Content 32
- Offloading Your Content to a Computer 32
- Downloading Your Content to a Smartphone 32
Adjusting Zoom Levels 33
Reformatting Your Memory Card 33
Remote 34
Maintaining Your Camera 37
Battery Maintenance 37
Mounting Your Camera 39
Contact Us 40
Important Messages
Congratulations on your new AKASO Brave 4 Pro Action Camera! You must be excited to use your new camera, but please spend some time familiarizing yourself with this manual first so that you get the most out of your camera's features.
- This camera is a precise product. Please protect it from falling or colliding in case it's badly damaged.
- Please place this camera away from machines or matters rich in strong magnetic fields or power, such as motors or magnets.
- Please make sure the camera work at its operating temperature. Do not leave it exposed to high or low-temperature areas for a long period of time in case its service life is shortened.
- Please make sure to securely attach the action camera to the waterproof case before diving in case water leaks in, causing malfunction on it.
- Please do not charge the battery for a long period of time. Keep it away from kids and pets in case of any incident.
- Please take the battery out of the camera if you do not use it for a long period of time.
- Please store this camera away from any sharp metals and wet compartments.
Warm Tip: In case your camera does not work normally or encounters any photo or video quality issues, please feel free contact customer support for help by sending emails to our official email address cs@akasotech.com.
Your Brave 4 Pro
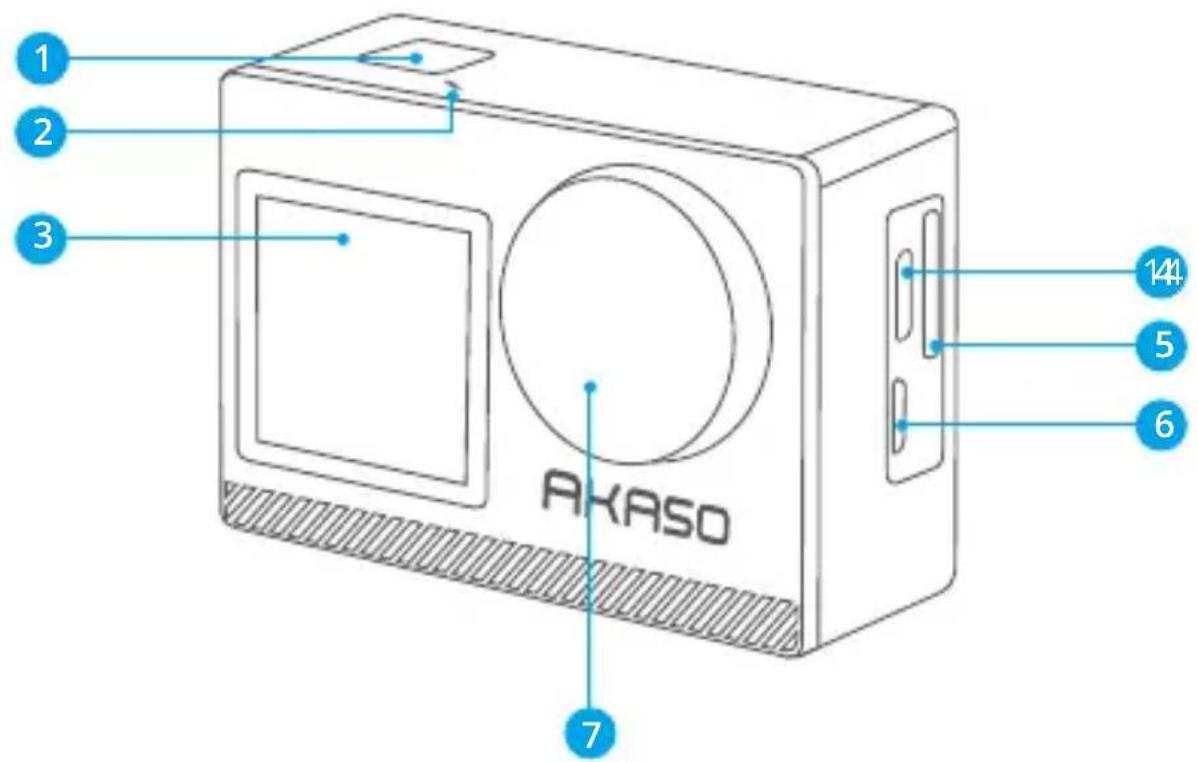
OK/Shutter/Power Button
2 Wifi Indicator
3 Front Screen
4 USB / External Mic Port
Micro SD Card Slot
Micro HDMI Port
7 Lens
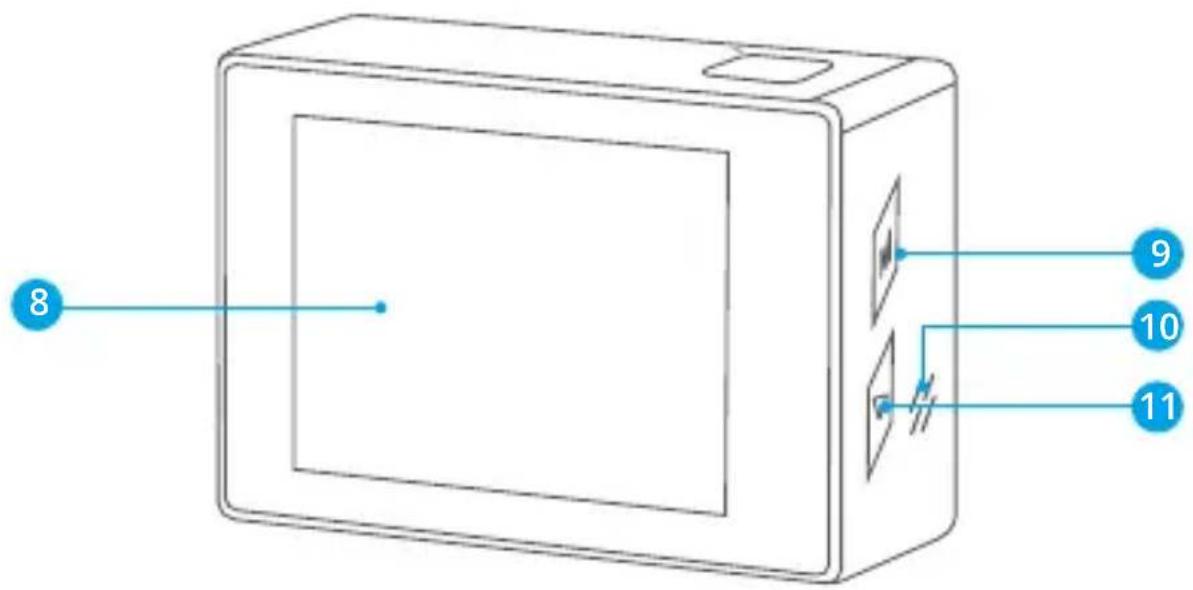
8 Touch Screen
11 Down Button
9 Mode/Up Button
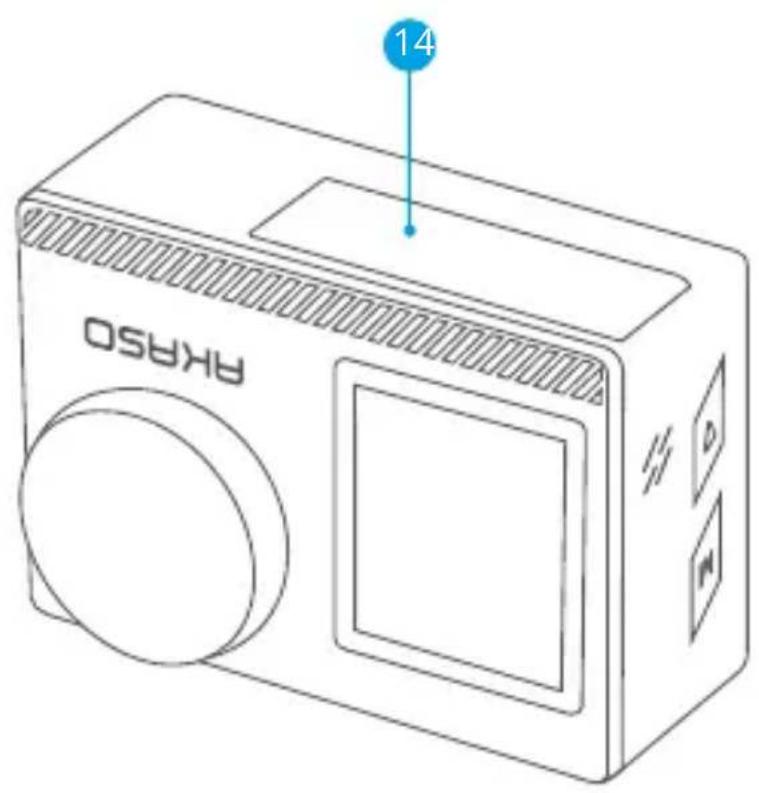
12 Battery Cover
10 Speaker
Note: The camera will not record sound when it is in the waterproof case.
What's in the Box
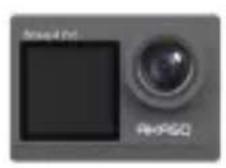
AKASO Brave 4 Pro x1
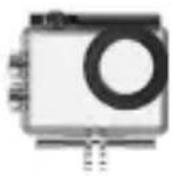
Waterproof Housing x 1
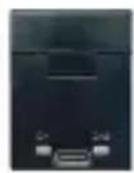
Battery Charger X1
Battery X2
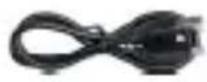
USB Cable x1
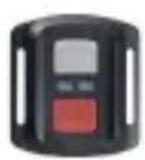
Remote Control x1
Remote Control Strip × 1
Protective Backdoor x 1
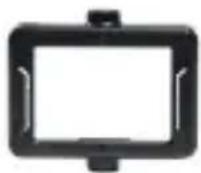
Clip x 1
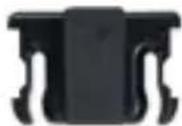
Clip 2 x1
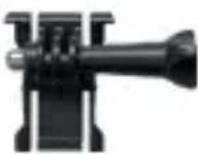
Buckle Mount x1
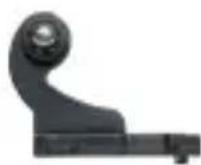
J-Hook Mount x1
EMount x1
C Mount x1
D Mount x1
FMount x1
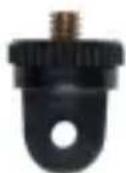
AMount x1
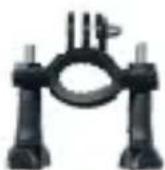
H Mount x1
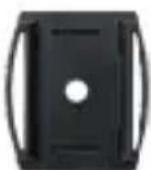
Helmet Mount x2
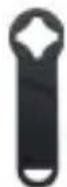
Spanner X1
Bandage x4
Tether x5

Lens Cloth x1

Double-Sided Adhesive Tape x2
Quick Start Guide x 1

Camera specifications
| Brand | AKASO |
| Name | 4K Versatile Brave 4 Pro Action Camera |
| Model | Brave 4 Pro |
| Size | 66×44×34mm |
| Net weight | 112g |
| Material | Plastic, silicone, glass |
| Battery capacity | 1350mAh |
| Battery life | 110 minutes of recording time in 4K. |
| Wireless network | RF 2.4G+Wifi 2.4GHz |
| Working Temperature | -5°C~45°C (23°F~113°F) |
| External Microphone | Supported but sold separately. Note: Be sure to purchase external microphones compatible with this camera. |
Getting Started
1. First Use
1.1 Unboxing
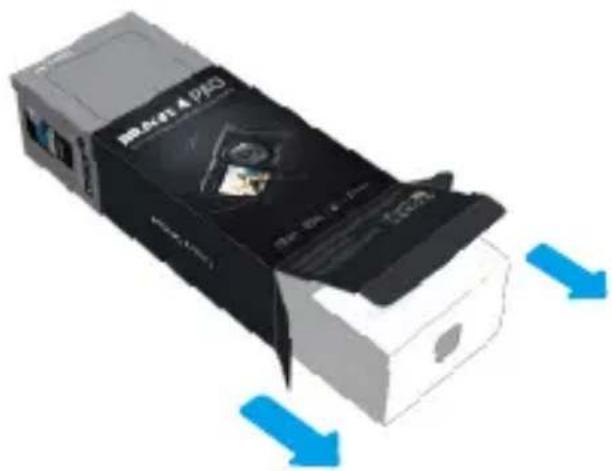
Open the packing box along the dotted line, then take the Brave 4 Pro action camera together with its accessories out of the packing box.
1.2 Take the camera out of the waterproof housing
Pull up the waterproof housing buckle as indicated by the arrow to open the protective backdoor, then take the camera out of the housing.
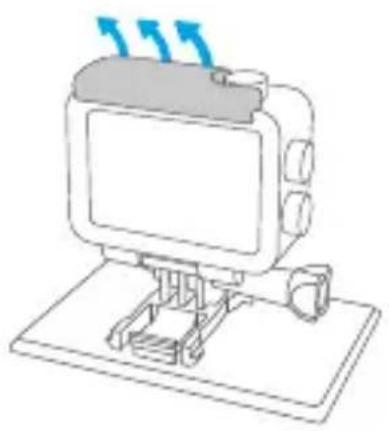
a Lift the housing buckle upwards
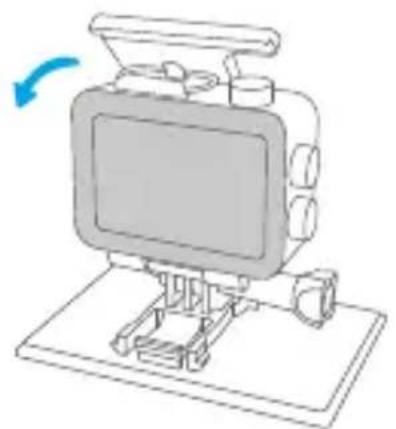
Open the protective backdoor
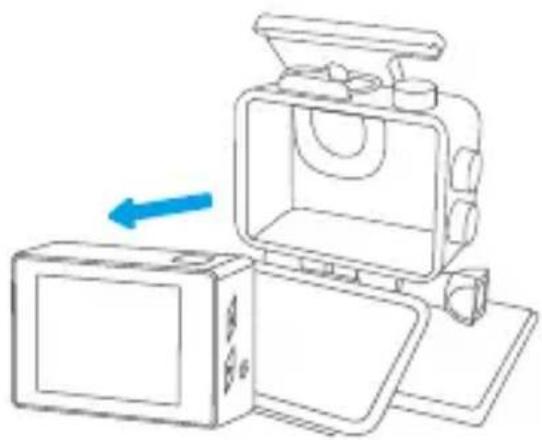
Remove the camera from the housing
1.3 Detach the waterproof housing from the Packing Box
Unscrew the screw rod counterclockwise using either your hands or the included spanner. Once the screw rod is removed, detach the housing. Next, tear off the silicon gel and pull up the mount buckle. Finally, push the buckle backward to detach it from the housing.
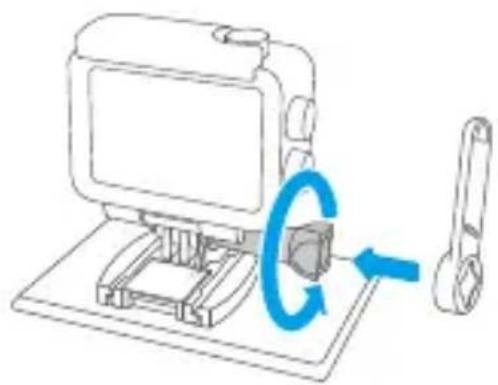
a Unscrew the screw rod with the spanner
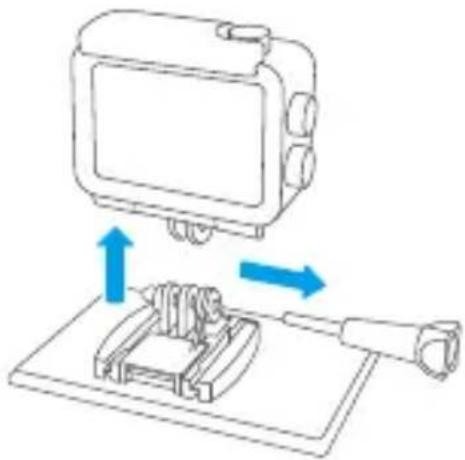
Remove the screw rod and the waterproof housing
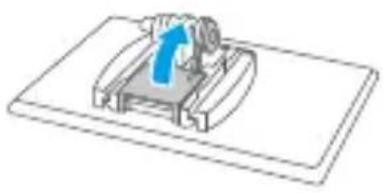
Tear off the silicon gel
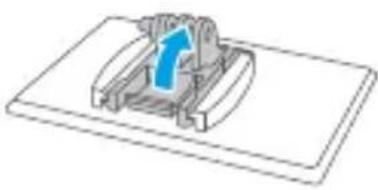
Pull up the mount buckle
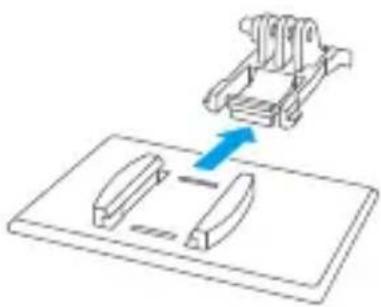
e Push it backward
1.4 Charge the Battery Separately
Connect the battery charger to a USB outlet, then insert the battery.
Warm tip: The battery charger indicator will appear red while charging and blue when fully charged.
1.5 Install the battery
Press the buckle of the battery cover to open it, then place the battery into its slot and close the battery cover. To remove the battery, pull the battery strip.
1.6 Install the Micro SD card
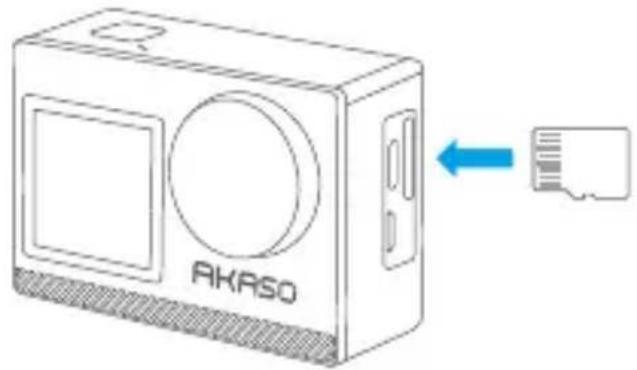
First press the charging cover to reveal the memory card slot, then insert the memory card in the orientation shown and close the cover.
Note: Be sure to turn off the camera before installation.
1.7 Charge the camera
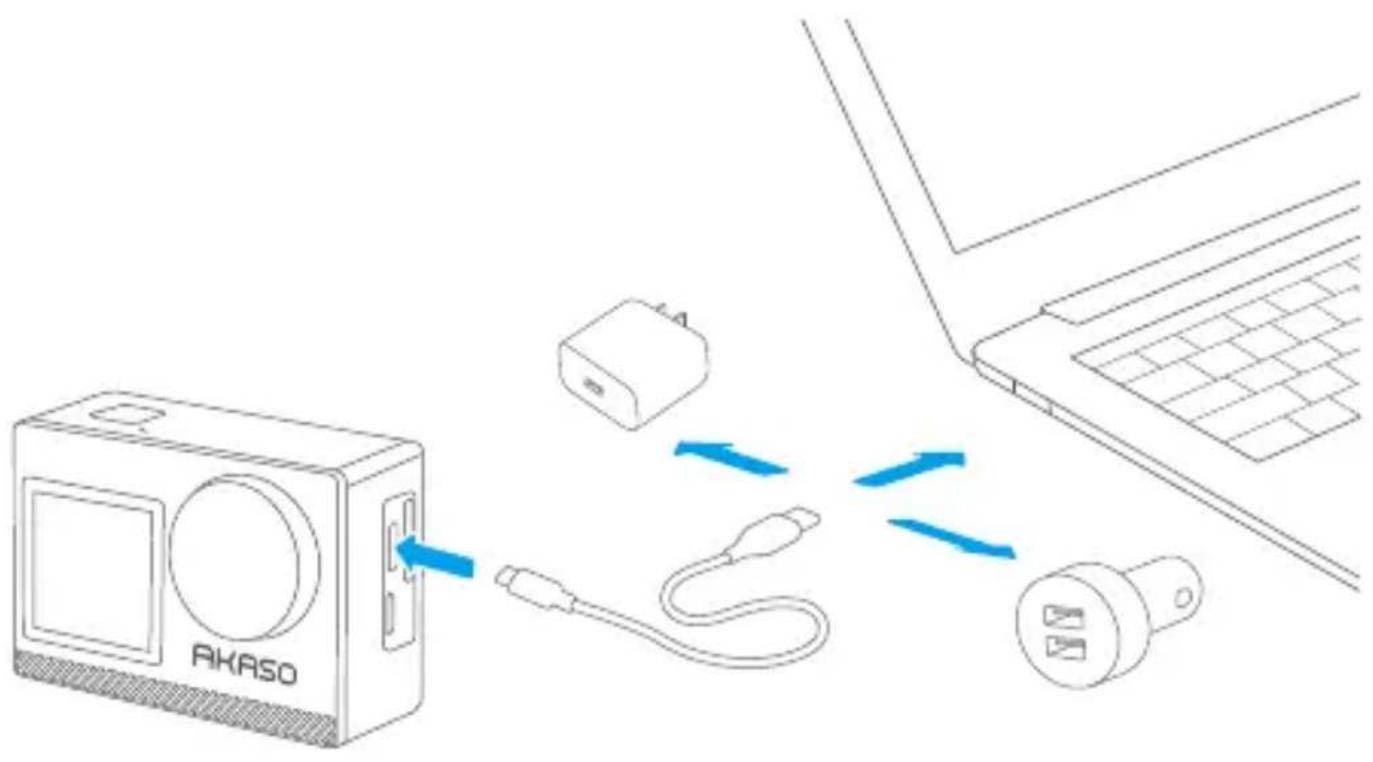
Connect the camera to a USB adapter or computer using the USB cable. Once fully charged, disconnect the cable and ensure the battery cover is securely fastened.
1.8 Power on the camera
Press and hold the Power button for 3 seconds to turn on the Brave 4 Pro action camera. Ensure all the camera covers are securely closed before powering it on.
2. Operation Instructions
2.1 Powering on or off
When the camera is turned off, press and hold the Power button for 3 seconds to turn on the camera.
When the camera is turned on, press and hold the Power button for 3 seconds to turn off the camera.
2.2 Switching shooting modes
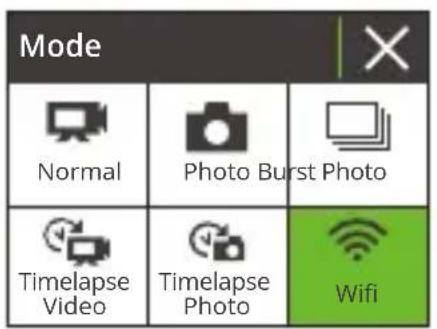
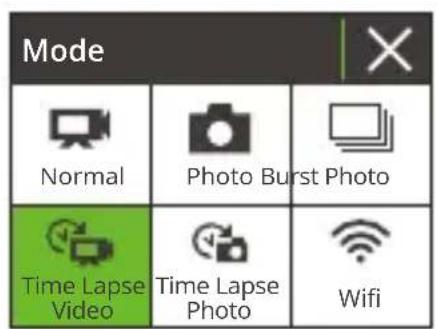
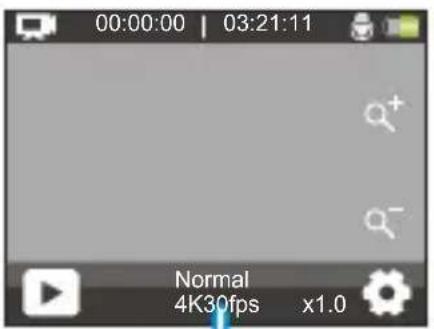
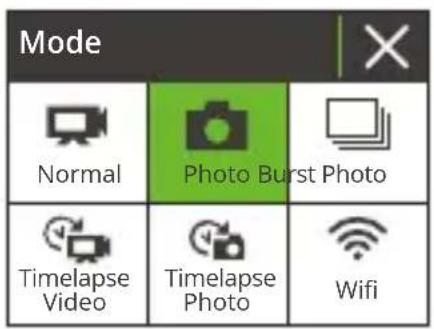
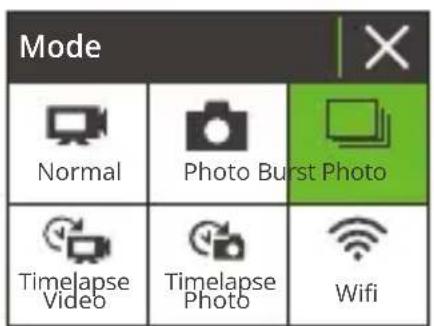
When the camera is turned on, tap the Mode icon at the bottom of the screen to enter the mode menu, then choose the desired shooting mode. The camera will enter the selected mode. You can also press the Mode button to switch modes. Tip: To exit the mode menu, tap the "X" icon in the upper right corner. There are 9 modes of this action camera: Normal, Timelapse Video, Loop Recording, and Slow Motion, Photo, Burst Photo, Timelapse Photo, Self-Timer, and Wifi.
2.3 Switching screens
When the camera is turned on, press and hold the Mode or Up button to toggle between front and touch screens.
2.4 Zooming in or out
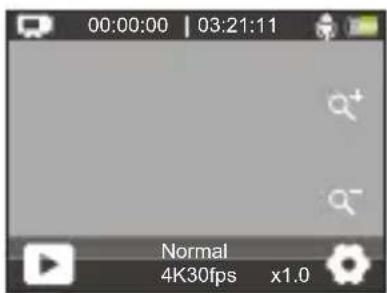
On the preview screen, tap the "+" icon to zoom in, and tap the "-" icon to zoom out. Brave 4 Pro action camera supports up to 5X.
2.5 Using the shutter button
In Photo or Video mode, press the Shutter button to capture photos or start video recording. To stop recording in Video mode, press the Shutter button again.

2.6 Entering the settings screen
On the preview screen, tap the Settings icon in the bottom right corner of the screen, or press and hold the Down button to enter the settings screen. Then, you're free to configure the photo or video, and system settings.
2.7 Entering the playback screen
On the preview screen, press the Down button or tap the Playback icon in the bottom left corner to enter the playback screen. You will be able to access the video or the photo set to playback or delete files. To exit the playback screen, simply tap the "X" icon in the upper right corner.
2.8 Turning Wifi On or Off
Turning on Wifi
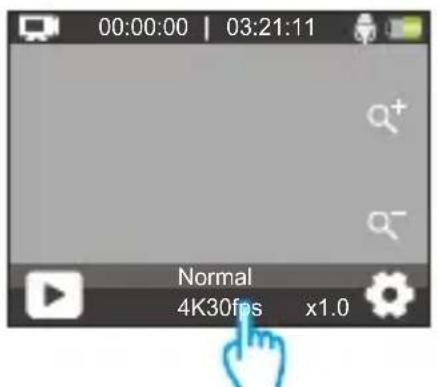
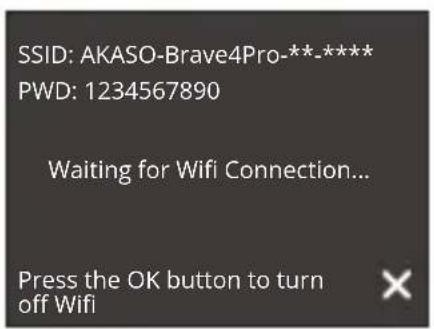
When the camera is turned on, tap the mode icon on the bottom screen to enter the mode menu, and tap the Wifi icon to turn on Wifi. The camera will enter Wifi mode and display the Wifi information in 3 seconds.
Turning off Wifi
In Wifi mode, press the OK button or tap the "X" icon on the Wifi screen to turn off Wifi.
3. Indicators
Charging Indicator (Red)
Remains on while charging; turns off when the camera is fully charged.
Working Indicator (Blue)
Remains on when the camera is turned on; flashes while shooting or recording.
Wifi Indicator (Red)
Flashes when Wifi is turned on; remains on when connected.
4. Memory card use
To capture video or take photos, you need to insert a Micro SD card (sold separately). Please use brand name memory cards that meet the following requirements:
(1) U3
(2) Capacity up to 256B (FAT32)
Warm tips:
- Please format the memory card in this camera before using it for better compatibility.
- To keep your memory card in good condition, reformat it on a regular basis. Reformatting erases all your content, so please make sure to offload your photos and videos before reformatting. FAT32 format memory card will stop recording and starts to record again on a new file when the file size reaches 4GB.
Notes
- Please do not use the Micro SD card in environments exposed to strong currents or magnetic fields.
- Please do not touch the Micro SD card or leave it touched by any mental items in case it's squeezed, bent, or falling.
- Please keep the Micro SD card away from water, wet areas, or places with erosive items.
- Please insert the Micro SD card into the card slot in the right direction.
- Please do not insert any foreign item into the Micro SD card slot.
- Please turn off the camera before inserting or removing the Micro SD card.
Video Menu
1. Video Mode
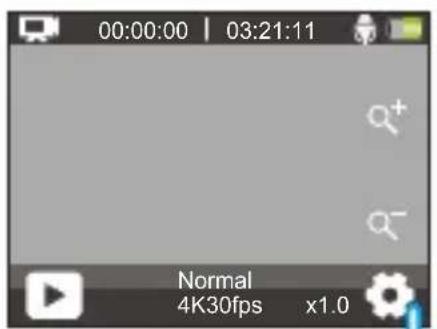
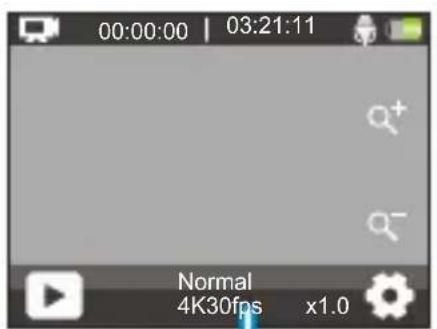
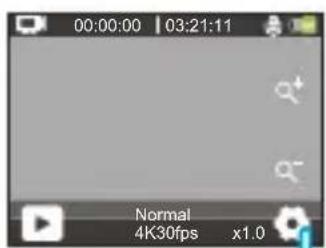
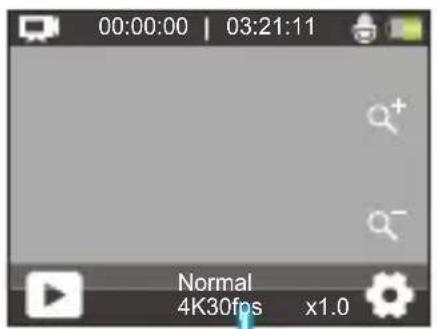
The camera is in Normal mode by default when it's turned on.
Video modes of this camera include Normal, Time Lapse Video, Loop Record, and Slow Motion.
Normal Mode
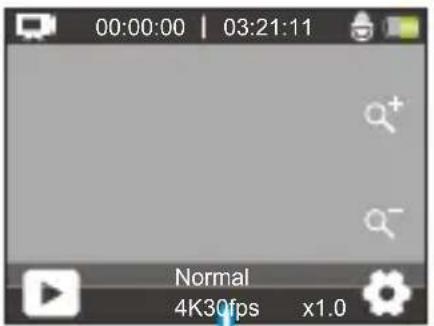
When in this mode, press the Shutter button to record normal video in the set resolution. Tap the "+" or "-" icon to zoom in or out.
Tip: You can also enable this mode from the video settings screen.
Time Lapse Video Mode
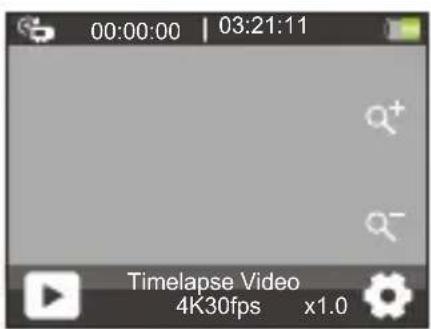
To enter this mode, tap the current mode at the bottom to enter the mode menu, and select "Time Lapse Video" from the menu.
In this mode, when you press the Shutter button, the camera will capture frames at designated intervals and condense longer events into short video clips.
Loop Record Mode
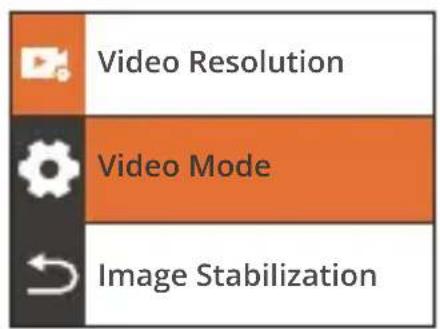
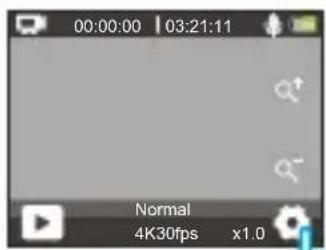
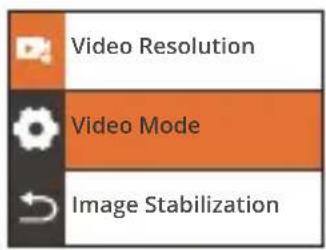
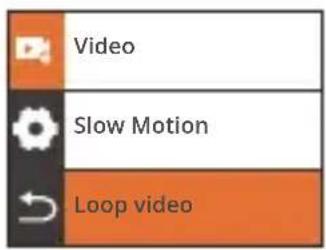
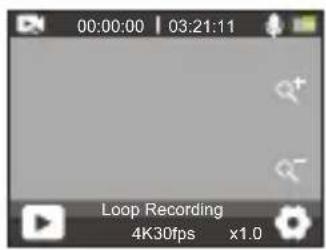
To enter this mode, first make sure the camera is in video mode. Second, tap the Settings icon in the bottom right corner to enter the video settings screen. Third, tap "Video Mode" to choose "Loop Video" from the available options. Last, go back to the preview screen.
In this mode, when you press the Shutter button, the camera will record video and save the content every 3 minutes. When the memory is full, the camera will automatically delete the earliest videos to continue recording.
Slow Motion Mode
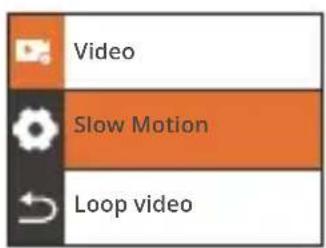
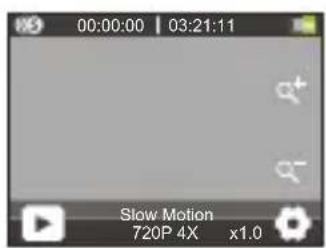
To enter this mode, select "Slow Motion" from the options available in the video mode menu, and go back to the preview screen.
In this mode, when you press the Shutter button, the camera will capture footage at your chosen resolution and speed ratio, but it saves the video at a playback rate of 30 fps. This ensures that on playback, the video displays in a captivating slow-motion effect.
2. Video Settings
(1) Video Resolution
4K30fps/2.7K30fps/1080P120fps/1080P60fps/1080P30fps/720P240fps/720P120fps /720P60fps/720P 30fps (Default setting: 4K 30fps)
This camera is capable of recording video up to 4K30fps, with higher resolution offering greater clarity and detail due to the increased number of pixels. However, higher resolution video also results in larger file sizes.
Note:
① 4K30, 2.7K30, 1080P120, 1080P30, 720P240, and 720P30 are not available in Slow Motion mode.
② Capturing high-resolution or high-fps videos in in warmer conditions may consume more power.
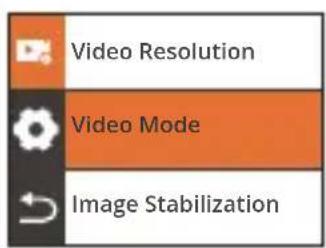
(2) Video Mode
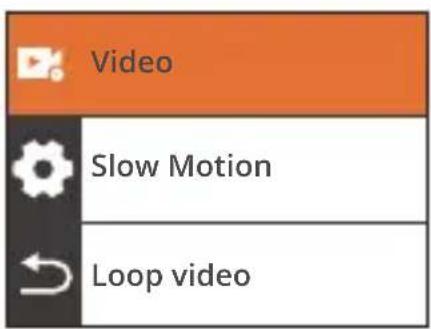
You can choose the video mode you want from the Video, Slow Motion, and Loop Video.
Video
After selecting the "Video" option, go back to the preview screen. The camera will swift to the normal video mode.
Slow Motion
1080P 2X/720P 4X/720P 2X(Default setting:720P 4X)
After selecting the "Slow Motion" option, go back to the preview screen. The camera will swift to the slow motion mode. To set the speed by which the video is slowed down, select the "Slow Motion" from the video settings screen.
Note: 4K30, 2.7K30, 1080P120, 1080P30, 720P240, and 720P30 are not available in Slow Motion mode.
Loop Video
2Min / 3Min / 5Min (Default setting: 2Min)
After selecting the "Loop Video" option, go back to the preview screen. The camera will swift to the loop record mode. To set the looping interval, select the "Loop Recording Time" from the video settings screen.
Note: This setting is available in Loop Video only.
(3) Image Stabilization
Off/On(Default setting:Off)
Electronic Image Stabilization (EIS) 2.0 effectively corrects the lens distortion, allowing for smooth videos. This feature is suitable for use in riding, skiing, and handheld scenes.
Note: Image Stabilization will be disabled when the camera is in Slow Motion and Timelapse Video modes.
(4) Time Lapse Interval
1Sec/2Sec/5Sec/10Sec/30Sec/60Sec(Default setting:1Sec)
Under this setting, the camera will save a scene at the set interval and automatically turn these scenes into a single video, making it ideal for use in capturing beautiful transitions like sunrise, sunset, bloom, and more.
Note:
① Time Lapse videos are captured without audio.
② Time Lapse Interval is available only in Time Lapse Video mode.
(5) WDR
Off/On(Default setting:Off)
Wide Dynamic Range (WDR) retains a greater level of details in the dark and bright areas of an image. The result is that a photo is properly exposed in the two extremes. WDR is ideal for use in high-contrast scenes. WDR is available in Video mode only.
(6) Motion Detection
Off/On(Default setting: Off)
The Motion Detection feature allows the camera to sense movement and automatically start recording video. This process involves the camera detecting the motion of an object in its field of view, or the motion of the surroundings relative to the object. When Motion Detection is enabled, the camera will automatically start recording video when it detects any movement within its field of view.
(7) Exposure
-2/-1/0/1/2(Default setting:0)
By default, your camera uses the entire image to determine the appropriate exposure level. However, Exposure lets you select an area that you want the camera to prioritize when determining exposure. This setting is particularly useful in shots where an important region might otherwise be over- or underexposed. The camera will display changes in the image the instant you change the setting. It will resume using the entire image to determine the appropriate exposure level if you switch modes.
(8) Date Stamp
Off/On(Default setting:On)
When Date Stamp is enabled, a time and date watermark will be added to the video or photo. You can also set it to Off.
(9) Metering
Center/Average/Spot (Default setting: Average)
Sets the metering mode for different scenes. You can choose modes according to the scenes. There are 3 metering modes available for the Brave 4 Pro action camera.
- Center Metering: Also known as center-weighted metering mode. In this mode, the camera measures the brightness of the scene with more emphasis on the center area. It's ideal for taking selfie, close-up shots of flowers and grass, etc.
- Average Metering: Also known as matrix metering mode. In this mode, the camera measures the brightness of the entire scene and calculates the exposure to avoid overexposure. It's suitable for use in scenes of even lights.
- Spot Metering: In this mode, the camera measures the brightness of a small area or spot in the scene, and sets the exposure based on that reading. It's perfect for taking close-ups.
(10) Sharpness
High/Middle/Low (Default setting: Middle)
Sharpness adjusts the sharpness of the objects in your scene, which is crucial for capturing the fine details and enhancing the overall quality of your photos or videos.
(11) Video Quality
High/Middle/Low (Default setting: Middle)
Determines the image quality of the videos.
Photo Menu
Photo modes of this camera include Photo, Burst Photo, Time Lapse Photo, and Self-Timer.
1. Photo Mode
Photo Mode
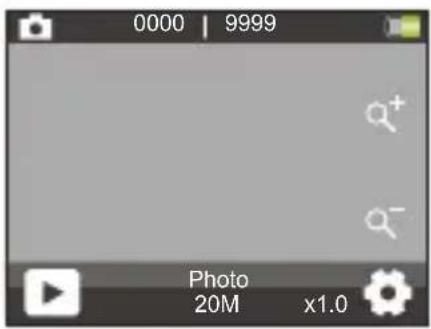
To enter this mode, tap the mode icon at the bottom to enter the mode menu screen, and select "Photo".
In Photo mode, press the Shutter button, the camera will capture a photo. You can tap the "+" or "-" icon to zoom in or out.
(2) Burst Photo Mode
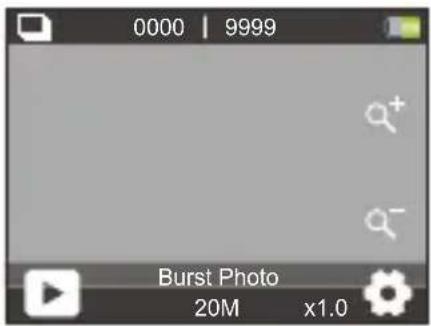
To enter this mode, select "Burst Photo" from the mode menu screen. In this mode, press the Shutter button, the camera will continuously capture 3, 5, or 10 photos per second.
Time Lapse Photo Mode
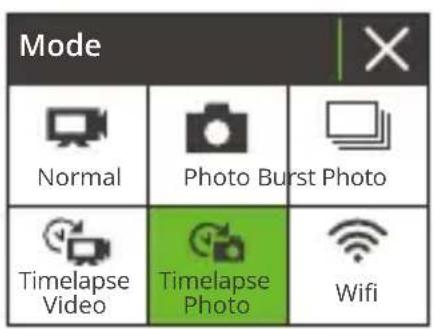
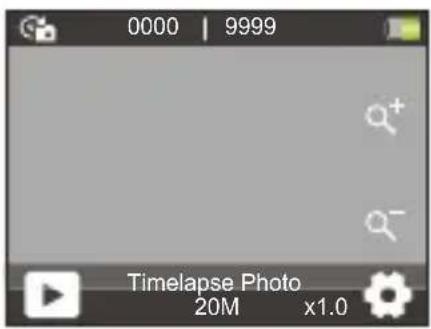
To enter this mode, tap "Time Lapse Photo" on the mode menu screen. In this mode, when you press the Shutter button, the camera will automatically start the countdown and continuously take a photo at the preset interval till you press the Shutter button again.
Self-Timer Mode
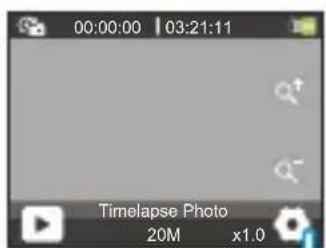
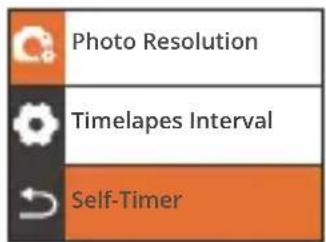
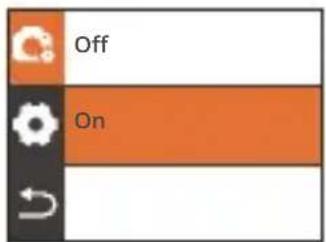
To enter this mode, first make sure the camera is in Time Lapse Photo mode. Second, enter the photo settings screen to find "Self-Timer" and select the "On" option. Last, go back to the preview screen.
In this mode, the camera will start a preset countdown and then automatically trigger the shutter to take a photo after the Shutter button is pressed.
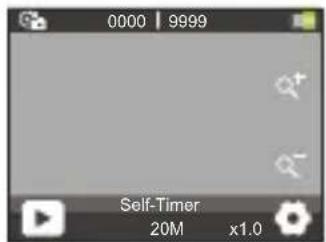
2. Photo Settings
(1) Photo Resolution
20MP / 16MP / 13MP / 8MP (Default setting: 20MP)
This camera is capable of capturing 20MP photos, with higher resolution offering greater clarity and detail due to the increased number of pixels. However, higher resolution photo also results in larger file sizes.
(2) Burst Photo
3P/S, 5P/S, 10P/S (Default setting: 3P/S)
Set the number of photos to be taken per second in Burst Photo mode. The camera will continuously take multiple photos at the specific shot.
Note: Only available in Burst Photo mode.
(3) Time Lapse Interval
Off / 3Sec / 5Sec / 10Sec / 20Sec / 30Sec / 60Sec (Default setting: 3Sec)
Set the interval at which the camera captures photos in Time Lapse Photo mode. For instance, if you select the "3 Sec" option, the camera will start counting down from 3 and continuously take a photo till you press the Shutter button again.
Note: Only available in Time Lapse Photo mode.
(4) Countdown
3Sec / 5Sec / 10Sec / 20Sec / 30Sec / 60Sec (Default setting: 20Sec)
Set the countdown time before the camera takes a photo in Self-Timer mode. For instance, if you set "Countdown" to "3Sec", the camera will count down from 3 to 1 before capturing the shot.
Note: Only available in Self-Timer mode.
(5) Self-timer
Off/On(Default setting:Off)
Choose to enable or disable Self-timer mode.
Note: The camera will automatically enter Time Lapse Photo mode when Self-Timer is disabled.
(6) Exposure
-2/-1/0/1/2(Default setting:0)
By default, your camera uses the entire image to determine the appropriate exposure level. However, Exposure lets you select an area that you want the camera to prioritize when determining exposure. This setting is particularly useful in shots where an important region might otherwise be over- or underexposed. The camera will display changes in the image the instant you change the setting. It will resume using the entire image to determine the appropriate exposure level if you switch modes.
(7) Metering
Center/Average/Spot (Default setting: Average)
Choose the metering mode from the available options to optimize your shot based on different scenes.
- Center Metering: Also known as center-weighted metering mode. In this mode, the camera measures the brightness of the scene with more emphasis on the center area. It's ideal for taking selfies, close-up shots of flowers and grass, etc.
- Average Metering: Also known as matrix metering mode. In this mode, the camera measures the brightness of the entire scene and calculates the exposure to avoid overexposure. It's suitable for use in scenes of even lights.
- Spot Metering: Targets a specific spot in the scene to determine exposure, perfect for detailed close-ups.
(8) Sharpness
High/Middle/Low (Default setting: Middle)
Sharpness adjusts the sharpness of the objects in your scene, which is crucial for capturing the fine details and enhancing the overall quality of your photos or videos.
(9) ISO
Auto/100/200/400/800/1600/3200(Default setting:Auto)
ISO determines the camera's sensitivity to light and creates a trade-off between brightness and resulting image noise. Image noise refers to the degree of graininess in the image. In low light, higher ISO values result in brighter images, but with greater image noise. Lower values result in lower image noise, but darker images.
(10) Date Stamp
Off/On(Default setting:On)
When Date Stamp is enabled, a time and date watermark will be added to the video or photo. You can also set it to Off.
System Settings
In Video or Photo mode, tap the Settings icon in the bottom right corner or press and hold the Down button to enter the settings page, then tap the Settings icon on the left to enter the system settings page.
(1) Special Effect
Normal/Black&White/Retro/Negative/Red/Green/Blue (Default setting: Normal)
You can choose from these options to get a desired shooting result.
(2) White Balance
Auto/Sunny/Cloudy/Incandescent/Fluorescent (Default setting: Auto)
White Balance captures the objects in photos with accurate color representation in various lighting conditions by adjusting the white balance, making it suitable for use in both warm and cool environments.
(3) Microphone
Built-in/External (Default setting: Built-in)
(4) Angle
Super Wide/Wide/Medium/Narrow (Default setting: Super Wide)
This setting allows you to choose a desired field of view. Angle refers to how much of the scene (measured by degree) can be captured by the camera lens. The "Super Wide" option captures the largest scene, while the "Narrow" option captures the least.
Note: Angle will be disabled when Image Stabilization is enabled.
5) Diving Mode
Off/On(Default setting: Off)
When Diving Mode is enabled, the camera can compensate for the absence of red light in underwater scenes. This mode is ideal for use in tropical and blue waters.
(6) Power Frequency
50Hz/60Hz/Auto (Default setting: Auto)
Power frequency is also known as the line frequency or mains frequency, it is the frequency of the alternating current (AC) that is used in most electrical power systems around the world. If you live in the northeastern area, please set the power frequency to 60Hz , meaning the current changes direction 60 times per second. If you live outside this area, set it to 50Hz .
(7) Language
English/简体中文/繁体中文/Italiano/Espanol/Deutsch/Français /日本語/한국어(Default setting: English)
You can set the camera's system language.
(8) Date & Time
Month/Day/Year
When you connect your camera with AKASO GO APP, the date and time on your camera will automatically synchronize with that on your phone. This ensures that your camera's time stamps are accurate and aligned with your local time zone.
Note: The camera's date and time will reset automatically after the battery is removed.
(9) Sounds:
Shutter: Off/On (Default setting: On)
Beep: Off/On (Default setting: On)
Boot: Off/On (Default setting: On)
You can turn the camera's shutter, beep, and boot sounds on or off.
Volume: You can press the OK button or tap "Volume" to adjust the camera's volume.
(10) Driving Mode
Off/On (Default setting: Off)
In this mode, the camera will automatically record video and save the video file when you connect it to the cigarette lighter, and start your car engine.
(11) Upside Down
Off/On (Default setting: Off)
This setting determines the orientation of the image in videos or photos, preventing the camera from recording videos with upside-down images.
Note: The user interface will be upside-down when this feature is enabled.
(12) Screen Saver
Unlimited / 30Sec/ 1Min / 2Min (Default setting: 1Min)
The display will be turned off automatically after a period of inactivity to save battery life. To turn on the display again, press any buttons on the camera.
(13) Auto Power Off
Unlimited / 3Min/ 5Min / 10Min (Default setting: 3Min)
The camera will power off after a period of inactivity to save battery life.
(14) Format
Yes/No (Default setting: No)
You need to format the memory card in the camera's settings before using the camera. To keep your memory card in good condition, please reformat it on a regular basis. Formatting will delete all the media files stored in the memory card. So be sure to back up important files before formatting.
(15) Reset
Yes/No (Default setting: No)
This option will reset all settings to the default values.
(16) Version
Brand:AKASO
Model: Brave 4 Pro
Version: SN-AX-XXXXXXXXX
You can check this camera's brand, model, firmware version and its updated time.
Connecting to the AKASO GO App
Please download and install the AKASO GO APP on the App Store or Google Play first. The AKASO GO APP allows you to control your camera using a smartphone. When your camera is connected to this APP, you can control it to capture, or change any settings. You can also live preview, playback, download, and edit videos via this APP. Please follow the instructions below to connect your camera to the AKASO GO APP.
- When the camera is turned on, tap the mode icon on the bottom screen to enter the mode menu, and then tap the Wifi icon to turn on Wifi. The camera will enter Wifi mode and display the WifiSSID as well as the default password in 3 seconds.
- Turn on your phone's Wifi to enter the Wifi settings page, find the Wifi SSID in the list and tap on it, then enter the password 1234567890 for connection.
Warm tip: Once the camera Wifi is connected, it will give you a"No Internet Connection" or "Weak Security" notice since your phone's 4G signal is blocked. You can ignore it and continue the app connection. This connection screen is for your reference only.
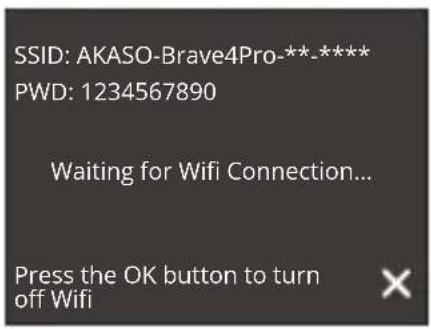
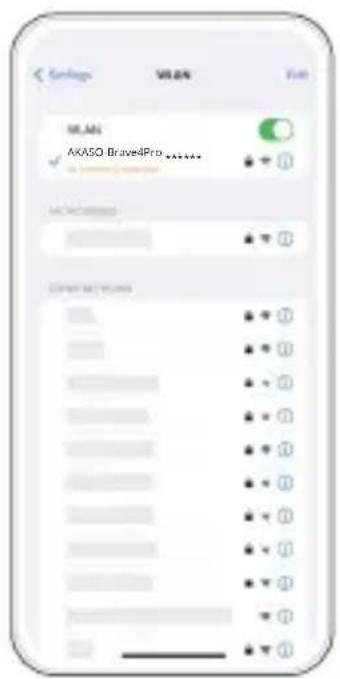
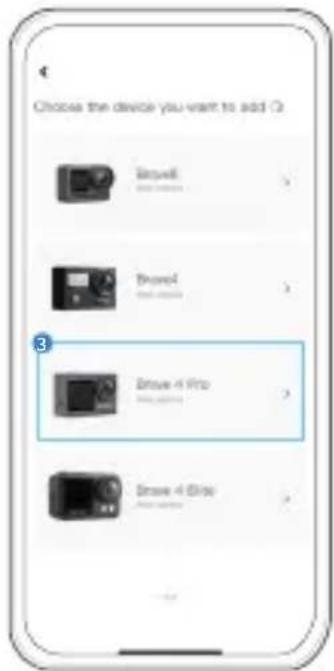
- Open the AKASO GO APP, tap "Device"→"Add Device", then pick "Brave 4 Pro" from the list for connection.
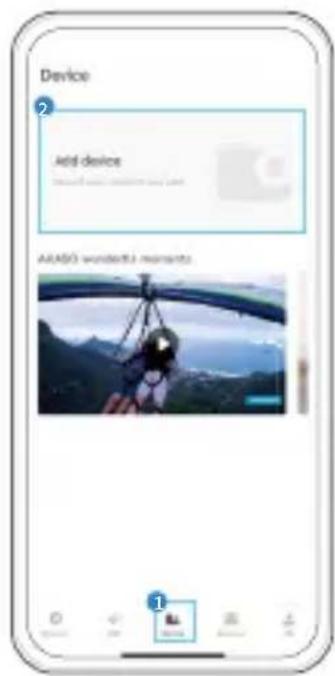
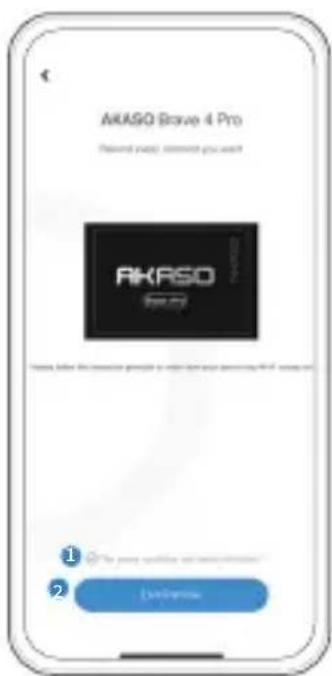
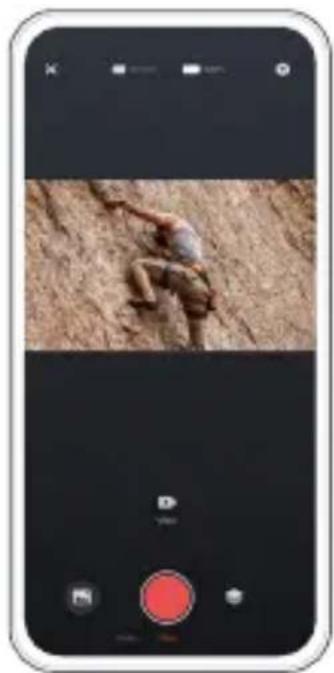
- Tick "The above operation has been confirmed", and tap "Live Preview". Your camera will be connected to the AKASO GO APP.
Playing Back Your Content
You can play back your contents on the camera, your computer, TV, or smartphone. To play back your videos and photos on a computer, you need to transfer these files first. Transferring files also frees up space on your memory for new contents. With this method, the playback resolution depends on the resolution of the device and its ability to play back that resolution.
1. Playing Back Files on Your Brave 4 Pro
(1) Turn on your Brave 4 Pro action camera.
(2) Press the Down button or tap the playback icon in the bottom left corner to enter the playback page.
(3) Tap the photo or video icon to access your photos or videos.
(4) Tap the Forward or Backward icon to select the photo or video you want to playback.
(5) Tap the photo or video to play it back in full screen.
(6) Tap the Back icon to exit the photo or video file.
Note: If your memory card contains a lot of content, it might take a minute to load.
2. Deleting files on Your Brave 4 Pro
(1) Press the Down button or tap the playback icon in the bottom left corner to enter the playback page.
(2) Tap the photo or video icon to access your photos or videos.
(3) Tap the Forward or Backward icon to select the photo or video you want to delete.
(4) Tap the Delete icon, the screen will show "Delete This File? Yes/No".
(5) Tap "Yes", the chosen file will be deleted.
Offloading Your Content
1. Offloading Your Content to a Computer
You can transfer your content to a computer via a USB cable or a card reader (sold separately). To transfer files to your computer via a USB cable, connect your camera to the computer using the USB cable. When prompted, select "USB Storage" as your connection preference. To transfer files to the computer using a card reader, insert a memory card into the card reader, then connect the reader to your computer's USB port. After successful transmission, you can transfer the files to your computer or delete selected files using File Explorer.
2. Downloading Your Content to a Smartphone
(1) Open the AKASO GO app, then connect it to your camera.
(2) Tap the Album icon to access all the videos and photos.
(3) Tap the Select icon located in the upper right corner. Once you have selected your desired file, tap on the Download icon in the bottom right corner. Next, tap on the Download option, and wait for the download process to finish. The file will be successfully saved to your phone's photo album.
Note:
- Please do not alter Wifi settings or disconnect from the app during the download progress.
- f you cannot download videos or photos to your iPhone via the app, please enter your phone's Settings page Privacy Photos, find "AKASO GO", and select "All photos".
Adjusting Zoom Levels
The Zoom function lets you adjust how close or far away the subject appears in your photo. The default is no zoom. The zoom feature is available in all shooting modes. Brave 4 Pro can zoom up to 5X. Please follow the instructions below to use the zoom function.
(1) Turn on the Brave 4 Pro action camera.
(2) Enter any of the shooting modes.
(3) Tap the "+" icon to zoom in, and tap the "-" icon to zoom out.
Reformatting Your Memory Card
To keep your memory card in a good condition, reformat it on a regular basis. Reformating erases all of your content, so be sure to offload your photos and videos first.
(1) Press and hold the Power button to turn on your Brave 4 Pro.
(2) Tap the Settings icon to enter the system settings page.
(3) Scroll down to find the "Format Card" option, then tap on it to enter the formatting screen.
(4) The screen shows "Format Card? Yes/No".
(5) Select the "Yes" option, and the screen will display "Busy...Please wait."
(6) Wait until formatting is complete. The memory card has been successfully formatted.
Remote
When the camera is turned on, it will be automatically connected to the remote within 10 meters of distance. You can control the camera to take photos or record videos using the remote.
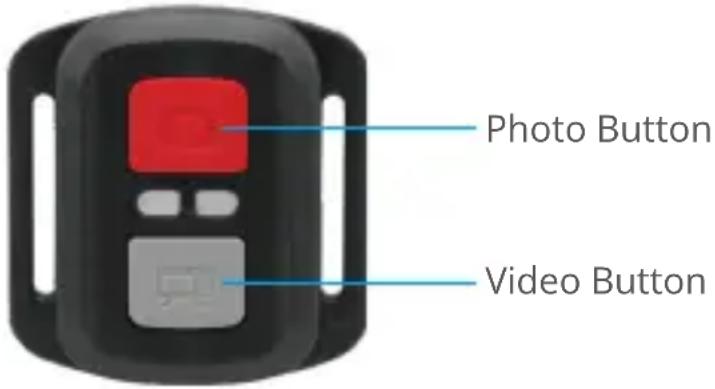
Note: The remote is splash-proof only.
Video
To record video, first make sure the camera is in Video mode, then press the Video button. The camera's working indicator will be flashing during video recording. To stop recording, press the Video button again.
Photo
To capture a photo, first make sure the camera is in Photo mode, then press the Photo button. The camera will emit a shutter sound indicating the completion of the shot.
Burst Photo
To capture burst photos, first verify the camera is in Burst Photo mode, then press the Photo button
Time Lapse
To capture time lapse photos or videos, first verify the camera is in Time Lapse mode, then press the Photo or Video button.
Replacing the CR2032 battery of the remote
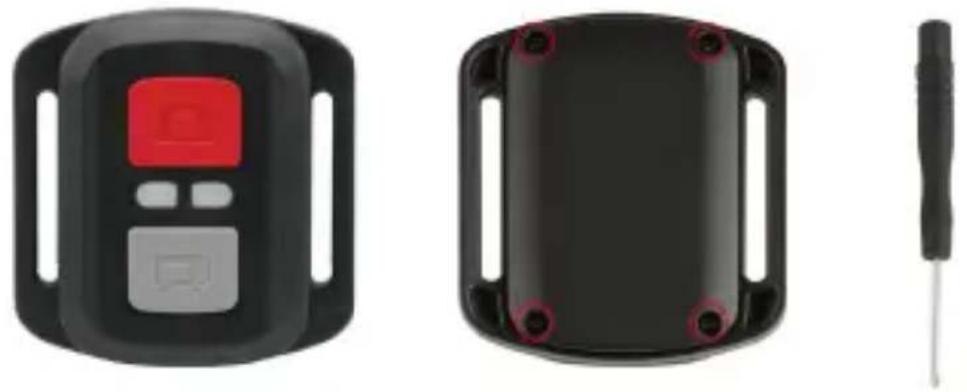
- Use a screwdriver to remove the 4 screws on the back cover of the remote, allowing you to open it.
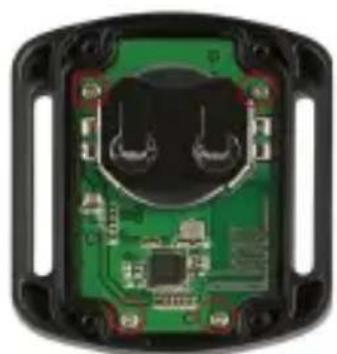
- Remove another 4 screws on the remote's circuit board.
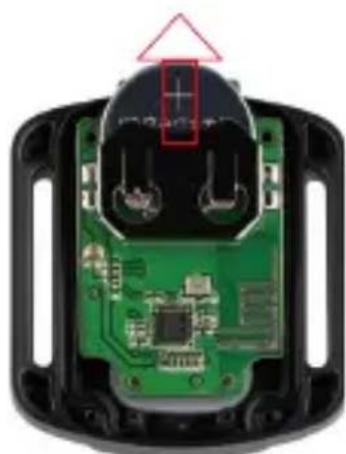
- Lift the circuit board and slide out the battery, as shown below.
Note: Avoid rotating the circuit board to prevent reversing the remote control buttons.
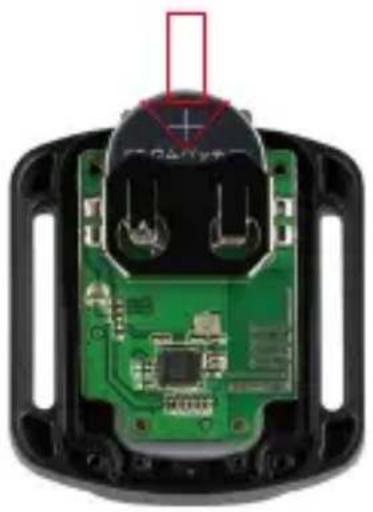
- Install the new battery, keeping the "+" pole facing up.
- Install all 4 screws back onto the circuit board.
- Install all 4 screws back into the cover.
Maintaining Your Camera
Follow these guidelines to get the best performance from your camera:
(1) For best audio performance, shake the camera or blow on the mic to remove debris from the microphone holes.
(2) To clean the lens, wipe it with a soft, lint-free cloth. Do not insert foreign objects around the lens.
(3) Don't touch the lens with fingers.
(4) Keep the camera away from drops and bumps, which may cause damage to the parts inside.
(5) Keep the camera away from high temperature and strong sunshine to avoid being damaged.
Battery Maintenance
1. Maximizing Battery Life
If the battery reaches 0% while recording, the camera saves the file and powers off. To maximize battery life, follow these guidelines when possible:
(1) Please fully charge the battery and put it into the battery slot for capturing when you use the Brave 4 Pro action camera for the first time.
(2) Capture at lower resolutions frame rates.
(3) Fully charge the battery before storing the camera.
(4) We recommend you replace the battery every year for better performance.
Warm tip: Please only use AKASO charging cables and batteries in case of any damage caused to this camera.
2. Battery Handling and Storage
- Please leave the lithium battery stored with the remaining battery of 50 - 60% if not using it for a long period of time. And we recommend you charge the battery every 3 months and discharge it every 6 months.
- Please do not store the battery with metal objects such as coins, keys, or necklaces. If the battery terminals come close to metal objects, fire may be caused due to a short circuit.
- Keep the battery away from wet or moist places, and protect it from damage caused by squeezing or collision.
- Please do not use or store the battery in high temperatures, such as in direct sunlight or a hot compartment. The battery will heat up, malfunction, or have its service life shortened in these conditions.
- Please do not use or store the battery in low-temperature environments as this will shorten the battery life or cause malfunction to the battery.
- Please do not put the battery in any places with strong static and magnetic fields, otherwise, the battery protection unit is likely to be destroyed, which causes safety risks.
- Please stop using the battery and remove the battery from the camera or the battery charger at once if it stinks, heats up, discolors, distorts, or if there is anything wrong with the battery while working, charging, or in store.
- Please wrap up the obsolete electrode with insulation paper in case of fire or explosion.
- Please do not throw the battery into the fire in case of an explosion.
Mounting Your Camera
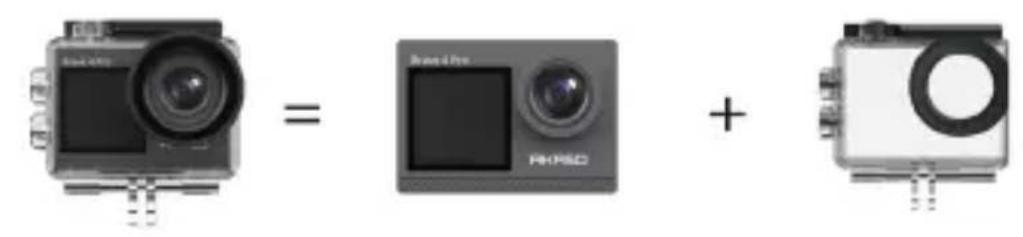
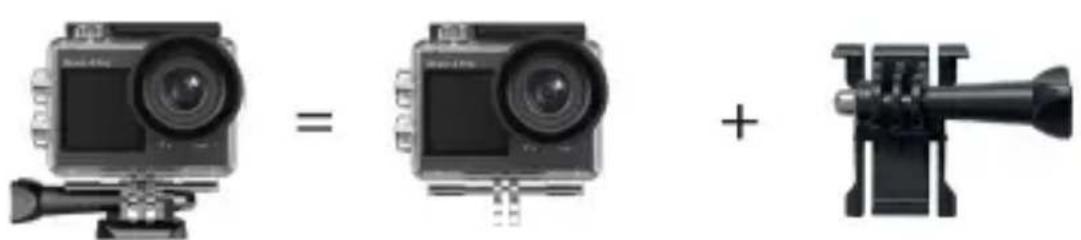
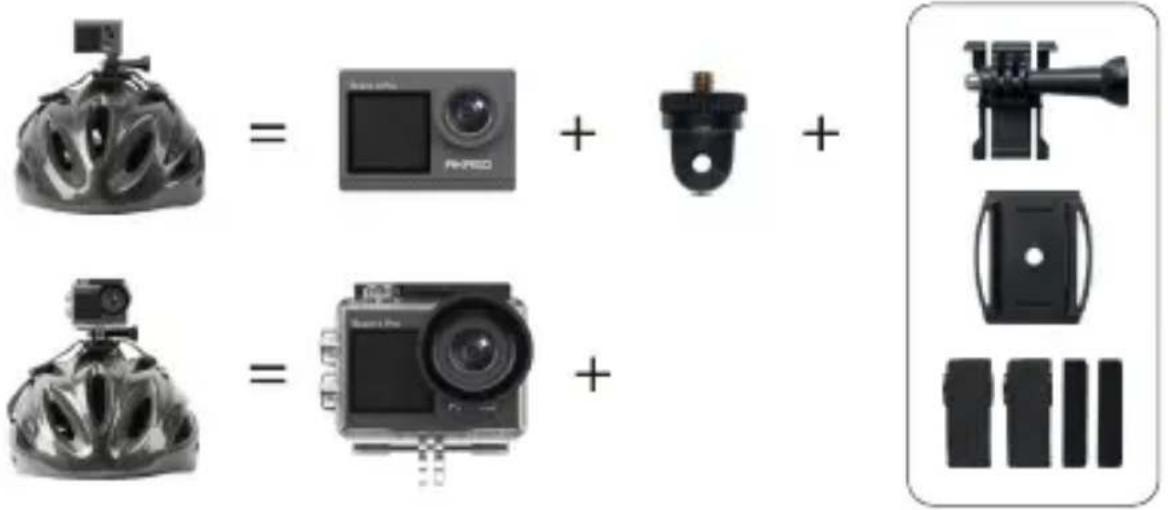
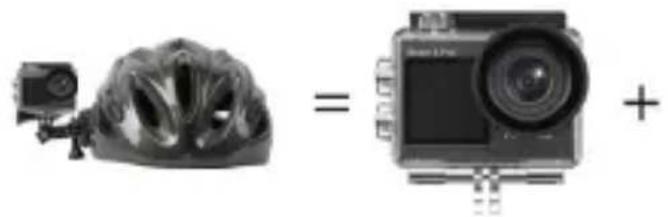
You can mount this action camera on different devices using the included accessories for different experiences.

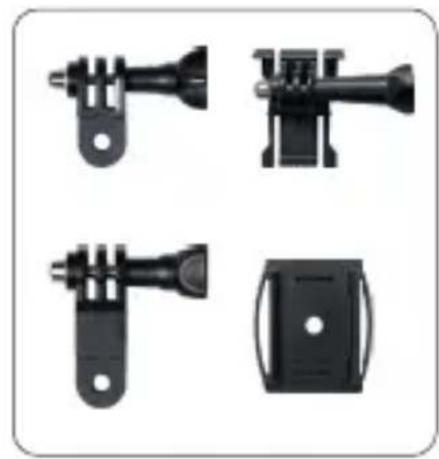

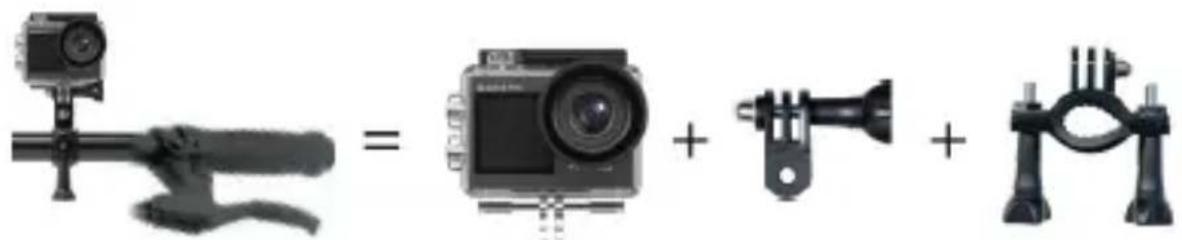
Contact Us
(888) 466-9222 (US) cs@akasotech.com www.akasotech.com
For any inquiries about AKASO products, please feel free to contact us. We will respond within 24 hours.
BRAVE 4 PRO
AKTIONKAMERA
BENUTZERHANDBUCH
V35AX

Inhalte
Schraubenschlüssel x1
Binden x4
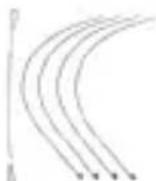
Anbindungen x5

Linsentuch x1

3M-Klebeband x2
Kurzanleitung x1

Version: SN-AX-XXXXXXXXX
4K30fps/2.7K30fps/1080P120fps/1080P60fps/1080P30fps/720P240fps
/720P120fps/720P 60fps/720P 30fps (Configuración predeterminada: 4K30fps)
Messages important 01
Mode Photo time-lapse
Version: SN-AX-XXXXXXXXX
12 Coperchio battery
10 Altoparlante
4K30fps/2.7K30fps/1080P120fps/1080P60fps/1080P30fps/720P240fps/720P120fps/720P60fps/720P 30fps (Impostazione predefinita: 4K 30fps)
Con这对于 the camera, the photocopier would be a good idea to use. The camera would be able to take the photo of the camera and the other camera.
Nota:
This is the first time you see a movie with a character from the film. 《来自魔鬼的花园》
一
This work was supported by the Ministry of Education, Science and Technology (2017) under Grant No. 2018-034.
K A M E R A A K C J I
INSTRUKCJA OBSŁUGI
V35AX

Zawartosci
ZAWARTOSC OPAKOWANIA 02
TWOJA BRAVE 4 PRO-03
PIERWSZE KROKI 05
PRZEGLAD TRYBOW-07
PERSONALIZACJA BRAVE 4 PRO- 09
LACZENIE Z APLIKACJA AKASOGO 16
ODTWARZANIE ZAWARTOSCI 17
PRZENOSZENIE ZAWARTOSCI 18
UTRZYMANIE APARATU 19
MAKSYMALIZACJA ZYWOTNOSCI BATERII 19
REGULACJA POZIOMU ZOOMU 19
FORMATOWANIE KARTY PAMIECI 20
PRZECHOWYWANIEAKUMULATORA 20
PILOT 21
MONTAZ KAMERY 23
OCHRONA SRODOWISKA 25
KONTAKT 25
5. Self-timer (Samowzwalacz)
- Important Messages
- Your Brave 4 Pro
- What's in the Box
- Camera specifications
- Getting Started
- First Use
- Unboxing
- Take the camera out of the waterproof housing
- Detach the waterproof housing from the Packing Box
- Charge the Battery Separately
- Install the battery
- Install the Micro SD card
- Charge the camera
- Power on the camera
- Operation Instructions
- Powering on or off
- Switching shooting modes
- Switching screens
- Zooming in or out
- Using the shutter button
- Entering the settings screen
- Entering the playback screen
- Turning Wifi On or Off
- Turning on Wifi
- Turning off Wifi
- Indicators
- Memory card use
- Warm tips:
- Notes
- Video Menu
- Video Mode
- Normal Mode
- Time Lapse Video Mode
- Loop Record Mode
- Slow Motion Mode
- Video Settings
- Video Resolution
- Note:
- Video Mode
- Video
- Slow Motion
- Loop Video
- Image Stabilization
- Time Lapse Interval
- WDR
- Motion Detection
- Exposure
- Date Stamp
- Metering
- Sharpness
- Video Quality
- Photo Menu
- Photo Mode
- Photo Mode
- Burst Photo Mode
- Time Lapse Photo Mode
- Self-Timer Mode
- Photo Settings
- Photo Resolution
- Burst Photo
- Time Lapse Interval
- Countdown
- Self-timer
- Exposure
- Metering
- Sharpness
- ISO
- Date Stamp
- System Settings
- Special Effect
- White Balance
- Microphone
- Angle
- 5) Diving Mode
- Power Frequency
- Language
- Date & Time
- Sounds:
- Driving Mode
- Upside Down
- Screen Saver
- Auto Power Off
- Format
- Reset
- Version
- Connecting to the AKASO GO App
- Playing Back Your Content
- Playing Back Files on Your Brave 4 Pro
- Deleting files on Your Brave 4 Pro
- Offloading Your Content
- Offloading Your Content to a Computer
- Downloading Your Content to a Smartphone
- Adjusting Zoom Levels
- Reformatting Your Memory Card
- Remote
- Photo
- Burst Photo
- Time Lapse
- Replacing the CR2032 battery of the remote
- Maintaining Your Camera
- Battery Maintenance
- Maximizing Battery Life
- Battery Handling and Storage
- Mounting Your Camera
- Contact Us
- BRAVE 4 PRO
- Inhalte
- Mode Photo time-lapse
- Nota:
- 一
- Zawartosci
- Self-timer (Samowzwalacz)
Brand : Akaso
Model : 4 Pro Action Cam
Category : Camera