BSW 950 MF - Sweeper Lavor - Free user manual and instructions
Find the device manual for free BSW 950 MF Lavor in PDF.

User questions about BSW 950 MF Lavor
0 question about this device. Answer the ones you know or ask your own.
Ask a new question about this device
Download the instructions for your Sweeper in PDF format for free! Find your manual BSW 950 MF - Lavor and take your electronic device back in hand. On this page are published all the documents necessary for the use of your device. BSW 950 MF by Lavor.
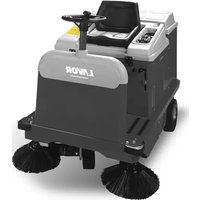
USER MANUAL BSW 950 MF Lavor
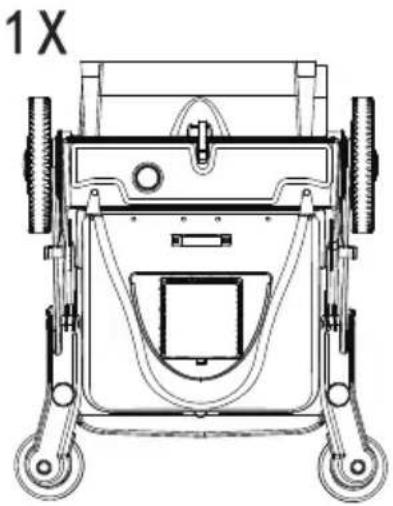
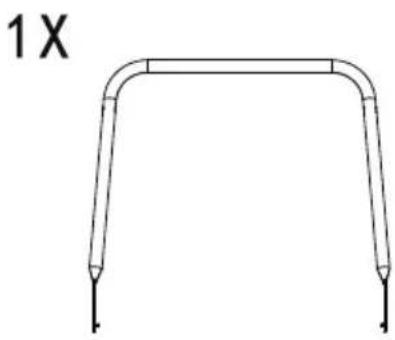
STANDARD PRODUCTS AND SPARE PARTS IN THE BOX


Side brush and screws
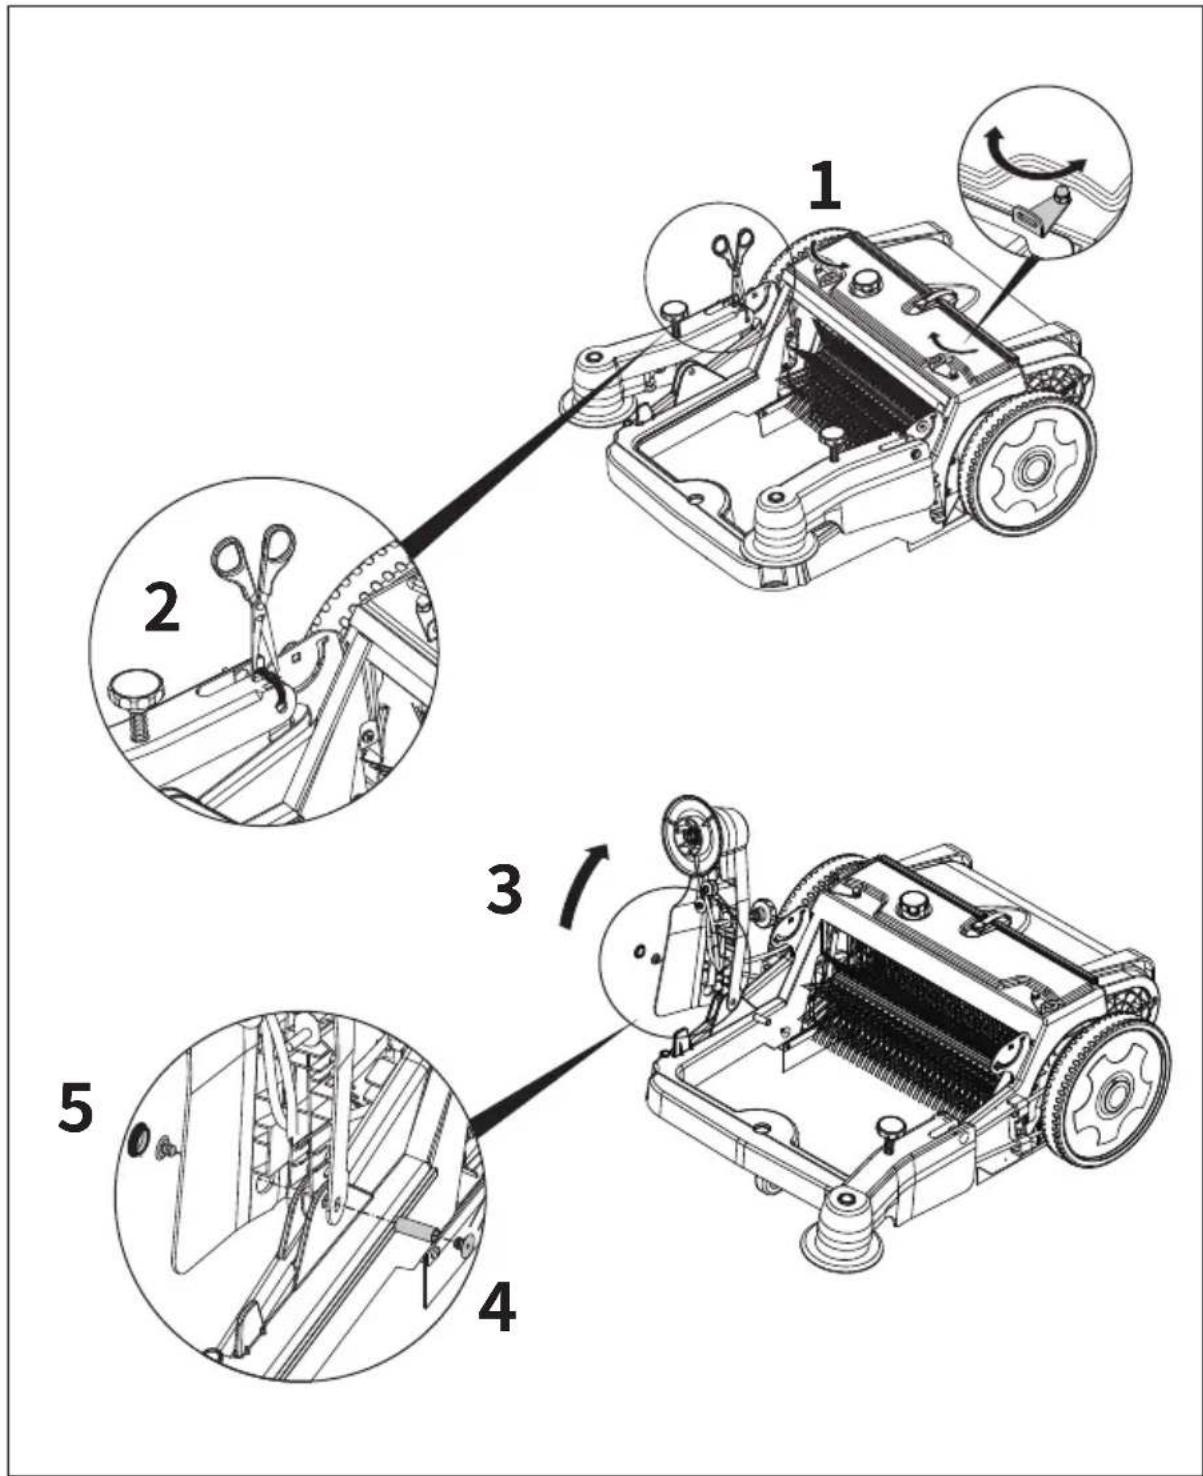
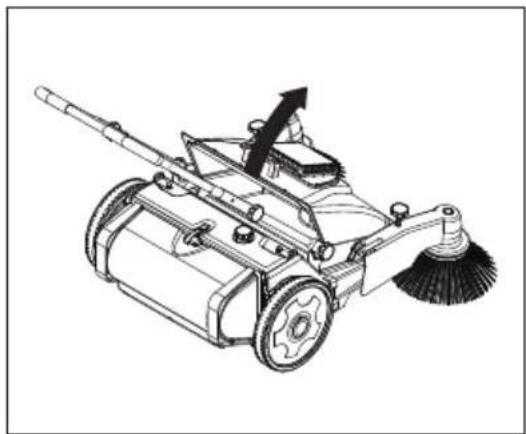
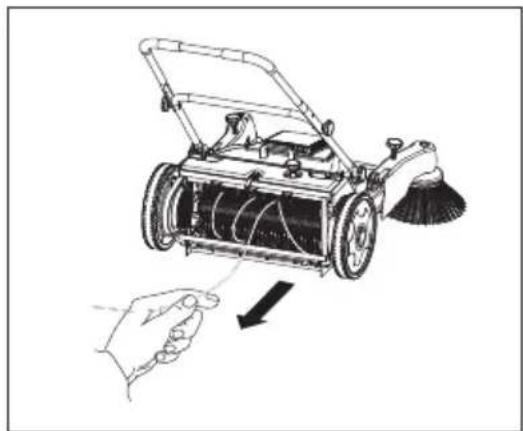
STEP 1 Install arm
Remove the bin and cut the cable tie. Lift the arm and align the holes, insert the tube and block both sides.
Note: When you take off the arm, don't remove the belt or rotate the arm.
It may cause the belt to turn wrong.
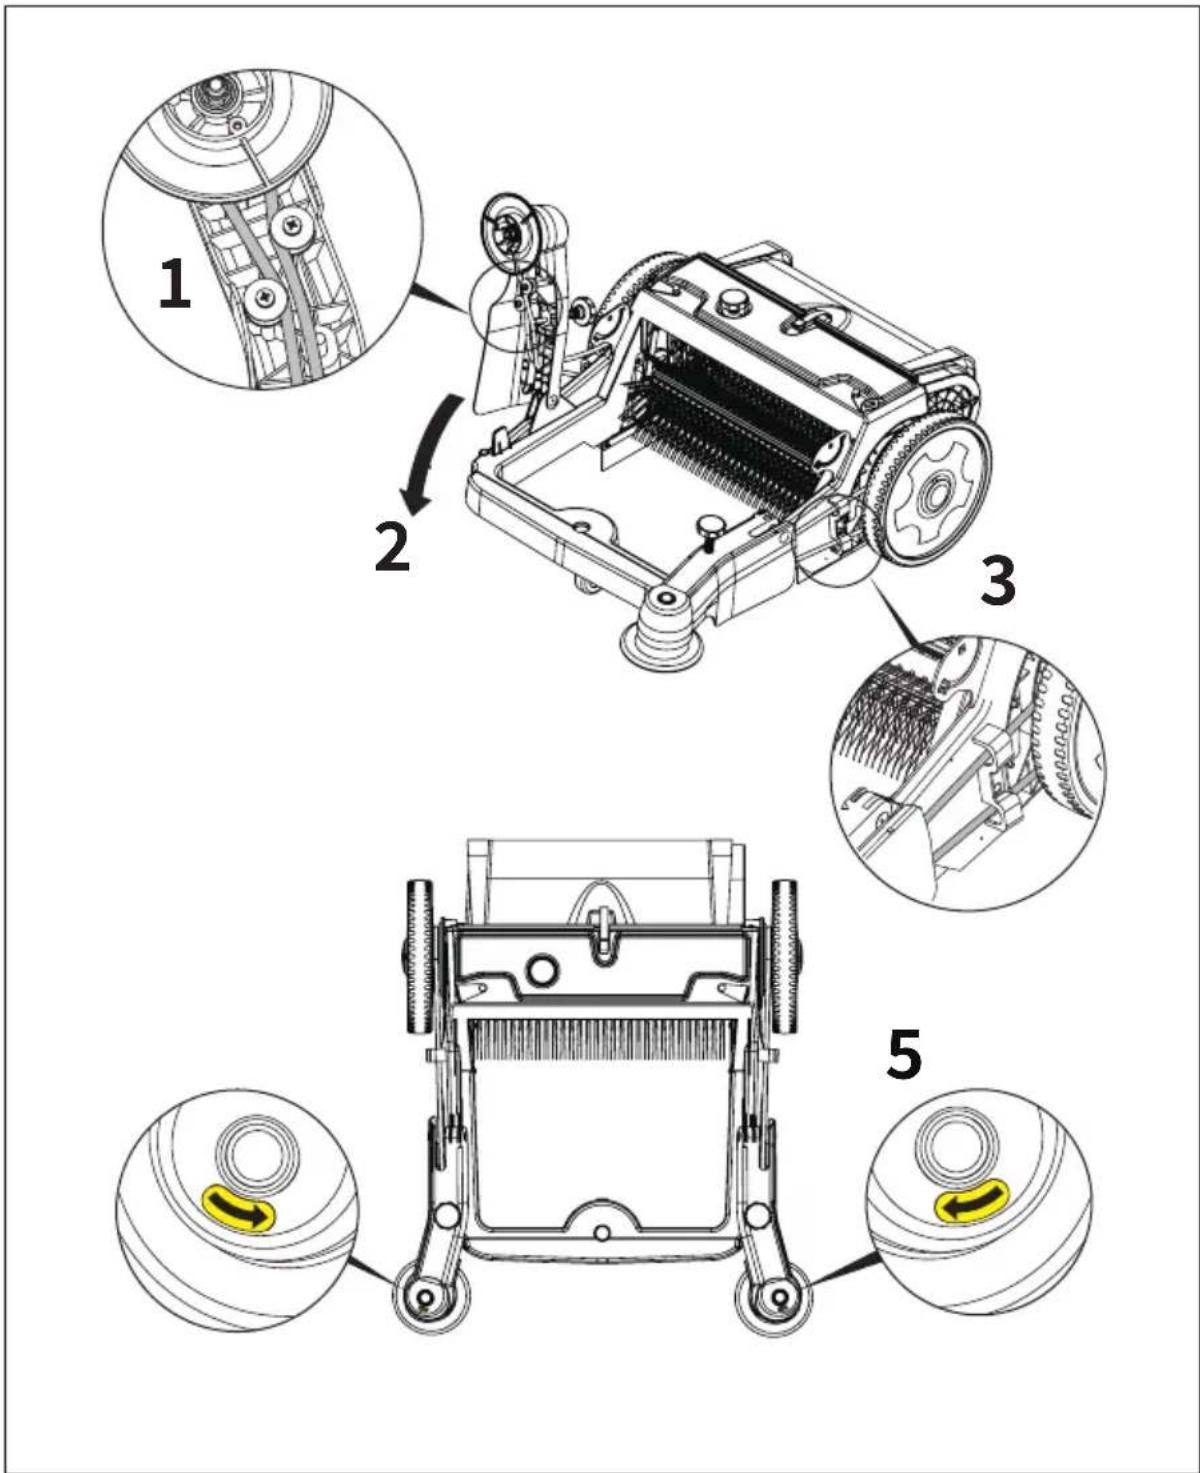
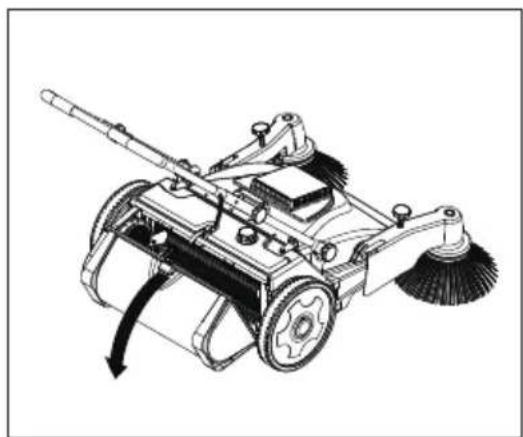
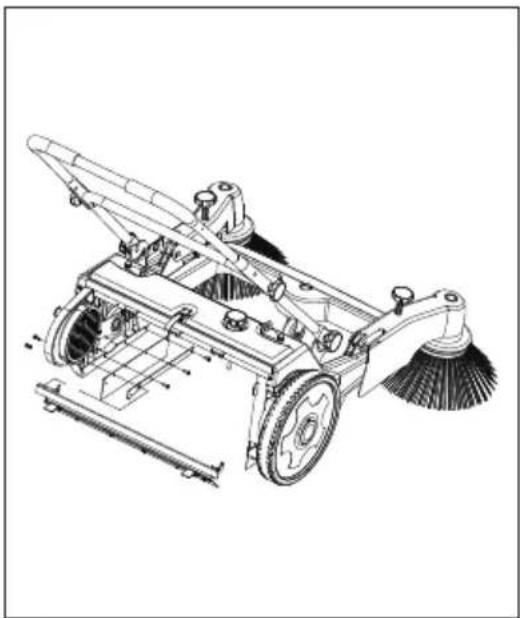
STEP 2 Return driving belt
Make the belt into the example 1 and put down the arm. And make the belt into the example 3. Then push the manual sweeper and make sure the rotation direction of the turntable is same as the label.
Note: To avoid confusion, install one side and then install the other side.
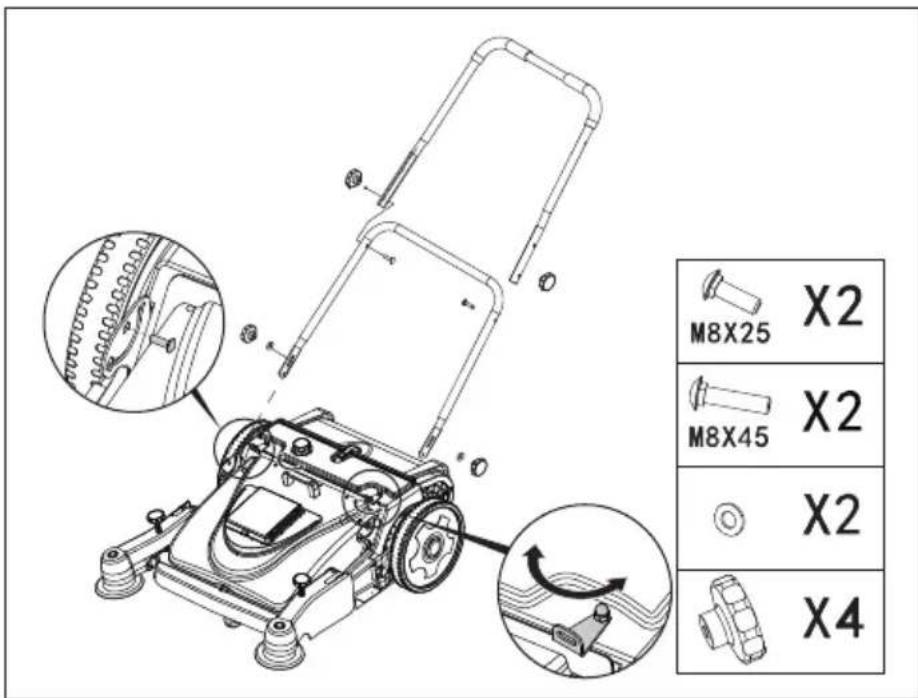
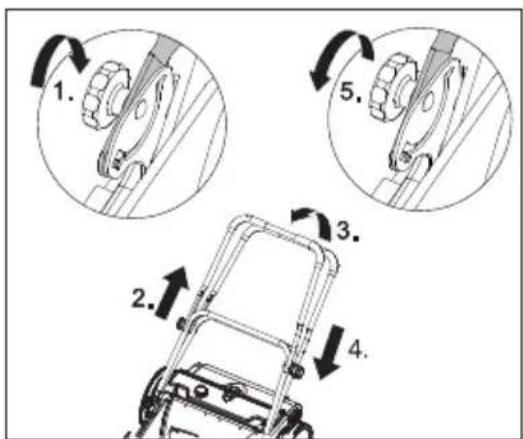
STEP 3 Handle assembly
Install the bin and lock it. Then install the handle.
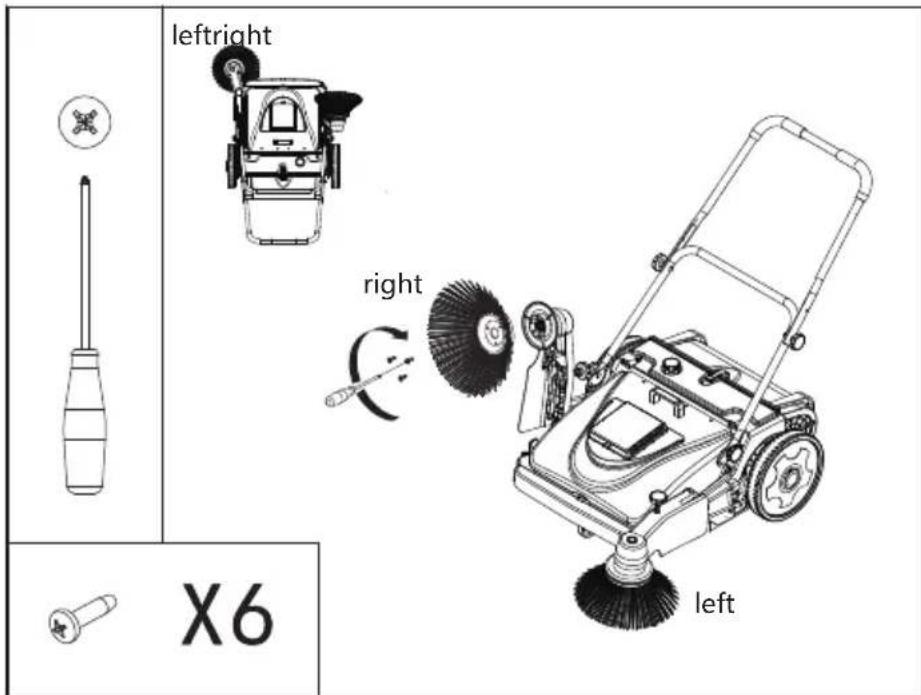
STEP 4 Side brush installation
According to the label on the front brush to distinguish the left and right side brush.
Three screws to set up each side brush.
Brush height adjustment
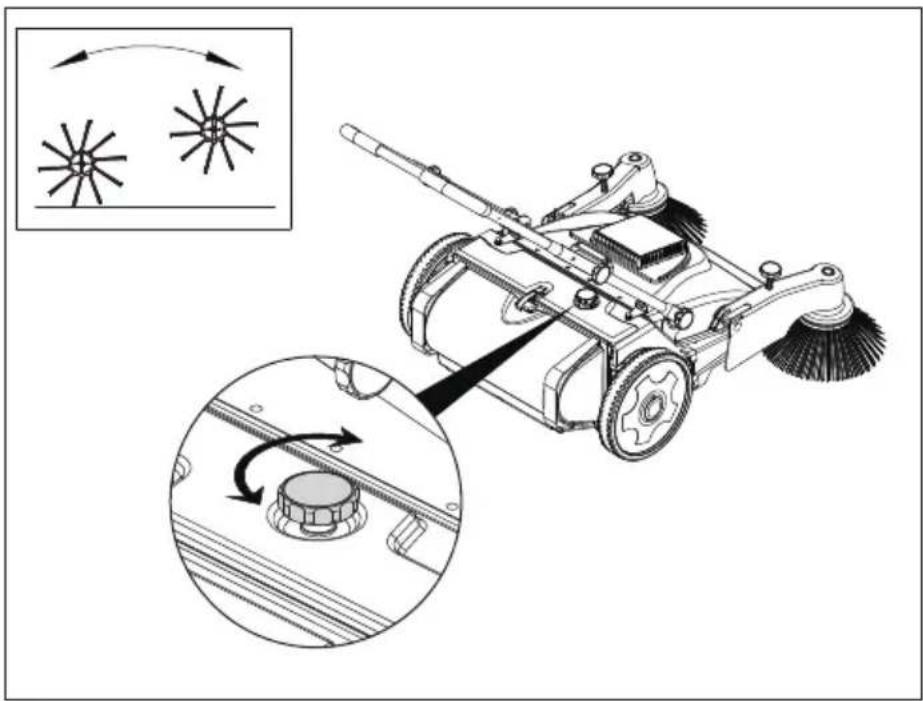
Main brush height turning knob
Lower the brush: counterclockwise rotate the knob
Raise the brush: clockwise rotate the knob
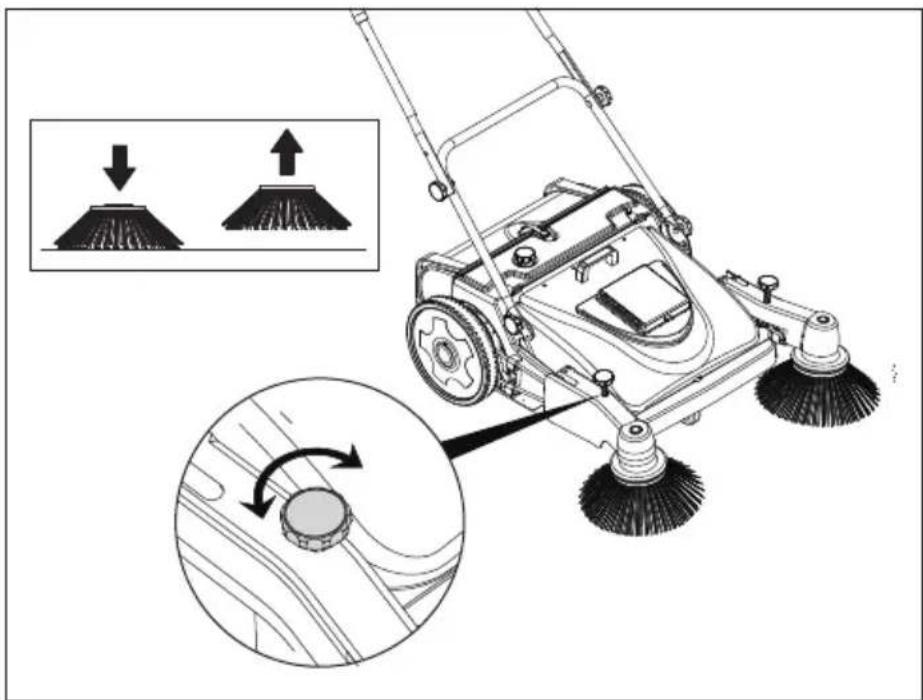
Side brush height turning knob
Lower the brush: counterclockwise rotate the knob
Raise the brush: clockwise rotate the knob
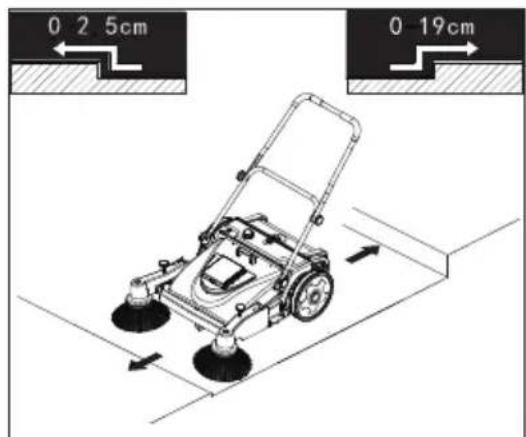
- The cleaning surface should be competitive flat and height difference ≤ 2.5cm . Walking the step in the opposite direction ≤ 19cm .
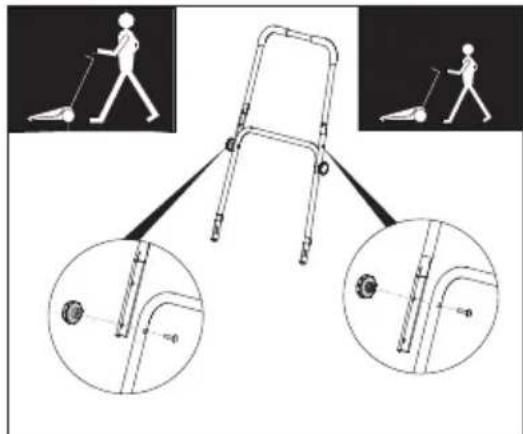
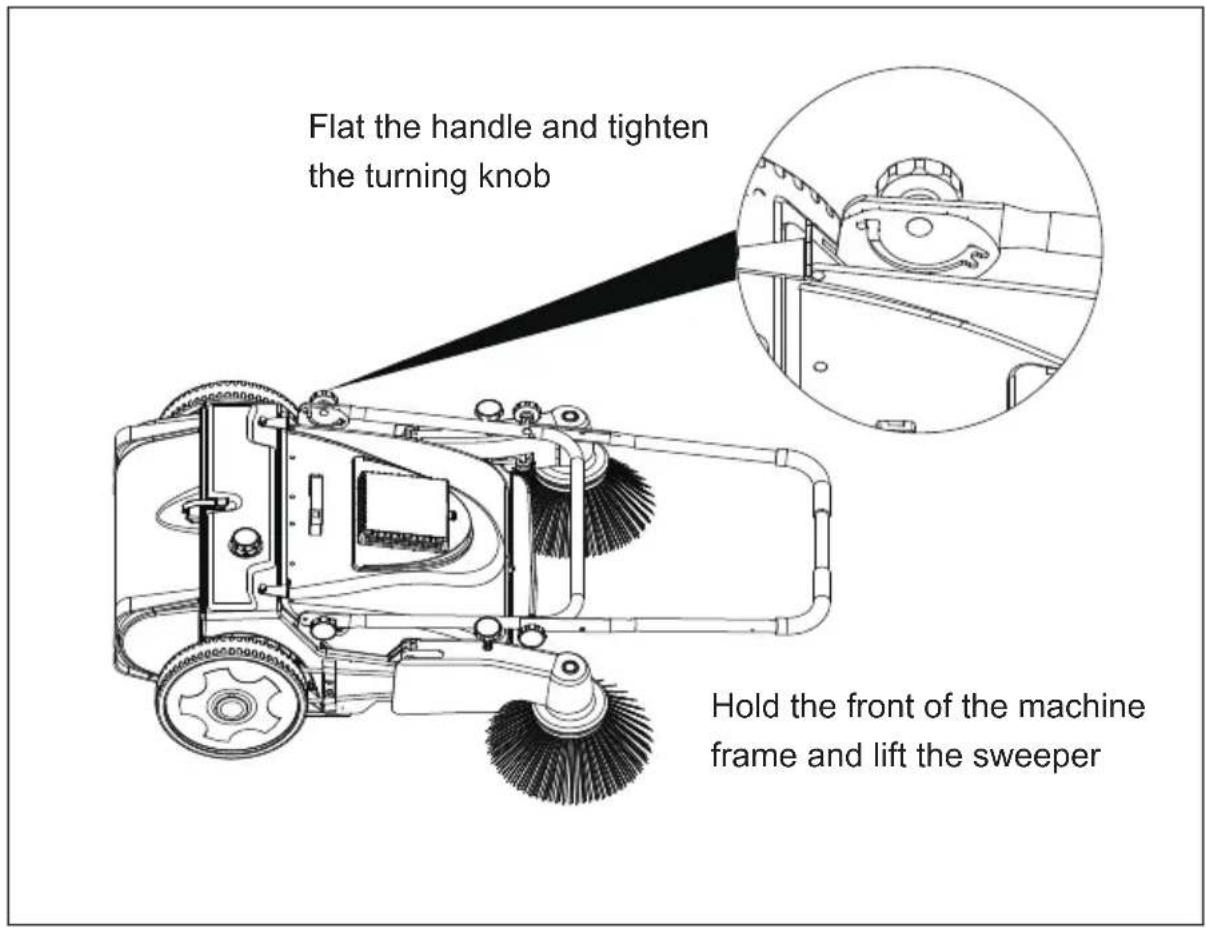
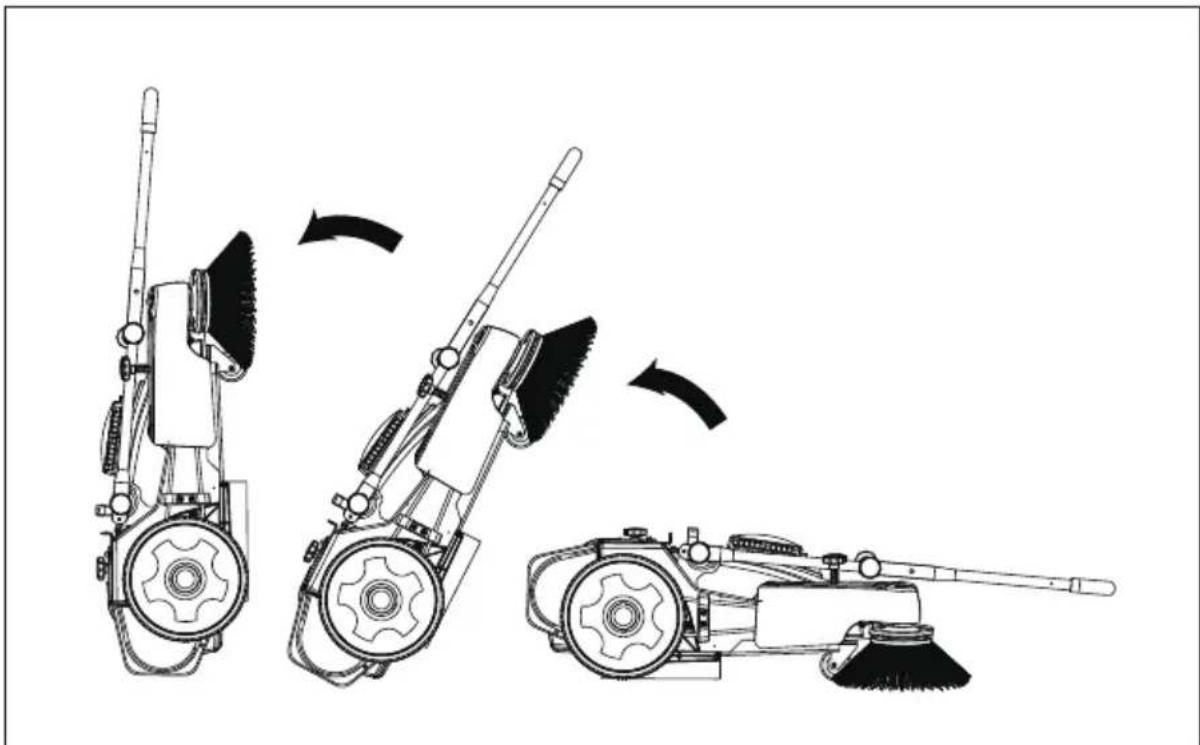
- Adjust the height of handle for need.
- Adjust the angle of handle for need.
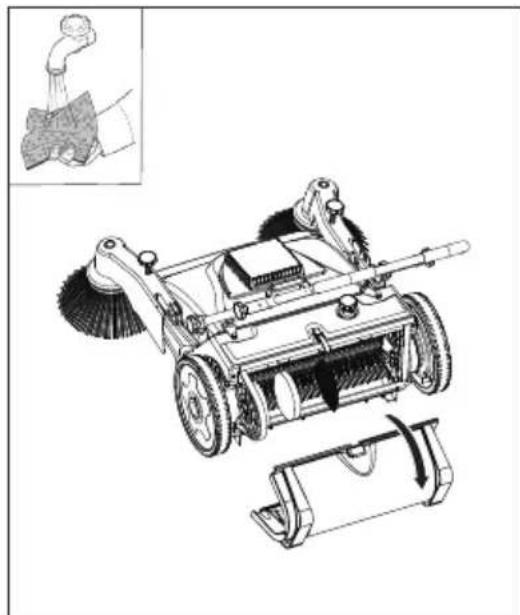
- Open metal button then pull back to unload back bin.
- Turn metal knob and lift to unload front bin.
- When the main brush is entangled in garbage, it should be taken out by reversing the roller brush.
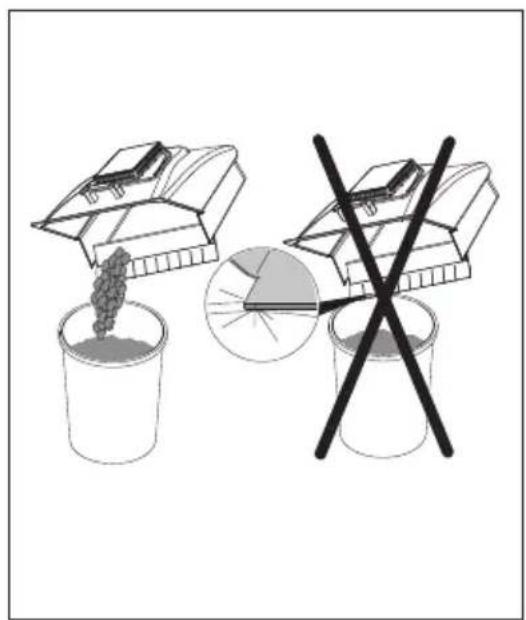
- Crashing bin is forbidden.
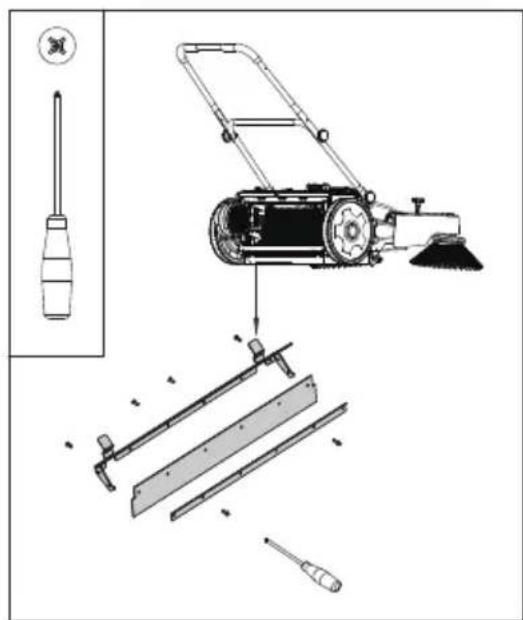
Install the ground lip on the back of main brush.
- Set up the ground lip of both sides of main brush.
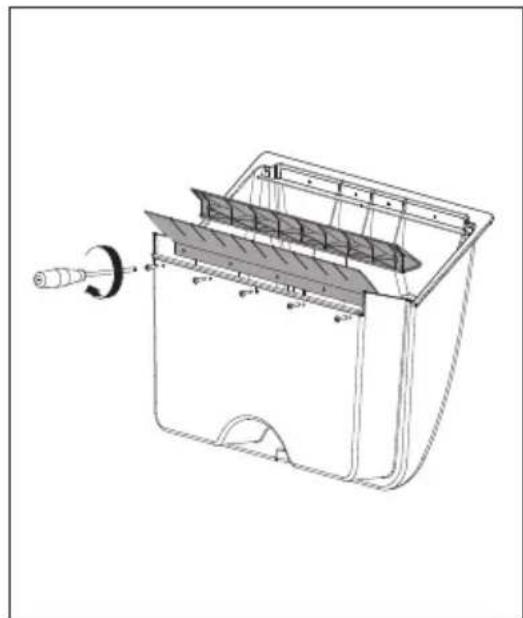
Install bin seal baffle.
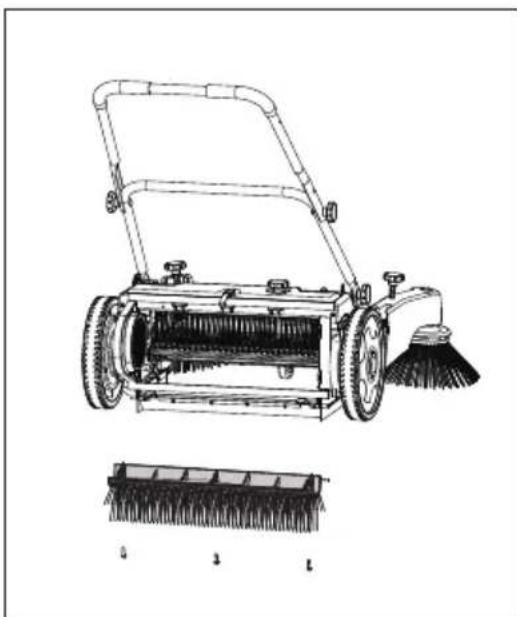
- Main brush unload installing.
- Clean filter in time.
The sponge filter can be washed with water, dried and used.
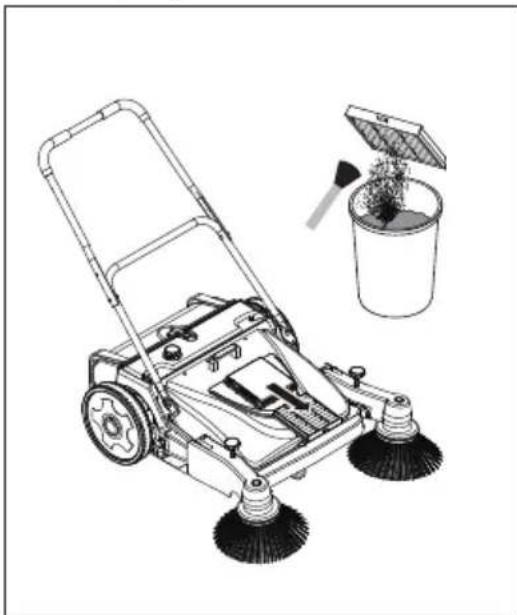
- To clean the top filter, please use a brush to clean it, do not flush with water.

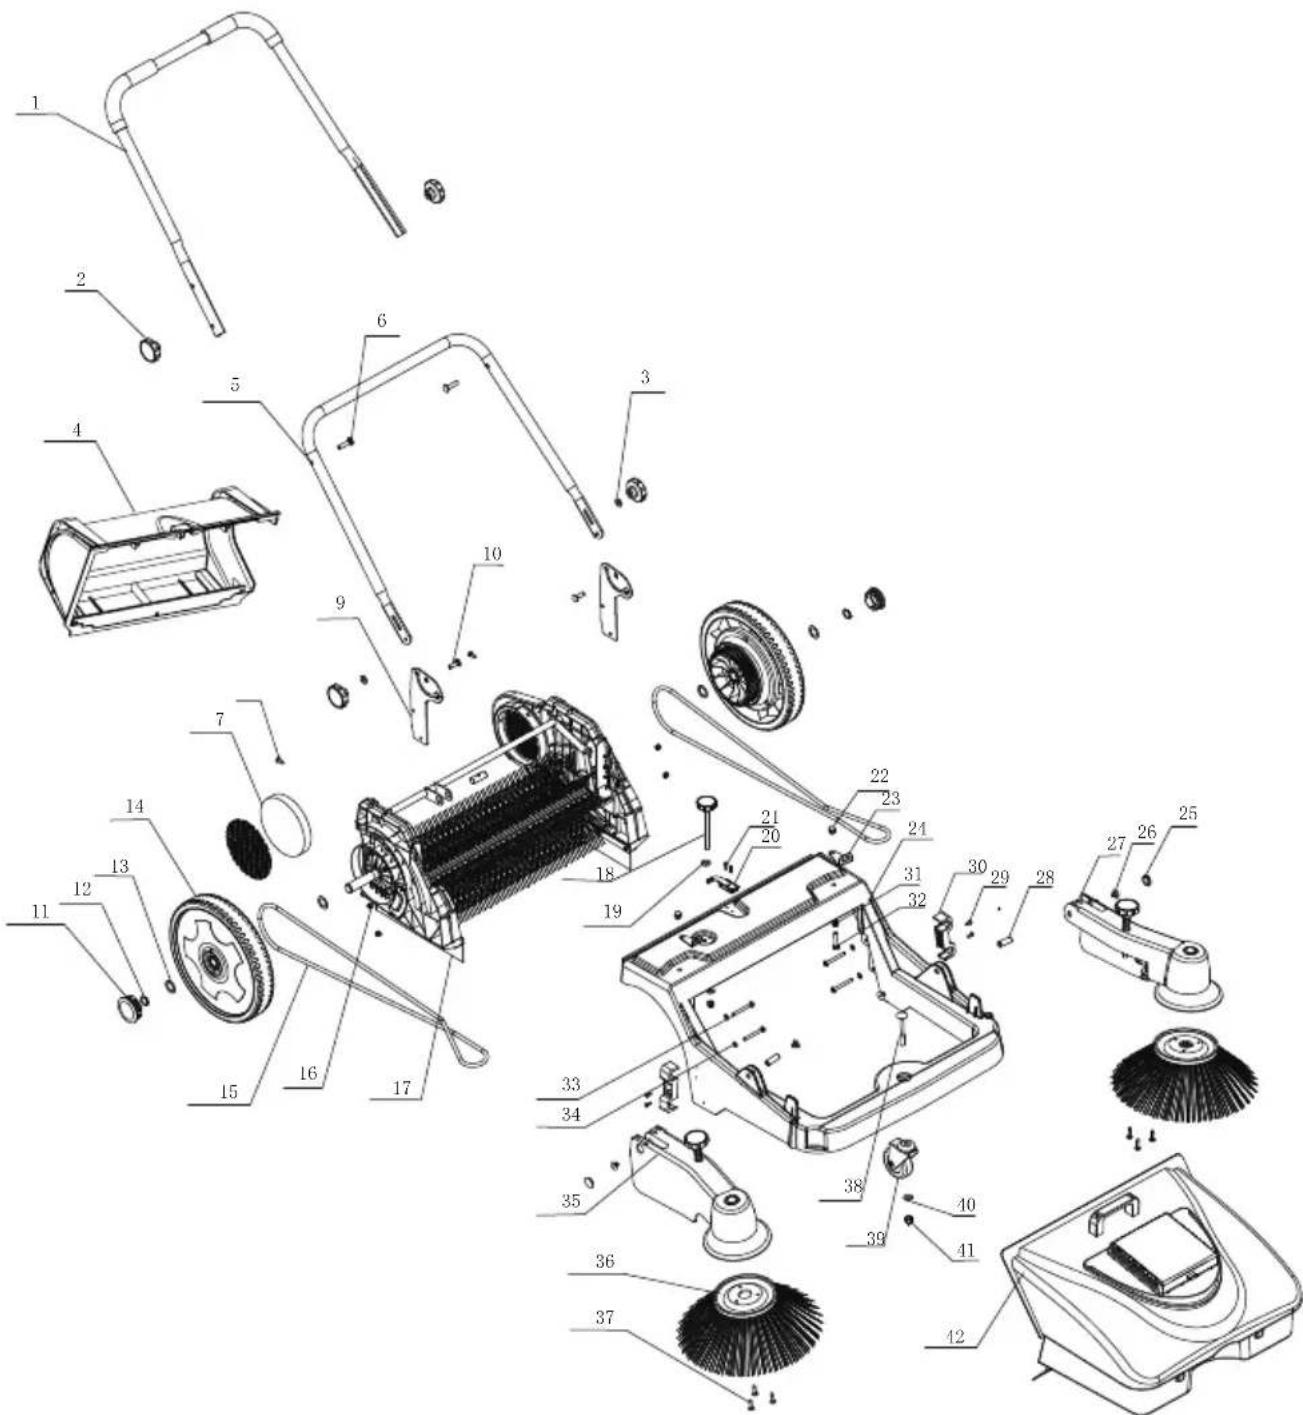
| NO. | Name | NO. | Name |
| 1 | Handle | 22 | Nut M8 |
| 2 | Turning knob | 23 | Pressing plate |
| 3 | Washer 8 | 24 | Body frame |
| 4 | Rear bin | 25 | Arm Plug |
| 5 | Sliding handle parts | 26 | Metal sleeve plug |
| 6 | Saucer-head Screw Mx45 | 27 | Left side brush arm components |
| 7 | Sponge filter | 28 | Sleeve |
| 8 | Screw ST5.5X22 | 29 | Screw St3.5x13 |
| 9 | Armrest plate | 30 | Belt guide plate |
| 10 | Saucer-head Screw M8x25 | 31 | Spring |
| 11 | Wheel cap | 32 | Bolt M8X35 |
| 12 | Shaft ring 20 | 33 | Cross recessed disc head screw M6X45 |
| 13 | Washer 20 | 34 | Washer 6 |
| 14 | Wheel | 35 | Right side brush arm components |
| 15 | Round belt | 36 | Side brush |
| 16 | Nut M6 | 37 | Screw ST4.8X22 |
| 17 | wheel support components and rolling brush | 28 | Saucer-head Screw M10x75 |
| 18 | Turning knob | 39 | Castor |
| 19 | Pad 8 | 40 | Washer 10 |
| 20 | Buckle | 41 | Nut M10 |
| 21 | Screw St3.5x16 | 42 | Bin components |