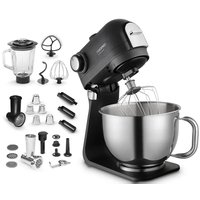
RM8000 - Food Processor Concept - Free user manual and instructions
Find the device manual for free RM8000 Concept in PDF.


| Product type | Food processor |
| Brand | Concept |
| Model | RM8000 |
| Power supply | 220-240 V ~ 50-60 Hz |
| Power | 1200 W |
| Standby consumption | 0.48 W |
| Off consumption | 0 W |
| Noise level | ≤ 42 dB |
| Maximum bowl capacity | 1.1 kg (kneading/mixing) 1.5 liters (blender) |
| Maximum continuous operation time | Kneading: 10 min Meat grinder: 5 min Whisk: 5 min Blender: 2 min |
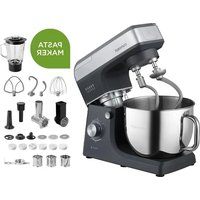
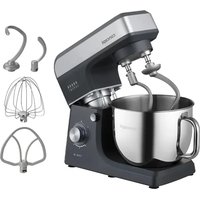
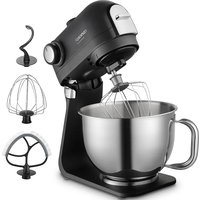
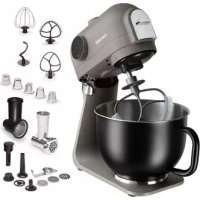
| Included accessories | Dough hook, mixing whisk, whisk, meat grinder with accessories (discs, sleeves), glass blender, grater (4 discs), pasta accessories |
| Main functions | Kneading, mixing, whipping, grinding, blending, grating, preparing pasta (sausages, dumplings, candies, pasta) |
| Main bowl material | Plastic (main bowl) Glass (blender) |
| Cleaning | Whisks and main bowl: dishwasher safe Blender, grinder, grater: soapy water Pasta accessories: do not immerse, dry clean |
| Safety | Automatic shutdown in case of overload; rear cover required for operation; unlock button for access |
| Maximum food temperature | 80 °C |
| Repairability | Authorized service center for repairs |
| Warranty | Warranty void if instructions not followed |
Frequently Asked Questions - RM8000 Concept
User questions about RM8000 Concept
0 question about this device. Answer the ones you know or ask your own.
Ask a new question about this device
Download the instructions for your Food Processor in PDF format for free! Find your manual RM8000 - Concept and take your electronic device back in hand. On this page are published all the documents necessary for the use of your device. RM8000 by Concept.
USER MANUAL RM8000 Concept
Thank you for purchasing a Concept product. We wish you much joy with your new appliance every day you use it. Please read the instruction manual carefully before initial use. To refer to this manual any time you need to, we recommend you to keep it in a safe place. And please pass it to any future owner of the appliance.
| Technical specifications | |
| Voltage 220-240 V - 50-60 Hz | |
| Input 1200 W | |
| Sound level ≤ 42 dB | |
| Continuous operating time | Kneading (KB max) 10 min. |
| Grinding (KB max) 5 min. | |
| Whipping (KB max) 5 min. | |
| Blending (KB max) 2 min. | |
| Power consumption in standby mode | 0.43 W |
| Power consumption in off state 0 W | |
When connected to the mains, the appliance immediately enters standby mode - the LED around the control knob lights up. When operation is complete, turn the control knob to OFF and the appliance enters standby mode.
IMPORTANT SAFETY PRECAUTIONS
- Do not use the appliance in any other way than as described in this manual.
- Remove all the covering and marketing materials from the appliance before the first use.
- Make sure the mains voltage corresponds to the values on the rating plate of the appliance.
- Do not leave the appliance unattended when it is switched on or connected to the mains.
- Disconnect the appliance from the electrical outlet if it is not being used.
- When disconnecting the unit from the wall outlet, never pull the power cord, grasp the plug end and disconnect it by removing it from the receptacle.
- Do not allow children or unauthorized people to handle the appliance, use it out of their reach.
- Persons with reduced mobility, reduced sensory perception, mental disadvantage or persons not familiar with the operation must use the appliance only under the supervision of responsible person, who is
图
EN
concept
concept
familiar with the instructions.
- Pay extra attention if the appliance is used near children.
- Do not use the appliance as a toy.
- Do not allow the power cord to hang freely over the edge of the worktop where children might reach it.
- Do not use the appliance outdoors or on a wet surface, there is a risk of electric shock.
- Do not use any accessories other than those recommended by the manufacturer.
- Do not use the appliance with a damaged cord or plug and have it repaired immediately by an authorized service centre.
- Do not use the power cord to move or handle the appliance.
- Keep the appliance away from heat sources such as radiators, ovens, etc. Protect it from direct sunlight and humidity.
- Do not touch the appliance with wet hands.
- When installing accessories, cleaning and maintenance or in the event of a malfunction, switch off the appliance and disconnect the plug from the electrical outlet.
- The appliance is only suitable for home use and is not intended for commercial use.
- Do not immerse the power cord, plug or appliance in water or any other liquid.
- Check the appliance and the power cord for damage regularly. Never switch on a damaged appliance.
- Do not touch moving parts when using the appliance.
- Keep your hair, fingers and cloth away from the moving parts of the appliance.
- Pay extra attention when handling the adapters, the blades are very sharp and can cause injury.
- The appliance accessories must not be used in a microwave oven.
- Immediately after switching off the motor and unplugging the power cord, some parts may be still moving for a while. Wait until they stop completely.
- Use the appliance for food processing only.
- The maximum allowable temperature of processed food is 80^ . Do not use the appliance for boiling food!
- Do not repair the appliance yourself. Contact an authorized service
centre.
- Never bypass the safety switches.
- Do not put food in the rotating hooks while the appliance is working.
- Place the appliance on a smooth, flat and stable work surface.
- Do not insert the plug into the wall outlet without installing all the necessary accessories.
- This appliance can be used by children aged from 8 years and above and persons with reduced physical, sensory or mental capabilities or lack of experience and knowledge if they have been given supervision or instruction concerning the use of the appliance in a safe way and understand the hazards involved. Cleaning and maintenance performed by the user must not be carried out by children unless they are 8 years old and under supervision. Children aged under 8 years of age must be kept away from the appliance and its power cord. Do not let children play with the appliance.
- This appliance can be used by persons with reduced physical, sensory or mental capabilities or lack of experience and knowledge if they have been given supervision or instruction concerning the use of the appliance in a safe way and understand the hazards involved. Do not let children play with the appliance.
Damages from failure to follow the manufacturer's instructions are not covered by the warranty.
concept
concept
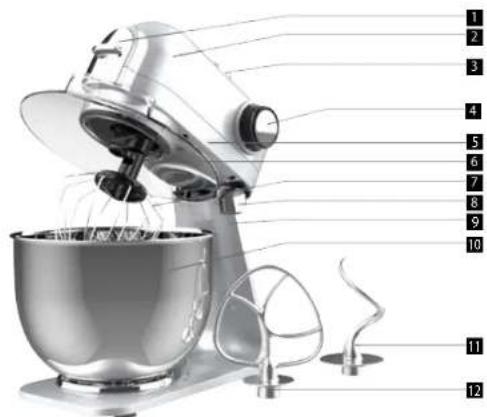
PRODUCT DESCRIPTION
1 Front cover
2 Am
3 Back cover
4 Speed control
5 The upper part of the appliance
6 Container lid
7 Whisk
8 Release button
9 The lower part of the appliance
10 Container
11 Dough hock
12 Mixing whisk
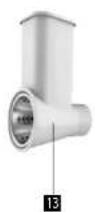
13 Grater
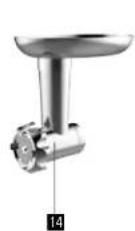
14. Grinders
15. Blender
16 Attachments for pasta preparation
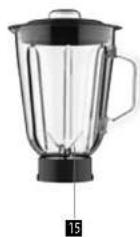
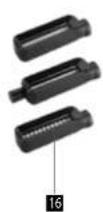
OPERATING INSTRUCTIONS
IMPORTANT
- If the back cover of the appliance is not in place, the appliance will not work.
-
DO NOT attempt to use this function while grinding or blending.
-
Place the mixing container in the base and turn it clockwise until it clicks into place.
- To raise the arm, press the release button (8) and at the same time lift the arm by gently pulling it up.
- Place the desired whisk on the output shaft, push the whisk against the spring gently and turn it until it locks into the lock.
- Now put the ingredients in the container. Do not exceed the maximum allowable amount of ingredients, which is 1.1 kg.
- Release the arm with the release button (8) while lowering it with a slight pressure.
- Insert the plug into the wall outlet.
- Switch on the appliance and turn the speed control button (4) to select a speed between 1 and 5 (depending on the type of dough being prepared).
- Pulse operation (kneading at short intervals): turn the speed control button to the "PULSE" position. When the switch is released, it automatically returns to the "OFF" position.
- After mixing is complete, turn the speed control button (4) to the "OFF" position. Then remove the plug from the wall outlet.
- Press the release button (8) and at the same time lift the arm by gently pulling it up.
- The container can now be removed.
- Remove the mixture from the container with a spatula.
- Cleaning is described in the "Cleaning" chapter.
Setting the speed and using the whisks. The maximum quantity of the mixture must not exceed 1.1 kg.
| Speed Use | Type of mixture | |
| 1-2 Dough hook | Dense mixtures (e.g. bread dough, pizza, yeast dough) | |
| 3-4 Mixing whisk | Medium dense mixtures (e.g. pancake mixture, rubbed dough, butter creams) | |
| 5 | Whisk | Light mixtures (e.g. cream, egg white, pudding) |
| Pulse | Whisk | Short-term whipping (e.g. whipped cream) |
NOTE:
Do not exceed the maximum continuous operating time (KB max), see the table of technical parameters. Leave the motor off for at least 20 minutes before using the appliance again.
Blender
IMPORTANT
DO NOT attempt to use this function while grinding or mixing.
- Do not connect the appliance to the mains until the blender container is in the correct position.
- Disconnect the blender from the mains before removing the blender container.
- Blended food in the container must not exceed 80^
- To avoid spillage, do not exceed 1.5 litres of liquid in the blender container.
- Warning: Never remove the lid from the blender container while blending.
- Do not use the blender for more than 2 minutes.
EN
concept
concept
Function
The blender can be used for both blending and mixing. It can be used for example for preparing soup, sauce, milkshake, baby food, blending vegetables, fruit, purée, etc. For easier operation, cut the food into small pieces before placing it in the container.
Blender instruction manual
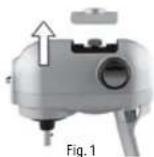
- Remove the back cover (Fig. 1).
- Place the food in the glass container.
- Place the lid on the glass container.
- Insert the measuring cup into the lid opening and turn it clockwise.
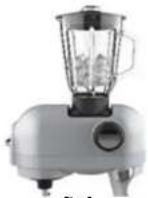
- Place the blender container on the appliance and turn it counter-clockwise (Fig. 2).
- Insert the plug into the wall outlet.
- Set the speed control button to the desired position S / P .
- Switch off the appliance and unplug it.
- Remove the measuring cup with the lid.
- Remove stuck food from the inside of the container with a soft spatula.
Keep the spatula away from the blades.
To remove the blender container, turn it clockwise.
To remove the measuring cup, turn it counter-clockwise.
TIPS
- Add food only when the appliance is switched off. If you remove the measuring cup from the lid, you can add food while the appliance is running.
- From time to time it is necessary to switch off the appliance and remove stuck food from the inside of the container.
Grinder
IMPORTANT
DO NOT attempt to use this function while blending or chopping.
- Cut boneless meat into pieces. Approximately to the size of 20 × 20 × 60 ~mm so as to be easily inserted in the opening of the container.
- Inserted food should not contain bones and other hard parts. Bones could cause the motor to stop. If the motor stops, stop the appliance immediately and unplug it. Remove the entire meal grinder assembly. If the motor stops automatically, eliminate the cause of the stop. After the motor has cooled down, it is possible to continue.
- Switch the appliance on by pressing the speed control button (4) to the speed 5.
- Place the food in the container exclusively using the stamper.
- After grinding is completed, turn the speed control button (4) to the "OFF" position and remove the plug from the wall outlet.
- Maximum grinding lime is 5 min. in continuous operation.
Assembly instructions for grinder
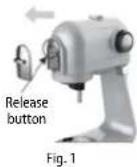
- Remove the front cover (Fig. 1).
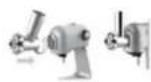
- Place and turn the grinder body counter-clockwise so that it clicks firmly into place (Fig. 2). Place the container on the grinder body.
- Place the meat container under the grinder.
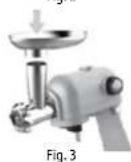
- Place the container on the grinder body (Fig. 3).
- Insert the plug into the wall outlet.
- Set the speed control button to position 5. Then place the food in the container
and push it into the container with the stamper.
- After use, switch off the appliance and unplugging it.
- Press the grinder release button (see Fig. 1). Turn the grinder clockwise and the entire grinder assembly (Fig. 4).
- Place back the front cover.
Stuffing sausages
- Insert the auger into the body of the grinder. Place the extruding disc and the sausage filling sleeve on the axis of the auger. Tighten the nut of the grinder by hand (Fig. 1).
- Fit and turn the grinder body counterclockwise so that the lock secures this part firmly.
- Fit the tray onto the grinder body.
- Tighten the casing at one end. Fit the free end onto the filling sleeve.
- Switch on the machine using the controller button (4). Select the speed as required.
- Insert the ground mixture into the inlet opening of the grinder and gradually fill the casing. Do not push the rammer with great force to avoid overloading the appliance.
- Be careful not to force air into the hopper when filling. The recommended length of each sausage is 10 - 15cm . Knot the individual sausages using string.
- At the end, you can squeeze the food residue out of the attachment by throwing in a few pieces of bread.
Filling of meatballs
- Insert the auger into the body of the grinder. Place the extruder disc and the meatball clamp on the axis of the auger. Tighten the grinder nut (Fig. 1).
- Fit and turn the girder body counterclockwise so that the lock secures this part firmly.
- Fit the tray onto the grinder body.
- Switch the machine on using the controller button (4). Select the speed as required.
- Feed the ground mixture into the inlet opening of the grinder. Do not p rammer with great force to avoid overloading the appliance.
- Shape the extruded mixture as required.
- At the end, you can squeeze the food residue out of the attachment by throwing in a few pieces of bread.
Preparing the candy
- Insert the auger into the body of the grinder. Place the extruder disc and the candy preparation sleeve on the axis of the auger. Tighten the nut of the grinder (FIG. 1).
- Fit and turn the grinder body counterclockwise so that the lock secures this part firmly.
- Fit the tray onto the grinder body.
- Slide the candy formers with different profile shapes into the nut..
- Switch on the machine using the controller button (4). Select the speed as required.
- Insert the dough into the inlet opening. Do not press the blower with great force to avoid overloading the appliance.
Note: It is recommended to hold the dough in the desired shape with your hand to prevent it from tearing.
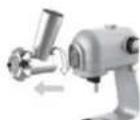
Fig.4
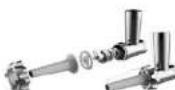
Fig.1
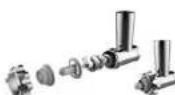
Fig. 1
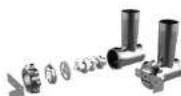
Fig.1
concept
concept
Grater
IMPORTANT
DO NOT attempt to use this function while grinding, blending or chopping.
- Cut the food into pieces. Approximately to the size of 20 × 20 × 60 mm so as to be easily inserted in the opening of the container. Inserted food should not contain hard parts. Hard parts could cause the motor to stop. If the motor stops, stop the appliance immediately and unplig it. Remove the entire grater assembly. If the motor stops automatically, eliminate the cause of the stop. After the motor has cooled down, it is possible to continue.
- Switch the appliance on by pressing the speed control button (4) to the speed 5.
- Place the food in the container exclusively using the stamper.
- After grinding is completed, turn the speed control button (4) to the "OFF" position and remove the plug from the wall outlet.
- Maximum grating time is 5 min. In continuous operation.
Assembly instructions for grater
- Remove the front cover (Fig. 1).
- Place and turn the grater body counter-clockwise so that it clicks firmly into place (Fig. 2).
- Place the grated food container under the grater.
- Insert the plug into the wall outlet.
- Set the speed control button to position 5. Then place the food in the container and push it into the container with the stamper.
After use, switch off the appliance and unplug it. - Press the greater release button (see Fig. 1). Turn the greater clockwise and remove the entire greater assembly (Fig. 3).
-
Place back the front cover.
-
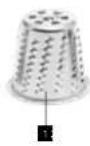
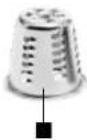
Fine vegetable grater
- Coarse vegetable grater
- Grater for thick slices
- Grater for thin slices
- Potato grater
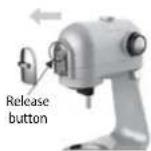
Fig.1
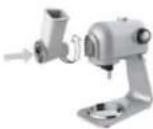
Fig.2
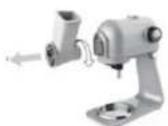
Fig. 3

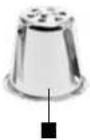
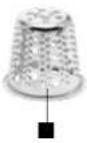
Attachment for pasta preparation
IMPORTANT
Do not attempt to use this function at the same time as mixing or stirring!
1.Prepare the pasta dough.
2. Recipe for basic dough: 200g plain flour, 2 eggs, 1 tbsp oil.
3. Switch on the machine using the speed control button (4).
4. Insert the dough slowly into the dough extender, holding the dough with your hands as it comes out.
5. When finished, turn the speed control knob (4) to the 'OFF' position and remove the plug from the socket.
Installation instructions for the pasta maker attachment
- Remove the front cover (Fig. 1).
- Fit and turn the attachment anti-clockwise so that the latch secures this part firmly (Fig.2).
- Insert the plug into the socket.
- Use the speed control (4) to select the speed that suits your work.
After use, switch off the appliance and disconnect it from the mains. - Press the attachment release button (see Fig. 1). Turn the attachment clockwise and remove the attachment.
- Replace the front cover.
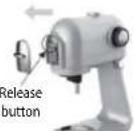
Fig.1
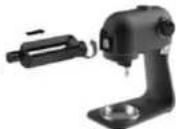
Fig. 2
EN
concept
concept
DE
CLEANING AND MAINTENANCE
- Unplug the power cord from the wall outlet before cleaning.
- Never immerse the base of the blender with a motor into the water!
- Do not use any sharp or abrasive cleaners.
Only a damp cloth should be used to clean the outside of the cover.
Container and accessories
NOTICE
The whisks and the container can be washed in the dishwasher.
- Other parts are not suitable for washing in a dishwasher.
- The pasta attachments cannot be washed in the dishwasher or immersed in water. Keep them dry. Allow the dough residue to dry, then clean with a dry cloth.
The parts that come into contact with food can be washed in soapy water.
Before reassembling, let all the parts dry thoroughly.
After drying, apply a small amount of vegetable oil to the surface of the container and the replaceable adapters of the grinder.
SERVICE CENTRE
Extensive maintenance or repair, which requires access to internal parts of the product, has to be performed by a qualified service centre.
ENVIRONMENTAL CONCERNS
- Packaging materials and old appliances should be recycled.
- Packaging materials may be disposed of as sorted waste.
- Dispose the plastic bags made of polyethylene (PE) of as sorted waste.
Recycling of the appliance at the end of its lifespan

This appliance is labelled in accordance with the European Directive 2012/19/EU on waste electrical equipment (WEEE). The symbol on the product or on its packaging indicates that this product may not be treated as household waste. It is necessary to take it to a container park for the recycling of electrical and electronic equipment. By ensuring this product is disposed of correctly, you will help prevent potential negative consequences for the environment and human health, which could otherwise be caused by inappropriate waste handling of this product. For more detailed information about recycling of this product, please contact your local council, your household waste disposal service or the shop where you purchased the appliance.

The product meets all the necessary requirements of the EU directives applicable to the specific product.
Changes in text, design, and technical specifications are subject to change without notice and we reserve the right to change them.
Danksagung
- IMPORTANT SAFETY PRECAUTIONS
- concept
- PRODUCT DESCRIPTION
- OPERATING INSTRUCTIONS
- IMPORTANT
- NOTE:
- Blender
- EN
- Function
- Blender instruction manual
- TIPS
- Grinder
- Assembly instructions for grinder
- Stuffing sausages
- Filling of meatballs
- Preparing the candy
- Grater
- Assembly instructions for grater
- Attachment for pasta preparation
- Installation instructions for the pasta maker attachment
- CLEANING AND MAINTENANCE
- Container and accessories
- NOTICE
- SERVICE CENTRE
- ENVIRONMENTAL CONCERNS
- Recycling of the appliance at the end of its lifespan
- Danksagung
Brand : Concept
Model : RM8000
Category : Food Processor