the Combi Wave 3 in 1 BMO870 - Microwave Oven SAGE - Free user manual and instructions
Find the device manual for free the Combi Wave 3 in 1 BMO870 SAGE in PDF.

| Product type | 3-in-1 Combination Microwave Oven |
| Brand | Sage |
| Model | the Combi Wave 3 in 1 BMO870 |
| Capacity | 32 liters |
| Microwave power (output) | 1100 W - 2450 MHz |
| Microwave power (input) | 1300 W |
| Oven power | 1700 - 2100 W |
| Grill power | 880 - 1100 W |
| Voltage / Frequency | 220-240 V ~ 50 Hz |
| External dimensions (H x W x D) | 31.6 x 51.9 x 51.3 cm (with handle) |
| Net weight | Approximately 15.4 kg |
| Turntable diameter | 31.5 cm |
| Cavity material | Stainless steel |
| Display | LCD screen |
| Cooking functions | Quick Combi, Air Fry, Oven, Microwave, Grill, Smart Cook, Smart Reheat, Smart Defrost |
| Included accessories | Combi Crisp plate, wire rack, glass turntable, guide ring |
| Child safety | Yes, control panel lock |
| Turntable stop | Yes, via dedicated button |
| Cleaning the Combi Crisp plate | Dishwasher safe (top rack) or hand wash with soapy water |
| Warranty | 2-year limited (domestic use) |
| Use | Domestic only |
Frequently Asked Questions - the Combi Wave 3 in 1 BMO870 SAGE
User questions about the Combi Wave 3 in 1 BMO870 SAGE
0 question about this device. Answer the ones you know or ask your own.
Ask a new question about this device
Download the instructions for your Microwave Oven in PDF format for free! Find your manual the Combi Wave 3 in 1 BMO870 - SAGE and take your electronic device back in hand. On this page are published all the documents necessary for the use of your device. the Combi Wave 3 in 1 BMO870 by SAGE.
USER MANUAL the Combi Wave 3 in 1 BMO870 SAGE
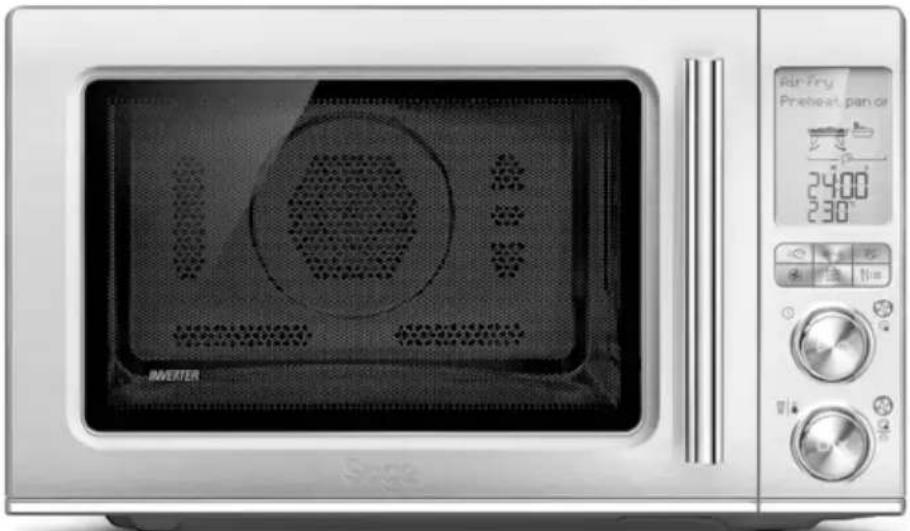
the Combi Wave ^TM 3 in 1
natural_image
Front view of a modern microwave oven with digital display and control knobs (no visible text or symbols on main body)ENUSER GUIDE
FRGUIDE UTILISATEUR
ITMANUALE UTENTE
PTMANUAL DO UTILIZADOR
DEHANDBUCH
NLHANDLEIDING
ESGUÍA DEL USUARIO
PLINSTRUKCJA OBSŁUGI

Contents
2 Sage Recommends Safety First
13 Components
14 Buttons and Dials
15 Assembly
17 Functions
25 Cooking Functions
- FAST COMBI 25
- COOK FROM FROZEN 25
- AIR FRY 26
- OVEN 27
- MICROWAVE 27
- GRILL 28
- SMART COOK 28
- SMART REHEAT 33
- SMART DEFROST 34
37 Hints & Tips
38 Care & Cleaning
39 Troubleshooting
40 Guarantee
SAGE RECOMMENDS SAFETY FIRST
At Sage we are very safety conscious. We design and manufacture consumer products with the safety of you, our valued customer, foremost in mind. In addition, we ask that you exercise a degree of care when using any electrical appliance and adhere to the following precautions.
IMPORTANT SAFETY INSTRUCTIONS
When using electrical appliances basic safety precautions should be followed, including the following:

WARNING
• To reduce the risk of burns, explosion, electric shock, or to prevent damage to property, personal injury, or loss of life, or exposure to excessive microwave energy:
READ ALL INSTRUCTIONS BEFORE USE AND SAVE FOR FUTURE REFERENCE
• A downloadable version of this document is also available at sageappliances.com
- Do not remove the microwave guide cover placed on the right panel inside the cavity. This sheet is not part of the packaging and needs to remain inside the microwave cavity. Please refer to the SMO870 Components on page 13.
- Remove and safely discard any packaging material and promotional labels before using the Sage microwave oven for the first time.
- Read and follow the specific "PRECAUTIONS TO AVOID POSSIBLE EXPOSURE TO EXCESSIVE MICROWAVE ENERGY" found on page 10.
- This appliance must be grounded. Connect only to properly grounded outlet. See “GROUNDING INSTRUCTIONS” found on page 12.
- Microwave oven is not intended to be mounted below a height of 916mm above the floor level.
- The outer housing of the oven may be hot during and after cooking. Please do not touch hot surfaces. Always keep the power cord of this oven, and those of other appliances near the oven, clear from the oven housing.
- The oven is not suitable to be used in a small appliance enclosure. Ensure to leave adequate space all around the oven. Minimum space of 20 cm (8 inches) is recommended.
• Install and locate this appliance only in accordance with the supplied installation instructions on page 14.
- This appliance can be used by children aged from 8 years and above and persons with reduced physical, sensory or mental capabilities or lack of experience and knowledge if they have been given supervision or instruction concerning use of the appliance in a safe way and understand the hazards involved.
• Children shall not play with the appliance.
- Cleaning and user maintenance shall not be made by children unless they are older than 8 and supervised.
- Keep the appliance and its cord out of reach of children less than 8 years.
- Some products such as whole eggs and sealed containers (for example, closed glass jars), have the potential to explode and should not be heated in this oven.
- Use this appliance only for its intended use as described in the manual. Do not use corrosive chemicals or vapours in this appliance. This type of oven is specifically designed to heat, cook, or dry food. It is not designed for industrial or laboratory use.

WARNING
- As with any appliance, close supervision is required when used by children.
- Regularly inspect the power cord. Do not operate this appliance if it has a damaged cord or plug, when it is not working properly, or when it has been damaged or dropped. Immediately stop using the appliance and contact Sage Consumer Support.
- The supply cord cannot be replaced. If the cord is damaged the appliance should be scrapped.
- This appliance shall be serviced only by qualified personnel. Contact Sage Consumer Support or the nearest Sage Authorized Servicer for examination, repair or adjustment.
- Do not cover or block any openings on the appliance.
- Do not store this appliance outdoors.
- Do not use this product near water, for example, near a kitchen sink, in a wet basement, near a swimming pool, or similar location.
- Do not immerse cord or plug in water.
- Keep cord away from heated surfaces.
- Do not let cord hang over edge of table or counter, touch hot surfaces or become knotted.
• To reduce the risk of fire in the oven cavity:
i) Do not overcook food. Carefully attend appliance when paper, plastic, or other combustible materials are placed inside the oven to facilitate cooking.
ii) Remove wire twist-ties from paper or plastic bags before placing bag in oven.
iii) In the event materials inside the oven ignite, keep oven door closed, turn oven off, and disconnect the power cord, or shut off power at the fuse or circuit breaker panel.
iv) Do not use the cavity for storage purpose. Do not leave paper products, cooking utensils, or food in the cavity when not in use.
• Always operate the microwave oven on a heat-resistant surface. Do not use on a cloth-covered surface, near curtains or other flammable materials.
- Do not use the oven without the turntable roller and glass turntable in place. Ensure the glass turntable is positioned correctly into the indents on the turntable roller.
- Never use the microwave only setting without food or water
in the oven cavity. Operating the microwave oven when empty could cause damage to the appliance. The microwave oven can only be operated when empty if in preheat mode, the LCD screen will display when the microwave oven is preheating. Do not leave the microwave oven unattended when in use.
- Do not touch hot surfaces. Allow the microwave oven to cool entirely before moving or cleaning any parts.
• Always press the STOP/CLEAR button and return to the default screen prior to unplugging the unit from the wall outlet before:
-The appliance is to be left unattended.
-If not in use.
-Before moving or assembly.
-When storing the appliance.
-Cleaning (see page 33).
- Keep the appliance clean. Follow the cleaning instructions provided in this book.
- Do not operate this appliance when it has a damaged cord or plug, when it is not working properly, or when it has been damaged or dropped.
- When cleaning surfaces of door and oven that come together on closing the door,
use only mild, non-abrasive soaps, or detergents applied with a sponge or soft cloth. The use of corrosive chemicals in cleaning will damage the appliance and may result in radiation leaks.
• The appliance shall not be cleaned with a steam cleaner.
- Do not place the microwave oven near the edge of a bench or table during operation. Ensure all surfaces are level, clean and free of water or any other substances.
- Do not place the microwave oven on or near a hot gas or electric burner, or where it could touch a heated oven.
- When using the microwave oven, provide adequate air space above and on all sides for air circulation (see page 14, Installation point 2).
- Microwave oven is to be used as free-standing unit. Do not build in or enclose microwave oven in a cabinet or confined space as it will cause overheating. (Refer to Installation section on page 14).
- Do not use the microwave oven on a metal surface, for example a sink drain board.
- The microwave oven is not intended to be operated by means of external timer or separate remote-control system.
- Liquids, such as water, coffee or tea can be overheated beyond the boiling point without appearing to be boiling. Visible bubbling or boiling when the container is removed from the microwave oven is not always present. THIS COULD RESULT IN VERY HOT LIQUIDS SUDDENLY BOILING OVER WHEN THE COTAINER IS DISTURBED OR A USTENSIL IS INSERTED INTO THE LIQUID.
IMPORTANT SAFEGUARDS FOR ALL ELECTRICAL APPLIANCES
- This appliance is for household use only. Do not use the appliance for anything other than its intended purposes as described in this manual. Do not use outdoors. Do not use in moving vehicles, boats or planes.
- Fully unwind the power cord before use.
• We recommend a separate circuit dedicated to serving only this microwave oven. - A short power cord is supplied to reduce the risks resulting from becoming entangled in or tripping over a longer cord.
• To protect against electric shock do not immerse the power cord, power plug or appliance in water or any other liquid.
- Do not disconnect or tamper with the power cord or the power outlet while the unit is operating.
- When storing the microwave oven, loosely wind the cord. Do not wrap the cord around the microwave oven.
- The glass window has been specially treated to make it stronger, more durable and safer than ordinary glass, however it is not unbreakable. If dropped or struck extremely hard, it may break or weaken, and could later shatter into many small pieces without apparent cause.
- Regularly inspect the power cord and actual appliance for any damage. Do not operate if damaged in any way, or if it is not working properly, or if it has been dropped. Immediately stop using the appliance, unplug or disconnect power and call Sage Consumer Support.
- For any maintenance other than cleaning, contact Sage Consumer Support.
- Position the appliance at a minimum distance 20cm (8 inches) away from side walls and 20cm from top, curtains and other heat or steam sensitive
materials and provide adequate space above and on all sides for air circulation.
- Do not disconnect the microwave oven from the power supply by pulling on the cord.
- The installation of a residual current device (safety switch) is recommended to provide additional safety protection when using electrical appliances. It is advisable that a safety switch with a rated residual operating current not exceeding 30mA be installed in the electrical circuit supplying the appliance. See your electrician for professional advice.
• The appliance must be used on a properly grounded outlet. If you are not sure if the power outlets are properly grounded, please consult your electrician. - Do not, under any circumstances, modify the power plug or use an adapter.
SPECIAL SAFETY INSTRUCTIONS FOR YOUR MICROWAVE OVEN
- The microwave oven is intended for heating food and beverages. Drying of food or clothing and heating of warming pads, slippers, sponges, damp cloths and similar may lead to risk of injury, ignition or fire.
- Ensure all food containers and/or plates are suitable for use in the microwave oven. This should be done prior to preparing food for heating or cooking in the microwave oven. Monitor foods and liquids heating or cooking in the microwave oven at all times due to the possibility of containers igniting.
- All suitable glass or plastic food containers should be used in strict compliance with the cookware manufacturer's recommendations.
- Food and/or liquids should not be heated or cooked directly on the glass turntable. They must be placed into a suitable microwave-proof container before placing onto the glass turntable.
- Food and/or liquids should not be heated or cooked in plastic or paper containers or bags, unless specified as suitable for use by the manufacturer, due to the possibility of containers exploding or igniting.
- Metal clips or twist ties should be removed from the packaging as these could cause sparking and/or fire.
- Do not use recycled paper or paper towels when cooking. Recycled paper may
contain small metal or other impurities which could cause sparking and/or fire.
- Do not use metal containers or utensils in the microwave oven as these could cause sparking and/or fire except the accessories provided with this microwave oven.
- Food grade foil should not be used in the microwave oven as this could cause sparking and/or fire.
- Ensure that lids and caps covering containers are removed prior to placing liquids and/or foods into the microwave oven.
- Feeding bottles and baby food jars should have lids and caps removed before warming or heating in the microwave oven. To avoid burns or scalding after heating, the contents should be stirred or shaken, and the temperature checked before serving.
• Always ensure the temperature of food or drink which has been heated or cooked in the microwave oven has been tested before eating, drinking or serving.
• Some containers and/or plates may appear suitable for use in the microwave oven but may be coated in a glaze that
will absorb the microwave energy, overheat and cause the container to crack. The glaze may also prevent the food from heating/cooking.
- Utensils should be checked to ensure that they are suitable for use in microwave ovens.
- Allow proper cool down time for heated food or drink before handling or serving from the microwave oven. Always test before eating, drinking or serving to others, especially children, disabled or elderly.
- If cooking meat, poultry or fish, always make sure they are cooked thoroughly and measured with an appropriate temperature registering device to help protect against foodborne illness.
- Do not heat popcorn in the microwave oven unless it has been commercially packaged for microwave oven use. There may be several un-popped kernels that may overcook and burn when popping popcorn.
- Do not cook any food surrounded by a membrane (such as potatoes, chicken liver, egg yolks, oysters, etc) without first piercing the membrane several times with a fork or similar utensil.
- “Boilable” cooking pouches, bags or containers should always be slit, pierced or vented as directed by the package. If they are not, plastic or packaging could burst resulting in burns and injury.
• Always allow items to cool down before opening or handling. Use caution when opening or handling. - Use caution when opening bags, pouches, lids or containers as hot steam, food or liquid can escape causing burns or injury.
- Eggs in the shell and whole hard-boiled eggs should not be cooked or heated in the microwave oven as they may explode during cooking, at the end of cooking or after removing from microwave oven.
- Caution should be taken when toasting and grilling high oil content foods, such as pine nuts and walnuts. They may catch fire. If this occurs, please keep the oven door closed and switch off and unplug oven until flame has extinguished.
-
Do not heat oil or fat in the microwave oven. Doing so may cause the microwave oven and/or the oil to overheat and/or ignite.
-
If smoke is observed, switch off and unplug the microwave oven at the power outlet. Keep the door closed to stifle any flames.
- If you see any sparks, arcing or flashing within the microwave oven, press the STOP/CLEAR button and correct the problem or contact Sage Consumer Support for assistance.
- Wipe the oven cavity with a soft, damp cloth after each use. Leaving food residue, grease or fat in the cavity could cause the microwave oven cavity to overheat and may cause the microwave oven to smoke or catch fire.
- Allow glass turntable to cool down to room temperature before washing or placing in cold water.
- The microwave oven should be cleaned regularly and any food splattering inside the cavity should be removed. Failure to maintain the microwave oven in a clean condition could lead to deterioration of the surface, adversely affecting the life of the microwave oven and possibly resulting in a hazardous situation.
- Do no attempt to operate the microwave oven by any method other than those described in this instruction book.
- When heating food in plastic or paper containers, keep an eye on the oven due to the possibility of ignition.

WARNING
- Liquids and other foods must not be heated in sealed containers since they are liable to explode.
COMBINATION MICROWAVE OVENS
- Oversized food or oversized metal utensils should not be inserted in a microwave oven as they may create fire or risk of electric shock.
- Do not store any materials, other than manufacturer's recommended accessories, in this microwave oven when not in use.
- Do not cover racks or any other part of the oven with metal foil. This will cause overheating of the microwave oven.
- Do not clean with metal scouring pads. Pieces can burn off the pad and touch electrical parts involving a risk of electric shock.
- Do not use paper products when appliance is operated in combination mode.
PRECAUTIONS TO AVOID POSSIBLE EXPOSURE TO EXCESSIVE MICROWAVE ENERGY
- Do not attempt to operate this oven with the door open since open-door operation can result in harmful exposure to microwave energy. It is important not to defeat or tamper with the safety interlocks.
- Do not place any object between the oven front face and the door or allow soil or cleaner residue to accumulate on sealing surfaces.

WARNING
- If the door or door seals are damaged, the oven must not be operated. Immediately cease use and call Sage Consumer Support for examination, repair or adjustment. It is particularly important that the oven door close properly and that there is no damage to the:
Door (bent), (2) Hinges and latches (broken or loosened), (3) Door seals and sealing surfaces.
- Do not put any foreign material between the door and door jamb of the microwave oven

WARNING
- It is hazardous for anyone other than a qualified service technician to carry out any service or repair operation.
SUPERHEATED LIQUIDS
To reduce this risk of injury to persons:
- Liquids, such as water, coffee or tea can become heated above their boiling points without the appearance of boiling or bubbling. THIS COULD RESULT IN VERY HOT LIQUIDS SUDDENLY BOILING OVER WHEN THE CONTAINER OR LIQUID SURFACE IS DISTURBED OR WHEN A SPOON OR UTENSIL IS INSERTED INTO THE LIQUID.
- Do not overheat the liquid.
- Stir the liquid both before and halfway through heating it.
- Do not use straight-sided containers with narrow necks.
• After heating, allow the container to stand in the microwave oven for a short time before removing the container. Use extreme care when inserting a spoon or other utensil into the container. - The heating of beverages in the microwave can boil over. Care should always be taken when handling beverages.

CAUTION
Changes or modifications not expressly approved by the party responsible for compliance could void the user's authority to operate the product.

NOTE
This equipment generates, uses and can radiate radio frequency energy and, if not installed and used in accordance with the instructions, may cause harmful interference to radio communications. However, there is no guarantee that interference will not occur in a particular installation. If this equipment does cause harmful interference to radio or television reception, which can be determined by turning the equipment off and on, the user is encouraged to try to correct the interference by one or more of the following measures:
- Reorient or relocate the receiving antenna. Increase the separation between the equipment and receiver.
- Connect the equipment into an outlet on a circuit different from that to which the receiver is connected.
- Consult the dealer or an experienced radio/TV technician for help.
GROUNDING INSTRUCTIONS

WARNING
Improper use of the grounding can result in a risk of electric shock.
- This appliance must be grounded. In the event of an electrical short circuit, grounding reduces the risk of electric shock by providing an escape wire for the electric current. This appliance is equipped with a cord having a grounding wire and grounding plug. The plug must be plugged into an outlet that is properly installed and grounded.
- Consult a qualified electrician if the grounding instructions are not completely understood, or if doubt exists as to whether the appliance is properly grounded.
- Do not use an extension cord. If the power supply cord is too short, have a qualified electrician or serviceman install an outlet near the appliance.
SPECIFICATIONS
| Power Consumption | 220-240V 50Hz Microwave Input Power: 1300W Oven Input Power: 1700-2100W Grill Input Power: 880-1100W |
| Microwave Output | 1100W - 2450 MHz |
| Outside Dimensions | 31.6cm / 12.5 inches (H) 51.9cm / 20.4 inches (W) 51.3cm / 20.2 inches (D) with handle 49.0cm / 19.3 inches (D) without handle |
| Glass Turntable Diameter | 31.5cm / 12.4 inches |
| Net Weight | Approx. 15.4kg |
| Oven Capacity | 32 Litres |
These specifications may change without notice.
FOR HOUSEHOLD USE ONLY SAVE THESE INSTRUCTIONS

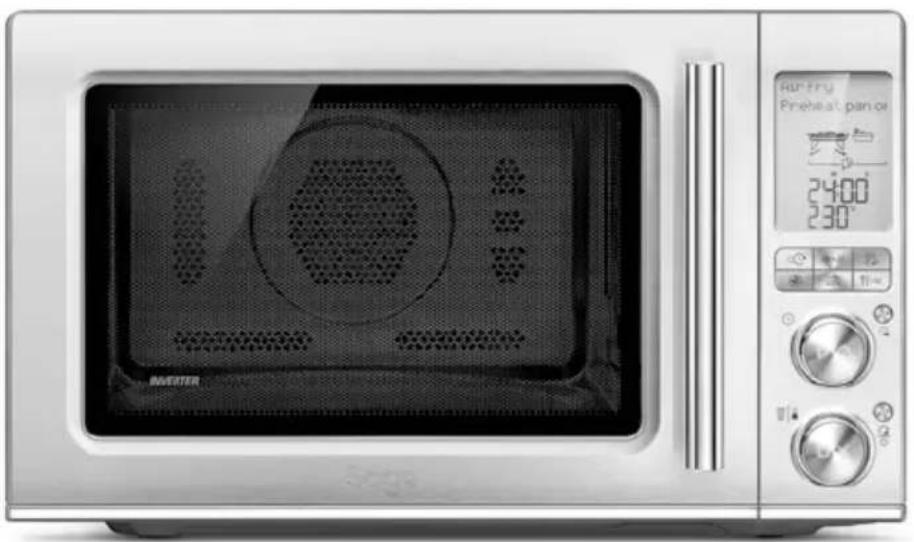
Components
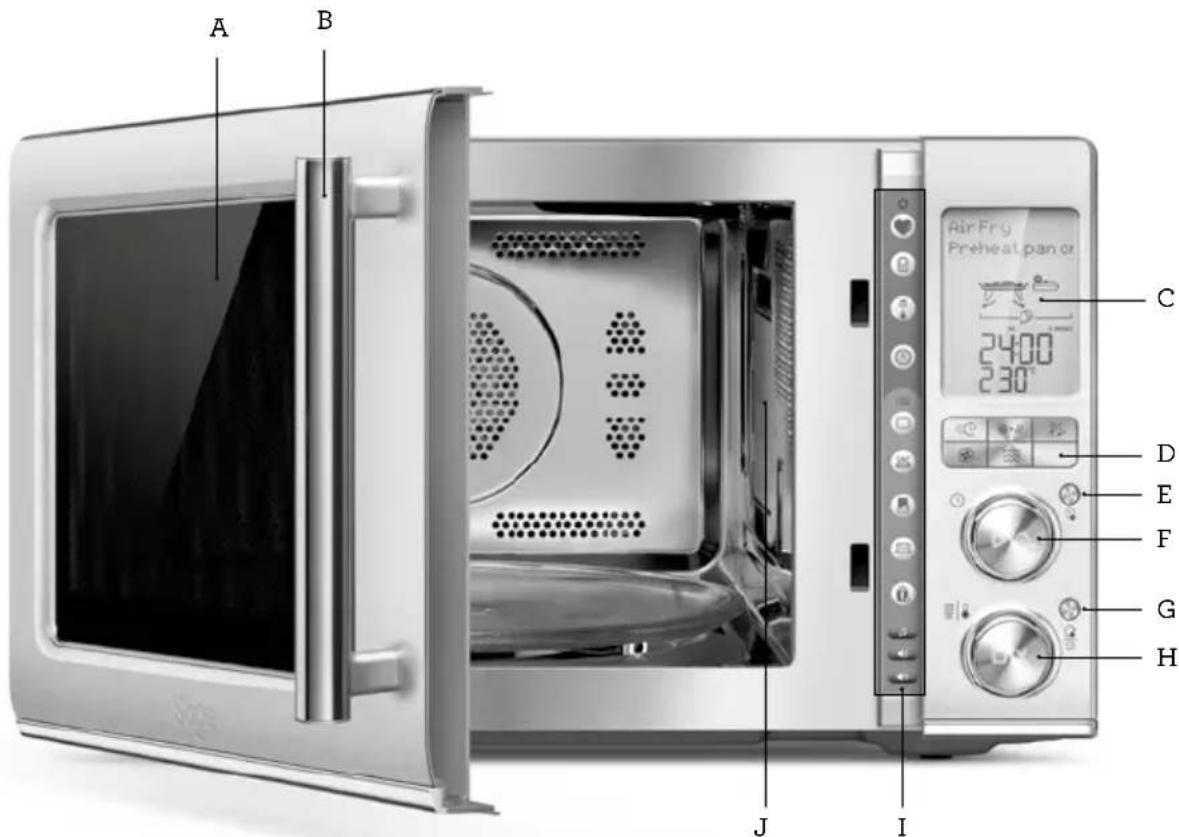
A. Viewing window
B. Door handle: Pull handle to open.
C. LCD screen
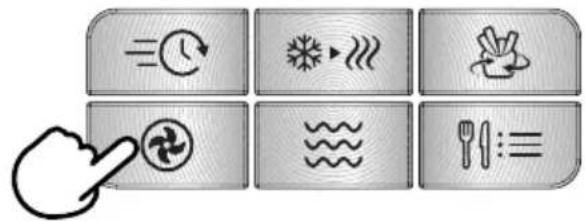
D. Function buttons: FAST COMBI, FROM FROZEN, AIR FRY, OVEN, MICROWAVE, FOOD MENU
E. A BIT MORE™
F. START/ Instant +30 button TIME / Select dial Each press adds 30 second increments at 100% power
CE UK CA
Rating Information
220–240V \~ 50Hz
MICROWAVE: 1300 W
OVEN: 1700–2100 W
GRILL: 880–1100 W
G. TURNTABLE OFF/LANGUAGE button Press once to stop the turntable from rotating during cooking. Press again to reactivate the turntable. Long press button for 3 seconds to change language settings.
H. ADJUST dial & STOP / CLEAR button Turn dial to adjust the power level, weight and quantity that corresponds with the food type selected. Press once to pause without cancelling the program. Press twice (or more if necessary) to clear the display.
I. Shortcuts panel Refer to functions section of this manual for detailed explanation.
J. Microwave Guide Cover Do not remove to ensure a safe operation.

Buttons and Dials
 | Start / Instant +30 Favourite |  | |
 | Stop / Clear |  | Child Lock |
 | Fast Combi Units (Metric / Imperial) |  | |
 | Cook From Frozen Set Clock (on shortcuts p | [1723] | |
| [5YHZ] | Air Fry Quick Start Menu |  | |
 | Oven Grill |  | |
 | Microwave Keep Warm |  | |
 | Food Menu Melt Chocolate | [1420] | |
 | Turntable Off / Language Selection Soften F  | ||
| [50WG] | A Bit MoreTM Popcorn | [8646] | |
 | Time Dial |  | Sound Shortcuts:Sound - select different sound suitesBeep Volume - adjust volumeMute - turn off all sounds |
| [C2DO] | |||
 | Adjust (Power / Temperature) Dial | [TKEW] |
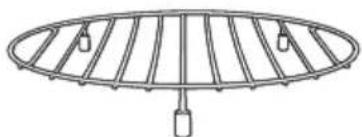
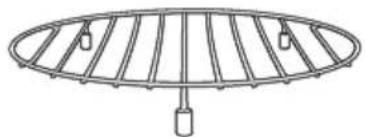
Included accessories:
- Combi Crisp™ Pan
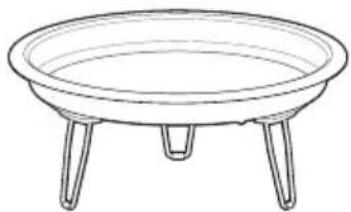
natural_image
Line drawing of a round empty bowl with three legs (no text or symbols)- Trivet

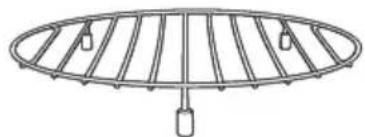
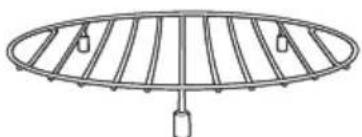
natural_image
Simple line drawing of a circular metal grate with two vertical bars and a central handle (no text or symbols)
Assembly
BEFORE FIRST USE
Before first use remove all promotional stickers and packaging material. Carefully unpack the microwave oven and keep all the packing material until all the parts of the microwave oven have been found and the appliance has been assembled. It is recommended to keep all the packing material in a safe place in case you wish to repack the product for shipping purposes.
To remove any dust that may have accumulated during packing, wash the turntable roller and glass turntable in warm soapy water, rinse in clean water then dry thoroughly. Wipe the interior and exterior of the microwave oven with a soft, damp cloth then dry thoroughly.
ASSEMBLING THE GLASS TURNTABLE
- Insert the turntable roller into position in the intended space in the oven cavity base.
- Place the glass turntable on top of the turntable roller, matching the indents of turntable roller at the centre area.
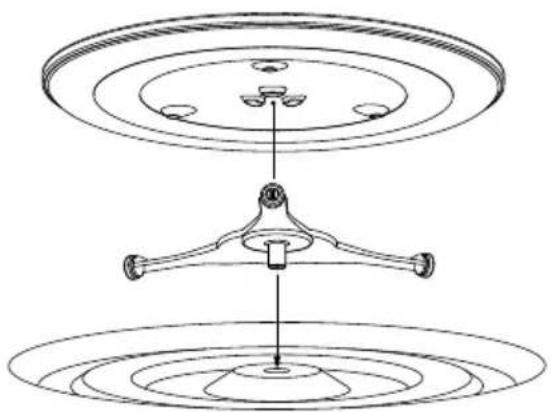
natural_image
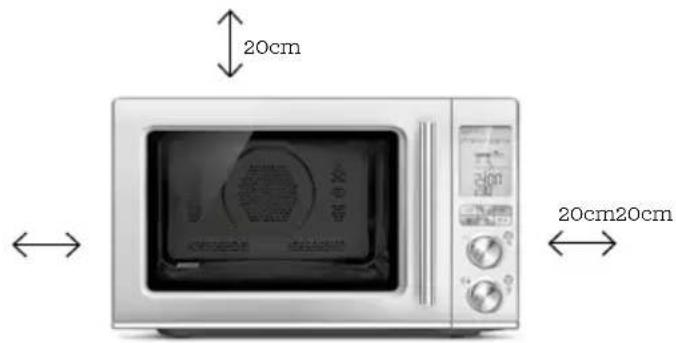
Technical line drawing of a mechanical assembly with concentric circular components and a central shaft (no text or symbols)- Select a level surface that provides enough open space for the intake and/or outlet vents.
- A minimum clearance of 20cm is required between the microwave and any adjacent walls.
- Leave a minimum clearance of 20cm above the microwave.
- Do not remove the legs from the bottom of the microwave.
- Blocking the intake and/or outlet openings can damage the microwave.
- Place the microwave as far away from radios and TV as possible.
• Operation of microwave may cause interference to your radio or TV reception. - Plug your microwave into a standard household outlet. Be sure the voltage and the frequency are the same as the voltage and the frequency on the rating label.
- The microwave must not be placed in a cabinet.

WARNING
- To avoid an electrical circuit overload, it is recommended that no other appliances are plugged into the same circuit as your microwave oven (or other products) when it is in use.
- Do not install oven over a range cooktop or other heat-producing appliances. If installed near or over a heat source, the oven could be damaged, and the warranty would be void.
- Check the oven for any damage, such a misaligned or bent door, sealing surface, broken or loose door hinges and latches and dents inside the cavity or on the door. If there is any damage, do not operate the oven and contact a Sage service centre.
- Do not immerse the microwave oven, power cord or plug in water or any other liquid.
USING THE COMBI CRISP PAN
- The Combi Crisp pan is ideal for crisping up items that can become soggy in the microwave, such as pizza, chicken nuggets and fries. The Combi Crisp Pan can be used in either the High or Low position (pan legs unfolded or folded) depending on the size of the food or how much browning is desired. To reduce the risk of injury or causing damage to the microwave oven, always place the Combi Crisp Pan securely in the centre of the turntable.
- Do not place plates or dishes of any kind on the Combi Crisp pan as they may overheat and become damaged.

CAUTION
The combi crisp pan and trivet are safe to use in microwave mode. But note that trivet and crisp pan cannot be used at the same time and never on top of the other.

NOTE
Best to use the trivet in convection oven mode. (e.g. for roasting)

NOTE
The non-slip silicone feet on the trivet are designed to help keep it steady and should NOT be removed.
The silicone on the Combi Crisp pan legs and trivets are safe in microwave mode to use.
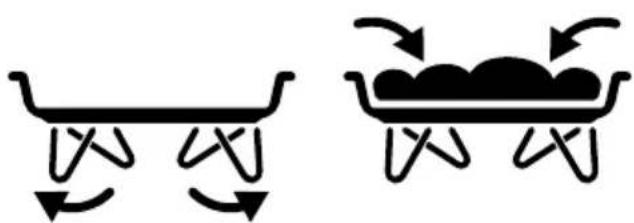
- When the use of the Combi Crisp pan is required for the selected cooking function, the pan icon will appear; or an animation showing pan legs will display on the screen.


natural_image
Two black line drawings: a curved bracket and a bowl with arrows, both without any text or symbols.Use Pan display
natural_image
Two black-and-white diagrams showing a table with arrows indicating rotation and a basket with arrows indicating movement (no text or symbols)Animation showing when pan legs should be set in the unfolded position

CAUTION
The Combi Crisp pan surfaces and legs are hot during and after operation. This accessory is only to be used with the SMO870.

Functions
SETTING THE DISPLAY LANGUAGE
The default language is English, however the Combi Wave 3-in-1 appliance, is programmed with 20 different European languages. The first time the appliance is plugged into the power outlet, or after an interruption in power, the unit will enter to “SELECT LANGUAGE MODE”.

NOTE
To choose the language at any other time, press and hold the "Turntable off" button for 3 seconds.
- Use any of the dials to navigate the menu.
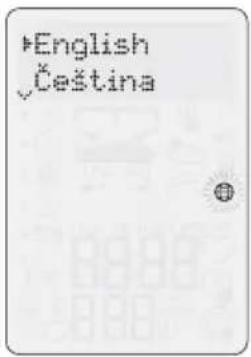
- Press Start button to select language of choice
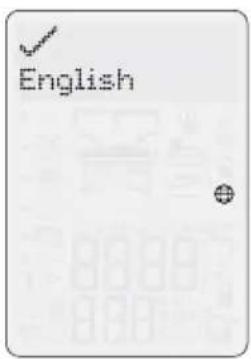
- Language selected is saved to the unit even if unit is powered off.
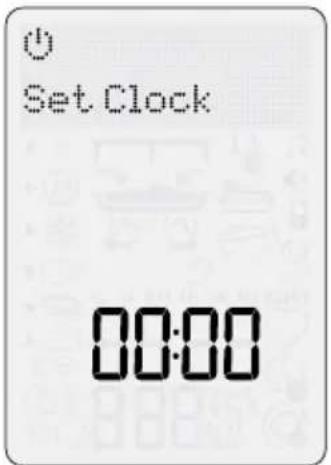
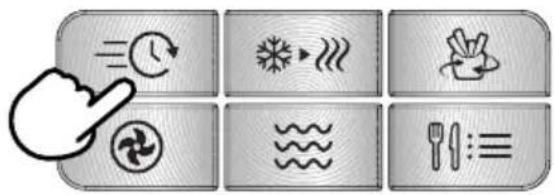
SETTING THE CLOCK - 12- OR 24-HOUR CLOCK DISPLAY
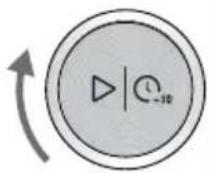
To set the time, press the SET CLOCK button ⏻ on the shortcuts panel. The clock can be set as 12- or 24 -hour clock display. The '12' will flash on display; to select a 12-hour clock, press START button ▷ | C _10 to confirm selection.
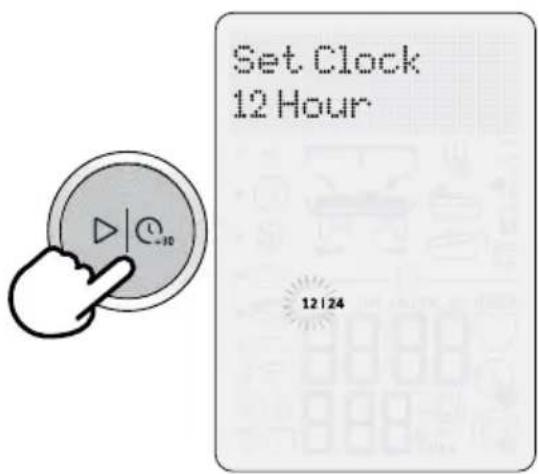
To select a 24-hour clock display, turn the TIME dial clockwise. The number '24' will flash. Press the START button to confirm selection.
The default time is 12:00. The highlighted digits will flash to show it can be adjusted.
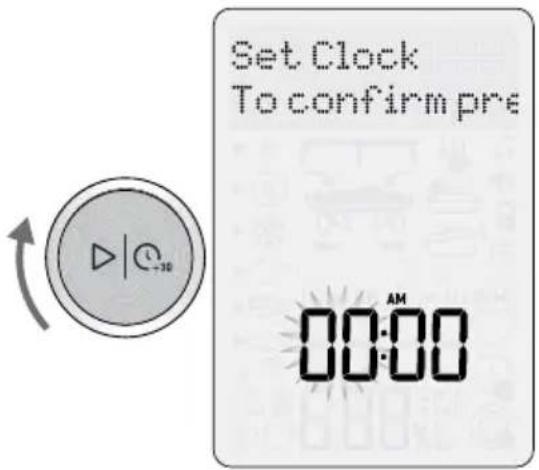
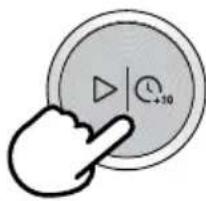
Turn TIME dial to adjust hours and press START button to confirm.

natural_image
Hand icon pointing at a circular button with play symbol and +10 speed control (no text or numbers)
Minutes now flash to show they can be adjusted. Turn TIME dial to adjust minutes and press START button to confirm.
natural_image
Hand icon pointing at a circular button with play symbol and +10 speed slider (no text or numbers)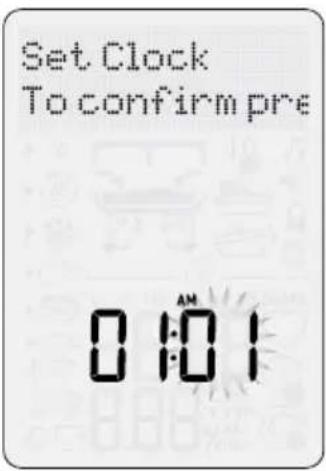
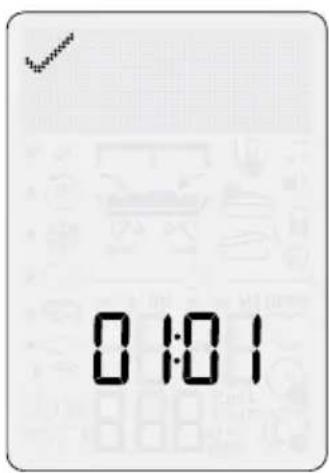

NOTE
If you forget to press START button to confirm hours or minutes, after 1 minute, the microwave will automatically cancel your selection.
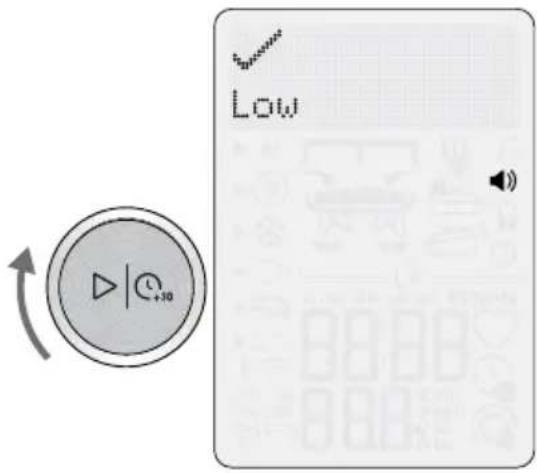
SETTING THE BEEP VOLUME

This allows you to choose the beep volume of your microwave oven.
Press the BEEP VOLUME button The default beep volume is set to LOW
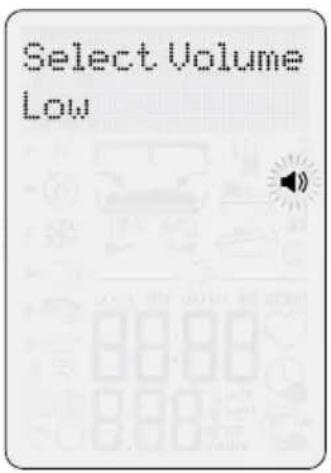
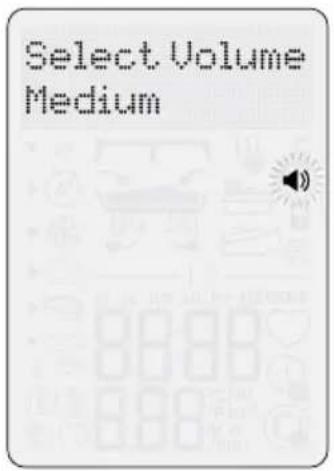
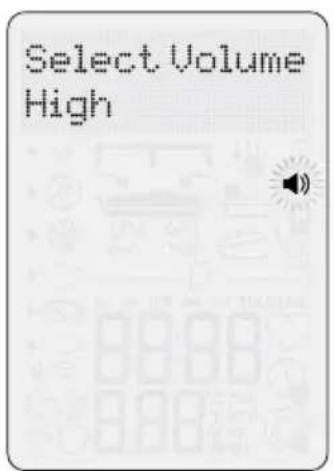
Turn the TIME dial to toggle between LOW, MEDIUM and HIGH volume. Each selection will sound the beep volume selected.

NOTE
If you forget to press the START button to confirm beep volume after 1 minute, the microwave will automatically confirm your selection.
SOUND

This program allows you to choose between the new or the traditional sound suite when using the microwave oven.
By default, the microwave oven will play the new Sage designated sound profile. If you wish to change, follow the below instructions:
Open door and press SOUND button on shortcuts panel.

Turn the TIME dial to switch between the sound selections. Press START▷|C, to confirm your selection or press STOP□|× to cancel your selection.
MUTE

This program allows you to mute the sound of the microwave oven.
When the MUTE program is selected, no tone will sound.
Open door and press the MUTE button on shortcuts panel. Press the START button to confirm. To cancel, press the MUTE button and then press the START button.
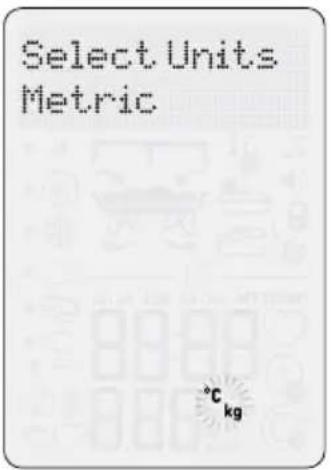
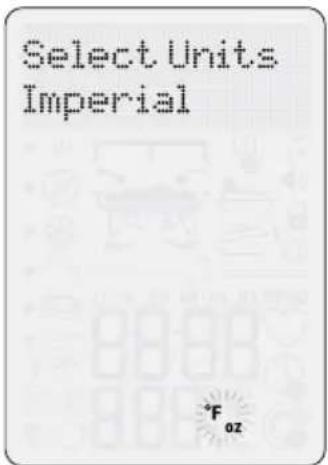
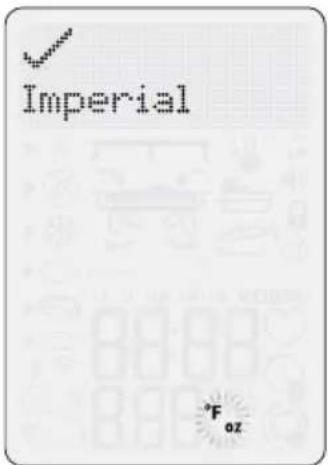
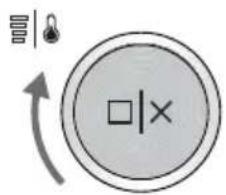
SETTING THE UNIT MEASURE
Press UNITS on shortcuts panel—Change from kilograms (kg) to ounces (oz) and from Celsius (°C) to Fahrenheit (°F). The default UNITS are Celsius (°C) and kilograms (kg). The highlighted °C and kg will flash to show it can be adjusted. Turn the ADJUST dial to toggle between Metric and Imperial units and press the dial to confirm selection.

SETTING CHILD LOCK
This setting is to lock the interface to prevent children from using the microwave oven.
Press CHILD LOCK button on shortcuts panel.
The CHILD LOCK symbol will be displayed on the LCD screen

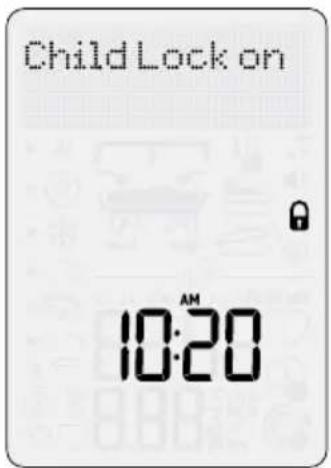
To deselect CHILD LOCK, press the CHILD LOCK button again.
The CHILD LOCK symbol will disappear from the LCD screen and you will have full functionality of your microwave.
STANDBY
When the microwave has been idle for 1-minute, standby mode will be activated. The backlight of the LCD screen will turn off and buttons will no longer be illuminated.
Standby mode when the time is not set.
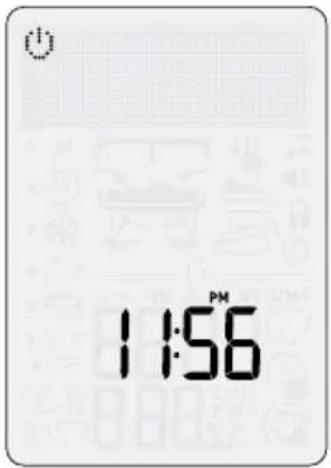
Standby mode when the time is set.
To activate the microwave:
- Open the door OR;
- Press START OR;
- Turn any dial OR;
- Press any button
TURNTABLE OFF

The TURNTABLE OFF button \®\ allows you to stop the turntable rotation while cooking in the microwave. This setting is useful if using a square or rectangular dish that will constrain the rotation.
In order to activate the turntable off setting, press the button once. 'Turntable off' will be displayed on the LCD screen.
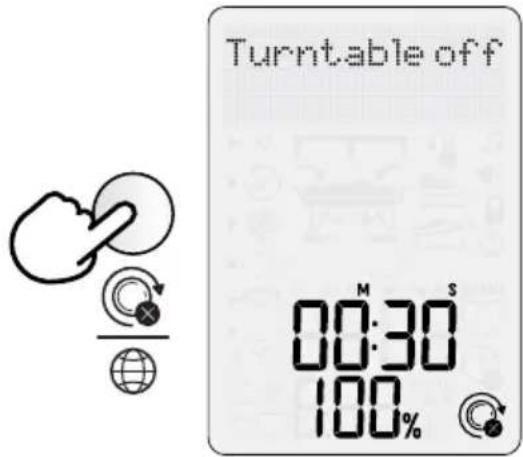
Press once again to enable the turntable to rotate again.
At the end of the cooking cycle, the turntable will remain in the last used setting for 1 minute, if left idle. After 1 minute the turntable will default to 'on'.
TIME & POWER / TEMPERATURE ADJUSTMENT
Time, power level and temperature can be changed by turning the ADJUST dial.
Adjustments can be made when in Microwave, Fast Combi, Air Fry, and Oven modes.
ADJUSTING TIME
Turn TIME dial to adjust the time.
The default time is 30 seconds.
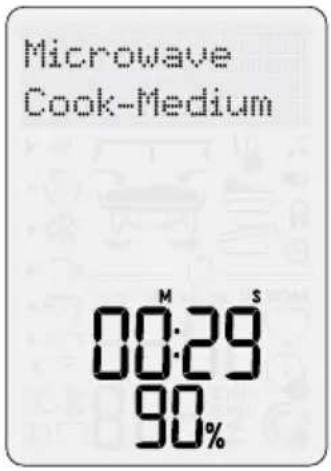
ADJUSTING POWER
When the ADJUST dial is turned clockwise, HIGH and 100% will be displayed.
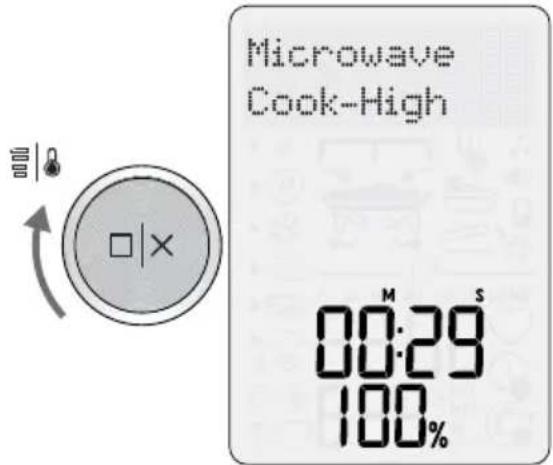
When the ADJUST dial is turned counterclockwise the power level % will start to decrease from 100% to 10%, in 10% increments.
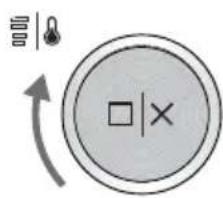
ADJUSTING TEMPERATURE
Turn the ADJUST dial counter clockwise to decrease the temperature in 10 degrees increments; and turn the ADJUST dial clockwise to increase the temperature.
Default temperature and temperature ranges are as follows:
Fast Combi:
- Temp range = 150 - 230°C
- Default temp = 200°C
Air Fry:
- Temp range = 200 - 230°C
- Default temp = 200°C
Oven:
- Temp range = 60 - 230°C
- Default temp = 180°C
DYNAMIC TIME POWER / TEMPERATURE ADJUSTMENT
Adjustment of time and power can be made when the microwave is in manual setting. Time and temperature adjustments can also be made when using the product in the Fast Combi, Air Fry and Oven manual settings.
An example of dynamic power adjustment can be seen below while using a SMART COOK function.
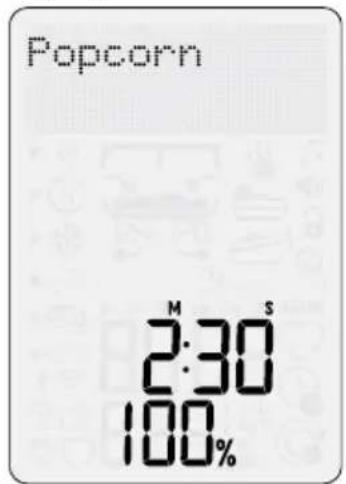
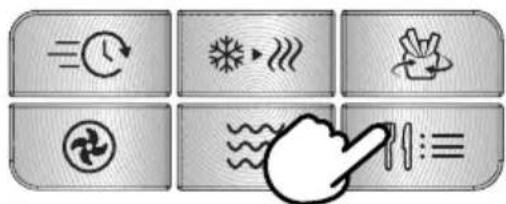
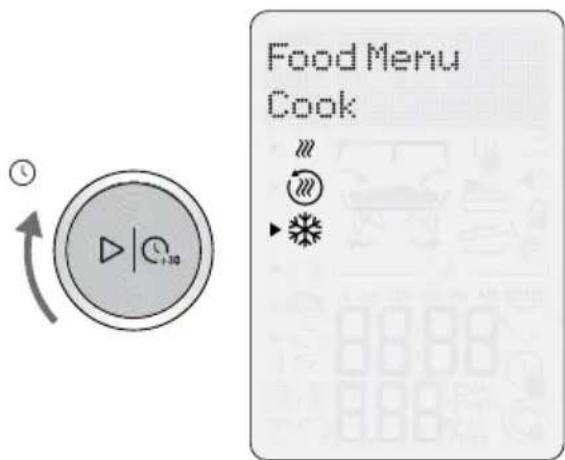
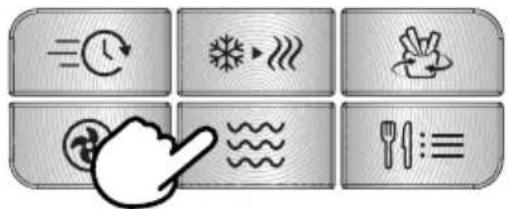
- Press FOOD MENU 🎨:≡ button and select COOK on the menu.
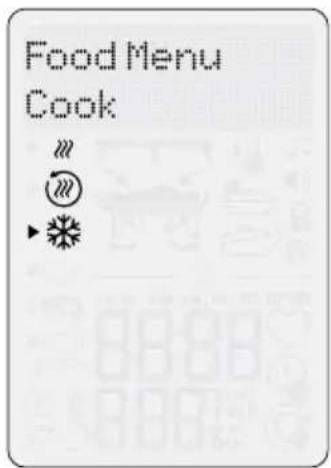
- Turn TIME dial to select food type.
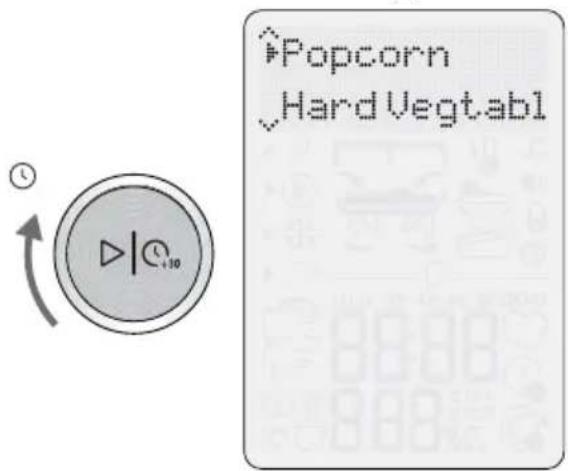
- As the TIME dial is turned, the arrow shifts and points to the food type selected. In this case POPCORN is selected.
- Once you have chosen FOOD TYPE, turn the ADJUST dial to adjust quantity or weight.
- Press START to begin cooking.
- Using the ADJUST dial the power level can be increased or decreased at any time during the cooking program.
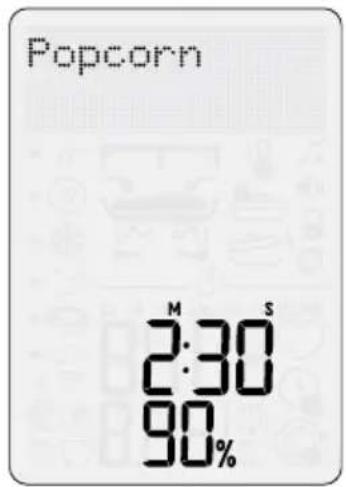

NOTE
Adjusting the power level while heating does not affect the time.

NOTE
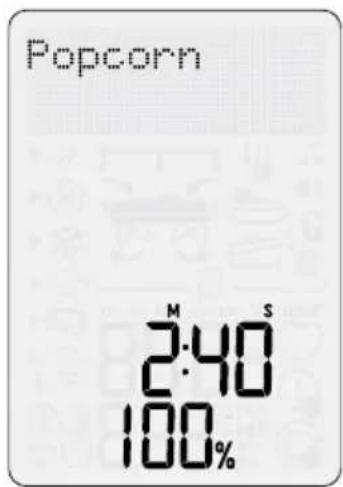
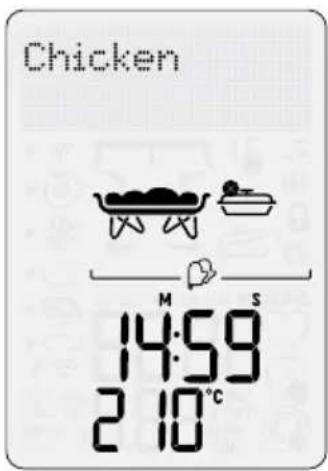
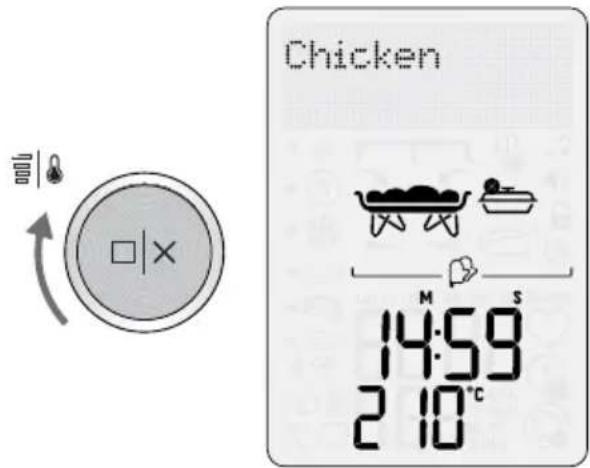
Following the steps from previous page, using the ADJUST dial, the temperature can also be increased or decreased at any time during the cooking program depending on the chosen FOOD TYPE from the FOOD MENU.
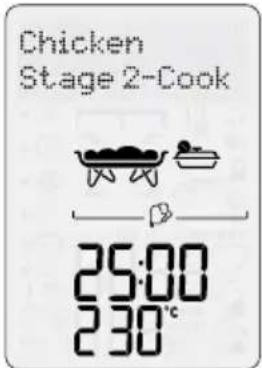
For example: Chicken

NOTE
Adjusting the power level while heating does not affect the time.
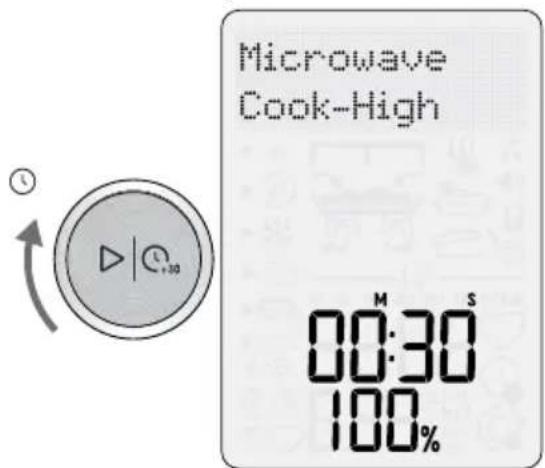
+30 SEC INSTANT START ▷|C _+30
Press START/Instant +30 button to begin cooking instantly for 30 seconds with 100% microwave power. Each additional press will increase the cooking time by 30 seconds.
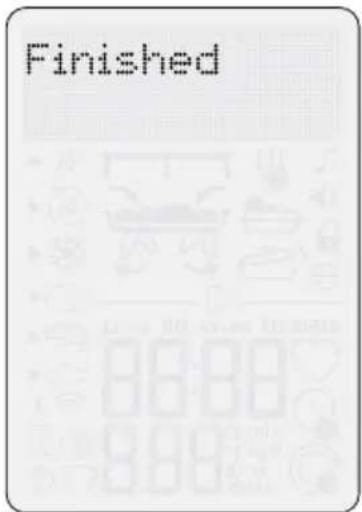
WHEN COOKING IS FINISHED
At the end of any cooking cycle, the microwave will play the designed cycle finish tone, and the word FINISHED is displayed. The word FINISHED will stay flashing on the screen for 5 minutes or until the door is opened.

STOP/CLEAR□|×
Press STOP/CLEAR once to pause the current function.
Press twice to clear and return to default screen.
When in the default screen, press STOP/CLEAR to show the clock.
To return to the default screen press any button, turn any dial or open the door.
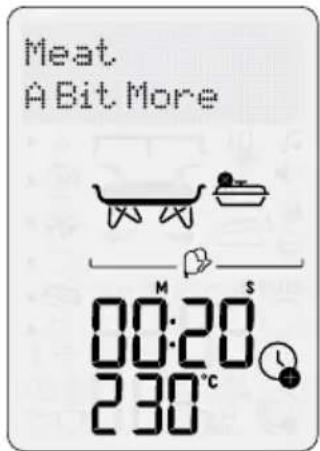
A BIT MORE™ BUTTON
Use A BIT MORE ^™ when cooking is finished, and your food is not quite cooked or hot enough.

For example:
Press the FOOD MENU button.
Turn the TIME dial to select COOK and then MEAT.
Press START to begin cooking. Cooking process ends.
At the end of the cooking process, if you think the food requires additional cooking time, you can select the 'A BIT MORE™' setting. Close the microwave door and press the A BIT MORE™ button to add a bit more cooking time. The timer will start to count down.

NOTE
A Bit More can be adjusted by turning the time dial, to override the 3 MIN preheat for the crisper pan if longer cooking time is needed.


NOTE
As soon as A BIT MORE™ button is pressed, the microwave will start cooking using the last food menu or shortcut selected. If there was no previous food menu, the microwave will default to adding 20 seconds at 100% power.
KEEP WARM

Keep Warm allows you to stop food going cold while completing other tasks. This program operates the oven at 80^ C, from 5 minutes to 2 hours. The default time is 10 minutes.
To use the Keep Warm setting, open the door and the press KEEP WARM 🎨 button on shortcuts panel.
FAVOURITE♥
The FAVOURITE setting will save your most used and favourite cook, reheat or defrost setting.
To set the microwave to your favourite setting:
- Set the cooking time.
- Open the microwave door.
- Press and hold the FAVOURITE button♡ on shortcuts panel for 2 seconds or until FAVOURITE is displayed on the LCD.

NOTE
The microwave will save this setting for future use. Pressing the FAVOURITE button next time will display your saved FAVOURITE setting on the shortcuts panel. To change your FAVOURITE setting at any time, repeat steps 1 to 3 above.

Cooking Functions
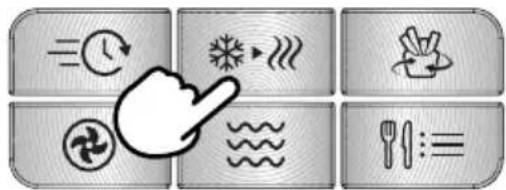
FAST COMBI
The FAST COMBI function is designed to cook your favourite dishes faster than in a traditional oven. The FAST COMBI function will alternatively use the microwave, the convection oven and the grill in order to reach the selected cooking temperature. This combination of the three functions helps the microwave reach the cooking temperature more quickly than a traditional oven, and maintain the temperature inside the cavity, for an optimal food result.
The FAST COMBI setting is ideal for cooking gratins, bake dishes, roast vegetables or different types of meat. Refer to the
'Instructions & Tips' sticker on the inside of the microwave door.
For best results, it is recommended to use the provided Combi Crisp pan except when cooking foods that require a specific baking dish or pan. Place other dishes or pans on the provided trivet for best results, provided they are not metal dishes or pans. Depending on the amount of food being cooked, use the Combi Crisp Pan with pan legs in folded or in unfolded position.
Press FAST COMBI button≡○ on the main interface to enter FAST COMBI function. Turn the START dial to select the cooking time, from 1 to 90 minutes. Then turn the ADJUST dial to select the cooking temperature, from 150°C to 230°C. Press START to begin cooking.
At the end of the cooking program, allow the food items to stand for 5 minutes before removing and serving.
COOK FROM FROZEN
The COOK FROM FROZEN function is designed to perfectly cook different types of meat, from frozen to a perfectly cooked result. The function uses the microwave, the convection and the grill alternately in two different cooking stages.

NOTE
To use this function, it is recommended to season and marinate the meat before freezing. Place the food item into the Combi Crisp pan, in the low position.
Press COOK FROM FROZEN, select the desired type of meat between chicken, meat and fish by turning the TIME or the ADJUST dials. Press START to select.
Turn the ADJUST dial to adjust quantity or weight. Minimum amount is 200g and maximum fish weight is 800g. Press START to begin cooking.
Halfway through the cook program, the oven will beep, and STIR/TURN will flash. Open door or press STOP button once to pause. Turn the food items over and press START to continue.
During FROM FROZEN, the different cooking stages will be displayed on the screen.
The first stage is designed to defrost the food, by using microwave only.
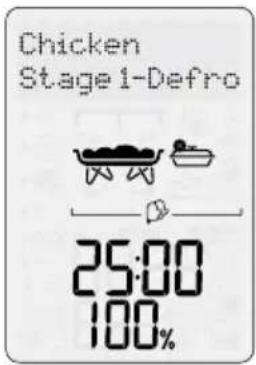
The second stage is designed to cook food using the suitable function for the food type.
Depending on the amount/weight selected, the final cooking time will vary from 16 to 70 minutes.

NOTE
For best results, cover cooked meat and allow to rest for 5 minutes.
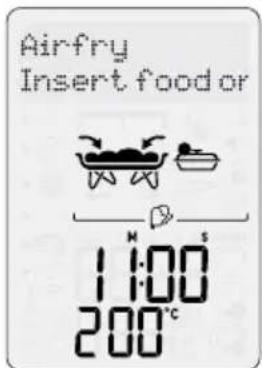
AIR FRY
The AIR FRY function is designed to deliver crispy golden food result, thanks to the Element iQ® system. Refer to the 'Instructions & Tips' sticker inside of the microwave door.
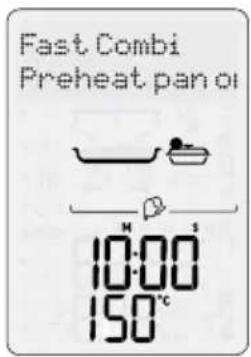
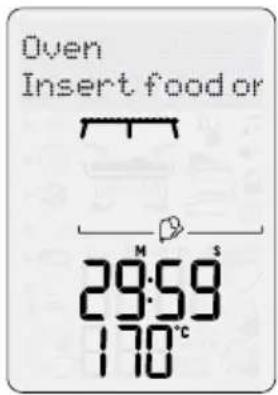
Press the AIR FRY button on the main interface to enter the AIR FRY function. The LCD screen will show PREHEAT PAN ONLY.
Place the Combi Crisp pan inside the microwave with the legs unfolded during the preheating cycle.
Turn the TIME dial to select the cooking time, from 1 to 60 minutes. Then turn the ADJUST dial to select the cooking temperature, from 200°C to 230°C.
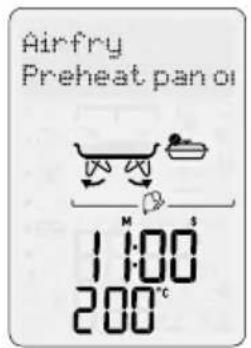
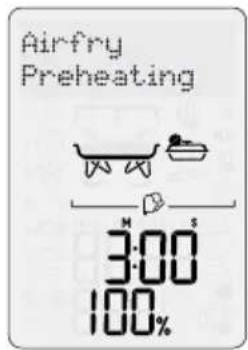
At the end of the 3-minute preheating cycle, an alert tone will sound, and the screen will indicate 'INSERT FOOD ON PAN'. Open the door to place the food on pan, and press START to continue.
Lay the food items flat in a single layer.
Halfway through the cook program, the oven will beep, and STIR & TURN FOOD is displayed on the screen. Open door or press STOP/CLEAR button once the pause. Turn the food items and press START to continue.
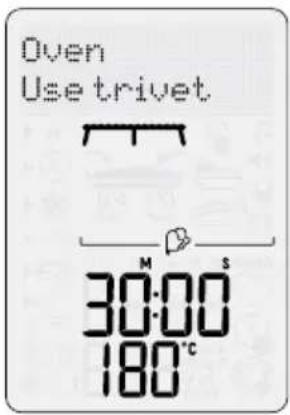
OVEN
The OVEN function is designed to cook food items using the convection oven.
The food needs to be placed in an oven-safe dish. Use the trivet to elevate the dish for better cooking results.

NOTE
It is highly recommended to use the trivet for this function, in order to allow heat to circulate around the food for a more efficient and effective cooking method.
Press the OVEN button on the main interface to enter the OVEN function. Turn the TIME dial to select the cooking time, from 1 to 120 minutes. Then turn the ADJUST dial to select the cooking temperature, from 60°C to 230°C. Press the START button to confirm the selection.
The microwave oven will start preheating. The LCD screen will show 'OVEN PREHEATING.'
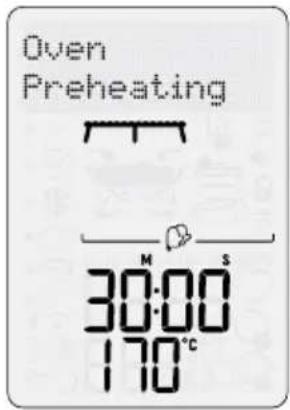
At the end of the preheating cycle, an alert tone will sound, and the screen will indicate 'INSERT FOOD ON TRIVET'. Open the door to place the food in the cavity, and press START to continue.
MICROWAVE
The MICROWAVE setting is designed to operate as a classic microwave function by adjusting the time and the power level. This is also the default function when activating the microwave oven.
Always use a microwave-safe dish or bowl when using the microwave function.
Press the MICROWAVE button on the main interface to enter the microwave function. Turn the TIME dial to select the cooking time, from 1 second to 95 minutes. Then turn the ADJUST dial to select the power level, from 10% to 100% Press the START button to confirm the selection.
GRILL

The grill function is designed to gently brown your food item, by using the top heating element.
Open the door and press the GRILL button on the shortcut panel to select the grill function.
Place the food item on the Combi Crisp pan, with pan legs unfolded.
Turn the TIME dial to select the cooking time, from 1 minute to 20 minutes. Press START to begin cooking.
FOOD MENU

In the FOOD MENU, choose between the Smart Settings: COOK, REHEAT or DEFROST.
Then select from a list of most commonly cooked food types and press START. The microwave oven will automatically set the time and power level or temperature for the selected food types removing the need to program this.

SMART COOK

NOTE
Go to our website Sage.com to discover many recipes created for the Combi Wave™ 3-in-1 Microwave oven.
The SMART COOK® setting is designed to automatically cook at the correct power or temperature for the correct time.
Press FOOD MENU button, then select COOK with the TIME dial. Press START to confirm your selection.
Turn the TIME dial to select food type. As the TIME dial is turned the arrow shifts and points to the food type is selected.
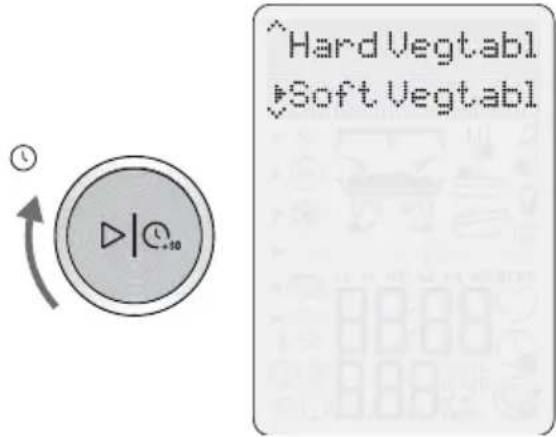
Once you have chosen FOOD TYPE, turn the ADJUST dial to adjust quantity or weight.
Press START to begin cooking.
FOR BEST RESULTS
- Foods should be cooked in a microwave safe container, either plastic, Pyrex or ceramic.
- Moist foods will cook more evenly because microwave energy heats water molecules very efficiently. Add approximately 15mL to 20mL of water per 100g when cooking soft and hard vegetables.
- For optimal results, arrange larger and thicker foods such as broccoli or the thick end of a chicken drumstick around the edges of the turntable. This allows maximum penetration of the microwaves through the food during cooking.
Stir foods such as casseroles and soups from the outside to the centre to distribute heat more evenly. Constant stirring is not necessary.
Small pieces of food cook faster than large ones. Pieces similar in size and shape will cook more evenly when cooked together.
Be careful when removing lids or plastic wrap from your microwave cooked foods. Steam can build up and cause serious burns on face or hands.
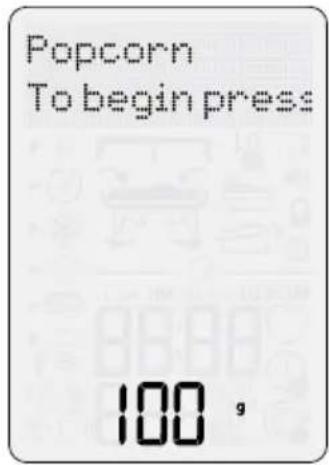
Popcorn
The SMART COOK POPCORN setting is designed to pop the maximum number of kernels in a 100g bag by using the microwave function.
Refer to popcorn package instruction for suggested microwave time settings.
Place the bag in the centre of the turntable. Press START to begin cooking.
Baked Potato
This setting uses the Oven function. Preheat time depends on the number of potatoes, but approximately 3:00min.
After preheating, place potatoes on pan, using Combi Crisp pan with the pan legs in unfolded position, and don't cover food.
Cook time depends on the number of potatoes. Using the Oven function, temperature setting at 220^ C
Hard Vegetables
The SMART COOK HARD VEGETABLES setting is suitable for vegetables such as carrot, corn, sweet potato and beets. This setting uses the microwave function.
Cook times are based on vegetables from the refrigerator (approx. 5°C).
Minimum amount of hard vegetables cooked is 100g and maximum is 1kg.
Cut into even size of 1 to 2cm pieces to ensure even cooking throughout. Add 20mL of water per 100g of hard vegetables.
Cover with a vented microwave-safe plastic lid or vented microwave-safe plastic wrap.
Halfway through the cook program, an alert tone will sound, and STIR & TURN FOOD is displayed on the screen. Open door or press STOP/CLEAR button once to pause. Stir vegetables, close door and press START button to continue the cooking program.
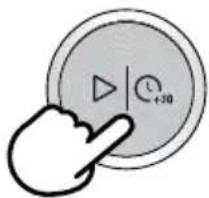
Soft Vegetables
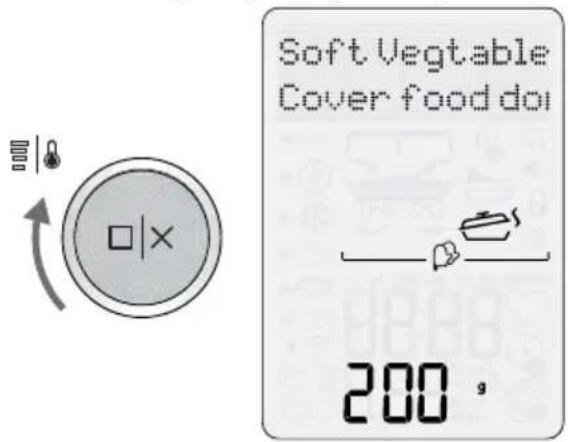
The SMART COOK SOFT VEGETABLES setting is suitable for vegetables such as broccoli, green beans, cauliflower, zucchini and peas. This setting uses the microwave function.
Cook time is based on vegetables from the refrigerator (approx. 5°C).
Minimum amount of vegetables cooked is 100g and maximum is 500g.
Add 1 tablespoon (15mL) of water per 100g of soft vegetables.
Cover with a vented microwave-safe lid or vented microwave-safe plastic wrap.
Halfway through the cook program, an alert tone will sound, and STIR & TURN FOOD is displayed on the screen. Open door or press STOP button once to pause. Stir vegetables, close door and press START button to continue the cooking program.
Rice
The SMART COOK RICE setting is suitable for white rice such as long grain rice, jasmine and basmati. This setting uses the Microwave function.
Always use a deep microwave-safe bowl. Do not cover the bowl.
Minimum amount of rice is 1 cup (250g) and maximum is 2 cups (450g). Rinse rice with cold water until it runs clear before cooking. Add a 2:1 ratio of water to rice. (2 parts water to 1-part rice)
Allow rice to stand for 5 minutes before serving.
Porridge
The SMART COOK PORRIDGE. This setting uses the Microwave function.
Always use a deep microwave-safe bowl. Do not cover the bowl.
Minimum amount is 50g - Maximum at 200g.
Example Ratio: 100g oats to 500g water set in 9 minutes.
Baked Beans
The SMART COOK BAKED BEANS. This setting uses the Microwave function.
Place in a deep, large microwave-safe bowl. Don't cover food.
Minimum amount is 200g - Maximum at 1kg.
Bacon
The SMART COOK BACON setting is designed to cook bacon slices until crisp, by using the microwave function.
Cook times are based on the bacon directly from the refrigerator (approx. 5^ C).
Arrange bacon slices in a single layer on a plate. Turn the ADJUST dial to select number of slices and press START to begin cooking. You can select between 2 to 4 regular slices of bacon. If cooking thick-cut bacon, add another minute to the cooking time.
Halfway through the cook program, an alert tone will sound, and STIR & TURN FOOD is displayed on the screen. Open door or press STOP button once to pause. Turn bacon over and press START to continue the cooking program. If cooking more than 2 slices, move the centre slices to the outside of the plate when turning them over to ensure even cooking.

NOTE
Rashers of bacon recommended.
Cake
The SMART COOK CAKE setting is designed to cook different types of cakes using the convection oven.
Use bakeware suitable for a convection oven. For best results use 19 - 22cm round cake pan and approximately 450g of batter. 24-26cm round cake pan can also be used for packaged cake mixes.
Place the bakeware on the trivet to bake the cake. Do not cover the food.
Press START to begin the cooking program.
Once cooking has finished, allow the cake to stand for 5 minutes.
Melt chocolate
At the press of a button, the SMART COOK MELT CHOCOLATE setting is designed to melt chocolate without overheating and seizing of the chocolate, using the microwave.

NOTE
The SMART COOK MELT CHOCOLATE setting was tested with dark chocolate. If using other types of chocolate, check at short intervals to prevent possible seizing of chocolate.
Choose a suitable glass bowl and do not cover. If using a block of chocolate, cut into 1cm pieces.
Turn ADJUST dial to select weight and press START button to commence melting. Minimum amount of chocolate is 50g and maximum is 400g.
Halfway through the program, an alert tone will sound, and STIR & TURN FOOD is displayed on the screen. Open door or press STOP button once to pause. Stir chocolate, close door and press START button to finish melting.
At the end, some of the chocolate may still hold their shape. Stir until completely melted and smooth.
The SMART COOK MELT CHOCOLATE setting can also be selected from the SHORTCUTS panel.
Soften butter
The SMART COOK SOFTEN BUTTER setting is perfectly designed to soften butter suitable to cream immediately in a mixer, using the microwave.
The soften butter setting is designed for butter that has been taken directly from the refrigerator (approx. 5^ C).
The butter should be cut as a whole piece and placed onto a plate. Do not cover.
Turn the ADJUST dial to select weight and press START button to commence softening. Minimum amount of butter is 125g and maximum is 500g.

NOTE
The butter should be soft enough to push a spoon easily into the centre. The butter should not be melted.

NOTE
Press the A Bit More ^™ button if butter is not soft enough.
Pizza
The SMART COOK PIZZA setting is designed to cook frozen pizzas up to 30cm in diameter, using both microwave and grill.
The cook time is based on pizza that has been taken directly from the freezer (approx. -18°C).
Place the pizza or the pizza slices into the provided Combi Crisp pan with pan legs unfolded to bake the pizza. Do not cover the food.
Press START to start the cooking program.
Once cooking has finished, allow the pizza to stand for 5 minutes.

NOTE
Pizzas smaller than 25cm requires less cooking time.
Chicken Nuggets
The SMART COOK CHICKEN NUGGETS setting is designed to air fry chicken nuggets in the microwave oven.
The cook time is based on chicken nuggets that have been taken directly from the freezer (approx. -18°C).
Turn the ADJUST dial to select the amount of chicken nuggets to air fry and press START to begin cooking. You can select from 200g to 500g of nuggets.
When selecting the SMART COOK CHICKEN NUGGETS setting, the LCD screen will show 'PREHEAT PAN ONLY'. Place the Combi Crisp with pan legs unfolded inside the microwave for the preheating program.
At the end of the 3-minute preheating program, an alert tone will sound, and the screen will indicate 'INSERT FOOD ON PAN'. Open the door to place the food on pan, and press START to continue. Lay the chicken nuggets flat in a single layer.
Two thirds of the way through the cook program, an alert tone will sound, and STIR/TURN will flash. Open door or press STOP/CLEAR button once to pause. Turn the chicken nuggets and press START to continue the cooking program.
Fries
The SMART COOK FRIES setting is designed to air fry French fries in the microwave oven.
The cook time is based on fries that have been taken directly from the freezer (approx. -18°C).
Turn the ADJUST dial to select the amount of fries to air fry and press START to begin cooking. You can select from 200g to 450g of fries.
When selecting the SMART COOK FRIES setting, the LCD screen will show 'PREHEAT PAN ONLY'. Place the Combi Crisp with pan legs unfolded inside the microwave for the preheating program.
At the end of the 3-minute preheating program, an alert tone will sound, and the screen will indicate 'INSERT FOOD ON PAN'. Open the door to place the food on pan, and press START to continue. Lay the fries flat in a single layer.
Halfway through the cook program, an alert tone will sound, and STIR & TURN FOOD is displayed on the screen. Open door or press STOP button once to pause. Turn the fries and press START to continue the cooking program.
Chicken
The SMART COOK CHICKEN setting is suitable for fresh chicken pieces as well as cooking whole chickens. This setting uses convection and grill, with the addition of microwave power when cooking a whole chicken.
Cook times are based on chicken directly from the refrigerator (approx. 5°C).
Minimum amount of chicken to be cooked is 200g and maximum is 1.6kg.
- 200g to 500g suitable for chicken fillets and boneless chicken pieces.
- 1kg to 1.6kg suitable for chicken pieces with bones and whole chickens.
Use the provided Combi Crisp pan to cook the chicken. For chicken pieces, use the Combi Crisp pan with the pan legs set in the unfolded position. For whole chicken, use the Combi Crisp pan with the pan legs set in the folded position.
Halfway through the cook program, an alert tone will sound, and STIR & TURN FOOD is displayed on screen. Open door or press STOP button once to pause. Turn the chicken pieces (not necessary when cooking a whole chicken) and press START to continue the cooking program.
Once cooking has finished, allow chicken to stand for 5 minutes.
Meat
The SMART COOK MEAT setting is designed to cook different type of meat.
Cook times are based on meat directly from the refrigerator (approx. 5°C).
Minimum amount of meat to be cooked is 200g and maximum is 2kg.
- 200g to 500g suitable for meat fillets, minced meat and meat in pieces.
- 750g to 2kg suitable for whole roasts.
Use the provided Combi Crisp pan to cook the meat. For 200g - 500g, use the Combi Crisp pan with pan legs unfolded. For 750g - 1kg, use the Combi Crisp pan with the pan legs set in the folded position.
Halfway through the cook program, an alert tone will sound, and STIR & TURN FOOD is displayed on screen. Open door or press STOP button once to pause. Turn the meat over and press START to continue the cooking program.
Once cooking has finished, allow the meat to stand for 5 minutes.
Fish
The SMART COOK FISH setting is designed to cook your fish without dry and overcooked edges. This setting automatically combines the power of microwave, convection oven and grill.
Cook times are based on the fish directly from the refrigerator (approx. 5°C).
Minimum amount of fish should not be less than 200g and not more than 800g.
Suitable for white fish fillets and salmon fillets; arrange in a single layer in the Combi Crisp pan with pan legs unfolded. Fold over the thin tail end of the fillets to prevent overcooking.
Once cooking has finished, allow fish to stand for 5 minutes.

NOTE
For best results we recommend cooking oily fish with skin left on.
SMART REHEAT
The SMART REHEAT setting uses lower power levels to gently reheat food without drying or overcooking.

NOTE
While the microwave is reheating, time can be increased or decreased. Adjusting the reheating time does not affect selected weight or quantity.
Beverage
The SMART REHEAT BEVERAGE setting is suitable to reheat hot drinks such as coffee and tea that may have become cold. The BEVERAGE setting will warm your drink to approx. 60–65°C which is suitable to drink right away.
Position cups around the outside of the turntable. Turn the ADJUST dial to select the number of cups and press START to begin reheating. You can select the amount of beverage from 1 cup (250mL) to 4 cups (1000mL).
At the end of the reheat program, stir heated drinks and allow to stand for 1-2 minutes before consuming. Be aware, that overheating may scald or burn drinks.

NOTE
Use a ceramic cup or mug.
Leftovers
The SMART REHEAT LEFTOVERS setting is suitable for reheating a plate of leftovers from the refrigerator (approx. 5°C).
For even reheating, place food onto a microwave-safe plate or into a bowl. Cover food with a vented microwave-safe lid or vented microwave-safe plastic wrap (do not seal).
Turn the ADJUST dial to select the number of plates and press START to begin cooking. You can select the amount from 1 to 2 plates/bowls. When using 2 plates, use the trivet to place the plates on top of each other.
Halfway through the cook program, an alert tone will sound, and STIR & TURN FOOD is displayed on screen. Open door or press STOP button once to pause. Stir the food in the plate and press START to continue the reheating program. When reheating 2 plates, it is recommended to switch the plates position (from top to bottom, and vice-versa) to ensure even reheating.
At the end of the reheat program, stir heated food and allow to stand for 1-2 minutes before consuming.
By time
The SMART REHEAT setting also enables you to select the reheat time, from a range to 1 minute to 95 minutes.
When reheating any food item, place the food onto a microwave-safe bowl or plate. Cover food with a vented microwave-safe lid or vented microwave-safe plastic wrap (do not seal).
Halfway through the cook program, an alert tone will sound, and STIR & TURN FOOD is displayed on screen. Open door or press STOP button once to pause. Stir or turn the food item and press START to continue the reheating program.
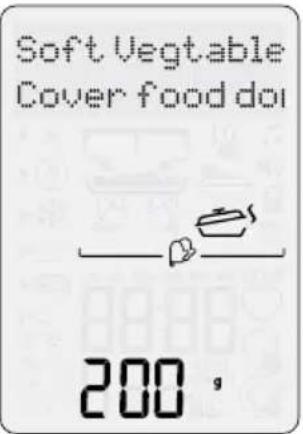
SMART DEFROST
The SMART DEFROST setting is designed to gently defrost food without overheating and drying out of edges.
Press the FOOD MENU button, then select DEFROST with the TIME dial. Press START to confirm your selection. An alert tone will sound.
Turn TIME dial to select the food type. As the TIME dial is turned the arrow shifts and points to what food type is selected.
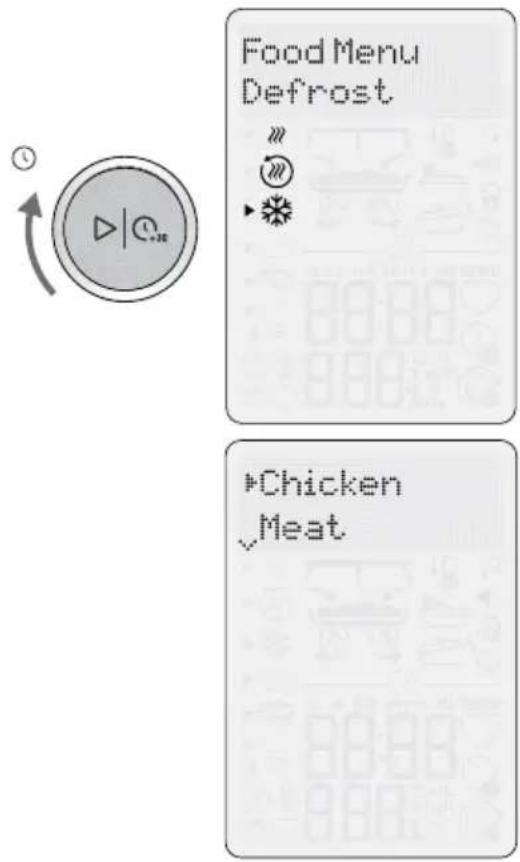
Once you have chosen FOOD TYPE, turn ADJUST dial to adjust quantity or weight.
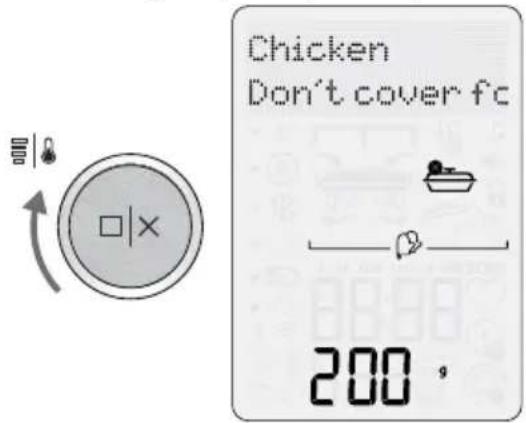
Press START to commence defrosting.

NOTE
While the microwave is defrosting time can be increased or decreased. Adjusting the defrosting time does not affect selected weight or quantity.
FOR BEST RESULTS
- Defrost times are for thoroughly frozen foods that have been in the freezer for at least 24 hours and maintained at temperatures of -18^ or lower.
- When freezing meats, poultry and fish, use good quality plastic wrap, bags and containers.
- To separate meat, such as chicken pieces or steak, place wax paper or plastic film between each layer.
- Ensure that all air has been removed and packaging has been sealed securely.
- Label the packs with type and cut of meat, date and weight.
- After the defrost cycle, most foods will still be somewhat icy in the centre when removed from the microwave. Stand food for 5–15 minutes until completely thawed.
- Position foods in a single layer with thinner parts in the centre and thicker ends around the outside of the turntable.
- Remove any packaging and bags from frozen meats. If packaging is too frozen to remove, defrost for 3 minutes using the TIME DEFROST setting; remove packaging and continue with the SMART DEFROST setting.
Chicken
The SMART DEFROST CHICKEN setting is suitable to defrost either chicken pieces (legs, breasts) or a whole chicken. Minimum amount of chicken to defrost is 200g and maximum is 1kg.
- 200g to 750g - suitable for chicken fillets and chicken pieces.
- 1kg - suitable for chicken pieces with bones and whole chickens.
For chicken pieces, position chicken pieces in a single layer in a microwave-safe dish, plate or container. Arrange thicker ends around the outside of the plate/container.
Halfway through the defrost setting, an alert tone will sound, and STIR & TURN FOOD is displayed on screen. Open door or press STOP button once to pause. Turn over chicken pieces and press START button to continue the defrost program.
Once program has finished, remove chicken from microwave and stand 5-15 minutes to thaw completely.
For whole chickens, remove from original packaging. Place chicken, breast side down onto a in a microwave-safe dish, plate or container.
Halfway through the defrost setting, an alert tone will sound, and STIR & TURN FOOD is displayed on screen. Open door or press STOP button once to pause. Turn chicken over and press START button to continue the defrosting program.
After defrost program has ended, remove the chicken from the microwave. Rinse under tap water, making sure to wash the cavity well to loosen the icy core.
Place onto a clean plate and pat dry. Cover with cling film and refrigerate for 1-2 hours until completely thawed.
Meat
The SMART DEFROST MEAT setting is suitable to defrost any type of ground or diced meat such as beef, lamb and pork, as well as steaks and chops. Minimum amount of meat to defrost is 200g and maximum is 1kg.
- 200g to 500g - suitable for meat fillets, minced meat and meat in pieces.
- 750g to 1kg - suitable for whole roasts.
Remove any packaging, foam trays and absorbent pads from the meat. Place directly onto a microwave-safe plate or shallow dish.
Halfway through the defrost setting, an alert tone will sound, and STIR & TURN FOOD is displayed on screen. Open door or press STOP button once to pause. Remove any defrosted meat and set aside in the refrigerator. If some ground meat is still thawed, remove from the microwave oven as well. Turn the frozen meat over and return to the microwave oven. Press START button to continue the defrost program.
At the end of the program, remove meat and stand 5–15 minutes to thaw completely.
Fish
The SMART DEFROST Fish setting is programmed to gently thaw delicate fish fillets without cooking and heating the edges. Minimum amount of fish to defrost is 200g and maximum is 800g.
For best results, place frozen fillets in a single layer into a microwave-safe shallow dish.
Halfway through the defrost setting, an alert tone will sound, and STIR & TURN OVER FOOD is displayed on screen. Open door or press STOP button once to pause. Turn fish pieces oven. Cover thin ends of fish fillets with a small strip of foil and return to oven. Press START button to continue the defrost program.
At the end of the program, the fish will still be somewhat icy in the centre. Remove from the microwave and stand for 5–15 minutes until completely thawed.

NOTE
For best results defrost oily fish.
Soup
The SMART DEFROST Soup is suitable for defrosting frozen prepared soup directly from the freezer (approx. -18°C). Minimum amount of soup to defrost is 250mL and maximum is 1000mL.
Remove soup from any packaging and place into a microwave-safe bowl. Do not cover food.
Halfway through the defrost setting, an alert tone will sound, and STIR & TURN FOOD is displayed on screen. Open door or press STOP button once to pause. Break up any frozen pieces and press START button to continue the defrost program.
Loaf of Bread
This setting will defrost and warm a whole loaf of bread. Let bread rest for 5-10min after the cycle.
Place uncut loaf of bread, without a cover on trivet on turntable.
Select Defrost Bread, press START button.
Half-way through (at the beep) turn bread upside down to evenly defrost.

NOTE
This time is based on bread 500-750g; smaller breads might need less time. Denseness of breads varies, so wholemeal bread will take longer than white bread. Adjust time accordingly.
By time
The SMART DEFROST setting also enables you to select the defrost time, from a range to 1 minute to 95 minutes.
When defrosting any food item, place the food onto a microwave-safe bowl or plate, and do not cover.
Halfway through the defrost program, an alert tone will sound, and STIR & TURN FOOD is displayed on screen. Pause program and stir or turn the food item. Press START button.

Hints & Tips
SOME IMPORTANT TIPS FOR MICROWAVE COOKING
To help equalize energy in the food so that it cooks evenly follow these helpful tips.
- Arrange foods with varying size ends, such as chicken drumsticks and broccoli with the thicker or tougher part positioned to the outside of the dish. This ensures the parts that require more cooking will receive more energy, so the food will cook evenly.
- Covering the dish during cooking holds in the heat and steam to speed up cooking time. Use a microwave safe lid or plastic wrap that has been vented by turning back one edge at the side of the dish to form a narrow vent to release excess steam.
- Choose cooking dishes that are shallow and preferably have straight sides. Shallow dishes enable the food to cook faster and straight sides prevent the edges from being overcooked.
- Arrange individual items such as ramekins or whole potatoes around the outside of the turntable. Make sure to leave space between items so the energy can penetrate from all sides.
- Use round shaped microwave dishes. Round shapes cook more evenly than square or rectangle dishes which absorb most of the energy in the corners causing food to overcook and toughen.
- Stir foods from the outside to centre of the dish once or twice during cooking to equalize heat and speed up microwaving.
- Turn medium to large food items over twice during microwaving. This enables even exposure to microwaves.
- Elevating some types of food such as cakes, roast vegetables and dough products can be advantageous. It allows more energy to penetrate the food from all sides, base and top. Use a microwave safe plastic or ceramic rack. If a rack is unavailable, use an upturned bowl or cup to elevate plates of food.
- Do not elevate any special browning dishes, jugs of sauce or custard, small quantities of food or mugs of beverages.
- Internal temperatures of foods continue to rise so that they continue cooking even after they have been removed from the microwave oven. It is better to undercook food as it will continue to cook once removed from the microwave.
MICROWAVE UTENSILS
- Containers, plates, dishes, etc. used in the microwave oven should always be microwave-safe. Check if stated on the underside of the utensil or contact the manufacturer.
- To test if a container, plate or dish is microwave-safe, place it into the microwave oven with 1 cup of cold water (in a microwave-safe cup) and heat on High (100%) Power for 1 minute. If the container is hot and the water is cold, the container is not suitable for microwave oven use. If the container is cold and the water is hot, then the container is suitable for microwave oven use.
- Microwave-safe cookware will not become hot by the microwave energy, but it will become hot from contact with hot food. When the food becomes hot, some of this heat is transferred to the dish. Always use oven mitts to remove hot dishes from the microwave.
- Metal containers and utensils should not be used in the microwave oven.

Care,Cleaning & Storage
- Remove the plug from the power outlet before cleaning.
- Keep the inside of the microwave oven clean. When food splatters or spilled liquids adhere to the microwave oven internal walls, wipe with a damp cloth. Mild detergent may be used if the cavity gets very dirty. Avoid the use of spray and other harsh cleaners as they may stain, streak or dull the door surface.
- The outside surfaces should be cleaned with a damp cloth. To prevent damage to the operating parts inside the microwave oven cavity, water should not be allowed to seep into the ventilation openings.
- Wipe the door and window on both sides of the door seals and adjacent parts frequently with a damp cloth to remove any spills or spatters. Do not use an abrasive cleaner.
- Do not allow the control panel to become wet. Clean with a soft, damp cloth. When cleaning the control panel, leave the microwave oven door open to prevent it from accidentally turning on.
- If steam accumulates inside or around the outside of the oven door, wipe with a soft dry cloth. This may occur when cooking foods high in moisture or if the microwave oven is operated under high humidity conditions, this is normal.
- It is occasionally necessary to remove the glass turntable for cleaning. Wash the glass turntable in warm soapy water, rinse in clean water and dry thoroughly.
-
The turntable roller and microwave oven floor should be cleaned regularly to ensure the glass turntable rotates correctly and avoids making excessive noise. Simply wipe the bottom surface of the microwave with a soft damp cloth. The turntable roller may be washed in mild soapy water, rinse in clean water and dry thoroughly. When removing the turntable roller from the cavity floor for cleaning, be sure to replace in the proper position.
-
Remove odours from your microwave oven by combining a cup of water with the juice of one lemon in a deep microwave-safe bowl, microwave on High for 5 minutes. Wipe the microwave oven cavity thoroughly and dry with a soft cloth.
- When it becomes necessary to replace the oven light, please consult your Sage Service Centre to have it replaced.
- Please do not dispose this appliance with domestic rubbish; it should be taken to the appropriate disposal centre provided by the local council municipalities.
- If storing the microwave oven, press the STOP button, switch off at the power outlet then unplug the power cord. Ensure the microwave oven is completely cool, clean and dry. Secure the roller ring and glass turntable and close the door. Do not place heavy objects on top. Store the microwave oven upright.
- Wash the Combi Crisp Pan and Trivet in the top rack of the dishwasher. Alternatively, wash with warm soapy water, rinse with clean water and dry thoroughly. If required, remove Combi Crisp Pan legs by pinching inwards to detach them from base of pan.

Troubleshooting
PROBLEM EASY SOLUTION
| Microwave oven interfering with radio, TV or similar equipment. | Clean door and sealing surface of the oven.Reorient the receiving antenna of radio or television.Relocate the microwave oven with respect to the receiver.Move the microwave oven away from the receiver.Plug the microwave oven into a different outlet so that microwave oven and receiver are on different branch circuits. |
| Dim microwave oven light | When operating on low power levels, the microwave oven light may be dimmer. |
| Steam accumulating on door and hot air coming out from vents. | During operation, steam may be produced. Most will exit through the vents; however, some may accumulate around the oven door. |
POSSIBLE PROBLEM POSSIBLE REASON EASY SOLUTION
| Microwave oven will not start | Power cord not plugged in properly or switched on.Trouble with outlet. | Unplug, put the plug in again and switch on.Have a professional check that the outlet is not faulty. |
| Microwave oven does not heat | Door not closed properly. | Ensure door is shut properly. |
| Glass turntable makes noise during operation. | Turntable roller not assembled properly or needs to be cleaned. | Reset and clean if necessary. |
| LCD time digit shows EA1A then V1:00 or similar information then goes to default mode. | Both STOP/CLEAR and A BIT MORETM button are pressed at the same time under the default mode. | No action required. This is normal and LCD just shows the model type and software version. |

Guarantee
2 YEAR LIMITED GUARANTEE
Sage Appliances guarantees this product for domestic use in specified territories for 2 years from the date of purchase against defects caused by faulty workmanship and materials. During this guarantee period Sage Appliances will repair, replace, or refund any defective product (at the sole discretion of Sage Appliances).
All legal warranty rights under applicable national legislation will be respected and will not be impaired by our guarantee.
For full terms and conditions on the guarantee, as well as instructions on how to make a claim, please visit www.sageappliances.com.
the Combi Wave ^TM 3 in 1
natural_image
Front view of a microwave oven with digital display and control knobs (no visible text or symbols on main body)DEHANDBUCH
Sage®

Inhalt
natural_image
Line drawing of a round empty bowl with three legs (no text or symbols)- Untersetzer
natural_image
Simple line drawing of a circular metal grate with two handles and a central handle (no text or symbols)
Montage
VOR DEM ERSTEN GEBRAUCH
natural_image
Technical line drawing of a mechanical component with concentric circular layers and a central shaft (no text or symbols)MONTAGE UND EINSATZ DER MIKROWELLE
natural_image
Two black silhouette icons: a curved line and a bowl with arrows, both without any text or symbols.natural_image
Two black-and-white diagrams showing a table with arrows indicating rotation and a basket with arrows indicating movement (no text or symbols)natural_image
Simple line drawing of a hand holding a circular object, with a globe and a curved arrow symbol below (no text or labels)natural_image
Front view of a modern microwave oven with digital display and control knobs (no visible text or symbols on main body)FRGUIDE UTILISATEUR
Sage®

Table des matières
natural_image
Line drawing of a round-bottom table with three legs (no text or symbols)• Grille
natural_image
Simple line drawing of a circular metal grate with two handles and a central handle (no text or symbols)
Assemblage
AVANT LA PREMIÈRE UTILISATION
natural_image
Technical line drawing of a mechanical assembly with concentric circular components and a central shaft (no text or symbols)INSTALLATION ET MISE EN MARCHE DU FOUR À MICRO-ONDES
natural_image
Two simple line drawings: a curved ramp and a bowl with arrows indicating flow or movement (no text or symbols)natural_image
Two black-and-white diagrams showing a person sitting on a bench with arrows indicating motion or movement, and another person standing on a cart with arrows indicating rotation (no text or symbols)PROBLÈME POSSIBLE CAUSE POSSIBLE SOLUTION FACILE
the Combi Wave ^m 3 in 1

natural_image
Front view of a microwave oven with digital display and control knobs (no visible text or symbols on main body)NLHANDLEIDING
Sage®

Inhoud
natural_image
Line drawing of a round empty bowl with three legs (no text or symbols)• Rekje
natural_image
Simple line drawing of a circular metal grate with two handles and a central handle (no text or symbols)
Montage
natural_image
Technical line drawing of a mechanical assembly with concentric circular components and a central hub (no text or symbols)DE MAGNETRON INSTALLEREN EN AANZETTEN
natural_image
Two black line drawings: a curved ramp and a bowl with arrows (no text or symbols)natural_image
Two black-and-white diagrams showing a curved structure with arrows indicating rotation, and a bowl-like container with arrows indicating flow or movement (no text or symbols)natural_image
Simple line drawing of a cloud with a globe below, no text or symbols presentnatural_image
Front view of a microwave oven with digital display and control knobs (no visible text or symbols on main body)ITMANUALE UTENTE
Sage®

Sommario
natural_image
Line drawing of a round empty bowl with three legs (no text or symbols)• Sottopentola
natural_image
Simple line drawing of a circular metal grate with two handles and a central support (no text or symbols)
Montaggio
PREPARAZIONE AL PRIMO UTILIZZO
natural_image
Technical line drawing of a mechanical assembly with concentric circular components and a central shaft (no text or symbols)INSTALLAZIONE E ACCENSIONE DEL FORNO A MICROONDE
natural_image
Simple line drawing of a curved shape and a bowl with arrows indicating flow or movement (no text or symbols)natural_image
Two black-and-white diagrams showing a table with arrows indicating rotation and a container with arrows, no text or symbols present.natural_image
Simple line drawing of a hand holding a globe with a circular arrow and a globe symbol below (no text or labels)STOP/CLEAR (STOP/ANNULLA)□|×
KEEP WARM (MANTIENI CALDO)

In FOOD MENU (MENU ALIMENTI), scegliere l'impostazione smart desiderata: COOK (COTTURA), REHEAT (RISCALDA) o DEFROST (SCONGELA).
By time (In base al tempo)
Loaf of Bread (Pane in cassetta)
By time (In base al tempo)
natural_image
Front view of a modern microwave oven with digital display and control knobs (no visible text or symbols on main body)ESGUÍA DEL USUARIO
Sage®

Índice
natural_image
Line drawing of a round empty bowl with three legs (no text or symbols)- Rejilla inoxidable

natural_image
Simple line drawing of a circular metal grate with two handles and a central handle (no text or symbols)
Ensamblaje
natural_image
Technical line drawing of a mechanical assembly with concentric circular components and a central shaft (no text or symbols)natural_image
Two black line drawings of objects: a curved bracket and a bowl with arrows (no text or symbols)natural_image
Two black-and-white diagrams showing a curved structure with arrows indicating rotation, and a bowl-like container with arrows indicating flow or movement (no text or symbols)natural_image
Simple line drawing of a cloud with a globe below, no text or symbols presentthe Combi Wave ^m 3 in 1

natural_image
Front view of a modern microwave oven with digital display and control knobs (no visible text or symbols on main body)PTMANUAL DO UTILIZADOR
Sage®

Conteúdo
A. Janela
natural_image
Line drawing of a round empty fire pan with three legs (no text or symbols)• Tripé
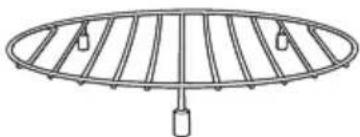
natural_image
Simple line drawing of a circular metal grate with three vertical panes and a central handle (no text or symbols)
Montagem
natural_image
Technical line drawing of a mechanical assembly with concentric circular components and a central shaft (no text or symbols)INSTALAR E LIGAR O MICRO-ONDAS
natural_image
Two black line drawings: a curved bracket and a bowl with arrows, both without any text or symbols.natural_image
Two black-and-white diagrams showing a table with arrows indicating rotation and a container with arrows, no text or symbols present.natural_image
Simple line drawing of a hand holding a globe with a circular arrow and a globe symbol below (no text or labels)KEEP WARM (MANTER QUENTE)
Melt Chocolate (Derreter chocolate)
the Combi Wave ^M 3 in 1

natural_image
Front view of a white microwave oven with digital display and control knobs (no visible text or symbols on the main body)PLINSTRUKCJA OBSŁUGI
Sage®

Spis treści
A. Szklany wizjer
natural_image
Line drawing of a round empty basin with three legs (no text or symbols)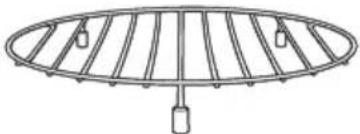
natural_image
Simple line drawing of a circular metal grate with two vertical bars and a central support (no text or symbols)
Montaż
PRZED PIERWSZYM UŻYCIEM
natural_image
Technical line drawing of a mechanical assembly with concentric circular components and a central shaft (no text or symbols)INSTALOWANIE I WŁĄCZANIE KUCHENKI MIKROFALOWEJ
natural_image
Two simple line drawings: a curved line and a bowl with arrows indicating flow or movement (no text or symbols)natural_image
Two black-and-white diagrams showing a table with arrows indicating rotation and a container with arrows, no text or symbols present.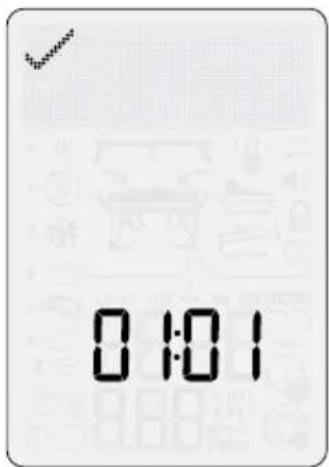

UWAGA
natural_image
Simple line drawing of a hand holding a circular object, with a globe and refresh symbol below (no text or labels)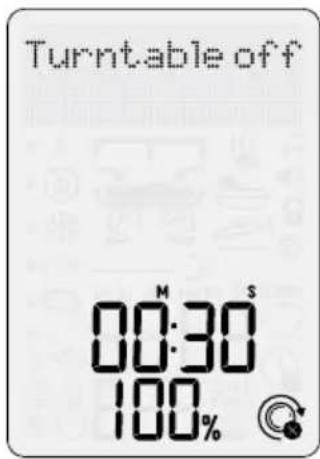
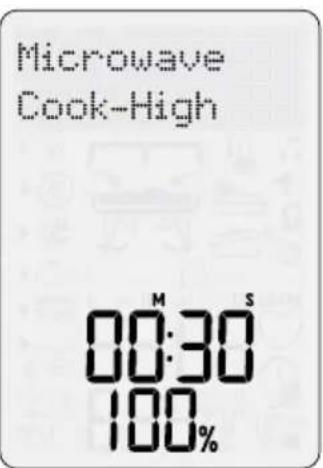
USTAWIENIE TEMPERATURY
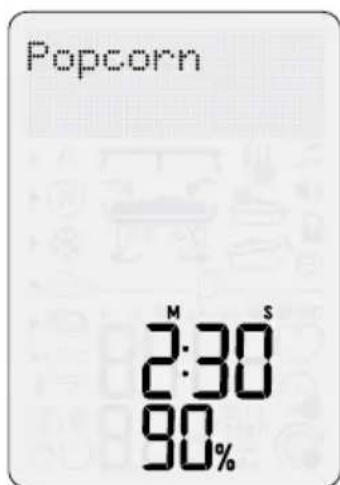

UWAGA

UWAGA
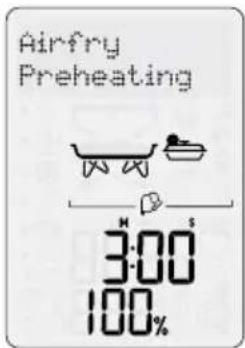
INTELIGENTNE GOTOWANIE

UWAGA
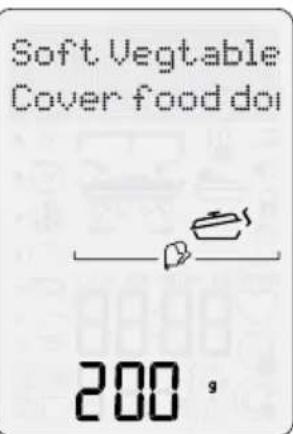
JAK UZYSKAĆ NAJLEPSZY EFEKT
BRG Appliances Limited
Unit 3.2, Power Road Studios,
114 Power Road, London, W4 5PY
Freephone (UK Landline): 0808 178 1650
Mobile Calls (National Rate): 0333 0142 970
DEU
Sage Appliances France SAS
www.sageappliances.com
Registered in England & Wales No. 8223512
Registered in Germany No. HRB 81309 (AG Düsseldorf)
Registered in France No. 879 449 866 RCS
EN Due to continued product improvement, the products illustrated or photographed in this document may vary slightly from the actual product.
Copyright BRG Appliances 2023