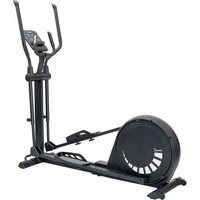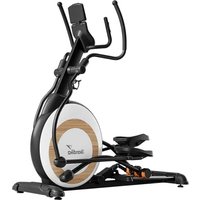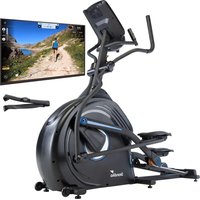
Cardiocross Carbon Conqueror SF-4500 - Elliptical bike Skandika - Free user manual and instructions
Find the device manual for free Cardiocross Carbon Conqueror SF-4500 Skandika in PDF.


User questions about Cardiocross Carbon Conqueror SF-4500 Skandika
0 question about this device. Answer the ones you know or ask your own.
Ask a new question about this device
Download the instructions for your Elliptical bike in PDF format for free! Find your manual Cardiocross Carbon Conqueror SF-4500 - Skandika and take your electronic device back in hand. On this page are published all the documents necessary for the use of your device. Cardiocross Carbon Conqueror SF-4500 by Skandika.
USER MANUAL Cardiocross Carbon Conqueror SF-4500 Skandika
natural_image
Exterior view of a black stationary exercise bike with adjustable arms and legs (no text or symbols visible)CardioCross Carbon Conqueror
Art.Nr. SF-4500
Inhalt

skandika.com/service
109 Schraube 3/8"x3/4" 4 St.
SCHRITT 2

natural_image
Line drawing of a screwdriver with a pointed tip and cylindrical head (no text or symbols)147 Schraubendreher
natural_image
Simple line drawing of a bent 3D rectangular pipe or elbow joint (no text or symbols)text_image
Technical schematic diagram of a vehicle's internal components with numbered parts and dimension annotationstext_image
Technical diagram of a stationary bike with numbered components and labeled parts2c
text_image
Technical diagram of a stationary exercise machine with numbered components for identificationTRANSPORT
natural_image
Exterior view of a stationary exercise bike with directional arrows indicating movement (no text or symbols)SCHMIERUNG
natural_image
Close-up of a hand holding a small white object near a black vehicle seat (no visible text or symbols)COMPUTER
BEDIENUNGSANLEITUNG


text_image
88:20 88:20 88:20 88:20 88:20 88:20 88:20 88:20 88:20 88:20 88:20 88:20 88:20 88:20 88:20 PROGRAM MANUAL PROGRAM FAT BURN CARDIO MILL INTERVAL HRC USER + + INCINE START ENTER STOP LEVEL FANnatural_image
Abstract geometric pattern composed of white squares on a blue background (no text or symbols)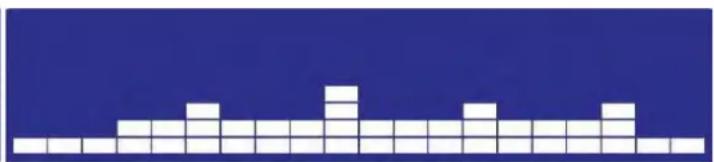
natural_image
Pixelated white block pattern on a solid blue background (no text or symbols)PROGRAMM 3 : Simulation
natural_image
Two side-by-side pixel art blocks of white squares on a dark blue background, no text or symbols present.
PROGRAMM 4 : Aerobes Training
natural_image
Two side-by-side pixelated white grid patterns on a blue background, no text or symbols present.PROGRAMM 5 : Hügel
natural_image
Two side-by-side pixel art blocks on a solid blue background, no text or symbols presentPROGRAMM 6 : X-Sport
natural_image
Two side-by-side pixelated grid patterns on a dark blue background, no text or symbols present.PROGRAMM 7: Kardiopulmonal
natural_image
Two identical white pixelated blocks on a blue background, no text or symbols presentnatural_image
Two identical grid patterns on a blue background, no text or symbols presentPROGRAMM 9 : Wilder Ritt
natural_image
Two identical white pixelated blocks on a dark blue background, no text or symbols present.natural_image
Two side-by-side pixel art blocks of white squares on a dark blue background, no text or symbols present.PROGRAMM 11: Niedrig-intensives Training
natural_image
Two side-by-side pixel grid patterns on a solid blue background, no text or symbols presentnatural_image
Two side-by-side pixel art blocks on a blue background, no text or symbols presentPROGRAMM 13 : Intervall
natural_image
Two identical pixelated white blocks on a blue background, no text or symbols presentPROGRAMM 14 : Bergland
natural_image
Two identical grid patterns on a blue background, no text or symbols presentnatural_image
Two side-by-side grid patterns on a blue background, no text or symbols present
PROGRAMM 16 : Cross-Training
natural_image
Two identical white pixelated waveforms on a dark blue background, no text or symbols present.natural_image
Two identical grid patterns of white squares on a blue background, no text or symbols present.PROGRAMM 18 : Intervall II
natural_image
Two identical grid patterns on a blue background, no text or symbols presentFAT BURN
natural_image
Two identical grid patterns on a blue background, no text or symbols presentCARDIO
natural_image
Two identical pixelated white blocks on a blue background, resembling a simplified music waveform or icon (no text or symbols)HILL
natural_image
Pixelated white block pattern on a blue background (no text or symbols)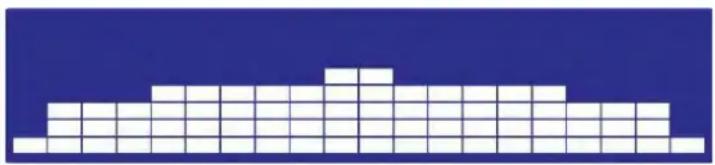
natural_image
Abstract geometric pattern composed of white squares on a blue background (no text or symbols)INTERVAL
natural_image
Abstract geometric pattern composed of white squares on a blue background (no text or symbols)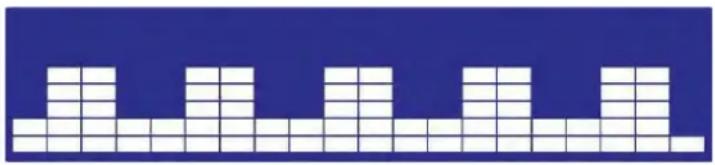
natural_image
Abstract geometric pattern composed of white squares on a blue background (no text or symbols)KINOMAP
27 Safety precautions
28 Pre-assembly check list
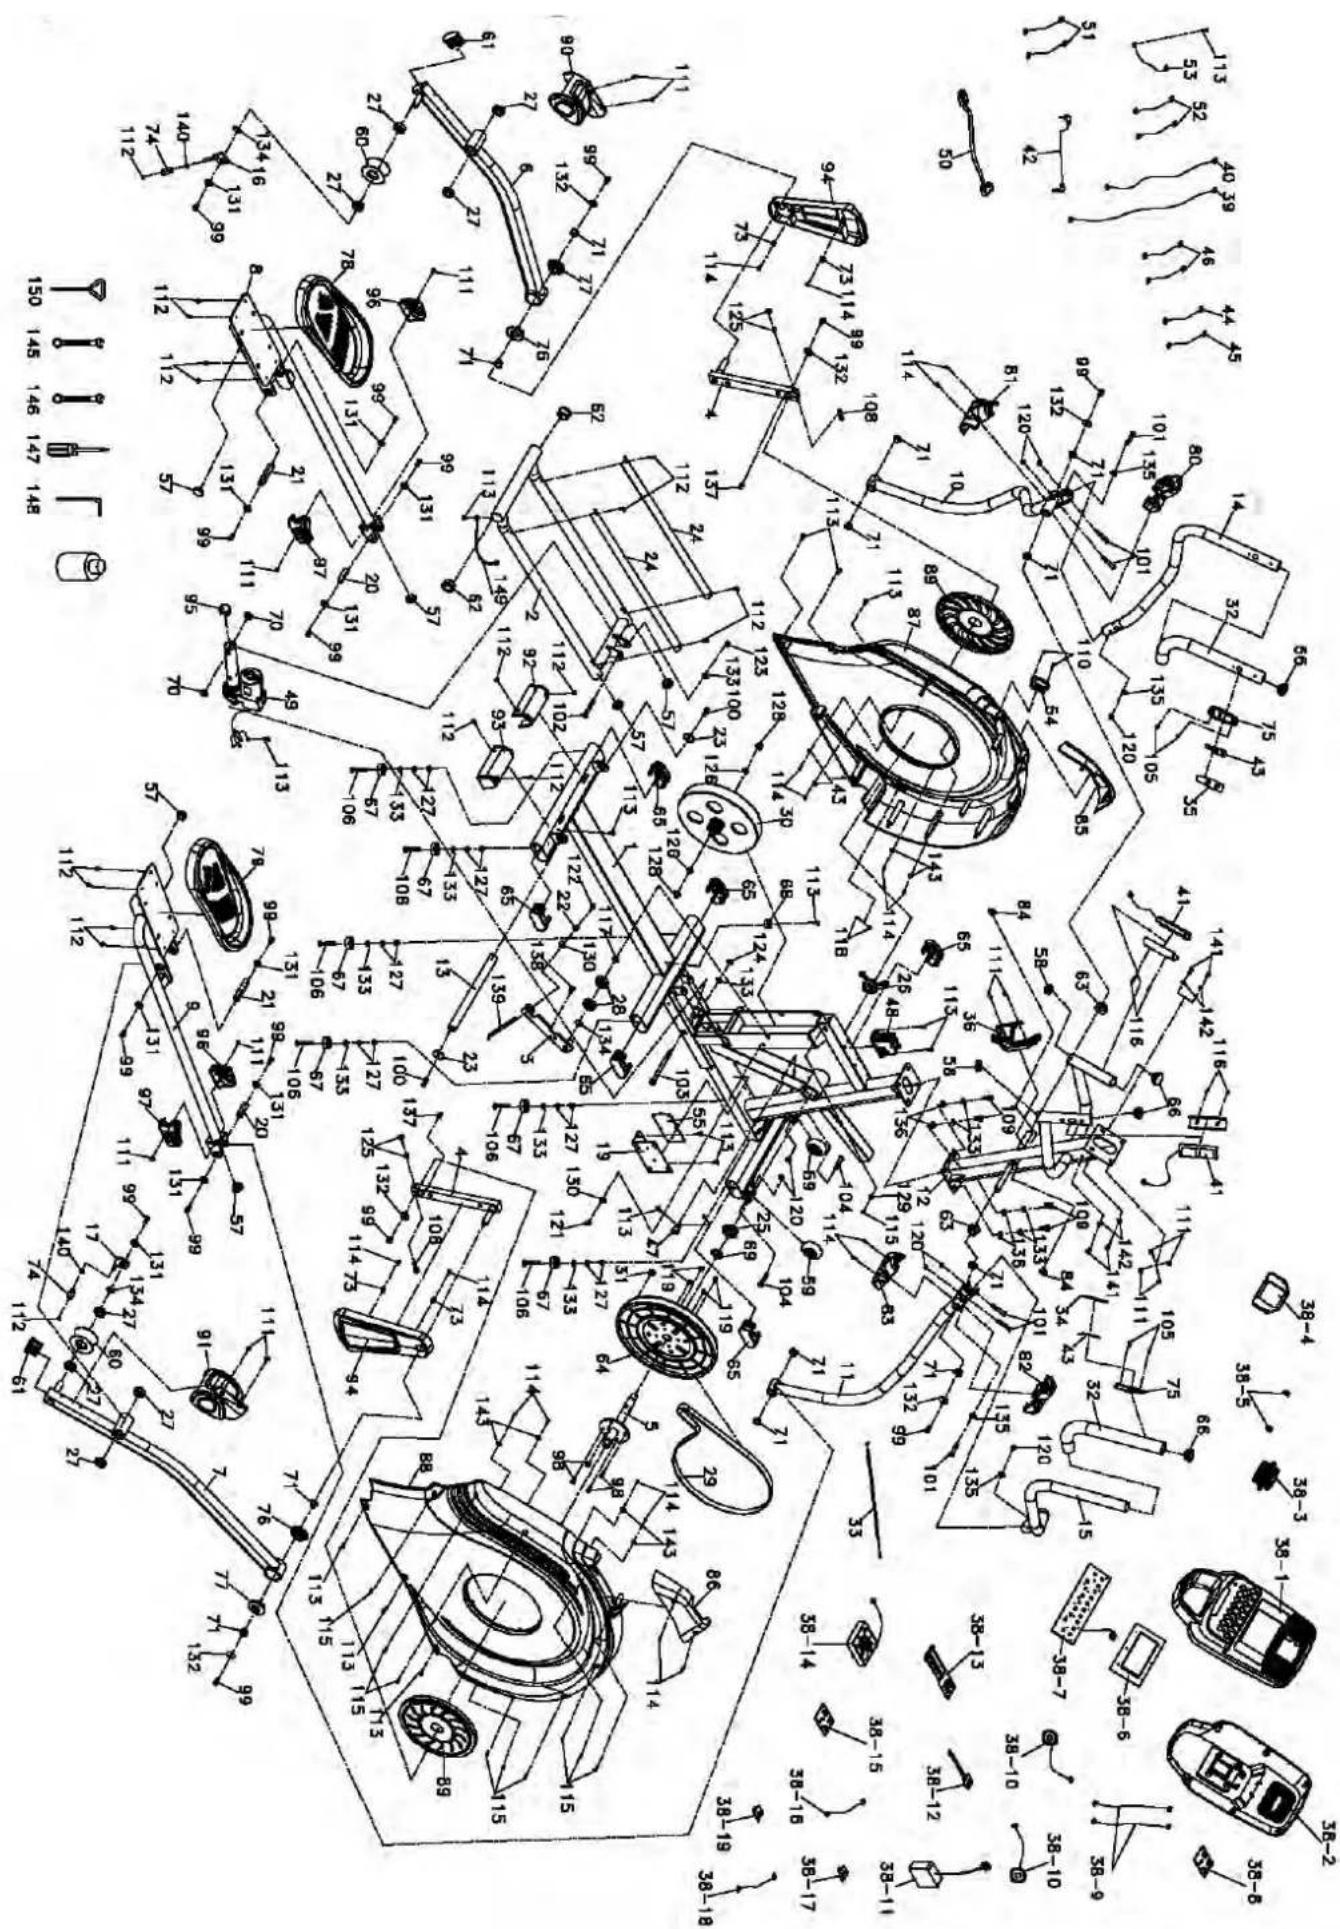
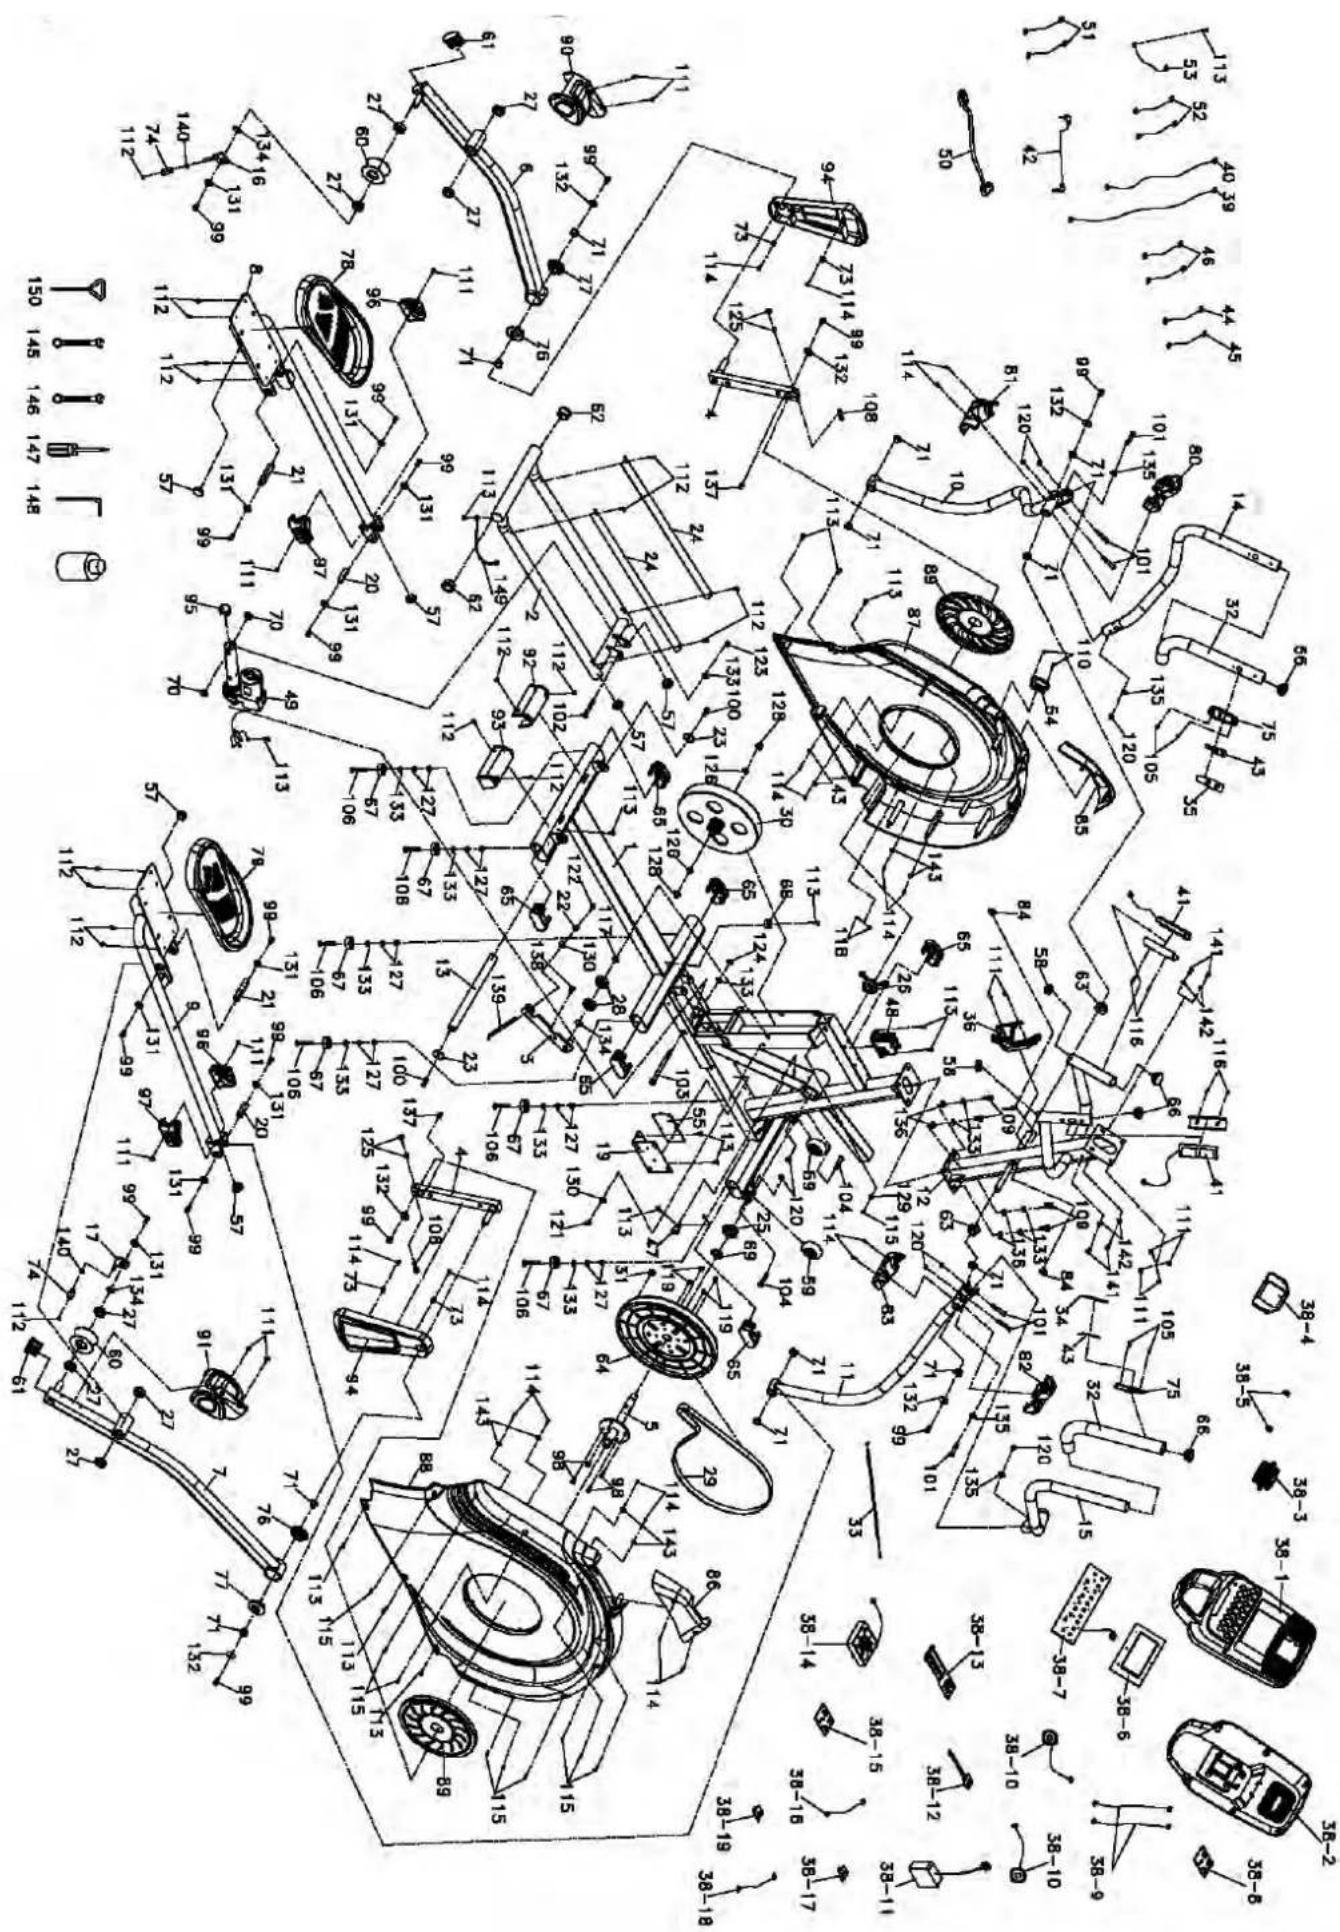
30 Exploded diagram
31 Parts list
33 Assembly instructions
38 Adjustment guide
39 Computer instructions
47 Using the App Kinomap
48 Warm-Up and Cool-Down
49 Guarantee conditions

skandika.com/service
Please visit the Skandika Service portal on our website for setup & help videos, FAQs and downloadable instructions. For more information about Skandika, simply visit our main page www.skandika.com

WARNING
To reduce risk of injury, read and understand this instruction manual before using the device! This machine is intended for home use only in accordance with the instructions provided in this manual. Read the instruction manual carefully before using this device and keep the instruction manual for future use.
SAFETY PRECAUTIONS
- Keep children and pets away from the appliance. This device is suitable for adult use only. Do not leave children unattended in the same room with the machine.
- Do not operate the appliance on deeply padded, plush or shag carpet. Damage to both carpet and device may result.
- Only one person at a time should use the machine.
- Not suitable for children under the age of 14 or pregnant women.
- If the user experiences dizziness, nausea, chest pain, or any other abnormal symptoms, stop the workout at once. Consult a physician immediately.
- Place the device on a solid and level and surface only. Only use the unit in enclosed spaces. Only use in cool, dry environments.
- Do not place fingers or objects in the range of moving parts of the device.
- Always wear appropriate clothing and shoes which are suitable for your workout on the device. The clothes must be designed in a way so that they will not get caught in any part of the device during the work-out due to their form (for example, length). Be sure to wear appropriate shoes which are suitable for the work-out, firmly support the feet and which are provided with a non-slip sole.
- Use the machine only for its intended use as described in this manual. Do not use attachments not recommended by the manufacturer.
- Do not place any sharp object around the machine. Never drop or insert any object into any openings.
- Children, disabled and handicapped persons should use the device only under supervision and in presence of another person who may give support and useful instructions.
-
Before using the machine to exercise, always do stretching exercises to properly warm up.
-
Never operate the machine if the machine is not functioning properly.
- Do not operate where aerosol spray products are being used or where oxygen is being administered. Sparks from the motor may ignite a highly gaseous environment.
- Keep the cord away from heated surfaces.
- To disconnect, turn all controls to the off position, then remove the plug from the outlet.
- The pulse sensors are not medical devices. Various factors, including the user's movement, may affect the accuracy of heart rate readings. The pulse sensors are intended only as exercise aids in determining heart rate trends in general.
-
The service or replacement of parts regarding the power system can only be conducted by certified professionals. Service without certified professional is prohibited.
-
The max. user capacity is 150 KGS.
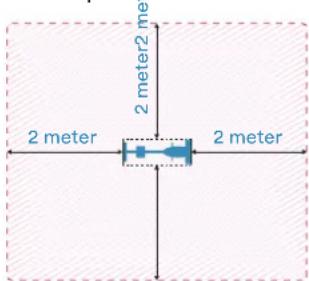
- Please only exercise with a minimum clearance area of 2 meters around the device.
Be sure to consult a physician before you start any device program. He may give you proper hints and advice with respect to the individual intensity of stress for you, your workout and sensible eating habits. This is especially important for individuals over the age of 35 or persons with pre-existing health problems.
text_image
2 meter 2 meter2 me 2 meter 2 meterSTEP 1
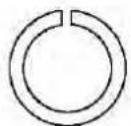
136 Spring washer 3/8"x2T 4 Pcs
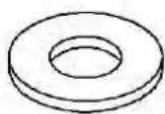
133 Flat washer 3/8"x19x1.5T 4 Pcs
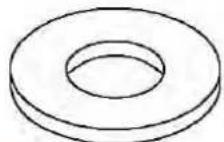
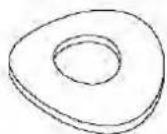
132 Flat washer 8.5×26×2.0T 2 Pcs
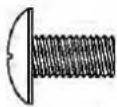
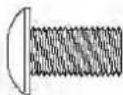
111 Screw M5×10mm 4 Pcs
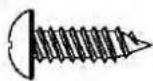
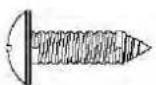
114 Screw 3.5×12mm 2 Pcs
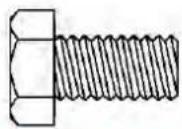
99 Screw 5/16"x15mm 2 Pcs
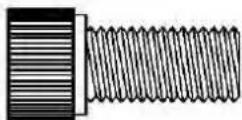
109 Screw 3/8"x3/4" 4 Pcs
STEP 2

120 Nut 5/16"x7T 6 Pcs
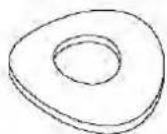
135 Curved washer 5/16"x19×1.5T 4 Pcs
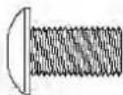
111 Screw M5×10mm 10 Pcs
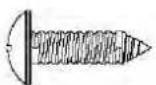
114 Metal screw 3.5×12mm 4 Pcs
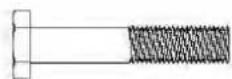
101 Screw 5/16"x1-3/4" 6 Pcs
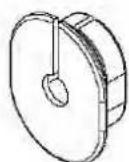
84 Wire cap 2 Pcs
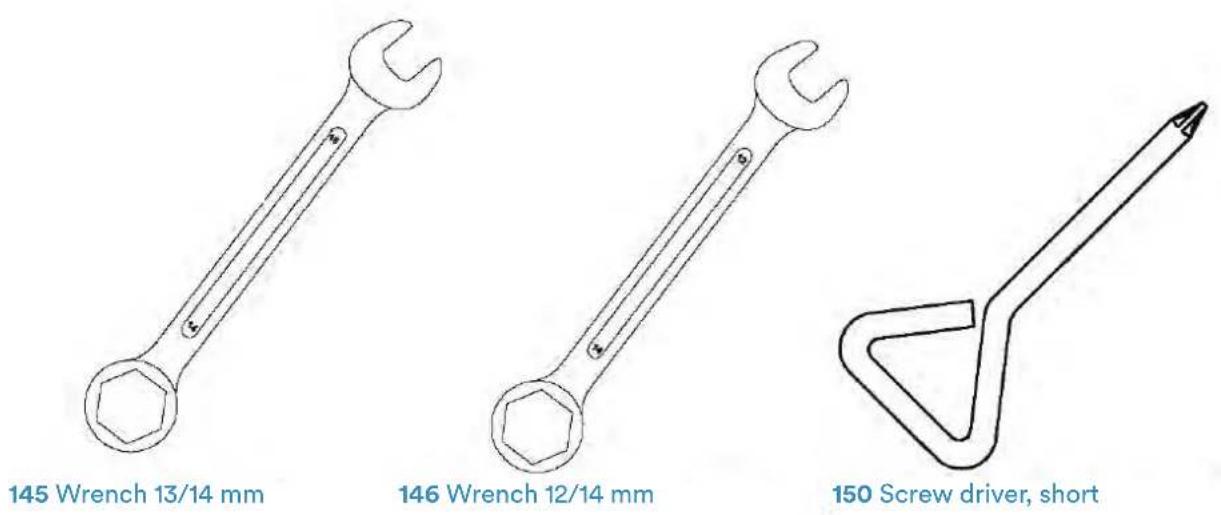
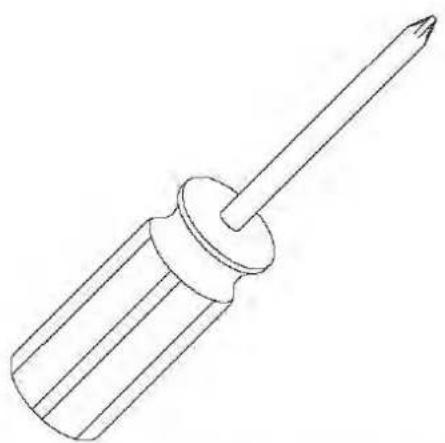
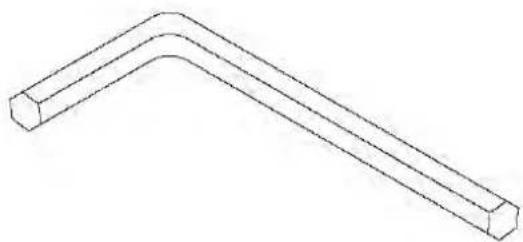
ASSEMBLY TOOLS
natural_image
Line drawing of a screwdriver with a pointed tip and cylindrical head (no text or symbols)147 Screw driver
natural_image
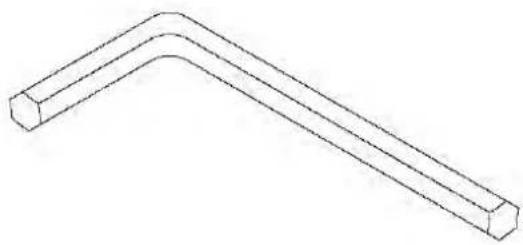
Simple line drawing of a bent pipe or support structure (no text or symbols)148 L Allen wrench
text_image
Technical schematic diagram of a vehicle's internal components with numbered parts and dimension annotations| Part No. | Description Spec. QTY | ||
| 1 Main frame 1 | |||
| 2 Rear Rail Assembly 1 | |||
| 3 Idler Wheel Assembly 1 | |||
| 4 Crank Arm Assembly 2 | |||
| 5 Bushing Housing, Pedal Arm 1 | |||
| 6 Pedal Arm (L) 1 | |||
| 7 Pedal Arm (R) 1 | |||
| 8 Connecting Arm (L) 1 | |||
| 9 Connecting Arm (R) | 1 | ||
| 10 | Lower Handle Bar (L) | 1 | |
| 11 | Lower Handle Bar (R) | 1 | |
| 12 | Console Mast | 1 | |
| 13 | Locking Tube Assembly | 1 | |
| 14 | Left Handle Bar (Top) | 1 | |
| 15 | Right Handle Bar (Top) | 1 | |
| 16 | Left Anti Off Assembly | 1 | |
| 17 | Right Anti Off Assembly | 1 | |
| 19 | Controller Back Plate | 1 | |
| 20 | Axle | 2 | |
| 21 | Axle for Pedal | 2 | |
| 22 | Rod End Sleeve | 2 | |
| 23 | Flat washer | 38 × 8.5 × 4T | 2 |
| 24 | Aluminum Rail | 2 | |
| 25 | 6005_Bearing | 1 | |
| 26 | 60052 RS/B10+2M5_Bearing | 1 | |
| 27 | 6003_Bearing | 8 | |
| 28 | 6203_Bearing | 2 | |
| 29 | Drive belt | 1 | |
| 30 | Flywheel | 1 | |
| 31 | Magnet | 1 | |
| 32 | Handgrip Foam | 2 | |
| 33 | Steel Cable 1 | ||
| 34 | Handgrip Resistance Label | (LEVEL) | 1 |
| 35 | Handgrip Resistance Label | (INCLINE) | 1 |
| 36 | Bottle Holder | 1 | |
| 38 | Console Assembly | 1 | |
| 38~01 | Console Top Cover 1 | ||
| 38~02 | Console Bottom Cover | 1 | |
| 38~03 | Deflector Fan Grill | 1 | |
| 38~04 | Fan Fixing Plate | 1 | |
| 38~05 | Fan Grill Anchor | 2 | |
| 38~06 | Console Display Board | 1 | |
| 38~07 | Key Board | 1 | |
| 38~08 | Amplifier Controller | 1 | |
| 38~09 | Amplifier Cable | 250 mm | 2 |
| 38~10 | Speaker with cable | 250 mm | 2 |
| 38~11 | W/Receiver, HR | 150 mm 1 | |
| 38~12 | Sound Board | 1 | |
| 38~13 | Interface Board | 1 | |
| 38~14 | Fan Assembly | 400 mm | 1 |
| 38~15 | Bluetooth | 1 | |
| 38~16 | Bluetooth W/Cable | 1 | |
| 38~17 | USB Charging module | 1 | |
| 38~18 | USB Board W/Cable | 1 | |
| 39 | 12P Computer Cable | 1600 mm | 1 |
| 40 | 5P Computer Cable | 800 mm | 1 |
| 41 | Handpulse Assembly | 850 mm | 2 |
| 42 | Audio Cable | 400 mm | 1 |
| 43 | Resistance Button W/Cable | 2 | |
| 44 | Handle Wire (Upper), Resis-tance (White) | 450 mm | 1 |
| 45 | Handle Wire (Upper), Incline (Red) | 450 mm | 1 |
| Part No. | Description Spec. QTY | ||
| 46 | Switch Cable (Lower), Resistance/Incline | 900 mm | 2 |
| 47 | Sensor W/Cable | 700 mm | 1 |
| 48 | Gear Motor | 1 | |
| 49 | Incline Motor 1 | ||
| 50 | Power Cord | 1 | |
| 51 | Connecting Wire, Controller | 400 mm | 2 |
| 52 | Connecting Wire | 80 mm | 2 |
| 53 | Ground Wire | 200 mm | 1 |
| 54 | AC Electronic Module | 1 | |
| 55 | Incline Controller | 1 | |
| 57 | Round Cap | ∅32 (2.5T) | 6 |
| 58 | Round Cap | ∅32 (2.0T) | 2 |
| 59 | Transportation Wheel | ∅65 | 2 |
| 60 | Slide Wheel , Urethane | ∅78 | 2 |
| 61 | Stabilizer End Cap | 2 | |
| 62 | Bushing | 2 | |
| 63 | Upright Bar Bushing | 2 | |
| 64 | Drive Pulley | 1 | |
| 65 | Oval End Cap | 6 | |
| 66 | Button Head Plug | ∅32 (1.8T) | 4 |
| 67 | Rubber Foot | ∅35 × 10 | 6 |
| 68 | Rubber Foot Pad | 1 | |
| 69 | Spacer Bushing | 1 | |
| 70 | Nylon Washer | ∅25 × ∅10 × 3T | 2 |
| 71 | Bushing | (WFM 1719 12) | 12 |
| 73 | End Cap Stopper | 4 | |
| 74 | Sleeve | 2 | |
| 75 | Handle Switch Bracket | 2 | |
| 76 | Bushing (Flat) | ∅56×∅19×15L | 2 |
| 77 | Bushing (Curved) | ∅56×∅19×21L | 2 |
| 78 | Pedal (L) | 1 | |
| 79 | Pedal (R) | 1 | |
| 80 | Front Handle Cover (L) | 1 | |
| 81 | Rear Handle Cover (L) 1 | ||
| 82 | Front Handle Cover (R) | 1 | |
| 83 | Rear Handle Cover (R) | 1 | |
| 84 | Wire Cap | 2 | |
| 85 | Left Upright Cover | 1 | |
| 86 | Right Upright Cover | 1 | |
| 87 | Side Case (L) | 1 | |
| 88 | Side Case (R) | 1 | |
| 89 | Side Case Pad | 2 | |
| 90 | Sliding Wheel Cover (L) | 1 | |
| 91 | Sliding Wheel Cover (R) | 1 | |
| 92 | Rear Slide Wheel Cover (L) | 1 | |
| 93 | Rear Slide Wheel Cover (R) | 1 | |
| 94 | Crank Arm End Cap | 2 | |
| 95 | Round Cap | 1 | |
| 96 | Connecting Arm Cover (L) | 2 | |
| 97 | Connecting Arm Cover (R) | 2 | |
| 98 | Hex Head Screw | 1/4" × 3/4" | 4 |
| 99 | Hex Head Screw | 5/16" × 15 mm | 16 |
| 100 | Hex Head Screw | 5/16" × 1" | 2 |
| 101 | Hex Head Screw | 5/16" × 1-3/4" | 6 |
| 102 | Hex Head Screw | 3/8" × 2-1/2" | 1 |
| 103 | Hex Head Screw | M10 × 130 mm | 1 |
| 104 | Button Head Socket Screw | 5/16" × 1-3/4" | 2 |
| 105 | Flat Head Socket Screw | M5 × 20 mm | 4 |
| 106 | Flat Head Socket Screw | 3/8" × 2" | 6 |
| 108 | Socket Head Cap Screw | M8 × 35 mm | 2 |
| 109 | Socket Head Cap Screw | 3/8" × 3/4" | 4 |
| 110 | Phillips Head Screw M4 × 12 mm 2 | ||
| 111 | Phillips Head Screw M5 × 10 mm 14 | ||
| 112 | Phillips Head Screw M5 × 10 mm 18 | ||
| 113 | Tapping Screw 5 × 19 mm 16 | ||
| 114 | Metal Screw | ∅3.5 × 12 mm 18 | |
| 115 | Metal Screw | ∅3.5 × 16 mm 10 | |
| 116 | Tapping Screw | ∅3 × 20 mm 4 | |
| 117 | C-Ringø17 mm | 1 | |
| 118 | Nut | M4 × 5T | 2 |
| 119 | Nut1/4" | 4 | |
| 120 | Nut | 5/16" × 7T | 8 |
| 121 | NutM8 × 7T | 1 | |
| 122 | Nut | M8 × 9T | 1 |
| 123 | Nut | 3/8" × 7T | 1 |
| 124 | Nut | M10 × 8T | 1 |
| 125 | Nut | M8 × 6.3T | 4 |
| 126 | Nut | 3/8" × UNF26 × 4T | 2 |
| 127 | Nut | 3/8" × 7T | 12 |
| 128 | Nut | 3/8" × UNF26 × 11T | 2 |
| 129 | Flat Washer | ∅1/4" × 19 | 1 |
| 130 | Flat Washer | 5/16" × 23 × 1.5T | 2 |
| 131 | Flat Washer | 5/16" × 23 × 3.0T | 10 |
| 132 | Flat Washer | ∅8.5 × 26 × 2.0T | 6 |
| 133 | Flat Washer | 3/8" × 19 × 1.5T | 12 |
| 134 | Flat Washer | ∅17 × 23.5 × 1T | 3 |
| 135 | Curved Washer | 5/16" × 19 × 1.5T | 4 |
| 136 | Spring Washer | 3/8" × 2T | 4 |
| 137 | Woodruff Key | 2 | |
| 138 | Carriage Bolt | M8 × 20 mm | 1 |
| 139 | J Bolt | M8 × 155 mm | 1 |
| 140 | E-Clip | 2 | |
| 141 | Phillips Head Screw M6 × 15 mm 4 | ||
| 142 | Flat Washer | ∅6.6 × 12 × 1.5T | 4 |
| 143 | Flat Washer | ∅5 × 15 × 1.2T | 8 |
| 145 | Wrench | 13/14 mm | 1 |
| 146 | Wrench | 12/14 mm | 1 |
| 147 | Screw Driver | 1 | |
| 148 | L Allen Wrench | 1 | |
| 149 | Ground Wire | 1 | |
| 150 | Short Screw Driver | 1 | |
| 152 | Ground Wire | 200 mm | 1 |
| 153 | Spring Washer | ∅8 × 1.5T | 2 |
ASSEMBLY
INSTRUCTIONS
1
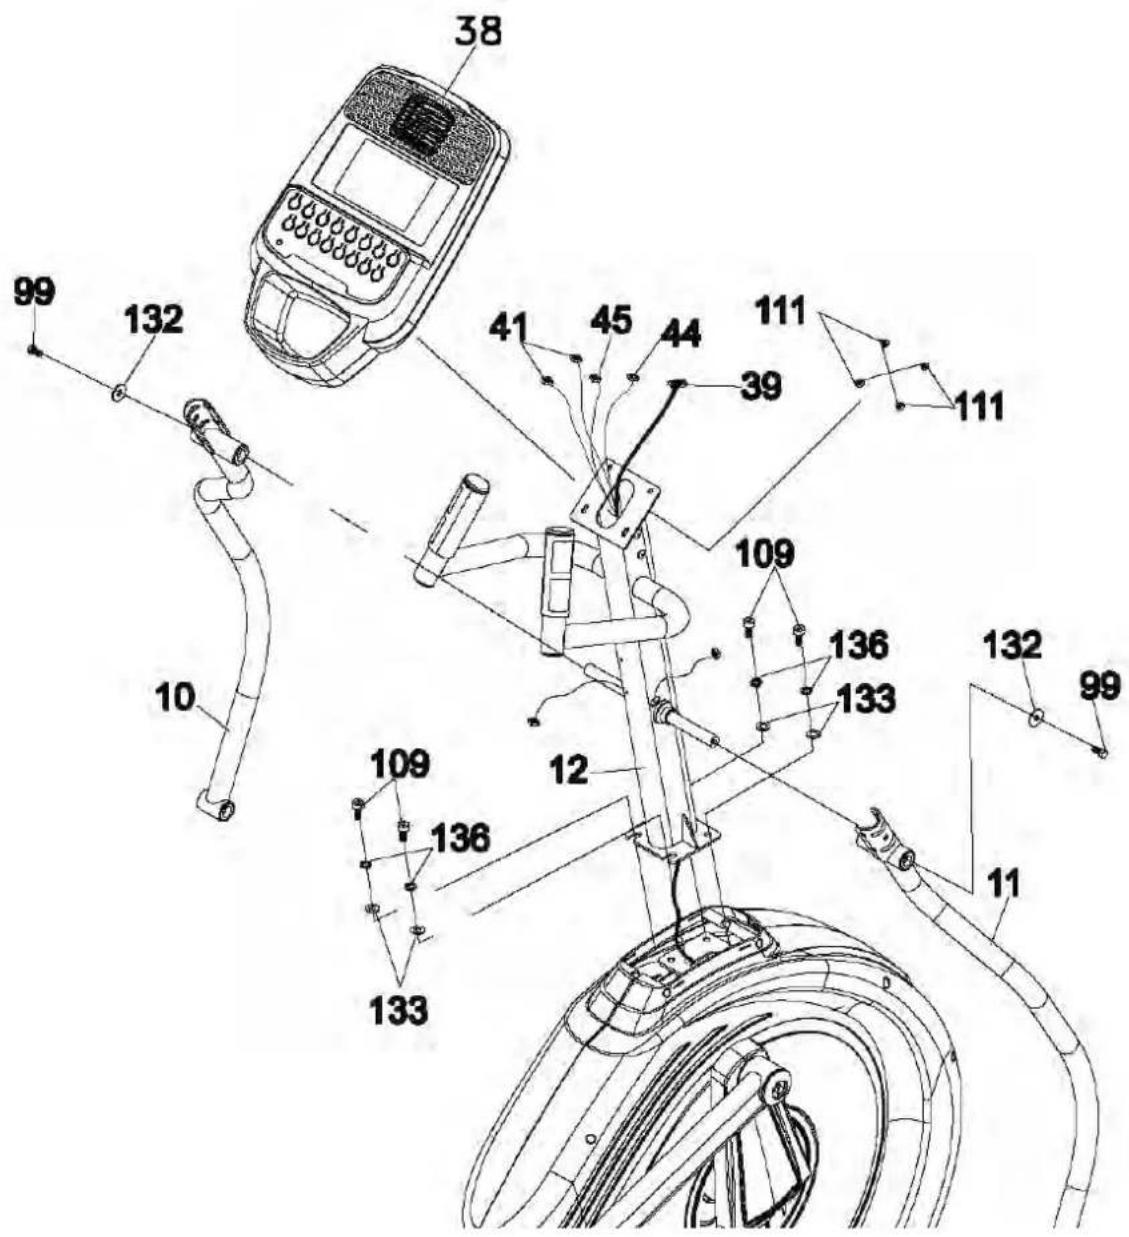
- Feed the computer cable (39) through the console mast (12) from below and then fix the console mast (12) to the mounting plate on the main frame with 4 screws (109), 4 spring washers (136) and 4 washers (133) using the Allen wrench (148).
- Connect computer cable (39), handpulse cables (41) and handle wires (44 & 45) to console (38). Fix the console (38) on the console mounting plate with 4 screws (111) - be careful not to damage the cables!
- Place left and right Lower Handle Bars (10 & 11) onto left side and right side of console mast shafts and secure with screws (99) and flat washers (132) with the help of the wrench (146).
text_image
99 132 10 38 41 45 44 111 39 111 109 136 133 133 12 109 136 11 132 992a
Connecting Arms & Lower Handle Bars
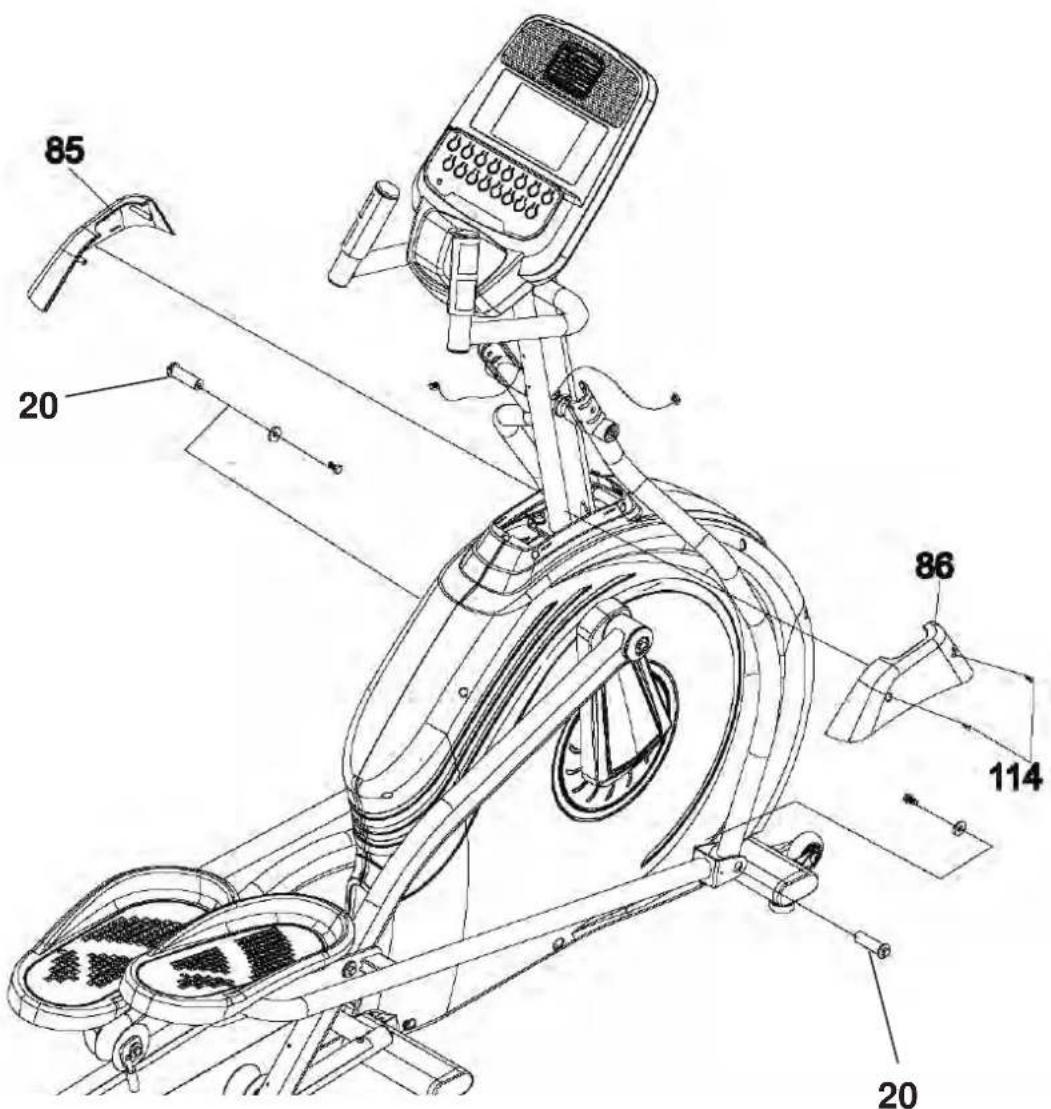
- Release axles (20) of left and right connecting arms. Connect the left and right connecting arm to left and right lower handle bars and secure with axles (20) and the screws and washers as shown below by using the wrench 12/14 mm (146).
- Fix left and right upright covers (85 & 86) on side case and console mast using 2 screws (114). Use the screwdriver (147) to fix them.
text_image
85 20 86 114 202b
Install left and right handle bars
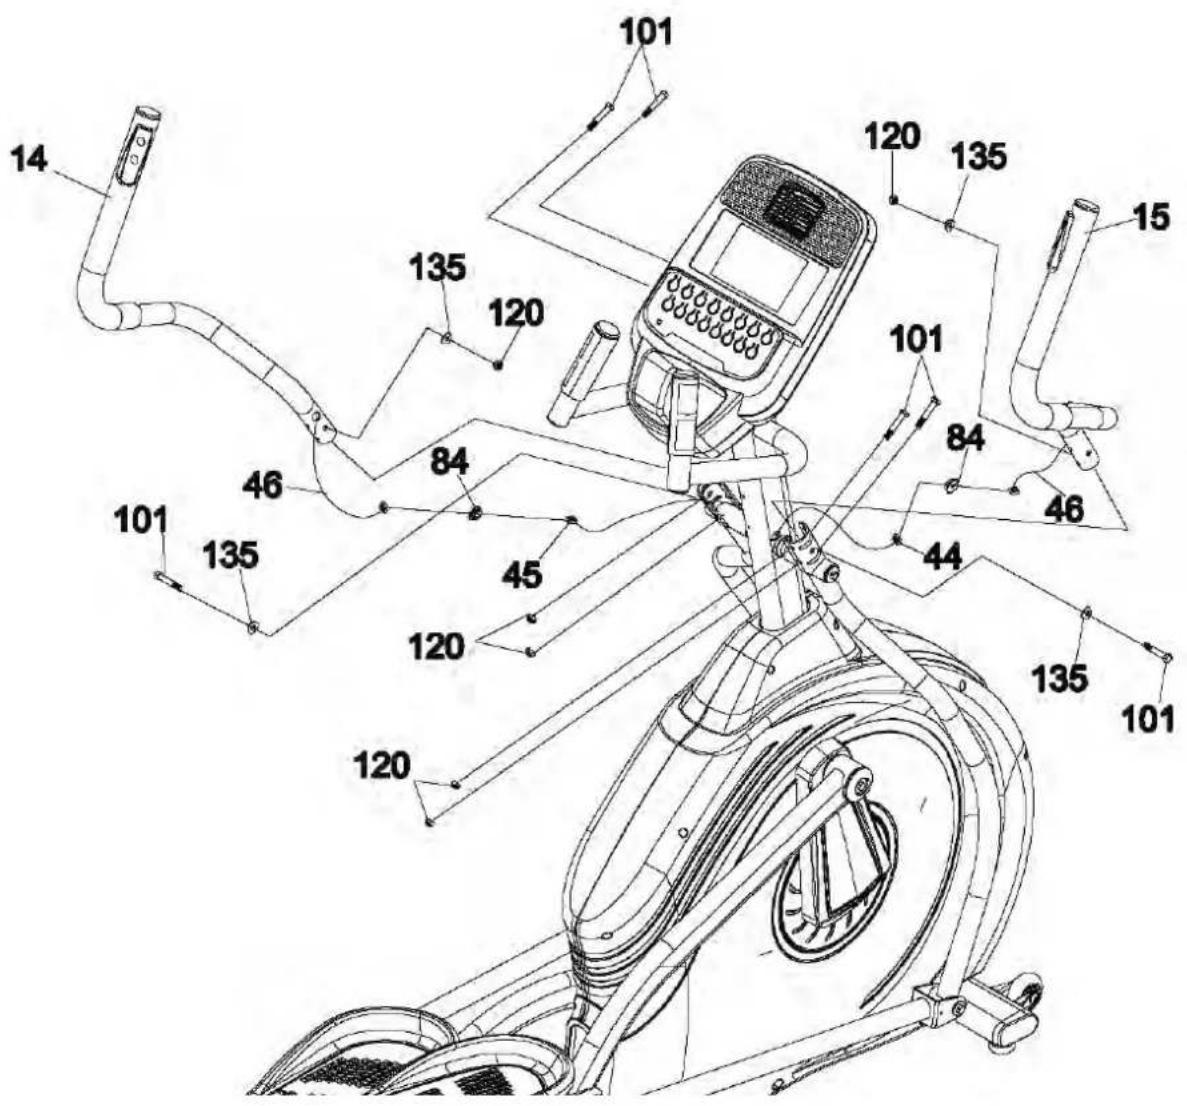
- Fix left and right handle bars (14 & 15) on left and right lower handle bars with 3 screws (101), 2 curved washers (135) and 3 nuts (120) by using wrench (145 & 146) on each side.
- Connect upper resistance wire (44) to lower resistance/incline switch cable (46) and store it inside the frame tube. Put wire cap (84) onto the console mast. Now connect upper incline wire (45) to lower resistance/incline switch cable (46) and store it inside the frame tube. Put on wire cap (84).
text_image
Technical diagram of a stationary exercise machine with numbered components for identification2c
Install covers
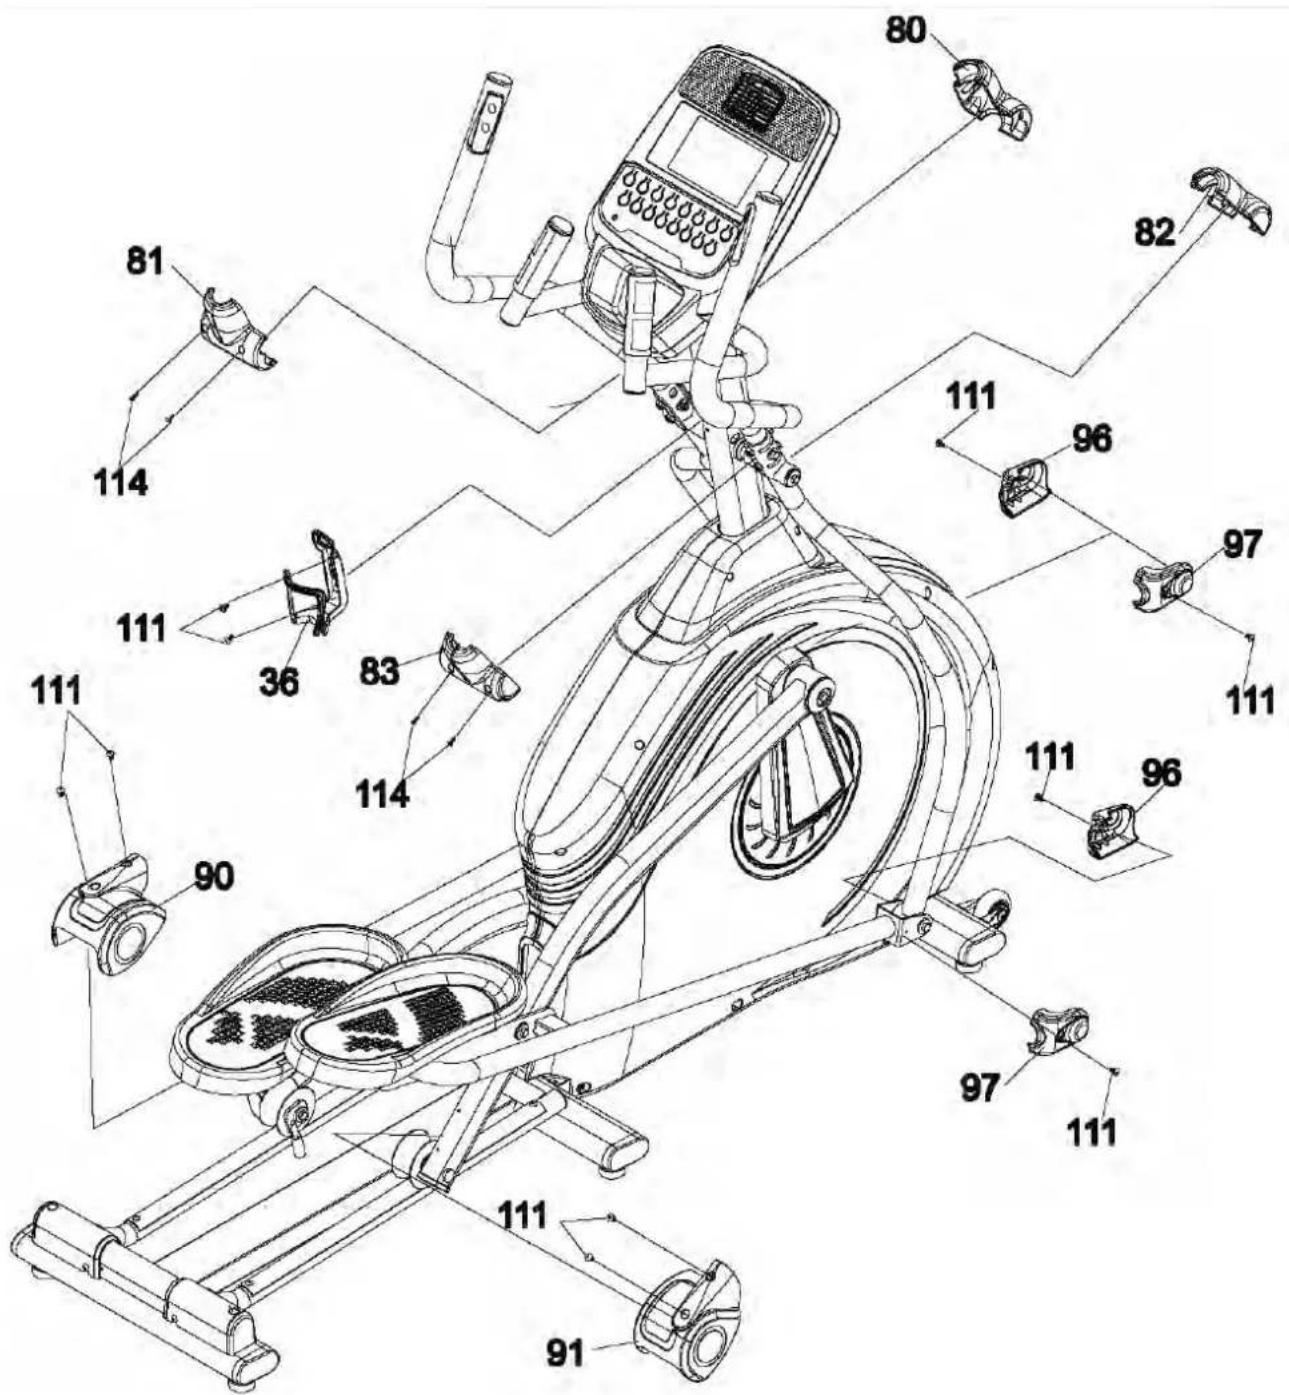
- Fix left and right connecting arm covers (96 & 97) on both connecting arms with 2 screws (111) on each side. Use the included screw driver (147) for this step.
- Install sliding wheel covers (90 & 91) on each side and secure with totally 4 screws (111).
- Attach the handle covers (80, 81, 82, 83) as shown with the help of 4 screws (114).
- Fix the bottle holder (36) on the console mast with 2 screws (111).
text_image
Technical diagram of a stationary exercise machine with numbered components for identificationTRANSPORTATION
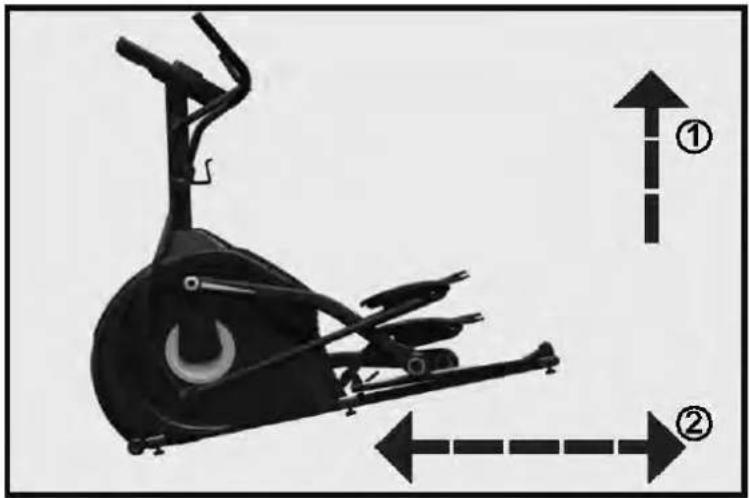
This appliance is equipped with transportation wheels, so you can easily move it to another location. Just lift the rear side of the device and carefully move it with the help of the transportation wheels.
natural_image
Side view of a stationary exercise bike with directional arrows indicating movement or positioning (no text or symbols present)LUBRICATION
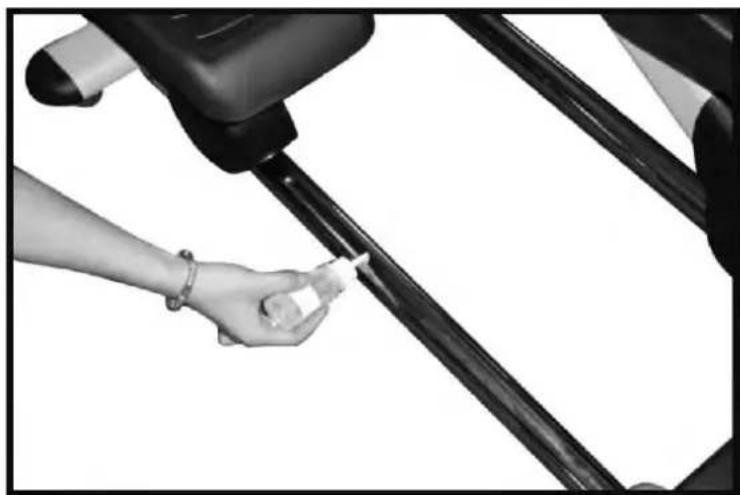
- We recommend to lubricate the device about every 3 months or if you hear exceptional noises during exercise.
- For proper lubrication, spread 2 cl of the lubricant on the middle of the rail (see figure below). You can use the device again directly after lubrication.
natural_image
Close-up of a hand holding a small object near a vehicle's side panel (no visible text or symbols)COMPUTER INSTRUCTIONS
text_image
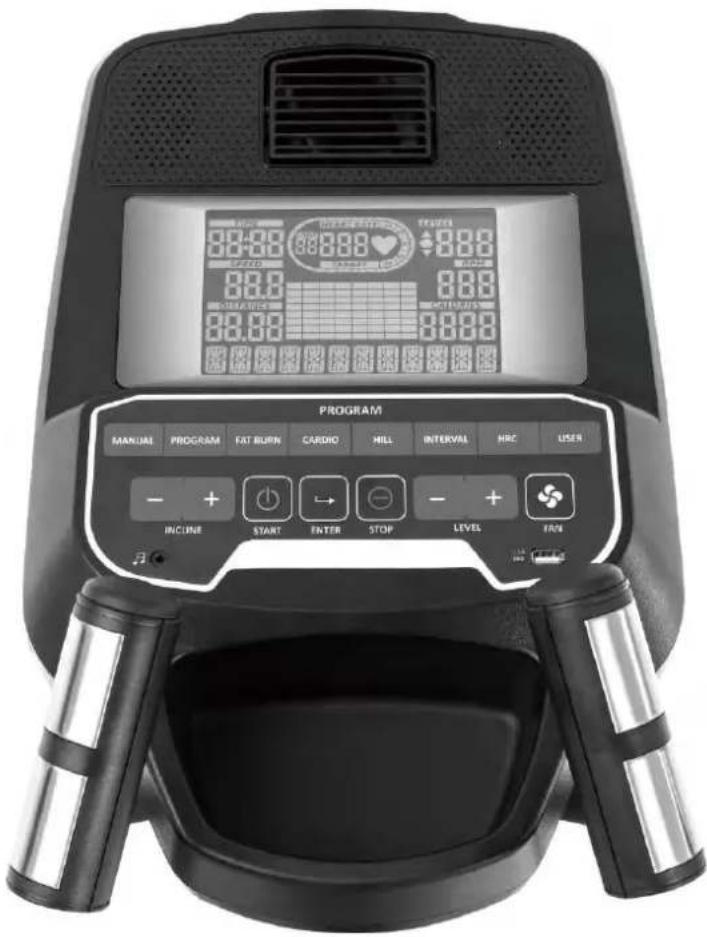
88:20 88:20 88:20 88:20 88:20 88:20 88:20 88:20 88:20 88:20 88:20 88:20 88:20 88:20 PROGRAM MANUAL PROGRAM FAT BURN CARDIO MILL INTERVAL HRC USER + + INCINE START ENTER STOP LEVEL FANFUNCTIONAL BUTTONS
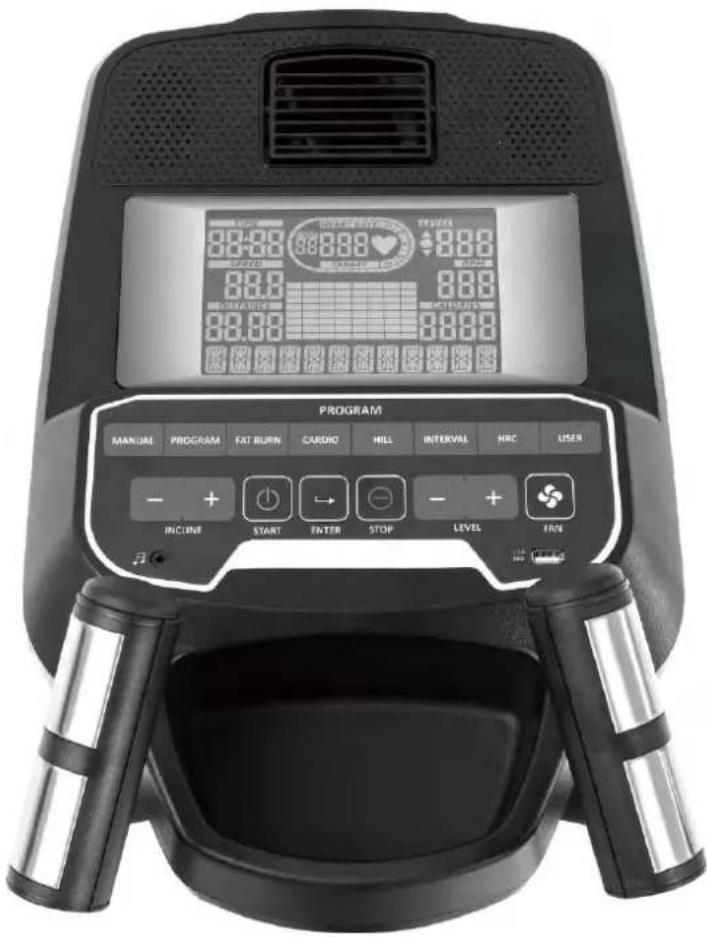
MANUAL Select manual mode.
PROGRAM Select program mode.
FAT BURN / CARDIO Select fat burn / cardio / hill / interval / HRC / user mode. / HILL / INTERVAL / HRC / USER
INCLINE - / + Decrease / Increase incline level.
START Start a workout.
ENTER Confirm function or setting value; switch LEVEL / INCLINE display
STOP Workout pause; press again to get into standby mode. Press and hold the button to restart console.
LEVEL - / + Decrease / Increase a function (e.g. time).
FAN Switch fan on or off.
OPERATION
This device requires AC 220V mains power supply. Connect the power cable to the socket on the left side of the machine near the front stabilizer and turn on the main switch. The console will power on with a beep sound, the full LCD will be shown for 2 seconds and afterwards the version and model no.s for 3 seconds. Then, the console will enter the USER DATA setting process:

flowchart
graph LR
    A["USER 1"] --> B["AGE 25"]
    B --> C["WEIGHT 65"]
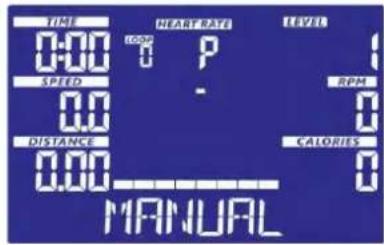
Choose the User (from 1 to 4) and enter all necessary personal data (your age in years and weight in kgs). Use LEVEL - / + and ENTER for all input screens. Afterwards, the console switches to standby mode.
text_image
TIME 0:00 SPEED 0.0 DISTANCE 0.00 NEAR RATE 100P - HEAVY RATE P LEVEL RPM CALORIES 0 MANUALIn standby mode you may press START to immediately start the workout without anymore settings. Alternatively, you may choose another mode with LEVEL - / + and ENTER or directly select a mode with the MANUAL / PROGRAM / FAT BURN / CARDIO / HILL / INTERVAL / HRC / USER buttons.
Manual Mode
Select manual mode with LEVEL - / + (choose "MANUAL") and ENTER or directly select the mode by pressing the MANUAL button. Now you may set different target values (TIME → DISTANCE → CALORIES → HEART RATE) with LEVEL - / + and ENTER. Press START to begin the workout. Press LEVEL - / + to adjust the resistance and INCLINE - / + to adjust the incline level. Press STOP to pause the workout and STOP again to return to standby mode. If a target value is set for TIME, DISTANCE or CALORIES, the machine will stop automatically if the value has been counted down to 0. Press STOP to leave this mode and return to standby mode.
Program Mode
After selection of program mode, choose a program from 1 to 18 with LEVEL - / + and ENTER. You may now adjust a target time for your workout. Press START to begin the workout. Press LEVEL - / + to adjust the resistance and INCLINE - / + to adjust the incline level. Press STOP to pause the workout and STOP again to return to standby mode. If a target value is set for TIME, the machine will stop automatically if the value has been counted down to 0. Press STOP to leave this mode and return to standby mode.
Fat Burn / Cardio / Hill / Interval Modes
These are special programs designed for a more effective workout in regard to your personal aim. After selection of the wanted mode, you may adjust a target time for your workout. Press START to begin the workout. Press LEVEL - / + to adjust the resistance and INCLINE - / + to adjust the incline level. Press STOP to pause the workout and STOP again to return to standby mode. If a target value is set for TIME, the machine will stop automatically if the value has been counted down to 0. Press STOP to leave this mode and return to standby mode.
HRC Mode
This mode requires the input of a target heart rate. The device will then try to control the resistance level automatically according to the desired heart rate level. After selection of HRC mode, you can select 50%, 60%, 70%, 80%, 90%, or TARGET HRC. If a percentage is chosen, the device will calculate the maximum pulse frequency by the input of your age and a percentage. The formula is: x% (e.g. 50%, 60%, 70%, 80% or 90%) x (220 – your age). TARGET HRC allows the direct input of the maximum pulse frequency. After starting the programme, the resistance level will be controlled automatically constantly during exercise and cannot be adjusted manually.
You may now adjust a target time for your workout. Press START to begin the workout. Press INCLINE - / + to adjust the incline level. Press STOP to pause the workout and STOP again to return to standby mode. If a target value is set for TIME, the machine will stop automatically if the value has been counted down to 0. Press STOP to leave this mode and return to standby mode.
If there is no pulse signal received during workout, the console will show “CHECK PULSE” and after 1 minute it will switch to standby mode. If the current pulse is over target pulse, the console will beep as a warning signal. If the actual pulse is more than 30 seconds over the target pulse, the device will automatically stop.
User Mode
In this mode you can exercise according to your own programmed profiles. You can preset each segment load in the profile (totally 20 segments) with the LEVEL - / + and ENTER buttons. After that, you need to preset each segment's incline with the LEVEL - / + and ENTER buttons. After you have finished your input, press and hold ENTER button to enter TIME presetting. Set your desired target time and press START to begin the workout.
Press LEVEL - / + to adjust the resistance and INCLINE - / + to adjust the incline level. Press STOP to pause the workout and STOP again to return to standby mode. If a target value is set for TIME, the machine will stop automatically if the value has been counted down to 0. Press STOP to leave this mode and return to standby mode.
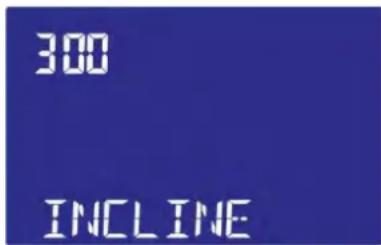
Incline calibration
In standby mode, press ENTER and INCLINE + for 2 seconds to enter the auto-calibration mode.
text_image
300 INCLINEFactory setting mode
In standby mode, press ENTER and LEVEL + for 2 seconds to enter the factory setting mode. These settings should only be amended after checking with the customer service. You may adjust different system settings with the LEVEL - / + and ENTER buttons:
- UNIT (KM/ML) - adjust to english or metric unit
- BRIGHT(0\~15) - adjust backlight brightness
- SPECIAL(YES/NO) - set motor to special drive action
- MAX LOAD(16-20-24-32) - set the maximum resistance value
- UX DATA(ON/OFF) - 4 sets of user options
- WHEEL(10\~99) - Wheel setting
- INCLINE LOAD(1\~20) - set the maximum incline value
When the last option is set, the values will be stored and the device will be restarted. You may also press STOP to exit.
Program profiles:
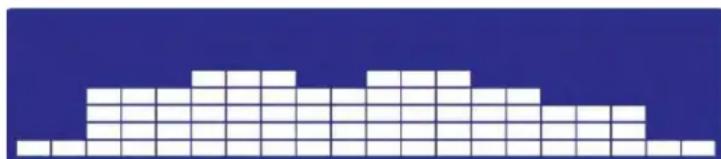
PROGRAM 1: Muscle endurance
Muscle endurance is the ability of a muscle to work under stress for a long time. Program 1 is ideal for increasing this ability by stimulating the adaptability of the muscle tissue.
natural_image
Pixelated white block pattern on a dark blue background (no text or symbols)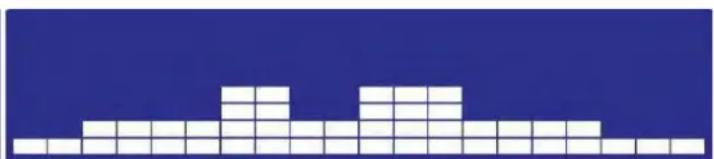
natural_image
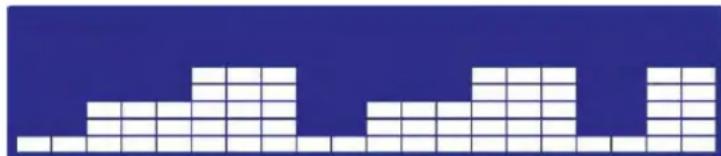
Abstract geometric pattern composed of white squares on a blue background (no text or symbols)PROGRAM 2 : Core Muscles
The core muscles must be trained continuously to maintain or increase muscle strength. Program 2 is capable of effectively setting this training stimulus.
natural_image
Abstract geometric pattern composed of white squares on a blue background (no text or symbols)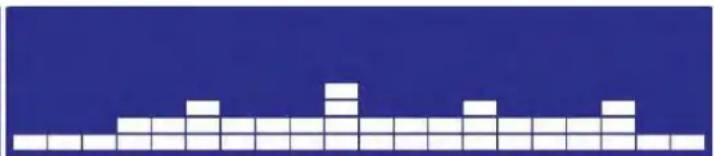
natural_image
Pixelated white block pattern on a dark blue background (no text or symbols)PROGRAM 3: Simulation
Program 3 simulates an ascent and the resulting muscular training effects.

natural_image
Two side-by-side pixel art blocks of white squares on a blue background, no text or symbols present.PROGRAM 4 : Aerobic training
The aerobic training program makes it possible to enter a moderate heart rate zone at a high running frequency and thus activate aerobic fat reduction.

natural_image
Two identical pixelated white blocks on a blue background, resembling abstract geometric patterns or pixel blocks (no text or symbols)PROGRAM 5: Hills
Program 5 combines several types of training - e.g. with variations of cardio and strength components.

natural_image
Two side-by-side pixel art blocks on a blue background, no text or symbols presentPROGRAM 6 : X-Sport
Program 6 continuously increases the resistance to a high level to increase muscle strength.

natural_image
Two identical grid patterns on a solid blue background, no text or symbols presentPROGRAM 7 : Cardiopulmonary
Program 7 is particularly useful for effective cardiovascular training.

natural_image
Two side-by-side pixel art blocks on a solid blue background, no text or symbols presentPROGRAM 8 : Off-Road
Program 8 is a simulated off-road race with different load specifics.

natural_image
Two identical white pixelated geometric shapes on a blue background, no text or symbols present.PROGRAM 9 : Wild Ride
Program 9 is an alternative route for cardiovascular training.

natural_image
Two identical white pixelated blocks on a blue background, no text or symbols presentPROGRAM 10 : Limited value
Program 10 is designed to train with continuous resistance. This is especially beneficial for strength endurance.

natural_image
Two identical grid patterns on a blue background, no text or symbols presentPROGRAM 11: Low-intensity training
Program 11 can be completed comfortably. It is especially recommended for beginners and people with untrained muscles.

natural_image
Two identical grid-based block structures on a blue background, no text or symbols presentPROGRAM 12 : Canyon Run
Program 12 alternates between high and low intensities. It is ideal for endurance and cardiovascular training.

natural_image
Two side-by-side grid patterns on a blue background, no text or symbols presentPROGRAM 13 : Interval

text_image
Interval training for effective endurance training.PROGRAM 14 : Mountainous country
Especially suitable for strengthening the leg muscles.

natural_image
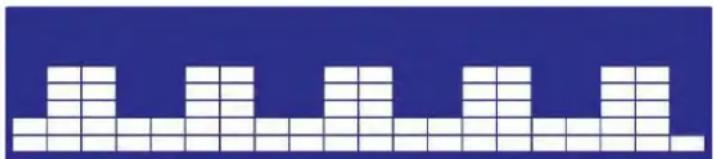
Two identical grid patterns on a blue background, no text or symbols presentPROGRAM 15 : Downhill run
Program 15 is particularly suitable for training speed.

natural_image
Two side-by-side grid patterns on a blue background, no text or symbols presentPROGRAM 16 : Cross-Training
Program 16 is designed for systemic training to achieve comprehensive physical fitness.

natural_image
Two identical pixelated white blocks on a blue background, no text or symbols present.PROGRAM 17 : Downhill run II
Speed training with parts for muscle strengthening.

natural_image
Two identical pixelated white blocks on a blue background, resembling a stylized mountain or pyramid pattern (no text or symbols)PROGRAM 18 : Interval II
Interval training for advanced endurance training.

natural_image
Two identical grid patterns on a blue background, no text or symbols presentFAT BURN
The Fatburn program is designed to provide effective fat burning and the recommended heart rate for this workout is approximately 60% to 70% of maximum heart rate (220 age).

natural_image
Two identical grid patterns on a blue background, no text or symbols presentCARDIO
The Cardio Program is designed to strengthen cardiovascular function and endurance. Blood flow and heart muscle activity are stimulated.

natural_image
Two identical pixelated white blocks on a blue background, resembling a stylized face or wave pattern (no text or symbols)HILL
The program “Hill” simulates the up and down of a hill. The resistance varies accordingly during the workout.
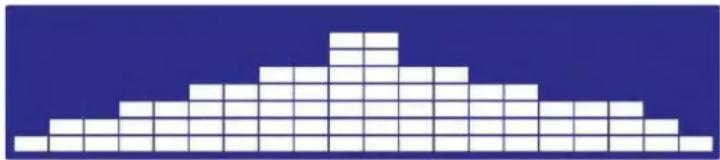
natural_image
Abstract geometric pattern composed of white squares on a blue background (no text or symbols)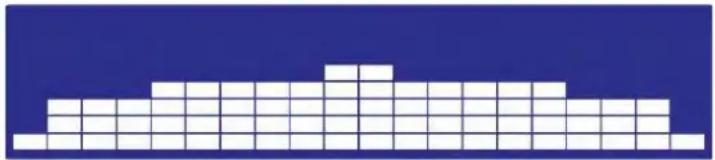
natural_image
Pixelated white geometric shape on a blue background (no text or symbols)INTERVAL
This program with a special interval course continuously alternates between high-intensity and less intensive training segments. This trains endurance and makes the cardiovascular system more efficient during exertion.
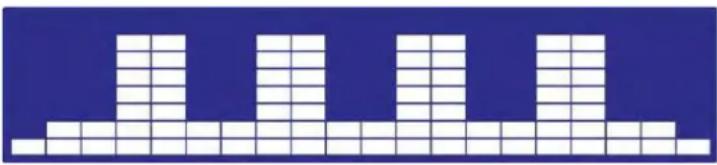
natural_image
Pixelated abstract pattern with white squares on blue background (no text or symbols)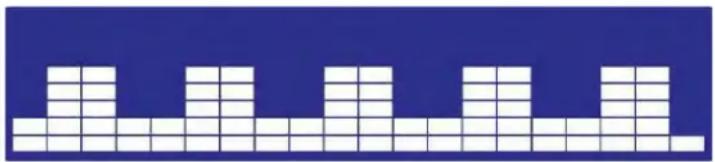
natural_image
Abstract grid pattern with white blocks on a blue background (no text or symbols)KINOMAP
The free KinoMap app turns your device into a powerful and fun fitness product! Choose from the geotagged video on Kinomap and go! Your position is shown in the video and as icon on the map. Download the Kinomap Fitness app in the app or play store by searching for 'Kinomap Fitness' or follow one of the links below.
Install and open the app and register resp. log in. Activate Bluetooth®. Now add the training device as follows:



text_image
Suchen Kinomap KinKingsp SAG ACTUAL SIGNAL 4,3 ★★★★☆ *53 46 Neue Funktionen Thanks for training on Kinomap. Our daily concern is offering you the best experience these d. Versionerlauf 3yr 1 M versus 8.4 M Vorschau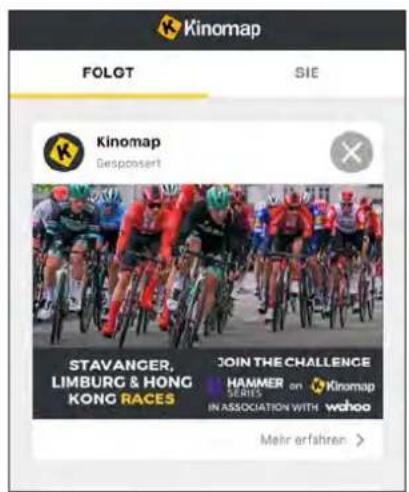
text_image
Kinomap FOLOT SIE Kinomap Desponsert STAVANGER, LIMBURG & HONG KONG RACES JOIN THE CHALLENGE HAMMER SERIES in association with wahoo Mehr erfahren >1.
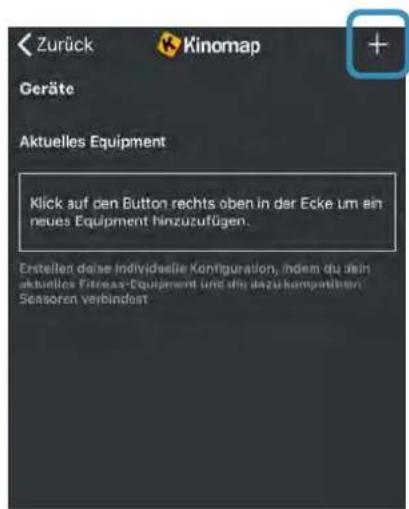
- Tap on „+“ 3. Select Elliptical
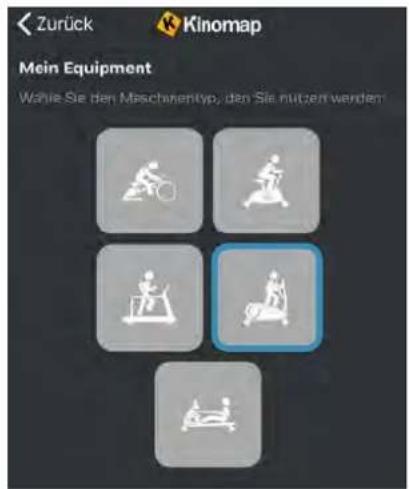
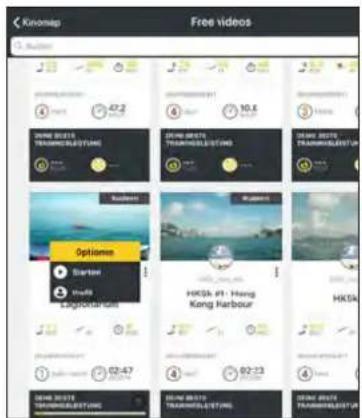
Now tap on OK and return to main menu. You can now choose a course for your exercise (depending on your type of KinoMap account maybe only some free courses). Press Start and begin to exercise!
text_image
Knomap Free videos Audio SNARE 2015 TRAVELIS/LETTING JUNAN BERTS TRAVELIS/LETTING JUNAN BERTS TRAVELIS/LETTING JUNAN BERTS TRAVELIS/LETTING Options Starter Hindi Lagourian HKSA. #1: Hong Kong Harbour HKSA 02:47 02:23 02:18 02:13 02:09 01:96WARM-UP and COOL-DOWN
A successful exercise program consists of a warm-up, aerobic exercise and a cool-down. Exercise for at least two or preferably three times a week, resting for a day between workouts. After several months, you may increase the frequency to four or five times per week.
WARM-UP
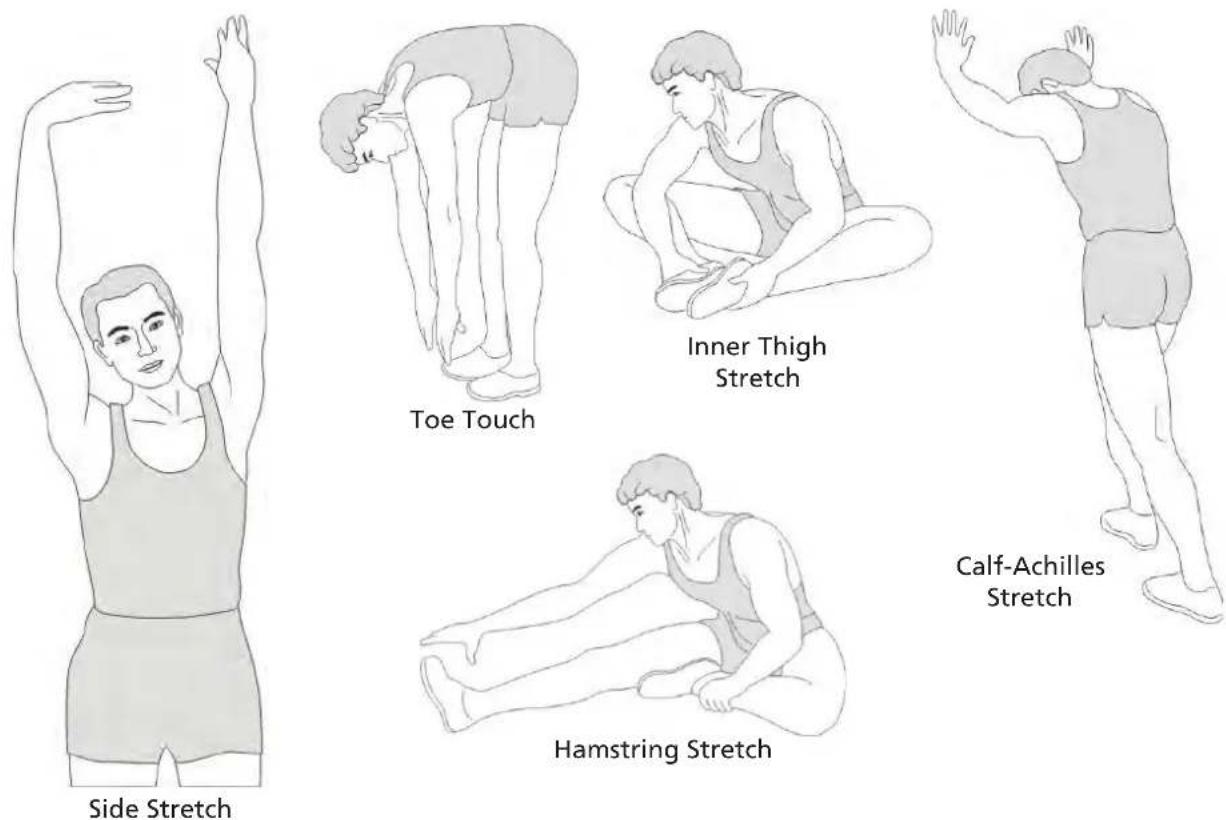
This stage helps to improve the blood circulation and prepares the muscles for your workout. It additionally helps to reduce the risk of injury or cramps. It is recommended to do some stretching exercises as shown here below. Hold each stretching position for approximately 30 seconds. Never force or jerk yourself into a stretching position – if you feel pain, STOP immediately. Warm-up exercises may also include brisk walking, jogging, jumping jacks, jump rope exercises or running in place.
STRETCHING
Muscles can be stretched more easily when these are warm. This reduces the risk of injury. DO NOT BOUNCE.
text_image
Side Stretch Toe Touch Inner Thigh Stretch Calf-Achilles Stretch Hamstring StretchRemember always to check with your physician before starting any exercise program.
COOL-DOWN
This stage helps to soothe your muscles and your cardiovascular system after your workout. At the end of your workout, reduce the speed and exercise for approximately 5 minutes at this lower speed level. Afterwards, repeat the warm-up exercises as described above.
GUARANTEE CONDITIONS
For our devices we provide a warranty as defined below.
- In accordance with the following conditions (numbers 2-5) we repair defect or damage to the device free of charge, if the cause is a manufacturing defect. Therefore, these defects / damages need to be reported to us without delay after appearance and within the warranty period of 24 months after delivery to the end user. The warranty does not cover parts, which easily break (e.g. glass or plastic). The warranty does not cover slight deviations of the product, which are insignificant for usability and value of the device and damage caused by chemical or electrochemical effects and damages caused by penetration of water or generally force majeure damage.
- The warranty achievement is the replacement or repair of defective parts, depending on our decision. The cost of material and labor will be borne by us. Repairs at customer site cannot be demanded. The proof of purchase along with the date of purchase and / or delivery is required. Replaced parts become our property.
- The warranty is void if repairs or adjustments are made, which are not authorized by us or if our devices are
equipped with additional parts or accessories that are not adapted to our devices. Furthermore, the warranty is void if the device is damaged or destroyed by force majeure or due to environmental influences and in case of improper handling / maintenance (e.g. due to non-observance of the instruction manual) or mechanical damages. The customer service may authorize you to replace or repair defective parts after telephone consultation. In this case, the warranty is not void.
- Warranty services do not extend the warranty period nor do they initiate a new warranty period.
- Further demands, especially claims for damages which occurred outside the device, are excluded as long as a liability is not obligatory legal.
- Our warranty terms - which cover the requirements and scope of our warranty conditions - do not affect the contractual warranty obligations of the seller.
- Parts of wear and tear are not included in the warranty.
- The warranty is void if not used properly or if used in gyms, rehabilitation centers and hotels. Even if most of our units are suitable for a professional use, this requires a separate agreement.
ENVIRONMENTAL PROTECTION
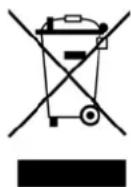
At the end of its life cycle, this product must not be disposed of with household waste but must be taken to a collection unit for the recycling of electric and electronic equipment. The symbol on the product, the instructions for use or the packaging express mention of this. The basic materials can be recycled as specified on the labelling.
When recycling the materials and finding other utilisation for used equipment, you are making a significant contribution towards protecting our environment. Ask at your council about the respective local disposal sites.
In accordance with our policy of continual product improvement, we reserve the right to make technical and visual changes without notice.
For service, accessories and spare parts, please contact: service@skandika.de Service centre: MAX Trader GmbH, Wilhelm-Beckmann-Straße 19, 45307 Essen, Germany
Contenu

skandika.com/service
99 Vis 5/16"x15mm 2 pcs.
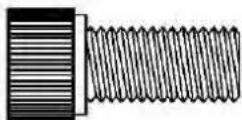
109 Vis 3/8"x3/4" 4 pcs.
ÉTAPE 2

120 Écrou 5/16"x7T 6 pcs.
135 Rondelle ondulée 5/16"x19×1,5T 4 pcs.
111 Vis M5×10mm 10 pcs.
natural_image
Line drawing of a screwdriver with a pointed tip and cylindrical head (no text or symbols)147 Tournevis

natural_image
Simple line drawing of a right-angle pipe fitting (no text or symbols)148 Clé Allen
text_image
Technical schematic diagram of a car's internal components with numbered parts and dimension annotationstext_image
Technical diagram of a stationary exercise machine with numbered components for identification2c
text_image
Technical diagram of a stationary exercise machine with numbered components for identificationTRANSPORT
natural_image
Exterior view of a stationary exercise bike with directional arrows indicating movement (no text or symbols)LUBRIFICATION
natural_image
Close-up of a hand holding a small white object near a black vehicle (no visible text or symbols)MODE D'EMPLOI DE L'ORDINATEUR
text_image
88:20 88:20 88:20 88:20 88:20 88:20 88:20 88:20 88:20 88:20 88:20 88:20 88:20 88:20 PROGRAM MANUAL PROGRAM FAT BURN CARDIO MILL INTERVAL HRC USER + + INCINE START ENTER STOP LEVEL FANTOUCHES DE FONCTION
natural_image
Pixelated white block pattern on a solid blue background (no text or symbols)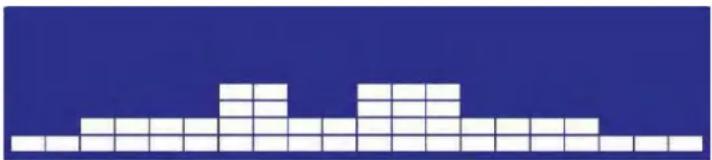
natural_image
Pixelated white block pattern on a blue background (no text or symbols)PROGRAMME 2 : Muscles centraux
natural_image
Abstract geometric pattern composed of white squares on a blue background (no text or symbols)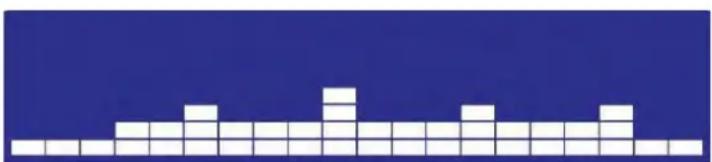
natural_image
Abstract pattern of white pixelated blocks on a dark blue background (no text or symbols)PROGRAMME 3 : Simulation
natural_image
Two side-by-side pixel art blocks of white squares on a dark blue background, no text or symbols present.natural_image
Two identical white pixelated geometric shapes on a blue background, no text or symbols present.natural_image
Two identical white pixelated geometric shapes on a dark blue background, no text or symbols present.PROGRAMME 6 : X-Sport
natural_image
Two identical pixelated white blocks on a dark blue background, no text or symbols present.PROGRAMME 7 : Cardiopulmonaire
natural_image
Two identical pixelated white blocks on a dark blue background, no text or symbols present.PROGRAMME 8 : Site
natural_image
Two side-by-side pixelated white squares on a blue background, no text or symbols present.natural_image
Two identical white pixelated blocks on a dark blue background, no text or symbols present.natural_image
Two identical white pixelated geometric shapes on a dark blue background, no text or symbols present.natural_image
Two side-by-side pixel grid patterns on a solid blue background, no text or symbols presentPROGRAMME 12 : Course aux gorges
natural_image
Two side-by-side pixel art blocks on a blue background, no text or symbols presentPROGRAMME 13 : Intervalle
natural_image
Two identical pixelated white blocks on a dark blue background, no text or symbols present.natural_image
Two side-by-side grid patterns on a blue background, no text or symbols presentPROGRAMME 15 : Course de descente
natural_image
Two identical white pixelated blocks on a dark blue background, no text or symbols present.PROGRAMME 17 : Course de descente II
natural_image
Two identical pixelated white blocks on a blue background, resembling abstract geometric patterns or pixel grids (no text or symbols)PROGRAMME 18 : Intervalle II
natural_image
Two identical grid patterns of white blocks on a blue background, no text or symbols present.FAT BURN (BRÛLURE DE GRAISSE)
natural_image
Two identical grid patterns on a blue background, no text or symbols presentCARDIO
natural_image
Two identical pixelated white blocks on a blue background, resembling abstract or mosaic patterns (no text or symbols)HILL (MONTAGNE)
natural_image
Abstract geometric pattern composed of white squares on a blue background (no text or symbols)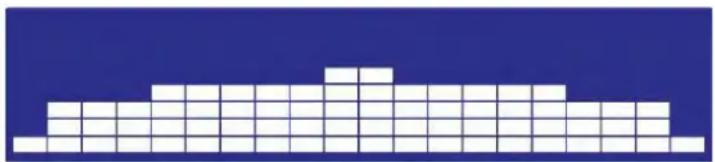
natural_image
Pixelated white block structure on a blue background (no text or symbols)INTERVAL
natural_image
Abstract geometric pattern composed of white squares on a blue background (no text or symbols)