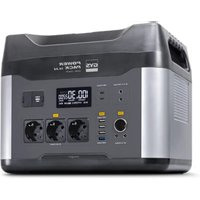
Power Pack 14.22 - Uninterruptible power supply GYS - Free user manual and instructions
Find the device manual for free Power Pack 14.22 GYS in PDF.


| Product type | Portable power station |
| Brand | GYS |
| Model | Power Pack 14.22 |
| Battery capacity | 55 Ah / 1408 Wh |
| Battery type | Lithium Iron Phosphate (8 cells) |
| Dimensions (L x W x H) | 360 x 270 x 278 mm |
| Weight | 17.1 kg |
| Input power | 100-240 V, 50/60 Hz (mains charger) or 2x DC 12-30 V (max 200 W) |
| AC outputs | 3 x 230 V / 50 Hz, 2200 W (pure sine wave) |
| USB outputs | 3x USB-A 5V 2.4A, 1x USB-A QC 3.0 (18W max), 2x USB-C PD (up to 100W) |
| DC outputs | 2x DC jack 12V/10A, 1x cigarette lighter 12V/10A |
| Booster function (12V starting) | 500 A (starting current), 1000 A (peak) |
| LED lighting | 12 W, 5 modes (low, medium, high, SOS, strobe) |
| Display | LCD, shows battery %, power, runtime, charging time |
| Charging temperature | 0°C to 55°C |
| Operating temperature | -20°C to 55°C |
| Lifespan (cycles) | 2000 cycles |
| Protections | Short circuits, overcurrents, overvoltages, undervoltages, overloads, overheating |
| Maintenance and cleaning | Disconnect before maintenance; clean with a dry cloth; do not use solvents |
| Safety | Class II device (charger); do not expose to rain; do not cover; use by children aged 8 and above with supervision |
| Warranty | 2 years (parts and labor), excluding transport, normal wear, misuse |
| Included accessories | Jump start cables, mains charger, Jack/cigarette lighter charging cable |
Frequently Asked Questions - Power Pack 14.22 GYS
User questions about Power Pack 14.22 GYS
0 question about this device. Answer the ones you know or ask your own.
Ask a new question about this device
Download the instructions for your Uninterruptible power supply in PDF format for free! Find your manual Power Pack 14.22 - GYS and take your electronic device back in hand. On this page are published all the documents necessary for the use of your device. Power Pack 14.22 by GYS.
USER MANUAL Power Pack 14.22 GYS
natural_image
Line drawing of a device rear panel with multiple ports and buttons (no text or symbols)FR 2-8 / 45-48
EN 2 / 9-14 / 45-48
DE 2 / 15-20 / 45-48
ES 2 / 21-26 / 45-48
RU 2 / 27-32 / 45-48
NL 2 / 33-38 / 45-48
IT 2 / 39-44 / 45-48
POWER PACK 14.22
1
natural_image
Line drawing of a clamp tool with clamps and a handle (no text or symbols)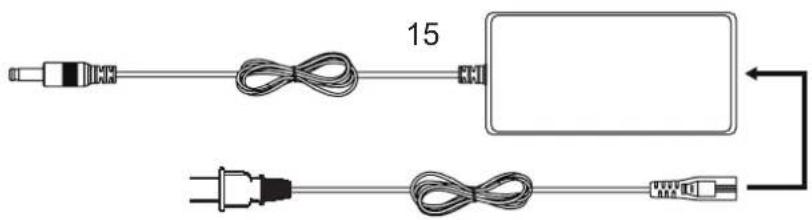
natural_image
Line drawing of a coiled cable with two connectors (no text or symbols)INSTRUCTIONS DE SÉCURITÉ

Réglementation :
ÉCRAN LUMINEUX LCD (FIG.1)
natural_image
Technical line drawing of two electronic device setups with no visible text or symbolsThis manual contains safety and operating instructions, to be followed your own personal safety. Please read it carefully before first use and keep it for future reference. These instructions must be read and fully understood before use. Do not undertake any alterations or maintenance work that is not directly specified in this manual. The manufacturer shall not be liable for any damage to persons or property resulting from use not in accordance with the instructions in this manual. If you have any problems or queries, please consult a qualified person to correctly operate the equipment. This device should only be used for recharging, starting and/or powering batteries within the limits indicated on the appliance and in the manual. These safety instructions must be followed. The manufacturer cannot be held responsible in the event of improper or dangerous use.

The device is designed to be used indoors. Do not expose this machine to rain.
This unit can be used by children aged eight or over, by people with reduced physical, sensory or mental capabilities as well as by those with a lack of experience or knowledge. However, these aforementioned persons must be properly monitored and they must have read the equipment's user instructions alongside having been made aware of the risks. Children must not play with the product. Cleaning and maintenance should not be performed by an unsupervised child.
Do not use to charge domestic batteries or non rechargeable batteries.
Do not use the charger if the mains cable or plug is damaged.
In order to avoid short-circuiting the battery, do not use the appliance if the charging cable is damaged or has an assembly defect.
Never charge a frozen or damaged battery.
Do not cover the device.
Do not place the unit near a heat source, direct sunlight or continuously high temperatures (above 50^ C).
Do not obstruct the machine's air intake system. Refer to the set-up instructions before using the appliance.
The automatic operating mode and the relevant usage restrictions are explained later in this manual.

Power supply:
Class II device (for the charger).


Maintenance:
- Maintenance should only be carried out by a qualified person.
- Warning! Always disconnect the plug from the USB input socket before carrying out work on the unit.
- Never use solvents or other aggressive cleaning agents.
- Clean the surfaces of the unit with a dry cloth.
- Do not attempt to open the product due to risk of electrical hazard.



Regulations:
- This device complies with European directives.
- The Declaration of Conformity is available on our website.
• EAEC conformity mark (Eurasian Economic Community). - This equipment conforms to UK requirements.
- The UK Declaration of Conformity is available on our website (see cover page).
• This equipment conforms with Moroccan standards. - The C _o (CMIM) Declaration of Conformity is available on our website (see cover page).
Disposal:
- This machine is subject to selective collection. Do not dispose of it in a domestic-waste bin.
- The battery must be removed from the unit before it is disposedof.
- The appliance must be disconnected from the power supply before removing the battery.
PRODUCT DESCRIPTION
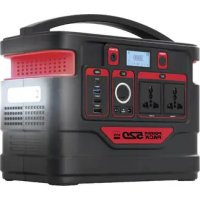
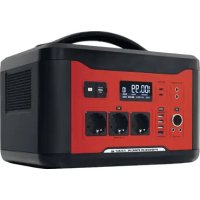
The POWER PACK 14.22 is a portable power source ideal as an emergency domestic power supply; it's perfect for emergency responses. It contains a high capacity 1408 Wh Lithium battery, for all machine-types operating at 5 / 9 / 12 / 15 / 20 V DC, as well as 230 V AC thanks to its internal converter.
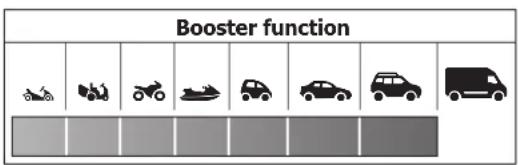
It also includes a "Booster" feature for starting 12 V vehicles:
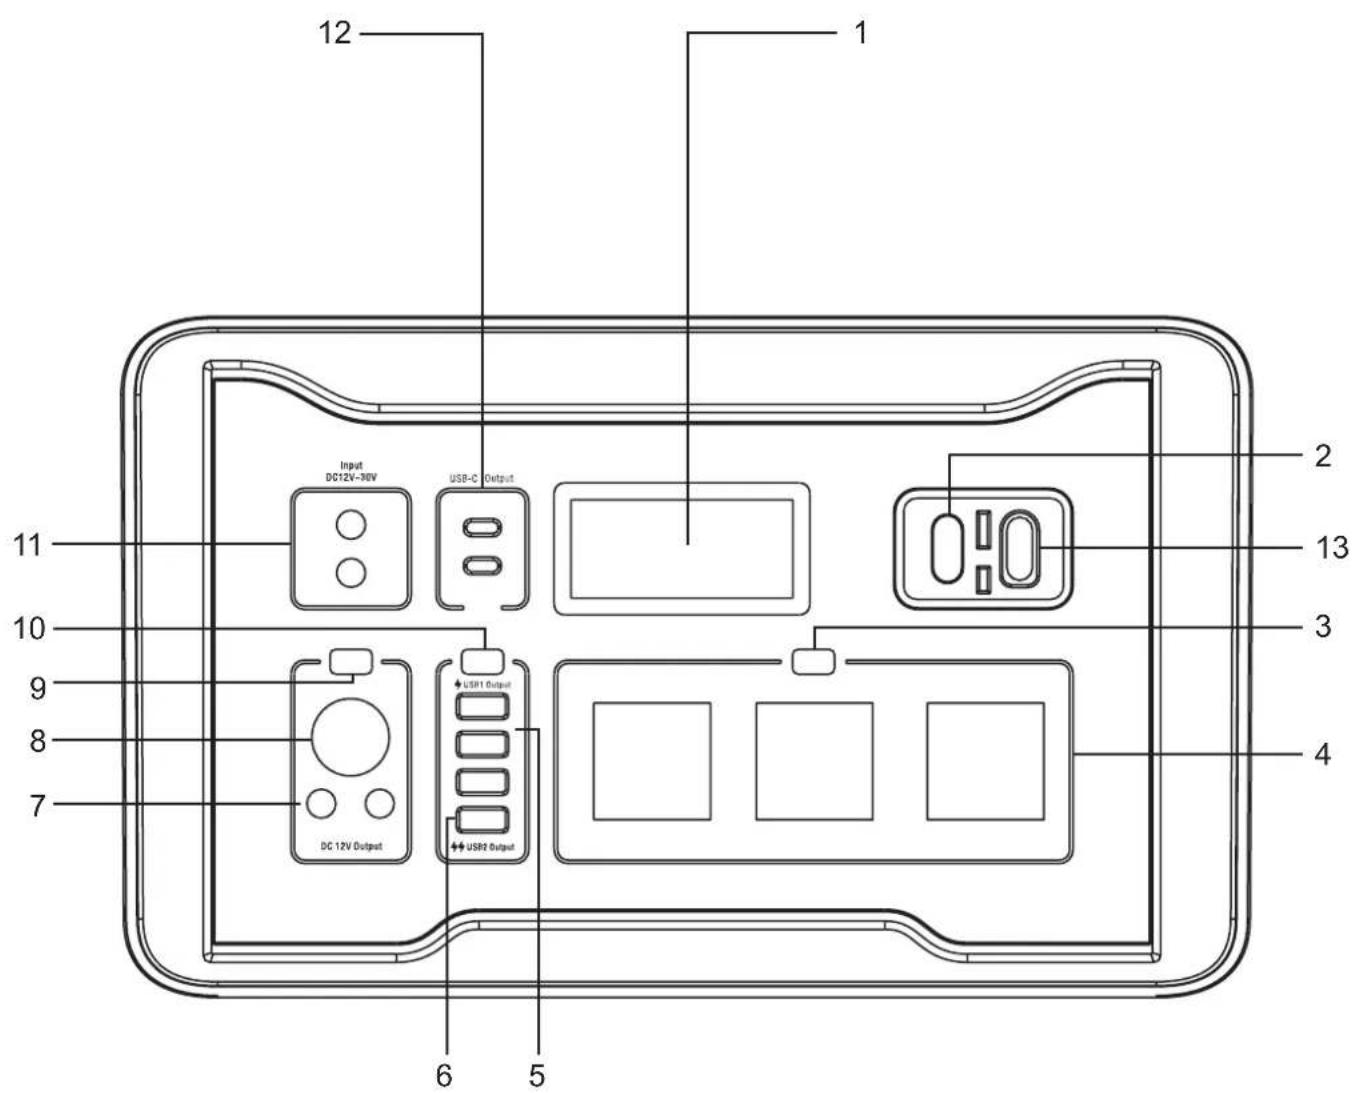
INTERFACE (FIG. 1)
| 1 LCD display | |
| 2 Jump-lead socket | |
| 3 AC output-activation button | |
| 4 230 VAC - 50 Hz - 1 kW output (x 3) | |
| 5 USB-A 5 V - 2.4 A output (x 3) | |
| 6 USB Quick Charge output | |
| 7 | DC 12 V / 10 A output (jack plug) (x 2) |
| 8 | 12 VDC / 10 A cigarette-lighter socket |
| 9 DC output-activation button | |
| 10 USB output-activation button | |
| 11 | 12-30 V / 200 W DC input (jack plug) |
| 12 USB Type-C output | |
| 13 Possibility of connecting a secondary battery to double the product's capacity (option n ot available). | |
ACCESSORIES
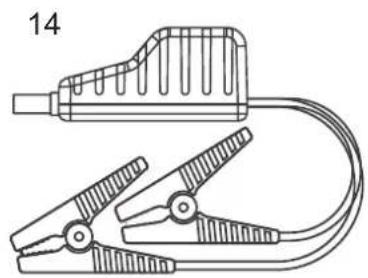
| 14 Jump leads | |
| 15 | Mains charger |
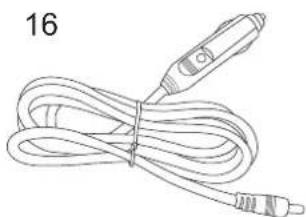
| 16 Jack / cigarette lighter charging cable | |
TECHNICAL SPECIFICATIONS
| POWER PACK 14.22 | ||
| Capacity 55 Ah / 1,408 Wh | ||
| Size (L x W x H) 360 x 270 x 278 mm | ||
| Weight 17.1 kg | ||
| Battery type Lithium Iron Phosphate battery (8 cells) | ||
| INPUTS | Inputs 12 - 30 V, DC (200 W) | max.) (x2) |
| Charging modes 100 - 240 V | 50/60 Hz charger | |
| Solar panels not included | ||
| AC adapter | 100 - 240 V, 50/60 Hz. Input: 2.5 A Output: ↑9 VDC / 9.47 A | |
| OUTPUTS | 12 V output Cigarette-lighter | socket: 12 V / 10 ADC ports: 12 V / 10 A (x2) |
| USB ports USB-A (x 3): 5 V, | 2.4 AUSB-A Quick Charge 3.0 (x 1): 5 V / 3 A, 9 V / 2 A, 12 V / 1.5 AUSB-C (x 2): 5 V / 3 A, 9 V / 3 A, 12 V / 3 A, 15 V / 3 A, 20 V / 3 A, 20 V / 5 A | |
| AC outputs 230 V / 50 Hz / 2 | 200 W (x 3) (PSW - Pur Sine Wave) | |
| Booster output | 12 V start-up (starting current: 500 A / peak current: 1,000 A) | |
| Lighting | 12 W LED (5 modes: low / medium / strong lighting, SOS and Stroboscopic) | |
| Battery indicator | LCD display | |
| Charging temperature | 0°C - 55°C (32°F - 122°F) | |
| Working temperature | -20°C - 55°C (-4°F - 122°F) | |
| Machine's working lifespan | 2,000 charging cycles | |
| Safeguards | This machine is protected against short circuiting, overcurrents, overvoltages, undervoltages, overloading and overheating. | |
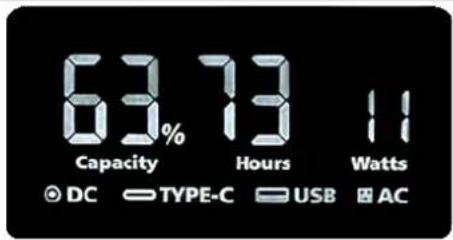
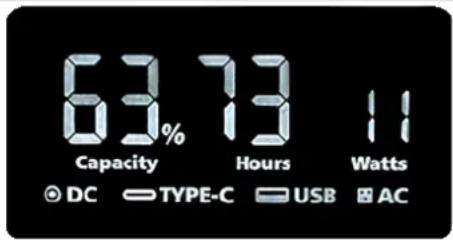
LCD DISPLAY SCREEN (FIG.1)
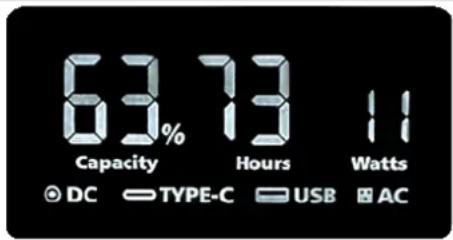
The LED display lights up as soon as one of the output buttons (3, 9 or 10) is pressed.
It will permanently indicate:
- the internal battery's charge percentage.
- the different types of input and output currently being used by the POWER PACK (USB - Type C, AC, DC).
When the POWER PACK1300 is charging, the display will also show:
- the charging power in Watts (W).
- the remaining recharge time in hours.
When the POWER PACK is in use, the display will also show:
- the power consumption in Watts (W).
- the machine's battery life in hours (the remaining charge will automatically update according to the device's power consumption).
The LED display remains on continuously as long as the POWER PACK is active; when it is on charge or in use. When all outputs are inactive, the LED display's backlighting will switch off after 30 seconds. The screen will turn off permanently after one minute of inactivity and the machine will go into standby mode.
OPERATING THE DIFFERENT POWER-SUPPLY MODES
Before using the appliance for the first time, it is recommended to fully charge the battery to prevent a lack of power from reducing the capacity of the POWER PACK.
- Powering up: Press one of the buttons (3, 9 or 10) to activate the required output block(s).
The names of the active output blocks will appear on the display screen. From this moment on, the relevant outputs are live, drawing power from the battery. The display screen will show the power consumption increasing. - Connect the chosen device, either to charge it or to use it. The power consumption will increase on the display screen as well as the appliance's remaining battery life, which will be automatically updated.
- Unplug the unit when you have finished charging or using it.
- Switch off the active output block(s) by pressing the relevant button (3, 9 or 10) again.

The POWER PACK works until it reaches its average power (2200 W):
- in case the power is exceeded and to allow more equipment to operate normally, the POWER PACK automatically regulates its AC output voltage (AC voltage decrease).
- In case the overload is too high, it goes into safety mode, the outputs are automatically cut off.

Be sure to disable the POWER PACK's output blocks. If they remain active, the POWER PACK will not go into standby mode immediately and the outputs will continue to consume power.
If no connection to the output block has been made in the six hours following the activation of an output, the output block will automatically switch off and only then will the POWER PACK to go into standby mode.
USING THE MACHINE IN BOOSTER MODE

RECHARGE THE POWER PACK's battery before and after each use.
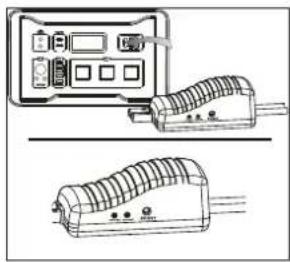
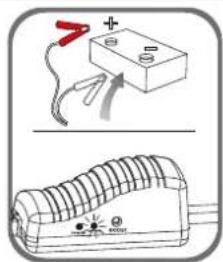
- Connect the jump-lead clamps (14) to the POWER PACK's connector (2), and make sure the cable indicator is off.
- Connect the red clamp to the vehicle's positive (+) battery terminal and the black clamp to the negative (-) terminal.
- To use the cable indicator, follow these instructions:
natural_image
Technical line drawing of two electronic devices with no visible text or symbolsGREEN LIGHT ON: RED LIGHT ON with warning buzzer:
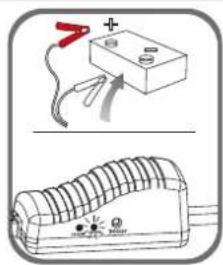
The connection is good and the circuit is working, turn on the vehicle's engine for an immediate start-up.
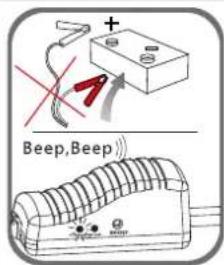
A beeping sound indicates a polarity reversal. Reconnect the clamps as explained in step two. Wait for the green light to come on before starting again.
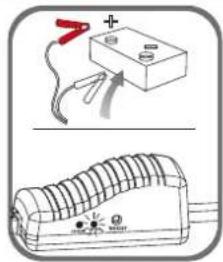
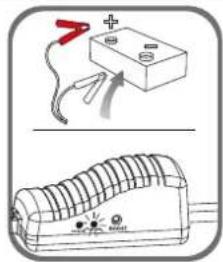
FLASHING GREEN LIGHT: No lights on, no warning buzzer:
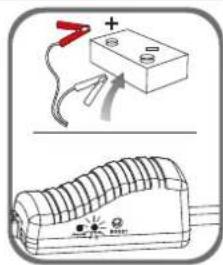
The vehicle's battery is low (between 1 V and 9 V). Press the "BOOST" button, wait for the flashing GREEN indicator light to turn solid, then turn on the cable indicator within 30 seconds.
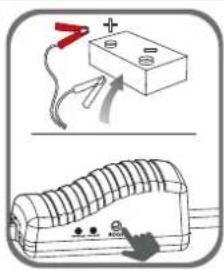
The vehicle's battery may be damaged (< 1 V). After making sure that the clips are properly connected, press the "BOOST" button, wait until the GREEN LIGHT is on, then start the vehicle's engine within 30 seconds.
4. Starting a vehicle

Do not attempt to jump start the vehicle more than three times in a row. This could cause damage if the unit overheats. Wait for at least two minutes between each attempt.
The jump lead may overheat. If this occurs, a safeguarding system will cut off the voltage to the jump-lead's clamps.
5. After having started the vehicle, remove the jump leads from the vehicle's battery. Leave the vehicle's engine running.

Remove the jump-start clamps from the vehicle's battery within 30 seconds of starting the engine. Otherwise, damage may occur.
1) Use the mains charger supplied with the machine.
- Connect the charger port to one of the POWER PACK's 12 V - 30 V DC inputs.
-
Connect the other end of the charger to a 230 V power outlet.
-
Let the POWER PACK recharge (eight hours max.) then disconnect it by working backwards through the aforementioned instructions.
2) Using solar panels (not supplied)

The POWER PACK has its own MPPT controller. It is therefore unnecessary to add one between the station and the solar panel.
The 12 V / 30 V DC inputs can support the energy of up to two solar panels (2 x 100 W max - < 30 V no-load).
- Place the solar panel(s) in direct sunlight without exposing the POWER PACK to direct sunlight or moisture.
- Connect the solar panel's output to the 12 V DC input port.
Repeat the operation if a second solar panel has also been used.
- Let the POWER PACK recharge and then disconnect it.
3) Using a car charger (not supplied)
- Plug the electric-vehicle charger cable into the 12 V - 30 V DC input.
- Plug the other end of the electric-vehicle charger cable into the car's 12 V cigarette-lighter socket.
- Allow the POWER PACK to recharge (for between 10 - 11 hours), then disconnect the machine.
USING THE LAMP
The POWER PACK LED has 5 lighting modes: low-medium-strong intensity - strobe - SOS. Press the button of the lamp. It lights up in low intensity. Press again to switch to the next mode. The 6th press turns off the lamp.
TROUBLESHOOTING
| Analysis Cause Solutions | ||
| The product is not charging.The charging indicator light has gone out. | The charger is not properly connected to the POWER PACK. | Check the charger's connection. |
| The connection is good but the charging indicator light still remains switched off. | The charger is defective, contact the After-Sales Service. | |
| The indicator light is on but the unit is still not charging. | The device is damaged. | |
| The outputs do not work. The charging | indicator is not properly connected to the POWER PACK. | Check the POWER PACK's connection to the vehicle. |
| The output block is not turned on. Turn on the output block (buttons 3, 9 or 10). | ||
| The POWER PACK is at limited capacity. Charge the POWER PACK. | ||
| The charging or operating power of the veh-cile is greater than that of the POWER PACK. | The vehicle requires a more powerful power source. | |
| The output has turned off while in use. | The charging or operating power of the veh-cile is greater than that of the POWER PACK. | The vehicle requires a more powerful power source. |
| The vehicle does not have enough charging power. The POWER PACK has not detected it. It will turn off automatically. | Turn the POWER PACK back on. | |
GUARANTEE
The warranty covers all defects or manufacturing faults for two years starting from the date of purchase (parts and labour).
The warranty does not cover:
- Any other damage caused by transport.
- The general wear and tear of parts (i.e. cables, clamps, etc.).
- Incidents caused by misuse (incorrect power supply, dropping or dismantling).
- Environmental faults (i.e. pollution, rust and dust).
In the event of a breakdown, please return the appliance to your distributor, along with:
- a dated proof of purchase (receipt or invoice etc.).
- a note explaining the breakdown.
SICHERHEITSHINWEISE

Vorschriften:
natural_image
Technical line drawing of two electronic devices with control panels and wiring (no text or symbols)natural_image
Technical line drawing showing two electronic devices with control panels and wiring (no text or symbols)Luz verde encendida Luz roja encendida alerta sonora
natural_image
Technical line drawing of two electronic devices with ports and wiring (no text or symbols)Горит зеленый свет:
BESCHRIJVING VAN HET APPARAAT
natural_image
Technical line drawing of two electronic devices with control panels and indicator lights (no text or symbols)Groene lampje brandt :
INTERFACCIA (FIG. 1)
DISPLAY LUMINOSO LCD (FIG.1)
natural_image
Technical line drawing of two electronic devices with control panels and indicator lights (no text or symbols)| 1 Circuit convertisseur* / Converter circuit* SAV04007 | |
| 2 Circuit BMS* / BMS circuit* SAV04008 | |
| 3 Circuit de face avant* / Front panel circuit* SAV04009 | |
| 4 Panneau LED / LED Board SAV04016 | |
| 5 Ventilateur / Fan SAV04017 | |
| 6 Câble pinces / Clips cable 53683 | |
| 7 Chargeur / Charger 53703 |
* △ Le remplacement des cartes comporte des risques (manipulations de la batterie Lithium). / Replacing the boards involves risks (handling of the Lithium battery).
PICTOGRAMMES / PICTOGRAMS / ZEICHENERKLÄRUNG / ICONOS / СИМВОЛЫ / PICTOGRAMMEN / PITTOGRAMMI

Produit recyclable qui relève d'une consigne de tri (selon le décret n°2014-1577) / Recyclable product that is subject to a sorting instruction (according to decree n°2014-1577) / Recyclingprodukt, der durch Mülltrennung entsorgt werden muss. (gemäß Dekret n°2014-1577). / Producto reciclable que requiere una separación determinada (según el Decreto n°2014-1577). / Перерабатываемый продукт, подпадаемый под определенные правила сортировки (Декретом № 2014-1577). / Afzonderlijke inzameling vereist. Gooi dit produkt niet bij het huishoudelijk afval (overeenkomstig decreet nr. 2014-1577). Prodotto riciclabile soggetto a raccolta selettiva.
GYS France
Siège social / Headquarter
- POWER PACK 14.22
- INSTRUCTIONS DE SÉCURITÉ
- Réglementation :
- ÉCRAN LUMINEUX LCD (FIG.1)
- Power supply:
- Maintenance:
- Regulations:
- Disposal:
- PRODUCT DESCRIPTION
- LCD DISPLAY SCREEN (FIG.1)
- OPERATING THE DIFFERENT POWER-SUPPLY MODES
- USING THE MACHINE IN BOOSTER MODE
- RECHARGE THE POWER PACK's battery before and after each use.
- GREEN LIGHT ON: RED LIGHT ON with warning buzzer:
- FLASHING GREEN LIGHT: No lights on, no warning buzzer:
- Starting a vehicle
- After having started the vehicle, remove the jump leads from the vehicle's battery. Leave the vehicle's engine running.
- 2) Using solar panels (not supplied)
- 3) Using a car charger (not supplied)
- USING THE LAMP
- GUARANTEE
- SICHERHEITSHINWEISE
- Vorschriften:
- Luz verde encendida Luz roja encendida alerta sonora
- BESCHRIJVING VAN HET APPARAAT
- DISPLAY LUMINOSO LCD (FIG.1)
- PICTOGRAMMES / PICTOGRAMS / ZEICHENERKLÄRUNG / ICONOS / СИМВОЛЫ / PICTOGRAMMEN / PITTOGRAMMI
- GYS France
Brand : GYS
Model : Power Pack 14.22
Category : Uninterruptible power supply