ProClean 9110 - Microwave Oven CECOTEC - Free user manual and instructions
Find the device manual for free ProClean 9110 CECOTEC in PDF.


| Product type | Microwave oven |
| Brand | Cecotec |
| Model | ProClean 9110 |
| Capacity | 30 L |
| Microwave power | 1000 W |
| Grill power | 1000 W |
| Voltage / Frequency | 230 V ~ 50 Hz |
| Reference | 01544 |
| Main functions | Microwave, Grill, Combi (2 modes), Auto defrost (3 modes), Auto cook (8 programs), Timer, Clock, Instant cook, Multi-sequence cooking |
| Control panel | Touch buttons and rotary selector for time/weight |
| Display | LED |
| Turntable | Included |
| Grill | Built-in, 1000 W |
| Safety | Child lock, Door safety lock system |
| Compatible materials | Heat-resistant ceramic, heat-resistant glass, heat-resistant plastic (microwave only) |
| Cleaning | Unplug before cleaning. Use a clean, soft, damp cloth. Do not immerse. Do not use harsh or abrasive detergents. |
| Maintenance | Remove bad odors by heating lemon, red tea, or orange peels at full power. |
| Warranty | 2 years from date of purchase, upon presentation of invoice |
| After-sales service | Phone contact: +34 9 63 21 07 28 |
| Origin | Made in China, designed in Spain |
Frequently Asked Questions - ProClean 9110 CECOTEC
User questions about ProClean 9110 CECOTEC
0 question about this device. Answer the ones you know or ask your own.
Ask a new question about this device
Download the instructions for your Microwave Oven in PDF format for free! Find your manual ProClean 9110 - CECOTEC and take your electronic device back in hand. On this page are published all the documents necessary for the use of your device. ProClean 9110 by CECOTEC.
USER MANUAL ProClean 9110 CECOTEC
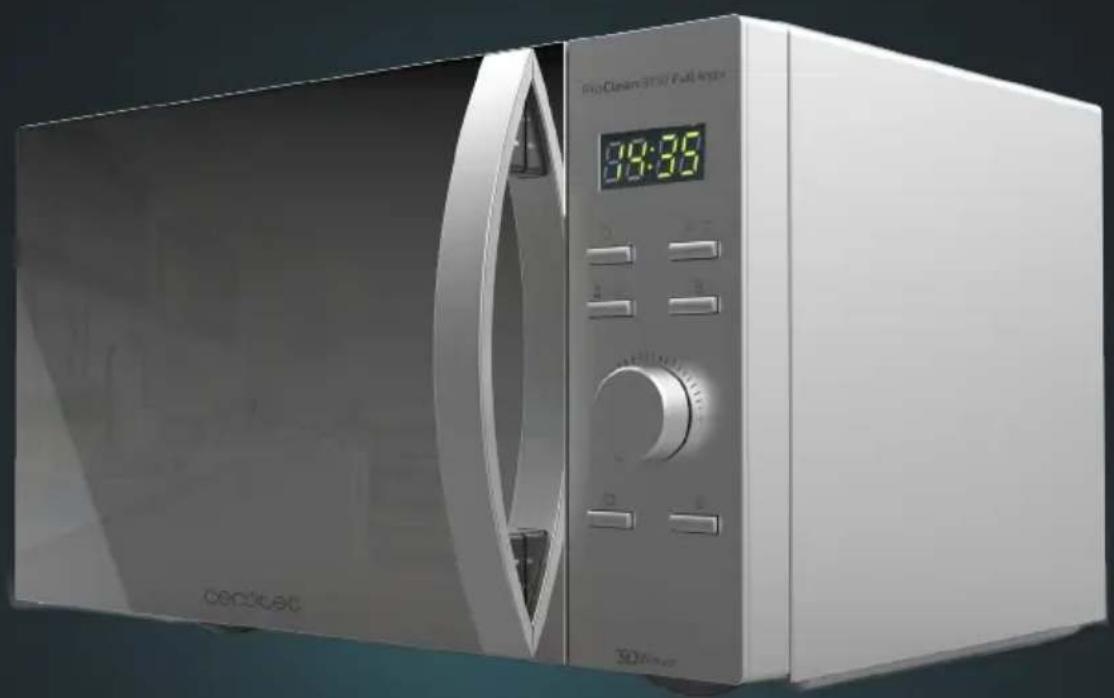
30-litre microwave with grill.
natural_image
Exterior view of a modern microwave oven with digital display and control knobs (no visible text or symbols)Safety instructions 8
-
Parts and components 47
-
Before use 47
-
Operation 48
-
Cleaning and maintenance 55
-
Technical specifications 56
-
Disposal of old electrical appliances 56
-
Technical support and warranty 56
SOMMAIRE
Read these instructions thoroughly before using the appliance. Keep this instruction manual for future reference or new users.
- Make sure that the mains voltage matches the voltage stated on the rating label of the appliance and that the wall outlet is grounded.
- Do not operate outdoors.
- This product is designed only for household use.
- Use this appliance only for its intended purpose, as described in this manual. Do not use corrosive chemicals or vapours in this appliance, it is not designed for industrial or laboratory use.
- If the door or door seals are damaged, the product must not be operated until it has been repaired by a competent person.
- Do not operate the microwave when empty.
- Do not operate this appliance if it has a damaged cord or plug or if it is not operating properly. If the cord is damaged, it must be replaced by the official Technical Support Service of Cecotec in order to avoid any type of danger.
- Only use utensils that are suitable for microwaves. Make sure utensils do not touch the interior walls during operation.
- Do not use the cavity for storage purposes.
- Do not attempt to deep-fry in this oven.
- In order to reduce fire risk:
- Do not overcook food.
- Remove wire twist-ties from paper or plastic bags before placing them inside the microwave.
- Do not heat liquids or other foods in sealed containers.
- In case of smoke or fire inside the device, keep the door closed, turn the product off and disconnect it from the power
supply.
- In order to prevent the glass tray from breaking, do not place hot foods, hot utensils, frozen foods or frozen utensils on it.
- After operating, the container is likely to be very hot. Use gloves in order to avoid burns and injuries.
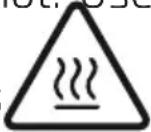
- In Grill or Combination (1, 2, 3) mode, all oven parts will be very hot during and after operation, including door and top part of the microwave. Remember to use handle, gloves or any other type of protection.
- The appliance is not intended to be used by children under the age of 8. It can be used by children over the age of 8, as long as they are given continuous supervision.
- This appliance can be used by children aged 8 and above, and persons with reduced physical, sensory or mental capabilities or lack of experience and knowledge, as long as they have been given supervision or instruction concerning the use of the appliance in a safe way and understand the hazards involved.
- Children shall not play with the appliance. Close supervision is necessary when the appliance is being used by or near children.
- This product is a Group 2 Class B ISM equipment. The definition of Group 2 which contains all ISM (Industrial, Scientific and Medical) equipment in which radio-frequency energy is intentionally generated and/or used in the form of electromagnetic radiation for the treatment of material, and spark erosion equipment. Class B equipment is suitable for domestic use and in establishments directly connected to a low voltage power supply network, which supplies buildings used for domestic purpose.
- Technical service and reparations that involve cover removals or exposure to cables must always be carried out
by a competent, professional and qualified person.
- It is important to use materials and containers which are suitable and safe for microwave cooking. The table below shows which materials are suitable and which are not:
| Material of container | Grill Co | mbi Microwaves Warnings | |
| Heatproof ceramics. | Yes Yes | Yes Never use | ceramics which are decorated with metal rim or glazed. |
| Heatproof plastic | No No | Yes Cannot be | used for long time microwave cooking. |
| Heatproof glass. | Yes Yes | Yes | |
| Plastic film. No | No Yes It | should | not be used when cooking meat, high temperature might damage the film. |
| Grill. Yes Yes No | |||
| Metal container. | No No No Microwave | No Microwave | c cannot cook through metal. |
| Lacquer. No No | No Poor heat- | resistance. | |
| Bamboo or paper. | No No No Poor heat- | resistance. |
INSTRUCTIONS DE SÉCURITÉ
- Door safety lock system
- Microwave window
- Rotating axis
- Roller ring
- Rotary plate
- Control panel
- Mica panel
- Grill
Buttons guide
Fig. 2
- On button
- Combination/Grill
- Defrost/Clock
- Autocooking
- Pause/Cancel
- Start
2. BEFORE USE
- Take the product out of the box. If the microwave has a protective film, tear it off before starting operation. Check carefully if there is any damage, and if there is, immediately notify the Technical Support Service of Cecotec.
- The product must be placed on a flat, stable and dry place and kept away from corrosive materials, heat and humidity, such as gas burners or water.
- To ensure enough ventilation, minimum distances have to be kept:
- From the back part to the wall: 10 cm.
- From the side to the wall: 5 cm.
- Free distance from the top surface: 20 cm.
- From the microwave to the ground: 85 cm.
- The product must be placed, at least, at 5 m from the TV, Radio or antenna.
- The product must be placed in such way that the plug is accessible and must ensure an effective grounding in case of leakage in order to avoid electric shocks.
- The microwave door must be closed in order to operate.
– In case there is any manufacturing rests in the microwave cavity or on the heating elements,
ENGLISH
leave the microwave open to ensure good ventilation. In such case, it is recommended to heat a glass of water at high power for several times.
Warning:
Never remove the mica panel.
3. OPERATION
Control panel
Fig.3
Before cooking
Connect appliance to power outlet. Once it is connected, the LED light will flash 3 times and will show 1:00. Select a function.
Time/weight knob
Cooking time and food weight can be increased or decreased during operation, depending on the mode, by turning the Time/Weight knob.
Pause/Cancel
– Before operation: Press once in order to reset settings and return to to initial stage.
- During operation: Press once in order to interrupt operation or press twice in order to cancel pre-set cooking program.
Reminder
Once the pre-set cooking process is over, it will say END on the LED display panel and the microwave will beep 3 times. Press Pause/Cancel button or open the microwave door in order to stop the alarm, if not, the alarm will sound at an interval of 3 minutes.
Instant cooking
From the initial position, press the Start button, the microwave will automatically operate at high power for 1 minute. Cooking time can be increased or decreased during operation by turning the Time/Weight knob.
Clock/timer setting
Use the Defrost/Clock button to set the time (by holding down the button for 3 seconds) and to set the Defrost mode (press once).
| Example: Setting clock at 12:30 | ||
| Steps Display | ||
| 1 After powering up, the display panel shows the colon sign. | 1:00 | |
| 2 Hold down the Defrost/Clock button for 3 seconds. 1:00 | ||
| 3 Turn the Time/Weight knob to set the exact hour. 12:00 | ||
| 4 Press the Defrost/Clock button once. 12:00 | ||
| 5 Turn the Time/Weight knob to set the exact number of minutes. | 12:30 | |
| 6 Press the Defrost/Clock button once again to confirm the selected time or wait for 5 seconds, time will be set automatically. | ||
Microwave cooking
Use this function in order to cook or heat food.
Press the On button and select on the LED display panel between: 100P-80P-60P-40P-20P.
| High power 100 % microwave power. Perfect for fast and efficient cooking. |
| Medium-High power 80 % microwave power. Perfect for medium express cooking. |
| Medium power 60 % microwave power. Perfect for steaming food. |
| Medium-Low power 40 % microwave power. Perfect for defrosting food. |
| Low power 20 % microwave power. Perfect for keeping food warm. |
- Microwave function can be set up to 60 minutes.
- Cooking or heating time may be changed during operation. It is recommended to turn or stir food at least once during the process. Press the Start button once to resume operation.
- If food is removed before the pre-set time, make sure you press Pause/Cancel once in order to stop operation and avoid the microwave from operating automatically and empty when closed.
- When operating at maximum power, the microwave will automatically lower power after a certain time in order to lengthen the appliance's shelf life.
ENGLISH
| Example: Cooking at P80 for 10 minutes. | ||
| Steps Display | ||
| 1 After powering up, the display panel shows: 1:00 | ||
| 2 Select the desired microwave power by pressing the On button consecutively. | 80P | |
| 3 Turn the Weight/Time knob to select the desired cooking time. | 10:00 | |
| 4 Press the Start button to start operation. The LED will display the countdown. | ||
Grill and Combination
Press once the Grill/Combi button in order to select grill or combination function. The LED display panel will show 3 modes, turn the Weight/Time knob to select the desired one:
| G (Grill) Only | heating elements will be energised during operation. Perfect for cooking sausages, pork, chicken wings... |
| C.1 Combines | 30 % microwave operation and 70 % grill operation. |
| C.2 Combines | 55 % microwave operation and 45 % grill operation. |
| Example: Grilling food on C.2 mode for 10 minutes. | ||
| Steps Display | ||
| 1 After powering up, the display panel shows the colon sign. | 1:00 | |
| 2 Press the Grill/Combi button to select the mode. C.2 | ||
| 3 Set the cooking time by turning the Time/Weight knob. | 10:00 | |
| 4 Press the Start button once to resume operation. | ||
Defrost
Function designed to defrost different types of food. Press the Defrost/Clock button once and turn the Weight/Time knob to select the Defrost mode:
| d.1 Perfect for defrosting meat (0.1 kg-2.0 kg) | |
| d.2 Perfect for defrosting poultry (0.2 kg-3.0 kg) | |
| d.3 Perfect for defrosting fish/seafood (0.1 kg-0.9 kg) |
When the LED displays the desired programme, press the Defrost/Clock button again and turn the Time/Weight button to set the weight of the food to be defrosted. Press the Start button to start the process.
- It is highly recommended to turn over food during operation on order to obtain a uniform effect.
– Usually defrosting will need longer time than cooking food. - If the food can be cut by knife, the defrosting process can be considered completed.
– Microwave radiation penetrates around 4 cm into most foods. - Defrosted food should be used as soon as possible. It is not recommended to freeze or put back in the fridge again.
| Example: Defrosting 0.5 kg of chicken | ||
| Steps Display | ||
| 1 After powering up, the display | panel shows the colon sign. | 1:00 |
| 2 Press the Defrost/Clock | button to set the food defrost type. | |
| 3 Press the Defrost/Clock | button to set the weight. | d.2 |
| 4 Turn the Defrost/Clock knob | to set food weight. | 0.4 |
| 5 Press the Start button once to resume operation. | ||
| 6 During the defrosting | process, an alarm will sound in order to remind you to turn over the food. Turn over food, close the door and press the Start button again to resume the defrosting process. | |
Auto cooking
The microwave has 8 default programmes, select the most appropriate one according to the
ENGLISH
food type and weight. Press the Auto Cooking button consecutively, the LED display panel will show different programmes. Use the Weight/Time knob to select one of the following:
| Display Food Dish | ||
| A.1 Popcorn Perfect for cooking | 85 g of | popcorn. |
| A.2 Reheat Perfect for reheating from 0.2 | to 1 kg of food. | |
| A.3 Liquids Perfect for heating | 250 ml | of liquid. Liquid must be between 5 °C and 10 °C. Do not seal the liquid container. |
| A.4 Pizza Perfect for heating 1 or 2 | pizza slices. | |
| A.5 Potato Perfect for cooking potato | cubes (5 mm height and width), 0.45-0.65 kg maximum. Place potato cubes on a large tray or container and cover it with a thin film to prevent water loss. | |
| A.6 Frozen dinner Perfect for heating cooked | food. | |
| A.7 Rice Perfect for cooking 0.1-0.5 kg | of rice. | |
| A.8 Vegetables Perfect for cooking 0.1-0.5 kg | of vegetables. | |
- Before cooking or heating food, its temperature must be about 20-25 °C. Higher or lower temperature of the food before cooking would require increasing or decreasing cooking time.
- Food's temperature, weight and shape will strongly influence the microwave effect on the cooking process. Adjust time in order to obtain the best result.
| Example: Cooking 0.5 kg of rice | ||
| Steps | Display | |
| 1 | After powering up, the display panel shows: | 1:00 |
| 2 Press the Auto Cooking | button to set cooking mode. | A.7 |
| 3 Set food weight by turning the Time/Weight knob. | 0.5 | |
| 4 Press the Start button to | start operation. The LED will display the countdown. | |
Automatic start
This function allows you to set cooking program and time, so at the pre-set time, the pre-set programme will automatically start operating. In order to activate this mode:
- Set the timer.
- Set the cooking programme.
| Example: It is 12:30 and you want to programme the microwave at 80 P, for 9 minutes and 30 seconds at 14:20. | ||
| Steps Display | ||
| 1 After powering up, the display | panel shows: | 1:00 |
| 1.1 Hold down the Defrost/Clock | button for 3 seconds. | 1:00 |
| 1.2 Set hour by turning Time/ | Weight knob. | 12:00 |
| 1.3 Press the Defrost/Clock | button again to confirm the hours. | 12:00 |
| 1.4 Set the minutes by turning | the Time/Weight knob. | 12:30 |
| 1.5 Press the Defrost/Clock | button to confirm the set time or wait for 5 seconds for the microwave to set it automatically. | 12:30 |
| 2 Set the cooking programme | and cooking time. | |
| 2.1 Select power by pressing the | On button. | 100P |
| 2.2 Turn the Time/Weight knob | to set the cooking time. | 9.30 |
ENGLISH
| 2.3 Hold down the Defrost/Clock | button for 3 seconds. | |
| 3 Set the time you expect | cooking to start and repeat steps 1.2, 1.3, 1.4. | |
| 4 Press the Defrost/Clock | button to confirm the selected cooking programme.Now the program has been activated and operation will start at 14.20. | |
| 5 You may check the pre-set | starting time by pressing the Defrost/Clock button. |
Multi-sequence cooking
In order to obtain the best result, some recipes require of different steps. This function allows you to personalise and to combine your cooking processes.
| Example: It is 12:30, you want to program the microwave at P 80 for 9 minutes and 30 seconds at 14.20. | ||
| Steps Display | ||
| 1 Select 100 P microwave for 3 | minutes. | |
| 1.1 Press the On button to select | the desired power level. | 100P |
| 1.2 Set the cooking time by | turning the Time/Weight knob. | 3:00 |
| 2 Grill function for 9 minutes. | ||
| 2.1 Press the Combi/Grill button | to select the Grill mode. | G |
| 2.2 Set the cooking time by | turning the Time/Weight knob. | 9:00 |
| 3 Press the Start button to start | operation. | |
- When the microwave function is finished, grilling function will operate automatically.
- Maximum 4 sequences can be set at a time. If more sequences are required, repeat stated steps.
Safety child lock
Security system that blocks control panel to ensure small children do not use the appliance without supervision.
- To activate lock: Hold the Pause/Cancel button for 3 seconds.
- To deactivate lock: Hold the Pause/Cancel button for 3 seconds.
Microwave cooking tips
- Food arrangement: Place the thickest food parts towards the edge of the glass tray. If possible, do not overlap food.
- Watch cooking time: Cook for the shortest amount of time at first, and add more minutes in case it is necessary. Over-cooking may result in smoke and burns.
- Cover food while cooking: Covering the food you are going to cook avoids spattering and allows for a more even cooking.
– Flip or stir food once during the cooking process. - Respect pre-heating time. Pre-heating time specified on the food's label must not be exceeded.
4. CLEANING AND MAINTENANCE
Warning:
The device, as well as food rests, must be cleaned and removed regularly.
- The device, as well as food rests, must be cleaned and removed regularly.
- Disconnect the power cord from the wall socket before cleaning. Do not immerse the product in water or any other fluid during cleaning.
- Failure to maintain the product in clean conditions could lead to surface deterioration and could adversely affect the product's shelf life, resulting in possible hazard.
- Never use strong detergents, abrasive powder or metal brush to clean any part of the product.
- Do not remove the wave guide.
- When the microwave has been used for a long time, some strong odours may arise from inside. To eliminate these odours, follow one of the below methods:
- Place several lemon slices in a cup and heat them at high power for 2 or 3 minutes.
- Place a cup of red tea inside the microwaves and heat it at high power for 2 or 3 minutes.
- Place orange peels inside the microwaves and heat it at high power for 1 minute.
- Use a dampened soft cloth to clean enclosures, door, interior walls and the door frame.
ENGLISH
5. TECHNICAL SPECIFICATIONS
Product reference: 01544
Product: ProClean 9110 Full Inox
Microwave power: 1000 W
Grill power: 1000 W
Voltage and frequency: 230 V, 50 Hz
Capacity: 30L
Made in China | Designed in Spain
6. DISPOSAL OF OLD ELECTRICAL APPLIANCES
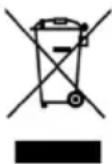
The European directive 2012/19/EU on Waste Electrical and Electronic Equipment (WEEE), specifies that old household electrical appliances must not be disposed of with the normal unsorted municipal waste. Old appliances must be collected separately, in order to optimise the recovery and recycling of the materials they contain and reduce the impact on human health and the environment.
The crossed out "wheeled bin" symbol on the product reminds you of your
obligation to dispose of the appliance correctly.
Consumers must contact their local authorities or retailer for information concerning the correct disposal of old appliances and/or their batteries.
7. TECHNICAL SUPPORT AND WARRANTY
This product is under warranty for 2 years from the date of purchase, as long as the proof of purchase is submitted, the product is in perfect physical condition, and it has been given proper use, as explained in this instruction manual.
The warranty will not cover the following situations:
The product has been used for purposes other than those intended for it, misused, beaten, exposed to moisture, immersed in liquid or corrosive substances, as well as any other fault attributable to the customer.
The product has been disassembled, modified, or repaired by persons, not authorised by the official Technical Support Service of Cecotec.
Faults deriving from the normal wear and tear of its parts, due to use.
The warranty service covers every manufacturing defects of your appliance for 2 years, based on current legislation, except consumable parts. In the event of misuse, the warranty will not apply.
If at any moment you detect any problem with your product or have any doubt, do not hesitate to contact Cecotec Technical Support Service at +34 963 210 728.
1. PIÈCES ET COMPOSANTS
Img. 1
Made in China | Designed in Spain
6. RECYKLING SPRZĘTU AGD

 | Micro Power |
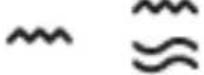 | Grill Combi |
 | Defrost/Clock |
 | Auto Cooking |
 | Pause/Cancel |
 | Instant/Start |
Fig./Img./Abb./Afb./Rys./Obr.2
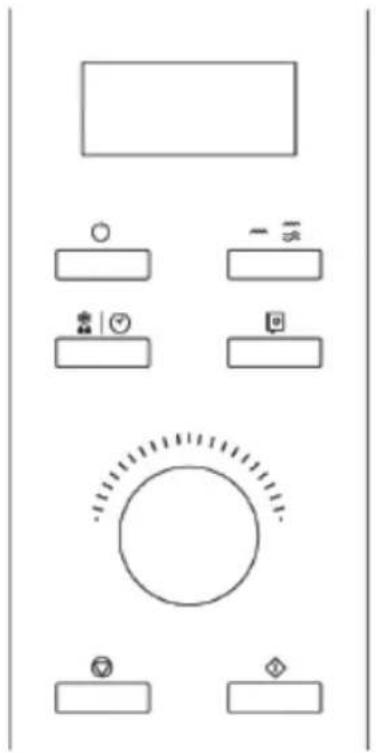
Fig./Img./Abb./Afb./Rys./Obr. 3

- SOMMAIRE
- INSTRUCTIONS DE SÉCURITÉ
- Buttons guide
- Fig. 2
- BEFORE USE
- ENGLISH
- OPERATION
- Pause/Cancel
- Reminder
- Instant cooking
- Clock/timer setting
- Automatic start
- Safety child lock
- Microwave cooking tips
- CLEANING AND MAINTENANCE
- Warning:
- TECHNICAL SPECIFICATIONS
- DISPOSAL OF OLD ELECTRICAL APPLIANCES
- TECHNICAL SUPPORT AND WARRANTY
- PIÈCES ET COMPOSANTS
- Img. 1
- RECYKLING SPRZĘTU AGD
Brand : CECOTEC
Model : ProClean 9110
Category : Microwave Oven