
SPELNÄS 505.938.86 - Fridge IKEA - Free user manual and instructions
Find the device manual for free SPELNÄS 505.938.86 IKEA in PDF.

| Product type | Wine cellar |
| Brand | IKEA |
| Model | SPELNÄS 505.938.86 |
| Dimensions (H x W x D) | 875 x 295 x 595 mm |
| Net volume | 60.0 L |
| Annual energy consumption | 138 kWh/year |
| Energy class | G |
| Noise level | 41 dB |
| Rated voltage | 220-240 V ~ |
| Rated frequency | 50 Hz |
| Refrigerant | R600a (flammable) |
| Installation type | Built-in |
| Temperature range | 5 °C to 18 °C (41 °F to 64 °F) |
| Defrost system | Automatic |
| Interior lighting | LED, switchable to continuous mode |
| Bottle capacity | Up to 3 standard bottles per shelf, 2 champagne bottles in the drawer |
| Door open alarm | Yes, after 120 seconds |
| Memory function | Yes (except if operation <20 min) |
| Shelf materials | Wood (shelves and drawer) |
| Warranty | 5 years (except LAGAN) |
| Adjustable feet | Yes |
| Weight (approx.) | Not specified, estimated ~40 kg |
| Climate class | SN, N, ST, T (10 °C to 43 °C) |
Frequently Asked Questions - SPELNÄS 505.938.86 IKEA
User questions about SPELNÄS 505.938.86 IKEA
0 question about this device. Answer the ones you know or ask your own.
Ask a new question about this device
Download the instructions for your Fridge in PDF format for free! Find your manual SPELNÄS 505.938.86 - IKEA and take your electronic device back in hand. On this page are published all the documents necessary for the use of your device. SPELNÄS 505.938.86 by IKEA.
USER MANUAL SPELNÄS 505.938.86 IKEA
natural_image
Simple diagram with four rectangular blocks and a crossed black X mark, no text or symbols present
Table of contents
Safety information 5
Safety instructions 6
Before first use 8
Product description 8
Operation
Daily use 10
Other tips 11
Cleaning and maintenance 11
Troubleshooting
Technical data 13
8 Environmental concerns 14
IKEA GUARANTEE 15
12
Safety information
Before the installation and use of the appliance, carefully read the supplied instructions. The manufacturer is not responsible if an incorrect installation or use causes injuries or damages. Always keep the instructions with the appliance for future reference.
Children and vulnerable people safety
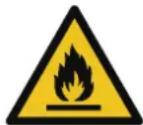
WARNING: Risk of fire/
Flammable materials
- This appliance can be used by children aged from 8 years and above and persons with reduced physical, sensory or mental capabilities or lack of experience and knowledge if they have been given supervision or instruction concerning use of the appliance in a safe way and understand the hazards involved. Children shall not play with the appliance.
- Cleaning and user maintenance shall not be made by children without supervision. Children should be supervised to ensure that they do not play with the appliance. Children aged from 3 to 8 years are allowed to load and unload refrigerating appliances.
- Very young children (0-3 years) should be kept away from the appliance.
- Young children (3-8 years) should be kept away from the appliance unless continuously supervised.
- Keep all packaging away from children and dispose of it appropriately.
General safety
- The appliance is designed exclusively for the storage of wine.
- This appliance is intended to be used in household and similar applications such as:
- staff kitchen areas in shops, offices and other working environments;
- farm houses and by clients in hotels, motels and other residential type environments;
- bed and breakfast type environments;
- catering and similar non-retail applications.
- WARNING: Keep ventilation openings, in the appliance enclosure or in the built-in structure, clear of obstruction.
- WARNING: Do not use mechanical devices or other means to accelerate the defrosting process, other than those recommended by the manufacturer.
- WARNING: Do not damage the refrigerant circuit.
- WARNING: Do not use electrical appliances inside the appliance, unless they are of the type recommended by the manufacturer.
- WARNING: Do not use water spray and steam to clean the appliance.
- WARNING: Clean the appliance with a moist soft cloth. Only use neutral detergents. Do not use abrasive products, abrasive cleaning pads, solvents or metal objects.
-
WARNING: Do not store explosive substances such as aerosol cans with a flammable propellant in this appliance.
-
WARNING: If the supply cord is damaged, it must be replaced by the manufacturer, its service agent or similarly qualified persons in order to avoid a hazard.
- WARNING: When positioning the appliance, ensure the supply cord is not trapped or damaged.
-
WARNING: Do not locate multiple portable socket-outlets or portable power supplies at the rear of the appliance.
-
Opening the door for long periods can cause a significant increase of the temperature in the compartments of the appliance.
- If the refrigerating appliance is left empty for long periods, switch off, defrost, clean, dry, and leave the door open to prevent mould developing within the appliance.
- This refrigerating appliance is not suitable for freezing foodstuffs.
- WARNING: To avoid a hazard due to instability of the appliance, it must be fixed in accordance with the instructions.
Safety instructions
Installation
- The appliance must be handled and installed by two or more persons.
- Installation and maintenance including replacement of the supply cord must be carried out by the manufacturer or a qualified technician, in compliance with the manufacturer's instructions and the local safety regulations in force. In order to avoid a hazard, do not repair or replace any part of the appliance including the supply cord, unless specifically stated in the user manual.
- Remove all the packaging.
- Do not install or use a damaged appliance.
- Follow the installation instructions supplied with the appliance.
- Always take care when moving the appliance as it is heavy. Always use safety gloves and enclosed footwear.
- Be careful not to damage the floors (e.g. parquet) when moving the appliance.
• Make sure the appliance is not near a heat source. - Install and level the appliance on a floor strong enough to take its weight and in a place suitable for its size and use.
- Make sure the air can circulate around the appliance.
- At first installation or after reversing the door wait at least 4 hours before connecting the appliance to the power supply. This is to allow the oil to flow back into the compressor.
- Before carrying out any operations on the appliance (e.g. reversing the door), remove the plug from the power socket.
- Do not install the appliance where there is direct sunlight.
- Do not install this appliance in areas that are too humid or too cold such as wine cellars.
• Install this appliance at a location where the ambient temperature corresponds to the
climate class indicated on the rating plate of the appliance. This ensures the correct operation of the appliance. Explanation of climate classes is as follows:
- "SN" indicates that this refrigerating appliance is intended to be used at ambient temperatures ranging from 10°C to 32°C.
- "N" indicates that this refrigerating appliance is intended to be used at ambient temperatures ranging from 16°C to 32°C.
- "ST" indicates that this refrigerating appliance is intended to be used at ambient temperatures ranging from 16°C to 38°C.
- "T" indicates that this refrigerating appliance is intended to be used at ambient temperatures ranging from 16°C to 43°C.
Electrical connection
⚠ WARNING! Risk of fire and electrical shock.
⚠ WARNING! When positioning the appliance, ensure the supply cord is not trapped or damaged.
⚠ WARNING! Do not use multi-plug adapters or extension cables.
• The appliance must be earthed.
- Make sure that the parameters on the rating plate are compatible with the electrical ratings of the mains power supply.
• Always use a correctly installed shockproof socket.
- Make sure not to cause damage to the electrical components (e.g. mains plug, mains cable, compressor). Contact an Authorised Service Centre or an electrician to change the electrical components.
- The mains cable must stay below the level of the mains plug.
ENGLISH 7
- Connect the mains plug to the mains socket only at the end of the installation. Make sure that there is access to the mains plug after the installation.
- Do not pull the mains cable to disconnect the appliance. Always pull the mains plug.
- UK and Ireland only: This appliance is fitted with a 13 A mains plug. If it is necessary to change the mains plug fuse, use only a 13 A ASTA (BS 1362) fuse.
Use
⚠ WARNING! Risk of injury, burns, electrical shock or fire.
The tubes of the refrigeration circuit contain a small quantity of the environmentally friendly but flammable refrigerant R600a. It does not damage the ozone layer and does not increase the greenhouse effect. If refrigerant escapes, it may injure your eyes or ignite. Do not damage the tubes.
- The surface of the compressor may become hot under normal operation. Do not touch it with hands.
- Do not change the specifications of this appliance.
- Do not put electrical appliances (e.g. ice cream makers) in the appliance unless they are stated applicable by the manufacturer.
- If damage occurs to the refrigerant circuit, make sure that there are no flames and sources of ignition in the room. Ventilate the room.
- Do not let hot items touch the plastic parts of the appliance.
- Do not store flammable gases or liquids in the appliance.
- Do not put flammable products or items that are wet with flammable products in, near or on the appliance.
- Do not touch the compressor or the condenser. They are hot.
- Follow the storage instructions on the packaging of food products.
Internal lighting
WARNING! Risk of electric shock.
- The LED used inside the appliance is specifically designed for domestic appliances and is not suitable for general room lighting within the home ((EU) 2019/2020).
Care and cleaning
WARNING! Risk of injury or damage to the appliance.
- Before maintenance, deactivate the appliance and disconnect the mains plug from the mains socket.
- This appliance contains hydrocarbons in the cooling unit. Only a qualified person can do the maintenance and the recharging of the unit.
- Regularly examine the drain of the appliance and if necessary, clean it. If the drain is blocked, defrosted water collects at the bottom of the appliance.
Service
• To repair the appliance contact an Authorised Service Centre listed at the end of this manual.
- Use original spare parts only.
Disposal
⚠ WARNING! Risk of injury or suffocation.
- Disconnect the appliance from the mains supply.
- Cut off the mains cable and discard it.
- Remove the doors to prevent children and pets to be closed inside the appliance.
- The refrigerant circuit and the insulation materials of this appliance are ozone-friendly.
- The insulation foam contains flammable gas. Contact your municipal authority for information on how to discard the appliance correctly.
- Do not cause damage to the part of the cooling unit that is near the heat exchanger.
The manufacturer declines any liability for injury to persons or animals or damage to property if the above advice and precautions are not respected.
Before first use
- Remove the exterior and interior packing.
- After unpacking the appliance, check for completeness of delivery and for shipping damage. If your delivery is damaged or incomplete, please contact the After-sales Service.
- Follow the supplied installation instructions to install the appliance.
- Remove all shelves and the drawer from the
appliance.
- Clean the interior surface with a soft, moistened cloth.
- Insert all shelves and the drawer back into the appliance.
- Wait at least 4 hours before switching on the appliance.
Product description
Product overview
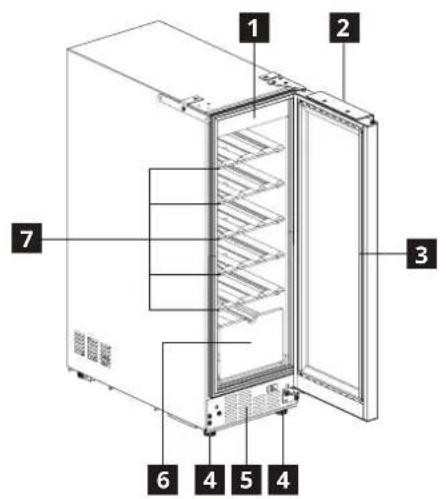
1 Control panel
2 Handle (accessory)
3 Door gasket
4 Adjustable feet
5 Air vent
6 Wooden drawer
7 Wooden shelves
Operation
Control panel
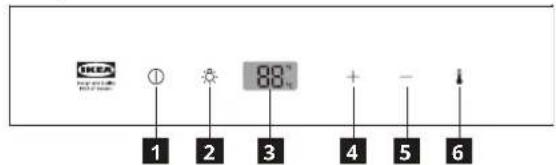
1 Power button
2 Internal light button
3 LCD display
4 Plus button
5 Minus button
6 Temperature unit button
Note: Do not use sharp objects to operate the control panel. They can scratch or damage the control panel.
Switching on
When you connect the mains plug to a power socket, the appliance switches on, emits a ring and starts operating using the default or last used settings.
Notes: The optimum wine storage temperature was already preset at the factory. After being switched on, the appliance needs 2-3 hours to reach the preset
temperature for storing wine.
Display
- The display lights up once the appliance switches on. A few seconds later, the display starts showing the set temperature for the storage compartment in °C or °F.
- During normal operation, the LCD display shows the set temperature for the storage compartment.
- In case of a known failure, the appliance shows one of the following error codes on the LCD display and beeps. To stop the beeping, tap any button.
| Error code Fault | |
| E1 Compartment temperature sensor failure | |
| E6 Internal communication failure | |
| E9 High compartment temperature |
Notes:
- If you see E1 or E6, contact an Authorised Service Centre for advice.
ENGLISH 9
- If you see E9, determine and remove causes of the high temperature such as the door being left open. If the problem persists, contact an Authorised Service Centre for advice.
Setting the temperature
Recommended temperature: 12°C (factory setting)
- You can set the temperature for the storage compartment via the control panel.
- The adjustable temperature range is from 5 to 18^ (41 to 64^ ).
- When you plug in the appliance for the first time, it sets the temperature to 12°C. When you plug in or switch on the appliance again, it sets the temperature to the last set temperature.
To set the temperature, tap the Plus or Minus button (or) until your desired set temperature is displayed. The new temperature will take effect in 15 seconds.
Tip: The lower the set temperature, the more electricity the appliance consumes.
Changing the temperature unit
The appliance can display the temperature in Celsius or Fahrenheit. To toggle between the two units, tap the Temperature unit button ( ⏻
Muting or unmuting the buttons
By default, you will hear a beep when you tap any button. To mute or unmute all the buttons, tap and hold the Plus button ( ) and Temperature unit button ( ) for 5 seconds. You will hear a ring when the change takes effect.
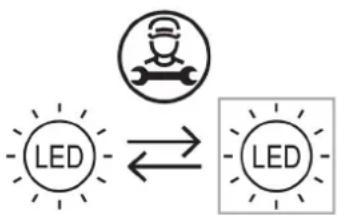
Using the internal light
The internal light can work in default or continuous mode.
- In default mode, the light turns on when the door opens and turns off when the door closes. To manually turn off the light in default mode, tap the Internal light button ( )
- In continuous mode, the light is always on, whether the door is open or closed. To enter continuous mode, tap the Internal light button (°) twice. The light will automatically exit continuous mode and turn off after 24 hours. To exit continuous mode earlier, tap the Internal light button (°)
Door opening alarm
- If the door is kept open for more than 120 seconds, the door opening alarm will go off.
- To stop the alarm, close the open door or tap any button.
Switching off
- To switch off the appliance, tap and hold the Power button (①) for 7 seconds. The appliance turns off the control panel and stops operating.
- To switch the appliance back on, tap and hold the Power button (☐) for 7 seconds. The appliance resumes its operation using the last used settings.
- To disconnect the appliance from the power supply, disconnect the mains plug from the power socket.
Memory function
The appliance has a memory function. If you switch off or unplug the appliance, it will resume its operation using the last used settings after you switch it on again.
Exceptions:
- The appliance will not remember your last set temperature if you switch off or unplug the appliance after it has operated continuously for less than 20 minutes.
- The appliance will not remember the internal light setting if you unplug it.
Daily use
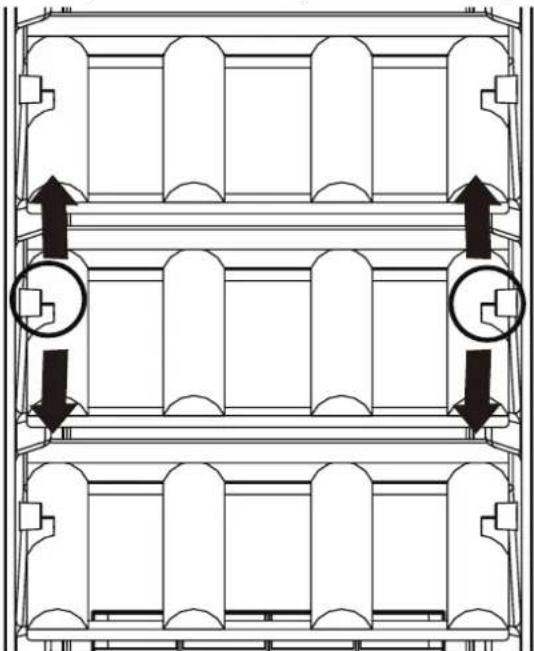
Removing and fitting the shelves and drawer
• To remove a shelf, pull it outwards.
• To fit a shelf, align the two sides of it with the rails and then push it all the way back until it stops.
natural_image
Architectural floor plan showing three horizontal panels with vertical supports and directional arrows indicating movement (no text or labels)• To remove the drawer, hold the top of it and pull it outwards.
- To fit the drawer, push it all the way back until it stops.
Notes:
• To protect the door gasket, ensure you open the door completely before removing a shelf or the drawer.
- Do not slide multiple loaded shelves outwards as it may cause bottles to fall or may cause the appliance to tip forward.
- Do not cover shelves with material like aluminium foil or metal plate as this will impact the internal airflow.
- To avoid damaging the appliance, do not move it while it is loaded with bottles.
Loading wine bottles
- The shelves are designed to store the standard 750 ml wine bottles or other smaller bottles. You can load your wine bottles in single or double rows.
- Up to three 750 ml wine bottles can be stored on each shelf. Store the bottles in a top-to-bottom (neck between bottle bodies) fashion, so you can get close to the maximum capacity.
- If a large bottle does not fit, remove a shelf to store the bottle, or store it in the bottom drawer.
- The bottom drawer is designed to store two champagne bottles or three 750 ml wine bottles.
- Do not let bottles come into contact with the rear wall. The rear wall will be at a temperature too low for wine.
- If you don't have enough bottles to completely fill the storage compartment, it's best to spread the load over the entire height of the compartment to avoid a thermal imbalance at the top or bottom of the compartment.

natural_image
Technical line drawings of three mechanical assembly components: a multi-tiered rack, a multi-cylindrical roller mechanism, and a multi-cylindrical housing (no text or symbols present)Wine serving temperatures
The table below shows the recommended serving temperatures for different types of wines.
To bring your wine to the serving temperature, try to place it in the appliance at least 48 hours before serving, and uncork or aerate it a few minutes before tasting.
| Wine | Serving temperature |
| Champagne, sparkling 6°C | |
| White: Sémillon, Sauvignon Blanc 8°C | |
| Vintage Champagne 10°C | |
| Dry white: Chardonnay 10°C | |
| Dry white: Gewürztraminer, Riesling, Pinot gris | 10°C |
| Sweet late harvested white: Sauternes, Barsac, Monbazillac | 10°C |
| Beaujolais 13°C | |
| Sweet white wine: Sauternes 14°C | |
| White Chardonnay vintage 14°C | |
| Pinot Noir 16°C | |
| Red Grenache, Syrah 16°C | |
| Red vintage 18°C |
Other tips
Energy-saving tips
• Install the appliance in a dry, well ventilated room far away from any heat source (e.g. radiator, cooker, etc.) and in a place not exposed directly to the sun. If required, use an insulating plate.
- To guarantee adequate ventilation follow installation instructions.
- Insufficient ventilation on back of the product increases energy consumption and decreases cooling efficiency.
- The internal temperatures of the appliance may be affected by the ambient temperature, frequency of door opening, as well as location of the appliance. Temperature setting should take into consideration these factors.
- Do not obstruct the fan in the storage compartment.
• After placing or removing wine, ensure you close the door properly. - Reduce to a minimum door opening.
- Damaged gaskets must be replaced as soon as possible.
Cleaning and maintenance
General tips
- Before servicing or cleaning the appliance, unplug it from the mains or disconnect the power supply.
- Regularly clean the appliance with a cloth and a solution of warm water and neutral detergent specifically formulated for refrigerator interiors. Do not use abrasive cleaners or tools.
Defrosting the storage compartment
- The appliance is equipped with an automatic defrosting function. Manual defrosting is not required.
- The defrost water runs into the drain outlet and then into a container where it evaporates.
- It is important to periodically clean the defrost water drain hole at the back of the storage compartment to prevent the water overflowing inside.
Cleaning the door gasket
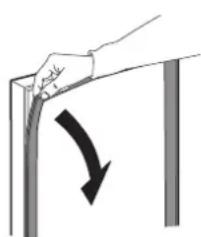
natural_image
Diagram showing a hand holding a curved object with a black arrow indicating direction (no text or symbols)- The door gasket can be removed for cleaning purposes.
- Wipe or wash the door gasket with clear water and dry thoroughly with a cloth. Then reinstall it correctly.
- Keep the door gasket free of oil and grease.
- Do not fold the gasket.
If you do not use the appliance for a prolonged period
- Switch off the appliance.
- Disconnect the appliance from the power supply.
- Remove all wine bottles.
- Clean and dry the interior.
- Leave the door open just enough to allow air to circulate inside the compartment. This will prevent the formation of mould and unpleasant odours.
In the event of a power cut
- Note when the power cut starts and ends. This helps you track how long the appliance has been without power.
- Keep the door of the appliance closed. This will allow the wines to stay cold as long as possible.
Replacing the lighting
The appliance is equipped with a LED for interior lighting.
Only an authorized technician is allowed to replace the lighting device. Please contact your Authorised Service Centre. For a quicker service, always refer to the full list of Authorised Service Centres located at the end of this manual and call the corresponding phone numbers.
flowchart
graph LR
    A["User Icon"] --> B["LED"]
    B --> C["LED"]
    C --> D["Output"]
Troubleshooting
| Problem Possible causes Solutions | ||
| The control panel is switched off and/or the appliance does not work. | There may be a problem with the power supply to the appliance. | Ensure that:There is no power cut.The power plug is properly inserted in the socket and the bipolar power switch, if present, is set to the correct position (on).The household electrical system protection devices are in good working order.The power supply cable is not damaged.Switch the appliance on with the power button. |
| The inside light does not work. | The light is broken.Failure of a component | Refer to "Replacing the lighting". |
| Temperature inside the compartments is not low enough. | There could be various causes (see the solutions in the next column). | Ensure that:The doors are closed properly.The appliance is not installed near a heat source.The temperature is set appropriately.Air circulation inside the appliance is not obstructed in any way (see the installation instructions). |
| Water collects at the bottom of the storage compartment. | The defrost water drain outlet is blocked. | Clean the defrost water drain outlet (see “Cleaning and maintenance”). |
| The front edge of the appliance next to the seal is hot. | This is not a problem.It prevents condensation from forming. | No solution is required. |
| The temperature in the compartment is too low. | The set temperature is too low.Compartment temperature sensor malfunctions. | If no wine in the compartment is frozen, set a higher temperature.If some or all wines in the compartment have become frozen, contact an Authorised Service Centre. |
ENGLISH 13
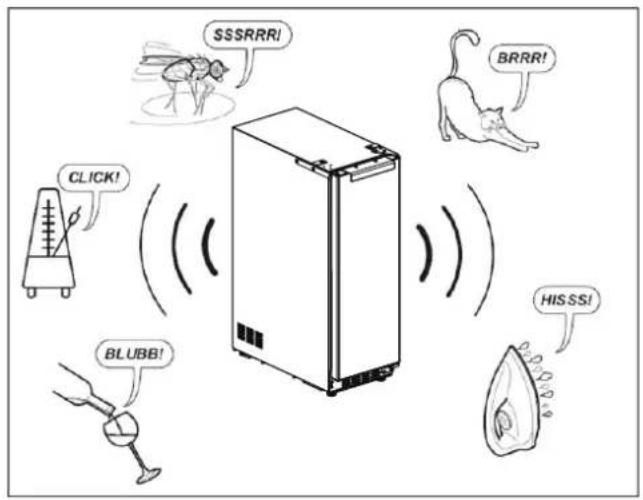
Normal noises
It is normal for the refrigeration system to produce some noises, such as gurgling and hissing.
Before contacting the After-sales Service:
Restart the appliance to see if the fault has been
remedied. If it persists, switch the appliance off again and repeat the operation after an hour.
If your appliance still does not work properly after carrying out the checks listed in the troubleshooting guide and switching the appliance on again, contact the After-sales Service, clearly explaining the problem and specifying:
• the nature of the problem
• the date of purchase
• the model and serial number of the appliance
The article number and serial number are shown on the rating plate on the back of the storage compartment.

Technical data
| Product category | |
| Product type Wine cooler | |
| Installation type Built-in | |
| Product dimensions | |
| Height 875 mm | |
| Width 295 mm | |
| Depth 595 mm | |
| Net volume 60.0 L | |
| Defrost system Automatic | |
| Other specifications | |
| Energy consumption 138 kWh/year | |
| Noise level 41 dB | |
| Energy class | G |
| Rated voltage | 220 - 240 V~ |
| Rated frequency | 50 Hz |
| Light source of energy efficiency class | Exempt |
Note: Information about the product in the product database can be accessed by scanning the QR code on the EPREL label.
Environmental concerns
1. Packing materials
Recyclable materials are marked with the symbol ☑ Put the packing materials in relevant containers to recycle them.
Keep the packing materials (plastic bags, polystyrene parts, etc.) out of the reach of children, as they are a potential source of danger.
2. Scrapping/Disposal
The appliance is manufactured using recyclable material.
This appliance is marked in compliance with European Directive 2002/96/EC on Waste Electrical and Electronic Equipment (WEEE). By ensuring the correct disposal of this appliance, you can help prevent potentially negative consequences for the environment and human health.

The symbol on the appliance, or on the accompanying documents, indicates that this appliance should not be treated as domestic waste but must be taken to a special collection centre for the recycling of electrical and electronic equipment. When scrapping the appliance, make it unusable by cutting off the power cable and removing the doors and shelves so that children cannot easily climb inside and become trapped.
Scrap the appliance in compliance with local regulations on waste disposal, taking it to a special collection centre; do not leave the appliance unattended even for a few days, since it is a potential source of danger for children.
For further information on the treatment, recovery and recycling of this product, contact your competent local office, the household waste collection service or the shop where you purchased the appliance.
Declaration of conformity
- This appliance has been designed for preserving food and is manufactured in compliance with Regulation (EC) No 1935/2004.

- This appliance has been designed, manufactured and marketed in compliance with:
- safety objectives of the "Low Voltage" Directive 2014/35/EU (which replaces 2006/95/CE and subsequent amendments);
- the protection requirements of Directive "EMC" 2014/30/EU.
- This appliance has been designed, manufactured and marketed in compliance with:
- Electromagnetic Compatibility Regulations 2016
- Electrical Equipment (Safety) Regulations 2016

IKEA GUARANTEE
How long is the IKEA guarantee valid?
This guarantee is valid for five (5) years from the original date of purchase of your appliance at IKEA, unless the appliance is named LAGAN in which case two (2) years of guarantee apply. The original sales receipt, is required as proof of purchase. If service work is carried out under guarantee, this will not extend the guarantee period for the appliance.
Which appliances are not covered by the IKEA five (5) years guarantee?
The range of appliances named LAGAN and all appliances purchased in IKEA before 1st of August 2007.
Who will execute the service?
IKEA service provider will provide the service through its own service operations or authorized service partner network.
What does this guarantee cover?
The guarantee covers faults of the appliance, which have been caused by faulty construction or material faults from the date of purchase from IKEA. This guarantee applies to domestic use only. The exceptions are specified under the headline "What is not covered under this guarantee?" Within the guarantee period, the costs to remedy the fault e.g. repairs, parts, labour and travel will be covered, provided that the appliance is accessible for repair without special expenditure. On these conditions the EU guidelines (DIRECTIVE (EU) 2019/771) and the respective local regulations are applicable. Replaced parts become the property of IKEA.
What will IKEA do to correct the problem?
IKEA appointed Service Provider will examine the product and decide, at its sole discretion, if it is covered under this guarantee. If considered covered, IKEA Service Provider or its authorized service partner through its own service operations, will then, at its sole discretion, either repair the defective product or replace it with the same or a comparable product.
What is not covered under this guarantee?
• Normal wear and tear.
- Deliberate or negligent damage, damage caused by failure to observe operating instructions, incorrect installation or by connection to the wrong voltage, damage caused by chemical or electrochemical reaction, rust, corrosion or water damage including but not limited to damage caused by excessive lime in the water supply, damage caused by abnormal environmental conditions.
- Consumable parts including batteries and lamps.
- Non-functional and decorative parts which do not affect normal use of the appliance, including any scratches and possible color differences.
- Accidental damage caused by foreign objects or substances and cleaning or unblocking of filters, drainage systems or soap drawers.
- Damage to the following parts: ceramic glass, accessories, crockery and cutlery baskets, feed and drainage pipes, seals, lamps and lamp covers, screens, knobs, casings and parts of casings. Unless such damages can be proved to have been caused by production faults.
- Cases where no fault could be found during a technician's visit.
• Repairs not carried out by our appointed service providers and/or an authorized service contractual partner or where non-original parts have been used. - Repairs caused by installation which is faulty or not according to specification.
- The use of the appliance in a non-domestic environment i.e. professional use.
- Transportation damages. If a customer transports the product to his home or another address, IKEA is not liable for any damage that may occur during transport. However, if IKEA delivers the product to the customer's delivery address, then damage to the product that occurs during this delivery will be covered by IKEA.
- Cost for carrying out the initial installation of the IKEA appliance. However, if an IKEA appointed Service Provider or its authorized service partner repairs or replaces the appliance under the terms of this guarantee, the appointed Service Provider or its authorized service partner will reinstall the repaired appliance or install the replacement, if necessary.
These restrictions do not apply to fault-free work carried out by a qualified specialist using our original parts in order to adapt the appliance to the technical safety specifications of another EU country.
How country law applies
The IKEA guarantee gives you specific legal rights, which cover or exceed all the local legal demands. However these conditions do not limit in any way consumer rights described in the local legislation.
Area of validity
For appliances which are purchased in one EU country and taken to another EU country, the services will be provided in the framework of the guarantee conditions normal in the new country.
An obligation to carry out services in the framework of the guarantee exists only if the appliance complies and is installed in accordance with:
ENGLISH 16
- the technical specifications of the country in which the guarantee claim is made;
- the Assembly Instructions and User Manual Safety Information.
The dedicated AFTER SALES for IKEA appliances
Please don't hesitate to contact IKEA appointed After Sales Service Provider to:
• make a service request under this guarantee;
- ask for clarifications on installation of the IKEA appliance in the dedicated IKEA kitchen furniture;
- ask for clarification on functions of IKEA appliances.
To ensure that we provide you with the best assistance, please read carefully the Assembly Instructions and/or the User Manual before contacting us.
How to reach us if you need our service
You can find phone numbers of the IKEA appointed After Sales Service Providers at the end of this manual.
In order to provide you with a quicker service, we recommend that you use the specific phone numbers listed in this manual. Always use the phone numbers listed in the user manual for the specific appliance you need an assistance for. Please remember to provide the 8-digit article number and 22-digit serial number shown on the rating plate of your appliance.
i SAVE THE SALES RECEIPT!
It is your proof of purchase and required for the guarantee to apply. The sales receipt also reports the IKEA name and article number (8 digit code) for each of the appliances you have purchased.
Do you need extra help?
For any additional questions not related to After Sales of your appliances please contact your nearest IKEA store call centre. We recommend you read the appliance documentation carefully before contacting us.
Spare parts information
- The following spare parts: thermostats, temperature sensors, printed circuit boards and light sources, will be available to professional repairers for a minimum period of seven years, after placing the last unit of the model on the market.
- The following spare parts: door handles, door hinges, trays and baskets will be available to professional repairers and end users for a minimum period of seven years, and door gaskets for a minimum period of 10 years, after placing the last unit of the model on the market.
The spare parts can be found:
www.ikea.com
Table des matières
natural_image
Architectural floor plan showing three vertical structural layouts with directional arrows indicating movement (no text or labels)natural_image
Isometric line drawing of stacked cylindrical components in a rack (no text or symbols)
natural_image
Technical line drawings of cylindrical components and a folded paper holder (no text or symbols)natural_image
Diagram showing a hand holding a curved object with a black arrow indicating direction (no text or symbols)natural_image
Architectural cross-section diagram of a multi-level building facade with structural elements and directional arrows (no text or symbols)natural_image
Isometric line drawing of stacked cylindrical components with no text or symbols
natural_image
Technical line drawing of a mechanical assembly with cylindrical components and flanges (no text or symbols)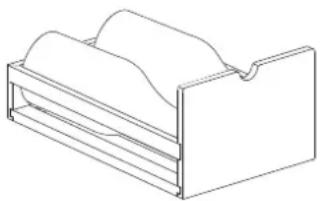
natural_image
Line drawing of a mechanical device with folded paper and a handle (no text or symbols)natural_image
Diagram showing a hand holding a curved object with an arrow indicating direction (no text or symbols)flowchart
graph TD
    A["User Icon"] --> B["LED"]
    B --> C["LED"]
    C --> A
Problembehebung
natural_image
Architectural floor plan showing three vertical structural layouts with directional arrows indicating movement (no text or labels)natural_image
Isometric line drawing of a multi-tiered mechanical assembly with rollers and housing (no text or symbols)
natural_image
Technical line drawings of cylindrical and rectangular components, no text or symbols presentnatural_image
Diagram showing a hand holding a curved object with a black arrow indicating direction (no text or symbols)natural_image
Architectural floor plan showing three horizontal panels with vertical supports and directional arrows indicating movement (no text or labels)natural_image
Isometric line drawing of stacked cylindrical components mounted on a rectangular base (no text or symbols)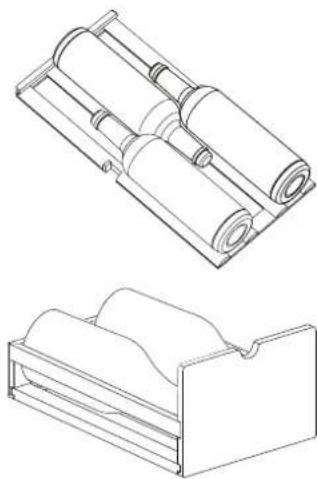
natural_image
Technical line drawings of cylindrical and rectangular components, no text or symbols presentnatural_image
Simple line drawing of a hand holding a curved object with a downward arrow, no text or symbols presentflowchart
graph TD
    A["Robot Icon"] --> B["LED"]
    B --> C["LED"]
    C --> A
Řešení potíží
natural_image
Architectural floor plan showing three vertical structural layouts with directional arrows indicating movement (no text or labels)natural_image
Technical line drawings of three different mechanical or storage components: a multi-tiered rack, a multi-layered roller stack, and a single drawer with folded material (no text or symbols present)Serveringstemperatur for vin
natural_image
Diagram showing a hand holding a curved object with an arrow indicating direction (no text or symbols)flowchart
graph LR
    A["Robot Icon"] --> B["LED"]
    B --> C["LED"]
    C --> A
Fejlfinding
⚠ WAARSCHUWING! Risico op letsel of verstikking.
natural_image
Architectural floor plan showing three horizontal panels with vertical supports and directional arrows indicating movement (no text or labels)natural_image
Technical line drawings of mechanical components including stacked cylinders, rolled rollers, and a folded case (no text or symbols)natural_image
Diagram showing a hand holding a curved object with an arrow indicating direction (no text or symbols)flowchart
graph LR
    A["User Icon"] --> B["LED"]
    B --> C["LED"]
    C --> D["Output"]
Probleemoplossing
Technische gegevens
BEWAAR HET AANKOOPBEWIJS!
natural_image
Architectural floor plan showing three horizontal panels with vertical supports and directional arrows indicating movement (no text or labels)natural_image
Technical line drawings of mechanical components including a multi-tiered rack, rolled rollers, and a folded sheet (no text or symbols)natural_image
Diagram showing a hand holding a curved object with a black arrow indicating direction (no text or symbols)flowchart
graph TD
    A["User Icon"] --> B["LED"]
    B --> C["Square Box"]
    style A fill:#fff,stroke:#000
    style C fill:#fff,stroke:#000
Vianmääritys
natural_image
Architectural floor plan showing three horizontal panels with vertical supports and directional arrows indicating movement (no text or labels)natural_image
Technical line drawings of three different mechanical or electronic components with layered arrangements (no text or symbols)natural_image
Hand holding a curved object with a black arrow indicating direction (no text or symbols)flowchart
graph TD
    A["LED"] --> B["Robot Icon"]
    B --> C["LED"]
natural_image
Architectural floor plan showing three horizontal structural layers with directional arrows indicating movement (no text or labels)natural_image
Technical line drawings of mechanical components including a multi-tiered rack, rolled rollers, and a folded sheet (no text or symbols)Vinserveringstemperaturer
natural_image
Diagram showing a hand holding a curved object with an arrow indicating direction (no text or symbols)- Dørpakningen kan fjernes for rengjøringsformål.
- Tørk eller vask dørpakningen med rent vann og tørk grundig med en klut. Deretter installerer du den riktig på nytt.
- Hold dørpakningen fri for olje og fett.
- Ikke brett pakningen.
Hvis du ikke bruker apparatet over en lengre periode
flowchart
graph LR
    A["Robot Icon"] --> B["LED"]
    B --> C["LED"]
    C --> A
Feilsøking
2. Kassering/avhending
Desmontar e montar as prateleiras e a gaveta
natural_image
Architectural floor plan showing three vertical structural layouts with directional arrows indicating movement (no text or labels)natural_image
Isometric line drawing of stacked cylindrical components in a rack (no text or symbols)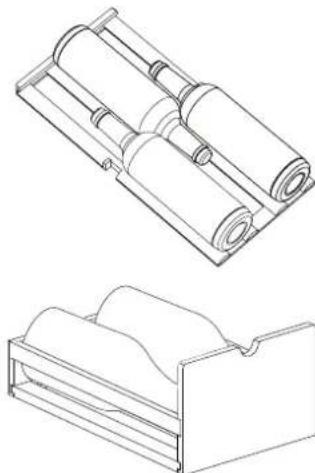
natural_image
Technical line drawings of cylindrical and rectangular components, no text or symbols presentnatural_image
Hand holding a curved object with a black arrow indicating direction (no text or symbols)natural_image
Architectural floor plan showing three vertical structural layouts with directional arrows indicating movement (no text or labels)natural_image
Isometric line drawing of a multi-tiered mechanical assembly with rollers and housing (no text or symbols)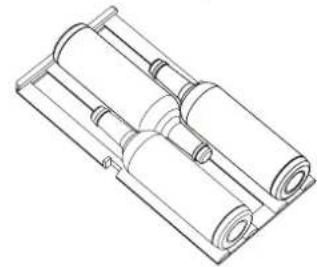
natural_image
Technical line drawing of a mechanical assembly with cylindrical components and mounting brackets (no text or symbols)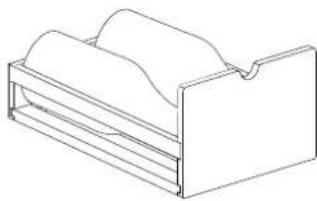
natural_image
Line drawing of a mechanical device with folded paper and a side clip (no text or symbols)natural_image
Hand holding a curved object with a black arrow indicating direction (no text or symbols)flowchart
graph LR
    A["User Icon"] --> B["LED"]
    B --> C["Second LED Output"]
natural_image
Architectural floor plan showing three horizontal panels with vertical supports and directional arrows indicating movement (no text or labels)natural_image
Isometric line drawing of stacked cylindrical components mounted on a rectangular base (no text or symbols)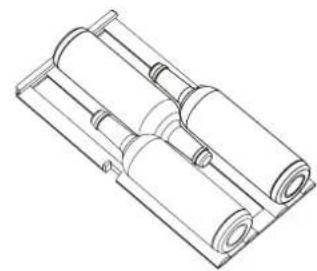
natural_image
Technical line drawing of a mechanical assembly with cylindrical components and mounting holes (no text or symbols)
natural_image
Line drawing of a mechanical device with folded paper and a side clip (no text or symbols)natural_image
Diagram showing a hand holding a curved object with a black arrow indicating direction (no text or symbols)flowchart
graph LR
    A["User Icon"] --> B["LED"]
    B --> C["LED"]
    C --> A
Felsökning
natural_image
Architectural floor plan showing three vertical structural layouts with directional arrows indicating movement (no text or labels)natural_image
Technical line drawings of three different mechanical or electronic components with layered arrangements (no text or symbols)natural_image
Diagram showing a hand holding a curved object with a downward arrow indicating rotation (no text or symbols)flowchart
graph TD
    A["LED"] --> B["Robot Icon"]
    B --> C["LED"]
    C --> A
natural_image
Architectural cross-section diagram of a multi-level building facade with structural columns and directional arrows (no text or labels)natural_image
Technical line drawings of three different mechanical or electronic components with no visible text or symbolsnatural_image
Diagram showing a hand holding a curved object with a downward arrow indicating rotation or movement (no text or symbols present)flowchart
graph LR
    A["Robot Icon"] --> B["LED"]
    B --> C["Square Box"]
    style A fill:#fff,stroke:#000
    style B fill:#fff,stroke:#000
    style C fill:#fff,stroke:#000
Problēmu novēršana
natural_image
Architectural floor plan showing three vertical structural layouts with directional arrows indicating movement (no text or labels)natural_image
Technical line drawings of three different mechanical or architectural components with layered arrangements (no text or symbols)Vyno patiekimo temperatūros
natural_image
Diagram showing a hand holding a curved object with a black arrow indicating direction (no text or symbols)flowchart
graph LR
    A["Worker Icon"] --> B["LED"]
    B --> C["LED"]
    C --> D["Output"]
Trikčių šalinimas
natural_image
Architectural floor plan showing three horizontal panels with vertical supports and directional arrows indicating movement (no text or labels)natural_image
Technical line drawings of mechanical components including a multi-tiered rack, rolled rollers, and a folded sheet (no text or symbols)natural_image
Diagram showing a hand holding a curved object with a black arrow indicating direction (no text or symbols)flowchart
graph LR
    A["LED"] --> B["Robot Icon"]
    B --> C["Square Box"]
    style A fill:#fff,stroke:#000
    style C fill:#fff,stroke:#000
natural_image
Architectural floor plan showing three horizontal panels with vertical supports and directional arrows indicating movement (no text or labels)natural_image
Isometric line drawing of a multi-tiered mechanical assembly with rollers and housing (no text or symbols)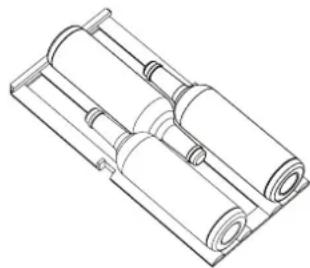
natural_image
Technical line drawing of a mechanical assembly with cylindrical components (no text or symbols)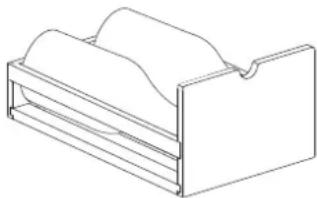
natural_image
Line drawing of a mechanical device with folded paper and mounting bracket (no text or symbols)natural_image
Simple line drawing of a hand holding a curved object with a downward arrow, no text or symbols presentflowchart
graph TD
    A["Robot Icon"] --> B["LED"]
    B --> C["LED"]
    C --> A
natural_image
Architectural floor plan showing three horizontal panels with vertical supports and directional arrows indicating movement (no text or labels)- Ak chcete zásuvku vytiahnut, podržte jej hornú čast' a vytiahnite ju smerom von.
- Ak chcete zásuvku namontovat, zatlačte ju úplne dozadu, kým sa nezastaví.
Poznámky:
natural_image
Isometric line drawing of stacked cylindrical components in a rack (no text or symbols)
natural_image
Technical line drawing of a mechanical component with cylindrical and rectangular sections (no text or symbols)
natural_image
Line drawing of a mechanical device with folded paper and a side panel (no text or symbols)natural_image
Hand holding a curved object with a black arrow indicating direction (no text or symbols)flowchart
graph LR
    A["LED"] --> B["Robot Icon"]
    B --> C["LED"]
Riešenie problémov
natural_image
Architectural floor plan showing three horizontal panels with vertical supports and directional arrows indicating movement (no text or labels)natural_image
Technical line drawings of mechanical components including multi-tiered folders, rolled rollers, and a folded folder (no text or symbols)natural_image
Hand holding a curved object with a black arrow indicating direction (no text or symbols)flowchart
graph LR
    A["LED"] --> B["Robot Icon"]
    B --> C["LED"]
    C --> A
natural_image
Architectural floor plan showing three horizontal panels with directional arrows indicating movement or flow (no text or symbols)natural_image
Technical line drawings of mechanical components including multi-tiered folders, rolled rollers, and a folded sheet (no text or symbols)natural_image
Hand holding a curved object with a black arrow indicating direction (no text or symbols)natural_image
Architectural cross-section diagram of a multi-level building facade with structural columns and directional arrows (no text or symbols)- Za uklanjanje ladice, uhvatite njen vrh i povucite je prema van.
- Kako biste namjestili ladicu, gurnite je skroz natrag dok se ne zaustavi.
Napomene:
natural_image
Technical line drawing of a multi-tiered mechanical assembly with rollers and brackets (no text or symbols)
natural_image
Technical line drawing of a mechanical assembly with cylindrical components and mounting brackets (no text or symbols)
natural_image
Line drawing of a mechanical device with folded paper and a side clip (no text or symbols)Temperature posluživanja vina
natural_image
Diagram showing a hand holding a curved object with a black arrow indicating direction (no text or symbols)- Brtva vrata može se zbog čišćenja ukloniti.
- Brtvu vrata prebrišite ili operite čistom vodom, a zatim je temeljito osušite krpom. Ponovno je ispravno postavite.
- Održavajte brtvu vrata bez ulja i masnoća.
• Nemojte savijati brtvu.
flowchart
graph TD
    A["User Icon"] --> B["LED"]
    B --> C["Square Box"]
    style A fill:#fff,stroke:#000
    style C fill:#fff,stroke:#000
natural_image
Architectural floor plan showing three vertical structural layouts with directional arrows indicating movement (no text or labels)natural_image
Technical line drawings of three different mechanical or architectural components: a multi-tiered rack, a rolled roller assembly, and a folded storage unit (no text or symbols present)natural_image
Diagram showing a hand holding a curved object with an arrow indicating direction (no text or symbols)natural_image
Architectural floor plan showing three vertical structural layouts with directional arrows indicating movement (no text or labels)natural_image
Technical line drawings of three different mechanical or architectural components: a multi-tiered rack, a rolled-up cylindrical component, and a folded paper holder (no text or symbols present)natural_image
Hand holding a curved object with a black arrow indicating direction (no text or symbols)flowchart
graph LR
    A["Robot Icon"] --> B["LED"]
    B --> C["LED"]
    C --> A
Depanare
natural_image
Architectural floor plan showing three horizontal panels with vertical supports and directional arrows indicating movement (no text or labels)- Da biste uklonili fioku, držite njen gornji deo i povucite je ka spolja.
- Da biste postavili fioku, gurajte je do kraja dok se ne zaustavi.
Napomene:
- Da biste zaštitili zaptivku vrata, pazite da vrata otvarate do kraja pre uklanjanja police ili fioke.
- Ne vucite nekoliko napunjenih polica ka spolja jer flaše mogu ispasti ili se uređaj može prevrnuti ka napred.
- Ne prekrivajte police materijalom poput aluminijumske folije ili metalne ploče jer će to uticati na unutrašnje strujanje vazduha.
- Da ne biste oštetili uređaj, nemojte ga pomerati dok je napunjen flašama.
Ubacivanje flaša s vinom
- Police su projektovane da nose standardne vinske flaše od 750 ml ili druge manje flaše. Flaše s vinom možete ređati u jedan red ili u dva reda.
- Svaka polica može da nosi najviše tri flaše s vinom od 750 ml. Čuvajte flaše postavljene od vrha ka dnu (sa grlima između dva dna flaše) da biste mogli maksimalno da iskoristite kapacitet.
- Ako velike flaše ne mogu da stanu, uklonite jednu policu da bi stala flaša ili stavite flašu u donju fioku.
-
Donja fioka je predviđena da se u njoj čuvaju dve flaše šampanjca ili tri flaše vina od 750 ml.
-
Ne dozvolite da flaše dospeju u kontakt sa zadnjim zidom. Temperatura zadnjeg zida je preniska za vino.
- Ako nemate dovoljno flaša da napunite odeljak za čuvanje, najbolje je da flaše ravnomerno rasporedite celom visinom odeljka da biste izbegli temperaturni disbalans na vrhu ili dnu odeljka.
natural_image
Isometric line drawing of a multi-tiered mechanical assembly with rollers and housing (no text or symbols)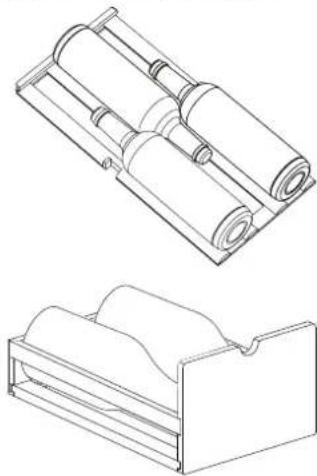
natural_image
Technical line drawings of cylindrical and rectangular components, showing top and side views (no text or symbols)Temperature serviranja vina
U tabeli ispod navedene su preporučene temperature serviranja raznih tipova vina.
Da bi vino došlo na temperaturu za serviranje, trudite se da ga stavljate u uređaj bar 48 sati pre serviranja, kao i da izvadite čep ili da prozračite vino nekoliko minuta pre degustacije.
| Vino | Temperatura serviranja |
| Šampanjac, penušavac 6 °C | |
| Belo: Sémillon, Sauvignon Blanc 8 °C | |
| Stari šampanjac 10 °C | |
| Suvo belo: Chardonnay 10 °C | |
| Suvo belo: Gewürztraminer, Riesling, Pinot gris | 10 °C |
| Slatko belo, kasne berbe: Sauternes, Barsac, Monbazillac | 10 °C |
| Beaujolais 13 °C | |
| Slatko belo vino: Sauternes 14 °C | |
| Beli stari Chardonnay 14 °C | |
| Pinot Noir 16 °C | |
| Crni Grenache, Syrah 16 °C | |
| Crno staro 18 °C |
Drugi saveti
Saveti za uštedu energije
- Postavite uređaj u suvu prostoriju sa dobrom ventilacijom, podalje od svih izvora toplote (npr. radijator, šporet itd.), na mesto na kom neće biti izložen direktnom suncu. Po potrebi, koristite izolacionu ploču.
- Da bi se zagarantovala odgovarajuća ventilacija, pratite uputstva za postavljanje.
-
Nedovoljna ventilacija sa zadnje strane proizvoda povećava potrošnju struje i smanjuje efikasnost hlađenja.
-
Na unutrašnje temperature mogu uticati temperatura okoline, učestalost otvaranja vrata, kao i pozicija uređaja. Pri podešavanju temperature treba uzeti u obzir ove faktore.
- Ne blokirajte ventilator u odeljku za čuvanje.
- Nakon stavljanja ili uzimanja vina pazite da pravilno zatvorite vrata.
- Smanjite otvaranje vrata na minimum.
- Oštećene zaptivke moraju se zameniti što je pre moguće.
natural_image
Diagram showing a hand holding a curved object with an arrow indicating direction (no text or symbols)- Zaptivka vrata se može ukloniti radi čišćenja.
- Obrišite ili operite zaptivku vrata čistom vodom i dobro osušite krpom. Zatim ponovo ispravno postavite.
- Očistite zaptivku vrata od ulja i masti.
- Ne presavijajte zaptivku.
Ako uređaj ne koristite duže vreme
flowchart
graph LR
    A["LED"] --> B["Robot Icon"]
    B --> C["LED"]
Rešavanje problema
natural_image
Architectural floor plan showing three horizontal panels with vertical supports and directional arrows indicating movement (no text or labels)- Če želite predal odstraniti, pridržite zgornji del predala in ga izvlecite.
- Če želite predal namestiti, ga potisnite nazaj do omejevala.
Opombe:
natural_image
Technical line drawings of three different mechanical or electronic components: a multi-tiered rack, a rolled roller assembly, and a folded sheet (no text or symbols present)Temperature za serviranje vina
natural_image
Diagram showing a hand holding a curved object with a black arrow indicating direction (no text or symbols)- Tesnilo vrat je mogoče odstraniti za namene čiščenja.
- Obrišite ali očistite tesnilo vrat s čisto vodo in ga temeljito posušite s krpo. Nato ga znova pravilno namestite.
- Zagotovite, da na tesnilu vrat ni madežev olja in masti.
- Tesnila ne pregibajte.
natural_image
Architectural floor plan showing three vertical structural layouts with directional arrows indicating movement (no text or labels)natural_image
Technical line drawings of three different mechanical or architectural components: a multi-tiered rack, a rolled roller, and a folded sheet (no text or symbols present)natural_image
Simple line drawing of a hand holding a curved object with a downward arrow, no text or symbols presentflowchart
graph LR
    A["LED"] --> B["Robot Icon"]
    B --> C["LED"]
Sorun Giderme
natural_image
Architectural floor plan showing three horizontal panels with vertical supports and directional arrows indicating movement (no text or labels)natural_image
Technical line drawings of three different mechanical or electronic components with layered arrangements (no text or symbols)natural_image
Hand holding a curved object with a black arrow indicating direction (no text or symbols)flowchart
graph TD
    A["User Icon"] --> B["LED"]
    B --> C["LED"]
    C --> A
Bilanaleit