
DD7004 - Steam cleaner DIRT DEVIL - Free user manual and instructions
Find the device manual for free DD7004 DIRT DEVIL in PDF.

| Product Type | 2-in-1 steam mop with detachable handheld unit |
| Brand | Dirt Devil |
| Model | DD7004 |
| Power | 1300 W |
| Power supply | 220-240 V ~ 50-60 Hz |
| Water tank capacity | 330 ml |
| Usage time per full tank | Approximately 15 minutes |
| Heat-up time | Approximately 30 seconds |
| Cable length | 5 m |
| Total reach | 5.5 m |
| Steam control | Variable (low to max) |
| Detachable handheld unit | Yes, for spot cleaning |
| Hard water filter | Yes, replaceable |
| Protection rating | IPX4 (splash-proof) |
| Floor brush type | Rectangular, with microfiber pad and carpet tool included |
| Accessories included | Floor brush, carpet tool, adapter, concentrator nozzle, curved nozzle, measuring cup, microfiber pad |
| Maintenance | Monthly descaling recommended; machine wash pad at 40°C |
| Weight | Approximately 2.5 kg (estimate) |
Frequently Asked Questions - DD7004 DIRT DEVIL
User questions about DD7004 DIRT DEVIL
0 question about this device. Answer the ones you know or ask your own.
Ask a new question about this device
Download the instructions for your Steam cleaner in PDF format for free! Find your manual DD7004 - DIRT DEVIL and take your electronic device back in hand. On this page are published all the documents necessary for the use of your device. DD7004 by DIRT DEVIL.
USER MANUAL DD7004 DIRT DEVIL
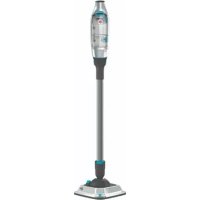
natural_image
Blue and silver electric vacuum cleaner with white base (no text or symbols visible)
IMPORTANT SAFETY INSTRUCTIONS
SAVE THESE INSTRUCTIONS FOR FUTURE USE
This model is for household use only. Commercial use of this unit voids the manufacturer's warranty.
READ ALL INSTRUCTIONS BEFORE USING YOUR STEAM MOP
When using an electrical appliance, basic precautions should be observed, including the following:
- Unplug from outlet when not in use and before conducting maintenance.
WARNINGS
- TO REDUCE THE RISK OF FIRE, ELECTRIC SHOCK OR INJURY: Always switch off and unplug the appliances from the socket after use and before cleaning the appliance or any maintenance task.

- WARNING: Danger of scalding.
- This appliance can be used by persons with reduced physical, sensory or mental capabilities or lack of experience and knowledge if they have been given supervision or instruction concerning use of the appliance in a safe way and understand the hazards involved.
• Children shall not play with the appliance.
- Cleaning and user maintenance shall not be made by children without supervision.
- Keep the appliance out of the reach of children when it is energized or cooling down.
- Don’t touch any hot areas/accessories on your steam mop. It’s normal for the steam mop and accessories to heat up during use, always allow them to cool down before handling.
- The appliance shall not be left unattended while it is connected to socket.
- The appliance shall not be used if it has been dropped, if there are visible signs or damage or if it is leaking.
- Liquid or steam must not be directed towards equipment containing electrical components, such as the interior of ovens.
- If the power cord is damaged stop using the appliance immediately.
- To avoid a safety hazard, an authorized agency service engineer must replace the power cord.
- Keep hands, feet, loose clothing and hair away from rotating brushes.
- Use only the power plug supplied with the appliance.
- Static electricity: some carpets can cause a small buildup of static electricity. Any static discharge is not hazardous to health.
- Do not use your appliance outdoors or on any wet surface or for wet pick up.
- Do not pick up hard or sharp objects, matches, hot ashes, cigarette ends or other similar items.
- Do not spray with or pick up flammable liquids, cleaning fluids, aerosols or their vapors.
- Do not run over the power cord when using your appliance or remove the plug by pulling on the power cord.
- Do not use the power cord as a handle, pull the power cord around corners, sharp edges or close a door over the power cord.
- Don’t attempt to remove blockages with sharp objects as this may cause damage to the steam mop, remove blockages only as instructed in this guide.
- Store the steam mop in a cool, dry area away from children.
- Before storing the steam mop please ensure all water/detergents tanks and hard water filter are thoroughly clean and dry.
- Always make sure the concentration nozzle and accessories are securely connected to the handheld before use.
- Always fill the clean water tank with water only, never add perfume, stain remover or productions container alcohol. Filling the water tank with hot or boiling water will damage the machine and invalidate your guarantee.
- Always make sure tanks are fitted correctly before using the steam mop.
• Always vacuum your carpets thoroughly and ensure hard floor areas are free from grit and debris before using the steam mop.
• Always carry the steam mop by the handle.
• Take extra care when cleaning on stairs.
- Agency service: To ensure the continued safe and efficient operation of this appliance we recommend that any servicing or repairs are only carried out by an authorized Agency service engineer.
- Do not use the appliance to clean animals or people.
- Do not use appliance in an enclosed space filled with vapor given off by oil-base paint, paint thinner, some moth proofing sub-stances, flammable dust, or other explosive or toxic vapors.
- Do not use on leather, wax polished furniture or floors, synthetic fabrics, valet or other delicate, steam-sensitive materials.
• CAUTION: HOT SURFACE
IPX4: Item is protected from splashing water, not matter the direction.
PRODUCT DESCRIPTION
Parts supplied
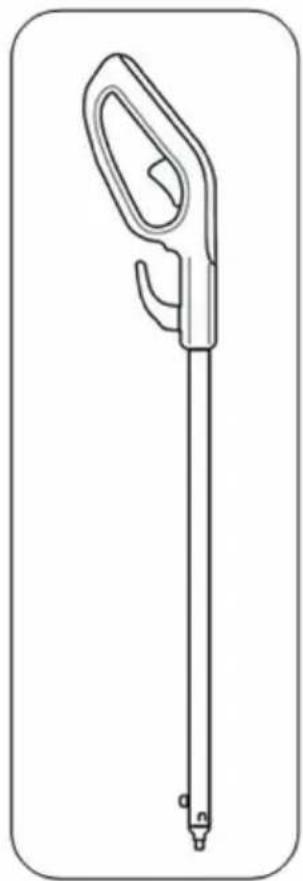
natural_image
Line drawing of a handheld medical or laboratory tool with a long handle and pointed tip (no text or symbols)Handle

natural_image
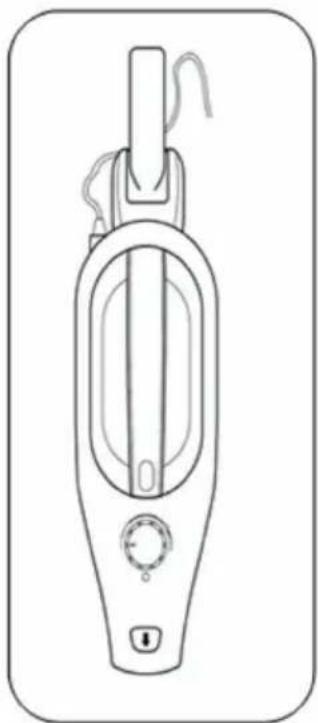
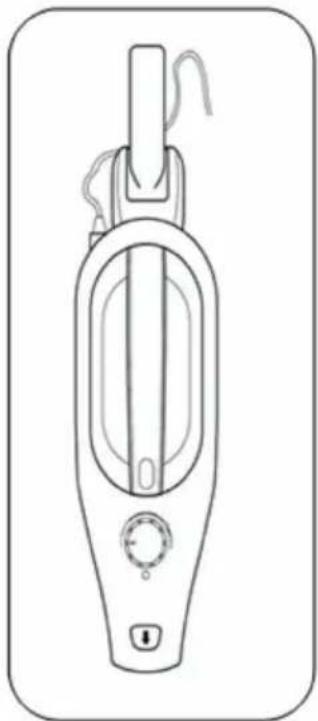
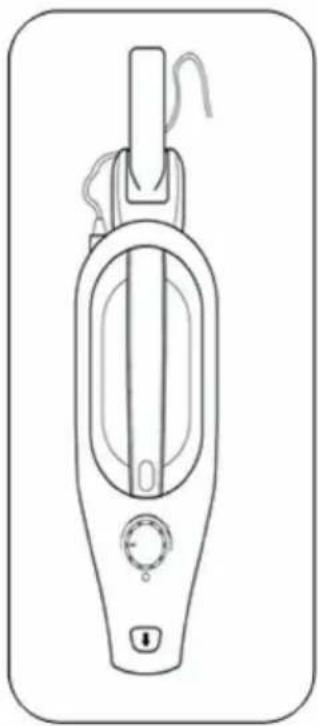
Line drawing of a handheld vacuum cleaner device with control knob and handle (no text or symbols)Steam mop body Floor head & carpet glider

natural_image
Line drawing of a sink with a handle and control knob (no text or symbols)Accessories supplied
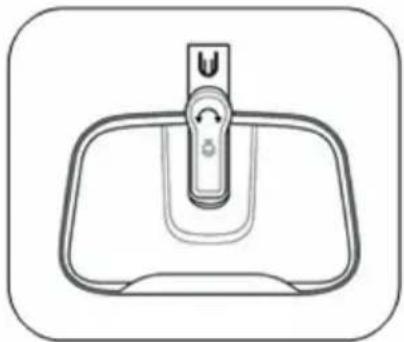
natural_image
Simple line drawing of a pair of eyeglasses inside a rounded square frame (no text or symbols)Floor pad x1

natural_image
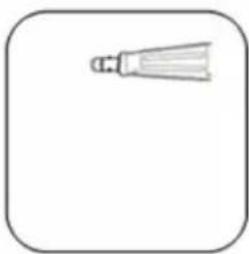
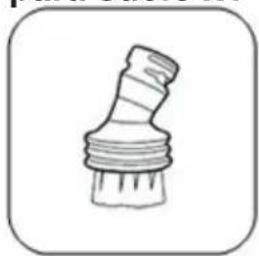
Simple line drawing of a bulb-like object with a pointed tip, enclosed in a rounded square frame (no text or symbols)Utility nozzle

natural_image
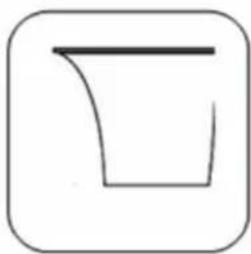
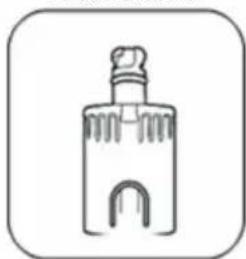
Simple line drawing of a container with a handle, enclosed in a rounded square frame (no text or symbols)Water jug
natural_image
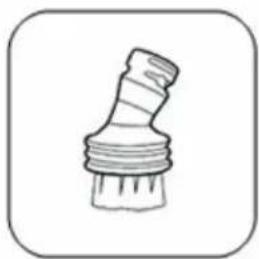
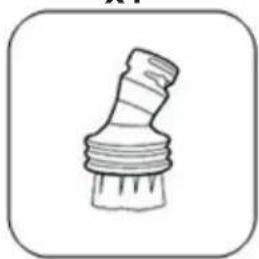
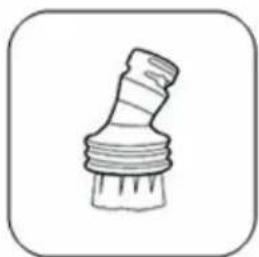
Simple line drawing of a mechanical component with threaded ends and a base (no text or symbols)Small brush

natural_image
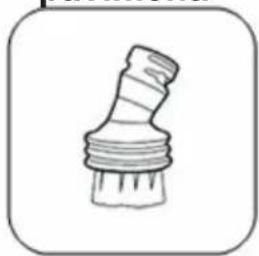
Simple line drawing of a bottle with a cap and decorative base (no text or symbols)Connector
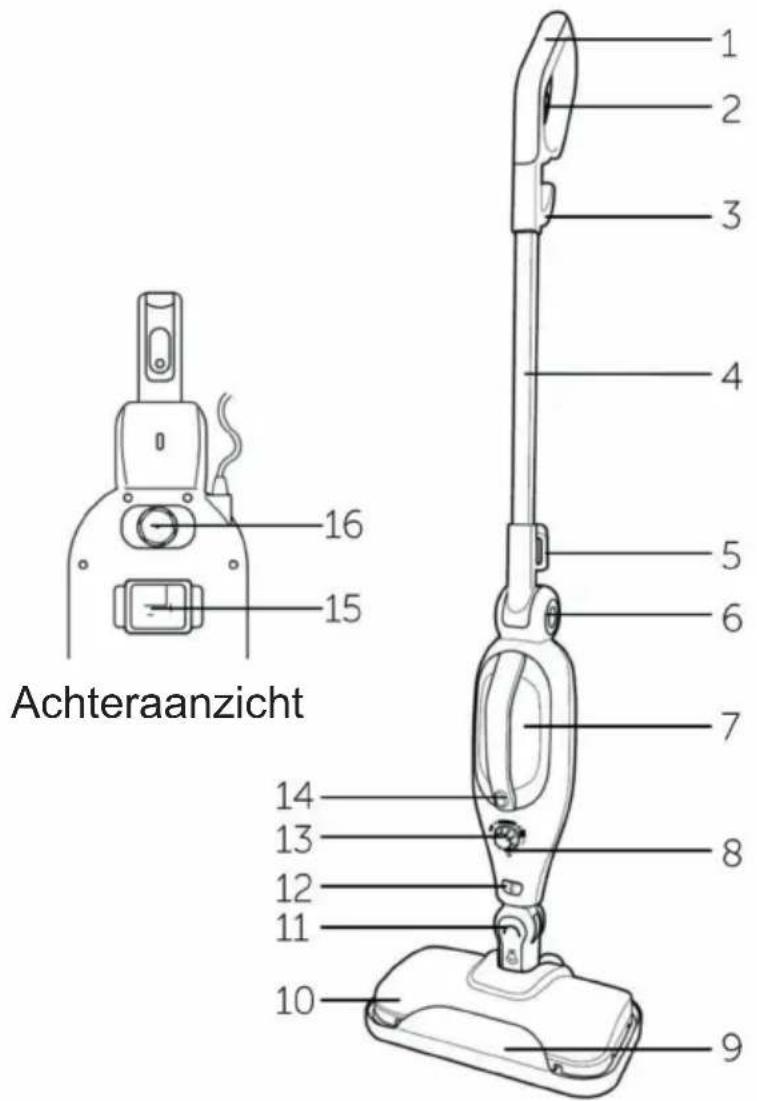
PARTS DESCRIPTION
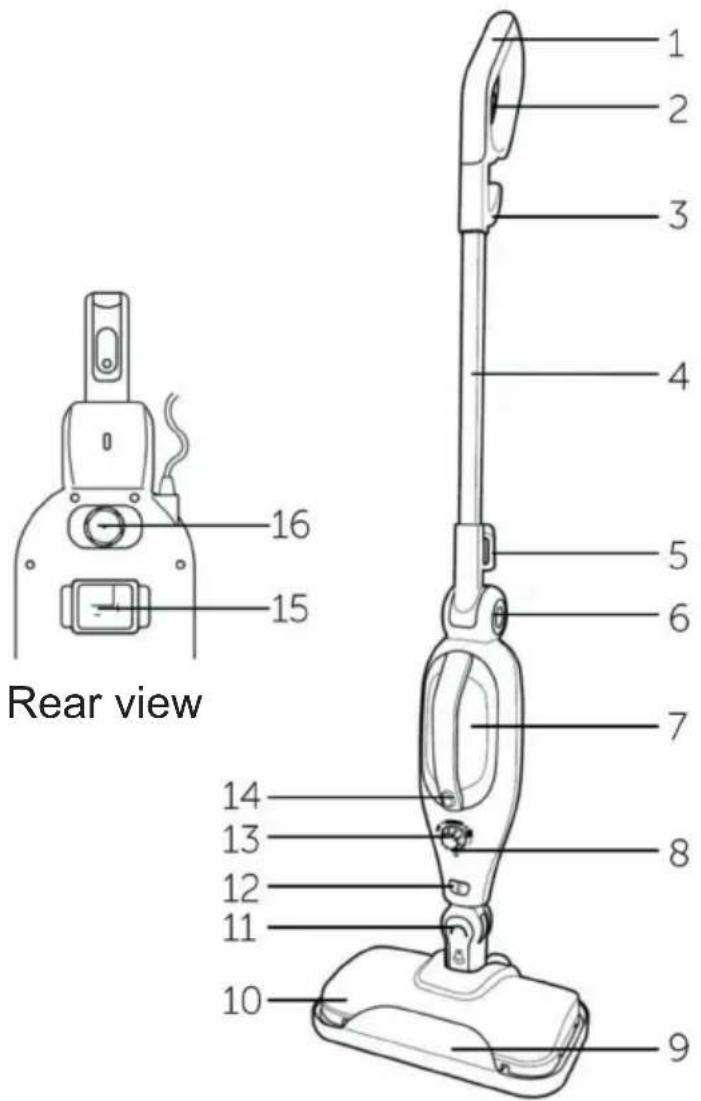
Features
- Handle 9. Carpet glider
- Steam trigger 10. Floor head
- Upper cord retaining hook 11. Auto lock
- Extension tube 12. Accessory release button
- Lower cord retaining hook 13. Steam adjustable knob
- Handle release button 14. Steam button
- Water reservoir 15. Water filter
- Indicator 16. Water reservoir stopper
ASSEMBLING THE STEAM MOP
Assembly
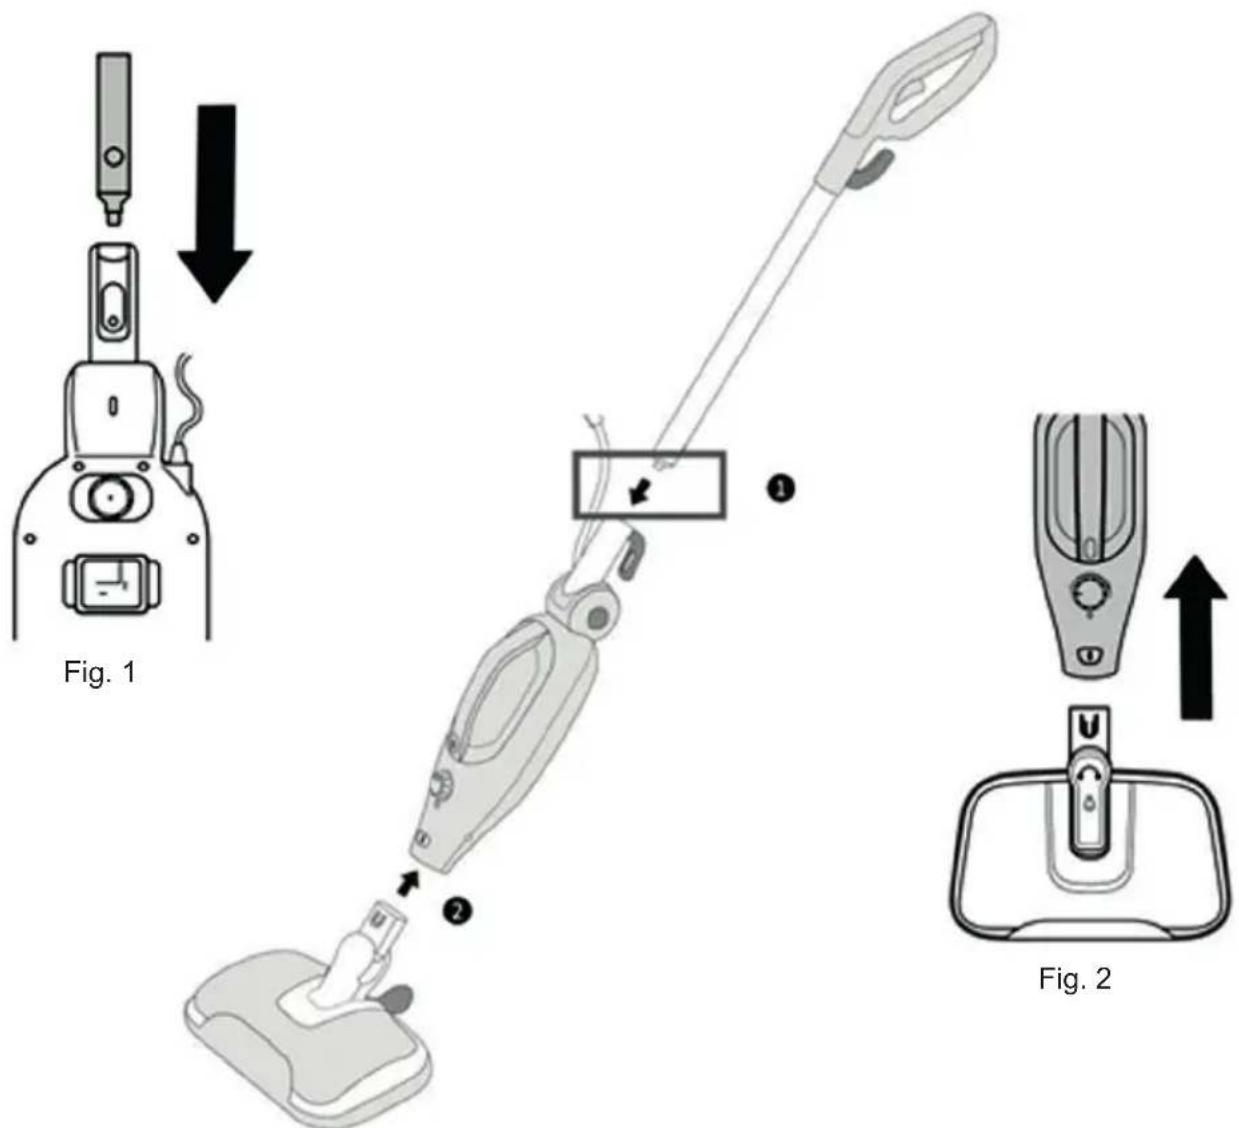
- Press the pop pin at the end of the extension tube fitted to the handle and insert into the body of the steam cleaner (fig.1). A click will be heard when the extension tube is correctly engaged.
- Insert the neck of the floor head into the body of the steam cleaner (fig.2). A click will be heard when the floor head is correctly engaged.
- To remove the handle extension tube, press the pop pin and pull apart.
- To disconnect the floor head from the body of the mop, ensure that mop is switched off. Press the release button and pull apart.
Fitting the accessories
-
Switch off the steam mop and disconnect from the supply.
-
Remove the handle extension tube from the body of the steam mop.
-
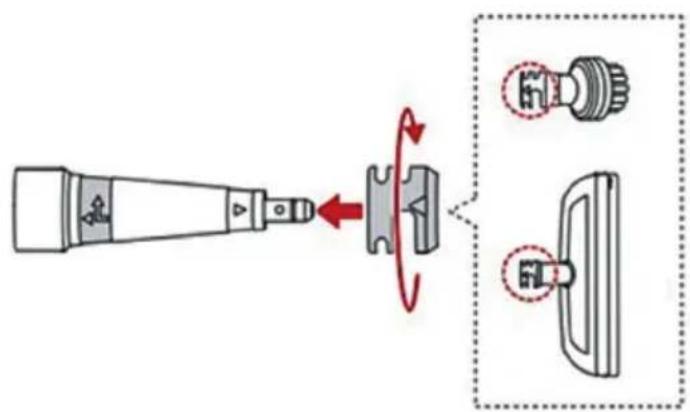
Remove the floor head from the body of the steam mop and fit the adaptor in its place and push together (fig. 3). A click will be heard when the adaptor is correctly engaged.
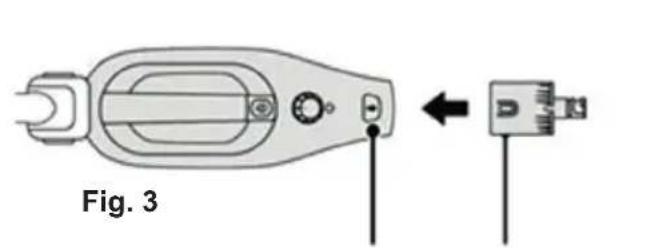
Steam mop body Notch ArrowAdaptor
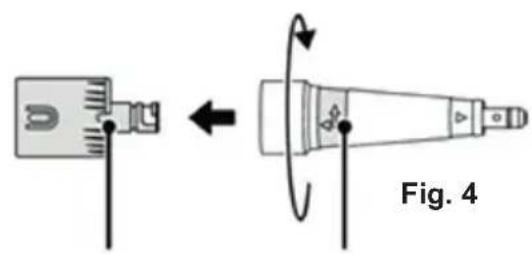
- Align the arrow marked on the neck of the utility nozzle with the notch cut our of the adaptor nozzle, push together and then twist the utility nozzle clockwise to lock together (fig. 4).
- The utility nozzle can now be used on its own to concentrate the steam or adapted further by fitting the remaining accessories onto the utility nozzle in a similar manner (Fig. 5)
Fig. 5
- To separate the accessory and utility nozzle, twist the nozzle anticlockwise and pull apart.
- To disconnect the adaptor from the body of the mop, press the accessory release button and pull apart.
USING THE STEAM MOP
This steam mop is designed to clean hard floor surfaces that will withstand high temperatures and to refresh carpets. Do not use on unsealed wood or waxed floors. Before using the steam mop on new surfaces, check the manufacturers care advise for flooring or test an inconspicuous area before proceeding to clean/refresh the main area.
- Vacuum or sweep the floor surface prior to steam cleaning.
- Pre-treat and heavy or stubborn stained areas on vinyl or linoleum floors with a mild detergent solution suitable for the flooring type.
- The floor head is supplied with one microfiber cleaning pad and the carpet ring already fitter. If using on a hard floor remove the carpet glider (see fig. 10).
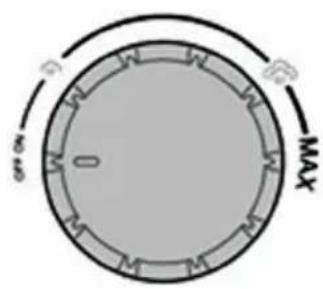
Fig. 6 Fig. 7

natural_image
Line drawing of a mechanical device with a lever and adjustment knob (no text or symbols)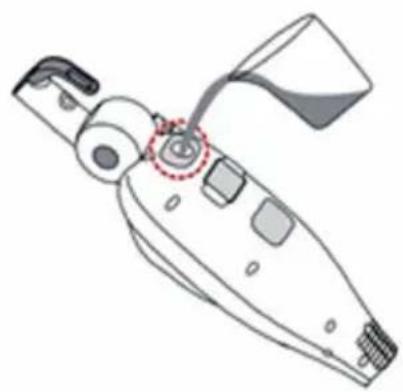
natural_image
Line drawing of a mechanical device with a highlighted circular component (no text or symbols)Fig. 8
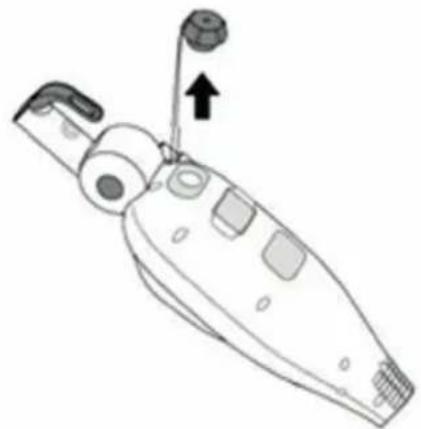
- Check if the steam adjustment knob is in the 'Off' position (fig. 6).
- Pull out the water reservoir stopper (fig. 7).
- Keeping the body of the steam cleaner tilted, use the water jug to fill the reservoir with water (fig. 8). If you live in a hard water area it is recommended to use distilled or softened water. Do not exceed the MAX lined marked on the front of the reservoir.
Never add any cleaning or perfuming liquids to the water reservoir. Refit the stopper.
- Fully unwind the cable plug in and switch of at the mains.
-
Turn the steam adjustment knob, select one of the steam settings and the indicator will initially illuminate red to show that the power is connected and the mop is heating up. When the steam mop is ready to use the indicator will change to green.
-
Tilt the mop head away from the floor, squeeze the trigger under the handle, the pump will start to operate and after a few seconds, steam will start to be generated. The steam mop is now ready to use.
- Place the mop head onto the surface of the floor to be cleaned / refreshed, tilt the handle to approximately a 45 degree angle and move the mop slowly across the floor.
Do not leave the steam mop in one spot for a long time as it may damage the floor surface. If refreshing carpets, pay attention to areas of high traffic.
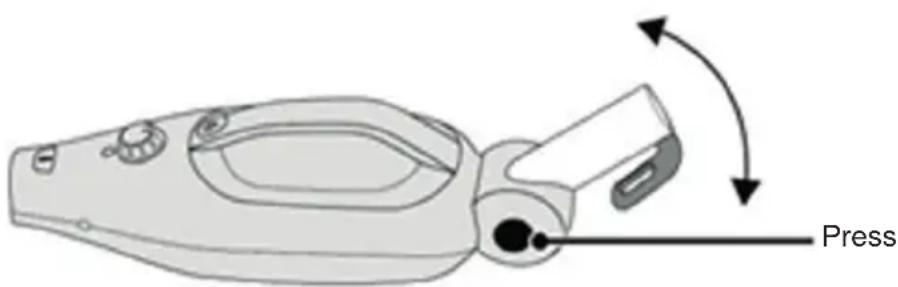
- To enable access into low hard reach places the handle can be released for easier access. Press the release button shown (fig. 9) to release the handle.
Fig. 9
- If the cleaning pad becomes very wet or dirty, switch off the steam mop, allow the mop head to cool fully and replace the pad with a clean one. (See fig. 10 – 12).
- When the floor has been cleaned, release the trigger and lift the mop head off of the floor and switch off at the mains.
- Allow the steam mop to cool fully, remove and wash the cleaning pad.
- To stop or interrupt cleaning, release the trigger or turn off at the mains.
Notes:
- When using the mop with the handle removed and accessories fitted, the steam is activated by pressing the steam button.
- If the rattling sound emitted from the mop changes, it usually indicates that the water level is low and the reservoir need to be refilled. Always switch off, allow it to cool and disconnect from the mains before refilling.
CARE AND MAINTENANCE
Maintenance
Switch off, disconnect from the mains supply and allow steam mop to cool fully before cleaning, maintaining or storing.
- Remove the water reservoir stopper and empty the reservoir after each use. Do not refit the stopper until next use.
- Remove the microfiber cleaning pad or cloth and wash after each use.
- Wipe the outside of the steam mop and accessories with a damp (not wet) cloth and then wipe dry. Do not use detergents, solvents or abrasives as these may scratch or damage the surface.
- Never immerse the steam mop, cable or plug water.
- Wind the cable onto the cable retaining hooks and note that the upper hook can be rotated for quick release of the cable at the time of use.
- When not in use, store in a cool, dry place.
Replacing the microfiber pad
- The carpet glider and one microfiber pad is supplied fitted to the floor head.
- To remove and replace the microfiber pad, remove the carpet glider. Press down on the carpet glider clip, and lift the floor head upwards (fig. 10).
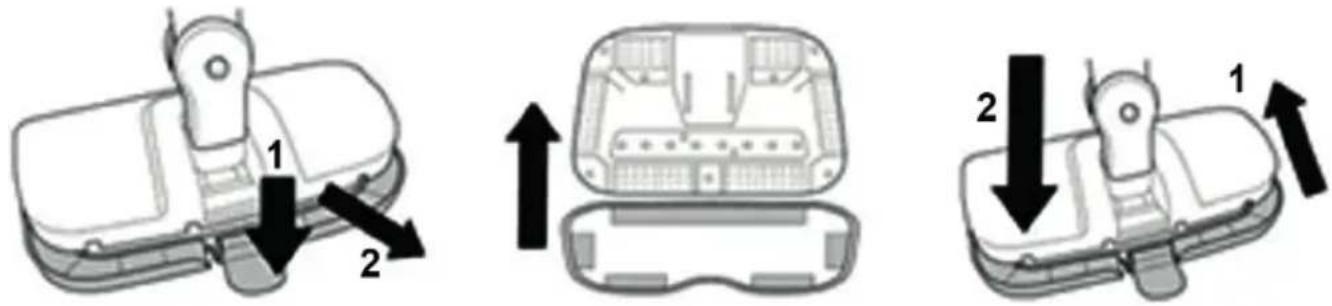
Fig. 10 Fig. 11 Fig. 12
- Pull off the dirty microfiber pad and place to one side for washing.
- Align the tapes on the underside of the clean pad with pads on the underside of the floor head and press together (fig. 11).
- Refit the carpet glider if required (fig. 12).
Cleaning the microfiber pads and cloths
The microfiber pads and cloths should be washed separately from other fabrics and garments. Wash by hand or machine wash on a delicate cycle with a mild laundry detergent. Allow to air dry.

40 °C Wash gentle action

Do not bleach
Do not tumble dry
Do not iron
Do not dry clean
Descaling the steam mop
To maintain efficiency of the steam mop use distilled or softened water in the reservoir. If using tap water, descale a minimum of once per month.
- Switch off, disconnect from the mains supply.
- Remove the floor head / adaptor and nozzle and empty the reservoir.
- Prepare a descaling solution with 100ml of distilled water and 50ml of vinegar. Fill the reservoir with the solution and refit the stopper.
- Plug in and set the steam dial to MAX. When the mop is up to temperature, squeeze the trigger / button and spray the contents of the reservoir into a bucket or into the sink.
- Turn the steam mop off, allow to cool before refilling the water tank with fresh water. Repeat step 4.
- The steam mop is now ready to be used as normal.
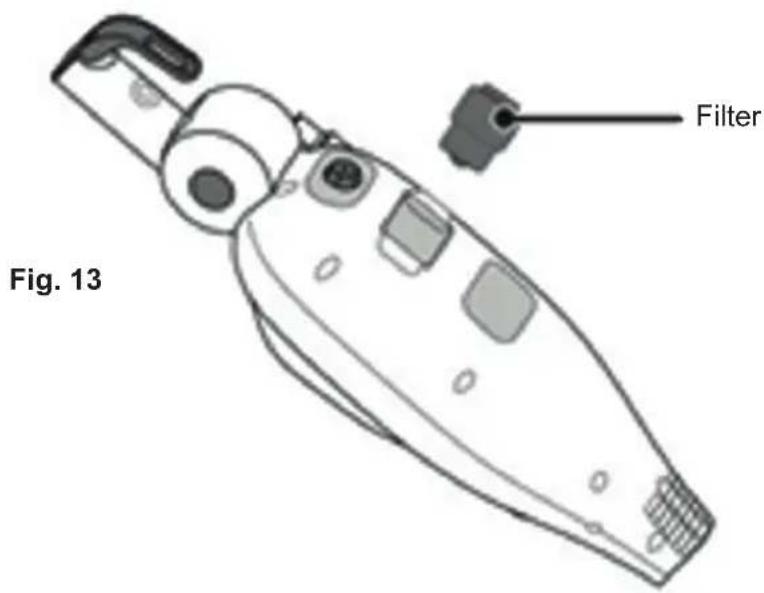
Replacing the water filter
The hard water filter will need to be replaced if it becomes discolored. To help extend the life of the filter use distilled or softened water in the steam cleaner.
-
Switch off and disconnect from the mains supply.
-
To remove the filter simply pull the filter unit from the rear of the body and replace with a new unit (fig. 13).
TROUBLESHOOTING
| Observation Potential | cause / solution |
| Steam mop does not work (LED not lit) | Is the plug fully inserted into the mains socket and switched on? |
| Do you have a power cut? | |
| LED lit but not steam produced | Is the water reservoir empty? |
| Does the steam mop need to be descaled? | |
| The steam nozzle may have become blocked. If this occurs a small wire (e.g. paper clip) may be inserted into the nozzle at the base of the body when the item is cold and disconnected from the mains. | |
| If the water filter clogged or discolored? | |
| The weighted ball inside of the steam mop may have become stuck. Give the mop a gentle shake. | |
| Steam production is weak or intermittent | Steam dial is set at low |
| Steam mop may require descaling | |
| Water is emitted in addition to steam | The steam control is set to MAX and this is normal. Lower steam setting. |
| Rattling sound | This is due to the weighted ball moving inside the water tank and is intentional. If the sound increases it is usually a sign the water reservoir is almost empty. |
PRODUCT SPECIFICATIONS
Power : 1300W
Input voltage : 220 - 240 V AC 50-60 Hz
Power plug : Type C (CEE 7/17)
Capacity watertank : 330ml
Usetime full tank : 15min
Heating time : 30sec
Cable length : 5m
Range : 5,5m
Detachable handheld unit : Yes
Removable tank : No
Hard water filter : Yes
Variable steam control : Yes
Shape foot : Rectangle
PACKAGING CONTENT
1x steam mop
1x carpet slider
1x measure cup
1x small bend nozzle
1x microfiber pad
1x adapter
1x concentration tool
THE ENVIRONMENT
The symbol on this appliance indicates that this appliance may not be treated as household waste. Instead it must be handed over to the applicable collection point for the recycling of electrical and electronic equipment. Disposal must be carried out in accordance with local environmental regulations for waste disposal. For more detailed information about treatment, recovery and recycling of this appliance, please contact your local city office, your household and waste disposal service or the shop where you purchased the appliance.
C€
natural_image
Line drawing of a handheld medical or laboratory tool with a long handle and pointed tip (no text or symbols)Griff

natural_image
Line drawing of a mechanical device with handle and control knob (no text or symbols)Dampf-Mopp-Gehäuse
natural_image
Line drawing of a sink with a handle and control knob (no text or symbols)natural_image
Simple line drawing of a pair of eyeglasses inside a rounded square frame (no text or symbols)Bodentuch x1

natural_image
Simple line drawing of a bulb-like object with a pointed tip, enclosed in a rounded square frame (no text or symbols)Düse

natural_image
Simple line drawing of a container with a handle, enclosed in a rounded square frame (no text or symbols)Wasserbecher
natural_image
Simple line drawing of a paintbrush (no text or symbols)Kleine Bürste

natural_image
Simple line drawing of a bottle with a cap and decorative base (no text or symbols)Stecker
natural_image
Line drawing of a mechanical device with a lever and adjustment knob (no text or symbols)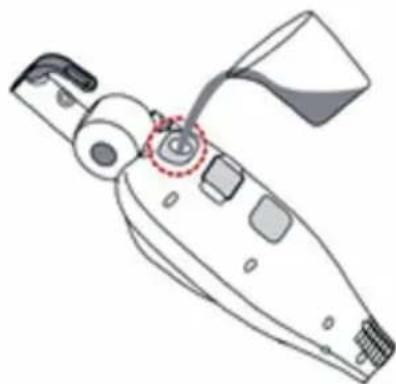
natural_image
Line drawing of a mechanical device with a highlighted section (no text or symbols)Abb. 8
Abb. 10 Abb. 11 Abb. 12
natural_image
Line drawing of a medical catheter or prosthesis device with handle and stem (no text or symbols)Manche
natural_image
Line drawing of a handheld vacuum cleaner device with control knobs and a handle (no text or symbols)natural_image
Line drawing of a sink with a handle and control knob (no text or symbols)natural_image
Simple line drawing of a pair of eyeglasses inside a rounded square frame (no text or symbols)Tampon de sol x 1
natural_image
Simple line drawing of a bulb-like object with a pointed tip, enclosed in a rounded square frame (no text or symbols)Embout polyvalent

natural_image
Simple line drawing of a container with a handle, enclosed in a rounded square frame (no text or symbols)Récipient d'eau

natural_image
Simple line drawing of a paintbrush (no text or symbols)Petite brosse
natural_image
Simple line drawing of a bottle with a handle and arched base (no text or symbols)Connecteur
DESCRIPTION DES PIÈCES
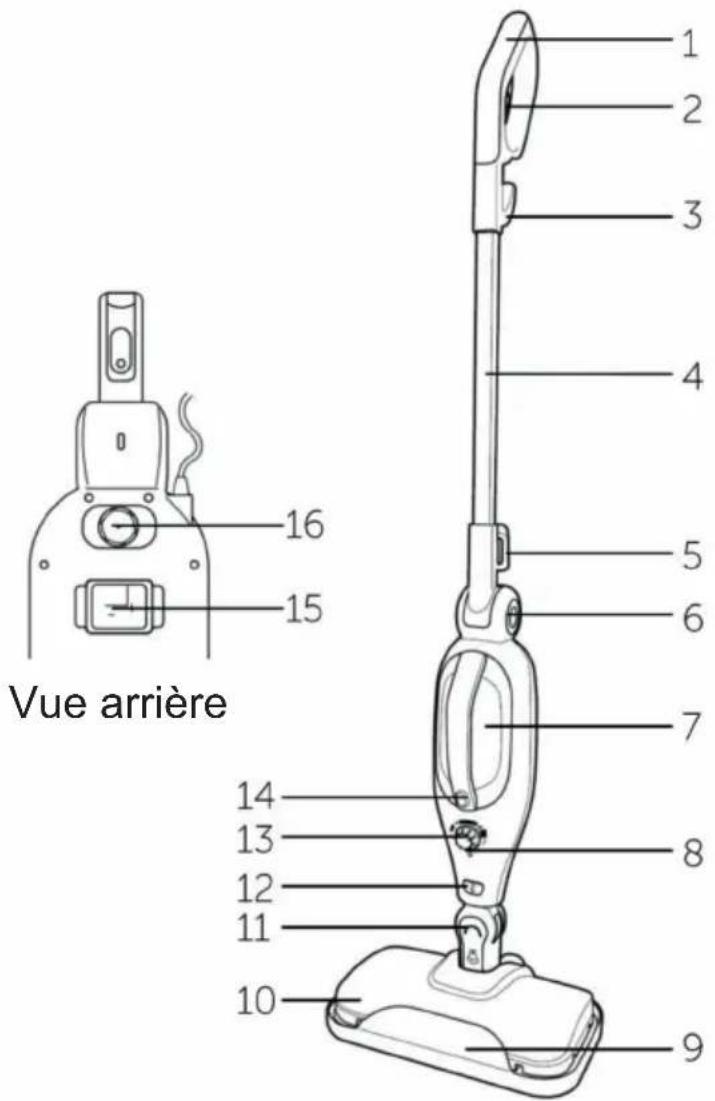
Fig. 6 Fig. 7
natural_image
Line drawing of a mechanical device with a lever and adjustment knob (no text or symbols)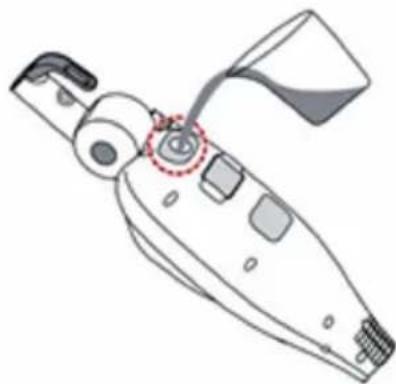
natural_image
Line drawing of a mechanical device with no visible text or symbolsFig. 8
natural_image
Diagram of a vehicle head with an upward arrow indicating motion or force (no text or symbols)
Fig. 10 Fig. 11 Fig. 12
SPÉCIFICATIONS DU PRODUIT
Puissance : 1 300 W
natural_image
Line drawing of a handheld medical or laboratory tool with a long rod and handle (no text or symbols)Handvat
natural_image
Line drawing of a mechanical device with handle, control knob, and base (no text or symbols)Behuizing stoomreiniger

natural_image
Line drawing of a sink with a handle and control knob (no text or symbols)natural_image
Simple line drawing of a pair of eyeglasses inside a rounded square frame (no text or symbols)Vloerpad x1

natural_image
Simple line drawing of a bulb-like object with a pointed tip, enclosed in a rounded square frame (no text or symbols)Utility mondstuk

natural_image
Simple line drawing of a container with a handle, enclosed in a rounded square frame (no text or symbols)Waterkan
natural_image
Simple line drawing of a mechanical component with threaded ends and a base (no text or symbols)Kleine borstel

natural_image
Simple line drawing of a bottle with a handle and curved base (no text or symbols)Aansluiting
BESCHRIJVING ONDERDELEN
Kenmerken
- Handvat 9. Tapijtloper
- Stoomtrekker 10. Vloerkop
- Bovenste kabelbevestigingshaak 11. Autoslot
- Verlengbuis 12. Accessoire-ontgrendelingsknop
- Onderste kabelbevestigingshaak 13. Stoomregelknop
- Hendel-ontgrendelingsknop 14. Stoomknop
- Waterreservoir 15. Waterfilter
- Indicator 16. Waterreservoir stop
DE STOOMREINIGER MONTEREN
Montage
natural_image
Diagram of a vehicle head with an upward arrow indicating motion or force (no text or symbols)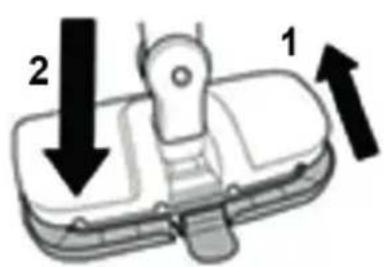
natural_image
Line drawing of a medical catheter or prosthesis device with handle and stem (no text or symbols)Impugnatura

natural_image
Line drawing of a handheld vacuum cleaner device with control knob and handle (no text or symbols)natural_image
Line drawing of a sink with a handle and control knob (no text or symbols)natural_image
Simple line drawing of a pair of eyeglasses inside a rounded square frame (no text or symbols)natural_image
Simple line drawing of a bulb-like object with a pointed tip, enclosed in a rounded square frame (no text or symbols)Bocchetta multiuso

natural_image
Simple line drawing of a container with a handle, enclosed in a rounded square frame (no text or symbols)Dosatore dell'acqua
natural_image
Simple line drawing of a paintbrush (no text or symbols)Spazzola piccola

natural_image
Simple line drawing of a bottle with a handle and curved base (no text or symbols)Connettore
Fig. 6 Fig. 7

natural_image
Line drawing of a mechanical device with a lever and adjustment knob (no text or symbols)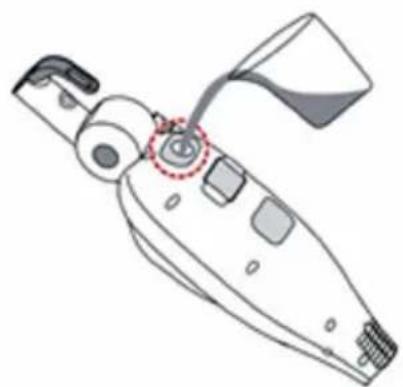
natural_image
Line drawing of a handheld device with a handle and control panel (no text or symbols)Fig. 8
natural_image
Diagram of a device with an upward arrow indicating orientation, no text or symbols present
Fig. 10 Fig. 11 Fig. 12
1x panno in microfibra
1 adattatore
natural_image
Line drawing of a handheld medical or laboratory tool with a long handle and pointed tip (no text or symbols)Mango
natural_image
Line drawing of a mechanical device with handle and control knob (no text or symbols)natural_image
Line drawing of a sink with a handle and control knob (no text or symbols)natural_image
Simple line drawing of a pair of eyeglasses inside a rounded square frame (no text or symbols)natural_image
Simple line drawing of a bulb-like object with a pointed tip, enclosed in a rounded square frame (no text or symbols)Boquilla multiuso
natural_image
Simple line drawing of a container with a handle, enclosed in a rounded square frame (no text or symbols)Jarra de agua
natural_image
Simple line drawing of a paintbrush (no text or symbols)Cepillo pequeño
natural_image
Simple line drawing of a bottle with a cap and decorative base (no text or symbols)Conector
natural_image
Line drawing of a mechanical device with a lever and attached sensor (no text or symbols)
natural_image
Line drawing of a mechanical device with no visible text or symbolsFig. 8
natural_image
Diagram of a device with an upward arrow indicating orientation, no text or symbols present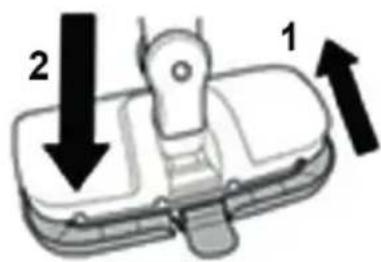
Fig. 10 Fig. 11 Fig. 12
DÔLEŽITÉ BEZPEČNOSTNÉ POKYNY
TIETO POKYNY SI USCHOVAJTE NA BUDÚCE POUŽITIE.
VAŽNE SIGURNOSNE UPUTE
SAČUVAJTE OVE UPUTE ZA BUDUĆU UPORABU
OLULISED OHUTUSJUHISED
HOIDKE NEED JUHISED HILISEMAKS KASUTAMISEKS ALLES

- IMPORTANT SAFETY INSTRUCTIONS
- SAVE THESE INSTRUCTIONS FOR FUTURE USE
- READ ALL INSTRUCTIONS BEFORE USING YOUR STEAM MOP
- WARNINGS
- PRODUCT DESCRIPTION
- Parts supplied
- Accessories supplied
- PARTS DESCRIPTION
- Features
- ASSEMBLING THE STEAM MOP
- Assembly
- Fitting the accessories
- USING THE STEAM MOP
- Never add any cleaning or perfuming liquids to the water reservoir. Refit the stopper.
- Notes:
- CARE AND MAINTENANCE
- Maintenance
- Replacing the microfiber pad
- Cleaning the microfiber pads and cloths
- Descaling the steam mop
- Replacing the water filter
- PRODUCT SPECIFICATIONS
- PACKAGING CONTENT
- THE ENVIRONMENT
- DESCRIPTION DES PIÈCES
- SPÉCIFICATIONS DU PRODUIT
- BESCHRIJVING ONDERDELEN
- Kenmerken
- DE STOOMREINIGER MONTEREN
- Montage
- DÔLEŽITÉ BEZPEČNOSTNÉ POKYNY
- TIETO POKYNY SI USCHOVAJTE NA BUDÚCE POUŽITIE.
- VAŽNE SIGURNOSNE UPUTE
- SAČUVAJTE OVE UPUTE ZA BUDUĆU UPORABU
- OLULISED OHUTUSJUHISED
- HOIDKE NEED JUHISED HILISEMAKS KASUTAMISEKS ALLES
Brand : DIRT DEVIL
Model : DD7004
Category : Steam cleaner