
DD7003 - Steam cleaner DIRT DEVIL - Free user manual and instructions
Find the device manual for free DD7003 DIRT DEVIL in PDF.

| Brand | Dirt Devil |
| Model | DD7003 |
| Product Type | Steam Cleaner |
| Power | 1400-1600 W |
| Input Voltage | 220-240 V AC, 50 Hz |
| Water Tank Capacity | 280 ml |
| Detergent Tank Capacity | 150 ml |
| Usage Time | Approximately 20 minutes |
| Heat-up Time | 20 seconds |
| Cable Length | 5 meters |
| Reach | 5.5 meters |
| Detachable Handheld Unit | Yes |
| Removable Tank | Yes |
| Hard Water Filter | Yes, replace every 3-6 months |
| Steam Control | On handle (trigger) |
| Foot Shape | Triangular |
| Included Accessories | 1 steam mop, 1 carpet tool, 1 microfiber pad, 1 large plastic brush, 1 window tool, 1 scraper, 1 concentrator tool, 1 grout brush, 1 detail nozzle |
| Plug Type | Type C (CEE 7/17) |
| Protection | IPX4 (splash-proof) |
| Usage | Domestic only |
Frequently Asked Questions - DD7003 DIRT DEVIL
User questions about DD7003 DIRT DEVIL
0 question about this device. Answer the ones you know or ask your own.
Ask a new question about this device
Download the instructions for your Steam cleaner in PDF format for free! Find your manual DD7003 - DIRT DEVIL and take your electronic device back in hand. On this page are published all the documents necessary for the use of your device. DD7003 by DIRT DEVIL.
USER MANUAL DD7003 DIRT DEVIL


MULTIFUNCTIONAL MOP
ITEM: 871125247593
A.I.&E. Adriaan Mulderweg 9-11
5657 EM Eindhoven, The Netherlands

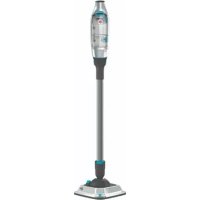
natural_image
Exterior view of a white and blue electric vacuum cleaner (no text or symbols visible)
IMPORTANT SAFETY INSTRUCTIONS
SAVE THESE INSTRUCTIONS FOR FUTURE USE
This model is for household use only. Commercial use of this unit voids the manufacturer's warranty.
READ ALL INSTRUCTIONS BEFORE USING YOUR STEAM MOP
When using an electrical appliance, basic precautions should be observed, including the following:
- Unplug from outlet when not in use and before conducting maintenance.
WARNINGS
• TO REDUCE THE RISK OF FIRE, ELECTRIC SHOCK OR INJURY: Always switch off and unplug the appliances from the socket after use and before cleaning the appliance or any maintenance task.

- WARNING: Danger of scalding.
- This appliance can be used by persons with reduced physical, sensory or mental capabilities or lack of experience and knowledge if they have been given supervision or instruction concerning use of the appliance in a safe way and understand the hazards involved.
• Children shall not play with the appliance. - Cleaning and user maintenance shall not be made by children without supervision.
- Keep the appliance out of the reach of children when it is energized or cooling down.
- Don't touch any hot areas/accessories on your steam mop. It's normal for the steam mop and accessories to heat up during use, always allow them to cool down before handling.
- The appliance shall not be left unattended while it is connected to socket.
- The appliance shall not be used if it has been dropped, if there are visible signs or damage or if it is leaking.
- Liquid or steam must not be directed towards equipment containing
electrical components, such as the interior of ovens.
- If the power cord is damaged stop using the appliance immediately.
- To avoid a safety hazard, an authorized agency service engineer must replace the power cord.
- Keep hands, feet, loose clothing and hair away from rotating brushes.
- Use only the power plug supplied with the appliance.
- Static electricity: some carpets can cause a small buildup of static electricity. Any static discharge is not hazardous to health.
- Do not use your appliance outdoors or on any wet surface or for wet pick up.
- Do not pick up hard or sharp objects, matches, hot ashes, cigarette ends or other similar items.
- Do not spray with or pick up flammable liquids, cleaning fluids, aerosols or their vapors.
- Do not run over the power cord when using your appliance or remove the plug by pulling on the power cord.
- Do not use the power cord as a handle, pull the power cord around corners, sharp edges or close a door over the power cord.
- Don’t attempt to remove blockages with sharp objects as this may cause damage to the steam mop, remove blockages only as instructed in this guide.
- Store the steam mop in a cool, dry area away from children.
- Before storing the steam mop please ensure all water/detergents tanks and hard water filter are thoroughly clean and dry.
- Always make sure the concentration nozzle and accessories are securely connected to the handheld before use.
- Always fill the clean water tank with water only, never add perfume, stain remover or productions container alcohol. Filling the water tank with hot or boiling water will damage the machine and invalidate your guarantee.
- Always make sure tanks are fitted correctly before using the steam mop.
- Always vacuum your carpets thoroughly and ensure hard floor areas are free from grit and debris before using the steam mop.
• Always carry the steam mop by the handle.
• Take extra care when cleaning on stairs.
- Do not continue to use your appliance or charger if it appears faulty.
- Agency service: To ensure the continued safe and efficient operation of this appliance we recommend that any servicing or repairs are only carried out by an authorized Agency service engineer.
- Do not use the appliance to clean animals or people.
- Do not use appliance in an enclosed space filled with vapor given off by oil-base paint, paint thinner, some moth proofing sub-stances, flammable dust, or other explosive or toxic vapors.
- Do not use on leather, wax polished furniture or floors, synthetic fabrics, valet or other delicate, steam-sensitive materials.
• CAUTION: HOT SURFACE
- IPX4: Item is protected from splashing water, not matter the direction.
PRODUCT DESCRIPTION
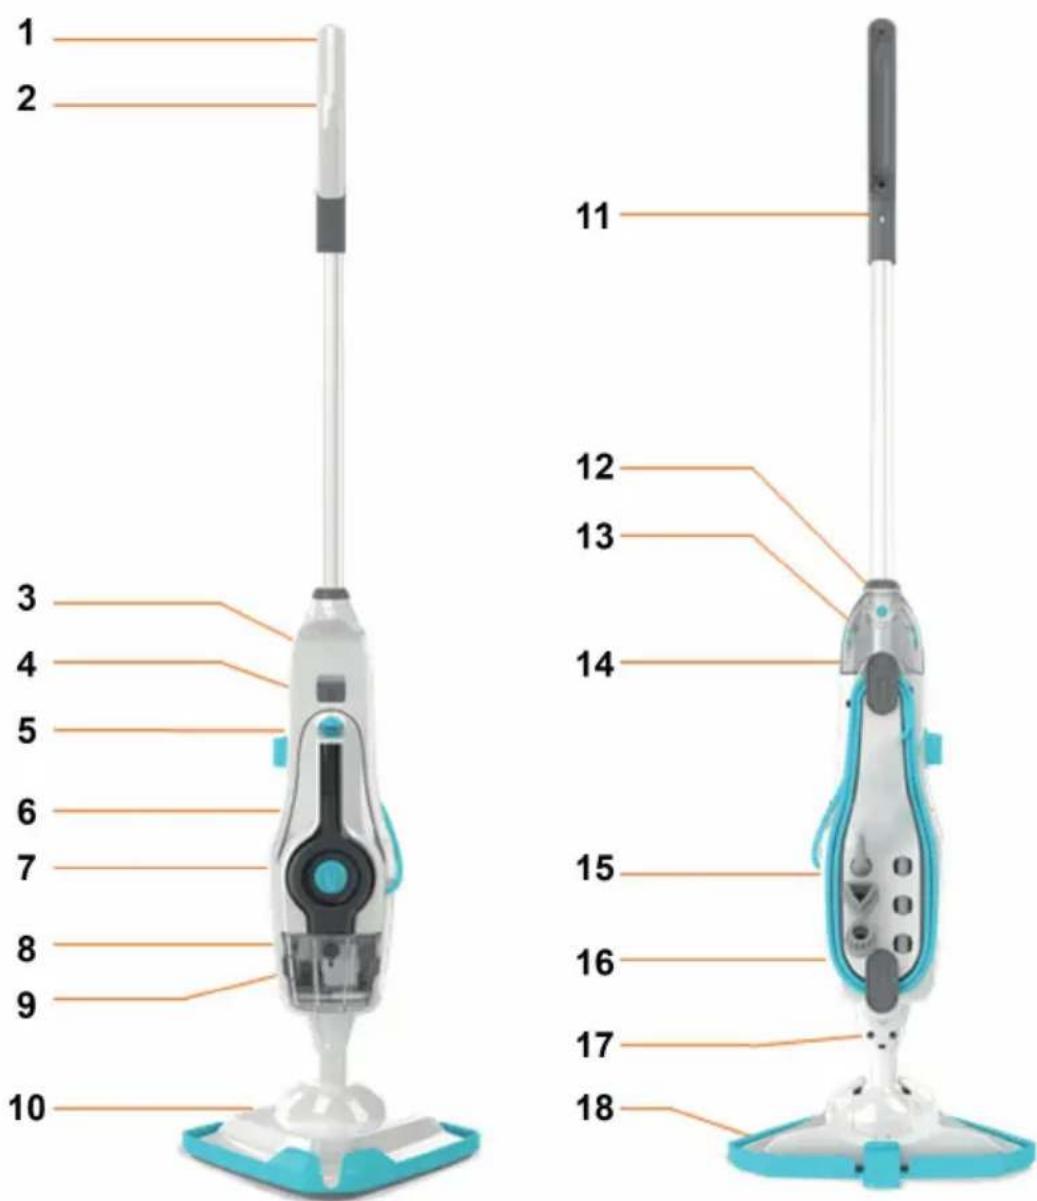
Features
- Handle 10. Floorhead
- Detergent trigger (hidden) 11. Concentration
- Handheld release button 12. Handle release button
- Handheld steam trigger 13. Detergent tank
- Detergent control dial 14. Quick cord release hook
- Steam ready indicator 15. Tool storage
- On/Off switch 16. Quick cord
- Water tank 17. Floorhead release button
- Hard water filter (hidden) 18. Carpet glider
HOW TO INSTALL / OPERATE THE MACHINE
Before you start
CAUTION:
- The streamer and accessories get very hot during use, always allow them to cool down before handling.
• Always unplug and switch of the steamer when assembling.
• Always switch off the steamer before emptying the water tank or changing the cloths/accessories.
IMPORTANT:
- Please refer to the manual instruction recommendations before use and test the steamer on a hidden are of flooring to begin with.
- Test for color fastness in a small hidden are of upholstery/fabric to check for color removal before use.
- When using the steamer, basic safety precautions should always be observed.
- The steamer is quipped with a thermostat and a thermal cut-out. If for any reason the steamer overheats it will switch off. If this happens turn off and unplug the steamer, allow to cool for at least 2 to 4 hours an re-try.
Assembling your machine
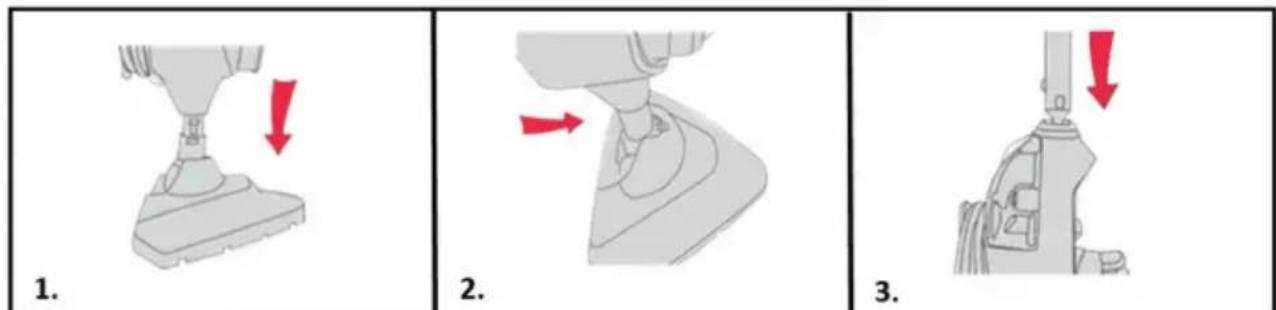
- Push the main body down into the floorhead until it clicks into place.
-
Stand the steamer upright by pushing the main body forward to lock into position.
-
Push the handle into main body until it clicks into place.
- Insert tools into the back of the steamer.
- Insert concentration nozzle into the storage hook on the back of handle.
IMPORTANT:
- If you don't want to use detergent on your flooring, turn detergent dial to OFF position.
- Always test on an inconspicuous area or flooring first before using detergent.
- Don't over fill the clean water/detergent tanks or exceed the maximum amount required.
- Don't use the steamer without water in the water tank.
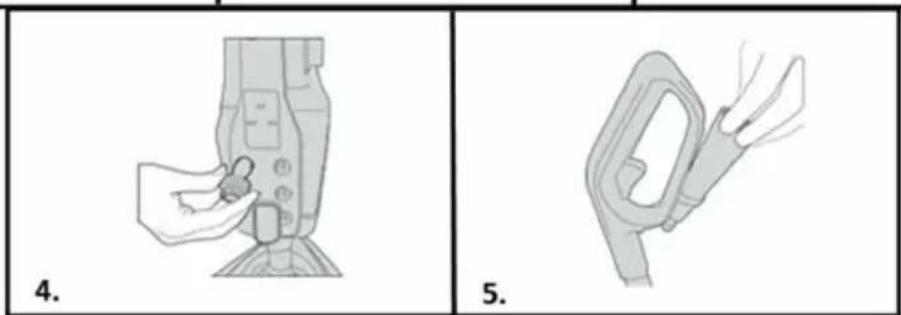
FILLING WATER TANK
- Press the water tank release buttons and pull the water tank to remove.
- Pull the tab on the water tank cap to open.
- Fill the water tank with 260ml of water, replace the cap and push firmly to close.
- Slide the water tank back into the machine until it clicks into place.
FILLING DETERGENT TANK
- Press the release buttons and pull the detergent tank to remove.
- Twist the detergent tank cap anti-clockwise and lift to remove.
- Fill the detergent tank with 150ml water.
- Replace the detergent tank cap and twist clockwise to close.
- Replace the detergent tank back into the steamer and push until it clicks into place.
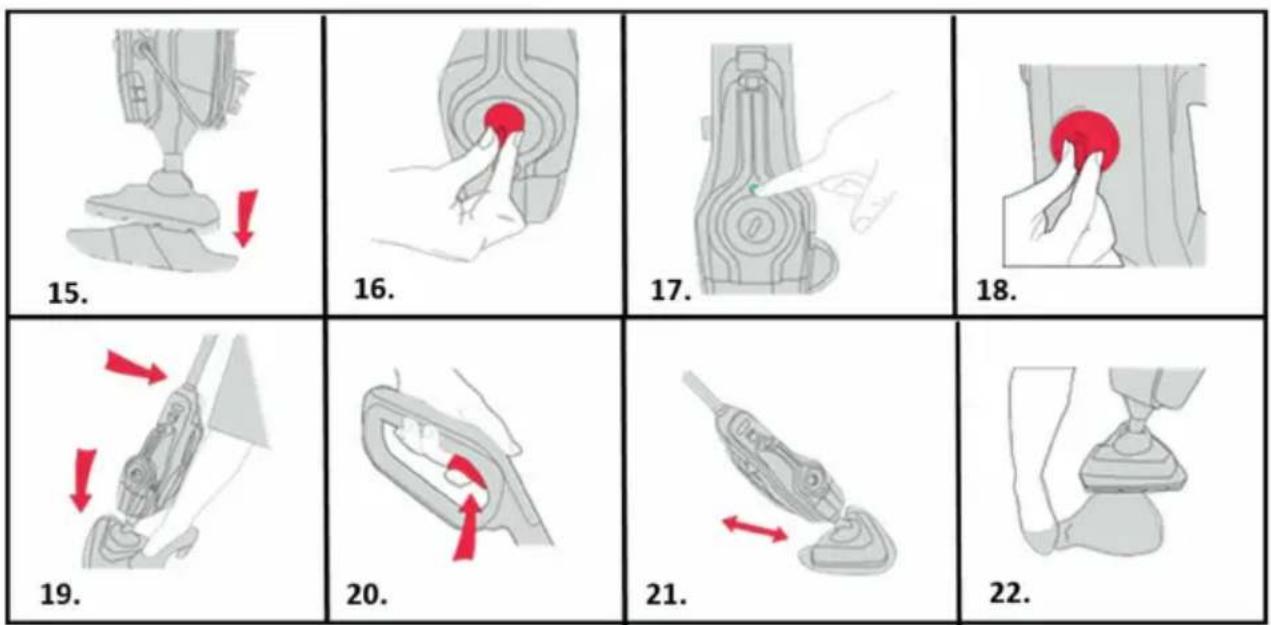
USING THE STEAMER
IMPORTANT: Never use the steamer without a cleaning pad attached to the floorhead. Never leave the steamer on one spot for an extended period of time or with a damp or wet microfiber pad attached as this may damage the floor surface.
-
Place the microfiber pad on the floor, white side facing up. Place steamer onto pad making sure the entire pad covers the floorhead.
-
Plug into mains and twist On/Off control dial to On.
- The blue light will illuminate to indicate power on. The green light will illuminate to indicate the steamer is ready to use.
- To steam your floors with detergent burn the dial to ON and without detergent turn the dial to Off.
- Place your foot onto the floorhead and pull handle backwards to recline.
- To produce steam squeeze the trigger in short bursts. Don't hold the trigger continuously to prevent over wetting floors.
- Move the steamer slowly backwards and forwards across the floor paying particular attention to high traffic areas. Squeeze/release trigger as required.
- Hold corner of pad down with your foot and lift steamer to peel away.
CAUTION: Always switch OFF the steamer when fitting the microfiber cleaning pads.
REFRESHING CARPETS
IMPORTANT: When using on carpets, always make sure the microfiber cleaning pad is used and covers the floorhead entirely before using the carpet glider. Only use the carpet glider when refreshing carpets and turn the detergent dial to Off.

- Place the microfiber pad on the floor white side facing up. Place steamer onto pad making sure the entire pad covers the floorhead.
- With microfiber pad attached, push steamer into front of the carpet glider, then place back of the floorhead into the clip. The carpet glider should only be used when refreshing carpets.
- Plug into mains and twist On/Off control dial to on.
- Turn the detergent dial to OFF when refreshing carpets.
- Place your foot on floorhead and pull handle backwards to recline.
- To produce steam squeeze the trigger in short bursts. Don't hold the trigger continuously to prevent over wetting carpet.
- Move the steamer slowly backwards and forwards across the carpet paying particular attention to high traffic areas. Squeeze/release trigger as required.
- To release the carpet glider, place your foot on the clip and push down. Lift steamer to remove.
USING THE HANDHELD STEAMER
CAUTION: Always switch off the steamer before attaching the concentration tool and accessories.
IMPORTANT: The handheld is to be used with water only, putting detergent into the water tank can cause damage. Always check the tools are clean and free from debris, don't use if damaged, broken or worn.
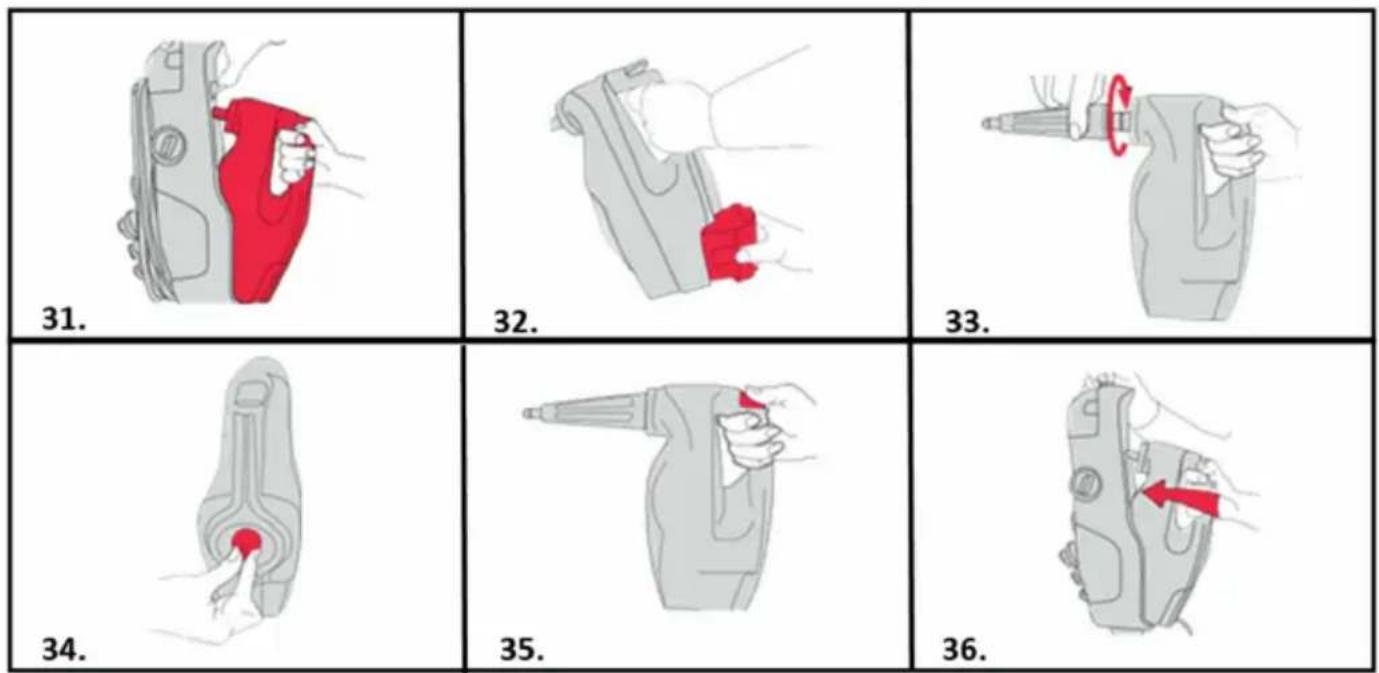
-
Lift the handheld release button and gently pull the handheld to release from the steamer.
-
Remove water tank and fill before use.
- When using the handheld, always attach the concentration tool. Push the concentration tool onto the handheld nozzle and twist clockwise to lock into position.
- Plug into mains and twist On/Off control dial to On.
- To produce steam squeeze the trigger in short busts. Don't hold the trigger continuously to prevent over-wetting.
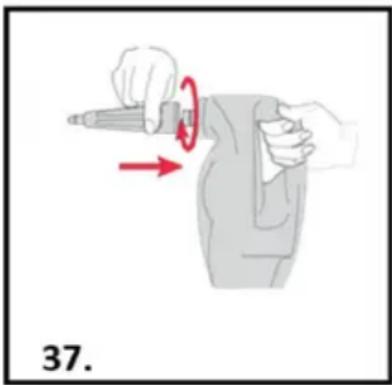
- To re-attach the handheld streamer, align the handheld with the steamer, lift the handheld release button and slide the handheld back into the steamer until it clicks into place, taking care not to trap the power cord.
Attaching small tools
natural_image
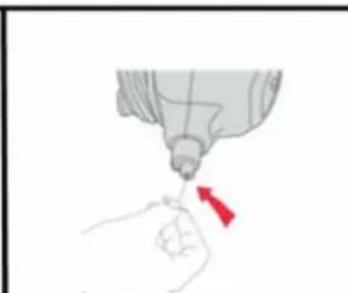
Illustration of a person using a tool to lift or rotate a bottle, with red arrows indicating motion (no text or symbols)- Small tools can be attached via the concentration tool. Twist clockwise until locked into position and secure. Turn anti-clockwise to remove.
Note: After attaching your chosen tool gently pull to make sure it's locked into place.
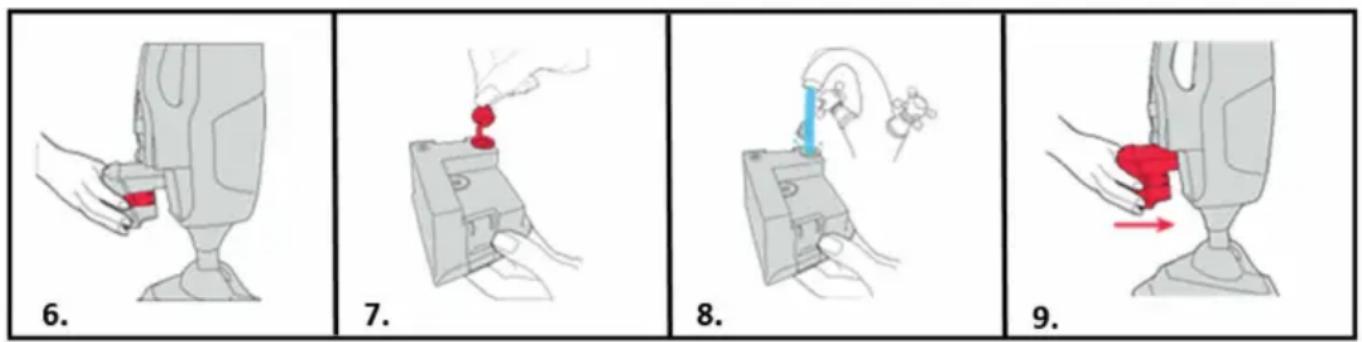
EMPTYING THE WATER/DETERGENT TANKS
IMPORTANT: Allow the steam to fully cool down before performing any maintenance or troubleshooting checks. Don't leave water or detergent in the tanks between use, as this can effect the steamers performance, the water/detergent tanks need to be emptied and rinsed after each use.
IMPORTANT: Don't use bleach or fabric softener when washing the microfiber cleaning pad. Always allow the steamer to fully cool down before removing the microfiber cleaning pad.
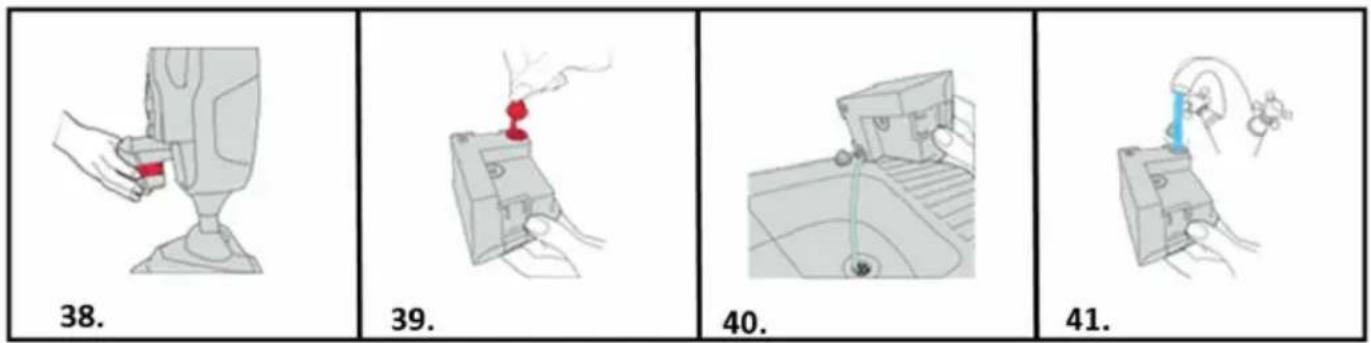
- To remove the water tank press both water tank release buttons, and pull to remove.
- Pull the tab on the water tank to open.
- Empty any excess water over the sink.
- Rinse water tank with water and replace water tank tab, push firmly to close before replacing back onto the steamer.
EMPTYING THE DETERGENT TANK
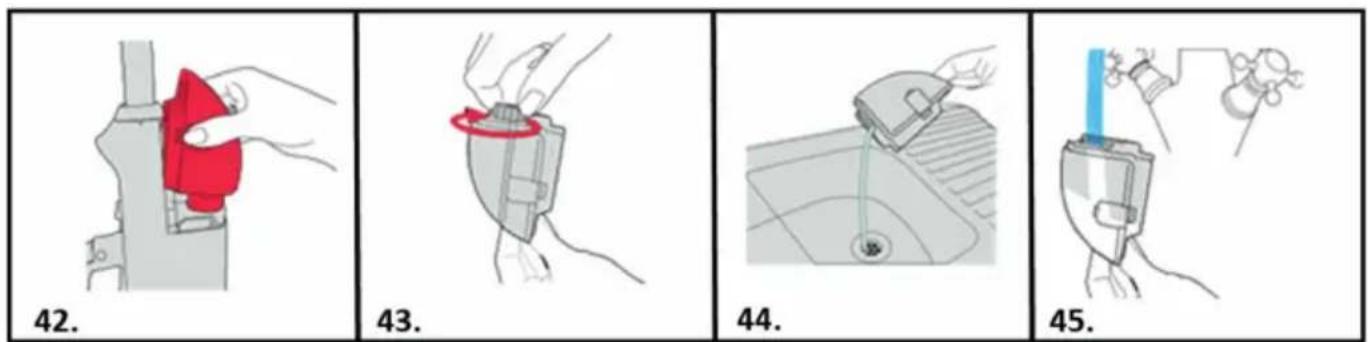
- Press the release buttons and pull the detergent tank to remove.
- Twist detergent tank cap anti-clockwise and lift to remove.
- Empty any excess detergent over the sink.
- Rinse detergent tank with water, replace, detergent tank cap and turn clockwise to tighten. Replace the detergent tank back onto the steamer.
REMOVING CLEANING PADS
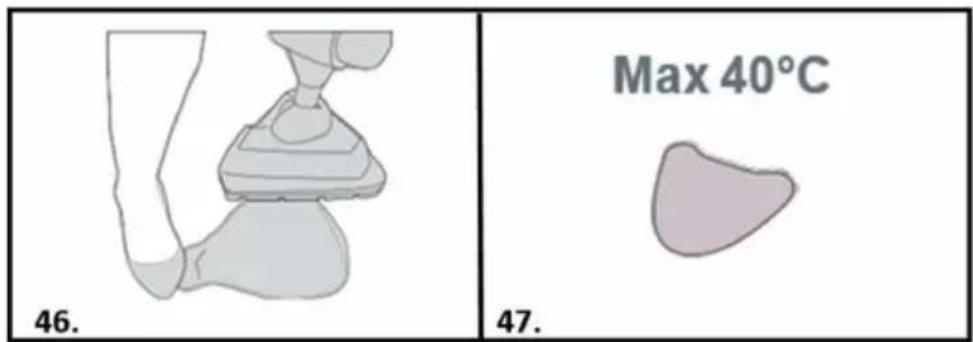
-
Using your foot, hold the corner of the microfiber cleaning pad down, lift steamer to peel away.
-
The microfiber pad is machine washable (Max 40°C) allow to fully dry before use.
STORING YOUR STEAMER
natural_image
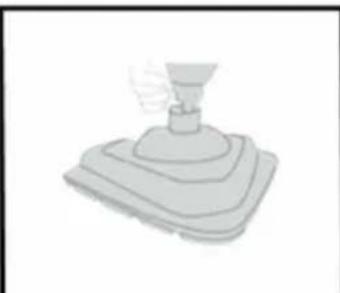
Illustration of a hand holding a tool interacting with a device component (no text or symbols visible)- Wrap the power cord around the quick cord release hooks.
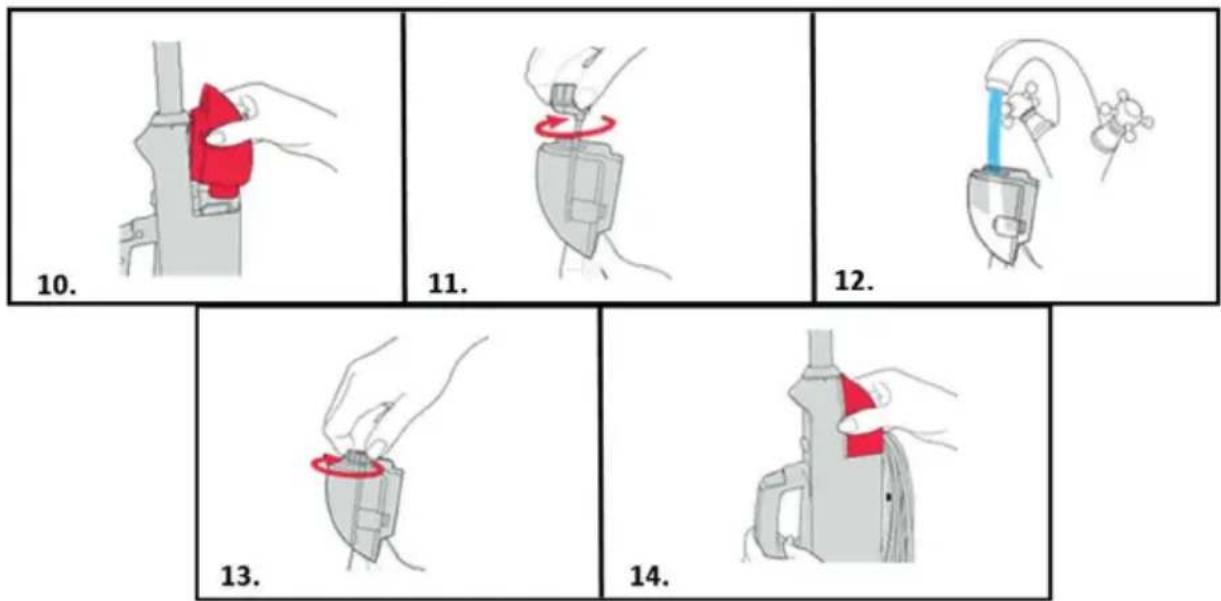
REPLACING THE HARD WATER FILTER
IMPORTANT: Don’t operate the steamer without hard water filter in place. The condition of the filter affects the performance of your steamer, check and change filter periodically. If you live in hard water area the filter will discolor or darken overtime. Depending on water hardness and frequency of use, the filter should be changed every 3 to 6 months (or if the filter has discolored).
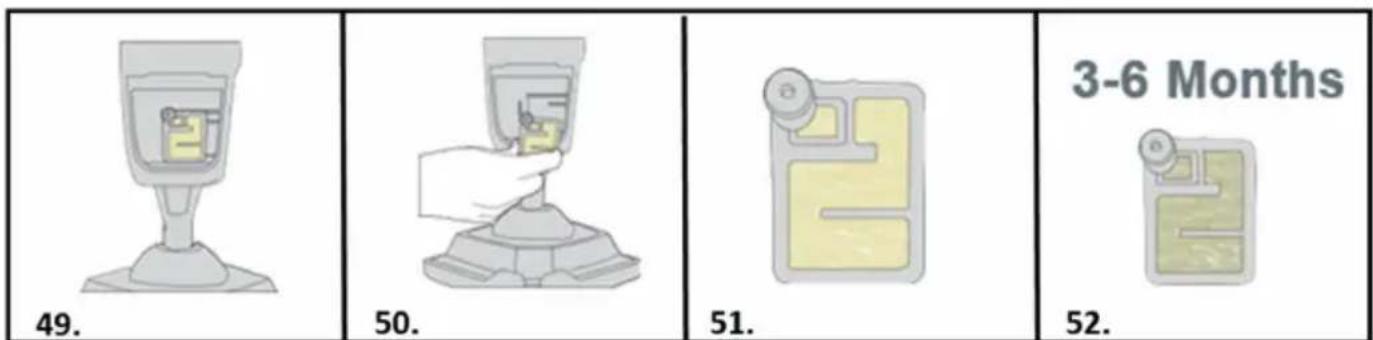
- Remove the water tank to access the hard water filter.
- Pull to remove the hard water filter.
- New filter (beige/cream color)
- Hard water filter should be replaced every 3 to 6 months or if discolored.
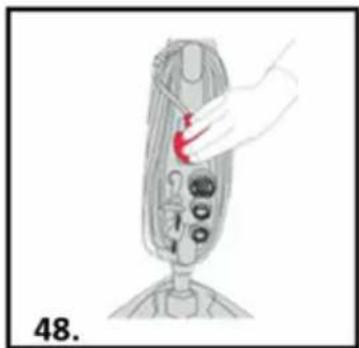
REMOVING BLOCKAGES
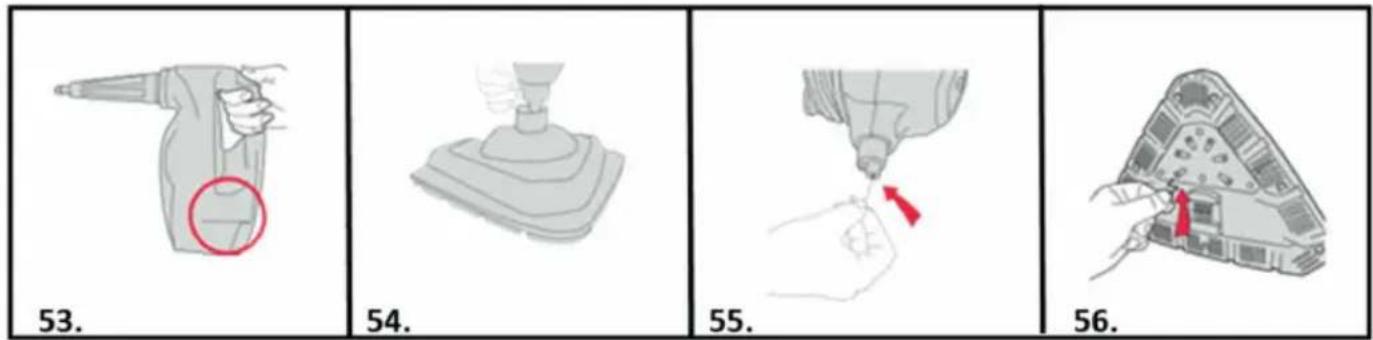
-
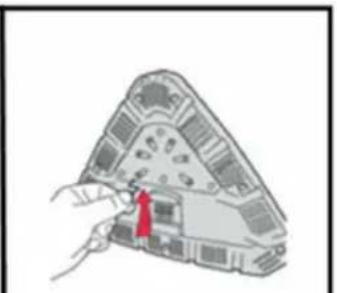
If there is an obstruction to the steam flow through the machine, steam may be released through the bleed valve located on the side of the handheld.
-
To remove the floorhead from main body push the floorhead release button and lift.
-
After floorhead is removed, using a thin object such as a paper-clip (in the area shown), insert to remove the blockage.
-
With the pad removed from the floorhead, insert a small thin object such as a paper-clip in to the steam holes to remove a blockage.
USING YOUR ACCESSORIES
natural_image
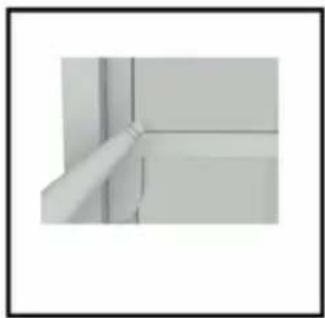
Close-up of a white wall corner with a diagonal pipe extending from the side (no text or symbols visible)Concentration tool
A concentrated flow of steam to lift grime. Use on any sealed surface in the home or car to tackle stubborn stains. The nozzle allows a powerful jet of steam to remove dirt even it is hard to reach places.

natural_image
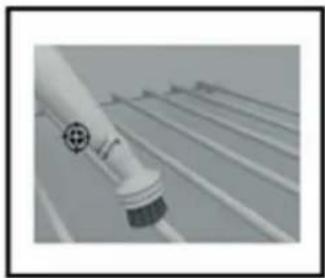
Close-up of a white pipe fitting with a small clip, no visible text or symbolsDetail nozzle
For those hard to reach places all around the home. This super-concentrated steam nozzle fits in small crevices at 45^ degree angle for easy access. Use to clean taps, under rails and radiators quickly and thoroughly.
natural_image
Close-up of a white cylindrical object with a black circular base, possibly a sensor or device component (no visible text or symbols)Plastic brush
A hard-waring brush for use on sealed surfaces. Always test a hidden area before use.
natural_image
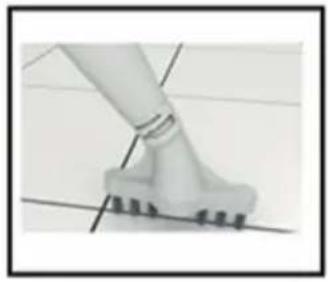
Close-up of a white mechanical component with a curved base and evenly spaced teeth, mounted on a flat surface (no text or symbols visible)Grout brush
A wide straight brush to tackle grout on tiled floors and surfaces. This lifts them bedded dirt from in between tiles and grouting.
natural_image
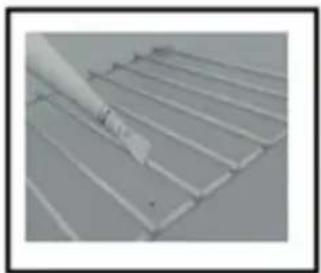
Close-up of a metal grate with a white tool applying material to the surface (no text or symbols visible)Scraper tool
Perfect for shifting dried on or stubborn residue from ovens, work surfaces, bathroom surfaces and even pots and pans.
natural_image
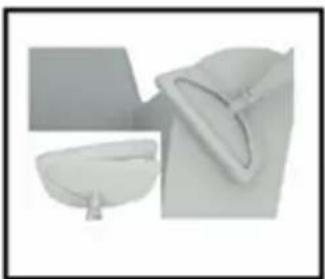
Two white objects resembling kitchen utensils or containers, one with a curved handle and the other a simple bowl (no text or symbols visible)Upholstery Tool
Attach the cloth to the Window Tool for use on upholstery and clothes.
natural_image
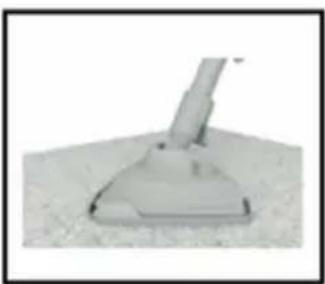
Close-up of a vacuum cleaner on a textured surface (no text or symbols visible)Carpet slider
A detachable carpet slider accessory which adapts the floorhead and enables you to make a seamless transition between cleaning hard floors and carpets. This can be used on all carpeted areas.
TROUBLE SHOOTING
Should you have any problem with you cleaner, follow this simple check list before calling the agency customer service center.
WARNING: Always unplug the steam mop before performing maintenance/troubleshooting checks.
A: Some accessories are missing
- Check the packaging content that is mentioned below the product specifications to be sure the parts included with the steamer.
B: Appliances have no power
- The plug is not connected (well) into the electrical socket.
- Check if the plug need to be replaced.
- Check the On/Off control dial.
- Check if the fuse in the plug needs replacing.
C: Why is the steamer not producing steam / detergent?
- There may be no water in the water tank, check the water tank has water.
- Check the water tank is securely fitted and the hard water filter is in place.
- Hard water filter may be blocked or discolored and need to be replaced.
- Make sure the handheld is fitter securely in the steamer.
- The water may not yet be at temperature, the green indicator light will be illuminated when it is ready.
- Steam path may be blocked. Go to removing blockages.
- Detergent must not be used in the handheld. Putting detergent into the water tank can cause damage to the steamer.
- Check correct setting has been selected on detergent dial, turn dial to ON.
- Check the detergent has been diluted to correct strength.
D: Why won't the microfiber pad pick up dirt?
- The microfiber pad may already be saturated or dirty. Wash the microfiber cleaning pad. Go to removing cleaning pad.
E: Why is the steam coming from the side of steamer?
- Steam coming from the side of the steamer indicates a blockage. Go to removing blockages.
PRODUCT SPECIFICATIONS
Power : 1400-1600W
Input voltage : 220 - 240 V AC 50 Hz
Power plug : Type C (CEE 7/17)
Capacity water tank : 280ml
Detergent tank : 150ml
Use time full tank : 20min
Heating time : 20sec
Cable length : 5m
Range : 5,5m
Detachable handheld unit : Yes
Removable tank : Yes
Hard water filter : Yes
Handle steam control : Yes
Shape foot : Triangle
PACKAGING CONTENT
1x steam mop
1x carpet slider
1x microfiber pad
1x large plastic brush
1x window tool
1x scraper
1x concentration tool
1x grout brush
1x detail nozzle
CE
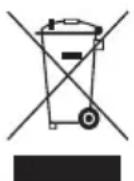
The Environment
The symbol on this appliance indicates that this appliance may not be treated as household waste. Instead it must be handed over to the applicable collection point for the recycling of electrical and electronic equipment. Disposal must be carried out in accordance with local environmental regulations for waste disposal. For more detailed information about treatment, recovery and recycling of this appliance, please contact your local city office, your household and waste disposal service or the shop where you purchased the appliance.
natural_image
Illustration of a hand using a tool to lift a body, with red arrows indicating motion (no text or symbols)natural_image
Illustration of a foot stepping on a mechanical device with a curved handle (no text or symbols)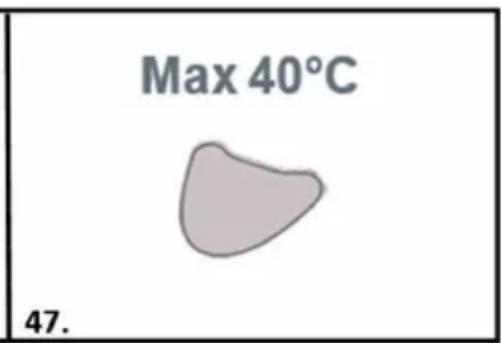
natural_image
Illustration of a hand holding a tool interacting with a device component (no text or symbols visible)natural_image
Close-up of a white wall corner with a diagonal line and a small protrusion (no text or symbols visible)natural_image
Close-up of a white pipe with a small gap, no visible text or symbolsDetaildüse
natural_image
Close-up of a white cylindrical object with a circular emblem, possibly a tool or device, against a grid background (no visible text or symbols)Kunststoffbürste
natural_image
Close-up of a person's foot stepping on a white foam roller (no text or symbols visible)Gratbürste
natural_image
Close-up of a hand holding a metal sheet with parallel grooves (no text or symbols visible)Kratzwerkzeug
natural_image
Three minimalist furniture items: a simple bowl, a flat plate, and a cushioned bag (no text or symbols visible)Polsterwerkzeug
natural_image
Close-up of a small mechanical component with a base and protruding arm, resting on a textured surface (no visible text or symbols)Teppichgleiter
natural_image
Illustration of a person using a tool to lift or lift a bag, with red arrows indicating motion (no text or symbols)natural_image
Illustration of a hand holding a tool interacting with a device, labeled '48.' (no text or symbols on the diagram itself)natural_image
Close-up of a wall corner joint with a pipe fitting (no text or symbols visible)Outil de concentration
natural_image
Close-up of a white pipe fitting with a small gap, no visible text or symbolsEmbout de détail
natural_image
Close-up of a white cylindrical object with a black base and circular emblem, mounted on a grid-like surface (no visible text or symbols)Brosse en plastique
natural_image
Close-up of a mechanical component with a lever and base, no visible text or symbolsBrosse à joints
natural_image
Close-up of a metal grate with a hand holding a white object (no text or symbols visible)Outil grattoir
natural_image
Three white objects: a rectangular frame, a curved container with a handle, and a flat surface (no text or symbols visible)natural_image
Close-up of a vacuum cleaner on a textured surface (no text or symbols visible)Outil pour tapis
SPÉCIFICATIONS DU PRODUIT
natural_image
Illustration of a hand using a tool to lift a jacket, with red arrows indicating motion (no text or symbols)natural_image
Illustration of a seated leg with a hand gesture, no text or symbols present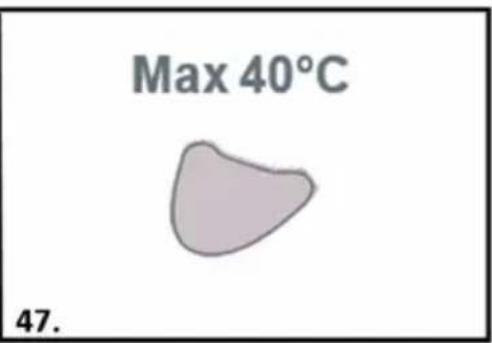
natural_image
Illustration of a hand holding a tool interacting with a device, labeled '48.' (no text or symbols on the diagram itself)natural_image
Illustration of a hand holding a spray gun with a red circle highlighting the handle area (no text or symbols present)53.
natural_image
Simple 3D illustration of a mechanical lever or pump component (no text or symbols)54.
natural_image
Illustration of a hand using a tool to apply a red arrow to a small object (no text or symbols present)55.
natural_image
Illustration of a hand inserting a component into a device (no text or symbols visible)56.
natural_image
Close-up of a corner shelf with a long rod inserted, no visible text or symbolsnatural_image
Close-up of a white pipe with a small mark and 'R' annotation, no readable text or symbols present.Detail-mondstuk
natural_image
Close-up of a white cylindrical object with a black base and circular mark, against a blurred background (no text or symbols visible)Plastic borstel
natural_image
Close-up of a human leg and foot stepping on a small mechanical component (no visible text or symbols)Voegenborstel
natural_image
Close-up of a metal grate with a hand holding a small object (no visible text or symbols)Krabber
natural_image
Three white objects: a rectangular block, a semi-circular container, and a curved surface (no text or symbols visible)natural_image
Close-up of a vacuum cleaner on a textured surface (no text or symbols visible)Tapijtloper
natural_image
Illustration of a hand using a tool to lift a jacket, with red arrows indicating motion (no text or symbols)natural_image
Illustration of a hand holding a red object above a mechanical device with circular components (no text or symbols)natural_image
Close-up of a wall corner with a diagonal line and horizontal bars, no visible text or symbolsnatural_image
Close-up of a white pipe with a curved tube extending from its side (no text or symbols visible)natural_image
Close-up of a white cylindrical object with a circular base, possibly a tool or component, against a blurred background (no visible text or symbols)natural_image
Close-up of a person's legs and feet on a tiled floor, with no visible text or symbolsnatural_image
Close-up of a white tool applying paint to a metal grid surface (no text or symbols visible)Raschietto
natural_image
Three white objects: a rectangular block, a curved container, and a small bowl (no text or symbols visible)natural_image
Close-up of a vacuum cleaner on a textured surface (no text or symbols visible)1x panno in microfibra
USO DE LA MOPA A VAPOR MANUAL
natural_image
Illustration of a hand using a tool to lift a jacket, with red arrows indicating motion (no text or symbols)natural_image
Illustration of a hand holding a tool interacting with a device, labeled '48.' (no text or symbols on the diagram itself)natural_image
Close-up of a white wall corner with a vertical pipe extending from the side (no text or symbols visible)natural_image
Close-up of a white pipe with a small attached clip, no visible text or symbolsDetalle de boquilla
natural_image
Close-up of a white cylindrical object with a circular mark and a crosshair symbol, resting on a grid-like surface (no text or symbols visible)Cepillo de plástico
natural_image
Close-up of a white mechanical component with a curved base and textured surface, no visible text or symbolsCepillo para juntas
natural_image
Close-up of a metal grate with a brush applying paint (no text or symbols visible)Rascador
natural_image
Three white objects: a rectangular frame, a curved container, and a triangular hat (no text or symbols visible)natural_image
3D rendered image of a vacuum cleaner on a textured surface (no text or symbols visible)DÔLEŽITÉ BEZPEČNOSTNÉ POKYNY
TIETO POKYNY SI USCHOVAJTE NA BUDÚCE POUŽITIE.
VAŽNE SIGURNOSNE UPUTE
SAČUVAJTE OVE UPUTE ZA BUDUĆU UPORABU
OLULISED OHUTUSJUHISED
HOIDKE NEED JUHISED HILISEMAKS KASUTAMISEKS ALLES


- MULTIFUNCTIONAL MOP
- IMPORTANT SAFETY INSTRUCTIONS
- SAVE THESE INSTRUCTIONS FOR FUTURE USE
- READ ALL INSTRUCTIONS BEFORE USING YOUR STEAM MOP
- WARNINGS
- PRODUCT DESCRIPTION
- Features
- HOW TO INSTALL / OPERATE THE MACHINE
- Before you start
- CAUTION:
- IMPORTANT:
- Assembling your machine
- FILLING WATER TANK
- FILLING DETERGENT TANK
- USING THE STEAMER
- REFRESHING CARPETS
- USING THE HANDHELD STEAMER
- Attaching small tools
- EMPTYING THE WATER/DETERGENT TANKS
- EMPTYING THE DETERGENT TANK
- REMOVING CLEANING PADS
- STORING YOUR STEAMER
- REPLACING THE HARD WATER FILTER
- REMOVING BLOCKAGES
- USING YOUR ACCESSORIES
- Concentration tool
- Detail nozzle
- Plastic brush
- Grout brush
- Scraper tool
- Upholstery Tool
- Carpet slider
- TROUBLE SHOOTING
- WARNING: Always unplug the steam mop before performing maintenance/troubleshooting checks.
- A: Some accessories are missing
- B: Appliances have no power
- C: Why is the steamer not producing steam / detergent?
- D: Why won't the microfiber pad pick up dirt?
- E: Why is the steam coming from the side of steamer?
- PRODUCT SPECIFICATIONS
- PACKAGING CONTENT
- CE
- The Environment
- Detaildüse
- Kunststoffbürste
- Gratbürste
- Kratzwerkzeug
- Polsterwerkzeug
- Teppichgleiter
- Outil de concentration
- Embout de détail
- Brosse en plastique
- Brosse à joints
- Outil grattoir
- Outil pour tapis
- SPÉCIFICATIONS DU PRODUIT
- Detail-mondstuk
- Plastic borstel
- Voegenborstel
- Krabber
- Tapijtloper
- Raschietto
- USO DE LA MOPA A VAPOR MANUAL
- Detalle de boquilla
- Cepillo de plástico
- Cepillo para juntas
- Rascador
- DÔLEŽITÉ BEZPEČNOSTNÉ POKYNY
- TIETO POKYNY SI USCHOVAJTE NA BUDÚCE POUŽITIE.
- VAŽNE SIGURNOSNE UPUTE
- SAČUVAJTE OVE UPUTE ZA BUDUĆU UPORABU
- OLULISED OHUTUSJUHISED
- HOIDKE NEED JUHISED HILISEMAKS KASUTAMISEKS ALLES
Brand : DIRT DEVIL
Model : DD7003
Category : Steam cleaner