USER MANUAL Berry Lionelo
natural_image
Close-up of hands installing a black bicycle handle and tire assembly (no text or symbols visible)
natural_image
Hand placing a black plastic object onto a black bicycle (no text or symbols visible)
natural_image
Close-up of a hand using a black bicycle-mounted device to lift a white wheel, with no visible text or symbols.
natural_image
Close-up of a hand adjusting a black bicycle handle and lever mechanism (no text or symbols visible)

natural_image
Close-up of hands using a tool to adjust or install a mechanical component, with an inset showing a close-up of the component (no text or symbols visible)
natural_image
Close-up of a hand holding a black tricycle with a handle and seat, no visible text or symbols
natural_image
Close-up of a hand adjusting a black trolley with a small circular component, no visible text or symbols
natural_image
Close-up of a person adjusting a black tricycle with a foot and seat, no visible text or symbols
natural_image
Close-up of a hand adjusting a bicycle seat component, no visible text or symbols
natural_image
Person wearing a blue and gray backpack with attached seatbelt, hands adjusting the seat (no visible text or symbols)
natural_image
Close-up of a hand adjusting a black athletic belt device with red buttons, no visible text or symbols
natural_image
Close-up of hands using a tool to adjust or install a cylindrical mechanical component (no text or symbols visible)
natural_image
Close-up of a hand adjusting a bicycle seat frame with a pressure gauge (no visible text or symbols)
natural_image
Close-up of a person using a bicycle pedal to adjust the wheel (no text or symbols visible)
natural_image
Close-up of a black stroller with visible wheels and seat, no text or symbols present
natural_image
Close-up of a hand adjusting a black cable with a small inset image showing a red mark, labeled '16' in the corner (no text or symbols on the diagram itself)
natural_image
Close-up of a black bicycle seat with red buttons and a white handle, no visible text or symbols
natural_image
Close-up of a black tricycle with visible wheels and a hand adjusting the seat (no text or symbols)
natural_image
Close-up of a hand adjusting the interior space of a black bicycle seat (no text or symbols visible)
natural_image
Close-up of hands assembling a dark fabric or mesh material (no text or symbols visible)
Dear Customer!
In case of any ques- ons or comments on the purchased product, please contact us:
help@lionelo.com
Producer:
BrandLine Group Sp. z o. o.
NOTE! KEEP THIS INSTRUCTION MANUAL FOR FUTURE REFERENCE.
- Please read this instruction on manual before operating the product to familiarise yourself with its functions and use it as intended. Equipment not used in accordance with the instructions on manual may pose a danger to your child!
- The safest areas to ride a bicycle are areas with limited or no tra c, such as private areas, recreational areas, playgrounds, school playing elds.
- Children should be instructed in the correct use of the product, especially how to brake.
- The product should be handled with care. Skills are required to avoid falls or collisions causing injury to the user or others.
- The product is intended for children between the ages of 9 months and 5 years.
- Never leave your child una ended.
- Make sure all locking mechanisms are locked before use.
- To avoid injury, make sure your child is out of the way when unfolding or folding this product.
- Check that the seat xings are correctly a ached before use.
- This product is not suitable for running or rollerblading.
- If the product is damaged in any way, stop using it immediately and contact your retailer.
- Do not allow your child to stand up while in the product.
-
The child must always be secured with a belt.
-
The product is intended for use by one child.
- It is permitted to use spare parts supplied exclusively by the manufacturer.
- Accessories which are not approved by the manufacturer should not be used.
- All parts of the bicycle should be checked regularly to ensure that they are functioning correctly.
- Do not hang or place any heavy objects on the handrail of the bicycle - this could cause it to tip over and injure your child.
- When putting / taking your child on / off the bicycle, the brake must be locked.
- Keep the product away from fire and heat sources.
- The maximum load capacity of the shopping basket is 2 kg.
PRODUCT DESCRIPTION (FIG. A)
- Canopy
- Button for handle height adjustment
- Handle for parent
- 3-point seat belt
- Handrail removal button
- Seat
- Rear basket
- Rear wheel
- Brake (x2)
-
Frame
-
Pedal (x2)
- Front wheel
- Mudguard
- Cup holder
- Handlebar removal button
- Handlebar
- Handrail
- Seat attachment bolt
- Footrest installation holes
PARTS LIST (FIG. B)
- Pedals
- Front wheel with fork
- Frame
- Rear wheels
- Seat
- Canopy
- Connector
- Handle for parent
-
Seat base
-
Cup holder
- Rear basket
- Mudguard
- Handrail
- Seat attachment bolt
- Installation tools
- Handlebar
- Rotating bar
- Sachet
TRICYCLE INSTALLATION
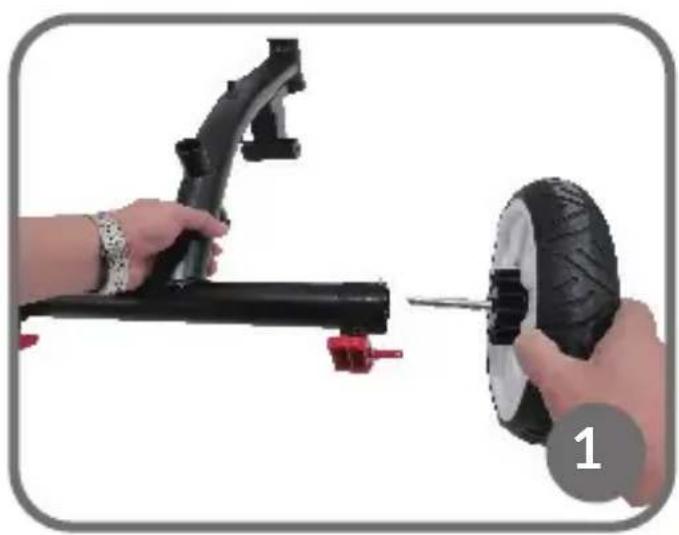
- Install the rear wheels in the correct positions on the rear of the frame (fig. 1). An audible “click” will indicate that they are correctly nested. Make sure
the wheels are correctly fitted – try to slide them out.
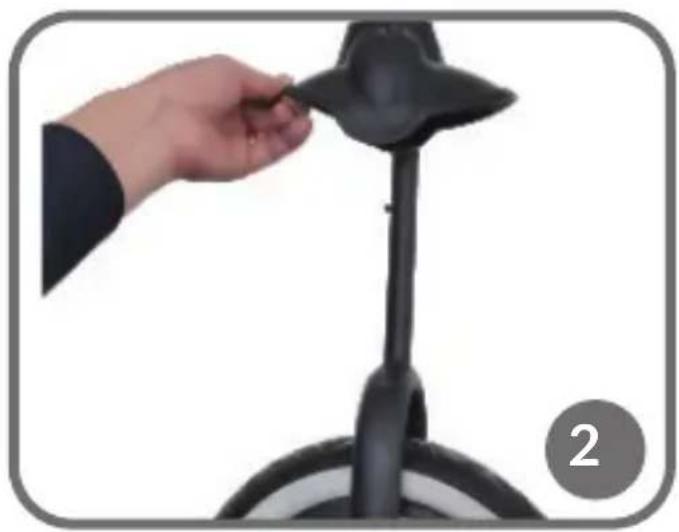
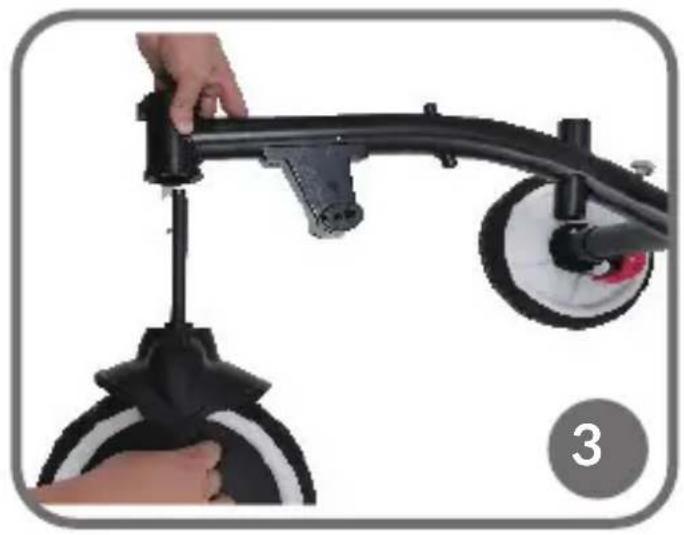
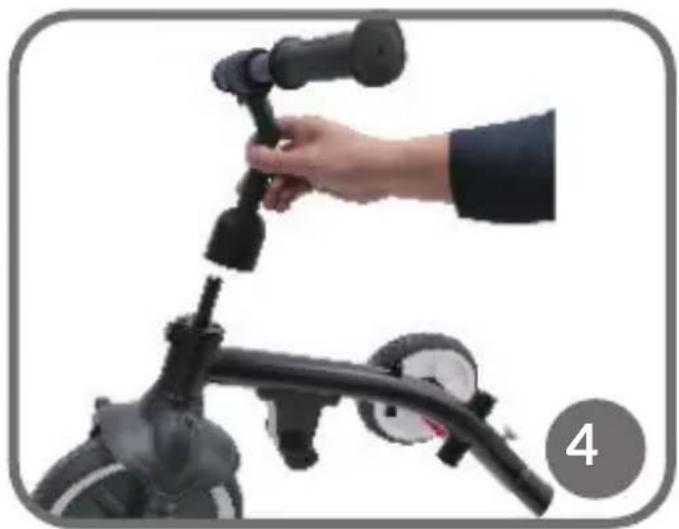
- Fit the front wheel together with the mudguard (fig. 2) into the front frame fork (fig. 3), paying attention to the markings on the mudguard and the direction of the handlebar axle. Then install the handlebar (fig. 4).
- Press the button located on the front wheel and then insert the pedals on both sides of the wheel (fig. 5). To use the freewheel function, press the button located at the front wheel and extend the pedal stem partially (see: Locking the pedals – freewheel function).
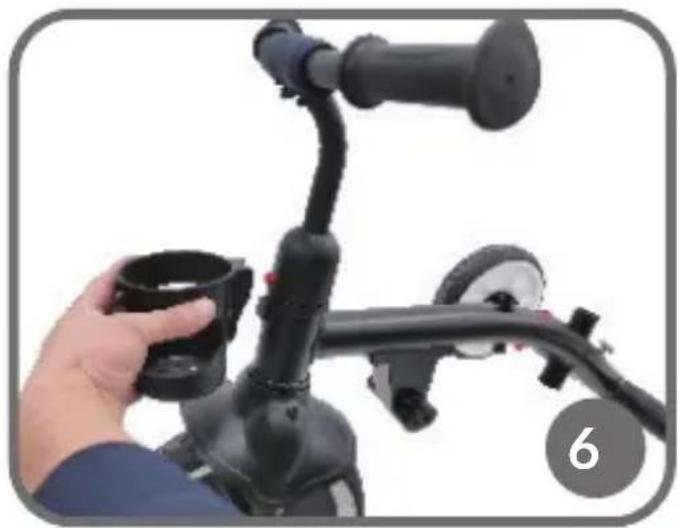
- Fit the cup holder to the front of the frame (fig. 6).
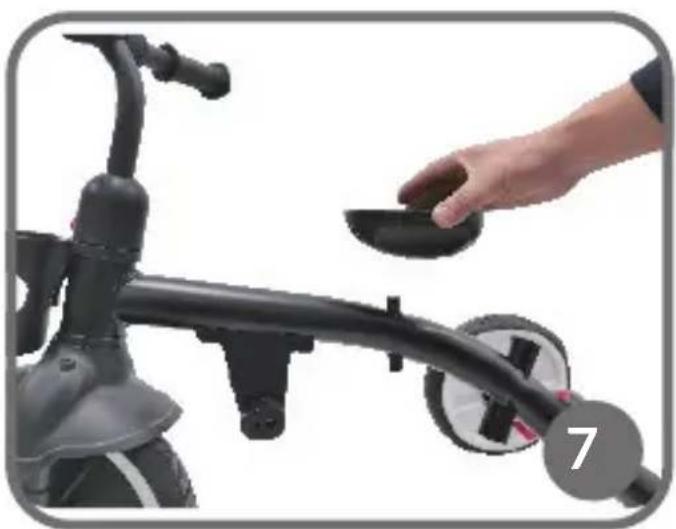
- Place the seat base on the frame (fig. 7).
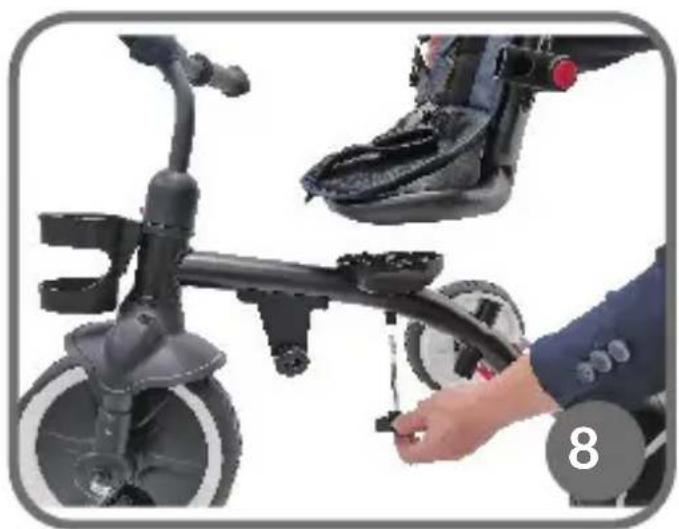
- Pass the protruding metal pin through the base and place the seat on the frame, then tighten the pin on the other side of the frame with the fixing screw (fig. 8). Make sure the button on the back of the seat is engaged and the backrest is locked.
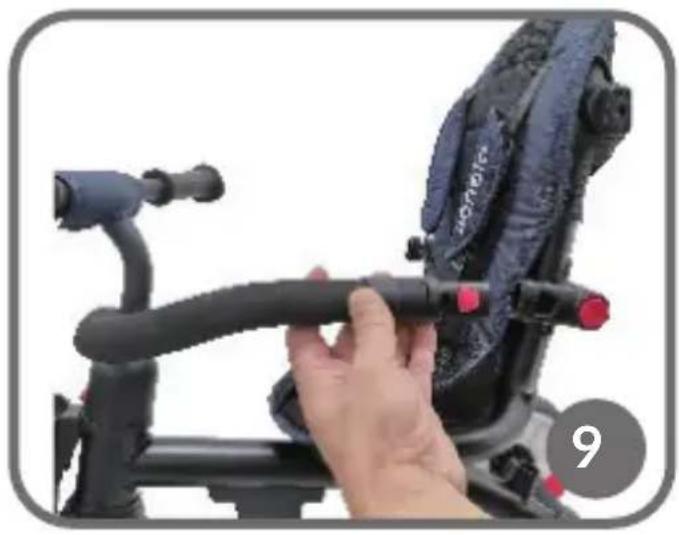
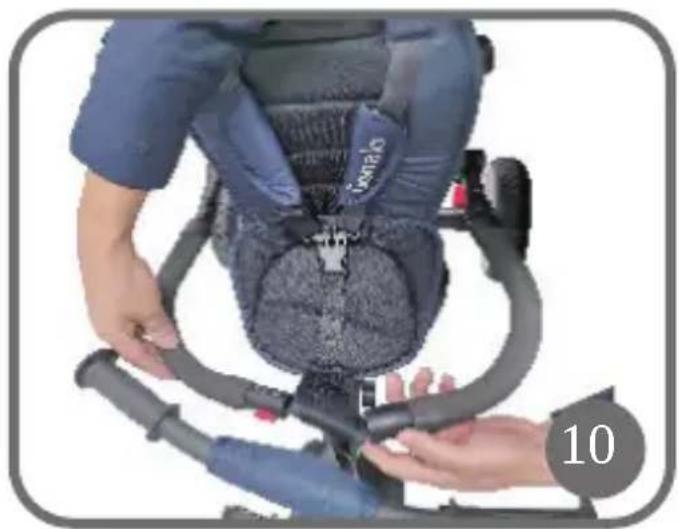
- Fix the handrail on both sides of the seat by sliding it into the corresponding holes (fig. 9), then slide the handrail into the seat cover and join the two parts (fig. 10). The correct installation will be signalled by a click.
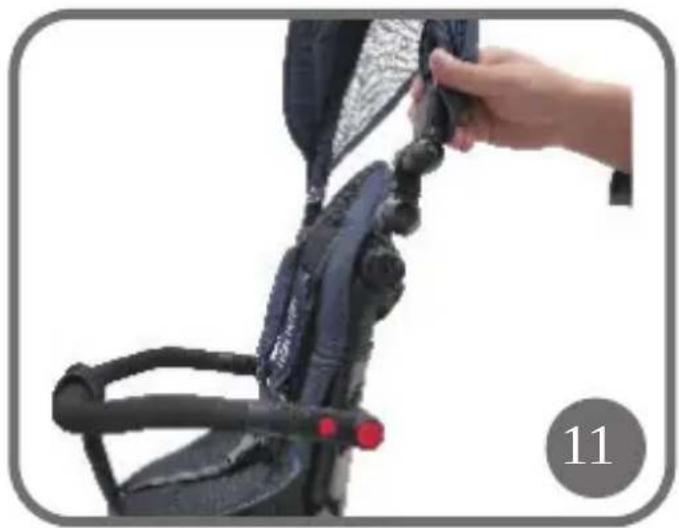
- Attach the canopy on the backrest by hooking the rubber hooks and then sliding the canopy into the corresponding holes on the frame (fig. 11).
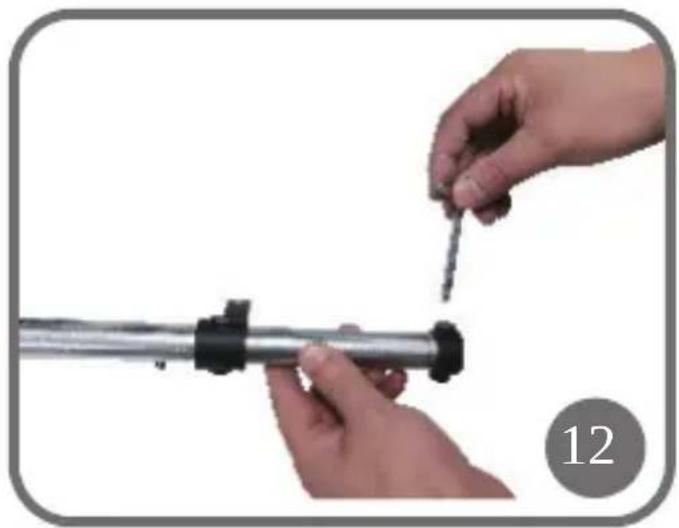
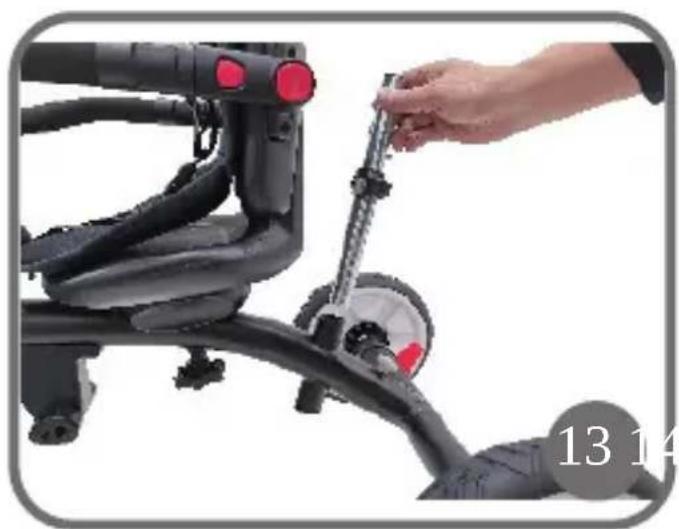
- Loosen the screw on the rotating bar (fig. 12). Then place the bar in the corresponding hole in the back of the frame (fig. 13) and tighten the screw again (fig. 14).
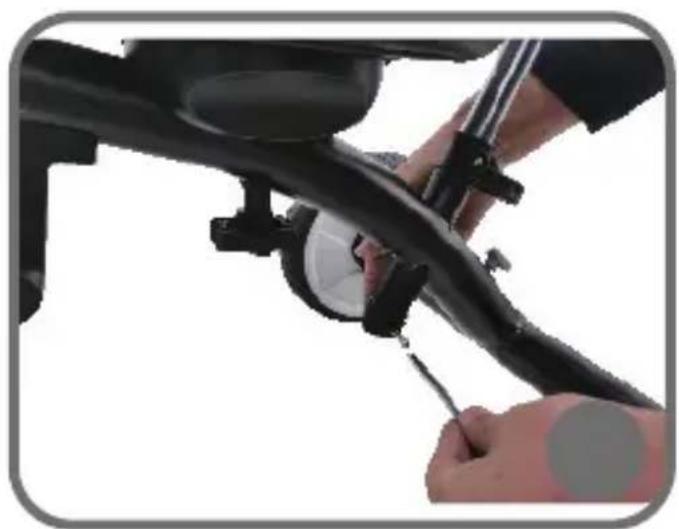
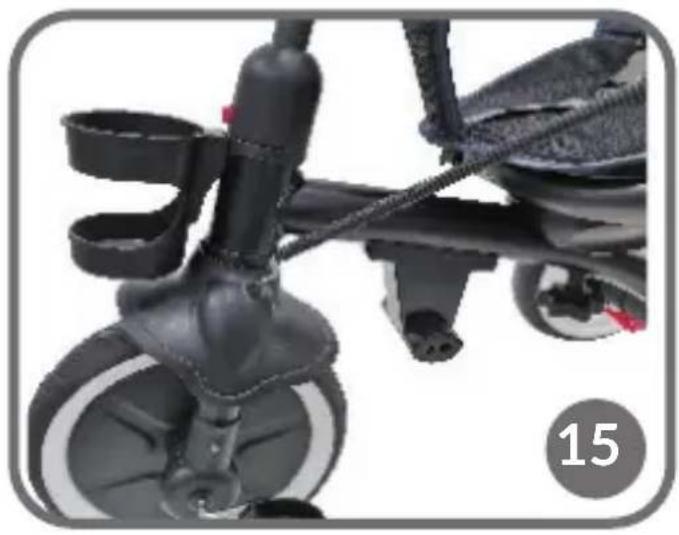
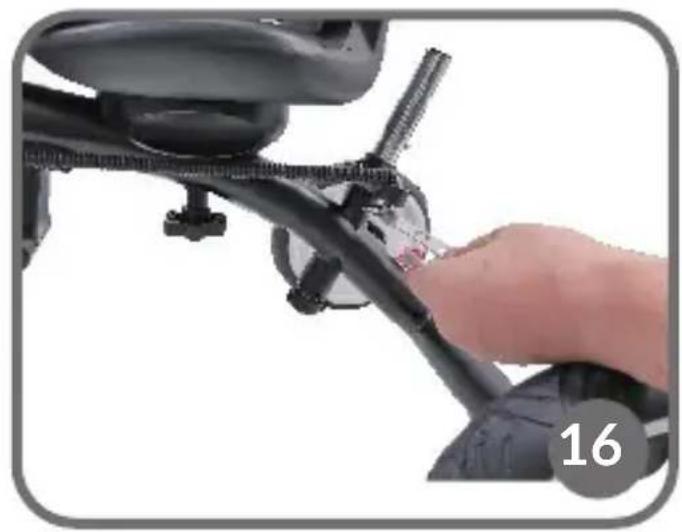
- Place the connector in the hole located in the mudguard (fig. 15) and in the rear part of the frame (fig. 16). Attach with installation tools.
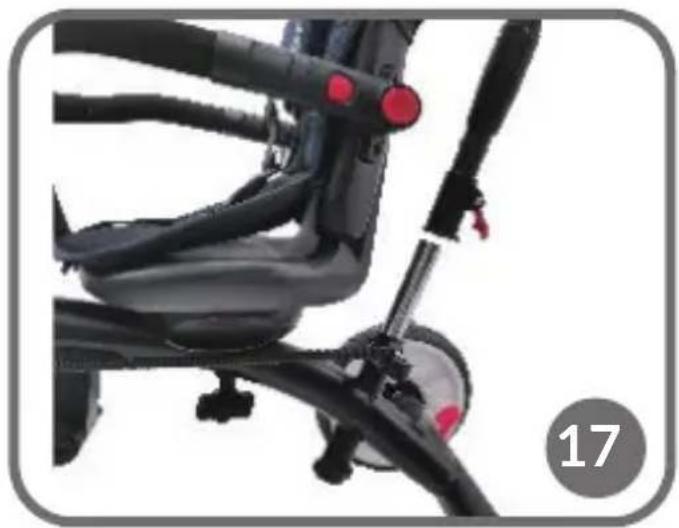
- Insert the parental handle into the corresponding position on the frame and secure it with the lock (fig. 17).
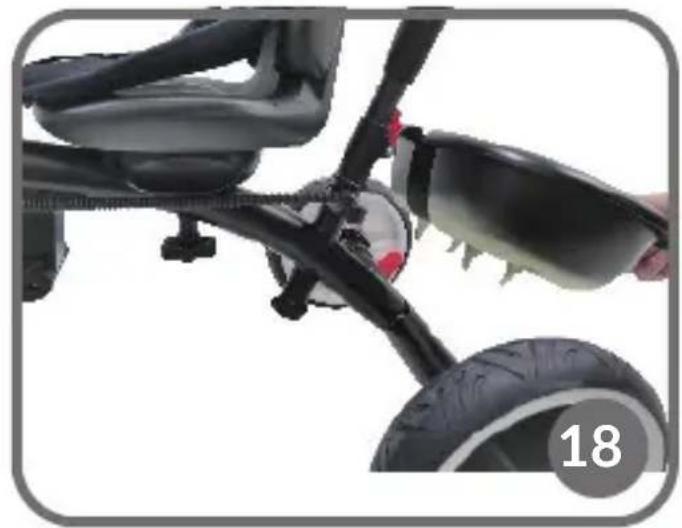
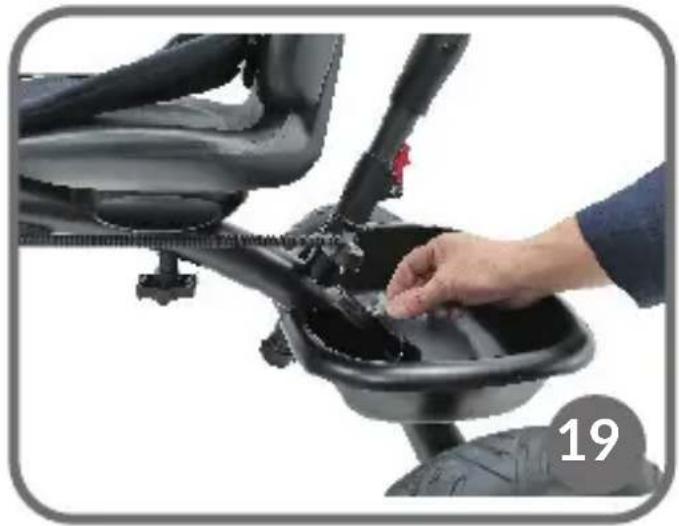
- Loosen the bolt at the back of the frame, then fit the basket (fig. 18, 19) and tighten the bolt again.
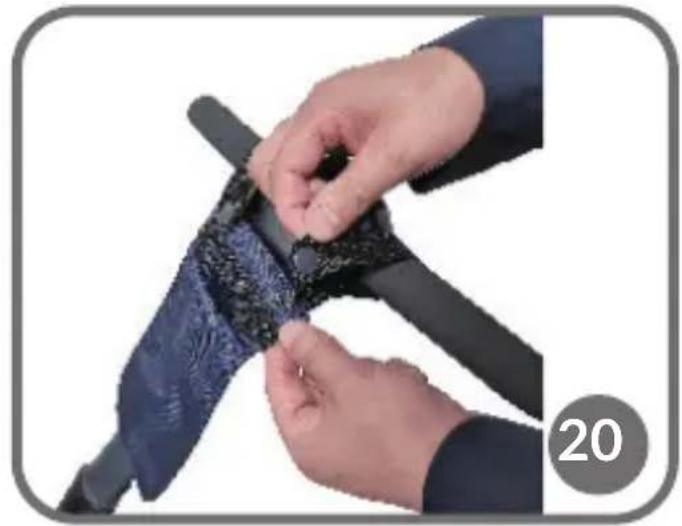
- Place the sachet on the parent handle and fasten the clasps (fig. 20).
- To remove the product, follow the above steps in reverse order.
ROTATING SEAT
Loosen the installation screw (18, fig. A), then rotate the seat in the desired direction. Tighten the screw again.
The pedals (11, fig. A) can also be used as a footrest. To do this, unbolt them from the wheel and fit them higher by inserting them into the corresponding holes (19, fig. A).
HANDLE HEIGHT ADJUSTMENT
Adjust the height of the handle for the parent by pressing the handle adjustment button (2, fig. A) and moving the handle in the desired direction. A 4-step adjustment is possible.
LOCKING THE REAR WHEELS
To lock the rear wheels, press both brakes at the rear wheels (9, fig. A). Slide upwards to unlock. Both brakes operate independently of each other.
LOCKING THE PEDALS - FREEWHEEL FUNCTION
The tricycle has a freewheel function. When using this function, your child can pedal without affecting the movement of the tricycle.
To set this up, press the button next to the front wheel and partially extend the pedal stem. If you want the movement of the pedals to cause the wheel to move, press this button again and retract the pedals.
If your child uses the tricycle independently, ensure that the freewheel function is deactivated.
CLEANING AND MAINTENANCE
- Check the bicycle regularly and keep it in good working order so that it does not pose a danger to the child.
- Wash the bicycle with a soft cloth. Do not splash or put the bicycle in water for cleaning.
- Check the bicycle regularly for loose parts or damaged parts. Do not use the bicycle with defective parts.
- Fabric parts can be hand washed at up to 30 degrees.
- You can apply oil to the connecting parts of the bicycle (e.g. its frame, handlebar hinges).
PL
Drogi Kliencie!
DESCRIPTION DU PRODUIT (FIG. A)
BrandLine Group Sp. z o.o.
BrandLine Group Sp. z o.o.
WAARSCHUWING! LET OP! BEWAAR ALS NASLAGWERK.
OMSCHRIJVING VAN HET PRODUCT (AFB. A)
PRODUKTBESKRIVNING (FIG. A)
JUSRERING AV HANDTAGETS HÖJD
PRODUKTBESKRIVELSE (FIG. A)
Detailed warranty conditions are available on the website: