Tris Plus - Bike Lionelo - Free user manual and instructions
Find the device manual for free Tris Plus Lionelo in PDF.

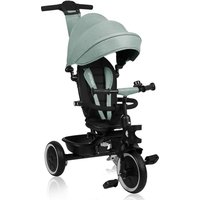
| Product Type | Convertible tricycle (children's bike) |
| Brand | Lionelo |
| Model | Tris Plus |
| Age range | 9 months to 5 years |
| Maximum supported weight | 15 kg (reasonable estimate) |
| Maximum basket load | 2 kg |
| Seat rotation | 360° |
| Backrest position | 3 adjustable positions (forward/rear tilt) |
| Parent handle height | Adjustable (locking button) |
| Brakes | 2 rear brakes (pedal) |
| Safety harness | 3-point |
| Canopy | Removable, attached with rubber hooks |
| Footrest | Foldable for older children; fixed for younger ones |
| Parent handle | Retractable, with bag and cup holder |
| Pedals | Freewheel (pedaling without drive) or direct drive |
| Frame material | Steel (estimate) |
| Dimensions (L x W x H) | ≈ 85 x 50 x 60 cm (estimate) |
| Product weight | ≈ 8 kg (estimate) |
| Fabric care | Hand wash max 30°C |
| General cleaning | Damp cloth, do not immerse |
| Spare parts | Contact the manufacturer (BrandLine Group) |
| Warranty | Detailed on BrandLine Group website |
Frequently Asked Questions - Tris Plus Lionelo
User questions about Tris Plus Lionelo
0 question about this device. Answer the ones you know or ask your own.
Ask a new question about this device
Download the instructions for your Bike in PDF format for free! Find your manual Tris Plus - Lionelo and take your electronic device back in hand. On this page are published all the documents necessary for the use of your device. Tris Plus by Lionelo.
USER MANUAL Tris Plus Lionelo
natural_image
Line drawing of a lionelo tricycle with a canopy and wheels (no text or symbols)A
B
1
natural_image
Close-up of hands holding a black mechanical device with a handle and lever (no visible text or symbols)2
natural_image
Close-up of a hand adjusting a black bicycle tire with a hand operating the wheel (no text or symbols visible)3
natural_image
Close-up of hands holding a black object attached to a circular ring (no text or symbols visible)
natural_image
Close-up of hands holding a black gavel and a black stick against a white background (no text or symbols visible)5
natural_image
Silhouette of a hand holding a black mechanical device with a handle, against a plain white background (no text or symbols visible)6
natural_image
Close-up of hands installing a black mechanical component with red buttons (no visible text or symbols)7
natural_image
Close-up of a hand adjusting a black tricycle seat, no visible text or symbols8
natural_image
Close-up of a hand adjusting a black athletic shoe component with red buttons (no visible text or symbols)9
natural_image
Close-up of a hand adjusting a black bicycle wheel (no text or symbols visible)10
natural_image
Close-up of a hand adjusting a black bicycle wheel rim and wheel rim (no text or symbols visible)11

natural_image
Close-up of a hand adjusting a black mechanical component with red adjustment knobs (no visible text or symbols)12
natural_image
Close-up of hands adjusting a bicycle seatbelt mechanism (no visible text or symbols)13
natural_image
Close-up of a black mechanical device being adjusted with red buttons, no visible text or symbols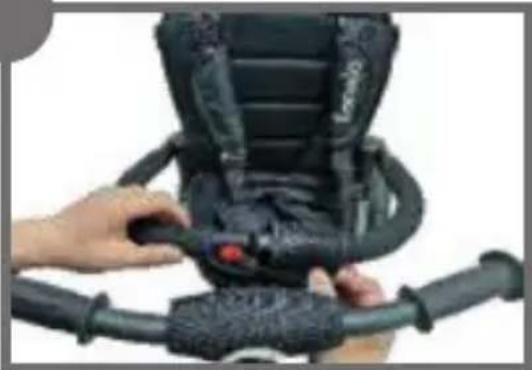
natural_image
Close-up of hands adjusting a black mechanical device with a red button, mounted on a curved pipe (no visible text or symbols)15
natural_image
Close-up of a hand adjusting black fabric with a bicycle handle (no visible text or symbols)16
natural_image
Close-up of hands holding a black fabric or garment, with a small object visible in the background (no text or symbols)17
natural_image
Close-up of a person using a black stroller with a hand adjusting the wheel (no visible text or symbols)18
natural_image
Close-up of a hand holding a black handheld device with a red button, against a plain background (no text or symbols visible)
natural_image
Close-up of a hand adjusting a black bicycle suspension system (no text or symbols visible)
natural_image
Close-up of a hand using a tool to adjust or install a black circular component, no visible text or symbols.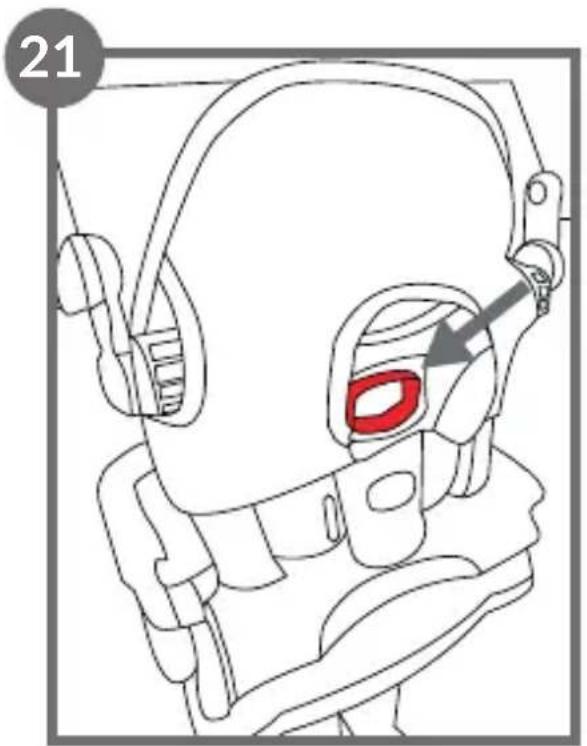
natural_image
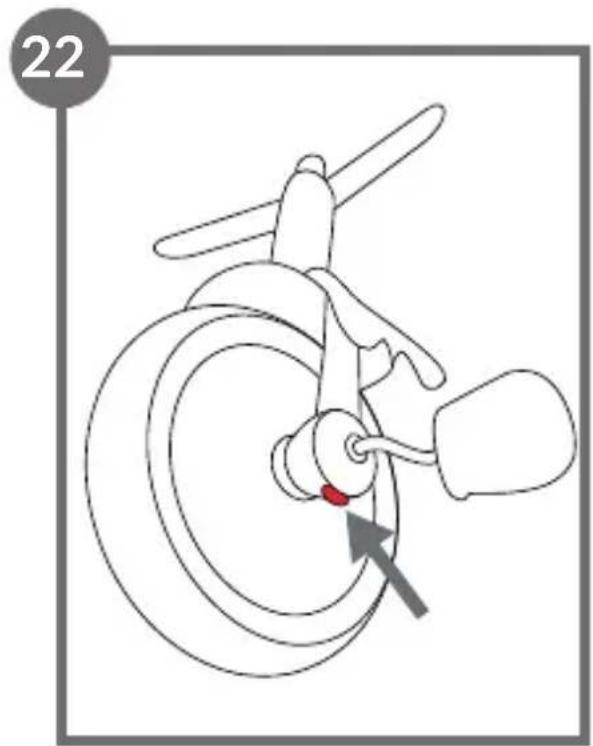
Diagram of a car's wheel and propeller assembly with a red arrow indicating the component (no text or labels)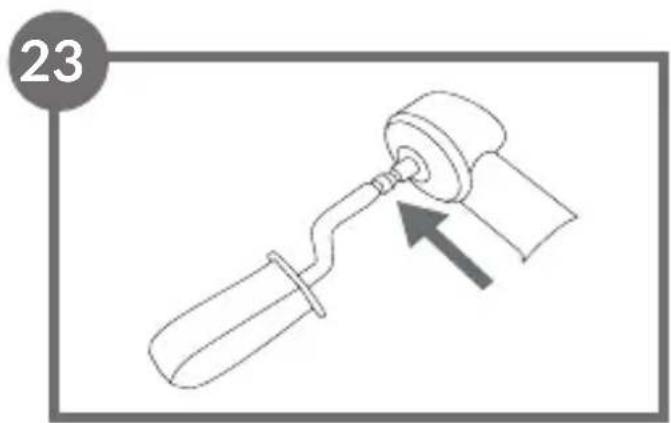
natural_image
Line drawing of a tool with an arrow indicating direction, no text or symbols presentDear Customer!
In case of any questions or comments on the purchased product, please contact us:
help@lionelo.com
Producer:
BrandLine Group Sp. z o. o.
NOTE! SAVE THIS MANUAL FOR THE FUTURE.
- Please read this manual before using the product to familiarize yourself with its functions and use it as intended. The equipment, if not used in accordance with the manual, can pose a danger to your child!
- The safest areas to ride the bike are areas with limited or no traffic, such as private areas, recreational areas, playgrounds, school playgrounds.
- Children should be instructed in the correct use of the product, especially how to brake.
- The product should be handled with care. Skills are required to avoid falls or collisions causing injury to the user or others.
- The product is intended for children between the ages of 9 months and 5 years.
- Never leave your child unattended.
- Make sure all locking mechanisms are locked before use.
- To avoid injury, make sure your child is moved away when unfolding or folding this product.
- To avoid injury, make sure your child is out of the way when unfolding or folding this product.
- This product is not suitable for running or rollerblading.
- If the product is damaged in any way, stop using it immediately and contact the retailer.
-
Do not allow the child to stand up while in the product.
-
The child must always be secured with the straps.
- The product is intended for use by one child.
- It is permitted to use spare parts supplied exclusively by the manufacturer.
- Accessories which are not approved by the manufacturer should not be used.
- All parts of the bicycle should be checked regularly to ensure that they are functioning correctly.
- Do not hang or place any heavy objects on the handrail of the bike - this can cause it to tip over and injure your child.
- The brake must be locked when putting your child on / off the bike.
- Keep the product away from fire and heat sources.
- The maximum load capacity of the shopping basket is 2 kg.
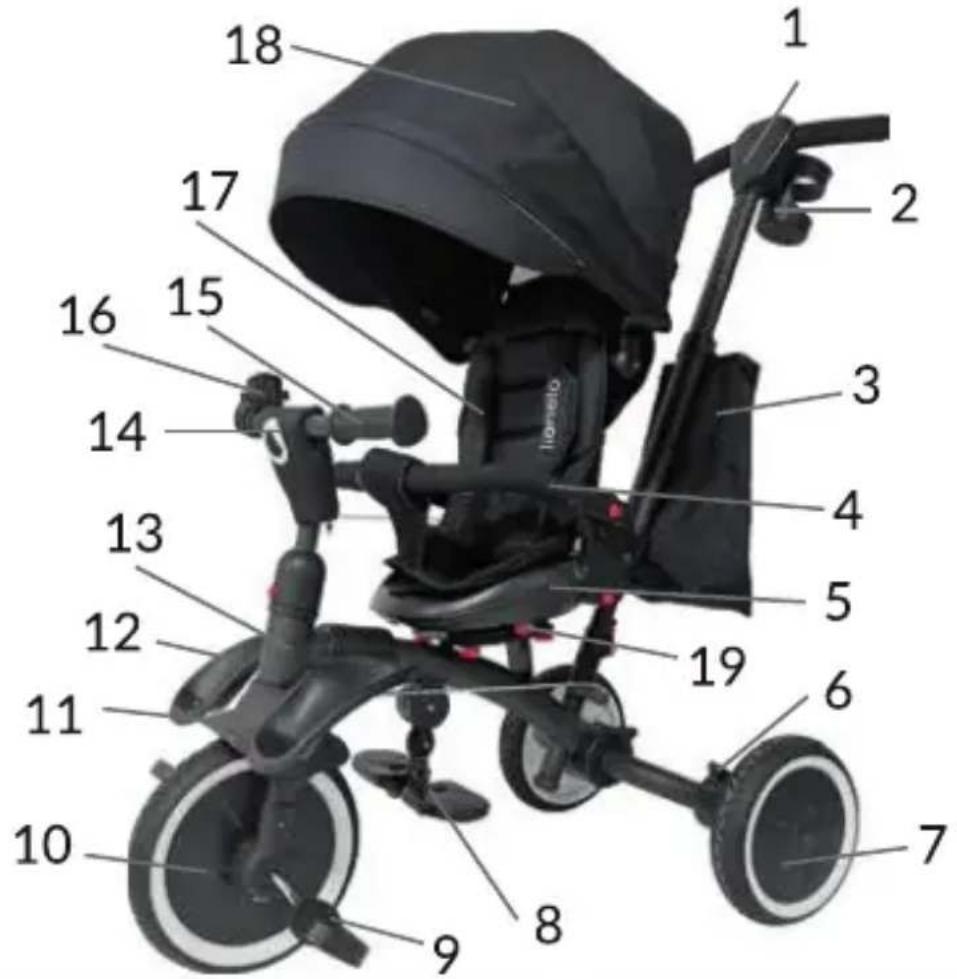
PRODUCT DESCRIPTION (FIG. A)
- Handle for the parent
- Cup holder
- Bag
- Safety bar
- Seat with backrest
- Brake (x2)
- Rear wheel
- Footrest for older children
- Pedal (x2)
- Front wheel
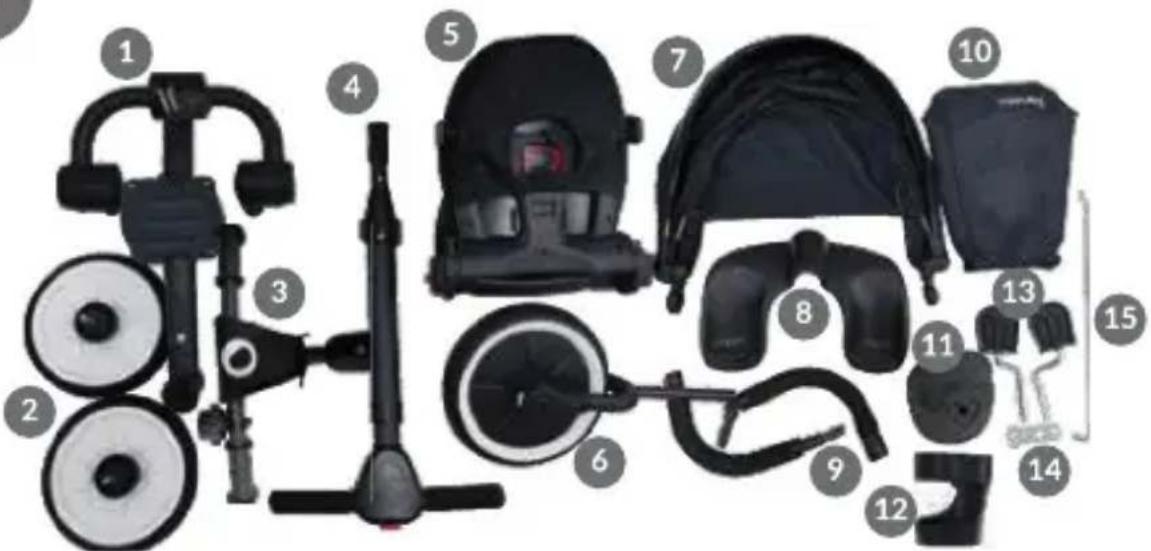
LIST OF PARTS (FIG. B)
- Frame
- Rear wheels
- Handlebar
- Handle for the parent
- Seat with backrest
- Front wheel
- Canopy
-
Footrest for younger children
-
Mudguard
- Footrest for younger children
- Frame
- Handlebar
- Handle
- Bell
- 3-point belt
- Canopy
-
Rotation button
-
Safety bar
- Bag
- Mudguard
- Cup holder
- Pedals
- Spanner
- Metal connector
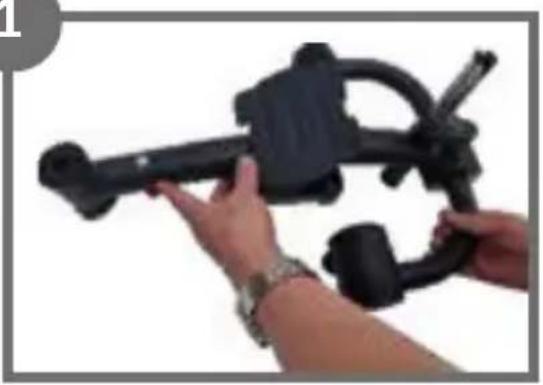
INSTALLATION OF THE TRICYCLE
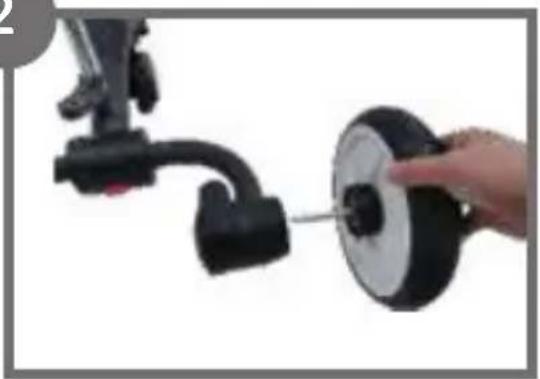
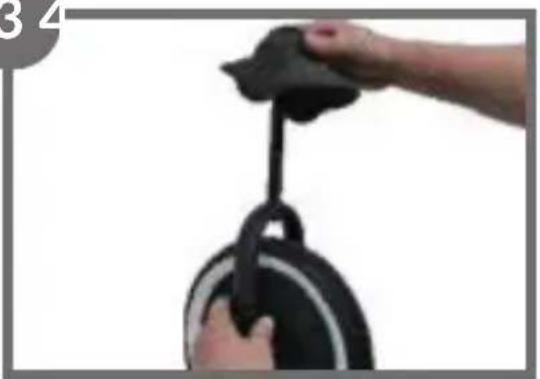
- Unfold the folding frame (fig. 1) and fix the rear wheels in the corresponding holes (fig. 2). An audible click will indicate correct installation. Make sure the wheels are correctly fitted - try to slide them out.
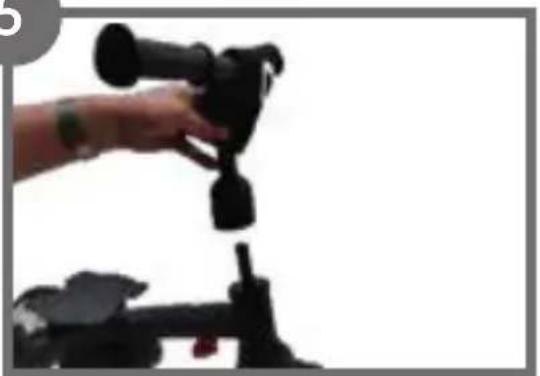
- Mount the front wheel with the mudguard (fig. 3) in the front frame fork (fig. 4), paying attention to the markings on the mudguard and the direction of the handlebar axle. Then fit the handlebar (fig. 5).
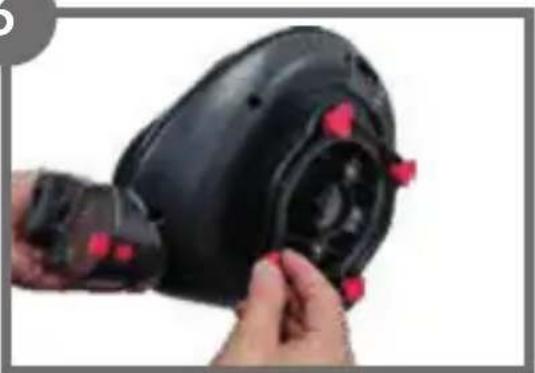
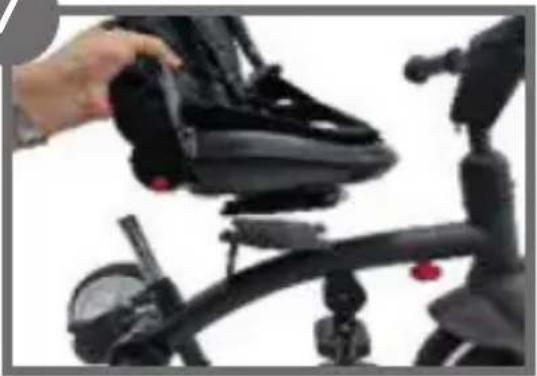
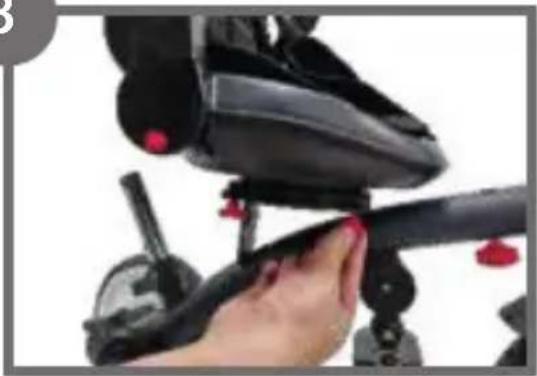
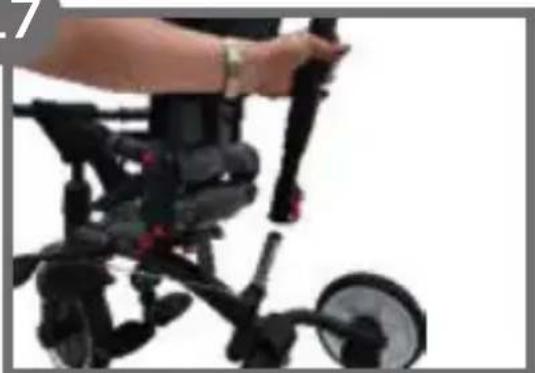
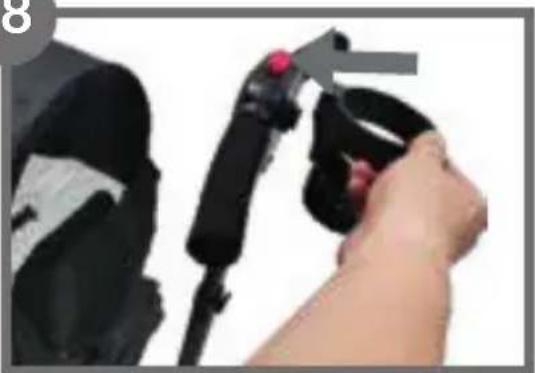
- Remove the seat bolts (fig. 6), then place the seat in the frame (fig. 7) and re-tighten the bolts (fig. 8).
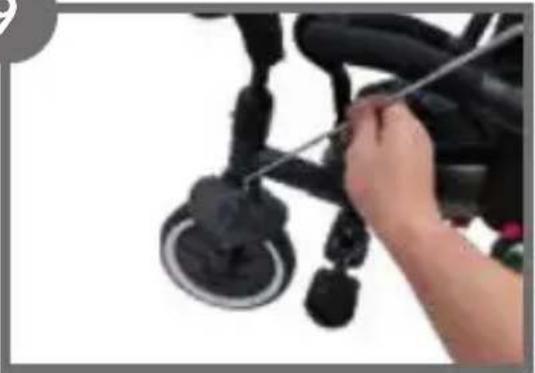
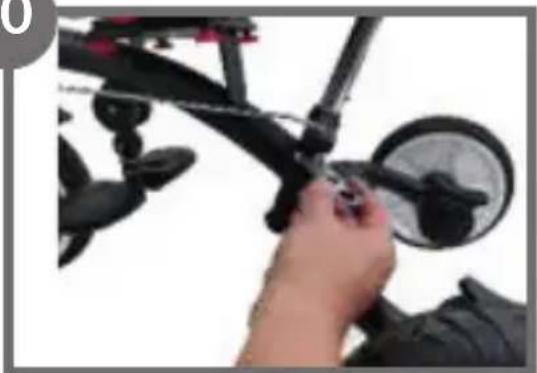
- Insert the metal connector into the hole in the mudguard (fig. 9), then insert the other side of the connector into the hole in the rear frame and tighten the bolt with a spanner (fig. 10).
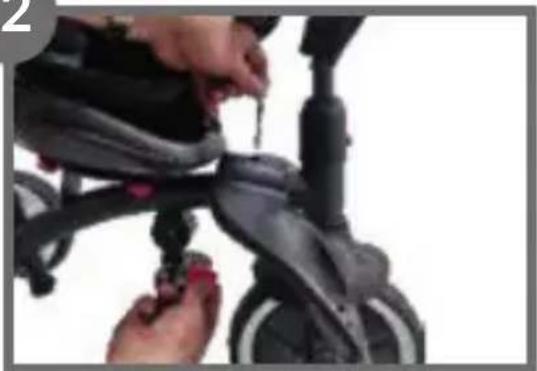
- Screw the footrest to the frame using the bolt and the red nut (fig. 11-12).
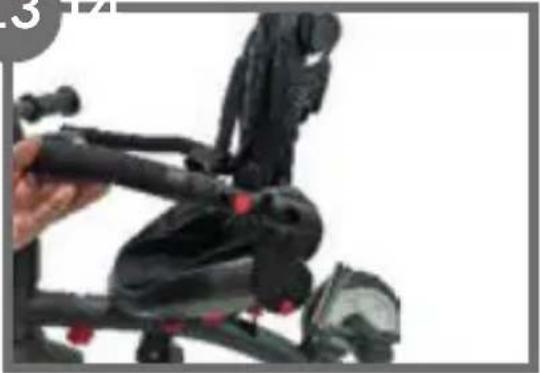
- Fix the safety bar on both sides of the seat by sliding it into the respective holes (fig. 13), then slide the safety bar into the seat cover and join the two parts (fig. 14). Correct installation will signal a click.
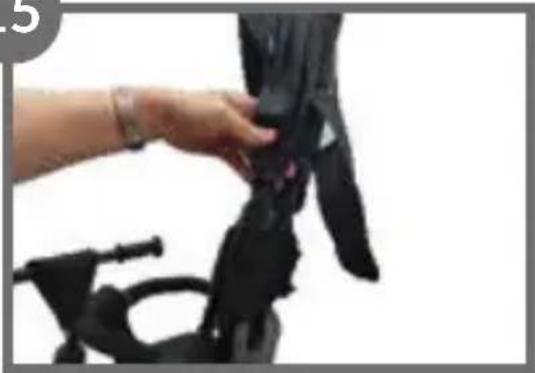
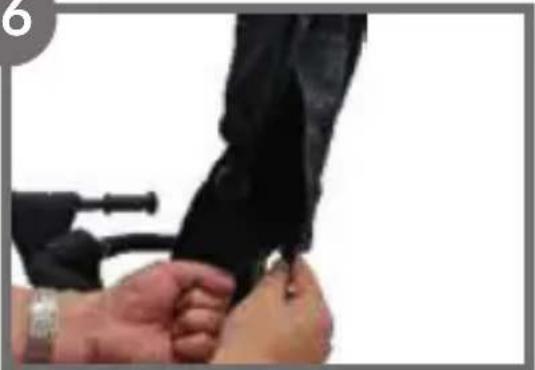
- Attach the canopy to the backrest by hooking the rubber hooks and then sliding the canopy into the corresponding holes in the frame. Fasten the button on the cover at the back of the backrest (fig. 15-16).
- Place the handle for the parent on the frame and close the locking lever (fig. 17).
- Clip the bag in the middle of the handle for the parent (fig. 19). Fasten the hook-and-loop fastener.
- Install the pedals on both sides of the front wheel (fig. 20).
- To remove the product, follow the above steps in reverse order.
HANDLE HEIGHT ADJUSTMENT
Adjust the height of the handle for the parent and set the desired height by pressing the button (A, fig. 18).
BACKREST ADJUSTMENT
To adjust the backrest to one of the three available positions, use the buckle at the back of the backrest (fig. 21). An audible click indicates that the backrest is correctly locked.
There are three backrest positions to choose from: rearward and forward facing.
The backrest can also be folded forwards for transport.
SEAT ROTATION
The seat can be rotated by 360^ . To rotate, use the button under the seat (19, fig. A).
LOCKING THE PEDALS
The tricycle has a freewheel function. When using this function, your child can pedal without affecting the movement of the tricycle.
To set this configuration, press the button next to the front wheel (fig. 22) and partially extend the pedal stem (fig. 23). If you want the movement of the pedals to cause the wheel to move, press this button again and retract the pedals.
LOCKING THE REAR WHEELS
To lock the rear wheels, press both brakes with your foot.
FOLDING AND UNFOLDING THE FOOTREST FOR OLDER CHILDREN
To fold or unfold the footrest for older children, push the black border down and move the footrest into the desired position. The pedals can be folded into the upright position by pushing towards the frame.
CLEANING AND MAINTENANCE
- Check the bicycle regularly and keep it in good working order so that it does not pose a danger to the child.
- Wash the bike with a soft cloth. Do not splash or put the bike in water for cleaning.
- Check the bike regularly for loose parts or damaged parts. Do not use the bike with defective parts.
- Fabric parts can be hand washed at up to 30 degrees.
- You can apply oil to the connecting parts of the bicycle (e.g. its frame, handlebar hinges).
The photos are for reference only, the actual look of the products may differ from the ones shown in the pictures.
Drogi Kliencie!
DESCRIPTION DU PRODUIT (FIG. A)
BrandLine Group Sp. z o.o.
BrandLine Group Sp. z o.o.
OMSCHRIJVING VAN HET PRODUCT (AFB. A)
PEDAAL VERGRENDELING
PRODUKTBESKRIVNING (FIG. A)
JUSRERING AV HANDTAGETS HÖJD
PRODUKTBESKRIVELSE (FIG. A)
PRODUKTBESKRIVELSE (FIG. A)
Detailed warranty conditions are available on the website: