
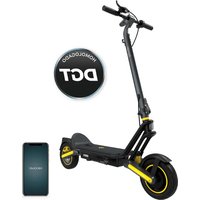
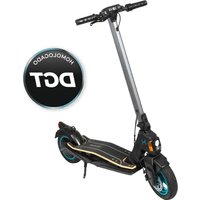
Makalu Pro - Scooter CECOTEC - Free user manual and instructions
Find the device manual for free Makalu Pro CECOTEC in PDF.

| Product type | Electric moped |
| Brand | Cecotec |
| Model | Makalu Pro |
| Dimensions (L x W x H) | 1350 x 630 x 1080 mm |
| Weight | 54 kg |
| Range | 45 km |
| Maximum speed | 45 km/h |
| Motor power (max / rated) | 1600 W / 1000 W |
| Torque | 54 N·m |
| Battery | Lithium-ion, 48 V, 20 Ah |
| Charging time | 6 hours |
| Charger | Model GJS150-5760200, input 100-240 V, output 57.8 V / 2 A |
| Tires | 135/65-8 |
| Minimum age required | 15 years |
| License required | AM (depending on country) |
| Brakes | Front and rear cable brakes |
| Lighting | Headlight, rear light, turn signals (approved version) |
| Speedometer | Yes (approved version) |
| Box contents | Makalu Pro, tool box, manual, 20 A fuse, seat frame and saddle, approved kit |
| Intended use | Electric transport alternative for short urban distances |
| Cleaning | Soft cloth, water and soap, dry metal parts |
| Warranty and after-sales service | Contact Cecotec at +34 9 63 21 07 28 |
Frequently Asked Questions - Makalu Pro CECOTEC
User questions about Makalu Pro CECOTEC
0 question about this device. Answer the ones you know or ask your own.
Ask a new question about this device
Download the instructions for your Scooter in PDF format for free! Find your manual Makalu Pro - CECOTEC and take your electronic device back in hand. On this page are published all the documents necessary for the use of your device. Makalu Pro by CECOTEC.
USER MANUAL Makalu Pro CECOTEC
natural_image
Exterior view of a modern electric scooter with black body, yellow side panel, and full body (no visible text or symbols)bongo
Safety instructions 10
-
Parts and components 65
-
Before use 65
-
Assembly 65
-
Operation 68
-
Cleaning and maintenance 69
-
Troubleshooting 70
-
Technical specifications 71
-
Disposal of old electrical and electronic
appliances 72
-
Technical support and warranty 72
-
Copyright 73
SOMMAIRE
Read these instructions thoroughly before using the device. Keep this instruction manual for future reference or new users.
- Cecotec shall not be liable for any problem caused by misuse of the device or non-compliance of both the traffic rules and the instructions in this manual.
- This vehicle is approved for use by one person at a time only. Do not carry more passengers. It aims at offering an environmentally friendly, sustainable, and efficient electric-transport alternative for short distances in urban areas. Be sure to comply with local traffic regulations when using the device. Ride in a civilised manner and pay attention to people and obstacles around you to prevent accidents.
- Remember that, if you follow the instructions and warnings in this manual, as well as the traffic rules in your area, you will reduce the risks, but you will not completely prevent them.
- Remember that the higher the speed, the greater the braking distance. Remember that hard braking can cause slips and falls.
- Wear protective equipment (such as helmet, goggles, gloves, and suitable elbow and knee pads) to prevent or reduce the risk of injury in the event of falls or accidents.
- Always use appropriate, tight, rubber-soled footwear.
- Make sure that both you and other users of the device read and understand these instructions. Make sure all users know how to make proper use of the device.
- Make sure the wheels are not damaged and all parts and components of the device are correctly installed before each use. If you notice that any of the parts is loose, hear strange noises, or the device does not work correctly, stop using
it immediately and contact the official Cecotec Technical Support Service.
- Do not use the product in a way that could damage or harm other people or objects.
- Do not modify the product in any way to avoid altering its performance and damaging it. Do not use any unapproved accessories or parts. Any unauthorised change will void the device warranty.
- Do not use the device under the rain to avoid damage and accidents.
- The device is not intended to be used by children under the age of 15. It can be used by children from 15 years of age if they are continuously supervised and have the documentation required. Consult the legal regulations in force in your region.
- This device can be used by children aged 15 and above and persons with reduced physical, sensory, or mental capabilities or lack of experience and knowledge, as long as they have been given supervision or instruction concerning the use of the device in a safe way, understand the hazards involved, and have all the documentation required in their region. Do not allow children to play with the device.
- Be sure to train children over the age of 15 on how to accelerate, decelerate, brake, and behave while driving. Children must be accompanied by an adult when reading this manual.
- Supervise children to prevent them from playing with the device. Close supervision is necessary when the appliance is being used by or near children.
- Do not sit or allow anyone to sit on the saddle or lean on the kickstand when the vehicle is stationary.
- The device does not feature a parking brake: always park it on flat and stable surfaces. To park the device, turn it off and
properly lower the kickstand. Put the kickstand back in place before resuming use of the device.
- Make sure that the mains voltage matches the voltage stated on the device marking and that the wall outlet is earthed before charging the device.
- Check the charger cable and casing regularly for visible damage. Do not use the device if the charger cable, socket, or structure are damaged, do not work properly, or have fallen, and contact the official Cecotec Technical Support Service immediately. If the power cable is damaged, it must be replaced with a special cable or set to be supplied by the official Cecotec Technical Support Service. The power cable is to be properly discarded.
- When you wish to disconnect the charger, pull from the plug, never the cable. Do not touch the device or its plug with wet hands.
- Check wheel pressure before every use. Remember that a low pressure may reduce the battery life.
- WARNING! Regularly check the condition of components or parts subject to wear or fatigue, such as the main frame, fork, wheels, brakes, etc. This will allow you to detect cracks or damage in high-stress areas that may indicate the component's service life has been exceeded and it needs to be replaced. Regular maintenance of the electric scooter and its components will extend its service life. Periodically check the tightness of the bolted parts, especially the wheel axles, the folding mechanism, the steering system, and the braking system.
- Use this device only with the power supply unit provided and with an original and compatible Cecotec battery.
-
WARNING: to recharge the battery, use only the power supply unit provided with the device, reference GJS150-5760200.
-
We recommend you charge the battery after every use and before it completely runs out of battery.
- WARNING! Keep plastic packaging out of the reach of children to prevent suffocation.
- Do not immerse the cable, plug, or any other non-removable part of the device in water or any other liquid. Do not expose the electrical connections to water. Make sure your hands are dry before handling the plug or switching on the device. Do not drive near high-humidity areas.
- Note that the braking distance will be longer in puddles, wet surfaces, and/or in wet-weather conditions. The vehicle is intended for use on flat, level, and dry surfaces.
- Do not use electronic devices, make calls, or listen to music while using the device.
- Check the current local regulations. Strictly consider your health and body condition. You should consult your doctor to determine if you have any physical or health conditions that could create a risk to your safety or prevent you from properly using the device. The device can be used by one person at a time only.
- Do not ride the device under the influence of alcoholic drinks, drugs, or medicine whose consumption is not compatible with driving.
- Do not use the device in hazardous areas where flammable or explosive substances, liquids, or dirt may be present.
- Do not place heavy objects on the handlebar. Any load attached to the handlebar will affect the stability of the electric scooter.
Battery safety instructions
- This device includes a lithium-ion battery.
- Unplug the battery from the charger before driving the
device and before folding or unfolding it.
- Charge the battery at an ambient temperature between 0 °C and 35 °C for most efficient operation.
- Do not burn or expose batteries to high temperatures, as they may explode.
- The battery may leak under extreme conditions. Do not touch any liquid that leaks from the battery. If the liquid gets into contact with skin, wash immediately with soap and water. If the liquid gets into the eyes, wash them immediately with clean water for a minimum of 10 minutes and seek medical attention. Wear gloves to handle the battery and dispose of it immediately in accordance with local regulations.
- Avoid contact between the battery and small metallic objects such as paper clips, coins, keys, nails, or screws.
- Never modify the charger in any way.
- The battery must be removed from the device for safe disposal.
- Battery ingestion can cause burns, perforation of soft tissue, and death. It can cause severe burns within two hours of the ingestion.
- In case of battery ingestion, please seek medical help immediately.
- Non-rechargeable batteries should not be recharged.
- The battery supply terminals must not be short-circuited.
INSTRUCTIONS DE SÉCURITÉ
-
Key switch
-
Handlebar height adjustment knob
-
Throttle
-
Rear-brake lever
-
Front-brake lever
-
Handlebar fixing lever
-
Deck
-
Front damper
-
Rear damper
-
Saddle
-
Front brake calliper
-
Brake calliper
-
Handlebar stem
-
Saddle heigh adjustment lever
-
Handlebar
-
Headlight (approved for road traffic)
-
Taillight (approved for road traffic)
-
Horn (approved for road traffic)
-
Speedometer (approved for road traffic)
Fig. 2
1 Throttle
2 Front-brake lever
3 Rear-brake lever
Note:
The graphics in this manual are schematic representations and may not exactly match the device.
2. BEFORE USE
- This moped comes in a packaging designed to protect it during transport. Take the moped out of the box and remove all packaging materials. You can keep the original box and other packaging elements in a safe place. This will help you prevent damage to the device when transporting it in the future. In case the original packaging is disposed of, make sure all packaging materials are recycled accordingly.
- Make sure all parts and components are included and in good conditions. If there is any
ENGLISHENGLISH
piece missing or not in good condition, immediately contact the official Cecotec Technical Support Service.
Box content:
- Makalu Pro
- Tool kit
- Instruction manual
- 20 A fuse
- Saddle and saddle post
- Headlight (approved version)
- Taillight (approved version)
- Horn (approved version)
- Speedometer (approved version)
- Carry bag (optional)
- Instruction manual
3. ASSEMBLY
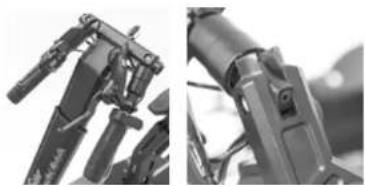
Unfolding the handlebar. Fig. 3
1 The vehicle is delivered folded and with the handlebars removed.
2 First, unscrew washer 1 and remove screw 2.
3 Position the handlebar and insert screw 2 with locknut 1.
4 To place the handlebar stem properly in position, raise the handlebar and press closing spring 3.
5 Insert the locking lever into the corresponding slot and turn until properly locked. NOTE: to fold the handlebar again, follow the reverse the procedure.
Assembling the handlebar grips. Fig. 4-5
With the handlebar upright, the grips will remain suspended as shown in Figure 4.
1 Take the left grip and pull it upwards until pushed into position.
2 Repeat the above step with the right grip.
Adjusting the handlebar height. Fig. 6
1 Turn the adjustment knob counterclockwise and adjust the handlebar to the desired height.
2 Once set to the desired height, turn the adjustment knob clockwise to lock it in place. Make sure the handlebar is firmly fixed.
Battery and motor
Both the battery and the motor come already installed and connected. To access any of these parts, lift the deck. To activate the electrical circuit, install the fuse provided.
Installing the saddle. Fig. 7
1 Insert the saddle into the saddle post fitting it snugly into the groove.
2 Screw the saddle in position on each side until completely fixed.
Adjusting the height of the saddle
To adjust the saddle height, unlock lever 1 and lower or raise the saddle to the desired position. Once the saddle is set to the desired height, lock lever 1 again.
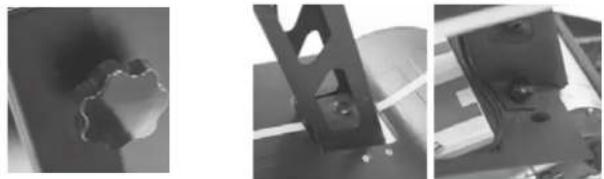
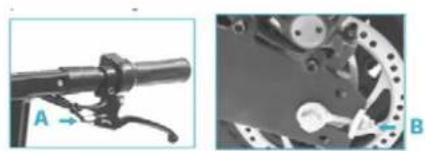
Adjusting the front and rear brakes. Fig. 8
- Both brakes require periodic adjustment.
- The brakes should be about 5–6 mm away from the handlebar grip.
- Stand on the vehicle to check the distance between the handlebar grip and the brake. If the brakes exceed the recommended distance, turn the brake washer (A) to adjust it.
- To adjust the brake cable tension, adjust the screw (B) on the rear wheel. This will allow the wheel to turn easily when the brake is not being used and will also immediately bring the vehicle to a stop when the brake lever is pressed.
WARNING: after each adjustment, tighten the locknut.
Vehicle approval
To register this vehicle for use in public spaces, you must:
- Consult the legal regulations in force in your region.
- Carry out the assembly described below.
-
Contact movilidadelectrica@cecotec.es and provide the following information:
-
Full name of the vehicle owner.
- ID of the vehicle owner.
- Chassis number located on the plate riveted to the chassis on the right side of the latter and laser engraved on the left side.
- Purchase invoice.
When driving your vehicle in public areas, we recommend you consult the legal regulations in force in your region and carry the following documents:
- ID
- Warranty
- Technical data sheet
- Road tax
- Registration certificate
Assembling the approval kit.
Parts and components. Fig. 9
1 Saddle post
2 Saddle
ENGLISHENGLISH
3 Headlight bracket
4 Speedometer bracket
5 Speedometer
6 Rearfender
7 Number-plate holder swingarm
8 Tool kit
9 Rearview mirrors
10 Number-plate holder with built-in light
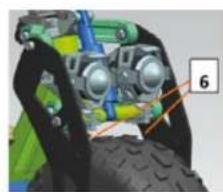
3.1. Mounting the headlight
- Headlights come installed by default as shown in Figure 10.
- To install the headlights in the correct position, first loosen the screws marked 6 and remove them. Then use 4 MB ^1 16 hex screws and 4 flange lock nuts to fix the headlight bracket, and mount the headlights on the bracket as shown in Figure 10. B
Warning: some of the headlight parts have no use and must be removed. Please remove the parts shown in Figure 11.
3.2. Mounting the swingarm for the number-plate holder with built-in light Fig. 12
- To fit the number-plate holder swingarm, add a hub and replace both screws.
- Replace the screws marked 7 and B with 2 M6*30 hex screws.
- Then connect the light cable from the number-plate holder to the cable of the moped post.
3.3. Mounting the rearview mirrors. Fig. 13
To install the rearview mirrors, simply insert them in the handlebar holes and screw them securely in place. Once fixed, cover the lower part with the trim piece.
3.4. Mounting the speedometer. Fig. 14-15
To install the speedometer, first mount the speedometer bracket on the handlebars. To do this, screw 2 M6*10 hex screws into the threaded holes at the rear of the handlebar as shown in Figure 14. Then use 2 M4*10 hex screws to fix the speedometer to the bracket.
4. OPERATION
Charging the battery. Fig. 16
WARNING: make sure the device is switched off.
1 Open the charging port cover (1) on the right side of the vehicle and insert the end of the adapter.
2 Connect the other end of the power cable to a plug socket. The indicator light will turn red during charging and will change to green once charge is complete.
NOTE:
- The device comes pre-charged. However, it is recommended to charge it for 6 to 8 hours before first use.
- It is also recommended to charge it after every use and before storage.
- Do not allow the vehicle to fully run out of battery to prevent damage to the latter.
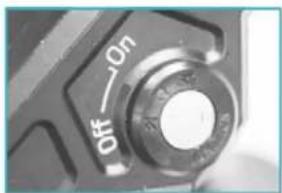
Start-up. Fig. 17
Insert the key and turn it clockwise to start the vehicle.
Throttle and brakes. Fig. 18
The throttle and front brake are located on the right handlebar grip.
1. Turn the throttle towards you to accelerate and release to decelerate.
2. Press the brake lever on the right side of the handlebar to brake with the front wheel.
3. The rear-brake lever is located on the left side of the handlebar. Press the left brake lever to brake with the rear wheel.
WARNING: do not turn the throttle abruptly. Turn it slowly to avoid accidents.
5. CLEANING AND MAINTENANCE
Cleaning
- Clean the vehicle with a soft cloth, water, and soap if necessary.
- After cleaning it, thoroughly dry any metal parts that may corrode or rust.
- Grease the suspension pivot points.
General maintenance
- Maintenance tasks must always be carried out by qualified personnel.
- Always use original Cecotec spare parts.
- Lower the kickstand and switch off the vehicle before carrying out any type of repair.
Tests to carry out
- After a fall, check that the throttle grip is working properly. To do this, try accelerating and decelerating several times.
- Regularly check that the brakes are in proper working condition. To do this, move the vehicle by pushing it manually and brake suddenly to make sure it responds.
- Check that all vehicle parts are in position and securely fastened.
- Check the screws.
- Check wheel wear and tension.
- Check the brakes and throttle cables for wear.
ENGLISHENGLISH
- TROUBLESHOOTING
| Error Possible cause | Possible solution | |
| The motor does not start. | The battery is not connected. Check the cables. | |
| Low battery. Charge the battery. | ||
| Electrical fault. Check all cables. | contact the official Cecotec Technical Support Service. | |
| The rear wheel does not turn. | Motor fault. Check the motor: contact the official. Cecotec Technical Support Service. | |
| The motor turns off during operation. | Tripped differential circuit. Release the throttle and wait until the motor cools down. Contact the official Cecotec Technical Support Service. | |
| The vehicle turns off after recharge. | The battery is not fully charged. | Charge the battery. |
| Battery fault. The battery has reached the end of its useful life or is not functioning properly. | Replace the battery: contact the official Cecotec Technical Support Service. | |
| The battery is frozen. Place the battery in a warm environment until it stabilises. | ||
| The vehicle stops suddenly during operation. | Fuse fault. Replace the fuse: contact the official. Cecotec Technical Support Service. | |
| The cable is damaged. Check and repair or replace the cable: contact the official Cecotec Technical Support Service. | ||
| The battery does not charge. | Low battery. Replace the battery: contact the official Cecotec Technical Support Service. | |
| The charger is broken. Check and repair or replace the cable: contact the official Cecotec Technical Support Service. | ||
Note:
If none of these situations match your problem, do not attempt to disassemble or repair the device by yourself. Repairs carried out by unqualified persons may result in injury or serious malfunctions. Contact the official Cocotec Technical Support Service. The repair must be carried out by an authorised technician and you must use only original spare parts.
- TECHNICAL SPECIFICATIONS
| Product reference: | 07320 | |
| Product: | Makalu Pro electric moped | |
| Features | Measuring units | Specifications |
| Dimensions Length x Width x Height (1) 1350 x 630 x 1080 mm | ||
| Weight | Moped weight | 54 kg |
| User requirements | Age bracket (2) | AM License |
| Technical specifications | Range (3) | 45 Km |
| Max. speed | 45 km/h | |
| Motor | Max. power | 1600 W |
| Rated power 1000 W | ||
| Par | 54 N*m | |
| Battery | Charging time | 6 h |
| Capacity: | 20 Ah | |
| Rated voltage | 48 V | |
| Max. charge voltage 54.6 V | ||
| Max. charging current | 2 A | |
| Wheels | Wheel | 135/65-8 |
ENGLISHENGLISH
| Charger Model GIS150 5760200 | ||
| Inlet 100-240 V ~ 50/60 Hz | ||
| Outlet 57.6 V - 2 A | ||
| Protection IP20 |
(1) Height from the floor to the upper part of the handlebar.
(2) Check the current local regulations.
(3) Measured with a weight of 80 kg, fully charged battery, flat surface, no inclination, no wind, and an ambient temperature of approximately 25 °C.
- The total value of the exposed vibration in the hand-arm system does not exceed 2.5 m/s ^2 .
- The weighted acceleration to which the whole body is submitted does not exceed 0.5 m/s.
- The A-weighted emission sound pressure level at work stations is less than or equal to 70 dB.
Technical specifications may change without prior notice to improve product quality. Made in China | Designed in Spain
8. DISPOSAL OF OLD ELECTRICAL AND ELECTRONIC APPLIANCES


This symbol indicates that, according to the applicable regulations, the product and/or batteries must be disposed of separately from household waste. When this product reaches the end of its shelf life, you should dispose of the batteries/accumulators and take them to a collection point designated by the local authorities.
For detailed information on the most appropriate way to dispose of electrical and electronic equipment and/or batteries, consumers should contact their local authorities.
Compliance with the above guidelines will help protecting the environment.
9. TECHNICAL SUPPORT AND WARRANTY
Cecotec shall be liable to the end user or consumer for any lack of conformity that exists at the time of delivery of the product under the terms, conditions, and deadlines established by the applicable regulations.
It is recommended that repairs are carried out by qualified personnel. If at any moment you detect any problem with your product or have any doubt, do not hesitate to contact the official Cecotec Technical Support Service at +34 963 210 728.
10. COPYRIGHT
The intellectual property rights over the texts in this manual belong to CECOTEC INNOVACIONES, S.L. All rights reserved. The contents of this publication may not, in whole or in part, be reproduced, stored in a retrieval system, transmitted, or distributed by any means (electronic, mechanical, photocopying, recording or similar) without the prior authorization of CECOTEC INNOVACIONES, S.L.
FRANÇAISFRANÇAIS
1. PIÈCES ET COMPOSANTS
Img.1
Fig./Img./Abb./Afb./Rys./Obr.3
natural_image
Three grayscale industrial equipment photos showing mechanical components and a close-up of a circular feature (no visible text or symbols)Fig./Img./Abb./Afb./Rys./Obr. 6 Fig./Img./Abb./Afb./Rys./Obr. 7
natural_image
Close-up of mechanical components including bipod and lever assembly (no visible text or symbols)Fig./Img./Abb./Afb/Rys./Obr.4
natural_image
Mechanical assembly diagram showing a lever and gear mechanism (no text or symbols)Fig./Img./Abb./Afb./Rys./Obr.8
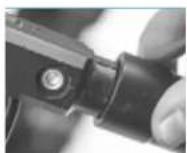
Fig./Img./Abb./Afb./Rys./Obr. 5
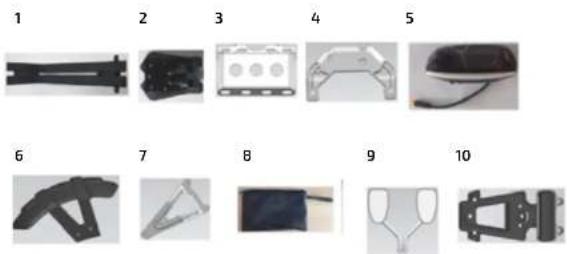
Fig./Img./Abb./Afb./Rys./Obr.9
natural_image
Mechanical assembly diagram showing a vehicle with green and blue components, no visible text or symbols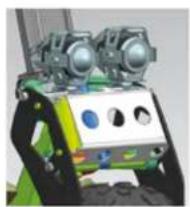
natural_image
3D rendered mechanical device with green and black components, no visible text or symbolsFig./Img./Abb./Afb./Rys./Obr. 10.A Fig./Img./Abb./Afb./Rys./Obr. 10.B
Fig./Img./Abb./Afb./Rys./Obr.11
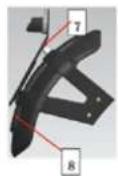
Fig./Img./Abb./Afb./Rys./Obr.12
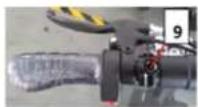
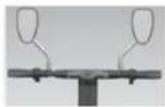
Fig./img./Abb./Afb./Rys./Obr.13
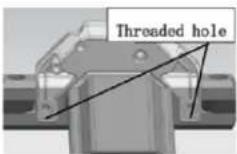
Fig./img./Abb./Afb./Rys./Obr. 14
Fig./img./Abb./Afb./Rys./Obr. 15
natural_image
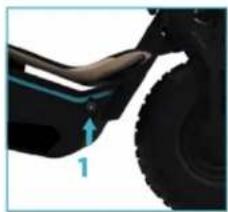
Close-up of a car's wheel and side arm with a blue arrow indicating force direction (no text or symbols)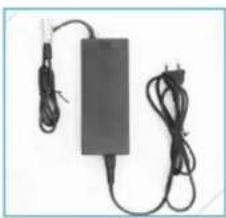
natural_image
Electric charger with attached cable and power cord (no visible text or symbols)Fig./Img./Abb./Afb./Rys./Obr. 16
natural_image
Close-up of a camera control dial with 'off' and 'On' labels (no additional text or symbols)Fig./Img./Abb./Afb./Rys./Obr.17

natural_image
Close-up of a mechanical lever handle and grip assembly (no visible text or symbols)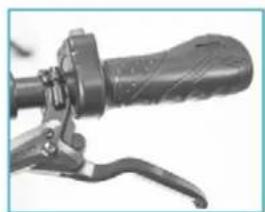
natural_image
Close-up of a black bicycle brake lever handle and grip (no text or symbols visible)Fig./Img./Abb./Afb./Rys./Obr. 18
www.cecotec.es
46910, Alfafar, Valencia (Spain)
YV_02230306


- SOMMAIRE
- Battery safety instructions
- INSTRUCTIONS DE SÉCURITÉ
- BEFORE USE
- ENGLISHENGLISH
- Box content:
- ASSEMBLY
- Battery and motor
- Adjusting the height of the saddle
- Adjusting the front and rear brakes. Fig. 8
- Vehicle approval
- Assembling the approval kit.
- Mounting the headlight
- Mounting the swingarm for the number-plate holder with built-in light Fig. 12
- Mounting the rearview mirrors. Fig. 13
- Mounting the speedometer. Fig. 14-15
- OPERATION
- Charging the battery. Fig. 16
- Start-up. Fig. 17
- Throttle and brakes. Fig. 18
- CLEANING AND MAINTENANCE
- Cleaning
- General maintenance
- Tests to carry out
- DISPOSAL OF OLD ELECTRICAL AND ELECTRONIC APPLIANCES
- TECHNICAL SUPPORT AND WARRANTY
- COPYRIGHT
- FRANÇAISFRANÇAIS
- PIÈCES ET COMPOSANTS
- Img.1
Brand : CECOTEC
Model : Makalu Pro
Category : Scooter