USER MANUAL Gdansk UFESA
natural_image
Black outdoor fan with a circular top and adjustable arm, mounted on a black stand (no text or symbols visible)
ESPAÑOL
natural_image
Simple line drawing of a rounded rectangular shape with a circular dial and two small circles, no text or symbols present.
natural_image
Pure electrical circuit lines without any symbols
INSTALACIÓN
natural_image
Simple diagram of a control panel with a pointer and circular buttons (no text or symbols)
natural_image
Simple diagram of a control panel with two circular buttons and a central icon (no text or symbols)
INSTALAÇÃO
WE WOULD LIKE TO THANK YOU FOR CHOOSING UFESA. WE WISH THE PRODUCT PERFORMS TO YOUR SATISFACTION AND PLEASURE.
WARNING
PLEASE READ THE INSTRUCTIONS FOR USE CAREFULLY PRIOR TO USING THE PRODUCT. STORE THESE IN A SAFE PLACE FOR FUTURE REFERENCE.
DESCRIPTION
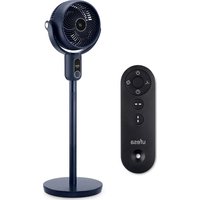
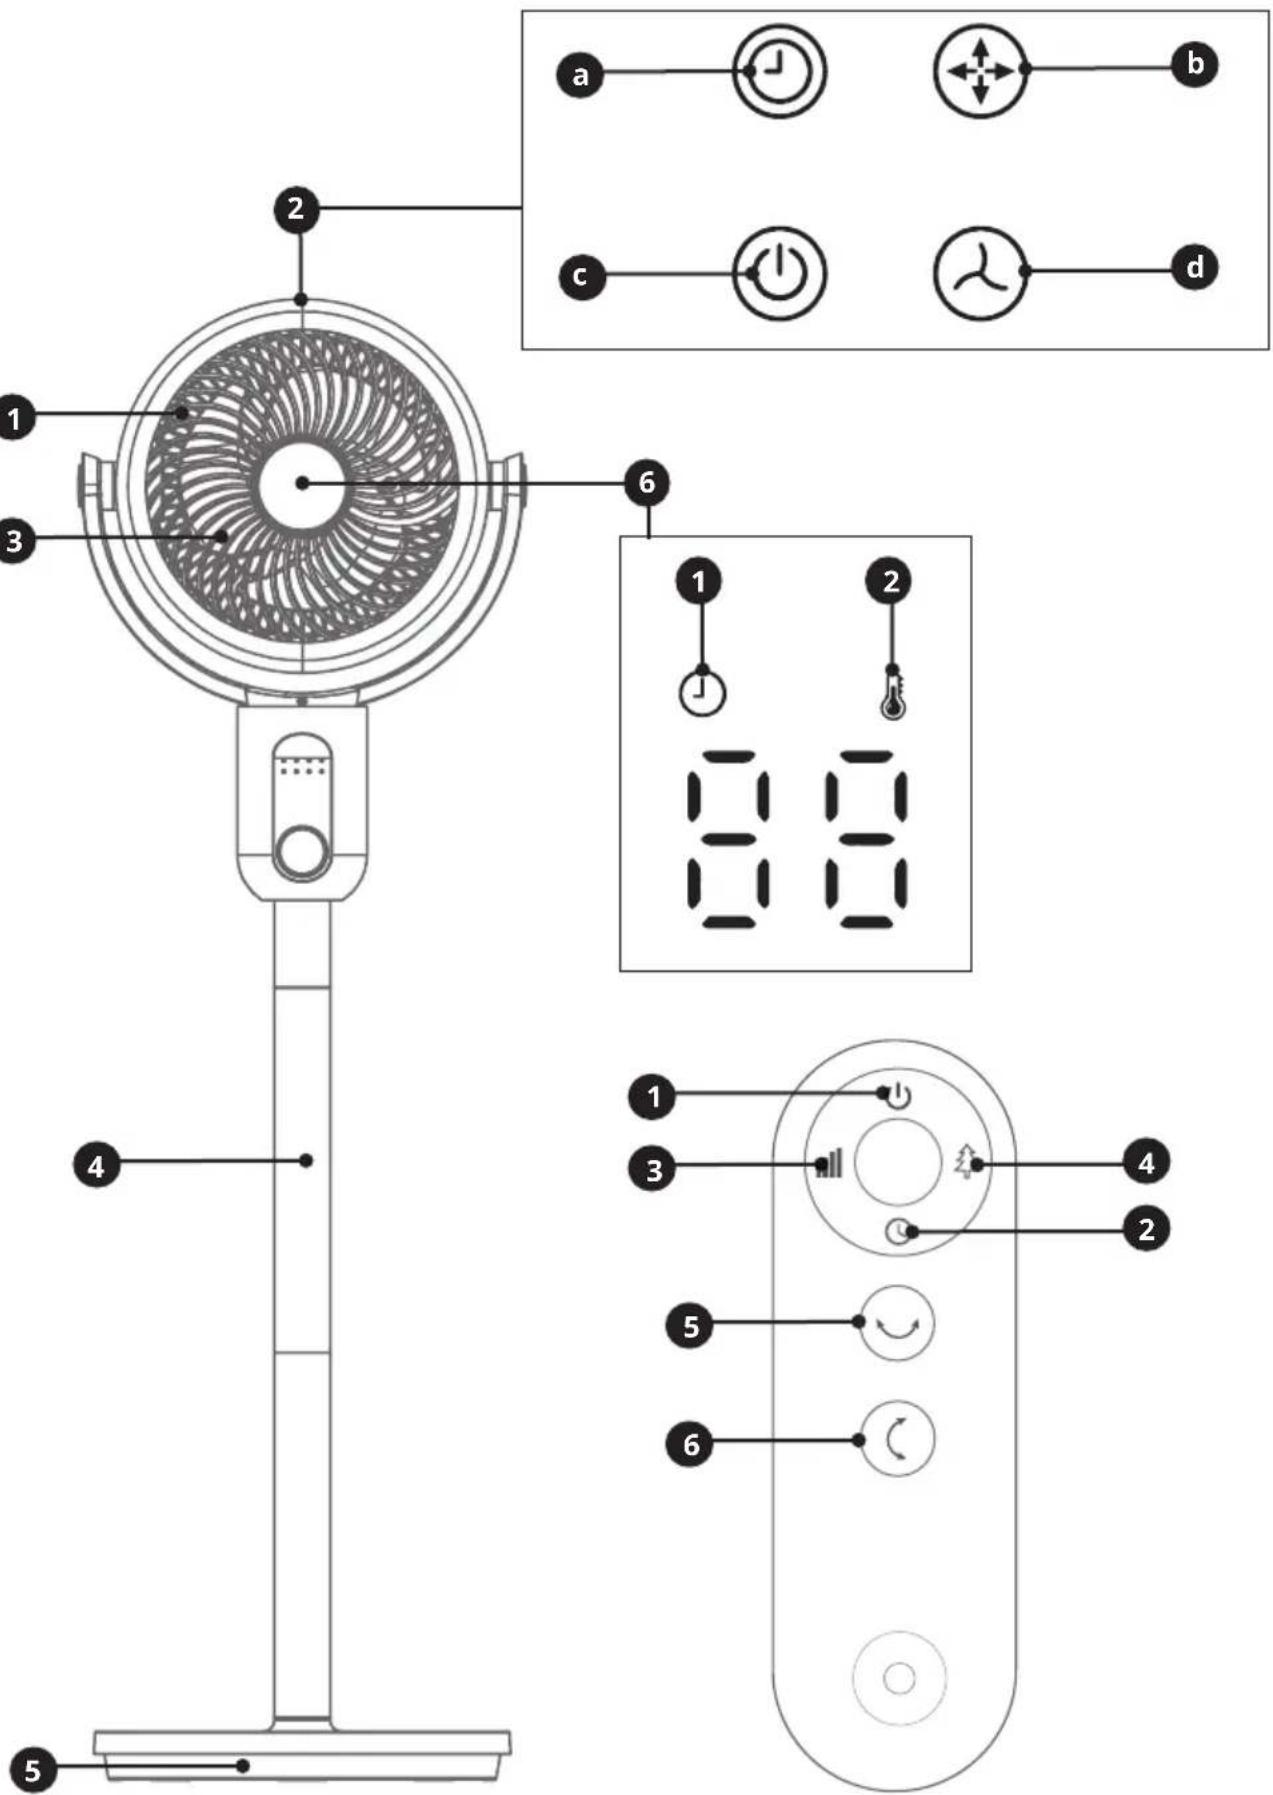
1) Front grille
2) Control panel
3) Blades
4) Connecting rods
5) Base
6) Display screen
Display Screen:
- Timer
- Temperature
a) Timer button
b) Oscillation button
c) On/Off button
d) Speed button
REMOTE CONTROL
- Power Button
- Timer button
- Speed button
- Mode button
- Horizontal oscillation button
- Vertical oscillation button
SAFETY INSTRUCTIONS
- This appliance can be used by children aged from 8 years and above and persons with reduced physical, sensory or mental capabilities or lack of experience and knowledge if they have been given supervision or instruction concer-
ning use of the appliance in a safe way and understand the hazards involved. Children should not play with the appliance. Cleaning and user maintenance shall not be made by children without supervision.
- If the supply cord is damaged, it must be replaced by the manufacturer, its service agent or similarly qualified persons in order to avoid a hazard.
- It is necessary to disconnect the appliance before assembling, disassembling and cleaning.
- This appliance is designed for use at a maximum altitude up to 2000m above sea level.
This appliance is intended exclusively for domestic use for the ventilation of rooms. Do not use it for other purposes. Any other use should be considered improper and dangerous. The manufacturer shall not be held responsible for any damage resulting from improper, incorrect and irresponsible use and/or for repairs made by unqualified technicians. Do not insert your fingers or any other objects through the fan's protector grille. The appliance must be kept out of the reach of children.
Do not use the appliance if it is not working properly, or if it appears to be damaged. If in doubt, take it to a professional, qualified technician.
Do not move the appliance while it is operating.
When the appliance is not being used, remove the plug from the mains socket. Do not touch the appliance with wet hands or feet.
Do not drag the appliance by the cable to move it.
Do not pull the cable or the appliance itself to remove the plug from the mains socket.
To clean the appliance, follow the instructions in the manual in the section dedicated to cleaning and maintenance.
B&B TRENDS, S.L. will not be held liable for any harm or damage which may occur to people, animals or objects as a result of failure to observe the aforementioned warnings.
REMOTE CONTROL BATTERY INSTALLATION
-
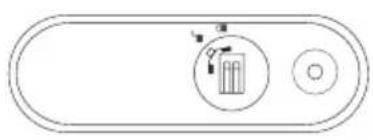
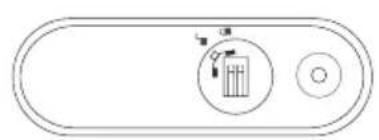
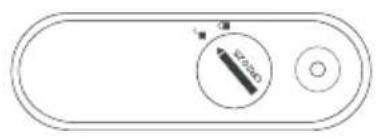
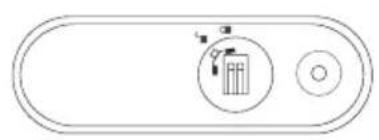
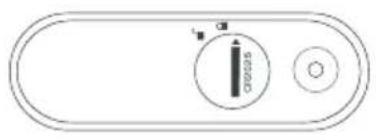
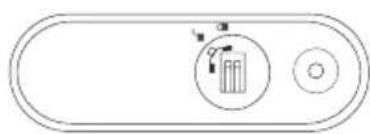
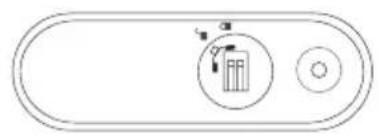
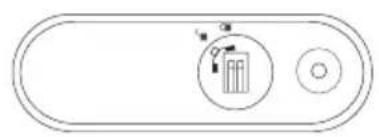
With the help of a semicircular thin object, turn the battery cover to the unlocked position as in the below picture:
-
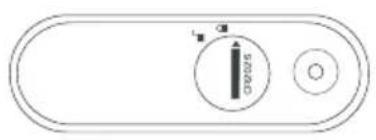
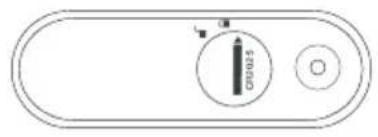
Take out the battery cover.
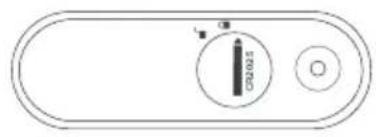
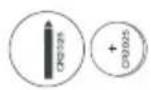
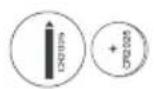
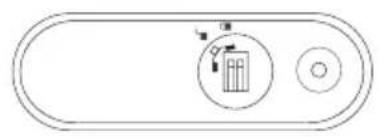
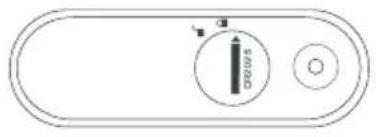
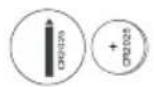
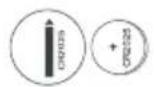
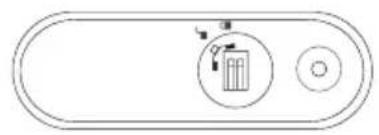
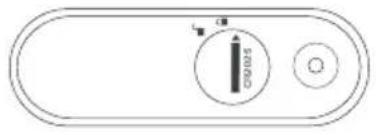
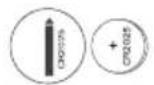
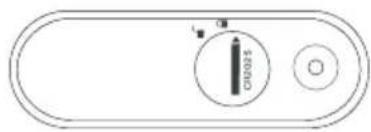
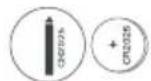
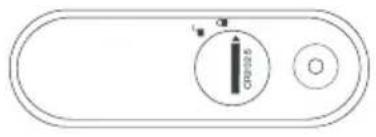
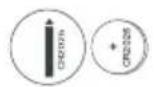
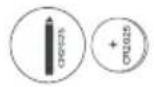
- Put the battery (CR2025) into the remote control and place the battery cover on the battery compartment making sure that the arrowhead icon on the battery cover is aligned with the unlock icon on the remote control. Then, with the help of a semi-circular thin object, turn the battery cover clockwise to the locked icon.
natural_image
Simple diagram of a control panel with a dial indicator and circular buttons (no text or symbols)
natural_image
Simple diagram with a circular arrow and a rectangular box, no text or symbols present
INSTALLATION
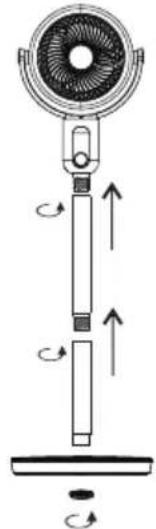
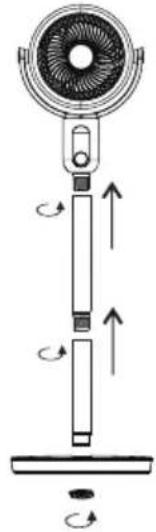
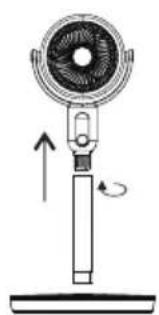
- Install the fan in the following sequence as in the picture.
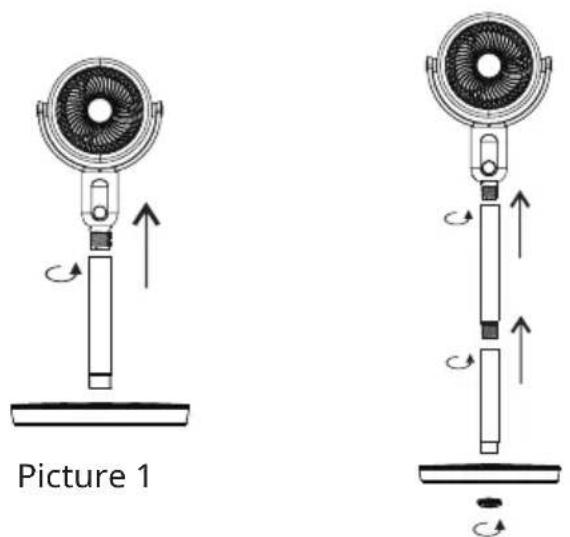
Picture 2
- After unpacking, check whether the body is in good condition and whether there is any defect.
* First remove the screw at the bottom of the short connecting rod, insert the short rod into the chassis and fix it together with the screw (Picture 1).
* Connect the connecting seat of the fan head with the long rod, fix the long rod together with the short rod (Picture 2)
Notice: When assembling and disassembling, please screw the connecting rod instead of pulling the machine head.
OPERATION
Plug the fan into the standard domestic socket to put the product in standby.

Push POWER button to switch the fan into operation at low level speed (F1). Push it again to select standby mode.

Push SPEED button to select MIDDLE (F2), HIGH (F3) or LOW (F1) fan speed. With each
push on SPEED button, the related symbol will flicker 3 times. Then the display will show the room temperature.
You can also push this button on the remote control.

Push "OSC" button to oscillate the fan horizontally, and the related symbol “_” will light up. Push it again to change the horizontal oscillation to vertical oscillation function, the related symbol "I I" will light up. Push it again to oscillate the fan up, down, left, and right simultaneously and the related symbol "[ ]" will light up. Push it again to stop the oscillation function and the related symbol will turn off.
Push 😊 or Ⓞ on the remote control to set the oscillation function.

Push "TIMER" button to select between 00-15 hours, and the related value will flicker 3 times. And then the room temperature will be displayed.

Push MODE button to select Natural mode (H1), Sleeping mode (H2) or Normal mode (F1) and the related symbol will light up or turn off (only for remote control adjustment).
Natural Mode: To imitate the effect of natural wind, the fan changes the speed between low-middle-high with a specific pattern.
Sleeping mode: In this mode the speed of the fan is decreased until it reaches the lowest speed.
Note: If no operation is performed within 180 seconds, the display screen will automatically turn off. Press any button to wake it up.
CLEANING AND MAINTENANCE
Warning: before carrying out regular cleaning operations, disconnect the plug from the mains socket.
- To clean the appliance, use a soft, slightly damp cloth. Do not use abrasive or corrosive products.
- Do not immerse any part of the fan in water or any other liquid. If this accidentally happens, under no circumstances should hands be put into the liquid. Immediately disconnect the plug from the mains socket. Then dry the appliance carefully and check that all the electrical parts are dry. If in doubt, check with professional qualified technician.
- It is essential that the air inlet and air outlet holes are free of dust and fibres.
- In case of long periods of non-use, store the fan, protecting it from dust and moisture. We recommend using the original packaging.
PRODUCT DISPOSAL
This product complies with European Directive 2012/19/EU on Waste Electrical and Electronic Equipment, known as WEEE, which establishes the legal framework applicable in the European Union for the disposal and recycling of electrical and electronic appliances. Do not throw this product into the bin. Take it to the nearest electrical and electronic waste treatment plant. The product may contain batteries. Remove them before disposing of the product and dispose in special containers approved for this purpose. We hope you are satisfied with this product.
The product may contain batteries. Remove them before disposing of the product and dispose in special containers approved for this purpose.
| Description Symbol Value Unit | | | |
| Maximum fan flow rate F 12.75 m3/min | | | |
| Fan power input P 39.4 W | | | |
| Service value SV 0.324 (m3/min)/W | | | |
| Standby power consumption | PSB 0.3 W | | |
| Fan sound power level LWA | 57.5 dB(A) | | |
| Maximum air velocity | C 4.11 meters/s | | |
| Measurement standard for service value | | IEC 60879:2019 – Comfort fans and regulators for household and similar purposes – Methods for measuring performance | |
FRANÇAIS
NOUS VOUS REMERCIONS D'AVOIR CHOISI UFESA. NOUS ESPÉRONS QUE CE PRODUIT RÉPOND À VOS BESOINS ET À VOS GOÛTS.
AVERTISSEMENT
VEUILLEZ LIRE ATTENTIVEMENT LE MODE D'EMPLOI AVANT D'UTILISER LE PRODUIT. CONSERVEZ-LE DANS UN ENDROIT SÛR POUR POUVOIR LE CONSULTER ULTÉRIEUREMENT.
DESCRIPTION
natural_image
Simple diagram of a control panel with a pointer and circular buttons (no text or symbols)
natural_image
Simple diagram with two rounded rectangles and a central circular icon containing a document or folder symbol (no text or labels)
INSTALLATION
natural_image
Pure electrical circuit lines without any symbols
natural_image
Simple diagram of a control panel with two circular buttons and a trash bin icon (no text or labels)
INSTAL·LACIÓ
natural_image
Diagram of a standing fan with rotating arm and upward arrow indicating rotation (no text or symbols)
Imatge 1
natural_image
Diagram of a vertical fan with rotating components and directional arrows indicating motion (no text or symbols)
Imatge 2
natural_image
Simple diagram of a control panel with a pointer and circular buttons (no text or symbols)
natural_image
Simple diagram with a circular icon containing a bar chart and a pointer, enclosed in an rounded rectangle (no text or symbols)
INSTALLAZIONE
natural_image
Simple diagram of a control panel with a pointer and circular buttons (no text or symbols)
natural_image
Simple diagram with a rectangular shape containing a grid and two circles, no text or symbols present.
natural_image
Pure electrical circuit lines without any symbols
INSTALLATION
natural_image
Diagram of a fan with rotating arm and upward arrow indicating rotation (no text or symbols)
Bild 1
natural_image
Diagram of a vertical fan with rotating arms and directional arrows indicating motion (no text or symbols)
Bild 2
natural_image
Simple diagram of a control panel with two circular buttons and a pointer (no text or symbols)
natural_image
Simple diagram with a rectangular shape containing a grid and two circular elements, no text or symbols present.
МОНТАЖ
natural_image
Diagram of a mechanical device with rotating components and directional arrows (no text or symbols)
الصورة ٢
natural_image
Diagram of a fan with directional arrows indicating rotation (no text or symbols)
الصورة 1
تحذیر
B&B TRENDS, SL. guarantees compliance of this product, for the use for which it is, during the period established by the legislation in force in the country of sale. In the case of breakdown during the term of this warranty, users are entitled to repair or else the replacement of the product at no charge if the former is unavailable, unless one of these options proves impossible to fulfil or is disproportionate. In this case, you can then opt for a reduction in price or cancellation of the sale, which must be dealt with directly with the sales vendor. This also covers replacement of spare parts provided that the product has been used according to the recommendations specified in this manual for both cases, and has not been tampered with by any third party that is not authorised by B & B TRENDS, SL. The warranty will not cover any parts subject to wear and tear. This warranty does not affect your rights as a consumer in accordance with the provisions in Directive 1999/44/EC for member states of the European Union.
USE OF WARRANTY
Customers must contact a B&B TRENDS, SL., authorised Technical Service for repair of the product. Since any tampering of the same by anyone not authorised by B&B TRENDS, SL., or the careless or improper use of the same shall render this warranty null and void. You must keep the purchase invoice, receipt or delivery docket in order to exercise your warranty rights. For technical service and after-sales care outside the Spanish territory, please submit your query to the point of sale where you purchased the item.
BON DE GARANTIE