GE-EL 1800/1 E - Blower EINHELL - Free user manual and instructions
Find the device manual for free GE-EL 1800/1 E EINHELL in PDF.

| Product Type | Corded electric leaf blower/vacuum |
| Brand | Einhell |
| Model | GE-EL 1800/1 E |
| Power supply | 230 V ~ 50 Hz, 1800 W |
| Rotation speed | 7000 to 13000 min⁻¹ (variable) |
| Max air speed | 300 km/h |
| Suction power (airflow) | 1080 m³/h |
| Collection bag volume | 50 L |
| Sound power level (LwA) | 103.6 dB(A) |
| Sound pressure level (LpA) | 92.3 dB(A) |
| Vibration (ahw) | 5.0 m/s² (uncertainty K = 1.5 m/s²) |
| Weight | 6.7 kg |
| Functions | Vacuum and blow |
| Electronic speed control | Yes |
| Safety device | Short-circuit protection switch (max 30 mA trip) |
| Minimum cable cross-section (extension cord) | 1.5 mm² |
| Protection class | II (double insulation) |
| Delivery contents | Suction tubes, collection bag, carrying strap, wheels, screws |
| Recommended maintenance | Clean after each use, empty the bag regularly, check the cable |
| Spare parts | Available from the manufacturer (ISC GmbH) |
Frequently Asked Questions - GE-EL 1800/1 E EINHELL
User questions about GE-EL 1800/1 E EINHELL
0 question about this device. Answer the ones you know or ask your own.
Ask a new question about this device
Download the instructions for your Blower in PDF format for free! Find your manual GE-EL 1800/1 E - EINHELL and take your electronic device back in hand. On this page are published all the documents necessary for the use of your device. GE-EL 1800/1 E by EINHELL.
USER MANUAL GE-EL 1800/1 E EINHELL
When using equipment, a few safety precautions must be observed to avoid injuries and damage. Please read the complete operating manual with due care. Keep this manual in a safe place, so that the information is available at all times. If you give the equipment to any other person, give them these operating instructions as well.
We accept no liability for damage or accidents which arise due to non-observation of these instructions and the safety information.
1. Safety information
General instructions
-Read the complete operating manual with due care. Acquaint yourself with the controls and how to use the tool.
- All persons (including children) who, for reasons of physical, sensory or mental ability or inexperience or lack of knowledge, are not in a position to be able to use this device safely, should not use the device unsupervised or without instruction by or from a responsible person. Children must always be supervised in order to ensure that they do not play with the device.
- Never allow children to use the tool.
- Never allow other persons who are not familiar with the operating instructions to use the tool. Contact your local government offices for information regarding minimum age requirements for operating the tool.
- Never use the tool when there are people – particularly children – or pets nearby.
The user is responsible for any accidents or hazards suffered by third parties or their property.
Preparation
Always wear sturdy footwear and long trousers when using the tool.
- Never wear loose fitting clothes or jewelry. They may get drawn into the suction opening. Rubber gloves and non-slip shoes are recommended when working outdoors. Wear a hair net if you have long hair.
Wear safety goggles while you work.
Use a dust mask when working on dusty jobs
Always check the tool, the power cable and the extension cable before using the tool. Only operate the tool when it is in good working order and is not damaged in any way. Damaged parts have to be replaced immediately by a qualified
electrician.
- Never use the tool if any of its safety devices or guards are damaged or if any safety attachments such as deflectors and/or grass catching devices are missing.
- When working outdoors, use only extension cables which are approved for outdoor use. Extension cables must have a minimum cross-section of 1.5mm^2 . The plug connections must be splash-proof.
Operation
Always trail the power cable behind the tool.
- If the power cable or extension cable is damaged, pull the plug out of the socket. NEVER TOUCH THE CABLE BEFORE THE PLUG HAS BEEN PULLED OUT OF THE SOCKET.
-Do not carry the tool by its power cable.
Always pull out the power plug:
- when the tool is not being used, when it is being transported or when you leave it unsupervised.
- when you are checking the tool, cleaning it or removing blockages.
- when you want to carry out cleaning or maintenance work on the tool or replace accessories.
-
after the tool impacts with foreign bodies or you notice unusual vibrations.
-
Use the tool only in broad daylight or in well-lit conditions.
-Do not underestimate the forces involved. Make sure you stand squarely and keep your balance at all times.
-If possible, avoid using the tool on wet grass. - Ensure that you maintain a steady foothold particularly while working on slopes.
Always walk. Never run.
Always keep the ventilation opening clean. - Never direct the vacuum/blow hole at persons or animals.
The machine may only be used at reasonable times of the day, i.e. not in the early morning or late evening when it will be a nuisance to other people. Permitted times of use specified by local authorities must be observed.
The machine must be run at the lowest possible motor speed required to carry out the work. - Remove all foreign objects with a rake and brush before starting any blowing work.
Where conditions are dusty, dampen the surface a little or use a sprinkler attachment. - Use the full-length blower nozzle extension so that the air current can work near to the ground.
GB
- Watch out for children, pets, open windows etc. and blow the foreign objects safely away from them.
Maintenance and storage
- Check that all nuts, bolts and screws are securely tightened in order to be sure that the machine is in a safe working condition.
Frequently check the debris bag for signs of wear and deformation. - Use only genuine accessories and spare parts.
For your own safety, replace worn or damaged parts without delay.
Electric tools should be kept in a dry place when not in use.
If the mains cable for this device is damaged, it must be replaced by the manufacturer or its after-sales service or similarly trained personnel to avoid danger.
The tool can be plugged into any socket-outlet (with 230 V AC) that is equipped with a 10A fuse or higher. The socket-outlet has to be safeguarded by an earthquake circuit breaker (e.l.c.b.). The operating current must not exceed 30mA .
CAUTION
Read all safety regulations and instructions.
Any errors made in following the safety regulations and instructions may result in an electric shock, fire and/or serious injury.
Keep all safety regulations and instructions in a safe place for future use.
Explanation of the warning signs on the equipment (see Fig. 9)
- Read the directions for use before operating the tool.
- Do not use the tool in rain or snow. Do not expose the tool to wet conditions.
- Keep all other persons away from the danger zone.
- Wear goggles and ear muffs.
- Switch off the tool and pull out the power plug before carrying out any cleaning or maintenance work.
- Rotating parts. Keep your hands and feet away from all openings.
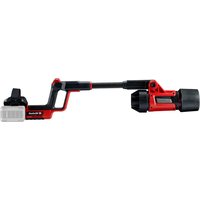
2. Layout (Fig. 1/2)
- Front suction tube
- Rear suction tube
- Additional handle
- Carrying strap
- ON/OFF switch
- Power cable
- Debris bag
- Selector switch for vacuum/blower
- Castors
- Speed controller
- Wheel support
- Screw for fitting the suction tube
- Screw for fitting the housing
- Screw (short) for fitting the housing
3. Items supplied
- Open the packaging and take out the equipment with care.
- Remove the packaging material and any packaging and/or transportation braces (if available).
Check to see if all items are supplied.
Inspect the equipment and accessories for transport damage.
If possible, please keep the packaging until the end of the guarantee period.
IMPORTANT
The equipment and packaging material are not toys. Do not let children play with plastic bags, foils or small parts. There is a danger of swallowing or suffocating!
Original operating instructions
Safety instructions
4. Proper use
The garden blower vac is designed to handle only foliage and garden refuse such as grass and small branches. Any other use is prohibited.
The equipment is to be used only for its prescribed purpose. Any other use is deemed to be a case of misuse. The user / operator and not the manufacturer will be liable for any damage or injuries of any kind caused as a result of this.
Please note that our equipment has not been designed for use in commercial, trade or industrial applications. Our warranty will be voided if the machine is used in commercial, trade or industrial businesses or for equivalent purposes.
Residual risks
Even if you use the equipment in accordance with the instructions, certain residual risks cannot be eliminated. The following hazards may arise in connection with the equipment's construction and layout:
Do not wear loose clothing or jewelry which may get drawn into the air supply opening. Keep long hair away from the air supply opening.
- Never use the equipment if any of its safety devices or guards are damaged or if any safety devices are missing.
5. Technical data
| AC motor 230V ~ / 50 Hz | |
| Output 1800 watts | |
| no load speed n | 7000-13000 min-1 |
| Protection class II / ☑ | |
| Air velocity 300 km/h | |
| Suction rate 1080 m | $/h |
| Volume of debris bag approx. 50 l | |
| Sound volume level LWA | 103.6 dB (A) |
| K uncertainty 1.0 dB | |
| Sound pressure level LpA | 92.3 dB (A) |
| Vibration ahy | 5.0 m/s2 |
| K uncertainty 1.5 m/s | 2 |
| Weight 6.7 kg | |
6. Before starting the equipment
Before you connect the equipment to the mains supply make sure that the data on the rating plate are identical to the mains data.
Always pull the power plug before making adjustments to the equipment.
6.1. Mounting the vacuum tube (Fig. 3a-3g)
Plug together the front and rear suction tube (Fig. 3a) and secure with the screw (Fig. 3b / Item 12).
Now slide the complete suction tube into the motor housing (Fig. 3c) and secure with the screw (Fig. 3d / Item 13+14).
- Slide the wheel support (Fig. 3e / Item 11) onto the front suction tube as far as the stop (Fig. 3e / Item A) and secure with the screw (Fig. 3e/Item B).
- Remove the thumb screw (Fig. 3f / Item A) and secure the axle (Fig. 3g / Item 9) with the thumb screw.
- When the thumb screw is slackened, the axle can be adjusted in height in accordance with the relevant requirements. Then retighten the thumb screw.
Note: Please note that the two vacuum tubes must always be joined together before they are mounted on the motor housing, and that they must never be taken apart when mounted!
6.2. Mounting the debris bag (Fig. 4a + 4b)
Hang the hook on the suction tube (Fig. 4a) Then slip the debris bag over the socket on the motor housing (Fig. 4b). It engages correctly when it makes an audible click.
Start up the tool only after the mounting has been fully completed. Always inspect the tool power cable for damage before starting up. The tool may only be used if the cord is in flawless condition.
GB
7. Operation
7.1 Sizing the strap (Fig. 1)
Size the length of the carrying strap (4) so that the vacuum tube just clears the ground. The guide rollers (9) at the bottom end of the suction tube will help you to maneuver the suction tube on the ground.
7.2. Adjusting the additional handle (Fig. 5)
To do so, undo the lever (Fig. 5 / Item A) by flipping it open. Now set the additional handle (Fig. 5 / Item 3) to the required position and flip back the lever.
7.3 Connecting the tool to the power supply and switching on (Fig. 6)
The tool can be plugged into any socket-outlet (with 230 V AC) that is equipped with a 10A fuse or higher. The socket-outlet has to be safeguarded by an earthquake circuit breaker (e.l.c.b.). The operating current must not exceed 30mA .
Insert the tool plug into the power cord coupling (extension).
- Secure the power cord with the sleeve provided on the tool as shown.
To switch on, press and hold the ON/OFF switch (5).
To switch off, let go of the ON/OFF switch (5).
7.4 Selecting the mode of operation
7.4.1 Suctioning (Fig. 7)
Turn the lever (Fig. 7/Item 8) to position A. You can do this both when the device is at a standstill and while it is running.
7.4.2 Blowing (Fig. 7)
-
Turn the lever (Fig. 7/Item 8) to position B. You can do this both when the device is at a standstill and while it is running.
-
Channel the air stream forward and walk slowly to blow foliage or garden refuse into a pile or to clear out hard-to-reach places.
Important!
Empty the debris bag before blowing. Otherwise, the material that has been vacuumed up could drop out.
7.5 Emptying the debris bag and pre-screen (Fig. 1)
Empty the debris bag (7) in good time. When the bag is heavily loaded with material, vacuum power is considerably reduced. Deposit organic refuse at a compost site.
- Switch off the tool and pull out the plug.
Open the zipper on the debris bag (7) and shake
out the material.
Close the zip on the debris bag (7) again.
7.6 Speed control (Fig. 8a)
The device is fitted with an electronic speed controller. To use it, turn the speed controller (Fig. 8a/ Item 10) to the desired position. Use the device only with the speed which is actually required and do not let it run at a speed which is faster than necessary.
8. Replacing the power cable
If the power cable for this equipment is damaged, it must be replaced by the manufacturer or its after-sales service or similarly trained personnel to avoid danger.
9. Cleaning, maintenance and ordering of spare parts
Always pull out the mains power plug before starting any cleaning work.
9.1 Cleaning
- Keep all safety devices, air vents and the motor housing free of dirt and dust as far as possible. Wipe the equipment with a clean cloth or blow it with compressed air at low pressure.
We recommend that you clean the device immediately each time you have finished using it.
Clean the equipment regularly with a moist cloth and some soft soap. Do not use cleaning agents or solvents; these could attack the plastic parts of the equipment. Ensure that no water can seep into the device.
After shaking out the debris bag, turn it inside out and thoroughly clean it in order to prevent mould and unpleasant odors from forming.
You can use soap and water to clean out a heavily soiled debris bag.
Rub a bar of dry soap across the zipper teeth if the zipper becomes difficult to pull.
Clean the vacuum/blower tube with a brush upon evidence of dirt and grime. - Dirt and grime can make the switch (blower/vacuum) more difficult to operate as a result of the material that swirls up off the ground. When this occurs, simply flip the switch back and forth a few times, which should bring it back to the normal feel.
To clean the interior of the housing undo the screw connection (Fig. 8a / Item A) and remove the cover (Fig. 8a / Item B). Never use cleaning
agents or liquids for cleaning purposes. Remove deposits with a brush, a dry cloth or compressed air. When you fit the cover, make sure that the nib at the bottom end of the cover (Fig. 8b / Item A) is inserted into the corresponding recess in the housing (Fig. 8b / item B).
Important: If the cover is not correctly closed, a microswitch will interrupt the power supply and the equipment cannot operate properly. For this reason, always check that the cover is properly fitted and secured.
9.2 Maintenance
Should the tool experience problems beyond those mentioned above, let only an authorized professional or a customer service shop perform an inspection.
There are no parts inside the equipment which require additional maintenance.
9.3 Ordering replacement parts:
Please quote the following data when ordering replacement parts:
-Type of machine
Article number of the machine
-Identification number of the machine
Replacement part number of the part required
For our latest prices and information please go to www.isc-gmbh.info
10. Storage
Store the equipment and accessories out of children's reach in a dark and dry place at above freezing temperature. The ideal storage temperature is between 5 and 30^ . Store the electric tool in its original packaging.
11. Disposal and recycling
The unit is supplied in packaging to prevent its being damaged in transit. This packaging is raw material and can therefore be reused or can be returned to the raw material system.
The unit and its accessories are made of various types of material, such as metal and plastic. Defective components must be disposed of as special waste. Ask your dealer or your local council.
GB
12. Troubleshooting guide
| Fault Possible cause | Remedy | |
| Motor does not start | No voltage present. | Check the cord and fuses |
| Power cord defective | Check the power cord | |
| Motor terminals disconnected | Have the unit checked by a customer service workshop | |
| Suction tube not mounted correctly | Mount the tube correctly | |
| The cleaning cover is not mounted correctly. | Mount the cover correctly | |

Attention!
Imprecision K 1,0 dB
Notified Body: Notified Body No.: Reg. No.:
2000/14/EC_2005/88/EC
Annex V
Annex VI
Noise: measured LWA = 103.6 dB (A); guaranteed LWA = 105 dB (A)
P = 1,8 kW; L/0 = cm
Notified Body:
2004/26/EC Emission No.:
Standard references: EN 60335-1; IEC 60335-2-100; EN 15503; EN 62233; EN 55014-1; EN 55014-2; EN 61000-3-2; EN 61000-3-3
Weichselgartner/General Manager Liu Product-Management

First CE: 13 Archive-File/Record: NAPR009343 Art-No.: 34.332.26 I-No.: 11023
Subject to change without notice Wiesenweg 22, D-94405 Landau/Isar
Documents registrar: Alexander Scheifl


Nur fur EU-Länder
For EU countries only
Never place any electric tools in your household refuse.
To comply with European Directive 2002/96/EC concerning old electric and electronic equipment and its implementation in national laws, old electric tools have to be separated from other waste and disposed of in an environment-friendly fashion, e.g. by taking to a recycling depot.
Recycling alternative to the demand to return electrical devices:
As an alternative to returning the electrical device, the owner is obliged to cooperate in ensuring that the device is properly recycled if ownership is relinquished. This can also be done by handing over the used device to a returns center, which will dispose of it in accordance with national commercial and industrial waste management legislation. This does not apply to the accessories and auxiliary equipment without any electrical components which are included with the used device.
The reprinting or reproduction by any other means, in whole or in part, of documentation and papers accompanying products is permitted only with the express consent of ISC GmbH.
F
All of our products undergo strict quality checks to ensure that they reach you in perfect condition. In the unlikely event that your device develops a fault, please contact our service department at the address shown on this guarantee card. You can also contact us by telephone using the service number shown. Please note the following terms under which guarantee claims can be made:
- These guarantee conditions regulate additional guarantee services. Your statutory guarantee claims are not affected by this guarantee. Our guarantee is free of charge to you.
- Our guarantee only covers defects suffered by the device which have been verifiably caused by a material or manufacturing fault and is limited to the rectification of such defects or the replacement of the device at our discretion.
Please note that our devices are not designed for use in commercial, trade or professional applications. A guarantee contract will not be created if the device has been used by commercial, trade or industrial business or has been exposed to similar stresses during the guarantee period.
-
The following are not covered by our guarantee:
-
Damage to the device caused by a failure to follow the assembly instructions or due to incorrect installation, a failure to follow the operating instructions (for example connecting it to an incorrect mains voltage or current type) or a failure to follow the maintenance and safety instructions or by exposing the device to abnormal environmental conditions or by lack of care and maintenance.
- Damage to the device caused by abuse or incorrect use (for example overloading the device or the use or unapproved tools or accessories), ingress of foreign bodies into the device (such as sand, stones or dust, transport damage), the use of force or damage caused by external forces (for example by dropping it).
-
Damage to the device or parts of the device caused by normal or natural wear or tear or by normal use of the device.
-
The guarantee is valid for a period of 24 months starting from the purchase date of the device. Guarantee claims should be submitted before the end of the guarantee period within two weeks of the defect being noticed. No guarantee claims will be accepted after the end of the guarantee period. The original guarantee period remains applicable to the device even if repairs are carried out or parts are replaced. In such cases, the work performed or parts fitted will not result in an extension of the guarantee period, and no new guarantee will become active for the work performed or parts fitted. This also applies if an on-site service is used.
- Please report the defective device on the following internet address to register your guarantee claim: www.isc-gmbh.info. If the defect is covered by our guarantee, then the item in question will either be repaired immediately and returned to you or we will send you a new replacement device.
Of course, we are also happy offer a chargeable repair service for any defects which are not covered by the scope of this guarantee or for units which are no longer covered. To take advantage of this service, please send the device to our service address.
Also refer to the restrictions of this warranty concerning wear parts, consumables and missing parts as set out in the service information in these operating instructions.

BULLETIN DE GARANTIE
Chere Cilente, Cher Client
Aeiotun neaata, aeiotue neatn
ta npoiovtmaac unokevitai oauotnpoleyxo noiotntac.Eav n oukeun autnnapo'da auta kanoet dev
Leioupynoe auoya, uouumaote nolu kai oac napakaloume va anotavtheta npoc to tmuac
Eumnpertnonc nelatuw otmydeltauvon nou avapepetal otnykapta autn. Euxapiotw ciaota eai
tnlepwika ot n diaeon acotov apioo oepic nou avapepetal otnykapta eyyunons. TnV axiowntnc
eyyunonc loxouv ta eNc: