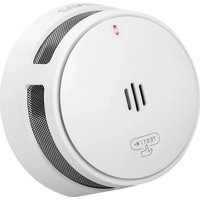
S10 - Smoke detector SAVS - Free user manual and instructions
Find the device manual for free S10 SAVS in PDF.


| Product Type | Photoelectric Smoke Detector |
| Brand | SAVS |
| Model | S10 |
| Dimensions (diameter × height) | 81.5 mm × 51.6 mm |
| Weight (with battery) | 110 g |
| Power Supply | CR123A 3 V Lithium Battery (non-replaceable) |
| Battery Life | 10 years |
| Sensor Type | Split-Spectrum Photoelectric |
| Alarm Volume | 85 dB(A) at 3 meters |
| Alarm Mode | Visual (flashing red light) and audible (buzzer) |
| Alarm Threshold | 0.2 to 0.3 dB/m |
| Detection Area | 20 to 40 m² (ceiling height < 8 m) |
| Operating Temperature | -10 °C to 55 °C |
| Operating Humidity | Up to 95% RH (non-condensing) |
| Standby Current | ≤ 15 μA |
| Alarm Current | ≤ 35 mA |
| Certification | EN 14604:2005+AC:2008 |
| Installation | On ceiling or sloped roof, at least 500 mm from walls |
| Maintenance | Weekly test, annual vacuum cleaning with soft brush |
| Silence Function | By TEST button or infrared remote (9 min pause) |
| Low Battery Indication | Red light flashes and beeps every 60 seconds |
| Package Contents | Detector, mounting plate, 2 screws, 2 expansion bolts, manual |
Frequently Asked Questions - S10 SAVS
User questions about S10 SAVS
0 question about this device. Answer the ones you know or ask your own.
Ask a new question about this device
Download the instructions for your Smoke detector in PDF format for free! Find your manual S10 - SAVS and take your electronic device back in hand. On this page are published all the documents necessary for the use of your device. S10 by SAVS.
USER MANUAL S10 SAVS
natural_image
Circular diagram with concentric rings and a central vertical bar, no text or symbols presentV1.0.0
1 Important Safeguards and Warnings
EN
This manual will help you to use the Device properly. Read the manual carefully before using the Device, and keep it well for future reference.
Operation Requirements

WARNING
- Never ignore any alarm. Failure to respond may lead to serious injury or death.
- Constant exposure to high or low temperature or high humidity may reduce battery life.

CAUTION
• Make sure that the power supply of the device works properly before use.
- Use the device according to the operating environment.
- Only use the device within the rated power range.
- Transport, use and store the device under allowed humidity and temperature conditions.
- Prevent liquids from splashing or dripping on the device. Make sure that there are no objects filled with liquid on top of the device to avoid liquids flowing into it.
- The smoke alarm is only designed for indicating the presence of smoke, but it cannot detect gas, heat or flames.
EN Installation Requirements

WARNING
Failure to properly install and operate this device will prevent proper operation of the Device and will prevent its response to fire hazards.

CAUTION
- Observe all safety procedures and wear required protective equipment provided for your use while working at heights.
- Do not expose the device to direct sunlight or heat sources.
- Keep the original packing material well because you might need it to pack the device and send it back for repair.
• Make sure the application scenario conforms to installation requirements. Contact your local retailer or customer service center if there is any problem. - All installation and operations shall conform to your local electrical safety requirements, fire protection regulations, and other relevant regulations.
Maintenance Requirements
- Do not clean the device with any cleaning products.
- Do not paint the device. Paint will seal the vents and interfere with the sensor's ability to detect smoke.
2 Introduction
2.1 Product information
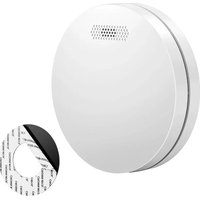
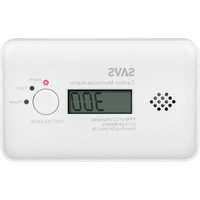
Smoke Alarm (hereinafter referred to as the device) is designed to continuously monitor smoke concentration. Adopting advanced split-spectrum photoelectric chamber and a built-in high-volume buzzer, it responds quickly and becomes highly sensitive with stable performance and low false alarm. Once the surrounding smoke concentration reaches the alarm value, it will promptly send out visual and audible alarm signal to remind the user to take immediate measures. This product is designed for household or similar residential application such as family home or apartment.
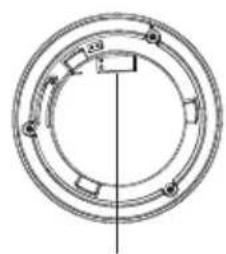
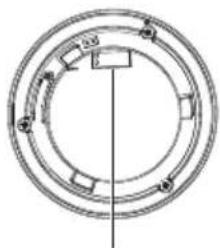
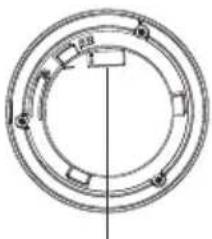
2.2 Product profile
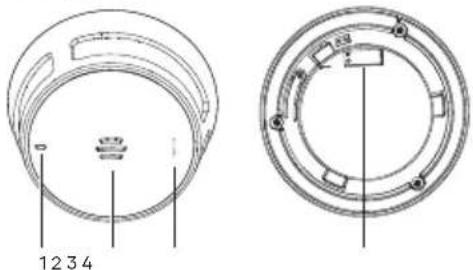
EN
| No. | Name | Introduction |
| 1 | Indicator | Standby: Green indicator flashes once per minuteAlarm: Red indicator flashes once per secondFault: Red indicator flashes twice per minute |
| 2 | Buzzer | Alarm Sound: 85 dB (A) at 3 m (9.84 ft) |
| 3 | TEST / ■ | Verify the normal workingStop the alarm sound |
| 4 | Battery Compartment | Built-in battery, not replaceable by user |
3 Technical Information
| Specification | Introduction |
| Sensor Type | Photoelectric |
| Power Source | 3V CR123A lithium battery (non-replaceable) |
| Battery Life | 10 years |
| Alarm Method | Visual and audible alarm |
| Pre-Set Alarm Value | 0.2 dB/m-0.3 dB/m |
| Operating Current | • Monitoring current: ≤15uA• Alarm current: ≤35mA |
| Operating Temperature | -10°C to +55°C (+14°F to +131°F) |
| Operating Humidity | ≤95% RH (non condensing) |
| Detecting Area | When the height of the space is less than 8 m (26.25 ft), the protection area of a device is 20 m2-40 m2 |
| Dimensions | Φ81.5 mm × H51.6 mm ( φ 3.21" × H2.03") |
| Weight (with battery) | 110 g (0.24 lb) |
| Certification | EN 14604:2005+AC: 2008 |
EN EN 4. Device Installation
4.1 Packing List
Check the package according to the following checklist. If you find device damage or any loss, contact the after-sales service.
Table 4-1 Checklist
| Name Quantity | |
| Smoke Alarm | 1 |
| Self-tapping Screw | 2 |
| Expansion Bolt | 2 |
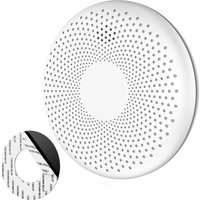
| Mounting Plate | 1 |
| User's Manual | 1 |
4.2 Installation Position
CAUTION
This device is intended for use in ordinary indoor locations of family living units. Construction and layout of individual dwellings will vary, so this should be regarded as a reference only. For further guidance, please check with your local fire station.
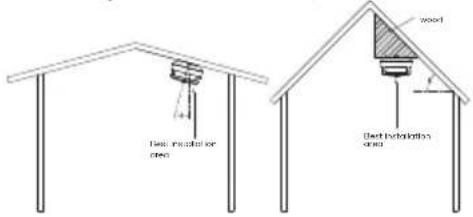
Figure 4-1 Overall layout
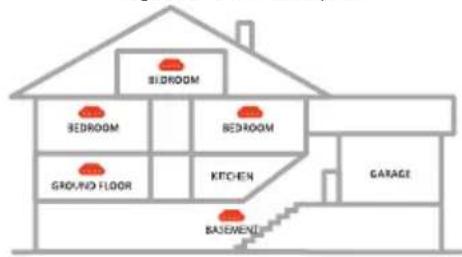
- Installed on the ceiling. If the device is installed on the ceiling, install at a distance of 20 inches (500 mm) away from the corners of the room. Figure 4-2 Installation position (1)
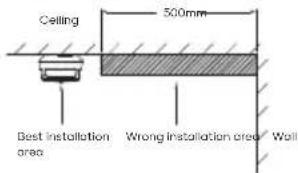
• Installed on the sloping roof. When the slope is less than 45irc , the appropriate distance is 20 inches (500 mm). When the slope is more than 45irc , a wood should be installed.
Figure 6-3 Installation position (2)
4.3 Installation Steps
Follow below steps to install the device properly.
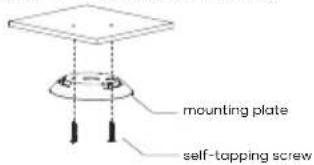
Step 1 Choose suitable place to install your smoke alarm.
Step 2 Drill holes ( 6 mm [0.24°]) on the wall, and then align the screw holes on the wall with the expansion bolts.
Step 3 Fix the mounting plate with self-tapping screws.
Figure 4-4 Installation step (1)
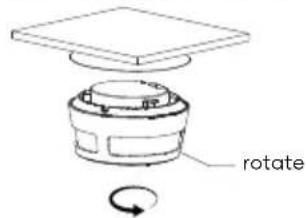
Step 4 Install the Device.
Rotate the device according to the corresponding position and direction as shown in the figure.

WARNING
The device will automatically power up after rotating. Please lock the alarm firmly to activate the device.
Figure 4-5 Installation step (2)
EN EN Test and Maintenance
5.1 Test
After the installation of the device or regular maintenance, a test must be carried out to confirm that the Device is operating properly. During the testing process, the defective device should be addressed according to "FAQ" and "Maintenance", and then tested again. If it fails to complete the test successfully, please send the device to the manufacturer for repair.
Device self-test
Press TEST / 📁, indicator light flashes quickly and buzzer beeps.
Silence/Pause the alarm
When the smoke concentration reaches a predetermined threshold, the indicator light flashes, and the buzzer beeps (85 dB). If a false alarm is triggered, you can silence it by pressing TEST / ▶× on the device to stop the alarm sound.
CAUTION
You can silence this device with an infrared remote controller by pressing the button on it and the device will pause the alarm. The alarm will automatically exit silence mode after 9 minutes.
Low voltage
When the battery voltage is lower than a certain threshold, indicator flashes and the buzzer beeps every minute until the battery is depleted. Please replace the device immediately or contact technical support for advice.
5.2 Maintenance
To keep your device in good working condition, please follow these requirements.
- Simulate fire alarm test: Test the device once a week.
Under normal working conditions, pressTEST/■× to ensure that the device can work normally. If there is a malfunction, please repair it in time. After cleaning, please install the device and test again.
- Clean the shell: Clean the device at least once per year (recommended).
Keep the device free of dust or inserts by gently vacuuming the shell with a soft brush attachment when required. Avoid cleaning solutions on the device to prevent the possibility of contaminating the sensor.
- Do not paint the device. Paint will seal the vents and interfere with the sensor's ability to work normally.
EN EN O Frequently Asked Questions
| Problem Solutions | |
| Your smoke alarm does not sound during testing | · If testing immediately after first activating the alarm, you should allow a few seconds for the alarm to set the before testing.· Make sure you press firmly. |
| Your smoke alarm chirps intermittently | · Check the location of your smoke alarm (see "Installation Position").· Clean the smoke alarm (see "Test and Maintenance"). |
| The LED indicator flashes red and the alarm sounds one beep every 60 seconds | · The device is under low battery condition, please replace the device immediately.· Please contact technical support for advice. |
7 Disposal

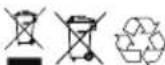
Waste electrical products should not be disposed of your other household waste. Please dispose in an environmentally friendly manner, and strictly follow the local regulations regarding the disposal or recycling of the electrical device.

WARNING
Do not burn or dispose of in fire.
8 Warranty and Contact
If you need after-sales service, please contact your local dealer or retailer.
IVendor B.V.
Docterskampstraat 5
5222 AM 's-Hertogenbosch
The Netherlands
+31(0)85-0043909

CE 23 RoHS 60 7781
1006-CPR-MC 08260090 CE-BC001 EM4804:2006-NC2005

natural_image
Pure diagram of a circular mechanical component with internal curved lines and no text or symbols1234
natural_image
Pure mechanical diagram showing concentric rings with mounting holes and a central vertical axis (no text or symbols)2.1 INFORMATIONS SUR LE PRODUIT
FR
natural_image
Technical line drawing of a circular mechanical component with internal features, shown from two views (top and side), no text or symbols present.FR
natural_image
Top-down schematic of a circular mechanical component with internal channels and two vertical lines (no text or symbols)1234
natural_image
Pure mechanical diagram showing concentric circular components with no text or symbolsnatural_image
Cross-sectional diagram of a mechanical component with internal features (no text or labels)1234
natural_image
Pure mechanical diagram showing concentric rings with no text, numbers, or symbols

- Important Safeguards and Warnings
- Operation Requirements
- WARNING
- CAUTION
- EN Installation Requirements
- Maintenance Requirements
- Introduction
- Product information
- EN EN 4. Device Installation
- Packing List
- Installation Position
- Installation Steps
- EN EN Test and Maintenance
- Test
- Device self-test
- Silence/Pause the alarm
- Low voltage
- Maintenance
- Disposal
- Warranty and Contact
- INFORMATIONS SUR LE PRODUIT
- FR
Brand : SAVS
Model : S10
Category : Smoke detector