
Sweet Candy 2in1 - Baby products Giordani - Free user manual and instructions
Find the device manual for free Sweet Candy 2in1 Giordani in PDF.


User questions about Sweet Candy 2in1 Giordani
0 question about this device. Answer the ones you know or ask your own.
Ask a new question about this device
Download the instructions for your Baby products in PDF format for free! Find your manual Sweet Candy 2in1 - Giordani and take your electronic device back in hand. On this page are published all the documents necessary for the use of your device. Sweet Candy 2in1 by Giordani.
USER MANUAL Sweet Candy 2in1 Giordani
natural_image
Simple line drawing of a hat and umbrella with 'C' labels, no text or symbols present[Non-Text]
LEGGERE TUTTE LE ISTRUZIONI
PRIMA DI MONTARE
E UTILIZZARE IL GIRELLO.
CONSERVARE LE ISTRUZIONI
IF THESE INSTRUCTIONS
ARE DISREGARDED,
READ CAREFULLY AND KEEP
FOR FUTURE REFERENCE.
WARNING! TO BE ASSEMBLED
BY AN ADULT!
FOR TECHNICAL OR COMMERCIAL REASONS, PRG RESERVES THE RIGHT, AT ANY TIME AND ALSO ONLY IN A SPECIFIC COUNTRY, TO MODIFY THE TECHNICAL CHARACTERISTICS OF THE MODELS DESCRIBED IN THIS LEAFLET, AND/OR THE SHAPE, TYPE AND NUMBER OF THE ACCESSORIES SUPPLIED.
E
Check that you have all the parts for this model BEFORE assembling your product. No tools required.
A. 2 wheels
B. 2 rear fixed wheels
C. 6 safety rubbers
D. Large spoiler
E. Foot rest
F. Baby walker frame
G. Padded seat
H. Toy bar with toys
natural_image
Diagram of a mechanical component with a circular arrow indicating direction (no text or symbols)
text_image
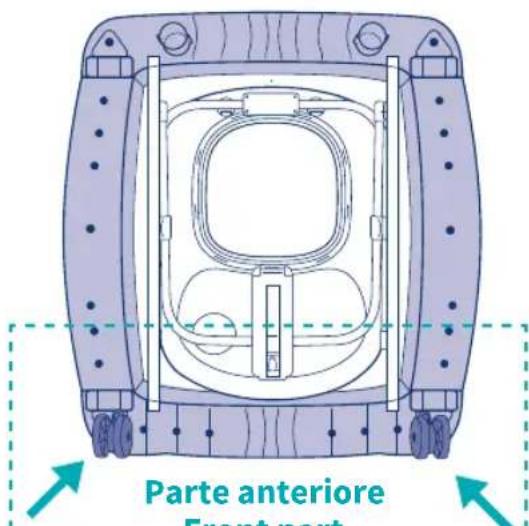
Parte anteriore Front partParte anteriore Front part Parte frontal Parte delantera Μπροστινή πλευρά Voorkant Partie avant
2
natural_image
Diagram of a mechanical component with a top view and a side view showing a circular outline (no text or symbols)
Parte posteriore Back part
Parte trasera
Parte traseira
Πίσω πλευρά
Achterkant
Partie arrière
natural_image
Technical line drawing of a mechanical component with no visible text or symbols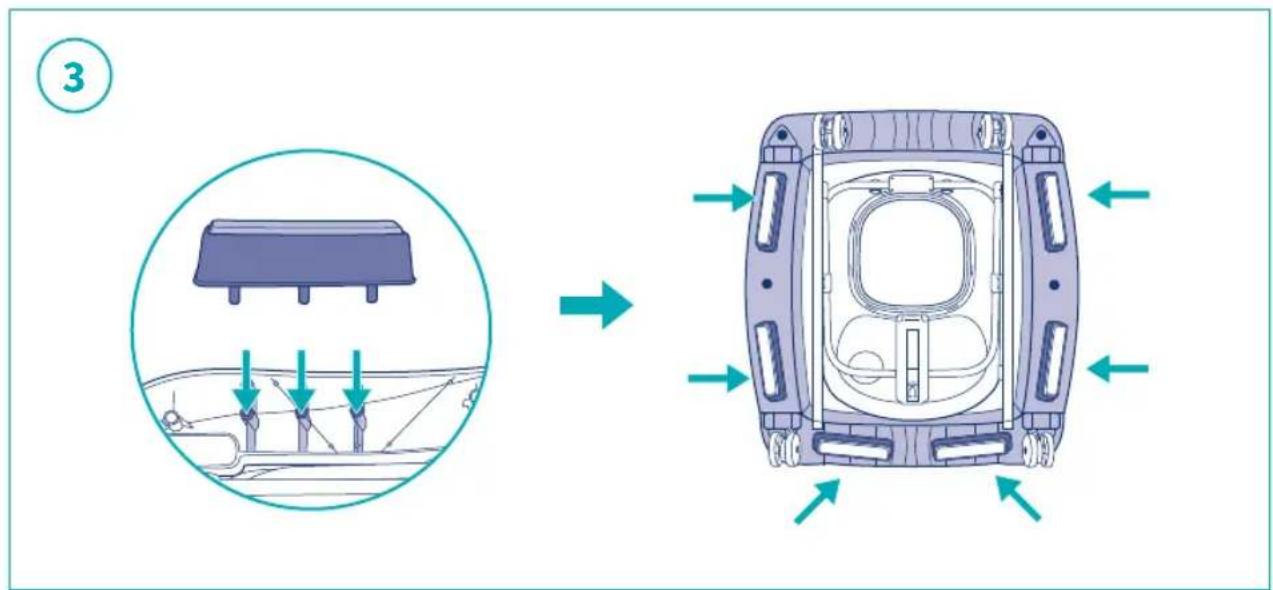
text_image
Diagram illustrating the assembly of a vehicle's internal components, showing before-and-after assembly with directional arrows.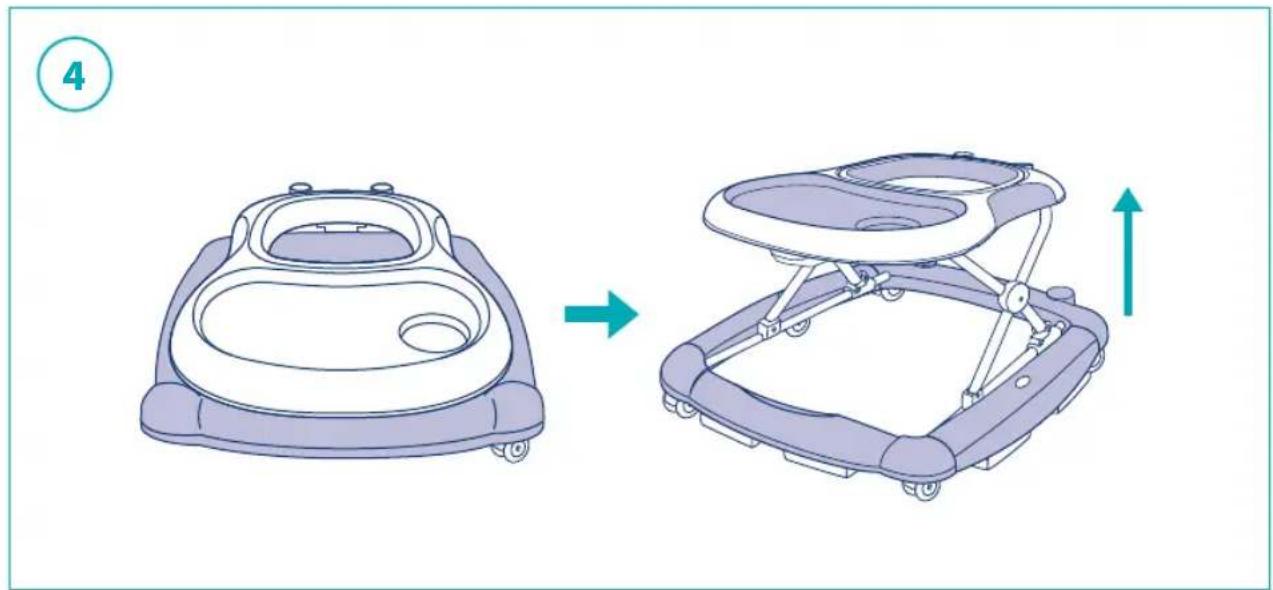
natural_image
Diagram showing a device before and after assembly, with no visible text or symbols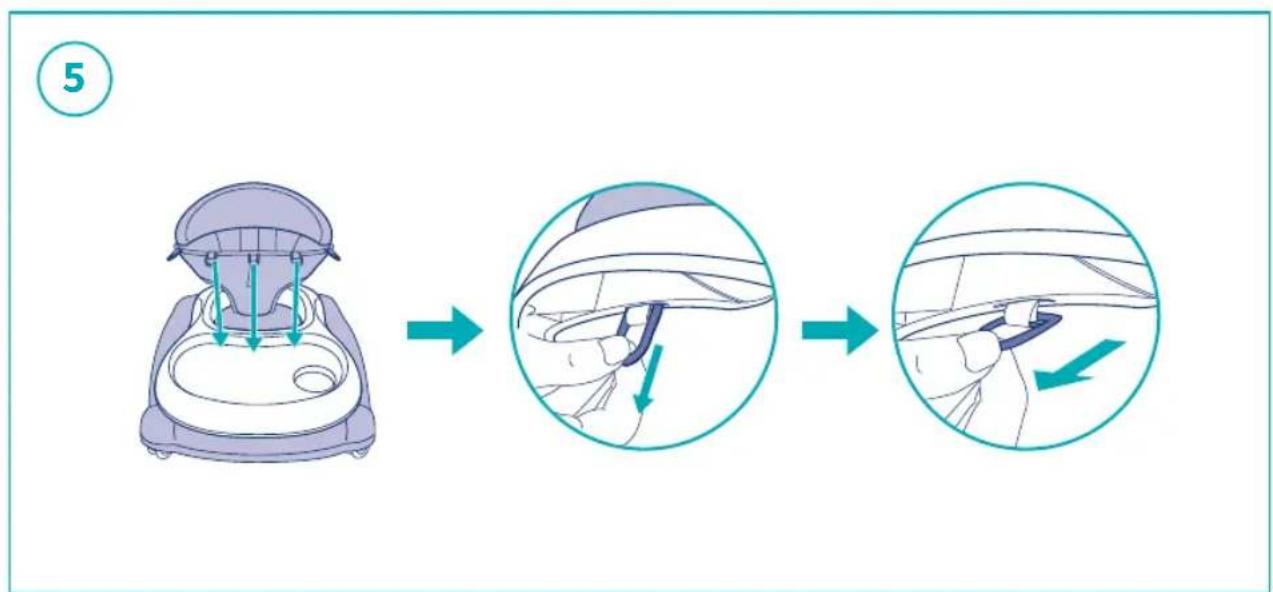
text_image
5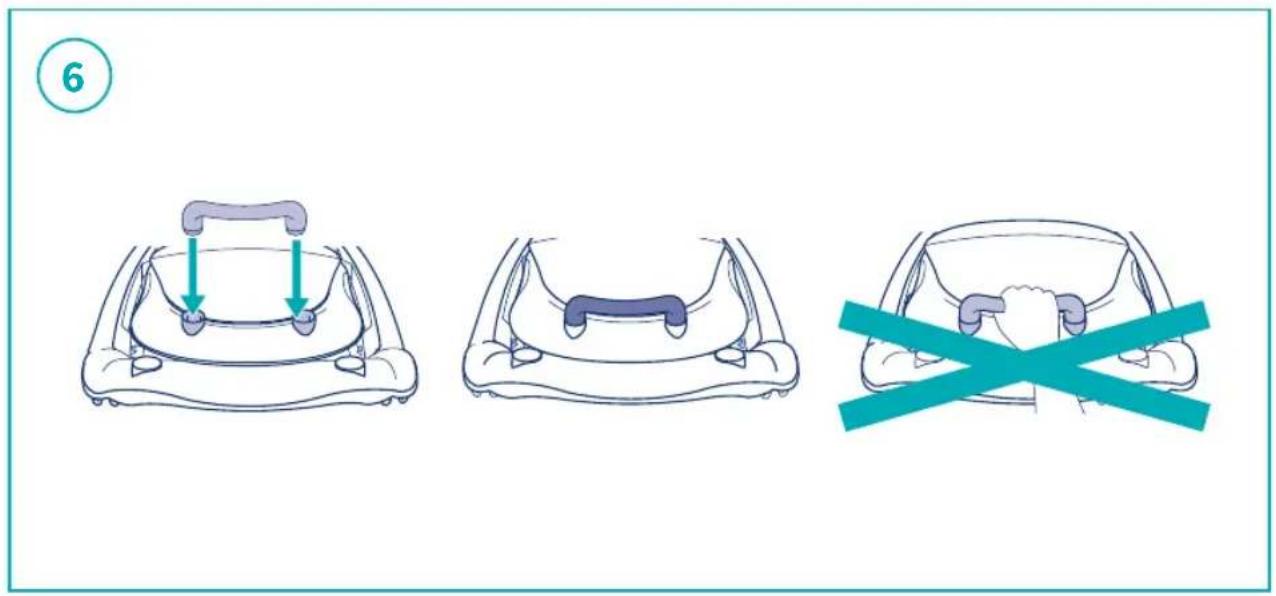
text_image
6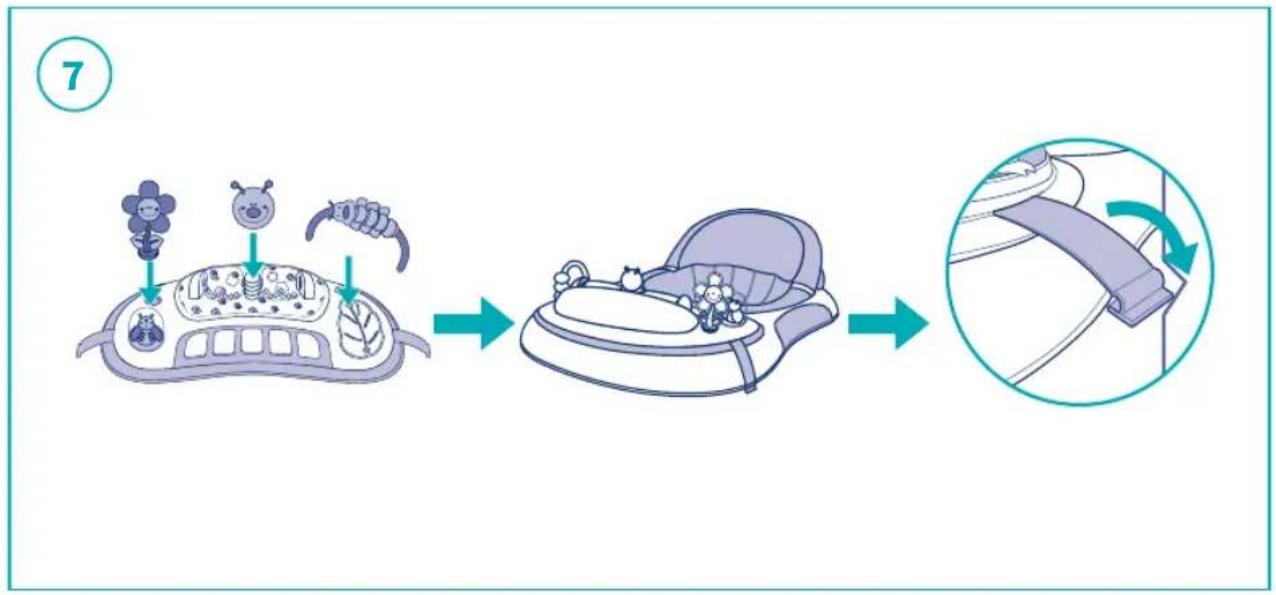
flowchart
graph LR
    A["Infant: Dog, Bird, Egg"] --> B["Car Seatbelt"]
    B --> C["Backseat with cat, elephant, mouse, and egg icons"]
    C --> D["Car Seatbelt with arrow, arrow, and seatbelt icon"]
text_image
Diagram illustrating a mechanical assembly process with labeled parts and directional arrows indicating motion or movement.9
natural_image
Illustration of a baby walker with floral accessories and wheels (no text or symbols)10
natural_image
Top-down diagram of a vehicle or device with a curved arrow indicating direction, enclosed in a circular frame (no text or symbols)

natural_image
Illustration of a hand pressing down on a rectangular object with an upward arrow, enclosed in a circular frame (no text or symbols)
natural_image
Top-down view of a purple TV set inside a circular frame with grid lines (no text or symbols)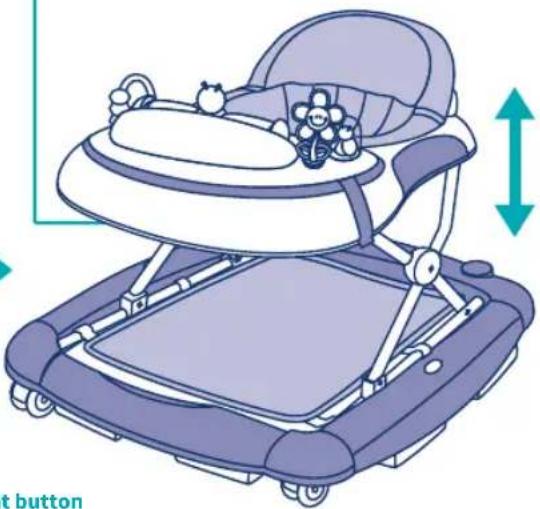
natural_image
Illustration of a baby car with a seat, wheels, and a double-headed arrow indicating vertical motion (no text or symbols)Pulsante anteriore / Front button
Pulsador frontal / Botão frontal
Μπροστινό πλήκτρο / De voorzijde aandrukken
Presser le devant
11
text_image
Diagram illustrating the use of a car seatbelt device, showing the left side with a circular diagram and the right side with a baby seatbelt device.12
text_image
Diagram illustrating the step-by-step installation of a car's steering wheel, showing hand positioning and steering wheel assembly.Pulsante anteriore / Front button
Pulsador frontal / Botão frontal
Μπροστινό πλήκτρο / De voorzijde aandrukken
Presser le devant
13
text_image
BAGFCDE
14
flowchart
graph TD
    A["Power Terminal"] --> B["Battery Switch"]
    B --> C["Battery Actuator"]
    C --> D["Battery Terminal"]
    style A fill:#f9f,stroke:#333
    style B fill:#ccf,stroke:#333
    style C fill:#cfc,stroke:#333
    style D fill:#fcc,stroke:#333
I
MONTAGGIO DEL GIRELLO
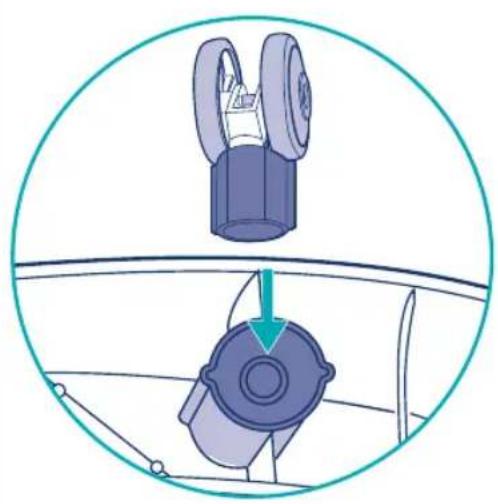
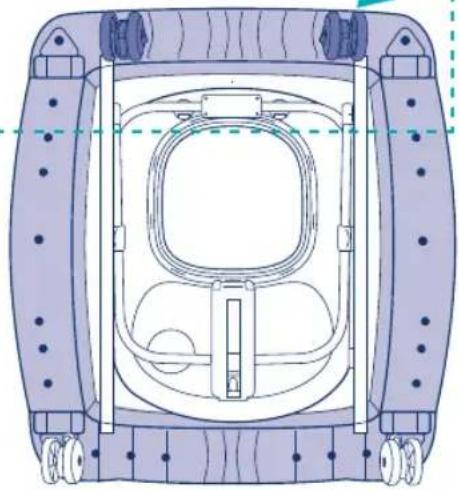
- Turn the baby walker frame upside down. Fix the wheels in the appropriate housings. Ensure that the wheels are firmly pushed all the way into the housing on the lower base of the walker.
- Fix the rear fixed wheels in the appropriate housings. Ensure that the wheels are firmly pushed all the way into the housing on the lower base of the walker.
- Fix the safety rubbers in the appropriate housings. Ensure that the safety rubbers are firmly pushed all the way into the housing on the lower base of the walker.
- Open the baby walker frame in the in-use position, ensuring that all wheels touch the floor. Slowly raise the tray by pulling it in an upward direction, until a click indicates that the frame has been locked correctly in one of the three positions.
- Insert the plastic rings of the padded seat in the slots located along the upper edge of the walker frame. Pass the rings through the slots and tug them until they clear the passage, then release them, ensuring that they are correctly locked in the position and cannot recede into the slot.
- Fit the large spoiler on the rear walker frame; simply place it on the housings, located at the rear of the backrest, and push it firmly in a downward direction, ensuring that it has been fitted in the correct position. Please do not lift up baby walker with large spoiler. It is dangerous doing it this way.
- Insert all small toy parts into corresponding holes. Put the electronic play tray into its housing in front of the walker's seat. Listen for two clicks to confirm the play tray is safely locked in place.
- Place the hooks on to the tube at the corresponding position to fix the foot rest well when in rocking function.
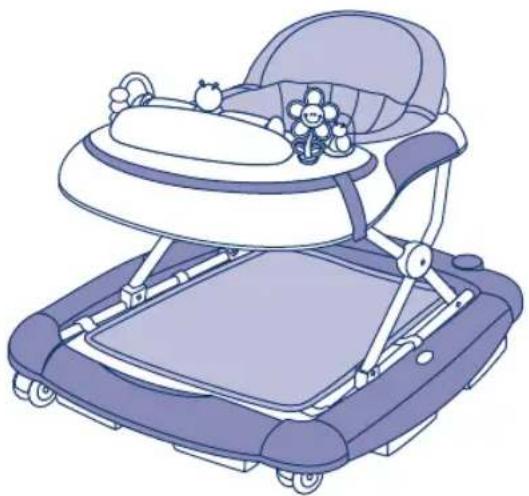
- Assembly is complete.
HOW TO ADJUST THE HEIGHT OF BABY WALKER FRAME
WARNING When opening, closing or adjusting the walker, ensure that your child is at a safety distance. Before placing the child in the walker ensure that the secondary lock button is correctly locked again.
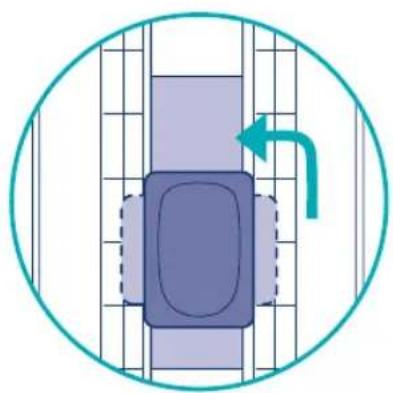
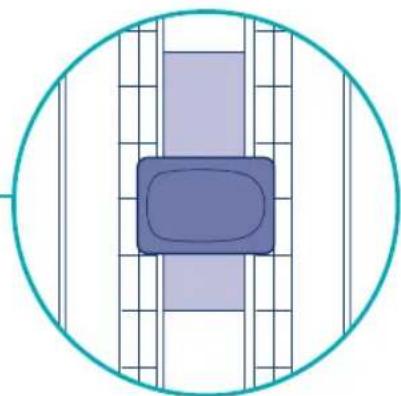
- To adjust the seat's height, remove the child from the baby walking frame, pull up the safety button located under the small tray table and rotate it to 90 degrees. Keep the safety button pressed, then raise or lower the small table until the desired position is reached, then pull up the safety button and rotate it to 90 degrees again to lock the small table. (If it is an automatic secondary lock, please make sure the lock is rotated to 90 degrees).
HOW TO CONVERT WALKER TO ROCKER
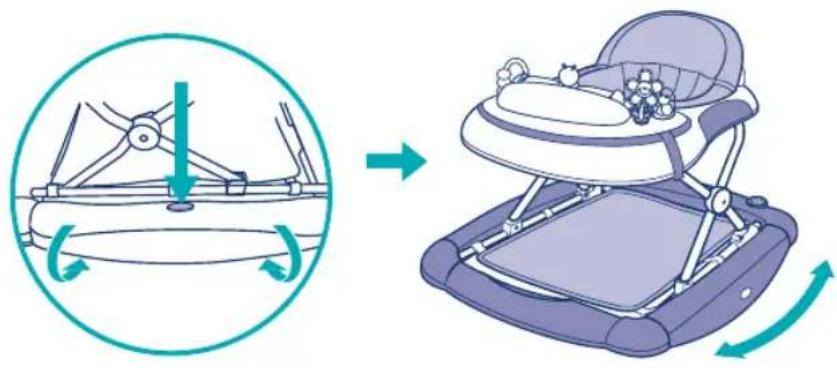
- Use two hands to press the buttons on the two sides and turn over the two side boards 90 degrees, then it will have changed to the rocking function.
HOW TO FOLD THE WALKER
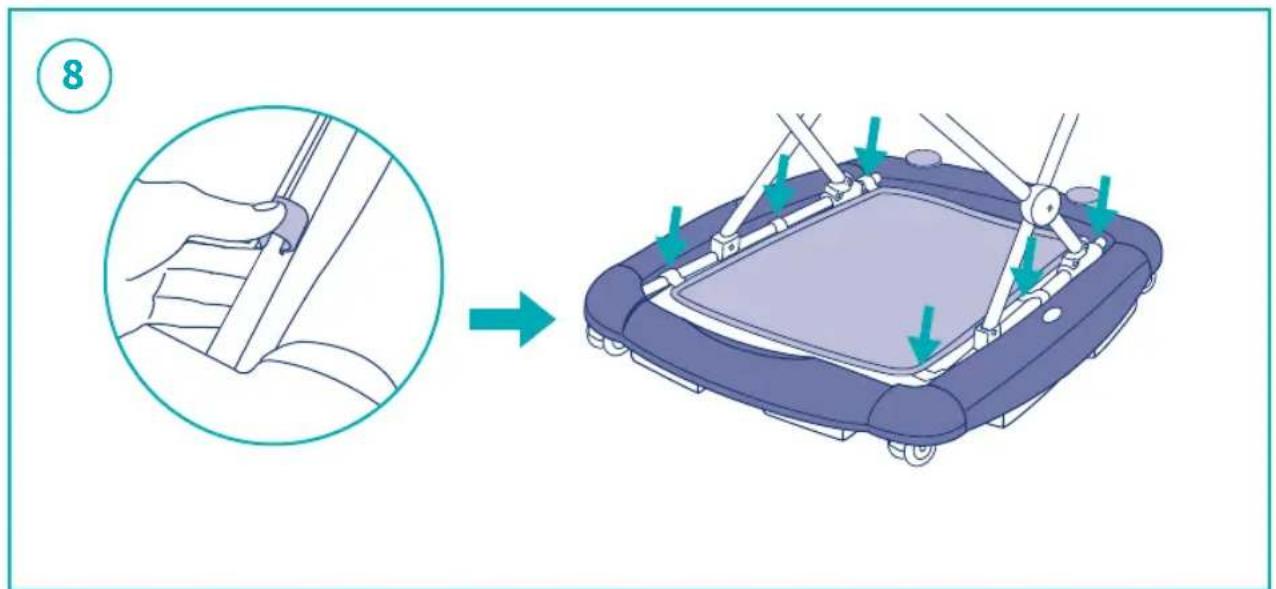
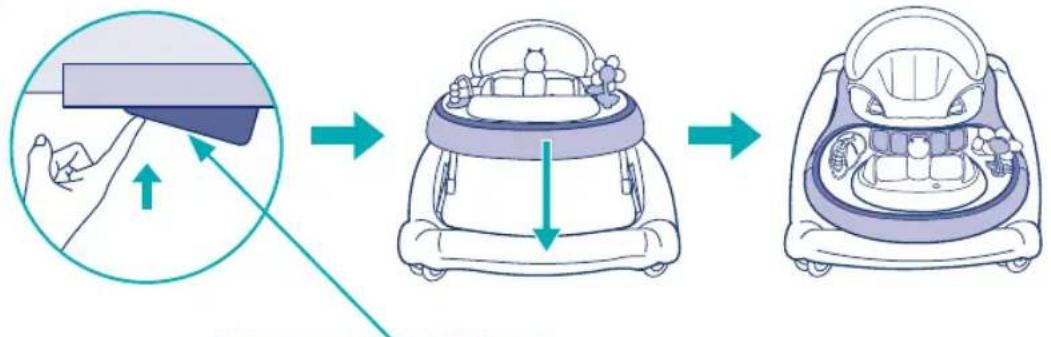
- Press the button as in the picture, meanwhile pull down the upper tray to the end, the frame folds up completely.
USING ELECTRONIC PLAY TOY TRAY
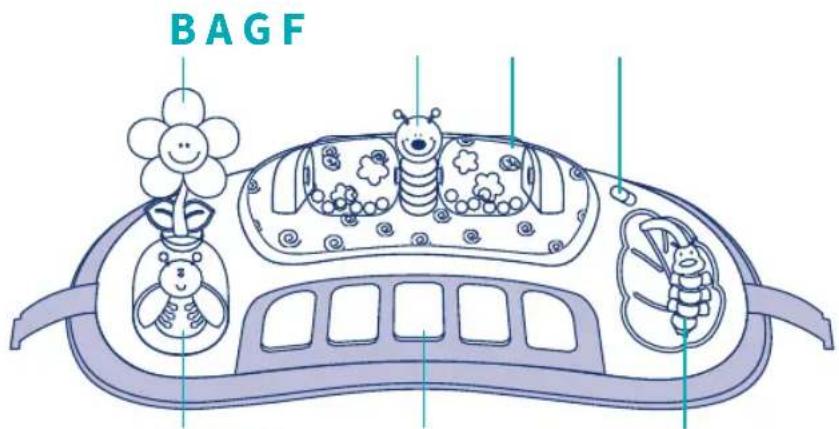
- WARNING The walker includes one electronic play tray that attaches to the walker frame as shown in step 7. The function and use of the play tray are shown here.
A Cute bee rotating toy
B Amusing 360 degrees rotating flower-shaped windmill
C Lights twinkle with music when the lovely ladabug is pressed
D Sound keys
E Coloured shapes arch to move
F Switch
G Roll with coloured shapes to move back and forth
HOW TO REMOVE & INSERT REPLACEABLE BATTERIES
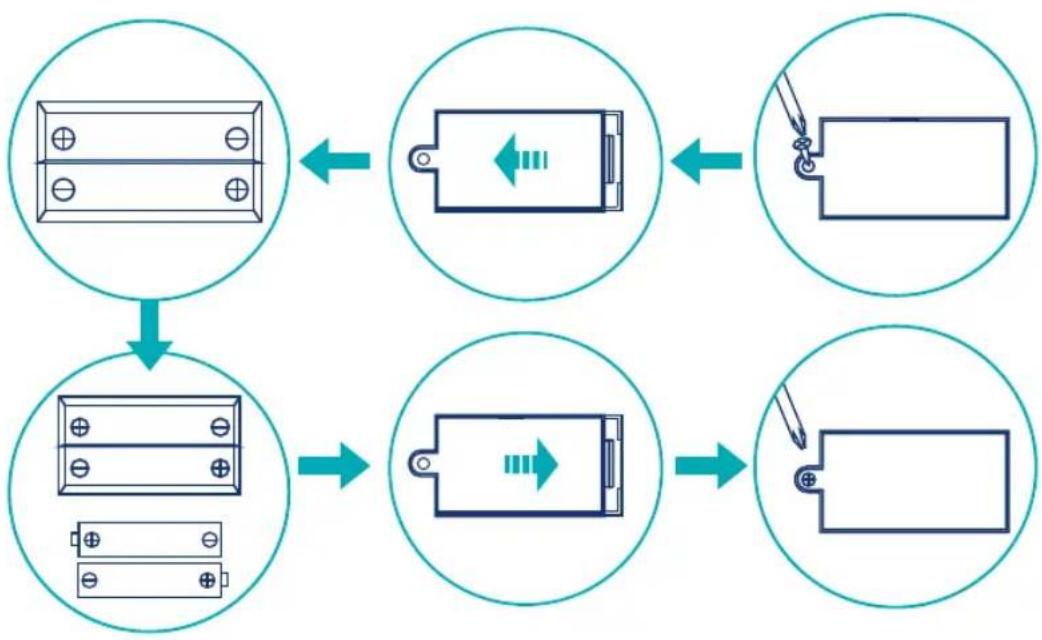
- To insert/replace batteries: undo the screw on the battery compartment cover and open the compartment. Fit batteries into space provided ensuring they observe the correct polarity (as shown on the product). Close the compartment securely tightening the screw. Secure the toy tray on the walker.
FITTING AND / OR REPLACING BATTERIES
WARNING
The toy of the walker frame requires 2x AA 1.5V alkaline batteries (not included) to be inserted into the battery compartment at the correct polarity.
• Non rechargeable batteries are not to be recharged.
- Rechargeable batteries (if they are removable) are to be removed from the toy in order to be recharged.
- Rechargeable batteries are to be recharged only under adult supervision.
- Do not mix different types of batteries, or new and used batteries.
- Batteries are to be inserted with correct polarity.
• Exhausted batteries have to be removed from the toy.
• The supply terminals are not to be short circuited.
- Do not try to open the batteries.
- Do not throw the batteries in the fire as they could explode or leak some liquid.
- Batteries should be changed by adults only.
- Remove batteries before storing the toy for long periods.
- Dispose of flat batteries in the designated recycling bins.
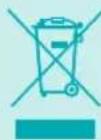
The strikethrough bin symbol on the appliance or on its packaging indicates that the product must be disposed of separately from other waste at the end of its life for it to be properly treated and recycled. The user must therefore confer the equipment at the end of its life to suitable separate waste collection centres for electronic and electronic waste, or return it to the retailer
according to the following methods:
- for small equipment, with at least one external side not exceeding 25 cm, there is free delivery without obligation to purchase at stores with a sales area of electrical and electronic equipment of over 400 square metres. For smaller stores, this mode is optional.
- for appliances which are larger than 25 cm, delivery is provided at all points of sale on 1on1 basis, which is to say that the delivery to the dealer will only take place when buying a new equivalent product, on a one to one basis. Adequate separate collection for the future recycling, treatment and environmentally compatible disposal of disused equipment, helps preventing possible negative impacts on the environment and on health, and promotes recycling and/or reuse of the materials of which they are composed. Improper disposal of the product by the user entails the application of the penalties referred to in current legislation.
PRODUCT CARE AND MAINTENANCE
- Check regularly the walker frame for signs of damage or wear.
- Clean the plastic parts, including the stoppers, with a damp cloth.
- Clean the seat with brush or family soap and neutral scour.
• Dry the metal parts to prevent the formation of rust. - Prolonged exposure to direct sunlight may cause the fabric to fade.

WARNING
Read the instructions carefully before use and keep them for future reference. The child may be hurt if you do not follow these instructions.
Before using, remove and dispose of any plastic bags and any other packaging (e. g fasteners, fixing ties, etc.) and keep them out of reach of children.
- Before using, check that the product and all of its components have not been damaged during transportation. Check regularly that the product is not broken or damaged. If the product is broken or damaged, keep out of reach of children.
- The product must only be assembled by an adult. For the correct assembly of the product, please refer to the following instructions.

WARNING
STAIR HAZARD: Avoid serious injury or death. Block stairs/step securely before using walker ring brake.
- The child will be able to reach further and move rapidly when in the baby walking frame.
- Prevent access to stairs, steps and uneven surfaces, slopes or unstable floors, swimming pools or other sources of water. Only use the baby walker frame on flat and stable surfaces.

WARNING
Never leave the child unattended. Always keep child in view while in walker.
- Guard all fires, heating and cooking appliances.
- Remove hot liquids, electrical cables and other potential hazards from reach.
- Prevent collisions with glass in doors, windows and furniture.
- Do not use the baby walking frame if any components are broken or missing.
- This baby walking frame should be used only for short periods of time (e.g.20 min).
- This product is intended only for a child who can sit up by itself and until it is able to walk by itself or weighs more than 12kg.
• Not suitable for children weighing more than 12 kg. - Do not use replacement parts other than those approved by the manufacturer or distributor.
- Do not use accessories or replacement parts other than those approved by the manufacturer.
E
MONTAJE
REPLACEMENT DES PILES
20815 Cogliate (MB) - Italy
www.giordanibaby.com


UK Approved to: EN EN 1273:2020