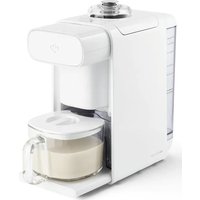
Mila - Other kitchen appliances Springlane - Free user manual and instructions
Find the device manual for free Mila Springlane in PDF.


User questions about Mila Springlane
0 question about this device. Answer the ones you know or ask your own.
Ask a new question about this device
Download the instructions for your Other kitchen appliances in PDF format for free! Find your manual Mila - Springlane and take your electronic device back in hand. On this page are published all the documents necessary for the use of your device. Mila by Springlane.
USER MANUAL Mila Springlane
natural_image
Line drawing of a portable coffee maker with yellow liquid inside and a heart-shaped logo on top (no text or symbols)Mila
Mandelmilchbereiter
Using Mila and Mila Mini 22
Cleaning and care 26
Trouble shooting 29
Customer service 31
Disposal/
Environmental protection 31
text_image
Technical diagram of a portable device with numbered parts for identification and assembly reference.natural_image
Simple gray rectangle with a single black circle in the center (no text or symbols)2b
text_image
Cavics 80:00 Self-clean mL Dry Step Finish Step Wash - Finish Grass Airway Coating Start Stop Problemnatural_image
Line drawing of a mechanical device with a tool interacting with a circular component (no text or symbols)natural_image
Simple icon of a refrigerator with a teapot, no text or symbols presentnatural_image
Simple icon of a kitchen appliance with a refrigerator, microwave, and teapot (no text or symbols)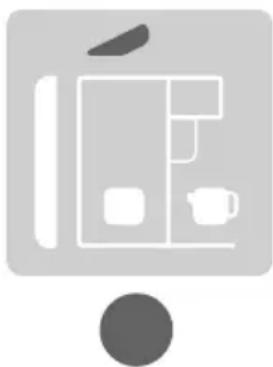
natural_image
Simple icon of a kitchen appliance with a refrigerator, microwave, and coffee mug (no text or symbols)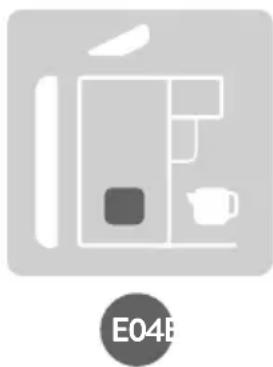
natural_image
Simple line drawing of a kitchen appliance with a teapot and side panel, labeled E048 (no text or symbols on the diagram itself)Important safety information
Please read this manual carefully before using the device for the first time and keep the manual.
- Warning – When positioning the appliance, ensure the supply cord is not trapped or damaged.
- Warning – Do not place any power strips or power generators in the immediate vicinity of the appliance.
- Warning – Do not insert objects or your hand into the appliance while it is in operation
Intended use
The appliance is exclusively intended for the preparation of vegetable drinks made of grains, nuts, pits, seeds, legumes, or fruit. Do not fill it with any other types of food, especially coffee.
Symbols

This symbol warns of hazards that can damage the appliance or cause injury.

This symbol warns of an electric shock that may be caused by a defective appliance or
by improper handling. This product may only be opened for necessary service work by an authorised technician.
Safety information

WARNING: Never hold your hands under the spout as the beverage is being dispensed. Danger of scalding!

WARNING: Never remove the plug from the lid during preparation. Danger of scalding!
Do not immerse the appliance in water or any other liquid. Protect the power cable and mains plug from moisture.
• After unpacking the appliance, check that it is in perfect condition and has not sustained any damage that could impair its functional safety. Should you notice any defects or if the appliance has fallen on the floor, do not attempt to use it, but call our customer service.
- Improper repairs can lead to hazards for the user and the warranty may be deemed void. If individual parts are damaged, they must be replaced by the manufacturer, an authorised specialist company, or a similarly qualified person.
- The appliance is exclusively intended for the preparation of vegetable drinks made of grains, nuts, pits, seeds, legumes, or fruit. Do not fill it with any other types of food.
- Store the appliance out of the reach of children.
• Children under the age of 8 should be kept away from the appliance or be under constant supervision. - Children aged 8 and above or persons with reduced physical, sensory, or mental capabilities or lack of experience and/or knowledge should only switch on/off or use the appliance if it is in its intended, normal operational position, and if they are supervised or have been instructed on the safe use of the appliance and have understood the hazards involved. Children aged 8 and above should neither connect nor clean or service
the appliance. The appliance is not a toy. Children should be supervised to ensure that they do not play with the appliance.
- Position the appliance on a free and level surface.
-
The appliance is only intended for use in the household or other similar uses such as
-
in kitchenettes in shops, offices, or other workplaces,
-
on farms,
• for use by guests in accommodation establishments (hotels, motels), private guest houses, or holiday homes. -
Only use the appliance after proper assembly.
- The appliance may only be used with its original accessories and spare parts.
- Mila may not be operated while standing in a cabinet.
- Never fill cold or hot liquids into the mixing chamber and only use ingredients at room temperature.
- Only fill the water container with filtered water with a low lime content, to protect your appliance and get the best possible taste.
- Do not disconnect the appliance from the mains during
preparation or the self-cleaning programme.
- Remove stones of fruit before processing (e.g. nectarines, cherries, plums, and similar fruit).
- Do not fill it with coffee beans or instant coffee!
- Allow the appliance to cool completely before cleaning.
- Connect the appliance only to alternating current as indicated on the type plate. Connect the mains plug only to an earthed socket.
- Uncoil the power cable completely before use.
- Disconnect the mains plug as soon as you have finished using the appliance. Do not pull on the power cable itself, as this might damage the cable.
- Switch off the machine before unplugging it.
- The appliance may not be operated with an external timer or remote-control system.
• Always disconnect the mains plug after use, before cleaning, or in the event of malfunctions during
operation.
- The appliance is not suitable for dishwashers. The lid, plunger, collection tray, and glass jar can be cleaned in the dishwasher.
- Never place or use the appliance and power cable on or near a hot surface.
- The cable must not hang over the edge of the work surface.
- Do not use the appliance outdoors.
Before using the appliance for the first time
- Remove all transport safety and packaging parts and keep them away from children – danger of suffocation!
- Mila should be cleaned before the first use and after prolonged periods of non-use. When doing so, follow our instructions on cleaning and maintenance.
- Place the appliance on a level and dry surface.
- Calibrate Mila by holding the Cleaning button. The programme will take 5 minutes.
Technical Data
Engine power: 210 W
Heating power: 1.000 W
Volt/frequency: 220-240 V; 50-60 Hz
Rotations: Mila 20.000 rpm;
Mila Mini 15.300 rpm
Dimensions (W/D/H):
Mila 16 x 36 x 37 cm;
Mila Mini 15 x 32 x 34 cm
Weight: Mila approx. 5,8 kg;
Mila Mini approx. 4,7 kg
Capacity: Mila 300-1000 ml;
Mila Mini 300-600 ml
Equipment: Filter-free preparation of plant based drinks; 6 programmes; delay timer; automatic self-cleaning function
Accessories: glass jar, recipe booklet
Specifications, technology, colours, and design are subject to change without notice.
Using Mila and Mila Mini
Product description
Appliance – Mila and Milia Mini
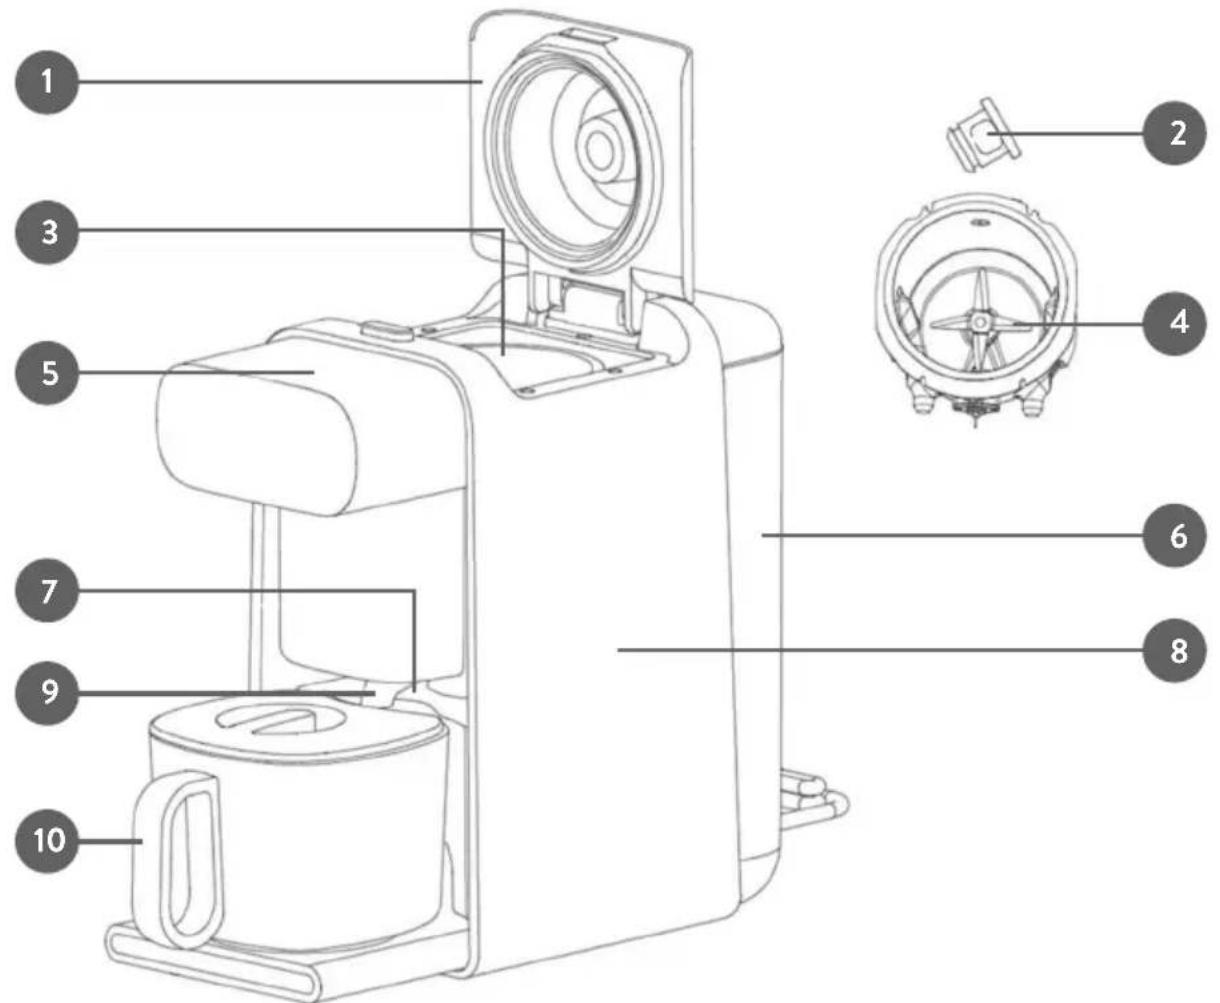
text_image
Technical diagram of a portable device with numbered parts for identification and assembly reference.- Detachable lid
- Plug
- Mixing chamber
- Knife
-
Display
-
Water container
- Collection container
- Housing
- Spout
- Glass jar with lid
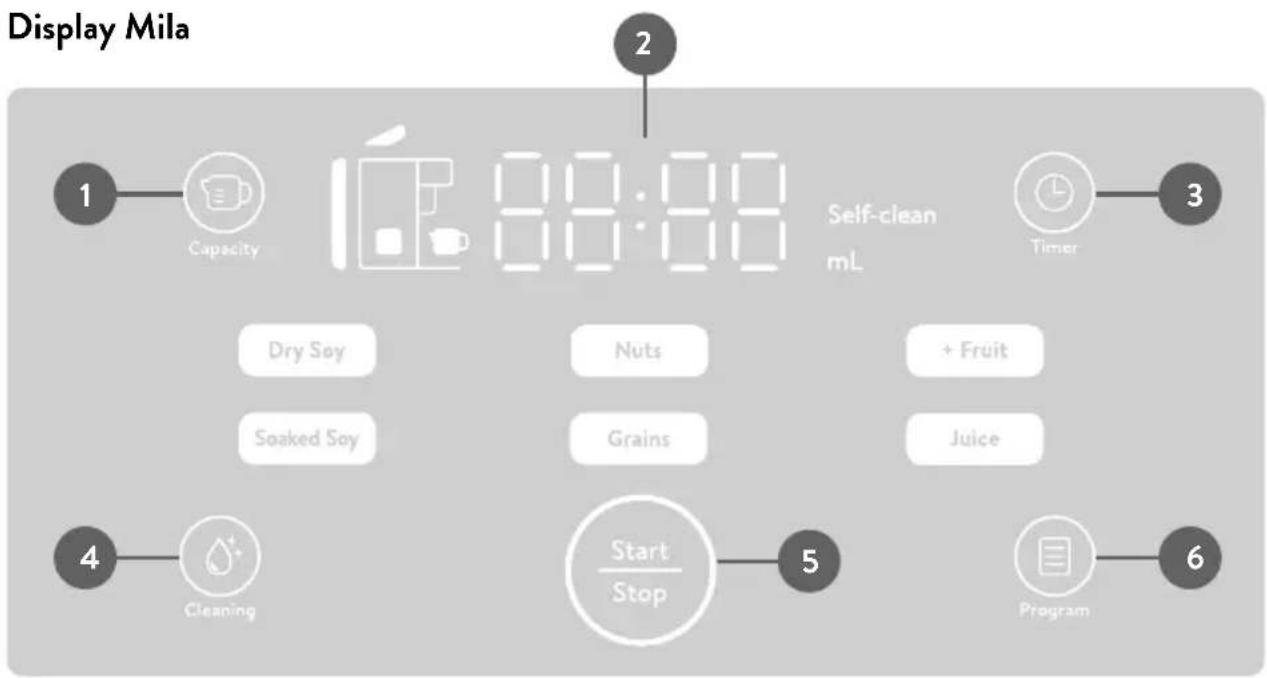
flowchart
graph TD
    A["1 Capacity"] --> B["2"]
    B --> C["3 Timer"]
    C --> D["4 Cleaning"]
    D --> E["5 Start/Stop"]
    E --> F["6 Program"]
    style A fill:#f9f,stroke:#333
    style B fill:#ccf,stroke:#333
    style C fill:#cfc,stroke:#333
    style D fill:#fcc,stroke:#333
    style E fill:#cff,stroke:#333
    style F fill:#ffc,stroke:#333
- Quantity
- Indicators for time, quantity, faults, and cleaning mode
-
Time delay
-
Cleaning mode and intensive cleaning mode
- Start/Stop
- Programme selection
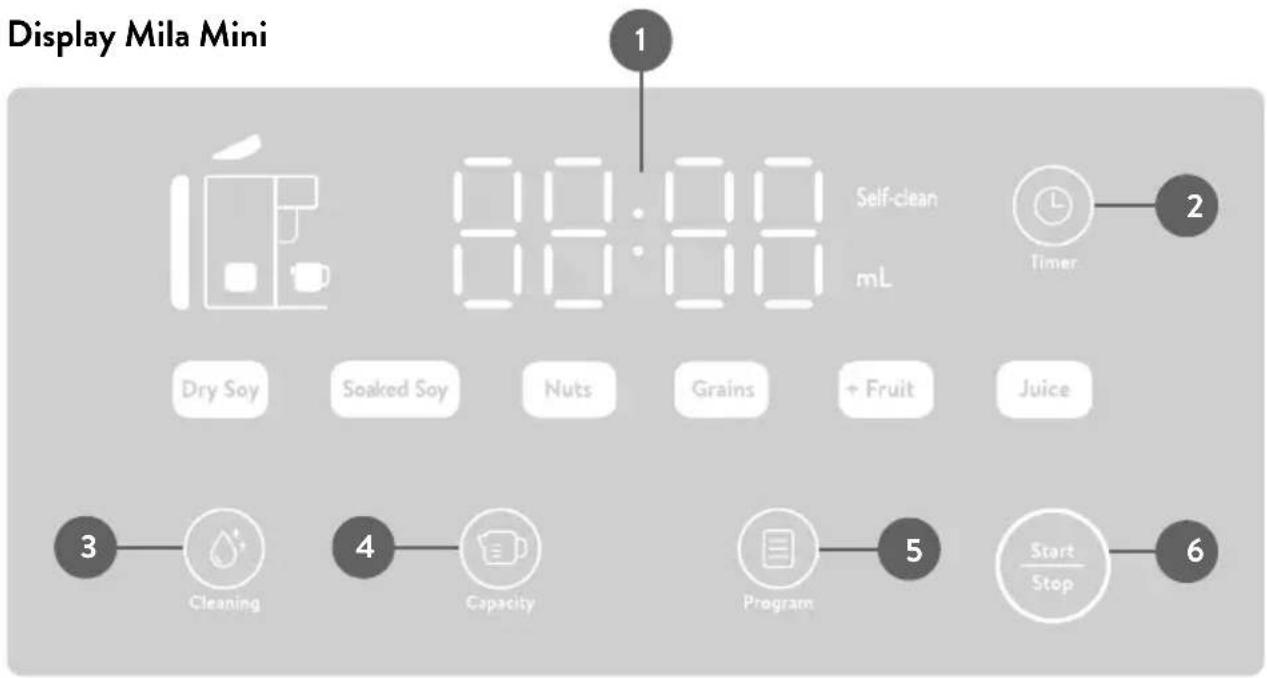
text_image
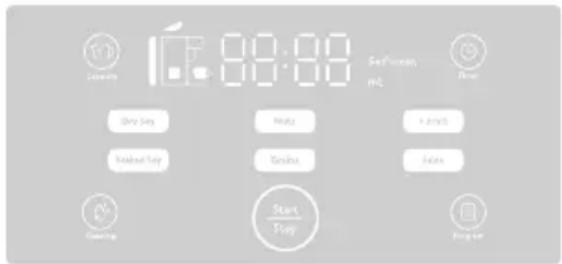
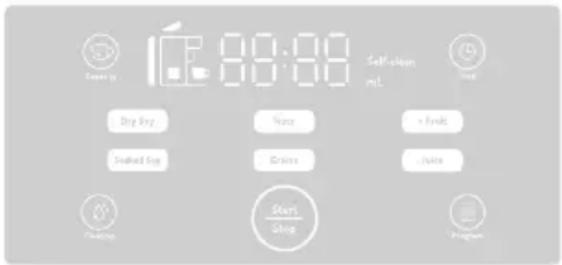
Display Mila Mini 1 88:00 Self-clean mL Dry Soy Soaked Soy Nuts Grains + Fruit Juice 2 3 Cleaning 4 Capacity 5 Program Start/Stop 6- Indicators for time, quantity, faults, and cleaning mode
- Time delay
-
Cleaning mode and intensive cleaning mode
-
Quantity
- Programme selection
- Start/Stop
Preparing a drink
- Connect the appliance to the power supply.
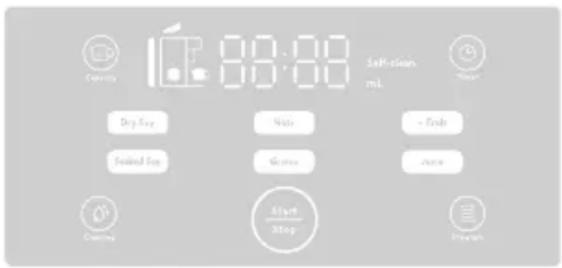
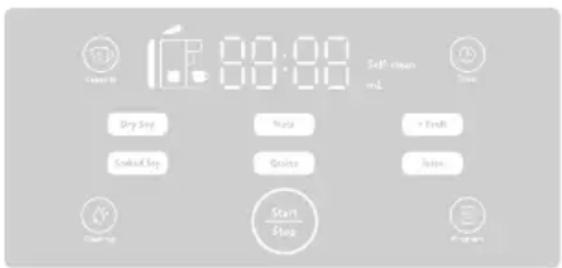
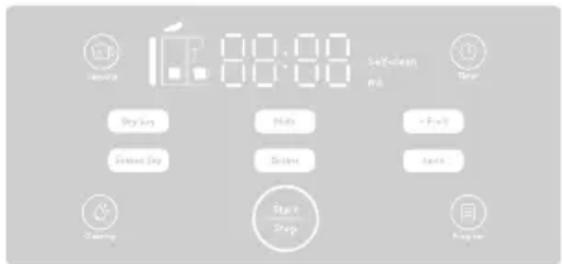
- Switch on Mila by tapping at the bottom centre of the display. The display now lights up.
2a
natural_image
Simple gray rectangle with a small circle in the center (no text or symbols)2b
text_image
80:00 Self clean mL Dry Drop Minds + Finish Cooked Drop Quicks Finish Start Stop- You can select the various programmes using the "Program" button. Just push the button several times.
- Press the "Capacity" button multiple times to select the quantity. You can prepare 300 ml, 500 ml, 800 ml, or 1,000 ml in the large Mila.
Mila Mini is suitable for the prepa-
ration of 300 ml or 600 ml. Mila processes large quantities in two runs. Nevertheless, all ingredients are to be poured into the mixing chamber at the beginning.
- Fill the water container with filtered water.
- Pour all ingredients into the mixing chamber.
- Press the "Start/Stop" button to start the programme.
- Press the "Start/Stop" button again during the first minute to stop the programme.
- Mila pours your drink into the glass jar. Warning: The drink and glass jar are very hot. Only hold the glass jar by the handle. At the end of preparation, you will hear a beep sound as the self-cleaning mode starts.
The display will show the following message “Self-clean”. Mila pours out the cleaning water into the collection container. Mila beeps again when the self-cleaning mode is completed.
Programmes
| Programme | Description Ingredients | |
| Dry soy/Soaked soy | For dried or soaked soybeans and other legumes | Dried soybeans |
| Soybeans soaked for 12 hours | ||
| Nuts For nuts, pits, and seeds | Almonds and hazelnuts (roasted, blanched, or natural) | |
| Cashews | ||
| Shredded coconut** | ||
| Lupine meal* | ||
| Macadamia | ||
| Grains For grains and pseudo-grains | Rice *** | |
| Oats and spelt (flakes, yield flakes, or instant flakes) | ||
| Buckwheat* | ||
| Hulled hemp seeds | ||
| Millet * | ||
| + Fruit | For non-dairy milk with dates or other dried fruits or ripe bananas | Ripe banana |
| Soft dried fruits such as dates* or apricots* | ||
| Juice | For approx. 500 g juice/fruit nectar from berries and soft fruit, washed and pitted. Fill in a maximum of 250 g fruit. | Banana |
| Berry fruit | ||
| Peach | ||
| Apricot | ||
| Nectarines | ||
* soaked ** max. preparation quantity 300 ml *** washed and cooked
Time delay
You can pre-set Mila to prepare the drink at a later time.
- Just select the programme and capacity
- Press the "Timer" button. By pressing
the button several times, you can increase the pre-set time in steps of 30 minutes, from 30 minutes up to a max. of 24 hours. The pre-set time is 8 hours. The programme is then
completed after 8 hours.
- Select the programme. For safety reasons, the "Soaked Soy" and "Juice" programme are not included.
- Fill in the ingredients and press "Start/Stop".
- You can stop the programme and delay time by pressing the "Start/Stop" button again during the first minute. Now you can make a new selection.

Warning: If the room temperature exceeds
30°C, do not set the timer at over 12 hours to prevent germs.
Cleaning and care
Cleaning
Mila comes with one automatic and two manual self-cleaning modes. This makes cleaning a breeze.
-
After every programme, Mila automatically switches on the self-cleaning mode. The cleaning takes 7 minutes. Mila only needs water to clean herself. After the end of the self-cleaning process, open the lid to allow the mixing chamber to dry.
-
You can also directly select the cleaning mode via the display, for example after not using the device for a longer period of time, after preparing a sweet drink (with sugar, syrup, or fruit), or whenever the appliance is due for a basic cleaning:
- Select the cleaning mode and
press “Start” to start the cleaning mode. It takes 3 minutes. After the end of the self-cleaning process, open the lid to allow the mixing chamber to dry.
- Press the Cleaning button again to select the intensive cleaning mode. This programme takes 8 minutes. It is recommended to run the intensive cleaning programme regularly, even if the appliance is in constant use. Add a drop of mild detergent into the mixing chamber before the programme starts. On first use, make sure that the detergent is not too highly concentrated to prevent excessive foam from
forming in the mixing chamber. If foam residues remain after the end of the programme, flush out the appliance using the 3-minute flushing programme. After the end of the self-cleaning process, open the lid to allow the mixing chamber to dry.
- Open the lid and simply remove it in the vertical direction for easier cleaning by hand. You can also simply remove the plug. Do not clean the lid and plug in a dishwasher, to avoid damaging the seals.
- Also regularly clean the metal pins protruding into the mixing chamber, the silicone valve through which the water flows into the mixing chamber, as well as the silicone spout with a damp cloth.
- Regularly clean the water container to make sure it always stays hygienically clean.
- Clean the housing with a damp and soft cloth and thoroughly dry afterwards.
Tip: should the blades be stained by ingredients, pour some water into the mixing chamber and add a denture cleaning tablet. Leave it to stand for 1–24 hours before running a short manual cleaning programme.
Warning: If you wish to clean the blades by hand, switch off the device and remove the mains plug. Please pay attention and be careful, the blades are very sharp.
Do not disconnect the power supply of the appliance during the cleaning programme and do not interrupt the programme.
Remove residues from the mixing chamber
Please follow these steps if you wish to remove any residues or unfinished milk left in the mixing chamber due to a power outage or for a different reason:
- Connect Mila to the power supply.
- As soon as the display shows all symbols, you can have the rests fed out by holding the "Capacity" button.
- Afterwards, start a manual cleaning programme using the "Cleaning" button.
Descaling
Treat Mila with care and only use filtered water. You should additionally descale
Mila regularly. We recommend descaling after every 50th preparation process, or whenever you clearly notice limescale on or in the machine. To descale, proceed as follows:
- Add 3 tsp baking soda into the water container and fill it with water.
- Start any programme with 300 ml.
- Stop the preparation as soon as Mila starts pumping water into the mixing chamber (approx. 5–10 seconds) by removing the water tank and disconnecting Mila from the power. Wait 1 hour.
- Plug Mila in again and allow the programme to run to the end.
- Afterwards, run through two preparation programmes without any ingredients using a quantity of 1,000 ml each time. Repeat the process, if required. Now, Mila is good to go.
The warranty does not cover faults and malfunctions of the appliance that are the result of a lack of descaling.
Replacement
If Mila's blades get blunt after a period of use, you can replace them yourself. Only use original spare parts!

Attention! Exercise particular care when handling the blades, also if they are dull.
There is a risk of injury!!
- Ensure that Mila is not connected to the power supply.
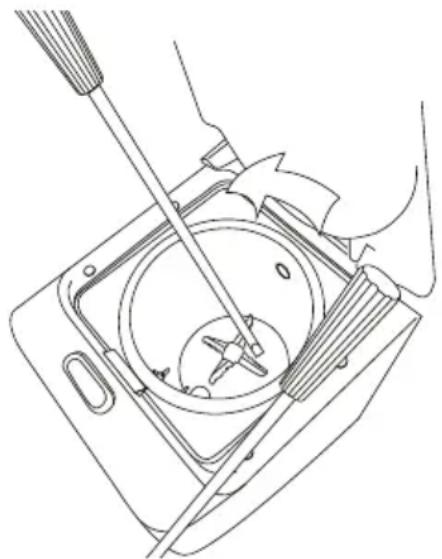
- Use two rugged tools such as long screwdrivers. Protect the base of the mixing chamber, e.g. by placing several layers of paper or a fitting piece of silicone underneath the blades, to prevent scratching the coating.
natural_image
Line drawing of a hand using a screwdriver to adjust or install a circular component on a device (no text or symbols)- Position one tool on the back side of the blade and slightly tilt it with the blade exerting a bit of resistance.
-
Use the other tool to strike against the tilted tool above the mixing chamber to loosen the blade.
-
After loosening the blade, carefully remove it by turning it and insert the new blade.
- Carefully tighten the new blade by
hand. Start a manual cleaning programme using the "Cleaning" button. The blade fastens itself during the first uses.
Trouble shooting
Mila indicates problems using a signal beep and via the display.
natural_image
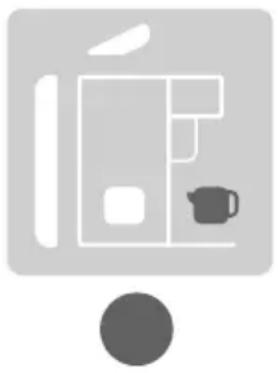
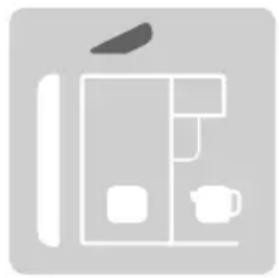
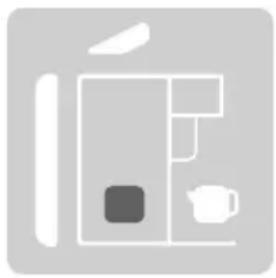
Simple icon of a kitchen appliance with a kettle and a refrigerator (no text or symbols)- There is no glass jar.
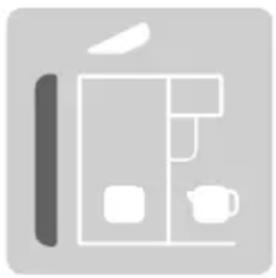
- The water container is empty.
- The lid is open or not properly closed.
natural_image
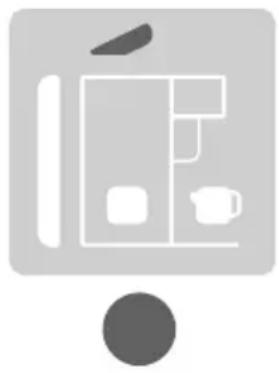
Simple icon of a kitchen appliance with a refrigerator, microwave, and coffee cup (no text or symbols)- The collection container must be emptied.
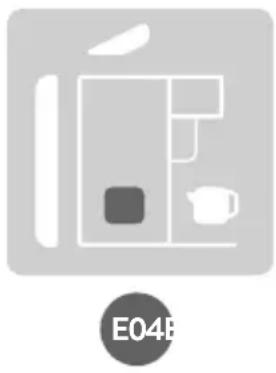
natural_image
Simple line drawing of a kitchen appliance with a teapot and a side panel, labeled E04B (no text or symbols on the diagram itself)If the device does not work properly, please check the following steps:
- Check if the manual was followed precisely and correctly.
- Check the following table for possible reasons.
- Check if all fuses are working.
| Problem Solution | |
| There is water underneath the device. | Make sure that the water and collection containers are closed and that the collection container has not spilled over. |
| The mixing chamber/blades are not clean after the automatic self-cleaning programme. | Add a drop of detergent and select the intensive cleaning mode. |
| Gently wipe off by hand with a damp cloth. | |
| The beverage tastes sandy. | Reduce the quantity of ingredients used to prepare your drink. |
| Soak the ingredients before processing. | |
| The mixing result is chunky. | Soak the ingredients and/or chop them before preparation. |
| Filter out any chunks using a sieve. | |
| Replace the blades. |
Error codes
| Error code | Problem Solution | |
| E 05 | The motor is overloaded due to too many ingredients. | Reduce the amount of ingredients and clean the machine. |
| E 06 | The temperature sensores are sticky or there are too many ingredients. | Reduce the amount of ingredients and clean the sensors inside of the mixing chamber. |
| E 07 The voltage is lower than 160 V or exceeds 260 V. | Please contact customer services. | |
| E 08 | Signal defect. | |
| E 09 | ||
| E 10 The discharge hose is jammed. Please clean. | ||
| E 11 | The temperature sensor is defective or damaged. | Please contact customer services. |
| E 12 | ||
| E 13 The pass-through sensor is defective or damaged. | ||
| E 14 Electrical fault. | ||
| E 15 | The heating unit of the mixing chamber is defective or damaged. | |
Should your Mila show any other defects, please contact a professional repair service provider. Do not attempt to repair the appliance yourself.
Customer service
In principle, our products have a legal warranty duty of 2 years. Further claims can only be processed in conjunction with a proof of purchase. Wearing parts exclude any warranty claims, when usual abrasion has occurred. The durability is determined by the respective handling and use of the products and is thus variable.
For questions concerning handling and functionality of our products, please contact our customer-service:
Free hotline for Germany/Austria only: 0800 270 70 27
From other EU countries: +49 211 749 55 10 (Different costs may apply.)
Disposal/Environmental protection
Our products are manufactured to high quality standards and are designed for a long service life.
Regular maintenance and care will help to extend service life. If the appliance is defective and can no longer be repaired, it must not be disposed of in the normal household waste.
Take the appliance to a designated disposal point for recycling electrical or electronic equipment. Through professional disposal and recycling you make an important contribution to protecting our environment.
Springlane GmbH herewith declares that the product complies with the essential CE requirements on the issuing date. The complete declaration of conformity can be accessed at www.springlane.de/bedienungsanleitungen.
Revoluties: Mila 20.000 rpm;
Mila Mini 15.300 rpm
Afmetingen (b/l/h): Mila 16 x 36 x 37 cm;
Mila Mini 15 x 32 x 34 cm
text_image
Technical diagram of a portable kitchen with numbered parts for identification and assembly reference.natural_image
Simple gray rectangle with a single black circle in the center (no text or symbols)- Met de knop "Program" kun je de verschillende programma's selecteren. 2b
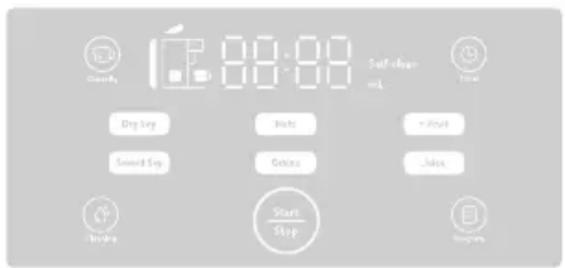
text_image
Day 00:00 Self-change mL Time Dog Day Night + Night Sweet Day Girls Jaws Shirts Start/Stop Shopinsnatural_image
Line drawing of a hand using a tool to adjust or install a circular component, no text or symbols presentnatural_image
Simple icon of a kitchen appliance with a refrigerator and a teapot, no text or symbols present.natural_image
Simple icon of a kitchen appliance with a refrigerator, teapot, and utensil (no text or symbols)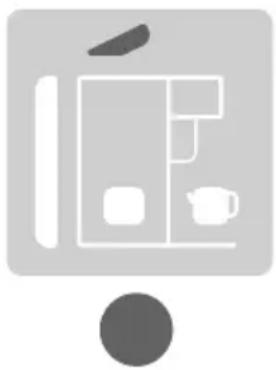
natural_image
Simple icon of a kitchen appliance with a refrigerator, teapot, and a knife (no text or symbols)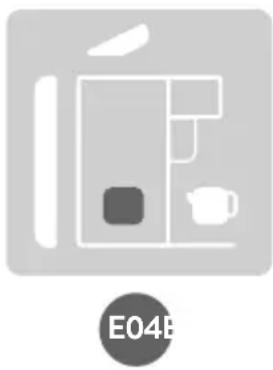
natural_image
Simple line drawing of a kitchen appliance with a teapot and side panel, labeled E04B (no text or symbols on the diagram itself)text_image
Technical diagram of a portable kitchen with numbered parts for identification and assembly reference.natural_image
Simple gray rectangle with a single black circle in the center (no text or symbols)2b
text_image
80:00 Send to: New Buy Next Add Finish Opening Start Stop Resetnatural_image
Line drawing of a hand using a tool to clean or adjust a circular component, no text or symbols presentnatural_image
Simple line drawing of a kitchen appliance with a kettle and a refrigerator (no text or symbols)
natural_image
Simple line drawing of a refrigerator with a teapot and a knife, no text or symbols present.
natural_image
Simple line drawing of a kitchen appliance with a refrigerator, microwave, and coffee cup (no text or symbols)
natural_image
Simple line drawing of a kitchen appliance with a refrigerator, kettle, and a knife (no text or symbols)
text_image
Technical diagram of a portable device with numbered parts for identification and assembly reference.natural_image
Simple gray rectangle with a single black circle in the center (no text or symbols)2b
text_image
Sleep 80:00 Self-claim mL Drip Drop Vapor + Drink Stressed Stop Drain Juice Punching Start Stop 12 o'clocknatural_image
Line drawing of a hand using a tool to adjust or install a circular component, no text or symbols presentnatural_image
Simple icon of a kitchen appliance with a refrigerator and a teapot, no text or symbols present.natural_image
Simple icon depicting a kitchen appliance with a refrigerator, teapot, and a knife (no text or symbols)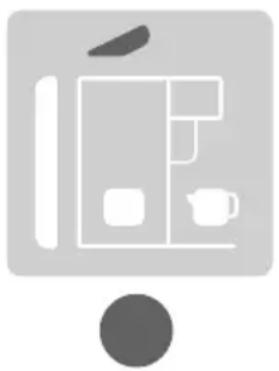
natural_image
Simple icon of a kitchen appliance with a refrigerator, teapot, and a spoon (no text or symbols)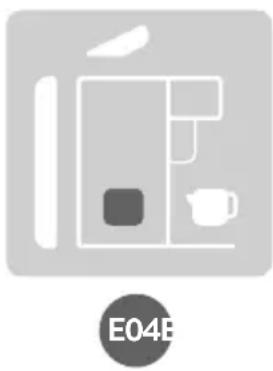
natural_image
Simple line drawing of a kitchen appliance with a teapot and side table (no text or symbols)text_image
Technical diagram of a portable device with numbered parts for identification and assembly reference.natural_image
Simple gray rectangle with a single black circle in the center (no text or symbols)2b
text_image
88:00 Sunset Time Day Sky Night + Day Window Sky Sister Jack Clearing Start Shop Programnatural_image
Line drawing of a hand using a tool to clean or adjust a circular component, no text or symbols presentnatural_image
Simple icon of a refrigerator with a teapot, no text or symbols presentnatural_image
Simple icon of a kitchen appliance with a refrigerator, kettle, and a knife (no text or symbols)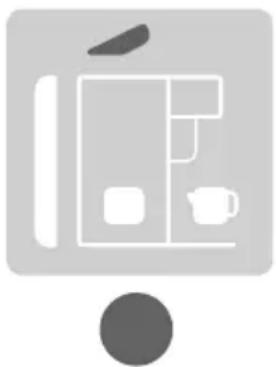
natural_image
Simple icon of a kitchen appliance with a refrigerator, teapot, and a knife (no text or symbols)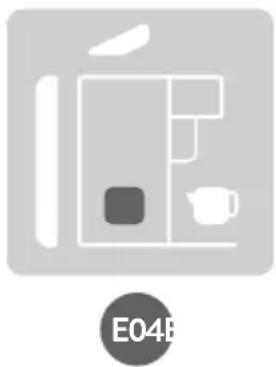
natural_image
Simple line drawing of a kitchen appliance with a teapot and side table (no text or symbols)Stand: November 2020