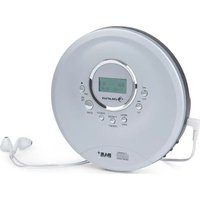
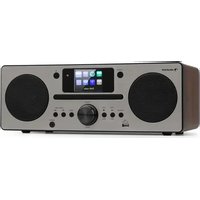
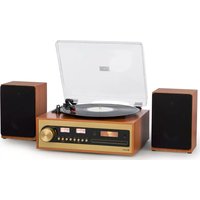
Graceland TT - Hi-fi system Auna - Free user manual and instructions
Find the device manual for free Graceland TT Auna in PDF.

User questions about Graceland TT Auna
0 question about this device. Answer the ones you know or ask your own.
Ask a new question about this device
Download the instructions for your Hi-fi system in PDF format for free! Find your manual Graceland TT - Auna and take your electronic device back in hand. On this page are published all the documents necessary for the use of your device. Graceland TT by Auna.
USER MANUAL Graceland TT Auna
text_image
QR code image containing encoded data, no visible human-readable textINHALTSVERZEICHNIS
natural_image
Technical diagram of a mechanical assembly with concentric circular components and a vertical support (no text or labels)natural_image
Symbol of a trash bin crossed with a diagonal line, representing no waste or discharge (no text or labels)Berlin Brands Group UK Limited PO Box 42
272 Kensington High Street
London, W8 6ND
United Kingdom
Congratulations on purchasing this device. Please read the following instructions carefully and follow them to prevent possible damages. We assume no liability for damage caused by disregard of the instructions and improper use. Scan the QR code to get access to the latest user manual and more product information.
text_image
QR code image containing encoded data, no visible human-readable textCONTENT
Safety Instructions 20
Device Overview 21
Connections 24
Commissioning and Settings 25
CD Functions 26
USB/SD Functions 26
BT Mode 26
Record Player 27
AUX Connector 27
Light Effects 27
Radio Functions 28
Troubleshooting 31
Disposal Considerations 32
Declaration of Conformity 32
TECHNICAL DATA
| Item number 10030442 | |
| Power supply (power pack) 230 V ~ 50 Hz | |
| Power supply (remote control) 1 x CR | 2025 battery |
| Connections | 1 x USB port, 1 x SD memory card slot, 1 x 3.5mm jack AUX input, 1 x stereo RCA line output |
| Compatible Disc Formats CD-R, CD-RW, MP3-CD | |
| FM frequency 87.5-108 MHz | |
| BT frequency 2402-2480 MHz | |
| BT radio-frequency power (max.) 6 dBm | |
SAFETY INSTRUCTIONS
General information
- Lightning - If you are not going to use the device for a long time or if there is a storm, disconnect the plug from the electrical outlet and disconnect the device from the antenna connector. This will avoid damage to the product that may be caused by lightning or overvoltage.
• Overload - Do not overload power outlets, extension cords, or built-in power outlets, as this may result in a fire or electric shock. - Foreign objects and liquid - Never push objects of any kind through openings in the device as they may touch dangerous voltage points or short out parts, which could result in a fire or electric shock. Never spill liquids of any kind on the device.
- Repairs and maintenance - Do not attempt to service this product yourself, as opening or removing covers will expose you to dangerous voltages or other hazards. Leave all maintenance to qualified service personnel.
- Damage requiring service - Disconnect the power plug from the outlet and consult a qualified specialist if any of the following conditions occur:
a) If the power cord or plug is damaged.
b) If liquid has been spilled or objects have fallen onto the product.
c) If the product has been exposed to rain or water.
d) If the product has been dropped or damaged.
e) If the product has a markedly reduced performance.
- Replacement parts - When replacement parts are required, make sure that the service professional who replaces the parts only uses replacement parts that have been approved by the manufacturer or that have the same characteristics as the original part. Unauthorized replacement may result in fire, electric shock or other hazards.
- Heat - Do not place the unit near heat sources such as radiators, heaters, stoves or other products (including amplifiers).
Special Instructions
- This device may be only used by children 8 years old or older and persons with limited physical, sensory and mental capabilities and / or lack of experience and knowledge, provided that they have been instructed in use of the device by a responsible person who understands the associated risks.
- Children should be supervised to ensure that they do not play with the appliance.
- Ensure children and babies do not play with plastic bags or any packaging materials.
- Mains plug/Power adaptor is used as disconnect device and it should remain readily operable during intended use.
- In order to disconnect the apparatus from the mains completely, the main plug/power adaptor should be disconnected from the mains socket outlet completely.
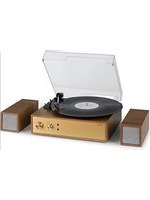
DEVICE OVERVIEW
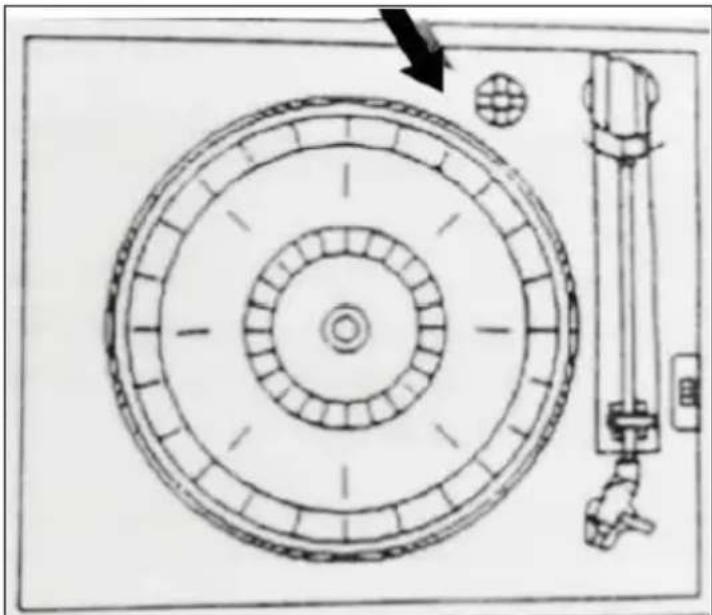
Record player
| 1 Turntable 3 Tonearm | ||
| 2 Tonearm end 4 | Speed regulator: 33/45/78 rotations per minute |
Set screw for the transport lock
natural_image
Technical diagram of a mechanical assembly with concentric circular components and a vertical support (no text or labels)Loosen the screw before using the turntable.
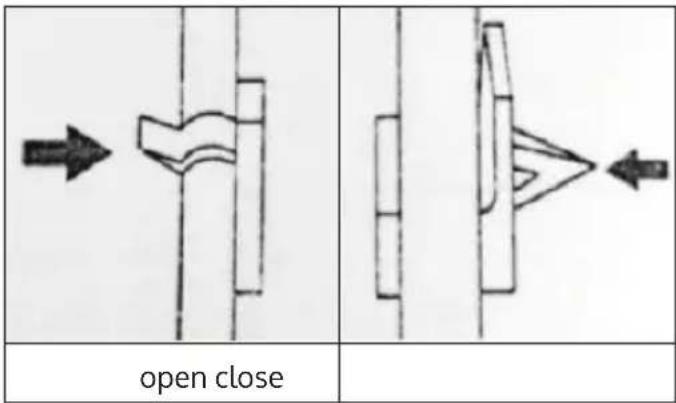
Tonearm protection
text_image
open closeJukebox, CD player and control panel
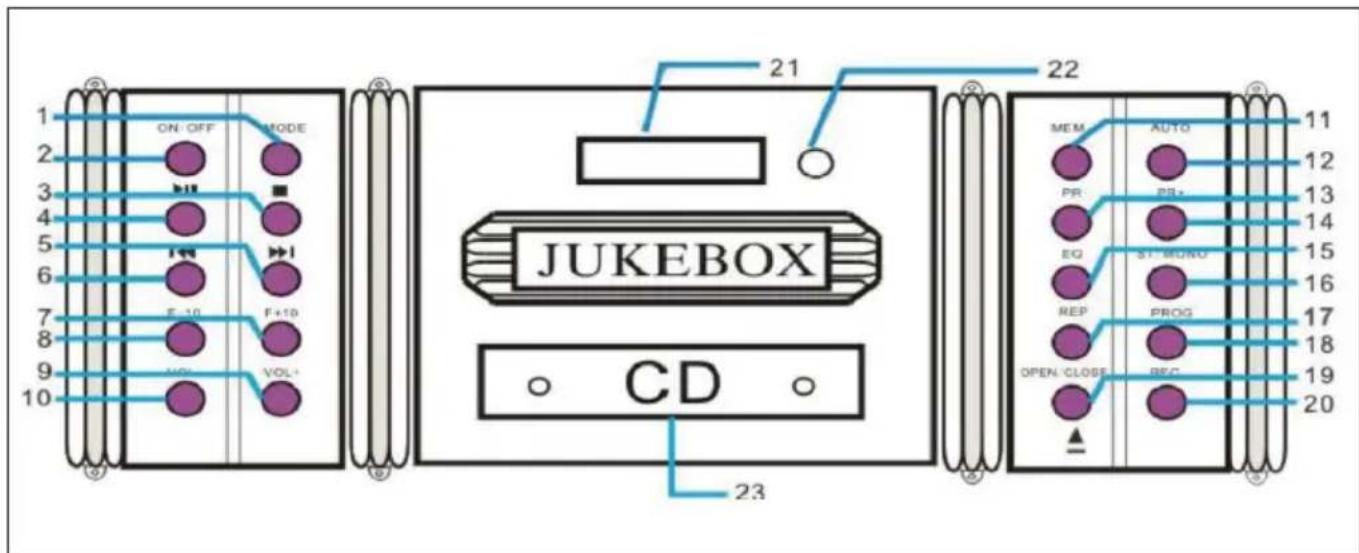
text_image
ON-OFF MODE JUKEBOX CD 21 22 MEM AUTO PR PR+ EQ ST-MONO REP PROG OPEN-CLOSE REC 23| 1 | MODE (select operating mode) | 13 PR- (Previous station) | |
| 2 ON/OFF 14 PR+ (Next station) | |||
| 3 STOP 15 EQ (Equalizer) | |||
| 4 PLAY/PAUSE 16 | ST/MONO (switch stereo/ mono reception) | ||
| 5 | Forward / Fast forward | 17 | REP (repeat mode on/off) |
| 6 Back / Fast rewind 18 PROG (Program Playlist) | |||
| 7 F+10 (10 tracks forward) 19 | OPEN/CLOSE (open/close CD tray) | ||
| 8 F-10 (10 tracks back) 20 REC (recording) | |||
| 9 VOL+ 21 Display | |||
| 10 VOL- 22 IR sensor | |||
| 11 | MEM (Save current radio station) | 23 CD tray | |
| 12 | AUTO (Automatic station search) | Note: With a few exceptions (open/close CD compartment) the functions can also be controlled by remote control. | |
CONNECTIONS
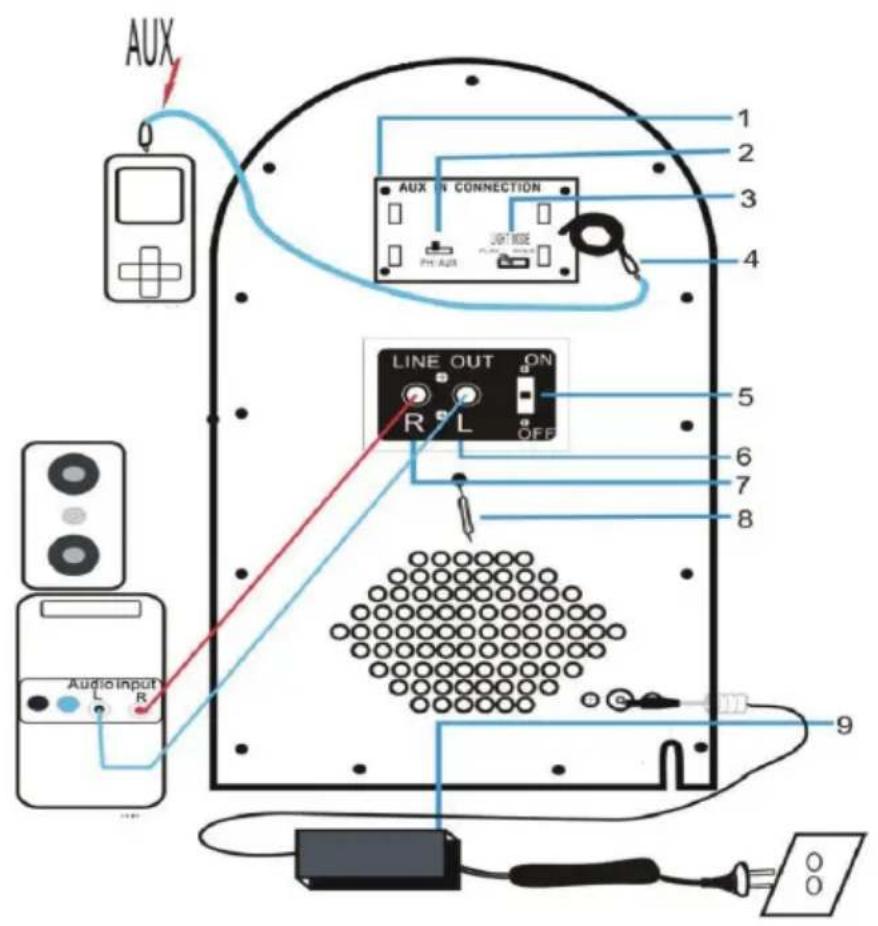
text_image
AUX 1 2 3 4 AUX IN CONNECTION PH-AUX LINE OUT ON R L OFF 5 6 7 8 Audioinput L R 9| 1 MP3 connections 6 | Line Out (R/L) for Stereo RCA cable | |
| 2 Turntable/AUX switch 7 | ||
| 3 Switch for the lighting effects 8 FM antenna | ||
| 4 AUX connection cable 9 | Power supply unit/power supply connection | |
| 5 Line-Out ON/OFF | ||
COMMISSIONING AND SETTINGS
Commissioning
Carefully unpack the unit and all accessories and remove the packing material. Connect the power cord to a standard household power outlet. Press the ON/OFF button on the control panel to turn on the machine.
Selecting the Mode
Press MODE or FUNCTION repeatedly to select between FM, CD, USB, SD, BT and Phono modes.
Adjusting the volume
Adjust the output volume with the VOL+/- buttons.
Line Out Switch
If you have connected the unit to a stereo system/PA or other audio device via RCA cable, use the switch on the rear panel to switch the line out on/off.
Setting the Time
• After switching on, the display shows the time 00:00.
- Press and hold PROG for 3 - 5 seconds to select between the display formats 12H or 24H. Use the arrow keys to select, then press PROG to confirm.
- The hour digits will now flash. Use the arrow keys to set the hour, then press PROG to confirm and continue.
- Repeat for the minutes.
Note: The time is not stored when the unit is unplugged from the power supply.
CD FUNCTIONS
Play
Insert CDs into the CD tray with the printed side facing up (OPEN/CLOSE). Use the PLAY/PAUSE, CONTINUE/BACK and STOP buttons to control playback.
Playback mode
Press REP several times for the play modes REP1 (current track is repeated), REP (all songs on the CD are repeated) and RAN (songs are played back in random order).
Playlist
In STOP mode, press PROG to generate a play list. Use the arrow keys to select the first track and press PROG to confirm. Then select the next title, and so on. You can add up to 20 titles. Press PLAY/PAUSE to play. Press STOP twice or open the CD tray to clear the playlist.
USB/SD FUNCTIONS
- Insert USB or SD memory devices into the appropriate ports.
- After selecting MODE from USB/SD, the display shows the number of folders and files contained.
- Use the PLAY/PAUSE, CONTINUE/BACK, F+10/-10 and STOP buttons to control playback.
Note: The play mode and playlist functions work in the same way as CD playback.
BT MODE
Select the BT mode with MODE. Activate BT also on your smartphone/tablet and open the list of BT devices found. Connect with JUKEBOX. Disconnect by switching (MODE) or from your smartphone/tablet.
RECORD PLAYER
- Set the AUX/PHONO selector switch on the rear panel to PHONO when you want to start up the turntable.
- Press MODE to select the phono mode. Adjust the rotation speed (switch next to the tone arm mount).
- Place a record on the turntable. Use the spindle adapter (puck) if necessary.
- Lift the tonearm off the tray and carefully move it to the place where you want to play the record. Then lower the tonearm carefully onto the record.
• After the end of the record, place the tonearm back on the holder.
Note: If the auto-stop range of the record is smaller than usual, please turn off the auto-stop function. Otherwise, the last track(s) of the album may be stopped because the tone arm moves back.
AUX CONNECTOR
Connect external media players (MP3 player, smartphone, laptop) to the AUX cable on the rear panel. Slide the AUX/PHONO switch to the AUX position. Use your external device to control playback.
LIGHT EFFECTS
Press the LIGHT MODE switch on the back of the jukebox to switch the light effects on or off. The light color changes continuously as long as the LIGHT MODE switch on the back is set to PLAY MODE. Tilt the switch to HOLD to stop the color change and set a specific color permanently.
RADIO FUNCTIONS
Keys relevant for the radio
text_image
ON OFF disc 0003 DUKE BOX CU 7 8 9 10 11 12| 1 ON/OFF (On/Standby) |
| 2 MODE |
| 3 Forward/Fast forward ( ) ▶▶ |
| 4 Back/Fast return ( ) ◀◀ |
| 5 VOL+ (increase volume) |
| 6 VOL- (decrease volume) |
| 7 AUTO (Automatic station search) |
| 8 MEM (Memory function for stations) |
| 9 PR+ (Search forward for stations) |
| 10 PR- (Search backwards for stations) |
| 11 ST/MONO (Switching between stereo and mono) |
| 12 EQ (Equalizer) |
General operation
- Press the ON/OFF button on the control panel to turn the power on. The appliance automatically switches to standby mode.
- Press the ON/OFF button on the control panel again to activate the appliance. The unit is automatically in FM radio mode.
- If the unit is not in radio mode, press the MODE button repeatedly until the display shows the desired mode:
| Mode Display | ||
| FM Radio | P00 | |
| CD | ---- / nod | |
| USB | USB | Usb |
| SD | ■ | Sd |
| BT | × | bLUE |
| Record player | PH | |
Search radio stations
Note: The built-in station memory can store up to 20 stations. However, the frequency of the station is not displayed, only the memory location of the station.
- When you use the radio for the first time, press the ON/OFF button on the control panel to turn on the unit. The unit will automatically go into standby mode.
- Press the ON/OFF button on the control panel again to activate the unit. The unit is automatically in FM radio mode. If the unit is not in radio mode, press the MODE button repeatedly and select FM mode. The display will show [P00] and a signal will sound from the speakers.
Option 1: Automatic search and save
- Press the AUTO key to perform an automatic search from 87.5 MHz upwards. The first 20 stations found are stored in memory and marked as [P01] to [P20].
- Press the PRE- or PRE+ keys to navigate through all stored stations. The LCD display will show [SCAN] and [P01] to [P20].
Option 2: Automatic search without storing
- Press and hold the / bottom to find radio stations with strong reception. This search function does NOT automatically save the found stations and does NOT search for the first found radio station.
- Press the / button briefly and repeatedly. The FM tuner searches the FM band in steps of 0.05 MHz up or down each time the button is pressed.
Option 3: Manual search and save
Press and hold the 1 button to find radio stations with strong reception. Then press the MEM button to store the found station in one of the program locations [P01] to [P20]. You can select the desired program location by pressing the PRE+/PRE- button. Confirm your selection by pressing the MEM key again.
Important notes on the radio function
- A maximum of 20 stations with a strong transmitter signal can be stored.
- All stored settings are deleted when the unit is disconnected from the mains.
TROUBLESHOOTING
| Problem Possible Cause Suggested Solution | ||
| Power does not come on when the power switch is pressed | Unit is Unplugged Connect the unit to the power adaptor supplied with the product | |
| No sound comes out of the speakers | The volume is turned down to low level. | Adjust the volume. |
| The input selector does not match the playback/source | Re-select the desired input source. | |
| The Sound is disturbed | The unit is too close to a TV Set or another such device | Turn off the TV or other appliance or re-locate the Jukebox device |
| Cannot listen to any station or signal appears weak | The station is not tuned-in properly. | Tune-in the desired station properly. |
| A TV set is being used nearby and is interfering with the radio reception | Turn-Off the interfering TV set. | |
| The sound is distorted. | The antenna is not oriented properly | Re-orient the antenna until the reception improves |
| No sound The CD Player | is Paused | Press the Play/Pause button to resume playing the track |
DISPOSAL CONSIDERATIONS

natural_image
Symbol of a trash bin crossed with a diagonal line, representing no waste or discharge (no text or labels)If there is a legal regulation for the disposal of electrical and electronic devices in your country, this symbol on the product or on the packaging indicates that this product must not be disposed of with household waste. Instead, it must be taken to a collection point for the recycling of electrical and electronic equipment. By disposing of it in accordance with the rules, you are protecting the environment and the health of your fellow human beings from negative consequences. For information about the recycling and disposal of this product, please contact your local authority or your household waste disposal service.
This product contains batteries. If there is a legal regulation for the disposal of batteries in your country, the batteries must not be disposed of with household waste. Find out about local regulations for disposing of batteries. By disposing of them in accordance with the rules, you are protecting the environment and the health of your fellow human beings from negative consequences.
DECLARATION OF CONFORMITY

text_image
CE UK CAManufacturer:
Chal-Tec GmbH, Wallstrasse 16, 10179 Berlin, Germany.
Importer for Great Britain:
Berlin Brands Group UK Limited
PO Box 42
272 Kensington High Street
London, W8 6ND
United Kingdom
Hereby, Chal-Tec GmbH declares that the radio equipment type Graceland TT is in compliance with Directive 2014/53/EU. The full text of the EU declaration of conformity is available at the following internet address: use.berlin/10030442
For Great Britain: Hereby, Chal-Tec GmbH declares that the radio equipment type Graceland TT is in compliance with the relevant statutory requirements. The full text of the declaration of conformity is available at the following internet address: use.berlin/10030442
Estimado cliente:
text_image
QR code image containing encoded data, no visible human-readable textÍNDICE DE CONTENIDOS
natural_image
Technical diagram of a mechanical assembly with concentric circular components and a vertical support (no text or labels)natural_image
Symbol of a trash bin crossed out by a diagonal line, with no text or labels present.Berlin Brands Group UK Limited
PO Box 42
272 Kensington High Street
London, W8 6ND
United Kingdom
text_image
QR code image containing encoded data, no visible human-readable textSOMMAIRE
natural_image
Technical diagram of a mechanical assembly with concentric circular components and a vertical support (no text or labels)natural_image
Symbol of a trash bin crossed with a diagonal line, representing no waste or discharge (no text or labels)DÉCLARATION DE CONFORMITÉ

text_image
CE UK CAFabricant :
Chal-Tec GmbH, Wallstraße 16, 10179 Berlin, Allemagne.
Berlin Brands Group UK Limited
PO Box 42
272 Kensington High Street
London, W8 6ND
United Kingdom
text_image
QR code image containing encoded data, no visible human-readable textINDICE
natural_image
Technical diagram of a mechanical assembly with concentric circular components and a vertical support (no text or labels)natural_image
Symbol of a trash bin crossed out by a diagonal line, with no text or labels present.Berlin Brands Group UK Limited
PO Box 42
272 Kensington High Street
London, W8 6ND
United Kingdom